


[*]
Have you ever ever created an Azure Useful resource Group (RG) and realized later that you simply’d misspelled the identify? Or possibly even used the fallacious identify utterly! Your preliminary response would in all probability be to rename the Azure Useful resource Group. However are you able to?
Sadly, Azure doesn’t assist renaming an RG. This rename operate request has been in limbo since 2014. When you’ve solely created the RG and haven’t added assets to it but, the quickest workaround is to delete the RG and create a brand new one.
But when the RG is just not empty, you clearly can’t delete it instantly to start out over. What do you do then? Fortunate for you, this text will educate you the subsequent neatest thing—to maneuver assets to a brand new RG as a technique to rename Azure Useful resource Teams. Let’s get began!
Conditions
This text will probably be a tutorial. When you plan on following alongside step-by-step, you will want the next:
- An Azure Subscription – When you don’t have one, you’ll be able to register for a free Azure account.
- An Azure person account – The person account will need to have no less than a Contributor Position permission to the Azure subscription. This position lets you create and delete useful resource teams and transfer assets between useful resource teams.
- Two useful resource teams – The place you’ll be shifting assets from and to. On this tutorial, the 2 useful resource teams are:
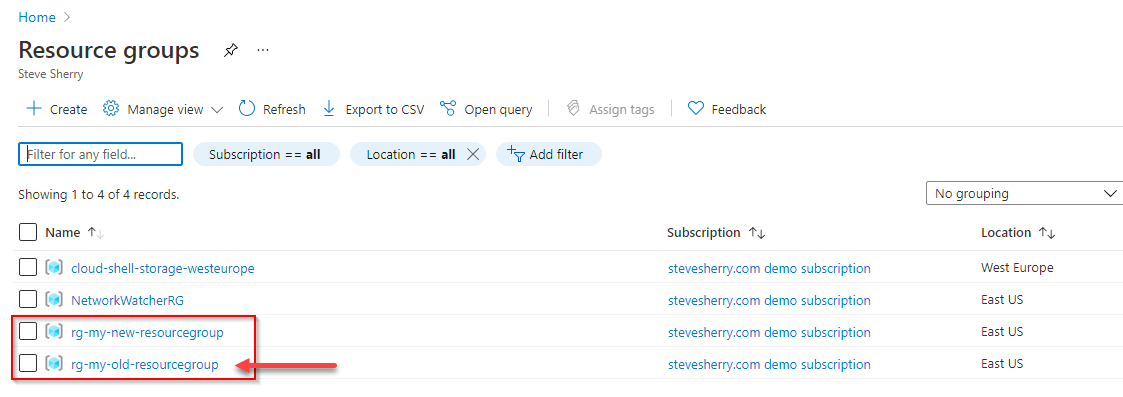
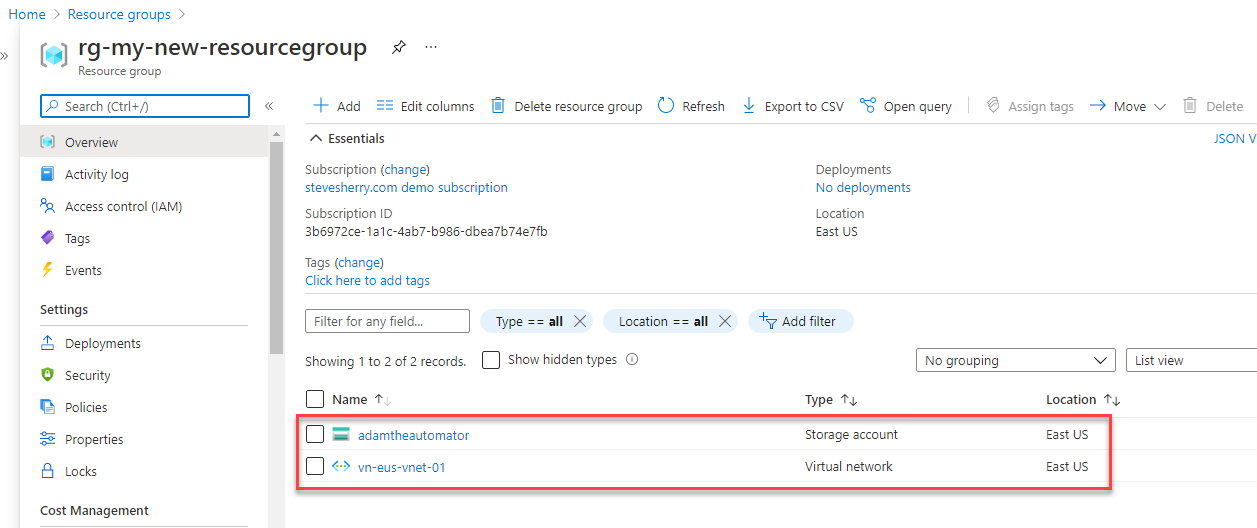
- rg-my-old-resourcegroup – The supply RG comprises two assets; a Digital Community named vn-eus-vnet-01 and a Storage Account named adamtheautomator.
- rg-my-new-resourcegroup – The empty vacation spot RG, which is the goal for shifting the assets from rg-my-old-resourcegroup.
This tutorial will solely cowl shifting assets between useful resource teams in the identical Azure subscription. Transferring of assets between subscriptions is feasible topic to the transfer operation assist for assets in Azure.
Transferring Sources Utilizing The Azure Portal
If not automating a activity, even IT professionals would almost definitely favor the Azure Portal to handle Azure assets. Utilizing the Azure Portal, you’ll be able to visually evaluation the obtainable assets and transfer them into a brand new RG with a number of mouse clicks.
Whereas shifting assets, each the supply and vacation spot useful resource teams will probably be in a locked state which will final for a most of 4 hours. When assets are in a locked, you can not add, replace, or delete them. The assets themselves will stay purposeful and unlocked.
Observe the steps beneath to maneuver assets to a different useful resource group.
1. Open an internet browser and navigate to the Azure Portal.
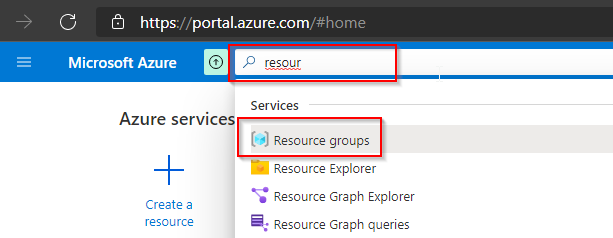
2. On the Search field on the high, kind useful resource teams. As you kind, the portal gives you a match. Click on on Useful resource teams on the record of outcomes.
3. On the Useful resource teams web page, click on the supply RG, which is rg-my-old-resourcegroup, to view the assets it comprises.
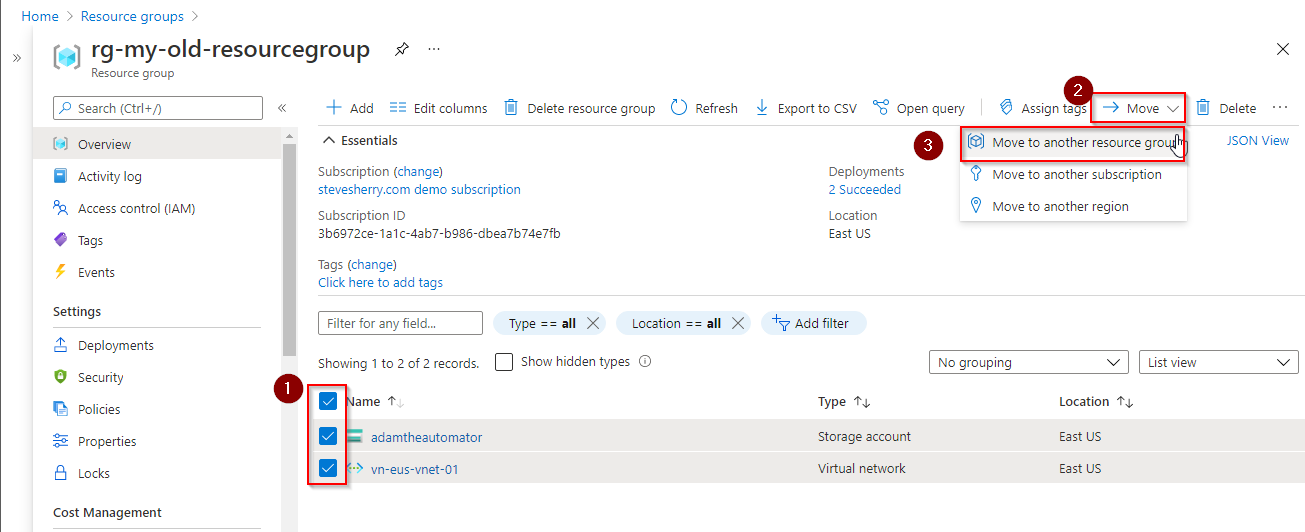
4. Subsequent, choose the assets to maneuver. On this tutorial, these assets are: adamtheautomator and vn-eus-vnet01. After choosing the assets, click on Transfer —> Transfer to a different useful resource group.
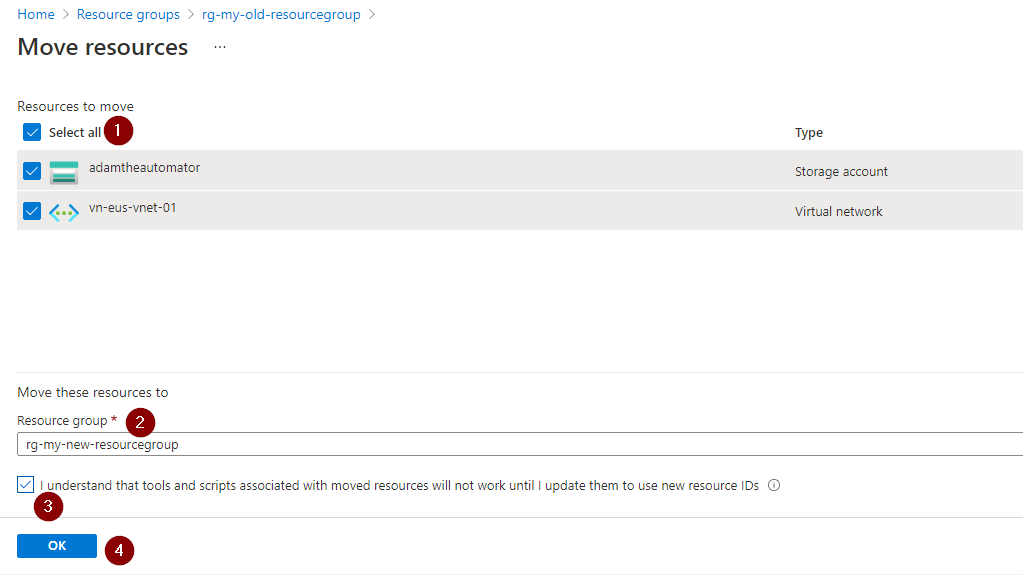
5. On the Transfer assets web page, click on to test the Choose all field to pick all assets.
Subsequent, underneath the Transfer these assets to part, choose rg-my-new-resourcegroup from Useful resource group the dropdown field.
Verify the field to substantiate that you simply perceive that any present instruments and scripts won’t work till you replace them with new useful resource IDs. Click on OK to proceed.
The RG identify kinds a part of the distinctive path to a useful resource in the identical method {that a} folder identify kinds a part of the trail for a file. Utilizing the distinctive path is how a useful resource is accessed programmatically. Transferring a useful resource will due to this fact impression any scripting assets you have got created.
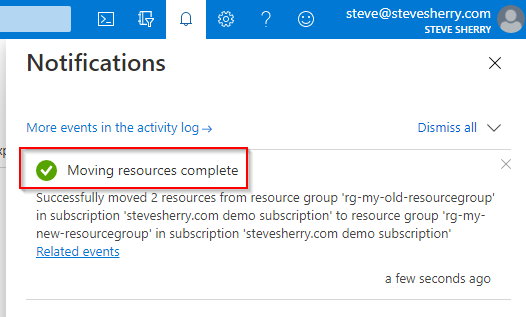
6. To see the progress, click on the bell icon on the upper-right a part of the web page. As you’ll be able to see on the screenshot beneath, the present standing says Transferring assets.

On this instance, the shifting course of took roughly 5 minutes to finish. Your expertise could also be totally different. After Azure accomplished the useful resource transfer, the standing then adjustments to Transferring assets full, as you’ll be able to see beneath.
Click on the X button on the top-right to shut the notification. Closing the notification will carry you again to the rg-my-old-resourcegroup web page.
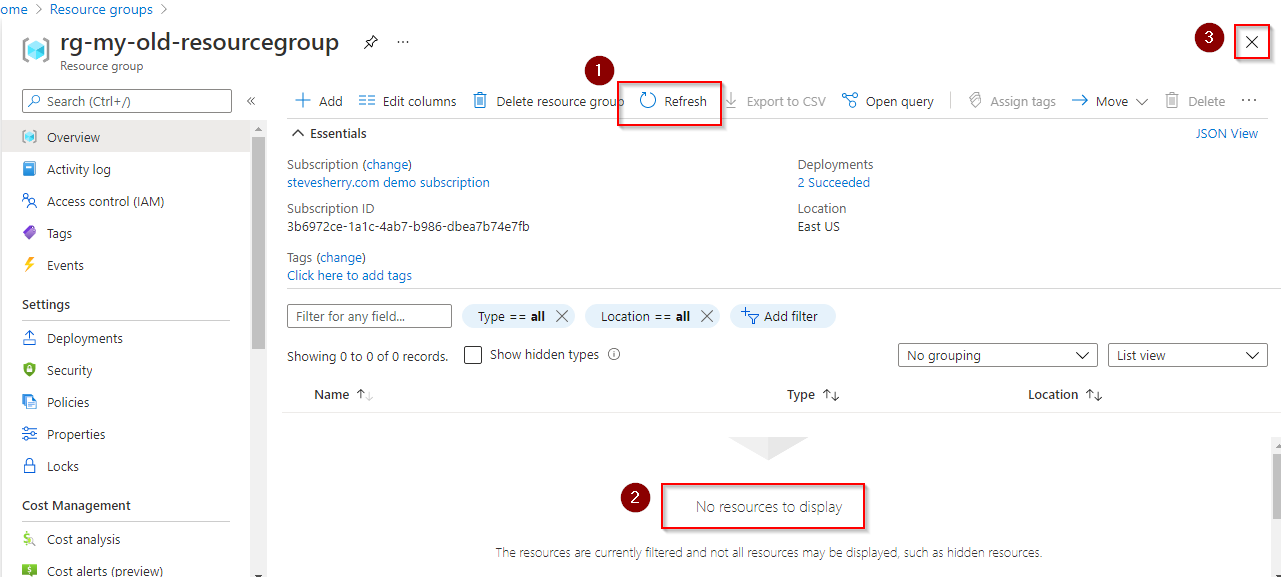
7. Again on the rg-my-old-resourcegroup web page, you’ll discover the message that claims No assets to show. This message is the results of shifting the assets to a different useful resource group. Click on the X within the upper-right to shut the web page.
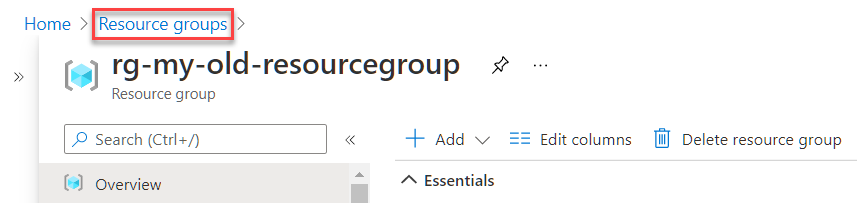
8. To verify that the assets are actually within the vacation spot useful resource group, click on the Useful resource teams breadcrumb hyperlink on the highest of the web page.
Subsequent, on the record of useful resource teams, click on rg-my-new-resourcegroup.
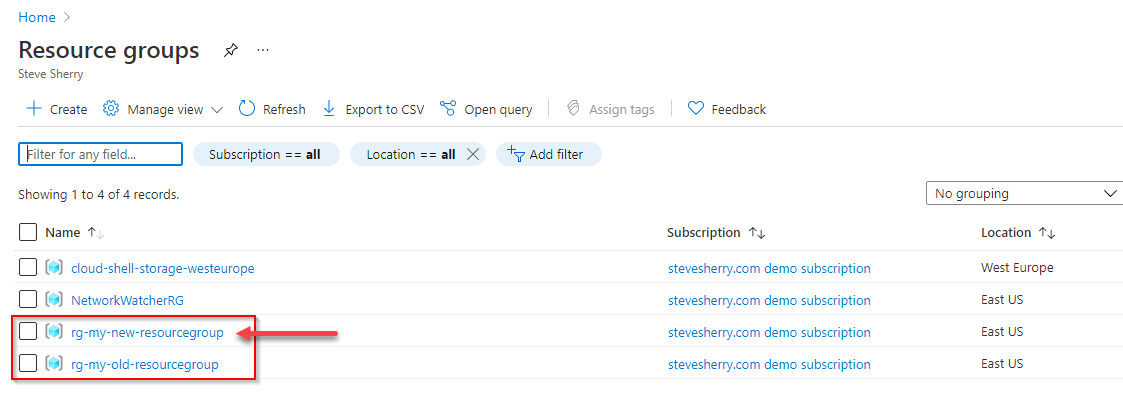
It is best to now see the assets that you simply moved from the rg-my-old-resourcegroup are actually in rg-my-new-resourcegroup.
Transferring Sources Utilizing Azure PowerShell
When you want typing instructions greater than clicking the mouse to handle Azure, then Azure PowerShell may very well be the fitting instrument for you. There are two methods you need to use PowerShell to handle Azure—domestically in your pc or from the Azure Cloud Shell.
This tutorial will probably be utilizing the Azure Cloud Shell, the place the Az PowerShell module comes pre-installed. The Az PowerShell module supplies quite a lot of cmdlet that you need to use to handle Azure from PowerShell.
Do you have to select to make use of Azure PowerShell in your native pc, you’ll have to set up the Az PowerShell module after which check in to Azure along with your Azure account.
To maneuver Azure assets utilizing the Azure PowerShell, proceed as follows.
When you’re accessing the Azure Cloud Shell for the primary time, Azure could ask you to select which subscription to create the storage account that the shell will use.
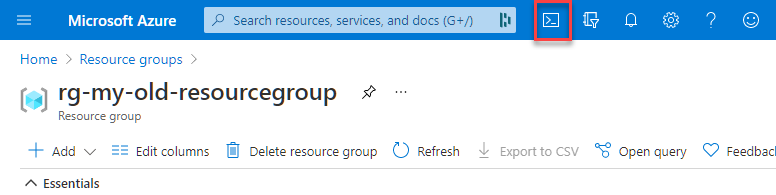
1. Open your browser and navigate to https://shell.azure.com/. Or, should you’re already on the Azure Portal, click on the Cloud Shell button subsequent to the Search field.
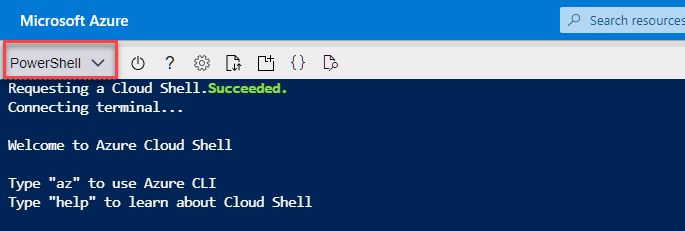
2. As soon as the Cloud Shell is prepared, on the upper-right nook, affirm that PowerShell is the energetic surroundings and never Bash. If not, click on the dropdown field and choose PowerShell.
3. Subsequent, run the az useful resource record command to get the ID of the assets you propose to maneuver. The ID worth is a singular identifier of every Azure useful resource.
# Get the record of assets and retailer them in a variable.
 $assets = Get-AzResource -ResourceGroupName rg-my-old-resourcegroup
# Show the ResoureID values on the display.
 $assets.ResourceId
4. Now, execute the Transfer-AzResource command beneath in your Azure PowerShell window. This command will transfer the assets you’ve saved contained in the $assets variable to the vacation spot useful resource group.
# Transfer the assets to the vacation spot useful resource group rg-my-new-resourcegroup
 Transfer-AzResource -DestinationResourceGroupName rg-my-new-resourcegroup -ResourceId $assets.ResourceId
5. On the subsequent immediate, affirm the transfer by urgent Y and press Enter. The useful resource transfer length could final from few seconds to a number of minutes. On this instance, the transfer took roughly 30 seconds to finish.

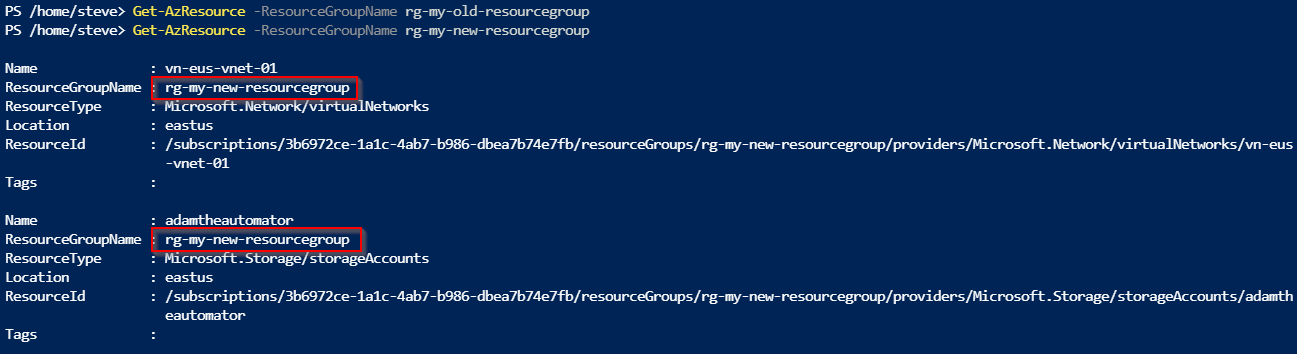
6. After finishing the useful resource transfer, execute every command beneath. These instructions will get the record of assets in every useful resource group, which is able to show you how to affirm if the useful resource transfer was profitable.
# Will get a listing of assets within the supply useful resource group
 Get-AzResource -ResourceGroupName rg-my-old-resourcegroup
# Will get a listing of assets within the vacation spot useful resource group
 Get-AzResource -ResourceGroupName rg-my-new-resourcegroup
As you’ll be able to see beneath, the primary command didn’t retrieve any assets from the supply RG. On the similar time, the second command confirmed that the assets now exist within the vacation spot RG. This outcome confirms that the useful resource transfer operation was profitable.
Transferring Sources Utilizing Azure CLI
One other glorious command-line instrument for managing Azure assets is the Azure CLI. Like Azure PowerShell, you need to use Azure CLI domestically in your pc and the Azure Cloud Shell. This tutorial will use the Azure Cloud Shell, the place Azure CLI is already pre-installed.
Do you have to select to make use of Azure CLI in your native pc, you’ll have to set up Azure CLI and check in to Azure.
To maneuver Azure assets utilizing Azure CLI on the Azure Cloud Shell, observe these steps.
When you’re accessing the Azure Cloud Shell for the primary time, Azure could ask you to select which subscription to create the storage account that the shell will use.
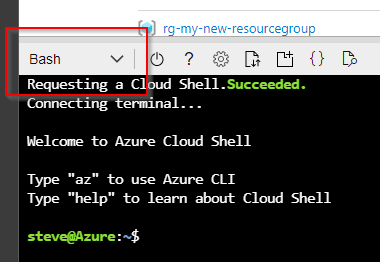
1. Open your browser and navigate to https://shell.azure.com/. Or, should you’re already on the Azure Portal, click on the Cloud Shell button subsequent to the Search field.

Azure CLI works on each the PowerShell and Bash cloud shell. For this tutorial, you’ll be working with the Bash shell expertise.
2. As soon as the Cloud Shell is prepared, affirm that Bash is the energetic surroundings and never PowerShell within the upper-right nook. If not, click on the dropdown field and choose Bash.
Subsequent, run the az useful resource record command to get the ID of the assets you propose to maneuver. The ID worth is a singular identifier of every Azure useful resource.
# Seize the ResourceID values of every useful resource and retailer them in a variable.
 oldresources=$(az useful resource record --query "[?resourceGroup=='rg-my-old-resourcegroup'].{ identify: id }" --output tsv)
# Show the ResourceID values on the display
 echo "${oldresources[*]}"
az useful resource record command4. Now, execute the az useful resource transfer command beneath. This command will transfer the assets you’ve saved contained in the oldresources variable to the vacation spot useful resource group.
# Passes the captured ids into the az useful resource transfer command
 az useful resource transfer --destination-group rg-my-new-resourcegroup --ids $oldresources
In the course of the transfer, you’ll not have management of the shell, and you may solely await the transfer operation to complete. The useful resource transfer length could final from few seconds to a number of minutes. On this instance, the transfer took roughly 5 minutes to finish.
5. After finishing the useful resource transfer, execute every command beneath. These instructions will get the record of assets in every useful resource group, which is able to show you how to affirm if the useful resource transfer was profitable.
# Will get a listing of assets within the supply useful resource group
 az useful resource record --query "[?resourceGroup=='rg-my-old-resourcegroup'].{ identify: id }" --output tsv
# Will get a listing of assets within the vacation spot useful resource group
 az useful resource record --query "[?resourceGroup=='rg-my-new-resourcegroup'].{ identify: id }" --output tsv
The outcome beneath reveals that the primary command didn’t retrieve any assets from the supply RG. On the similar time, the second command confirmed that there are actually assets within the vacation spot RG.

Conclusion
This text’s aim was to show you learn how to work round Azure’s lack of useful resource group rename performance. You’ve discovered three strategies of shifting assets as a technique to rename Azure useful resource teams. Why get caught with poorly named useful resource teams when you’ll be able to change them?
Between utilizing the Azure Portal, Azure PowerShell, and Azure CLI, which methodology did you want finest? Additionally, you might study additional by shifting totally different useful resource varieties between subscriptions too, and also you may uncover doable incompatibilities and unsupported situations.
[*]