


Disruptions and delays in your group’s workflow could be a actual headache. However with IdFix, you’ll quickly be waving goodbye to connectivity woes.
On this tutorial, you’ll study the IdFix device’s knack for pinpointing and resolving these pesky errors for a extra environment friendly Azure AD atmosphere.
Prepared? Take cost and conquer these Azure AD Join errors like a professional!
Stipulations
Earlier than ridding of these dreadful errors, guarantee you will have the next in place so you may observe alongside on this tutorial:
- An Azure subscription – A free trial will suffice.
- An account with read-and-write entry to the Energetic Listing (AD).
Putting in and Working the IdFix Device
Having met the conditions, you’ll now achieve firsthand expertise in leveraging IdFix to establish and resolve Azure AD Join errors effectively. However first, you could set up the IdFix device on any domain-joined pc or server.
To put in and run the IdFix device, observe these steps:
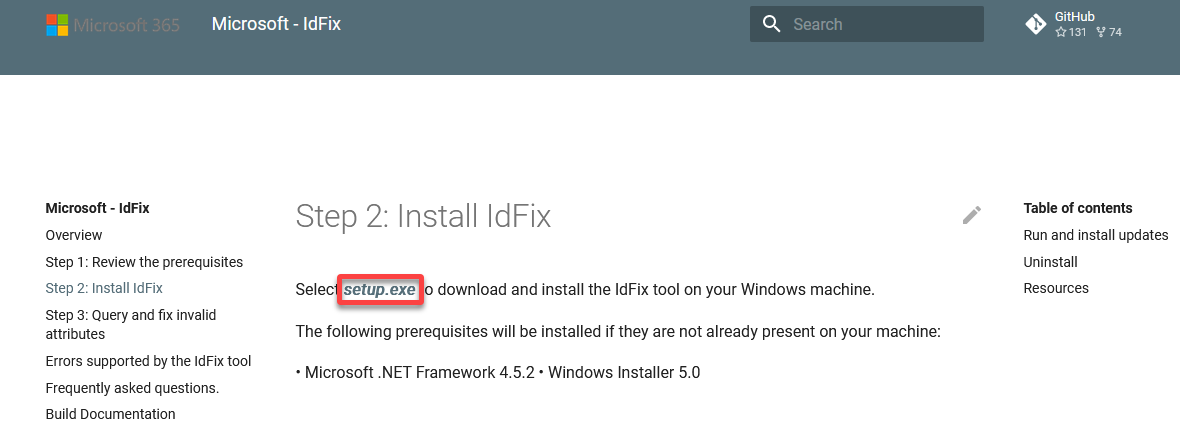
1. Open your internet browser and obtain the Microsoft IdFix device installer (setup.exe) from the official Microsoft GitHub web page.
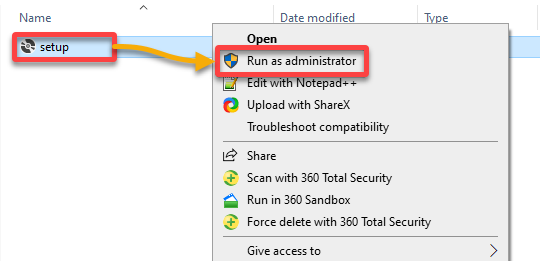
2. As soon as downloaded, run the IdFix installer as administrator for required privileges to entry AD customers and teams.
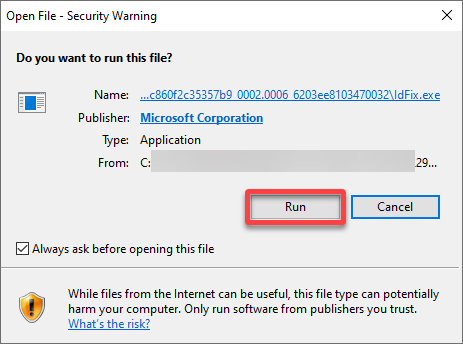
3. When prompted, click on Run to begin the set up.
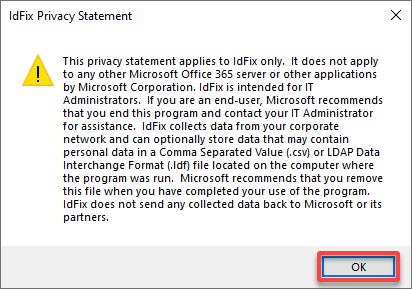
4. Lastly, click on OK to just accept the Privateness Assertion.
As soon as executed, the IdFix device launches mechanically, as proven under.
Now you can use the IdFix device to verify your AD for corruption and errors.
Scanning for Errors by way of the IdFix Device
After putting in the IdFix device, you’ll fill within the preliminary clean web page by scanning for errors. Consider this course of as peeling again the layers to disclose any hidden imperfections in your Azure AD setup.
To scan for errors by way of the IdFix device, full the steps under:
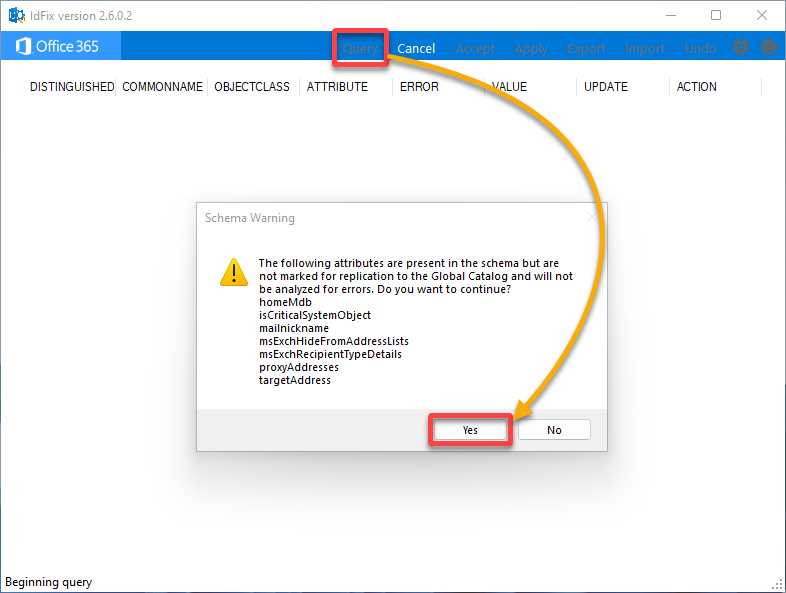
Whereas on IdFix, click on Question within the menu bar to begin the AD scan, then click on Sure on the immediate to proceed regardless of the Schema Warning. This warning alerts you about some attributes that aren’t marked for replication.
The IdFix device then analyzes your on–premises AD atmosphere for any current errors. Relying on the scale of your AD, the method can take a few minutes till the IdFix scan is accomplished.
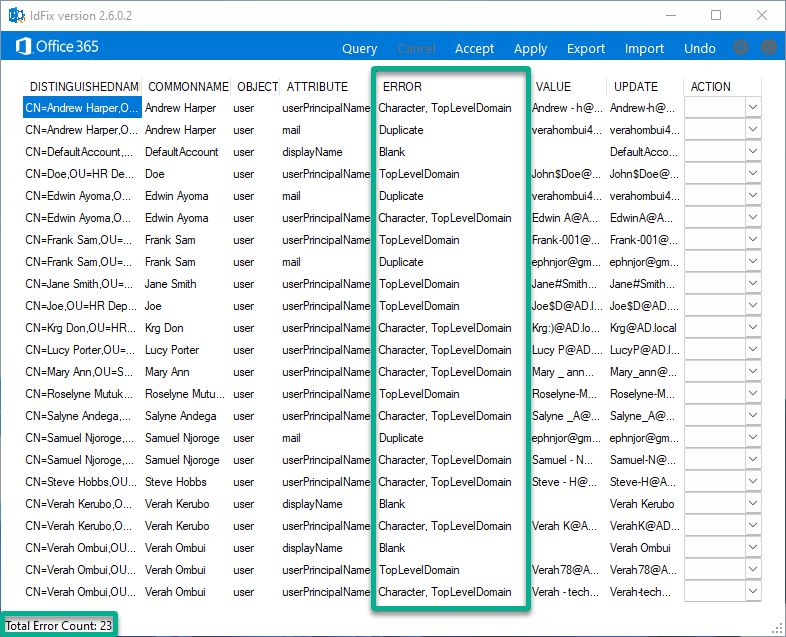
As soon as the scan is full, you will note the standing (lower-left), and any recognized errors can be listed within the dashboard, as proven under.
Take a more in-depth take a look at the question outcomes; you’ll discover that every error incorporates eight columns of data displayed as follows:
| Column | Particulars |
|---|---|
| DISTINGUISHED NAME | Refers back to the distinguished title of the AD object affected by the recognized subject. The distinguished title uniquely identifies every object inside an AD forest and represents its hierarchical location within the listing tree. |
| COMMON NAME | Represents the thing’s title and is commonly used to establish customers, teams, or different listing objects. |
| OBJECT CLASS | Specifies the AD object affected by the problem, comparable to a person account, group, or different AD object. |
| ATTRIBUTE | Signifies the AD attribute related to the recognized subject. This column specifies which attribute is inflicting the issue. |
| ERROR | Describes the kind of subject or error recognized. This column supplies a abstract of the issue. |
| VALUE | Refers back to the problematic worth at present assigned to the attribute. |
| UPDATE | Specifies the beneficial decision for addressing the recognized subject. |
| ACTION | Enables you to select the motion to carry out, comparable to Edit, Delete, or Full. |
Resolving Widespread Points Recognized by the IdFix Device
After querying to get the problematic customers/teams, you may clear up those to be synced to Workplace 365 Azure AD.
There exist a number of choices beneficial by IdFix to remediate the errors recognized, together with:
- Edit – The UPDATE subject incorporates the worth to use to an object. Admins can change the contents of this subject.
- Full – You need to use this motion with duplicate gadgets. You may mark the document as Full or set the motion to Take away for the duplicated object.
- Take away – This feature permits you to take away the sphere’s worth however not the thing itself.
Learn on and see the right way to resolve frequent points by way of the IdFix device.
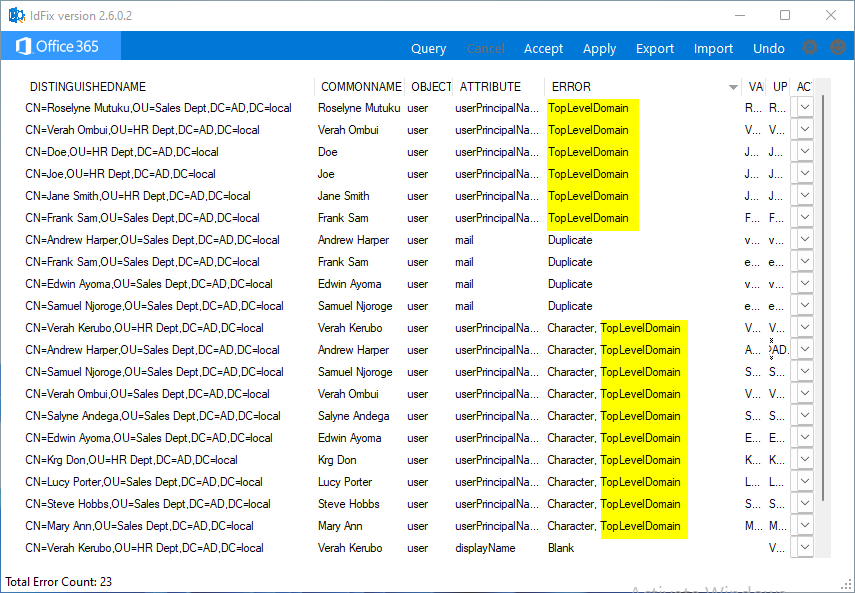
Fixing TopLevelDomain Errors
Questioning about the commonest points? TopLevelDomain errors take the lead in Azure AD Join hiccups, as highlighted under. They pop up while you use .native as your area title.
To repair TopLevelDomain errors for all of the customers/teams, perform the next:
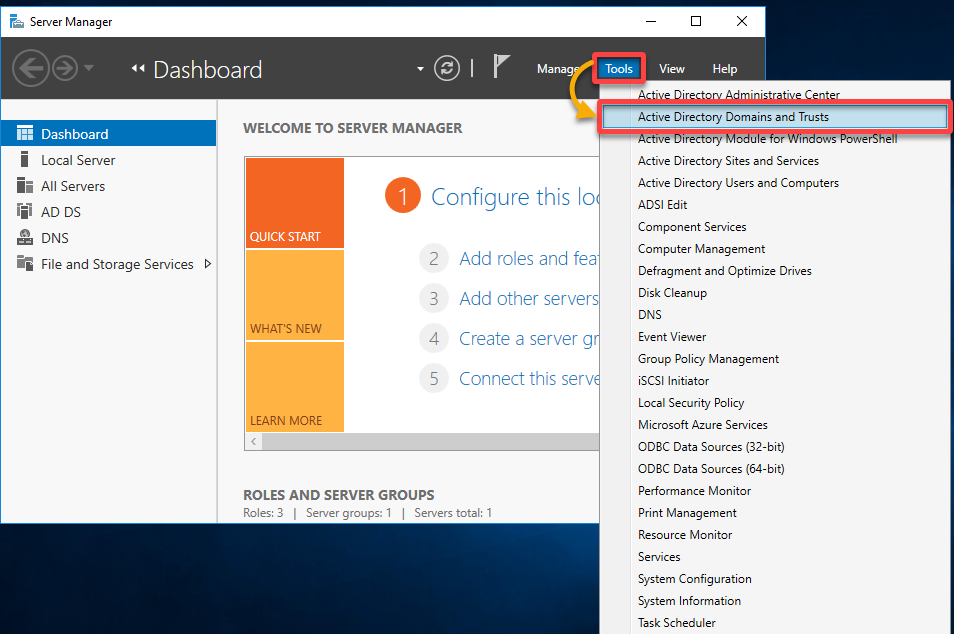
1. In your Home windows Server, launch your Server Supervisor from the Begin menu.

2. On the dashboard, click on Instruments and select Energetic Listing Domains and Trusts, which opens its administration console (step three).
This administration console is the place you may handle domains and belief relationships inside your AD atmosphere.
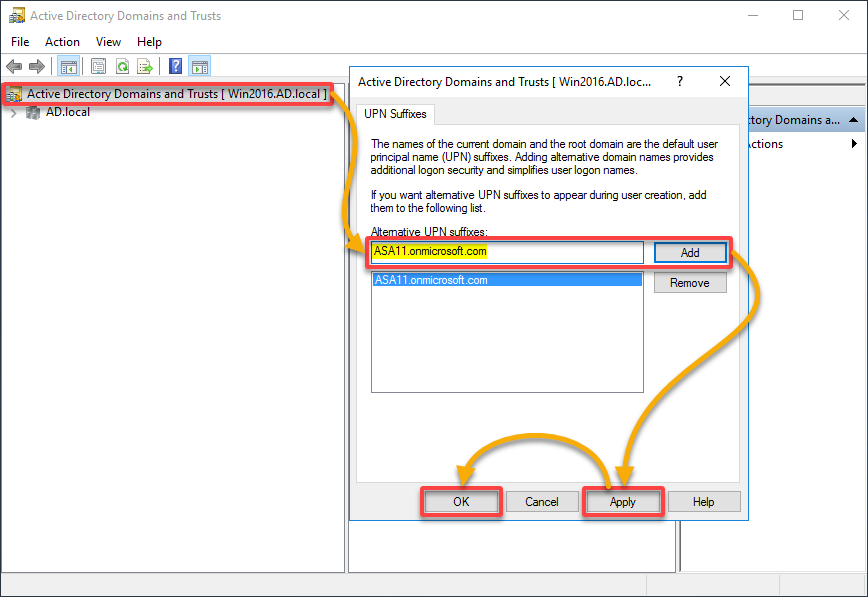
3. On the ADDT console, add an alternate area title as follows:
- Double-click on Energetic Listing Domains and Trusts (left pane) to open its properties window.
- Beneath the UPN Suffixes tab, enter Different UPN suffixes (public area), and click on Add to verify.
Including different UPN suffixes helps align person authentication with electronic mail domains, helps organizational adjustments, and improves the general person expertise. - Click on Apply, then OK in your adjustments to take impact.
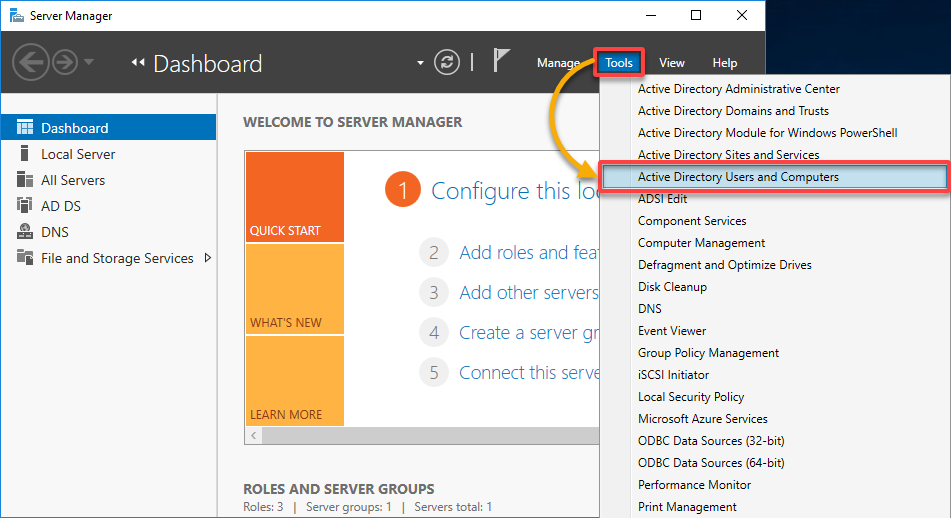
4. Swap to your Server Supervisor, click on Instruments, and select Energetic Listing Customers and Computer systems (ADUC).
💡 Notice: Altering the area suffix in your customers won’t have an effect on their login to their machines or every other utility server.
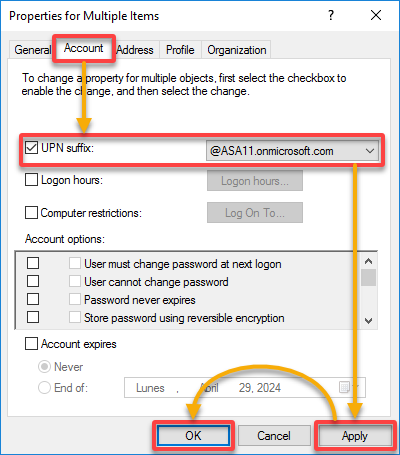
5. Increase your area (i.e., AD.native) within the left pane, select an Group Unit (OU) (i.e., Gross sales Dept), choose all customers to be synced, right-click, and select Properties.
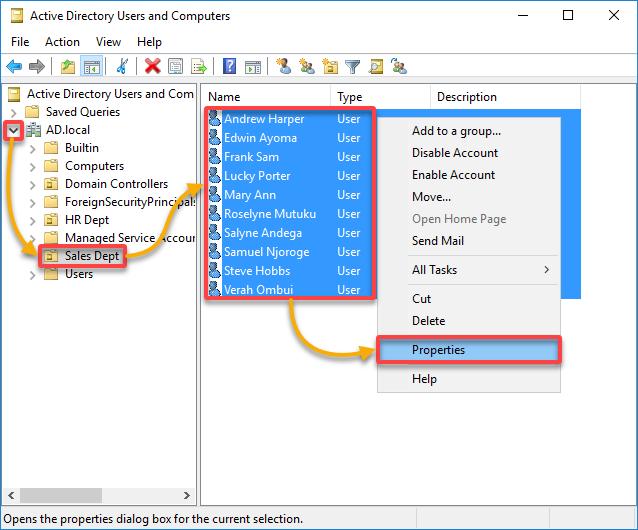
6. Now, modify all chosen customers’ UPN suffixes with the next within the Properties window:
- Navigate to the Account tab and tick the UPN suffix checkbox.
- Choose your newly created UPN suffix (i.e., @ASA11.onmicrosoft.com) from the drop-down subject. With this motion, you replace every person’s UPN to mirror your public area precisely.
- Click on Apply, then OK to impact your adjustments.
7. Lastly, rerun the IdFix device scanning to make sure TopLevelDomain errors are not current.
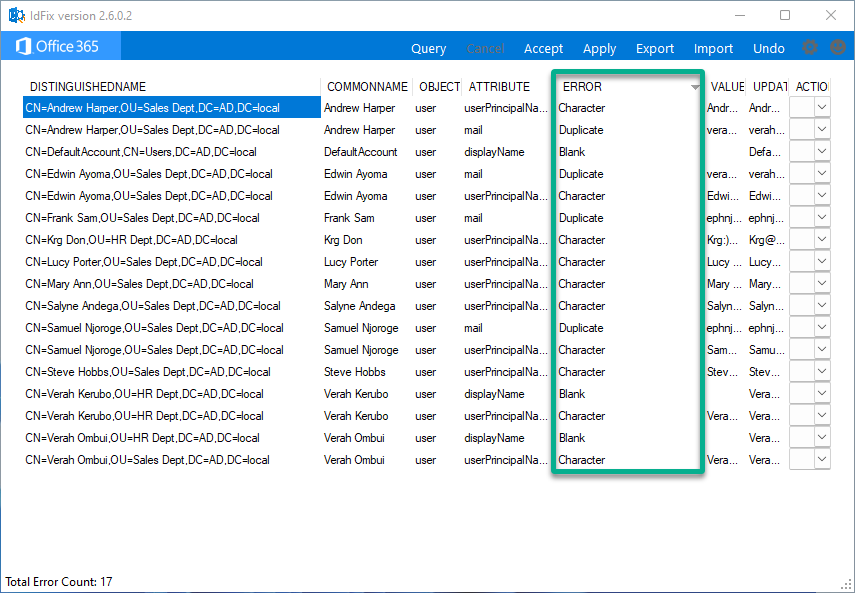
Addressing Duplicate Errors
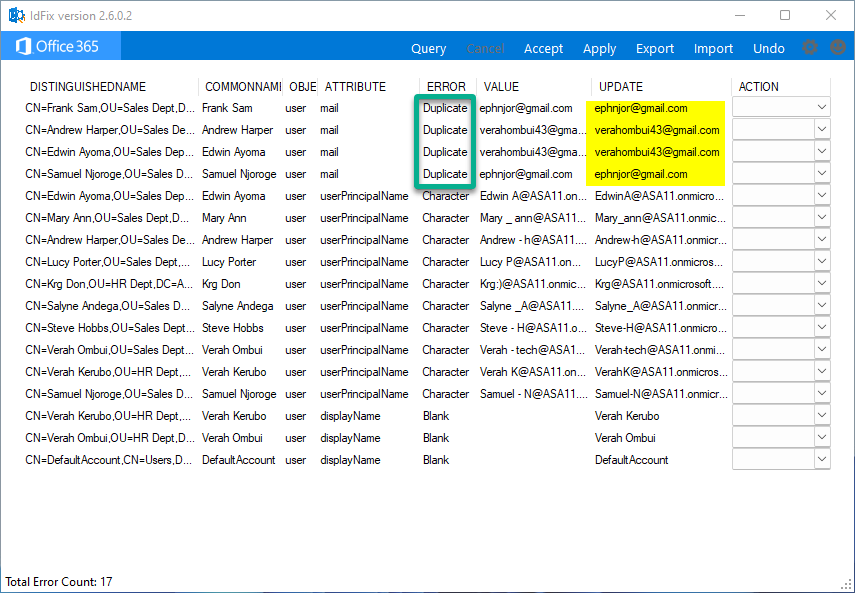
IdFix duplicate error, as illustrated under, happens when two or extra objects share equivalent values in an attribute configuration. The problem usually arises between two person objects or numerous mail-enabled objects, like a distribution group and a person object.
To handle duplicate errors, proceed with these steps:
Enter a singular electronic mail deal with within the UPDATE column of an object, choose EDIT within the ACTION column, and click on Apply within the menu bar to verify.
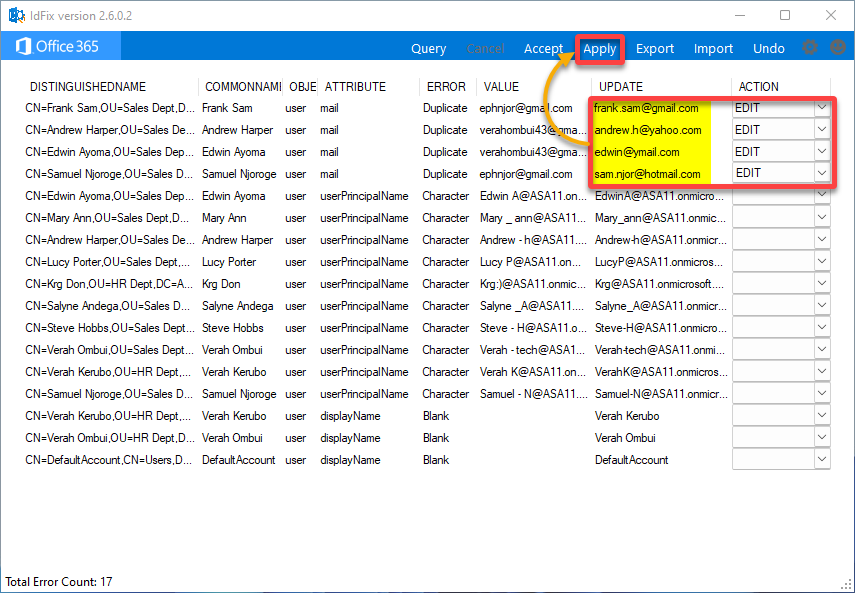
As soon as adjustments are utilized, the ACTION standing adjustments to COMPLETE.

Now, rerun IdFix to search for extra object errors.
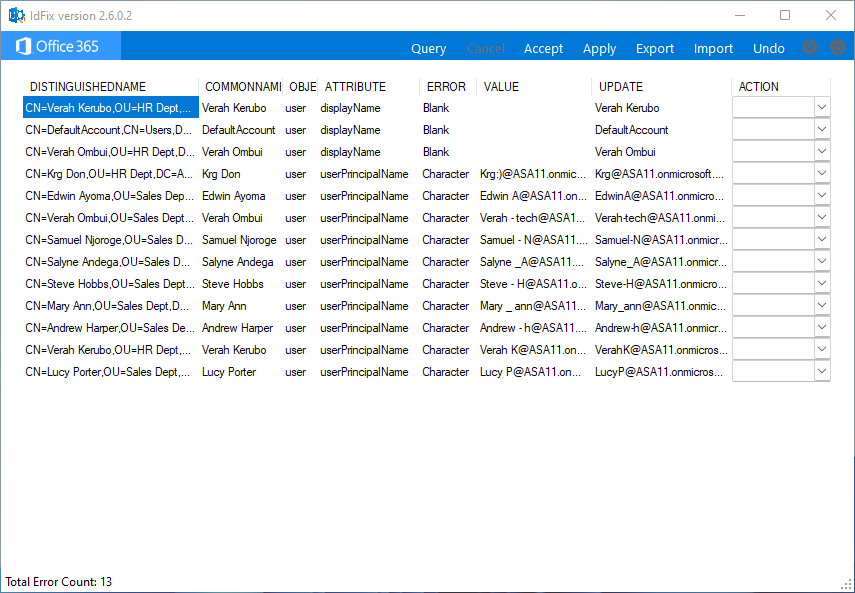
Rectifying Clean Attribute Points
Clean attribute points usually happen as a consequence of lacking or incomplete information in particular attributes of person accounts or different listing objects. Addressing these points might contain guide information entry, information migration, scripting, or different strategies, relying on the underlying reason for the problem.
This instance demonstrates fixing lacking information (VALUE) for the displayName attribute of some objects, like within the following screenshot.
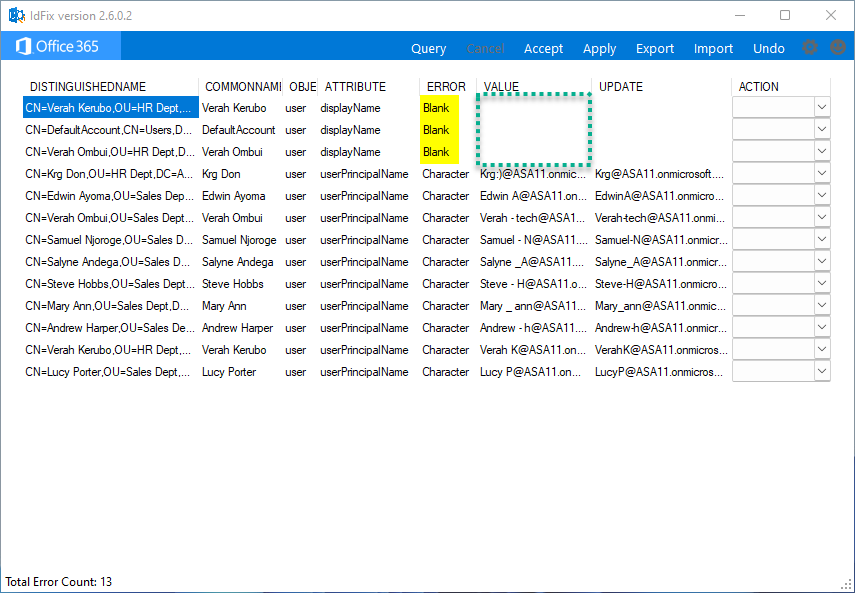
Undertake the next steps to rectify clean attribute points:
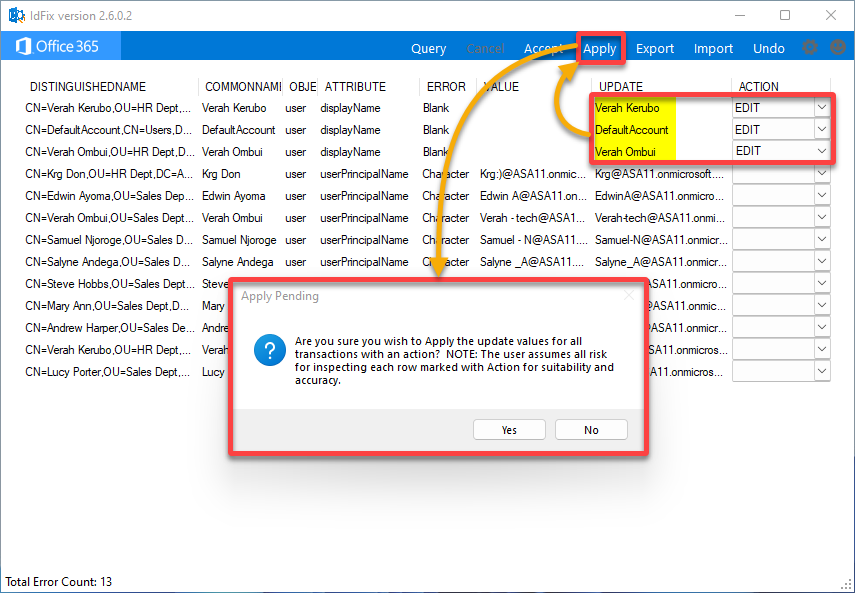
- Within the UPDATE column, enter the worth of an object’s displayName attribute, and select EDIT beneath the ACTION column.
- Repeat the identical course of for the remaining objects, then click on Apply for the adjustments to take impact.
- When prompted, click on Sure to verify making use of the adjustments.
Afterward, rerun the IdFix device to search for extra object errors.
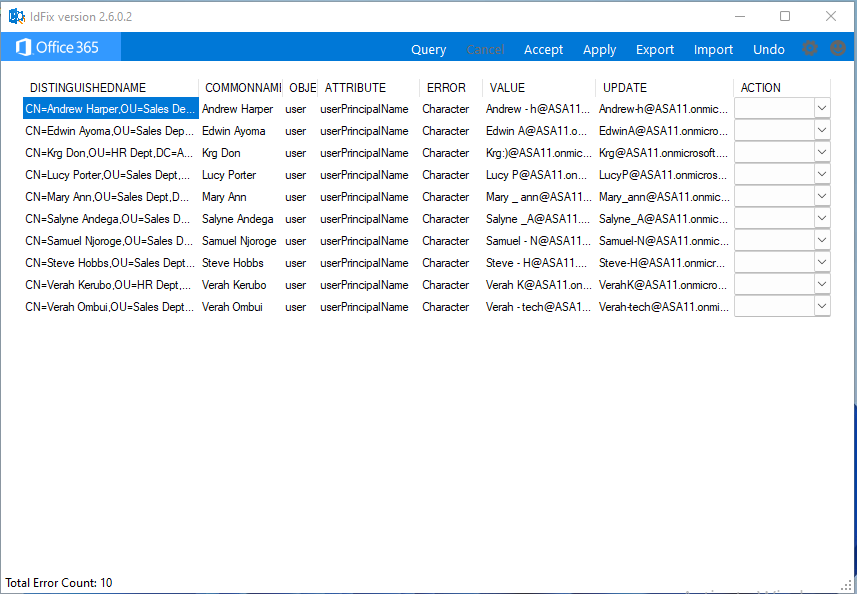
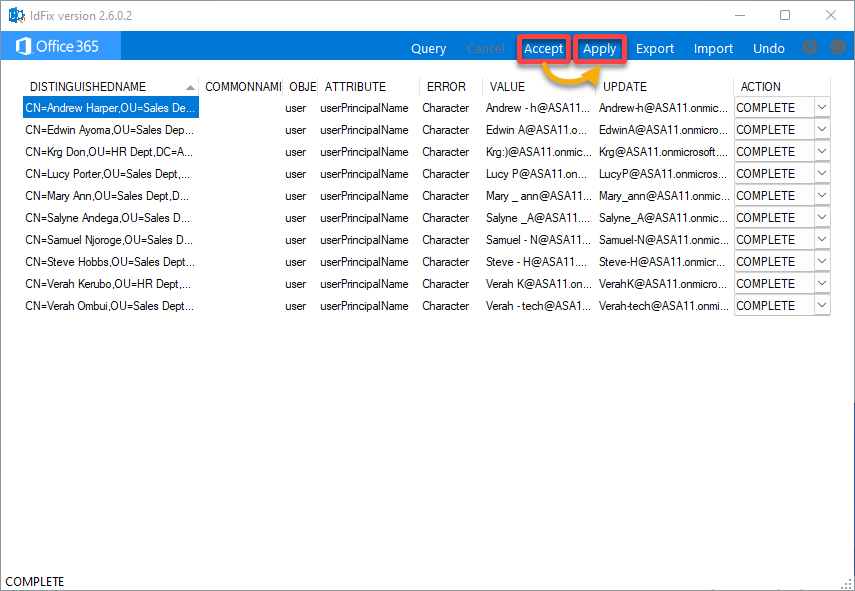
Coping with Invalid Character Errors
Encountering an invalid character error throughout area operations can impede the graceful functioning of your AD atmosphere. This error usually arises when trying to create, modify, or rename objects inside AD as a result of presence of characters not supported by AD.
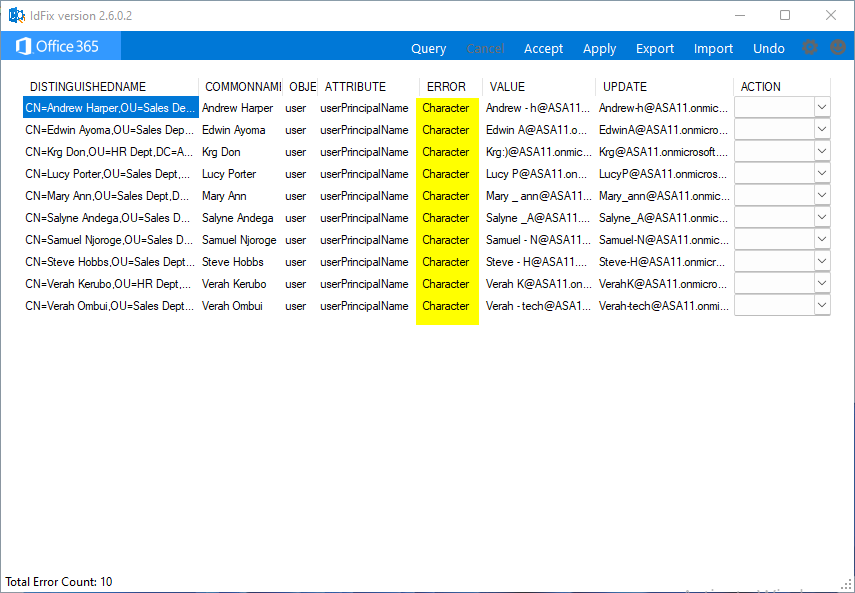
Search for invalid characters for every object and proper them as follows:
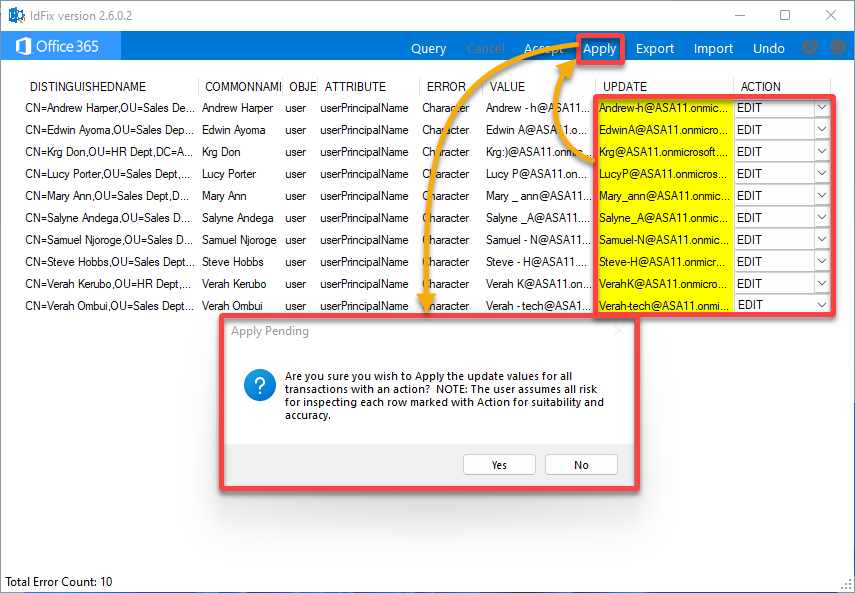
- Enter the right VALUE of the thing’s userPrincipalName attribute within the UPDATE column.
- Select EDIT beneath the ACTION column for every object with invalid characters, and click on Apply to verify the adjustments.
- Click on Sure within the warning message to proceed.
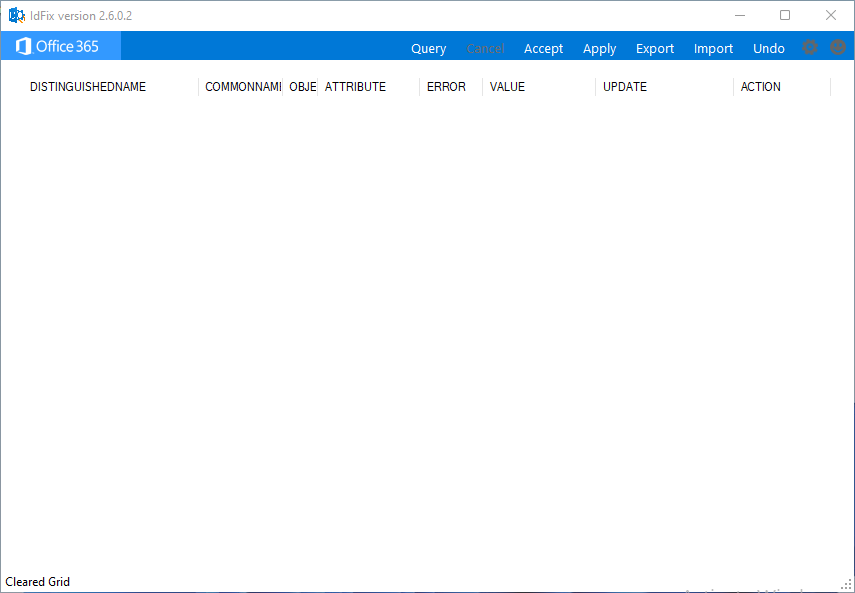
Now, rerun IdFix to search for extra object errors.
The picture under exhibits a clean web page, which signifies you will have efficiently resolved totally different points with the assistance of the IdFix device.
Undoing the Adjustments Made to Energetic Listing
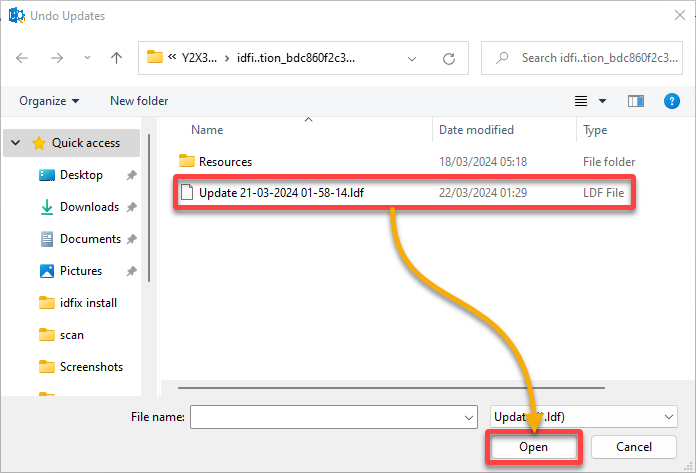
Realized you made adjustments you aren’t imagined to? Fear not! Undoing undesirable adjustments is easy with the IdFix device. Any adjustments made utilizing the IdFix device are often logged in a transaction log, which helps you to revert the adjustments beforehand made with the device.
💡 Notice: You may solely return one step, so guarantee your adjustments are in small steps and shouldn’t have any undesirable affect.
To undo adjustments, proceed as follows:
1. On IdFix, click on Undo within the menu bar to provoke undoing adjustments.

2. Subsequent, choose the .ldf file within the dialog field and click on Open. The log file is usually in the identical listing the place you put in IdFix.
3. Subsequently, click on Settle for, then Apply to revert the adjustments.
Synchronizing the Native AD with the Azure AD
With all errors mounted, you can begin putting in and configuring Azure AD Join. You will need to set up this device on a domain-joined server in your community to synchronize your on-premise AD with Azure AD. This synchronization aligns person accounts, teams, and objects in each AD environments.
To synchronize your on-premises AD with Azure AD, carry out the next:
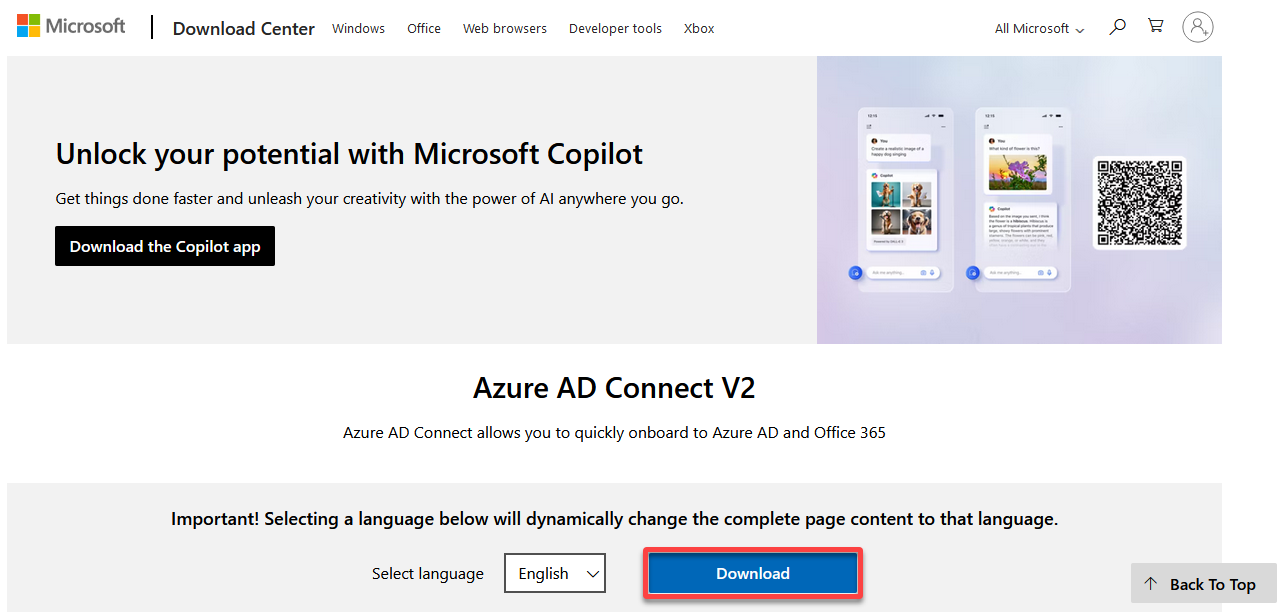
1. Open a brand new tab and obtain the most recent Azure AD Join device installer model from the Microsoft Obtain Heart.
2. Subsequent, run the downloaded installer (AzureADConnect) on a server inside your on-premises atmosphere.
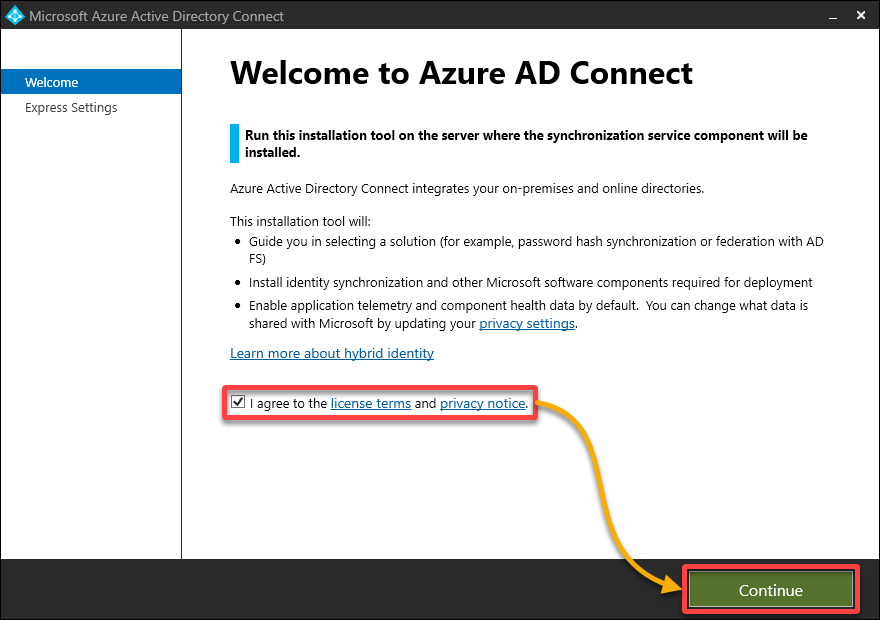
3. As soon as the installer launches, settle for the license settlement and click on Proceed.
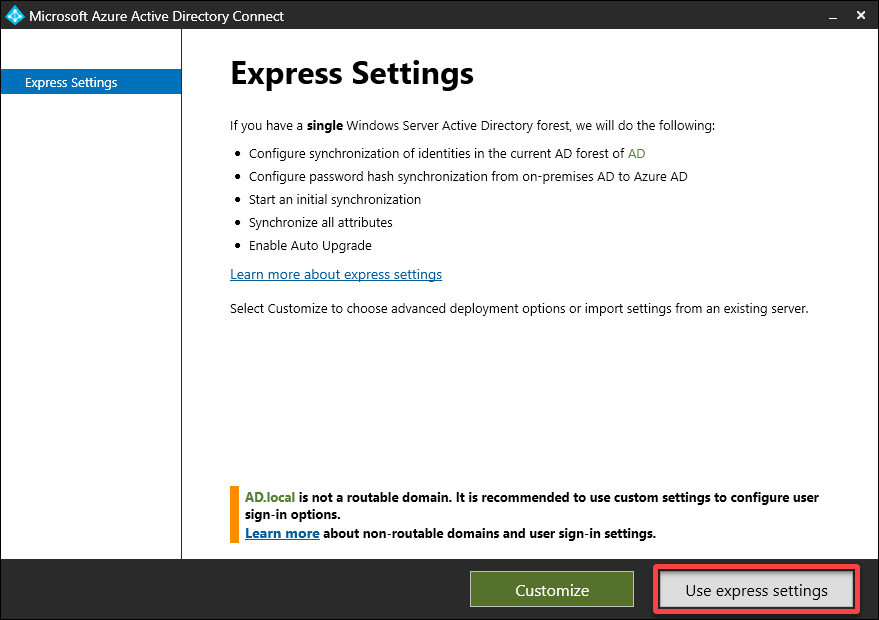
4. Now, click on Use categorical settings to put in the Azure AD Join device shortly.
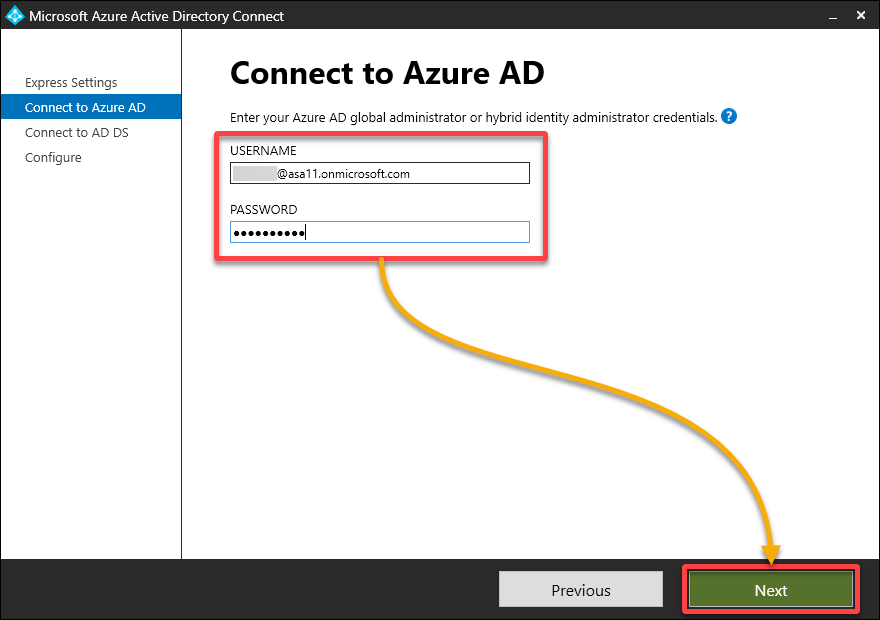
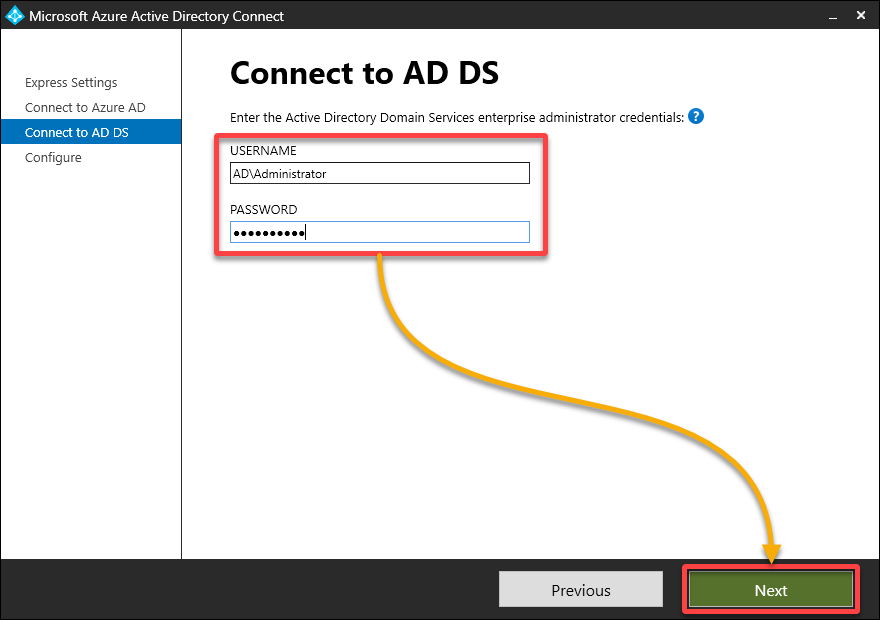
5. Connect with Azure AD by getting into your Azure AD World Administrator account, then click on Subsequent.
The USERNAME for this account concludes with .onmicrosoft.com, indicating it isn’t your native area administrator account.
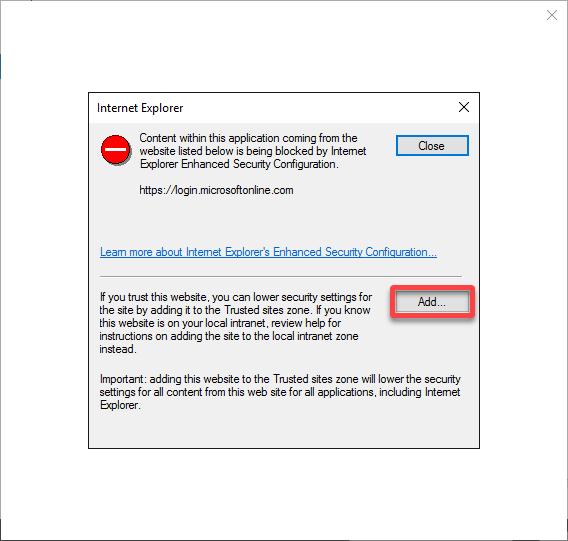
(Non-compulsory) Click on Add to and add the prompt URL to the trusted websites record.
For those who use MFA on the World Administrator account, you would possibly get an error saying the content material is blocked (as much as thrice).
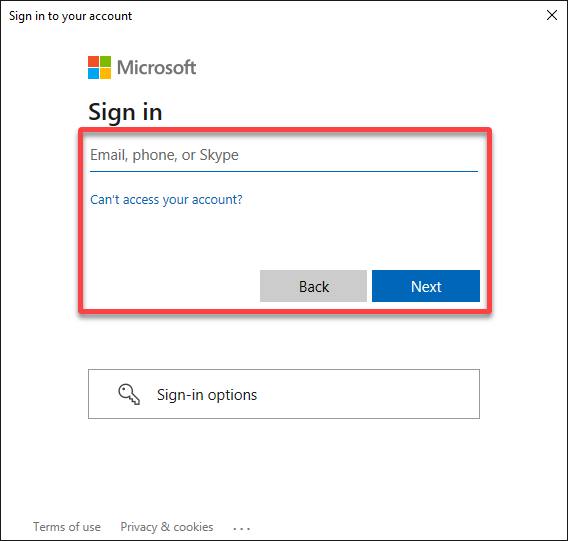
6. Login to Microsoft 365 with the credentials of your Azure AD World Administrator.
7. As soon as authenticated, check in by way of your native area administrator account. This account is employed to generate an area AD account for synchronization functions.
8. Tick the field on the backside; if a number of domains are listed and the first area is verified, click on Subsequent to proceed.
💡 Affirm your area with Microsoft 365 to make sure seamless integration. In any other case, customers can be required to log in utilizing the [email protected] format.

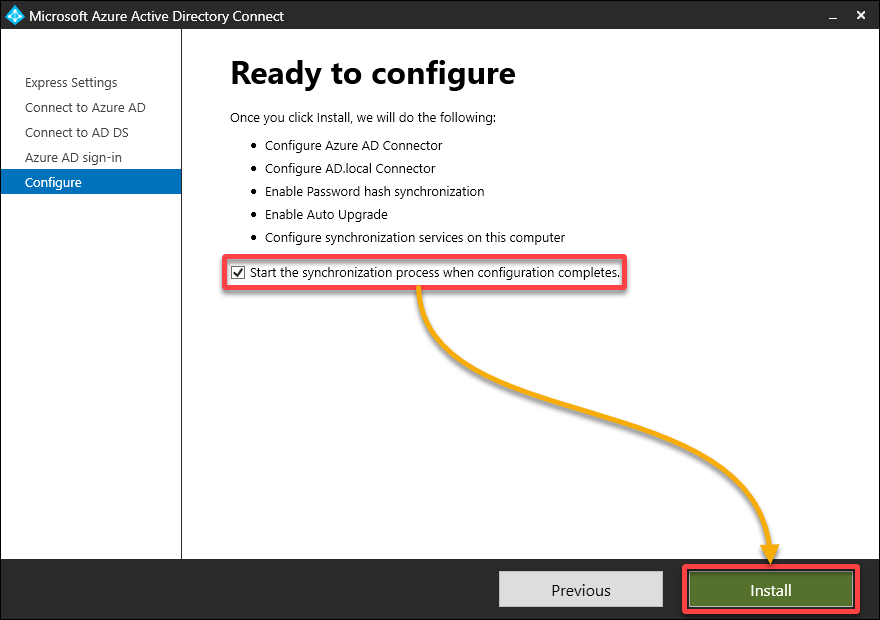
9. Afterward, tick the checkbox (backside) to synchronize all OUs when you have used the categorical possibility, then click on Set up to put in the Azure AD Join device.
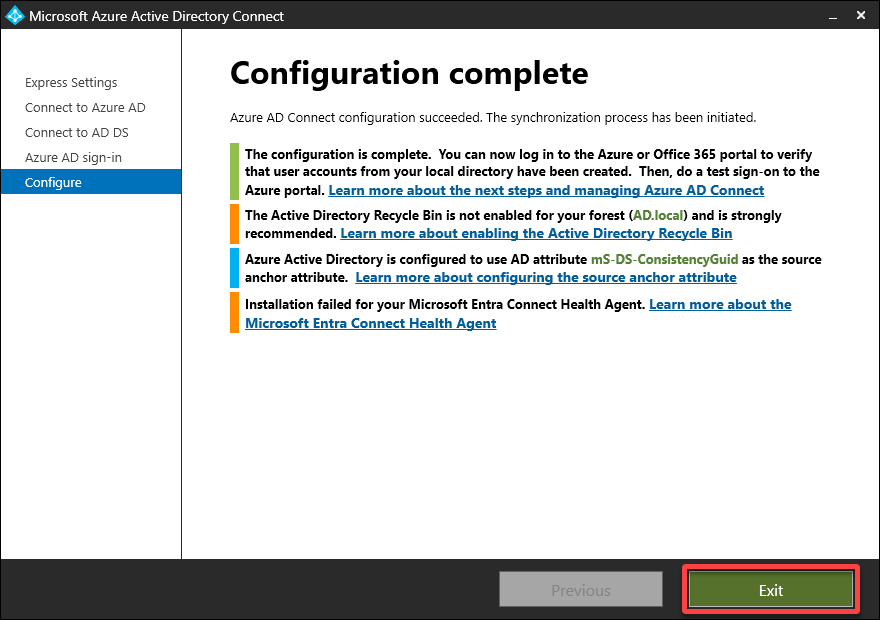
10. Look forward to the set up to finish, which might take a couple of minutes, and click on Exit to shut the set up wizard.
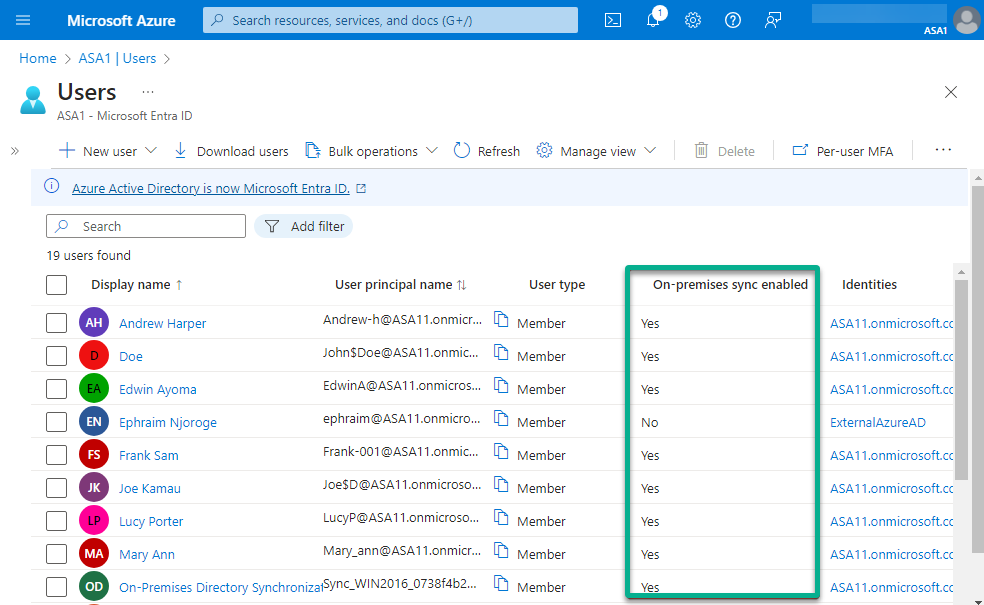
11. In the end, open the Azure Portal and navigate to your Azure AD (ASA1) → Customers to see all listing synced customers listed.
Conclusion
All through this tutorial, you will have realized how IdFix permits you to establish frequent errors, be it duplicate person principal names, invalid characters, and formatting inconsistencies. IdFix empowers directors like your self to preemptively deal with points earlier than initiating synchronization with Azure AD.
From this level, why not carry out complete well being checks with ADHealthCheck to establish numerous points inside your AD atmosphere? Along with IdFix, these instruments type a dynamic duo, offering a sturdy answer for optimizing your group’s listing infrastructure.