


Have you ever been looking for a platform to host your code, and construct your DevOps workflow and processes multi functional place? Why not use GitLab for CI/CD pipelines? GitLab enables you to host your utility code and use the GitLab CI CD function to repeatedly take a look at, construct and deploy your utility on each code change.
On this tutorial, you’ll learn to configure a CI/CD pipeline on GitLab to check, construct and deploy a Python flask utility to an Ubuntu server on Digital Ocean.
Sounds fascinating? Keep tuned and degree up your workflow with GitLab CI!
Stipulations
This tutorial shall be a hands-on demonstration. If you happen to’d prefer to comply with alongside, be certain you may have the next:
Initializing a GitLab Challenge
Earlier than configuring a CI/CD pipeline on GitLab, it’s essential to first have a repository on GitLab that homes your utility. This tutorial makes use of a Python flask utility for example GitLab CI CD in motion.
1. Obtain all recordsdata within the ATA Scripts GitHub listing for gitlab-ci.
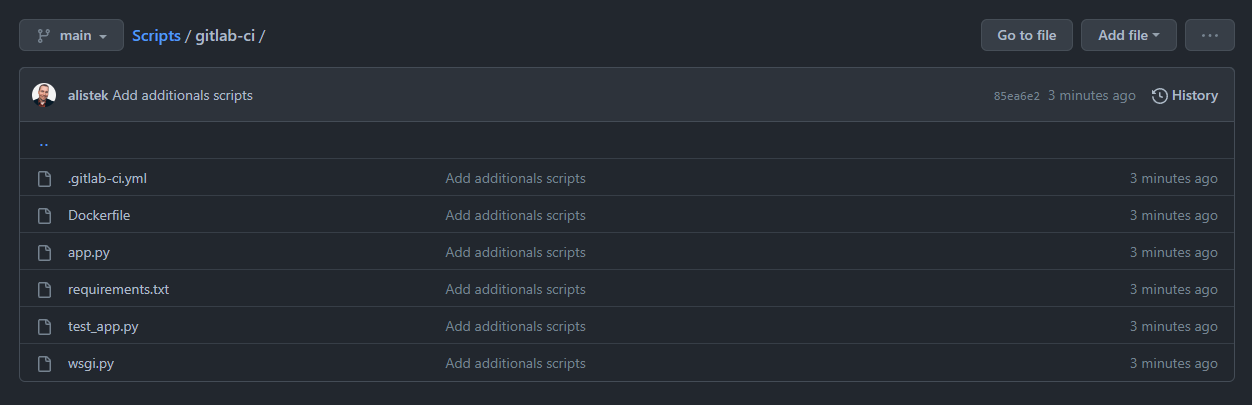
2. As soon as downloaded, open the listing containing your recordsdata out of your root listing and open it up together with your most well-liked code editor.
3. Subsequent, run the command under to spin up (flask run) the flask utility.
The output under signifies that the flask utility is fully practical and error-free.

4. Lastly, push the appliance as much as your GitLab repository.
Configuring Jobs on GitLab
After initializing your GitLab undertaking, you’ll want a strategy to execute duties in your CI/CD pipeline. How? By configuring Jobs the place you outline duties in a YAML file.
You’ll write the CI/CD pipeline as code in a YAML file, which GitLab will use to carry out the CI/CD pipeline to your undertaking.
There are two choices concerned when creating the YAML file:
- Create, and push the file in your undertaking listing regionally out of your machine alongside the pipeline configurations to your distant GitLab repository.
- Create the file immediately in your GitLab repository by way of the GitLab UI.
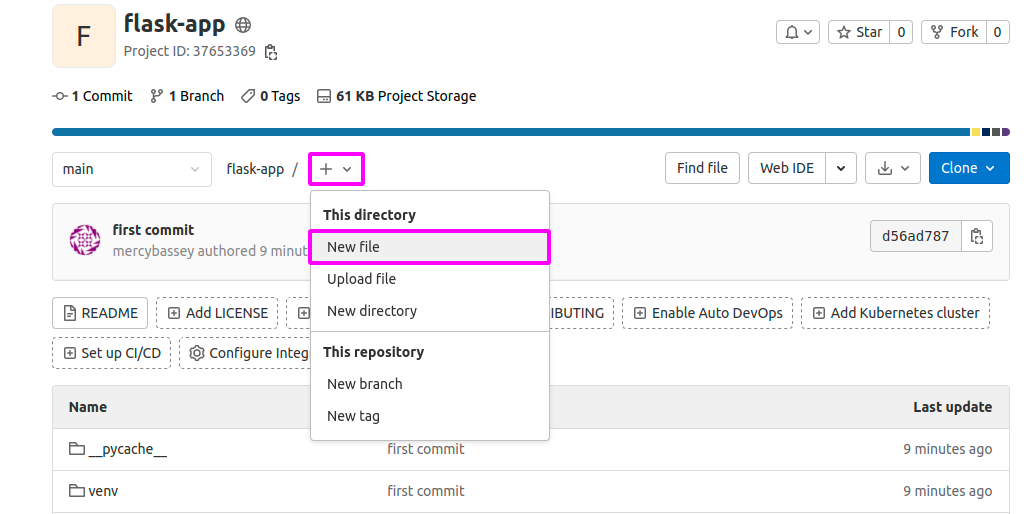
However on this tutorial, you’ll create the YAML file immediately in your GitLab repository by way of the GitLab UI:
1. Click on on the (+) icon proven under in your undertaking’s root listing of your GitLab repository to initialize creating the (.gitlab-ci.yaml) file. Your browser redirects to a web page the place you may configure the brand new YAML file (step two).
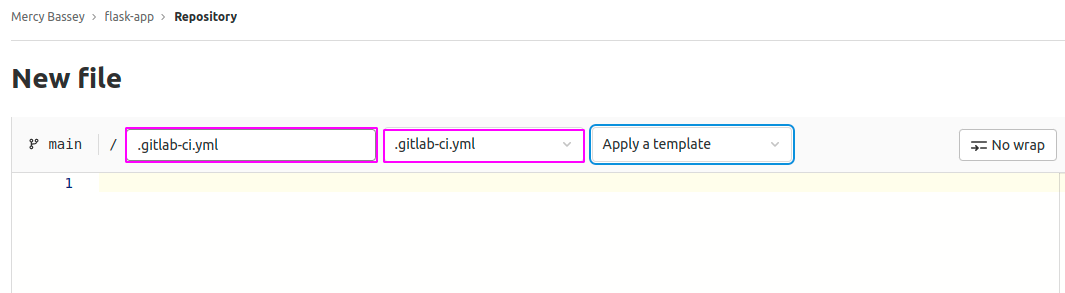
2. Subsequent, kind in .gitlab-ci.yml within the enter area with the filename placeholder, as proven under.
As you enter the brand new YAML file’s identify, you’ll discover the chosen field mechanically populates. This conduct signifies that GitLab has detected you’re about to configure a CI/CD pipeline to your undertaking.
In GitLab CI CD, each stage or configuration is known as jobs, and every job identify with multiple phrase is written within the snake case.
3. Add the code snippets under to the .gitlab-ci.yml file, which runs the take a look at for the Python flask utility.
run_tests:
    # Use GitLab-managed runner with a python:3.9-slim-buster picture to run the job
    picture: python:3.9-slim-buster
    before_script:
        # Replace the system package deal index
        - apt-get replace
        # Set up Python3 and pip
        - apt-get set up -y python3-dev python3-pip
        # Set up Flask and pytest
        - pip3 set up Flask pytest
    script:
        # Run the pytest command to run the take a look at for the Python flask utility.
        - pytest
GitLab-managed runners use Docker containers to execute jobs configured to your CI/CD pipeline. So all the roles to your CI/CD pipeline execute inside Docker containers relying on which picture you’d like to make use of. By default, GitLab makes use of a Ruby picture.
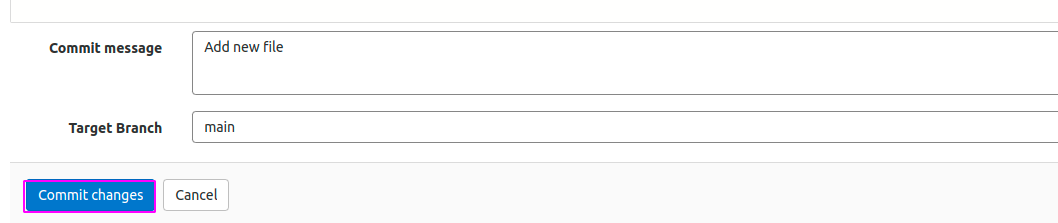
4. Now, scroll all the way down to the web page’s backside, and click on on the Commit adjustments button to commit the adjustments. Doing so makes GitLab detect the pipeline configuration code and run the job.
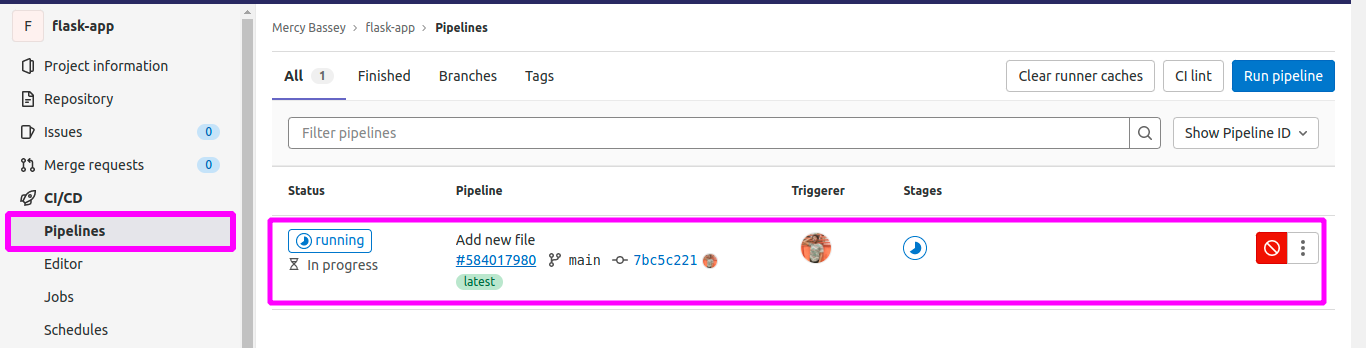
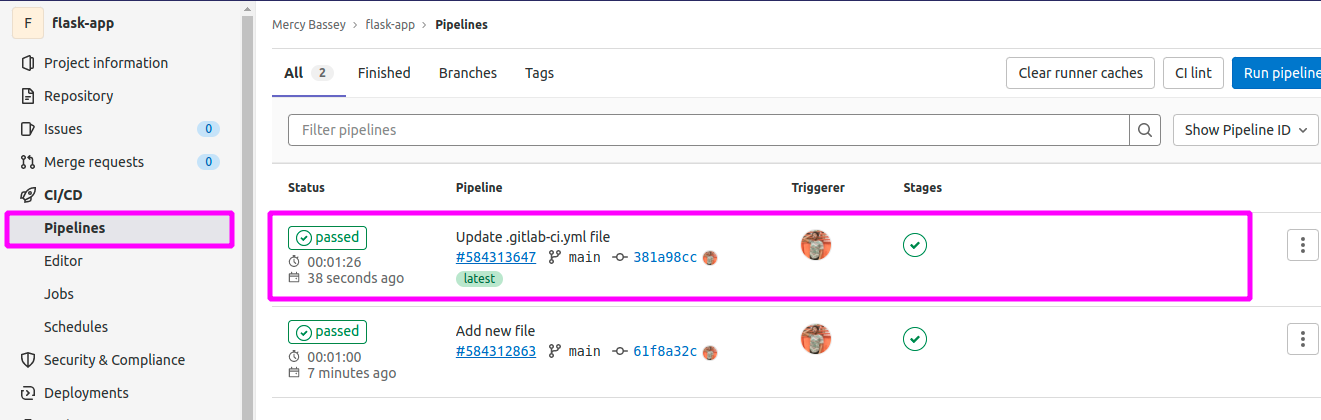
5. Lastly, navigate to the CI/CD part (left panel), and click on on the Pipelines tab to view your pipeline.
You’ll see that the pipeline is at the moment in operating standing, as proven under.
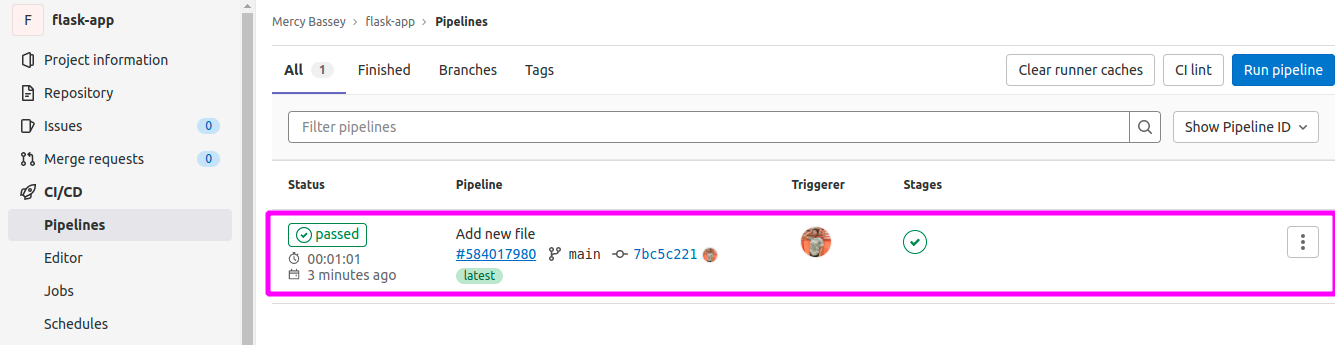
As soon as executed efficiently, your pipeline’s standing adjustments to handed, which signifies your job ran efficiently.
Securing Credentials by Creating Secret Variables
You’ve simply efficiently executed your first job. And now, you’re virtually able to construct and push the Docker picture for the Python flask undertaking to each Docker Hub and GitLab container registries.
However first, you’ll want a strategy to retailer your login credentials for Docker Hub and GitLab securely. What’s that safe method? You’ll create secret variables to carry these credentials and preserve them away from prying eyes.
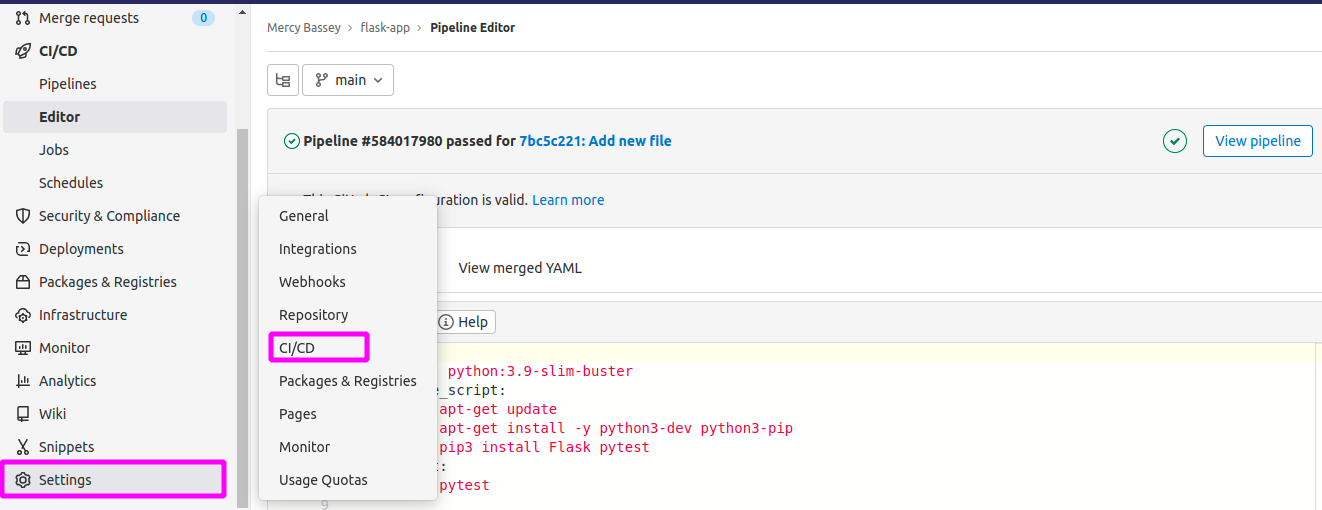
1. Navigate to Settings (left panel), and click on on the CI/CD tab, as proven under, to create a secret variable utilizing GitLab undertaking variables.
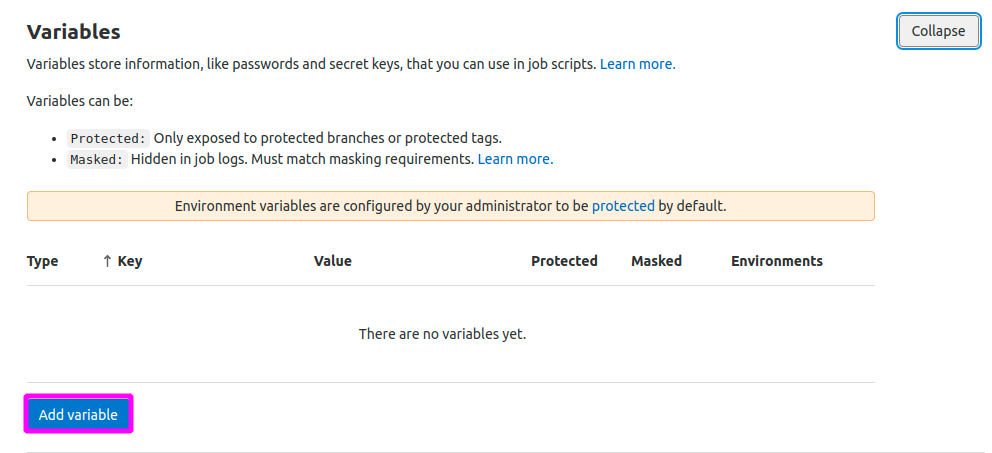
2. Subsequent, scroll down on the brand new web page, click on on the Variables sub-section, and click on Develop (top-right of the part) to broaden the Variables part.

3. As soon as expanded, click on Add variable (bottom-left) so as to add a secret variable.
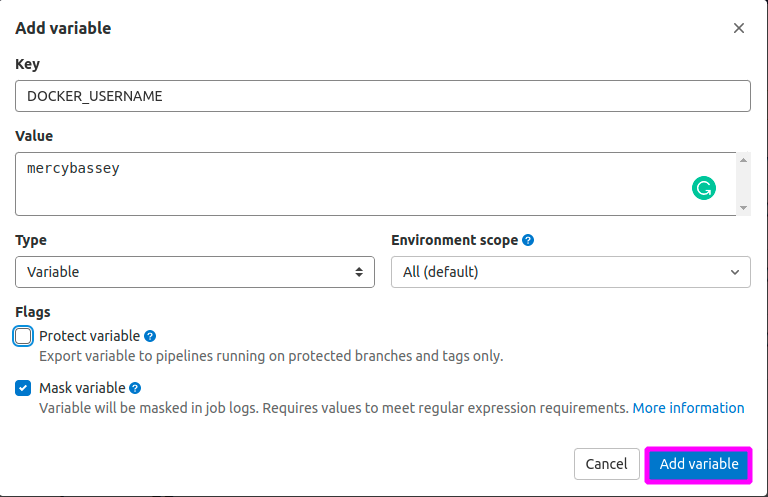
4. Now, configure the brand new secret variable with the next:
Word that the names within the Key fields are arbitrary.
- Worth – Enter your Docker Hub username.
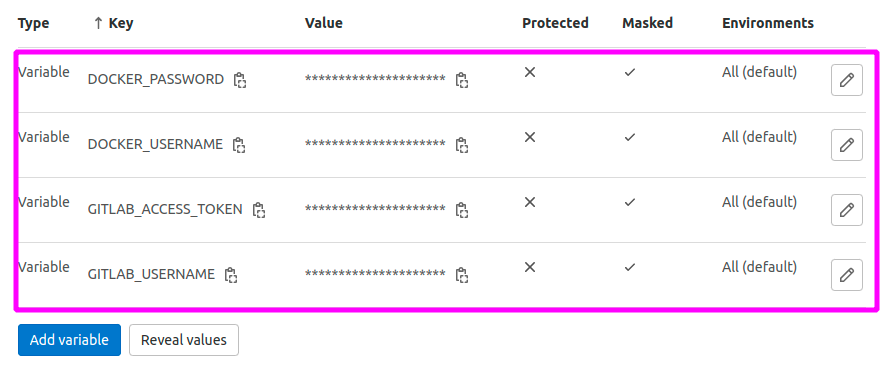
5. Lastly, repeat step 4, and add extra variables with the next particulars:
- Key – DOCKER_PASSWORD, Worth – Present your Docker Hub password.
- Key – GITLAB_ACCESS_TOKEN, Worth – Enter your GitLab entry token.
It’s best to now have 4 secret variables, as proven under.
Constructing and Pushing a Docker Picture to Docker Hub
Together with your secrets and techniques saved a secret, it’s time to configure your second job. This job will construct and deploy a Docker picture for the Python flask utility to Docker Hub.
1. Navigate to the CI/CD Pipeline Editor as you’ll want so as to add configurations to the pipeline.
2. Subsequent, add the next code on the high of the run-test block. Make sure to change dockerhub-user together with your Docker Hub username.
variables:
    IMAGE_NAME: dockerhub-user/flask-app
    IMAGE_TAG: flask-app-1.0
3. Add the next code under the run_test block, which builds a Docker picture for the Python flask utility. Make sure to change gitlab-user together with your GitLab username within the script block.
build_image:
    # Downloads a Docker shopper (docker:20.10.16).
    picture: docker:20.10.16
    # Connects to a Docker daemon.
    companies:
        - docker:20.10.16-dind
    # Create a certificates listing (DOCKER_TLS_CERTDIR) to allow the
    # Docker shopper and Docker daemon to share the identical certificates listing.
    # Allow Docker shopper and Docker daemon to authenticate one another.
    variables:
        DOCKER_TLS_CERTDIR: '/certs'
    # Authenticate GitLab with login parameters described as secret variables.
    before_script:
        - docker login -u $DOCKER_USERNAME -p $DOCKER_PASSWORD
        - docker login registry.gitlab.com -u $GITLAB_USERNAME -p $GITLAB_ACCESS_TOKEN
    # Construct and push the flask picture to DockerHub and GitLab container registry.
    script:
        - docker construct -t $IMAGE_NAME:$IMAGE_TAG .
        - docker push $IMAGE_NAME:$IMAGE_TAG
        - docker construct -t registry.gitlab.com/gitlab-user/flask-app .
        - docker push registry.gitlab.com/gitlab-user/flask-app
4. Now, click on on Commit adjustments once more to avoid wasting the adjustments, and set off the up to date pipeline.

It’s best to now have the next output, which signifies your construct is profitable.
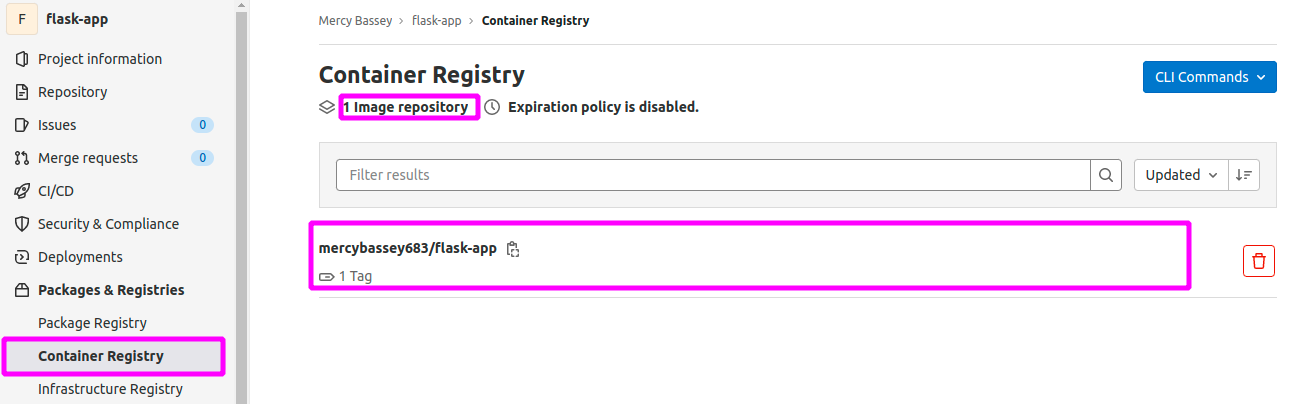
5. Navigate to the Packages & Registries (left panel) → Container Registry to substantiate your Python flask picture has been pushed to the GitLab container registry, as proven under.
6. Lastly, change to your Docker account and confirm your Python flask utility has been pushed to your Docker Hub registry.

Configuring Phases on the GitLab CI CD pipeline
At the moment, every job in your pipeline is executed in isolation and operating no matter if any job is just not profitable, which isn’t good follow.
One of the best ways to configure a pipeline is to make jobs execute accordingly, one after the opposite. With this conduct, if one job fails, different subsequent jobs is not going to execute.
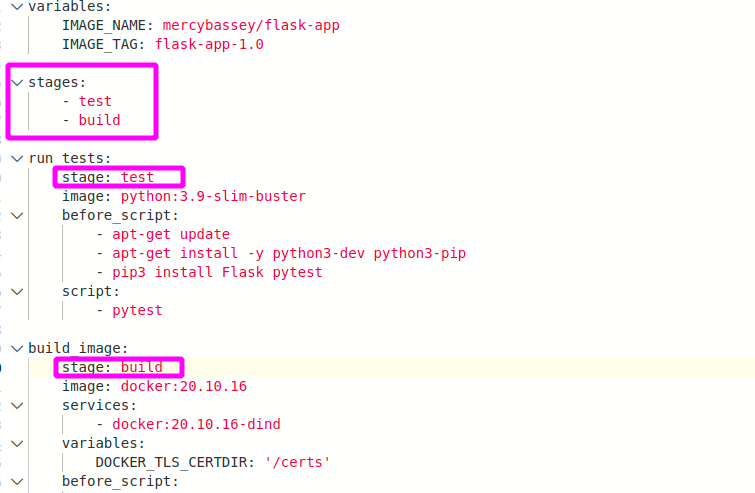
1. Navigate to the Pipeline Editor and add the next code under the variables block in your pipeline.
The code under provides phases to the pipeline, referenced from jobs within the pipeline.
2. Reference the phases in each the run_test and build_image blocks, as proven under.
3. Lastly, commit your adjustments to the pipeline, and navigate to Pipelines beneath the CI/CD part (left panel).
If all goes effectively, you’ll see every job executed one after the opposite within the Phases column, as proven under.
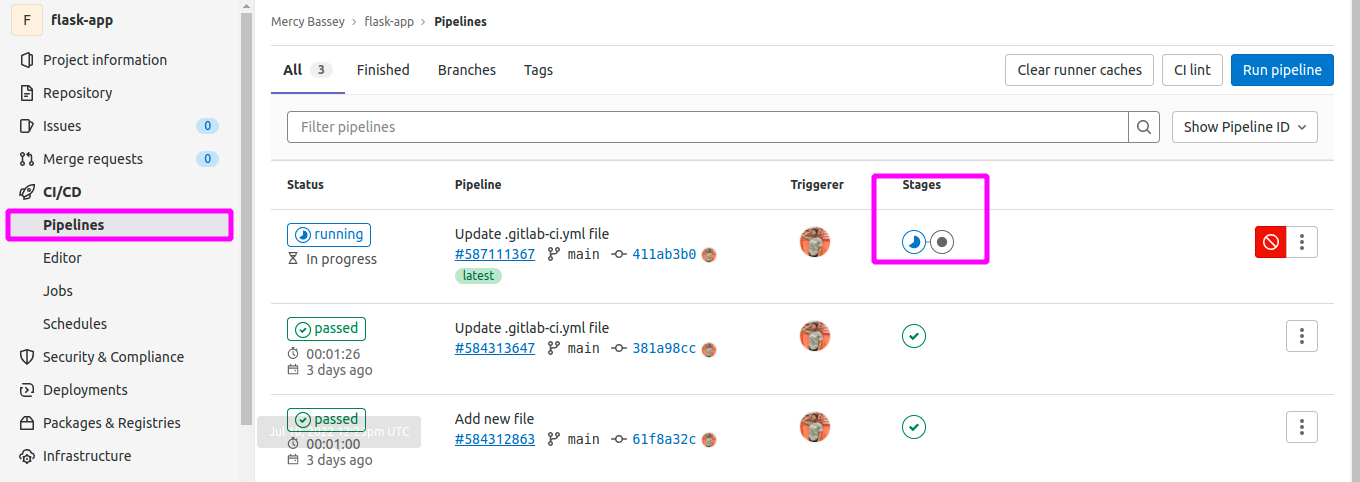
As soon as the run_tests job is finished executing efficiently, the construct job begins instantly.

When the construct job is executed efficiently, you’ll see the next output displaying two inexperienced checks beneath the Phases column.

Organising NGINX as Reverse Proxy for the Ubuntu Server
Now that you’ve configured phases in your GitLab pipeline, you’re able to configure NGINX as a reverse proxy. Doing so enables you to view your utility over an internet browser.
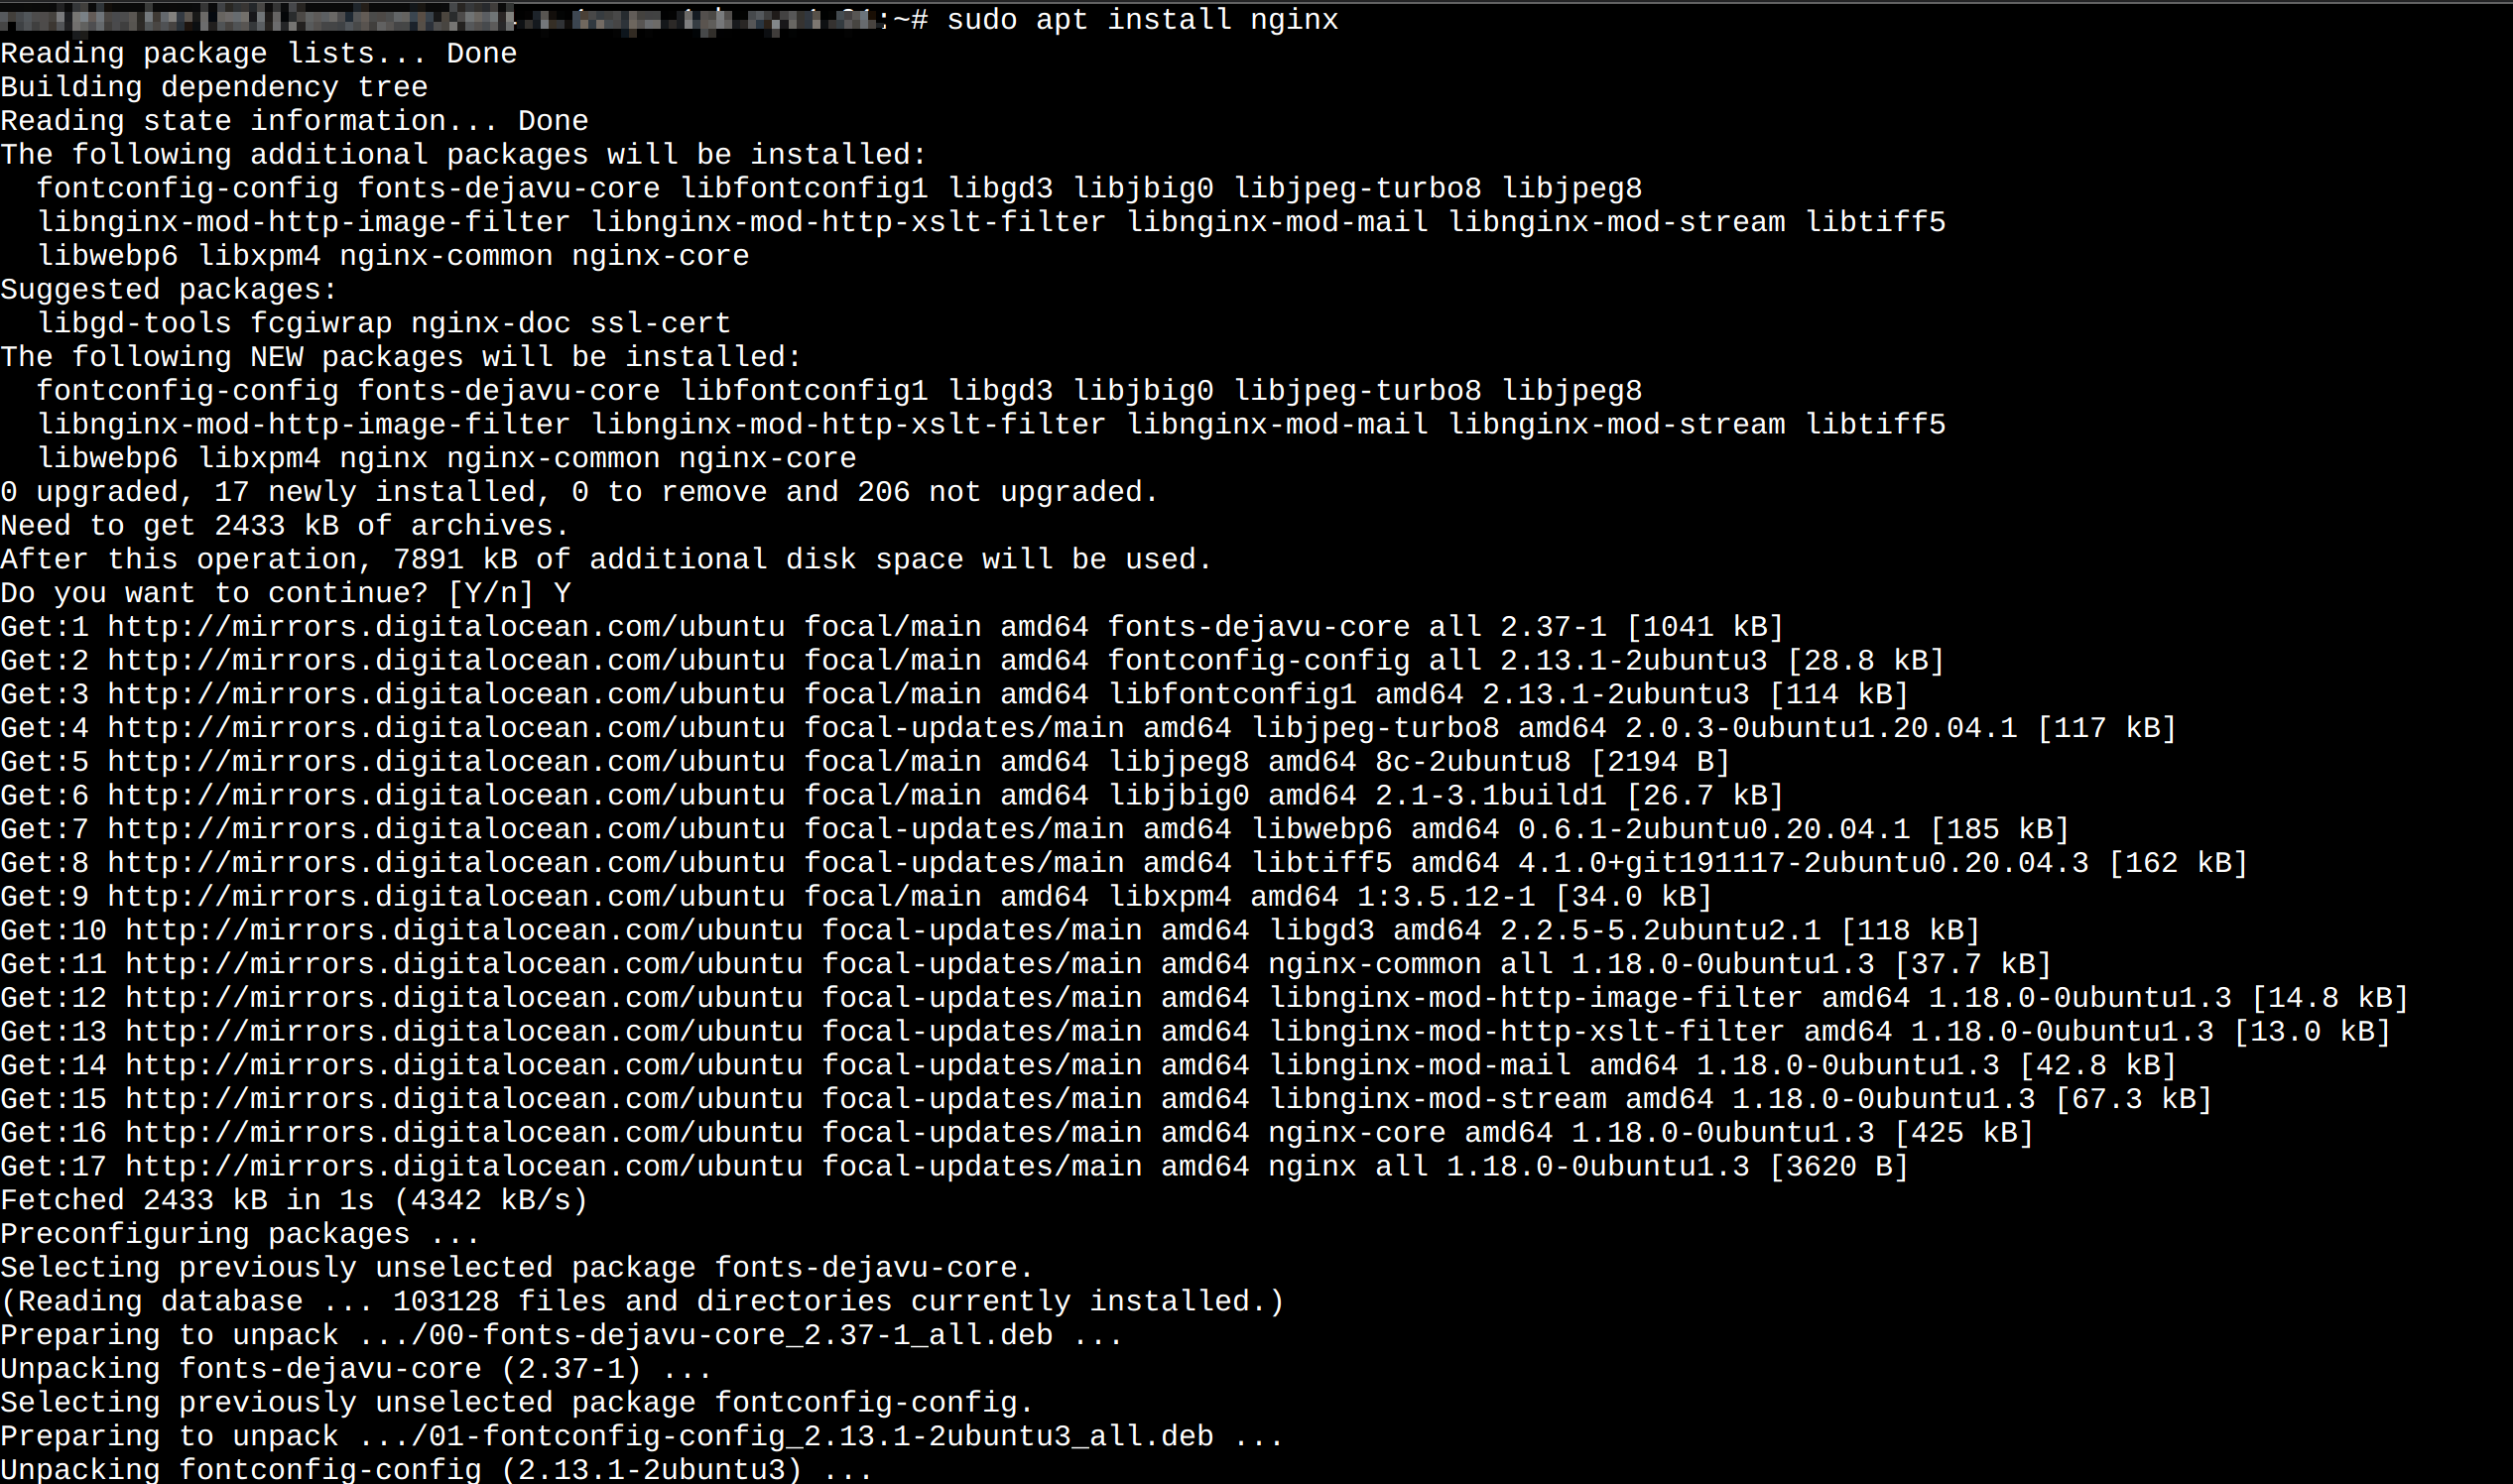
1. Run the command under to put in NGINX in your server (your droplet on Digital Ocean).
2. Subsequent, run the next rm command, which doesn’t present output however deletes the NGINX default configuration file (/and many others/nginx/sites-enabled/default). Doing so enables you to write and use your configuration file.
sudo rm /and many others/nginx/sites-enabled/default3. Create your NGINX configuration file (/and many others/nginx/sites-enabled/flask-app), add the code under, and change DROPLET_IP together with your server’s IP deal with. As soon as added, save the adjustments, and shut the editor.
The code under passes http://localhost:5000 to your distant server IP deal with.
server{
    pay attention 80;
    server_name DROPLET_IP;

    location / {
            proxy_pass http://localhost:5000;
            embrace /and many others/nginx/proxy_params;
        }
}
4. Now, run the ufw permit command under to permit http/tcp visitors in your firewall in order that your browser can entry your utility.

5. Lastly, run the under systemctl restart command, which doesn’t present output however restarts NGINX to implement the settings you created.
sudo systemctl restart nginxDeploying Docker Picture to an Ubuntu Server
After pushing the Docker picture to your Python flask utility to Docker Hub, you’re able to configure a brand new pipeline. This pipeline deploys your utility to an Ubuntu server on Digital Ocean.
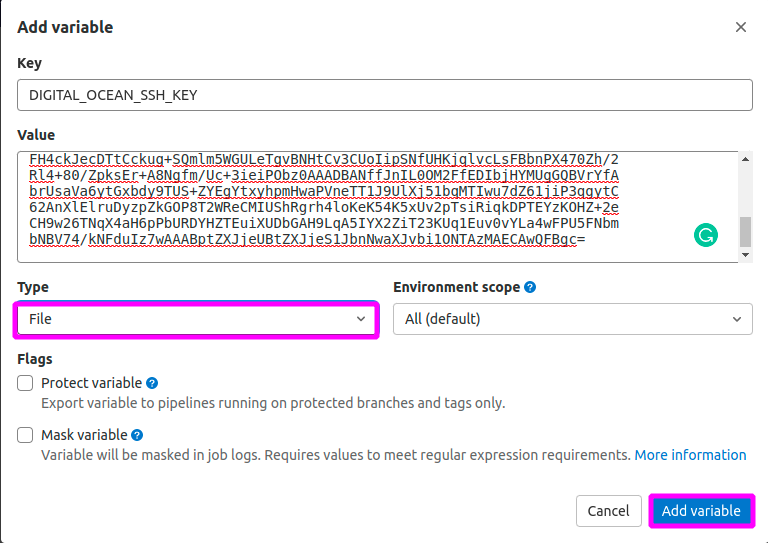
1. Head again to GitLab and add a secret variable with the next:
- Key – Set any key as you want, however this tutorial’s alternative is DIGITAL_OCEAN_SSH_KEY.
- Worth – The SSH key you used to hook up with your Ubuntu Server on Digital Ocean.
2. Subsequent, add a brand new stage known as deploy in your pipeline, as proven under.

3. Create a brand new job as you probably did within the “Configuring Jobs on GitLab” part, and identify the job as deploy.
4. Add the next pipeline configurations within the Pipeline Editor, and commit your adjustments to create a 3rd job known as deploy.
deploy:
    stage: deploy
    before_script:
        # Limit the DIGITAL_OCEAN_SSH_KEY file
        # to solely be learn and to not be modified by anybody else
        - chmod 400 $DIGITAL_OCEAN_SSH_KEY
    script:
        # Connect with the Ubuntu server on digital ocean utilizing SSH
        - ssh -o StrictHostKeyChecking=no -i $DIGITAL_OCEAN_SSH_KEY [email protected]
            # Login into your Docker account
            docker login -u $DOCKER_USERNAME -p $DOCKER_PASSWORD &&
            # Pull the docker picture out of your docker registry
            docker pull $IMAGE_NAME:$IMAGE_TAG &&
            # Cease any current containers
            docker ps -aq | xargs docker cease | xargs docker rm || true &&
            # Run the Python flask container in indifferent mode
            docker run -d -p 5000:5000 $IMAGE_NAME:$IMAGE_TAG"
After committing the adjustments, you’ll see the next output, which signifies all of your jobs are executed efficiently.

5. Run the next docker ps command to see the containers operating in your server.

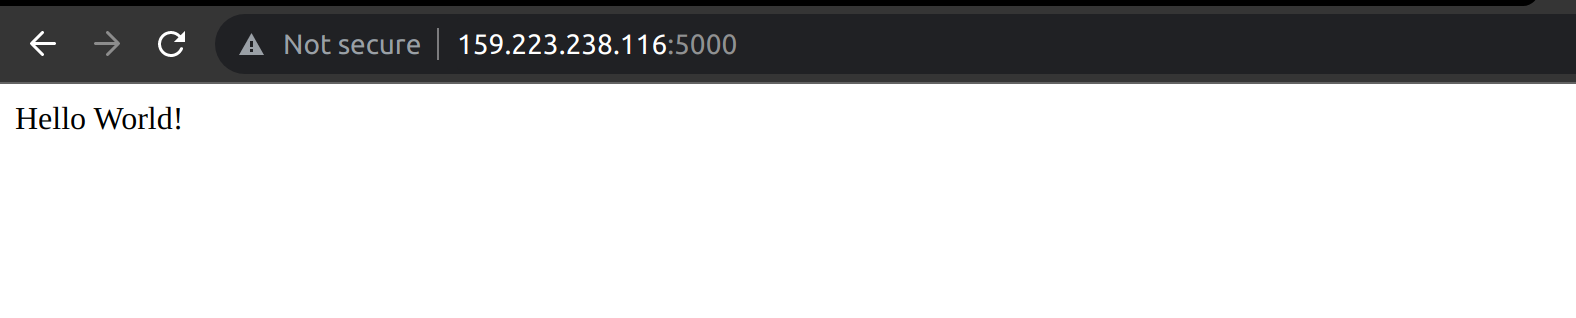
6. Finally, open one other tab in your browser and navigate to your server’s IP deal with, adopted by port 5000 (http://SERVER-IP:5000).
If all goes effectively, you’ll see the message under in your browser.
Conclusion
On this tutorial, you’ve realized tips on how to arrange a GitLab CI CD pipeline with GitLab for the uninterrupted growth of your utility. You’ve created jobs to automate duties, phases to outline when to run jobs, and secret variables to maintain delicate info, effectively, as secrets and techniques.
You’ve seen that pushing a Docker picture to GitLab’s container registry works like a attraction. However what else will you configure to your pipeline? Maybe deploy your Python flask utility to AWS Elastic Beanstalk?