


As you begin working with Azure, you’ll discover that the Azure Portal is an effective way to handle your sources. And when you’re questioning which sources and how one can handle Azure Portal, there are tons of them!
Azure Portal supplies an intuitive browser-based person interface you should utilize to provision and handle Azure sources. And on this tutorial, you’ll learn to use and handle your sources within the Azure Portal.
Learn on and uncover how the Azure Portal could make your life a breeze!
Conditions
This tutorial shall be a hands-on demonstration. When you’d prefer to observe alongside, ensure you will have an Azure account with an lively subscription. You’ll be able to create a free Azure account when you don’t have one already.
The right way to Handle Azure Portal and Create a Customized Dashboard
By default, Azure supplies you with a set of default dashboards you possibly can select from to handle your sources. However would you actually want a default dashboard? Why not create your personal customized dashboard, and tailor it to your particular wants?
Fortunately, Azure Portal additionally helps you to create a customized dashboard you possibly can name your personal. Suppose you desire a centered and clear view of your subscription’s digital machine (VM) and runbook sources. With Azure Portal in your facet, you possibly can create the sort of dashboard.
To create a brand new customized dashboard with an assigned identify:
1. Open your favourite net browser, and log in to the default Azure Portal.
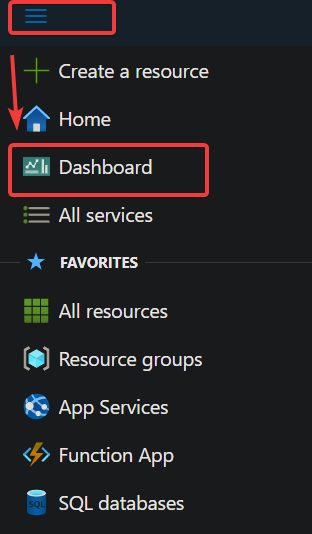
2. On the Azure Portal, click on on the top-left menu icon (three horizontal traces), and select Dashboard to provoke creating a brand new dashboard.
3. Subsequent, click on the New dashboard dropdown button, and choose Clean dashboard. This motion opens a brand new dashboard blade with an empty grid (step 4).

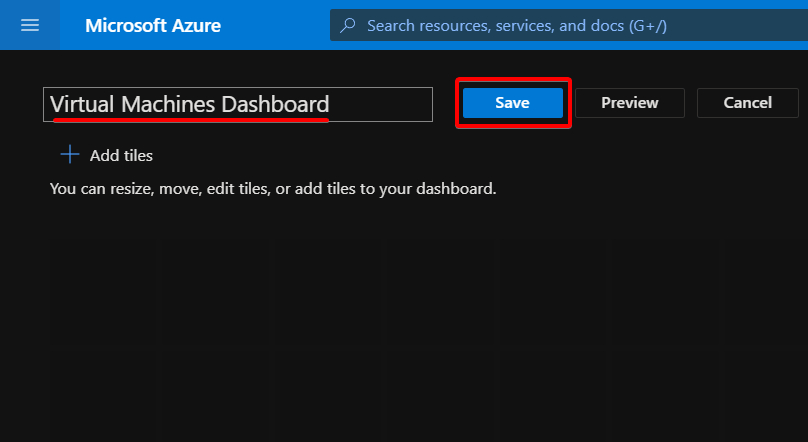
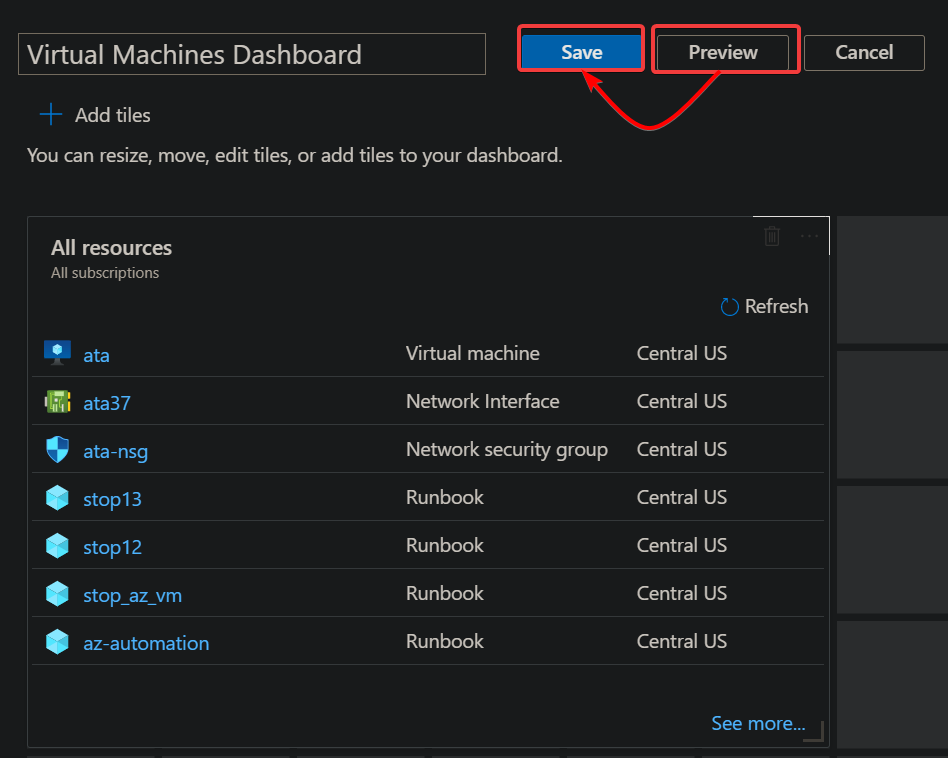
4. Now, present a descriptive identify on your new dashboard, and click on Save. This tutorial’s selection for the dashboard identify is Digital Machines Dashboard.
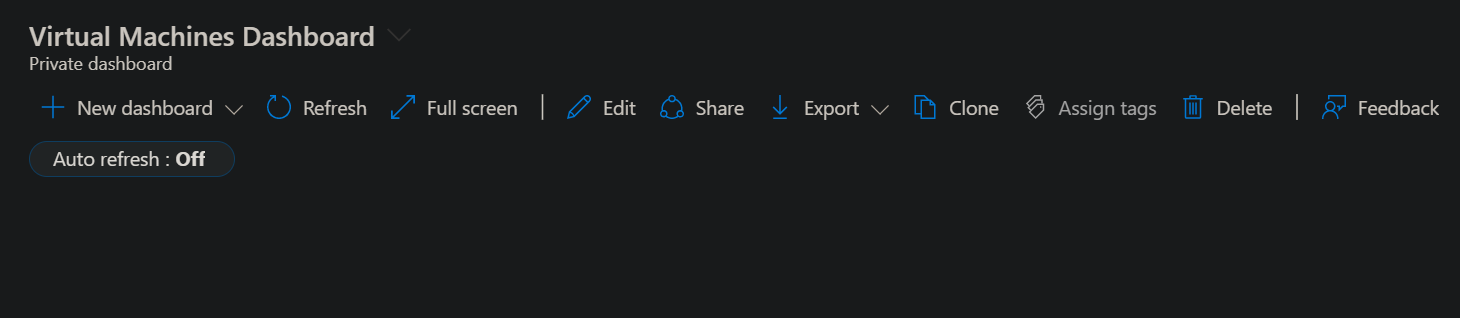
After saving the dashboard, your browser opens a blade just like the one beneath, displaying the newly-created dashboard as soon as provisioned.
Customizing Azure Dashboards
You’ve created your first customized dashboard in Azure Portal. However proper now, it’s empty. So why not add some content material to the dashboard? As an example, add a tile to the dashboard displaying all of your sources.
To edit your customized dashboard:
1. Click on Edit in your dashboard web page to enter edit mode.

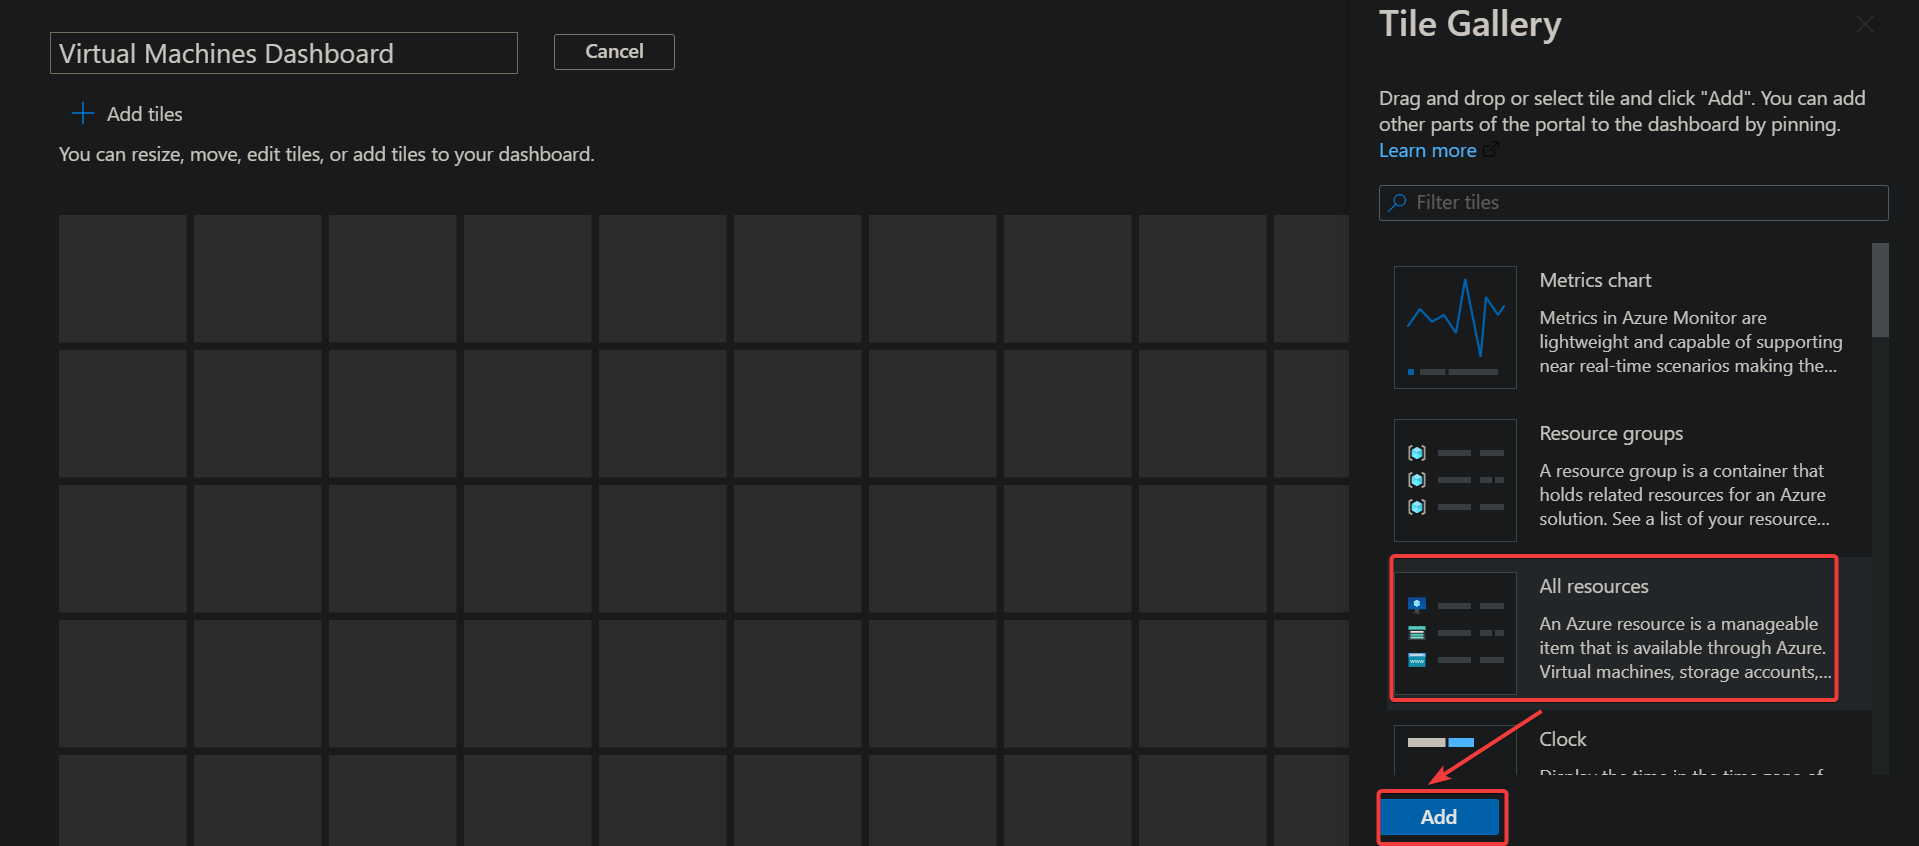
2. Subsequent, browse the Tile Gallery (right-panel), choose the kind of tile you want, and click on the Add button so as to add the chosen tile to your dashboard. This tutorial’s selection is the All sources tile, which exhibits all accessible sources on your account.
Like most individuals (after they really feel a bit lazy), you can even drag and drop the tile on the empty grid.
3. After including a tile, click on Preview to see how the brand new tile will look in your dashboard. When you’re pleased with how the dashboard seems to be, click on the Save button to save lots of your adjustments.
Maybe you wish to add a number of tiles to your dashboard. In that case, repeat steps one to a few for every tile you wish to add.
Resizing and Rearranging Tiles on the Customized Dashboard
Your dashboard now seems to be a bit full of life with added tiles. However you might wish to resize or rearrange the tiles to fit your style higher on how your dashboard ought to look.
1. Click on on Edit once more to enter edit mode.

2. Resize your tile from the dashboard with the next:
- Hover your mouse to the tile you wish to resize or rearrange, and click on the three dots that seem (top-right) on the tile. A context menu seems the place you possibly can choose actions or sizes you need the chosen tile to take.
- Choose the 2×1 measurement from the context menu, which takes up two columns and one row on the dashboard grid. As quickly as you choose a measurement, the tile resizes robotically.
- After resizing, click on on Save to save lots of the adjustments.
There are different sizes you possibly can select for the tile, which make the tile take a sure variety of columns and rows on the dashboard grid. The checklist of sizes goes on, however you get the concept of how these tile sizes work.
3. Lastly, drag and drop tiles to your required location to rearrange the tiles on the dashboard, and click on Save to save lots of the adjustments.
There you will have it. Your dashboard now seems to be extra clutter-free!
Creating an Azure Useful resource Group to Handle in Azure Portal
When you will have unorganized sources in Azure Portal, likelihood is you’ll get misplaced about which is which. Yikes! Seems like bother. How do you kind this drawback out?
Grouping associated sources collectively (like Azure VM sources) is a superb answer. Fortunately, useful resource teams maintain your sources organized and neat.
You’ll be able to create a useful resource group utilizing the Azure Cloud Shell, PowerShell, or Azure CLI. However on this tutorial, you’ll use the Azure Portal to create a useful resource group.
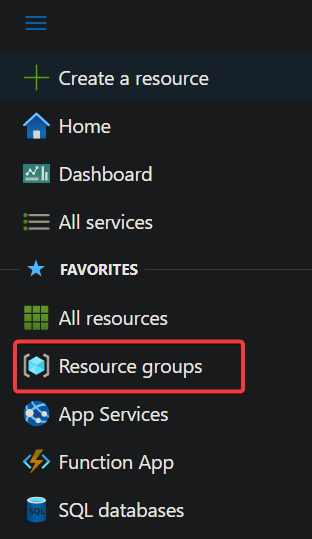
1. Click on on the menu icon once more —> Useful resource teams to entry the useful resource teams blade (step two).
2. Subsequent, click on Create within the Useful resource teams blade to initialize creating a brand new useful resource group.

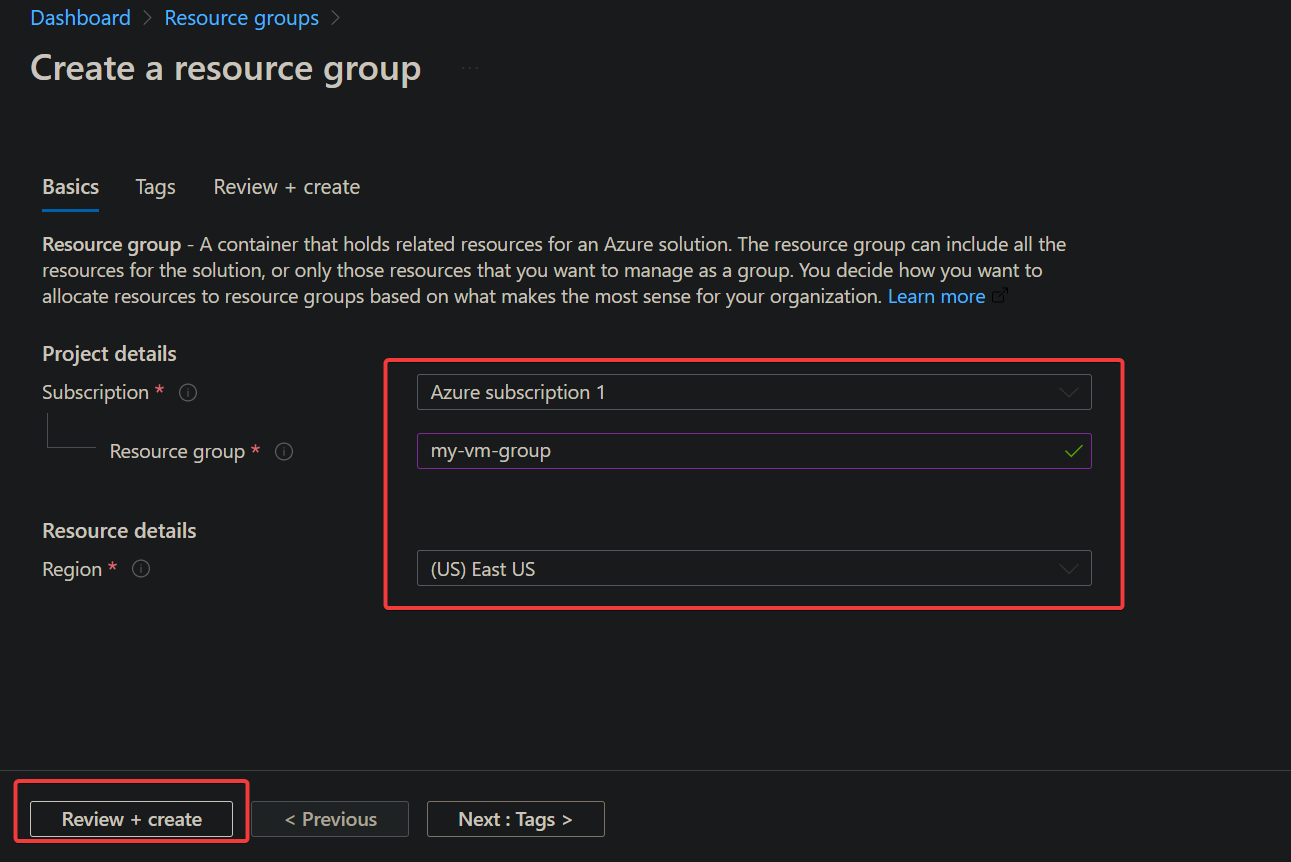
3. Present the next info for the useful resource group, and click on Evaluation + create to overview the main points you set for the useful resource group.
- Subscription – Choose your Azure subscription from the drop-down subject.
- Useful resource group – Present a descriptive identify on your useful resource group. However this tutorial’s selection is my-vm-group.
- Area – Choose the situation to make use of on your useful resource group from the situation drop-down subject. A area nearest to you or your sources is often the best choice to reduce community latency.
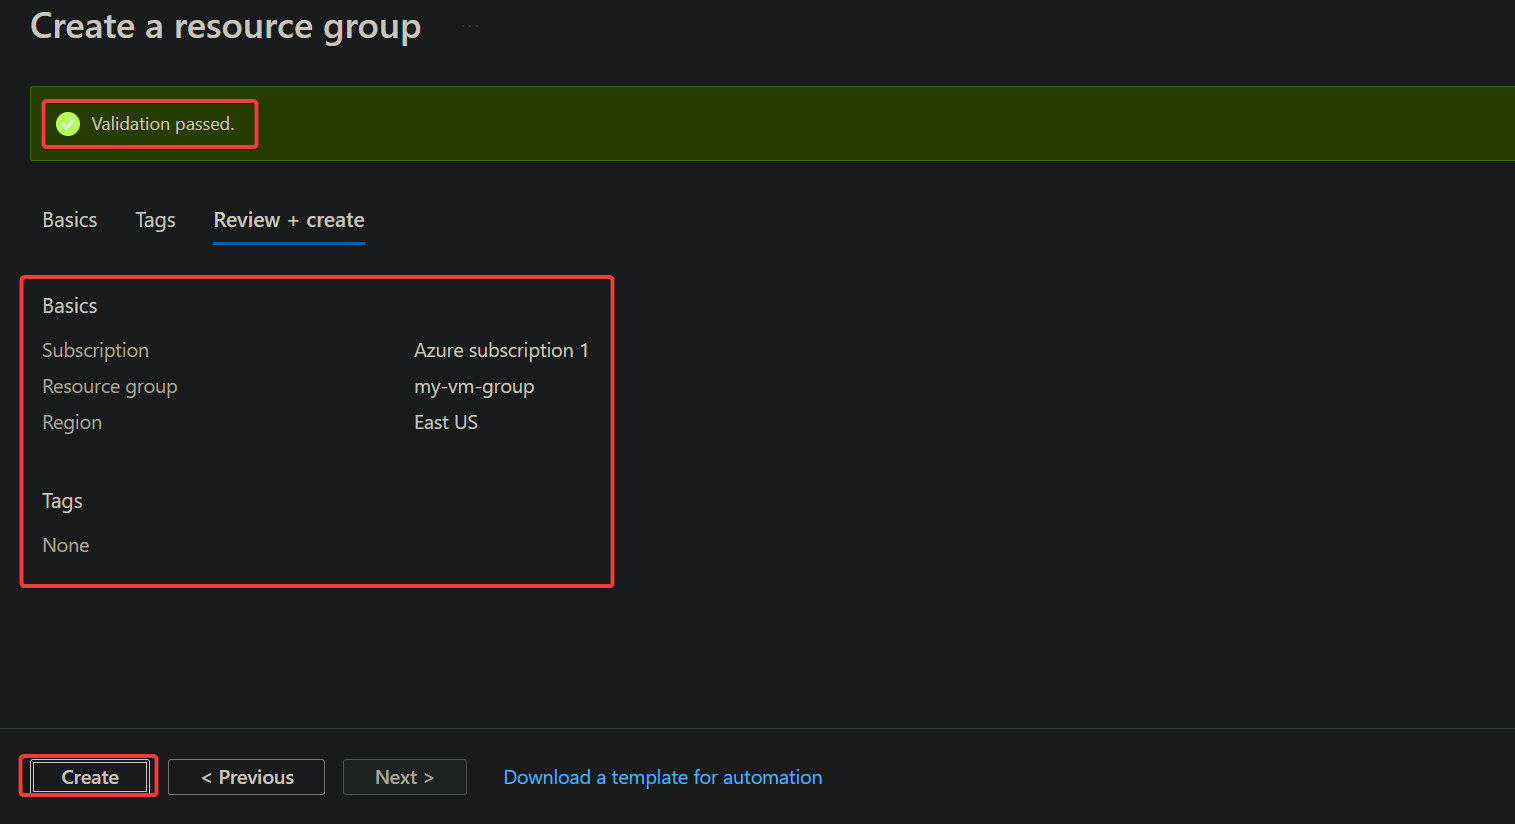
4. Now, overview the useful resource group particulars, and wait till you see the Validation handed message proven beneath.
As soon as validated, click on Create to finalize creating the brand new useful resource group, which can take a couple of minutes to finish.
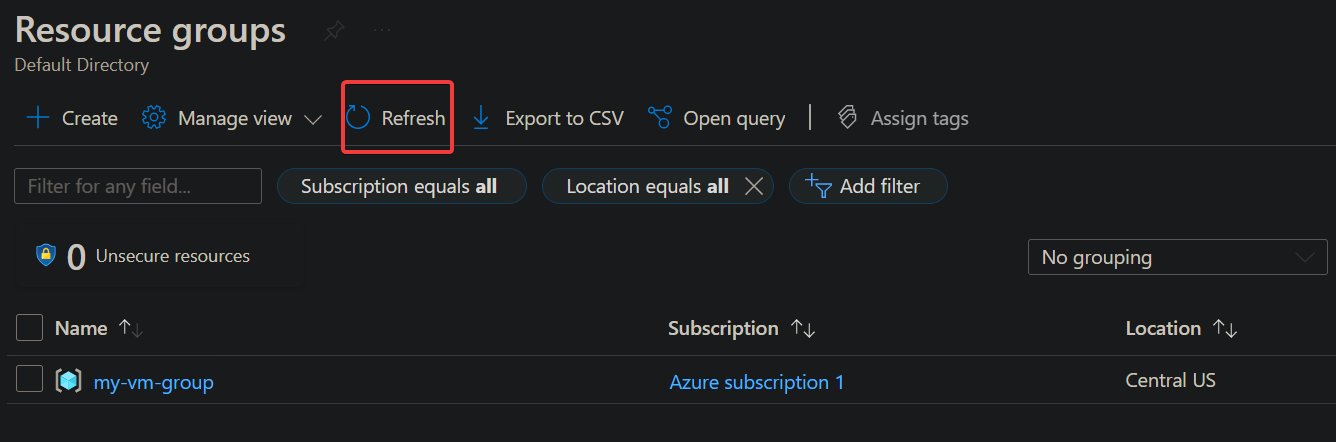
5. Click on the Refresh button to refresh the checklist of useful resource teams when you don’t see the newly-created one straight away.
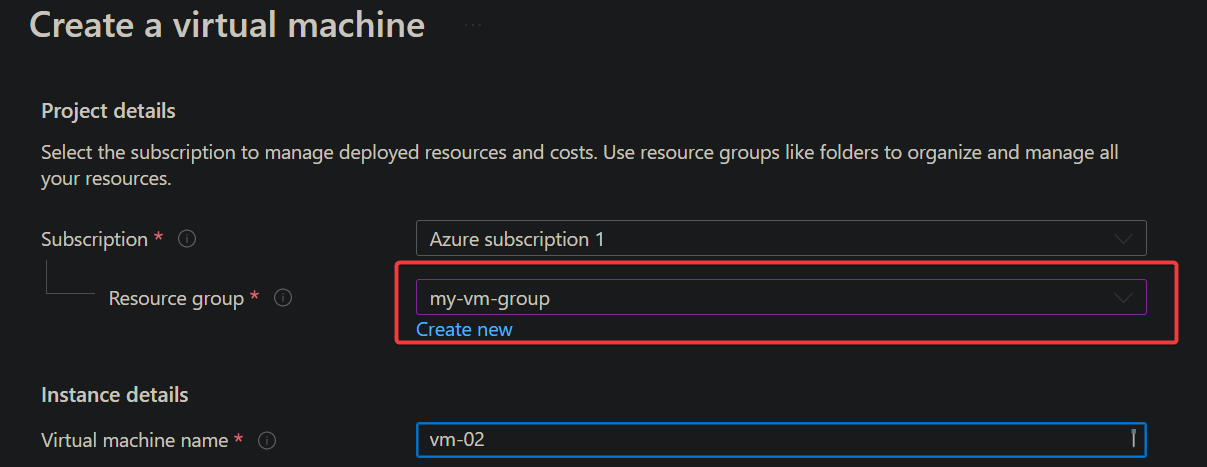
6. Lastly, create two VMs, named vm-01 and vm-02. Guarantee each VMs are below the useful resource group you created (my-vm-group), as proven beneath.

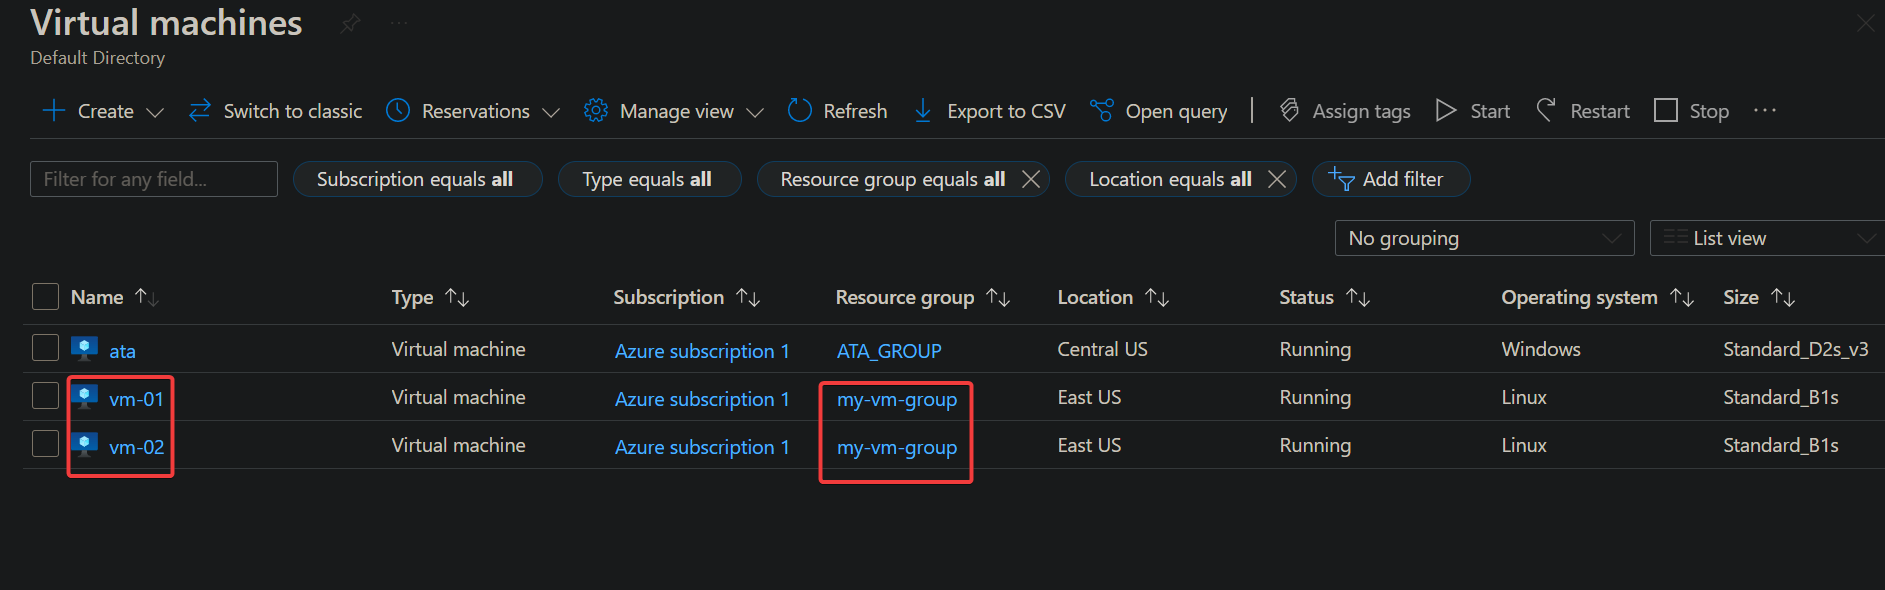
After creating the VMs, you’ll see them listed within the Digital machines blade, as proven beneath. Beneath, you possibly can verify that each VMs are below the identical useful resource group (my-vm-group).
Managing Azure Sources (VMs)
You’ve simply created an Azure useful resource group to arrange your sources (VMs). However how do you really handle your Azure sources in Azure Portal? As long as you will have your sources below the identical useful resource group, Azure Portal helps you to rapidly handle your sources multi functional place.
You’ll handle your VMs on this tutorial, however the identical ideas apply to any useful resource group like Storage account, Azure SQL Database server, and so forth.
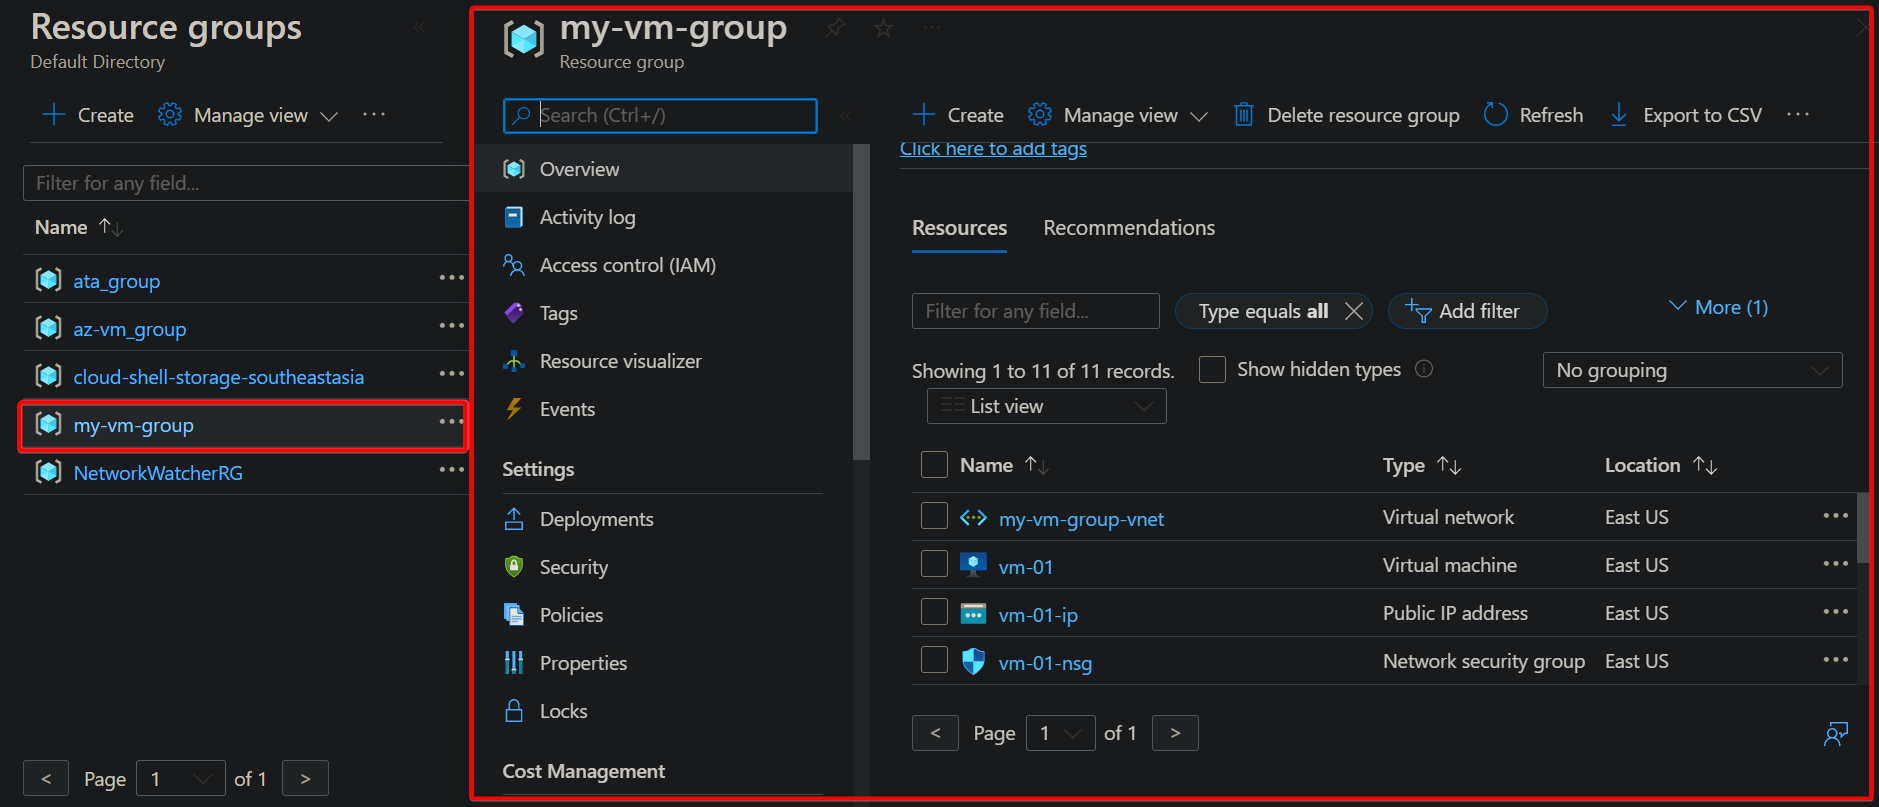
1. On the Useful resource teams blade, click on on the useful resource group (my-vm-group) you wish to handle from the checklist. Doing so opens a blade for the chosen useful resource group.
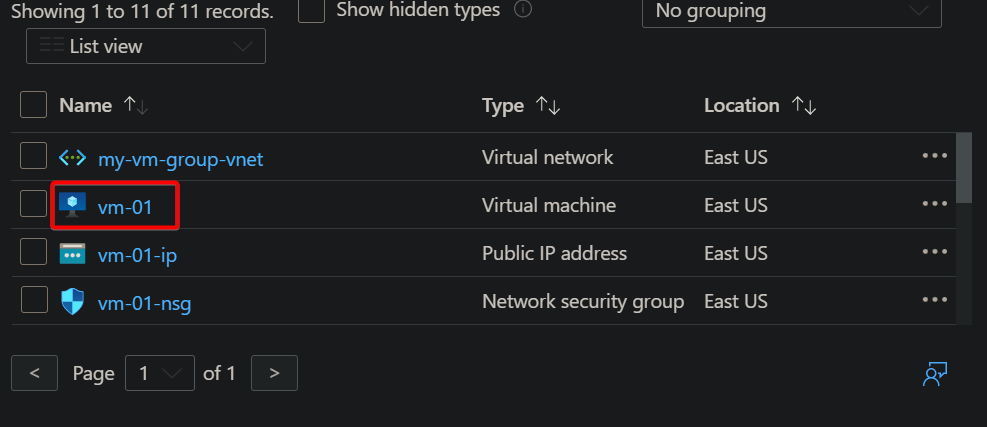
Beneath, you possibly can see that the blade lists all sources in your useful resource group (my-vm-group).
2. Subsequent, click on in your VM (vm-01) from the checklist of sources. A blade on your chosen useful resource opens, displaying all info and settings for the chosen useful resource.
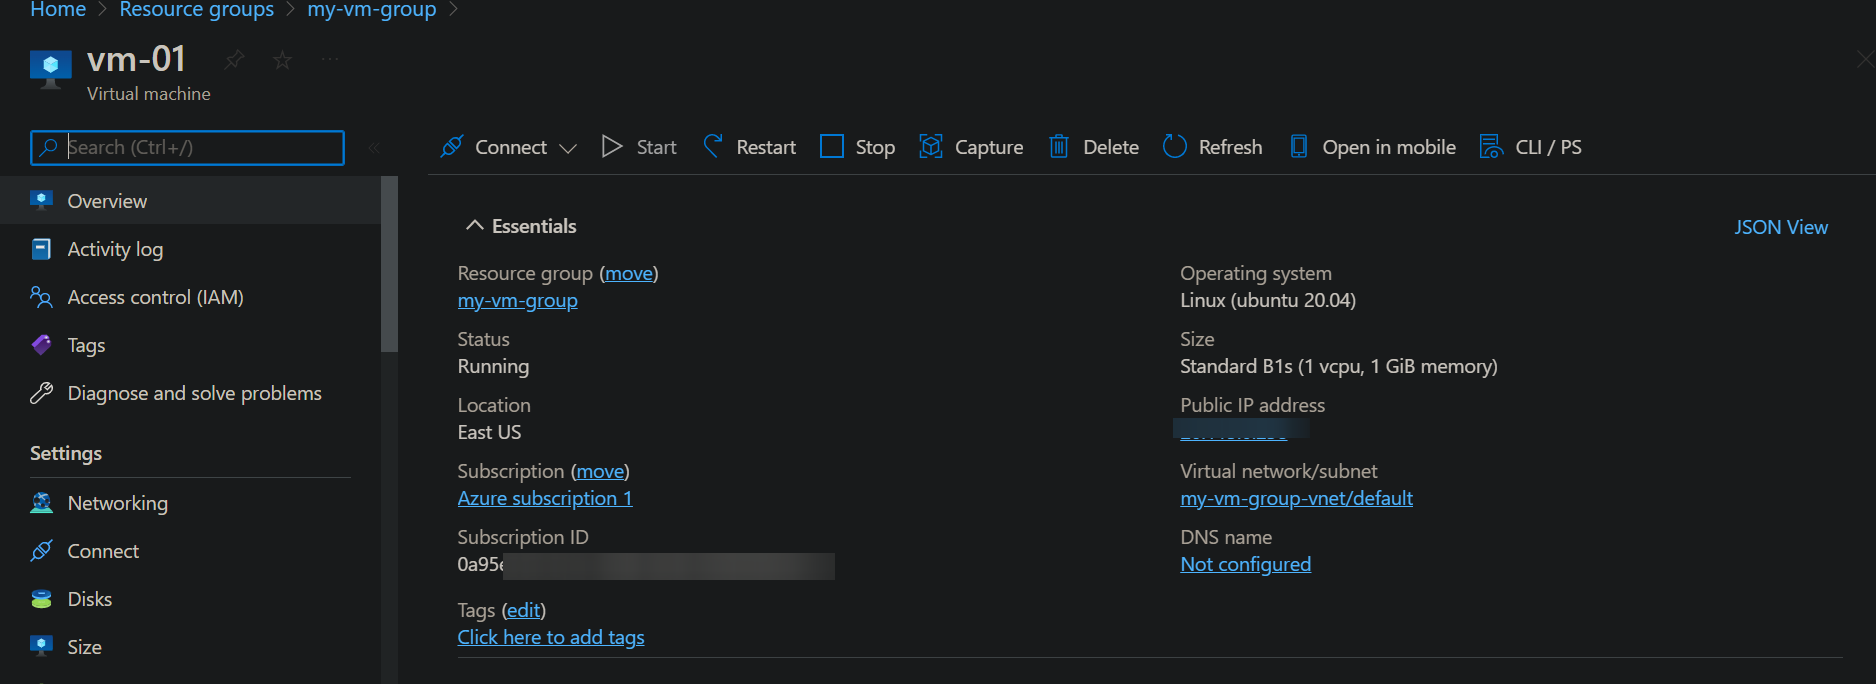
You’ll be able to see beneath all particulars about your VM. However other than the useful resource particulars, you can even see a number of actions you possibly can take to handle your VM. As an example, you can begin, cease the VMs, connect with them, and so forth.
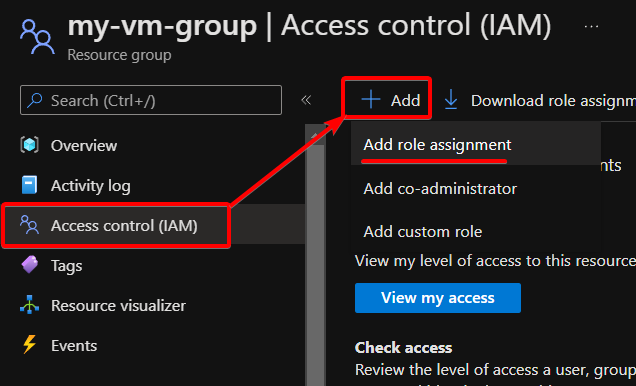
3. Swap again to your useful resource group’s (my-vm-group) blade, and click on on Entry management (IAM) on the left panel. An Entry management (IAM) blade opens, the place you possibly can handle entry management for the chosen useful resource group.
On the Entry management (IAM) blade, click on Add —> Add function project to provoke including a brand new function project.
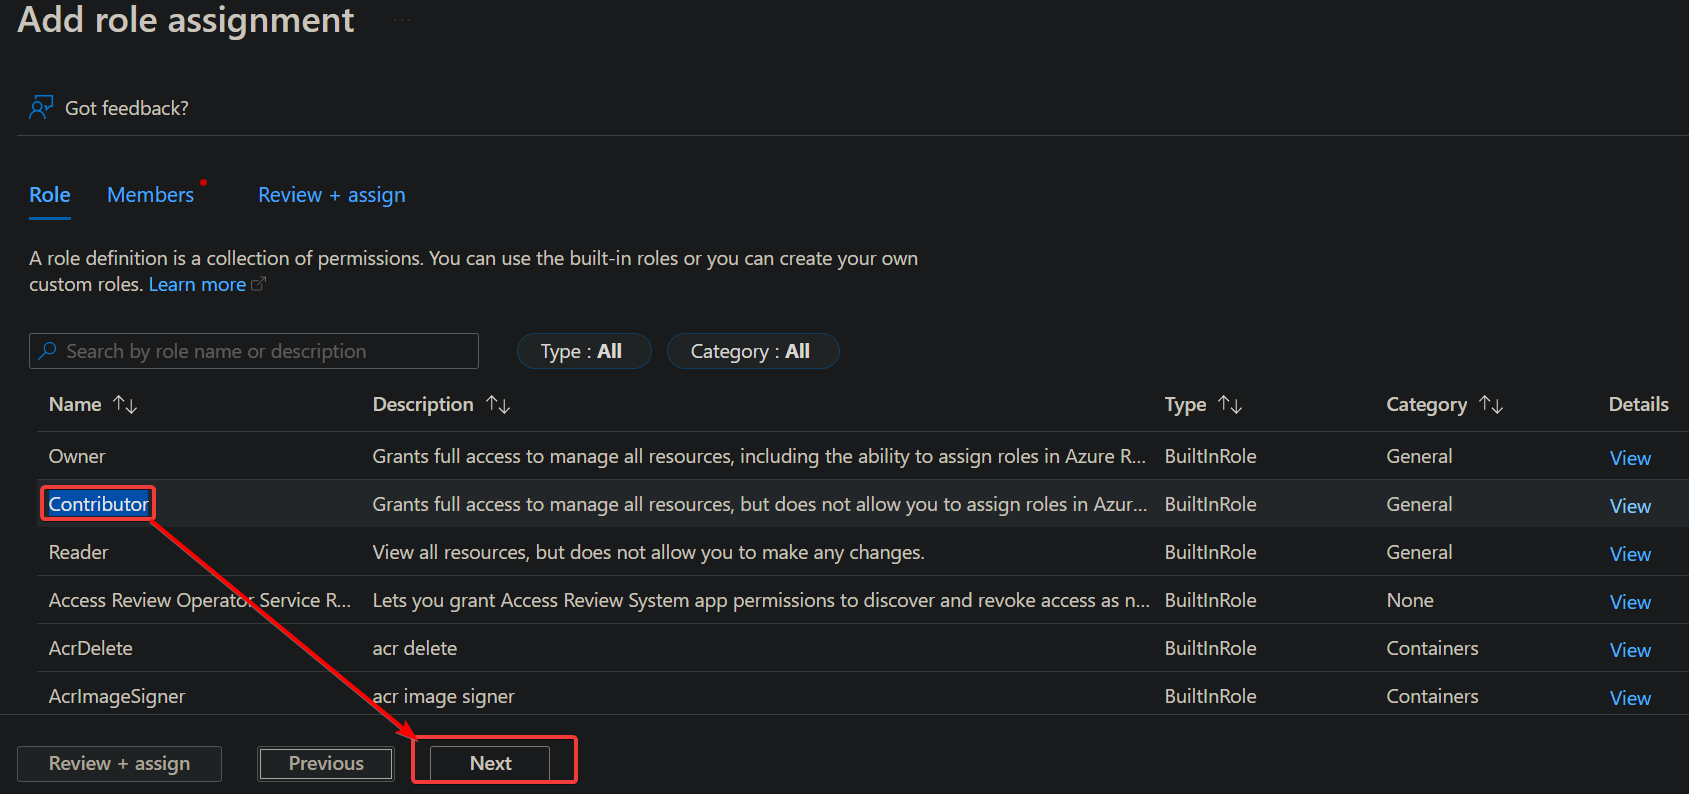
4. On the Add function project, choose the function (Contributor) you wish to assign below the Function tab and click on Subsequent.
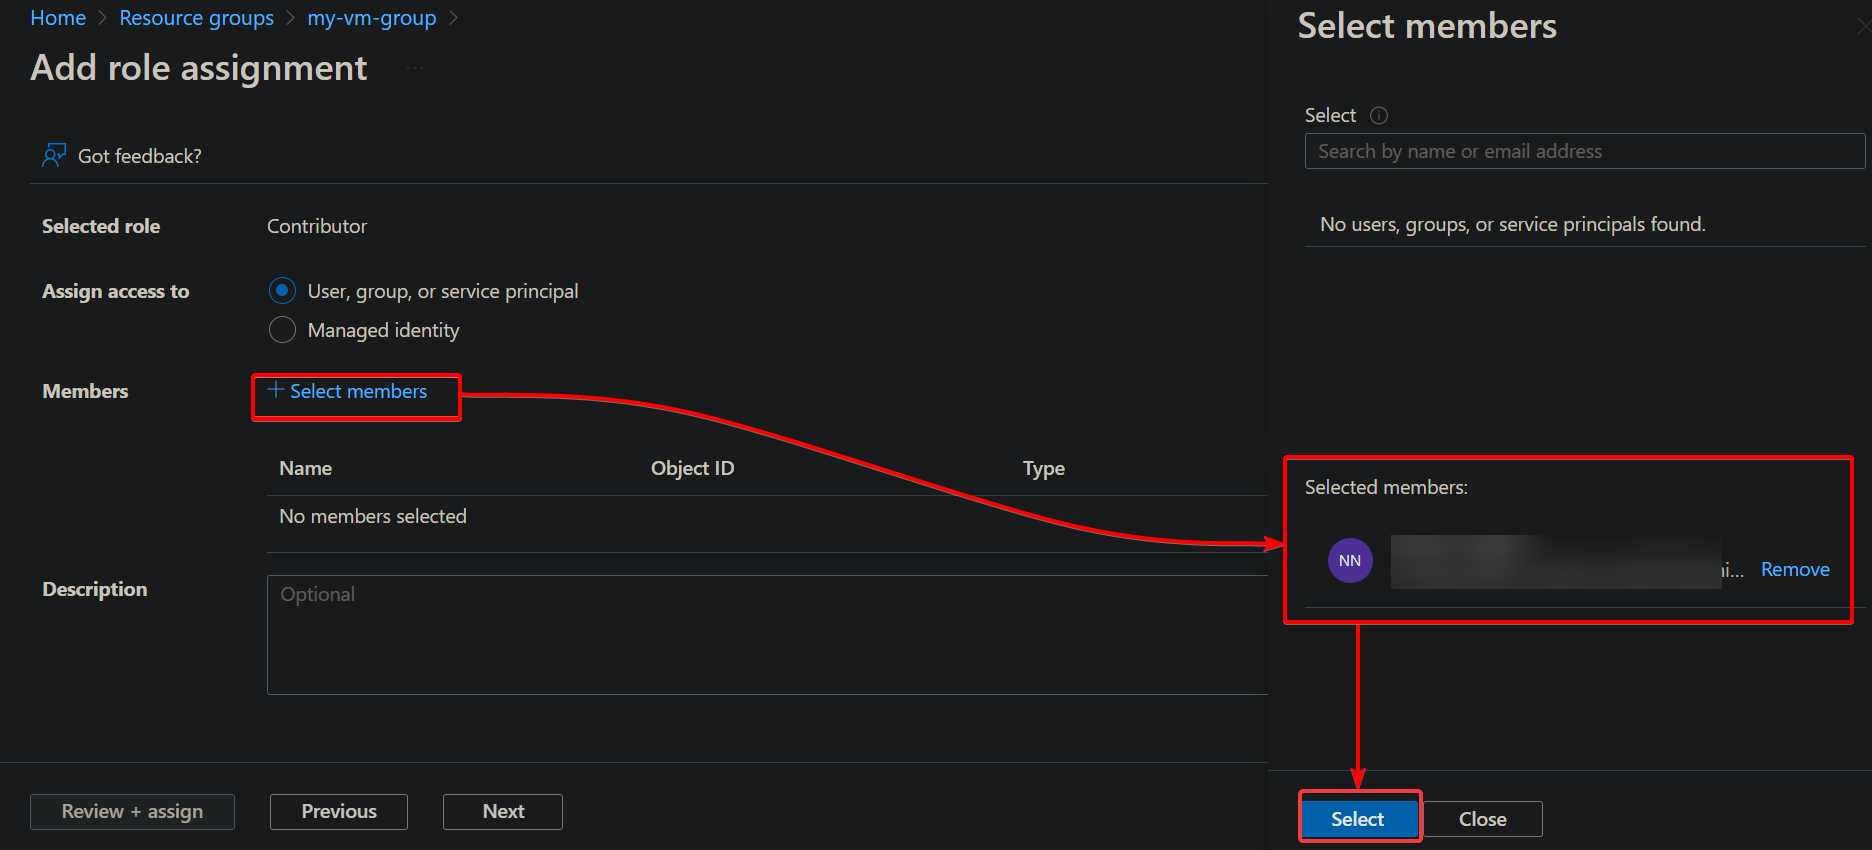
5. Click on the Choose member hyperlink, search for and click on the person to offer entry to your sources, and click on Choose.
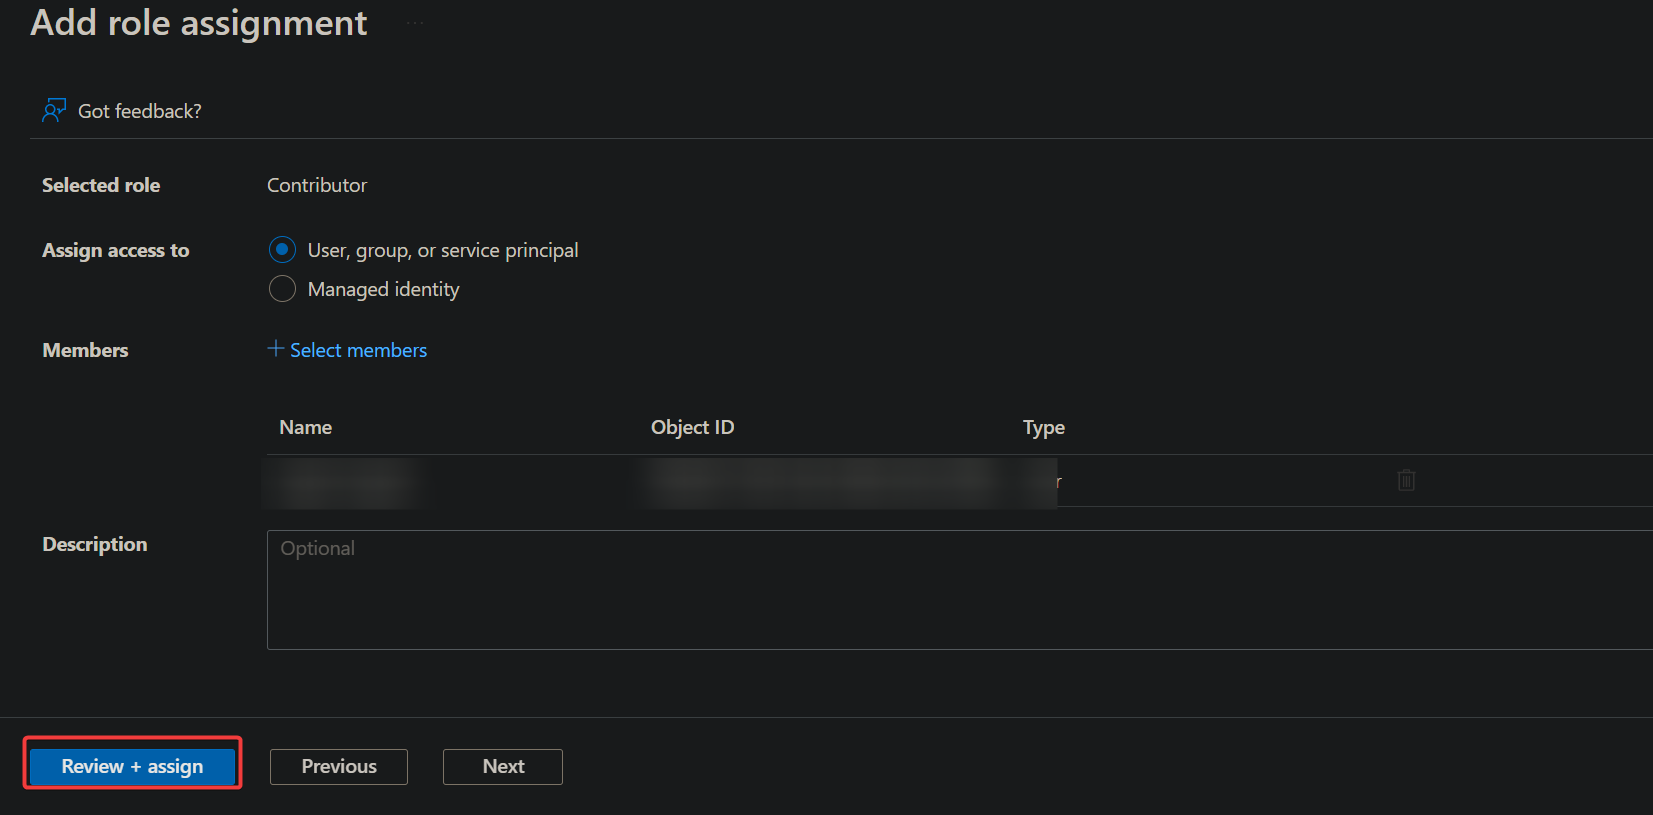
6. Now, overview the function particulars, the members added to the function, and click on Evaluation + assign twice to finalize including function project to the chosen member.
Be aware you can add a number of customers to a single useful resource group and assign totally different roles to every one.
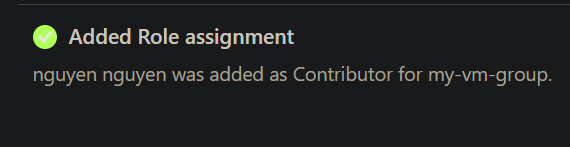
You’ll see an Added Function project message (top-right) when the function project is profitable, as proven beneath.
At this level, the chosen customers will now have the entry rights assigned to allow them to entry your sources within the Azure Portal and through the Azure CLI or Azure PowerShell.
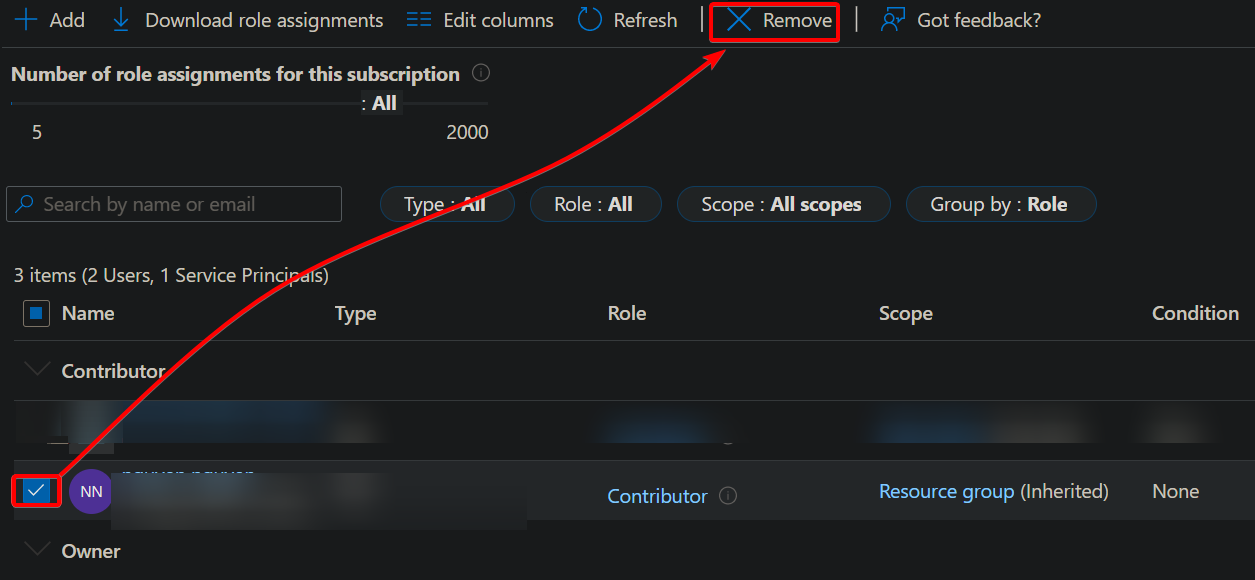
When you ever must take away a person’s entry, tick on the checkbox in entrance of the person’s identify and click on the Take away button, as proven beneath.
Conclusion
Managing sources might be tedious however nothing you possibly can deal with. And on this tutorial, you’ve discovered the right way to use and handle the Azure Portal and Azure sources. You’ve additionally managed entry to your sources utilizing the Azure role-based entry management (RBAC).
What different sources do you propose to handle in Azure Portal? Why not arrange Azure Availability Units to arrange your digital machines (VMs) into logical groupings?