


Working purposes in a secure and scalable approach may be difficult. Happily, Google Cloud Platform (GCP) provides GCP Cloud Run that enables customers to deploy and handle scalable, containerized purposes.
The complexity of managing sources, internet hosting them in a number of environments, and coping with potential service outages could cause complications for builders. However fear not! This tutorial will stroll you thru the best way to deploy a fundamental scalable containerized utility utilizing GCP Cloud Run.
Prepared? Learn on to up your app ops sport!
Prerequisite
This tutorial can be a hands-on demonstration. To observe alongside, guarantee you could have a GCP account with lively billing enabled, however a free trial account is enough.
Making a GCP Undertaking
Step one in containerizing your utility in GCP is to create a brand new GCP mission. Tasks are the logical method to set up sources throughout GCP. Every mission offers an remoted setting during which all of your companies and sources are contained.
Be aware that you shouldn’t combine sources from present initiatives, which additionally helps once you clear up your setting in a while.
To create a GCP mission, observe these steps:
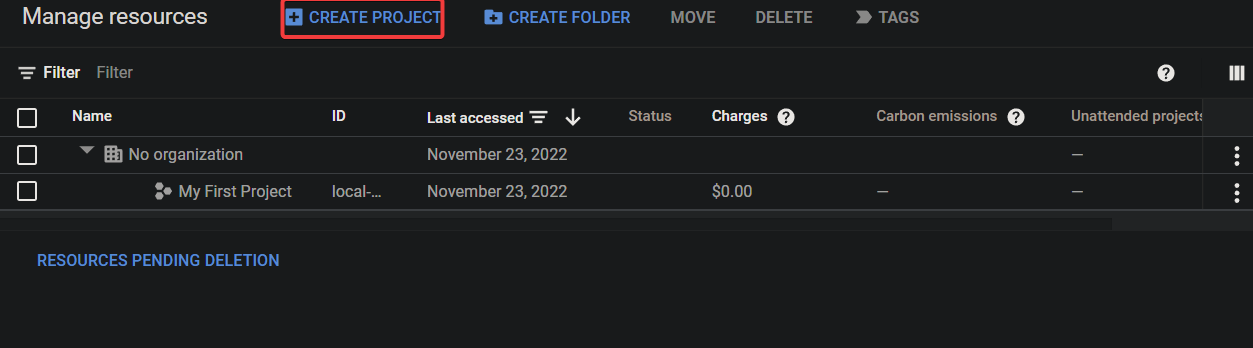
1. Open your favourite net browser, and navigate to the Handle sources web page within the Google Cloud Console.
2. Subsequent, click on CREATE PROJECT to provoke creating a brand new mission.
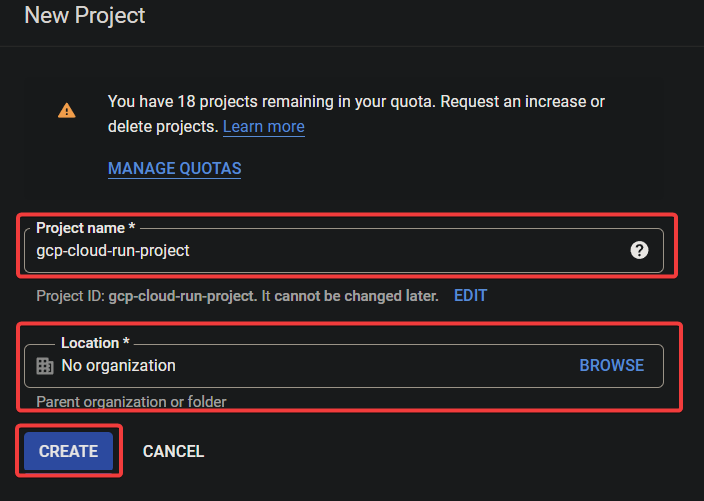
On the following display, present the next on your mission: Undertaking identify A novel identify on your GCP mission (i.e., gcp-cloud-run-project). Location An applicable group in case you have one; in any other case, skip this subject.
| Undertaking identify | A novel identify on your GCP mission (i.e., gcp-cloud-run-project). |
| Location | An applicable group in case you have one; in any other case, skip this subject. |
As soon as crammed up, click on CREATE to create the mission.
A affirmation message, as proven under, signifies a brand new mission has been created.

4. Now, navigate to the mission selector web page, and choose your newly-created mission to set it as the present/lively mission/

Enabling the Cloud Run API
Earlier than you deploy your containerized utility, you have to to allow the Cloud Run API first. How? Google Cloud offers a characteristic known as Google Cloud Shell, a web-based shell setting the place you possibly can handle your GCP sources.
On this tutorial, you’ll use Google Cloud Shell for working instructions and interacting with Cloud Run and different GCP companies.
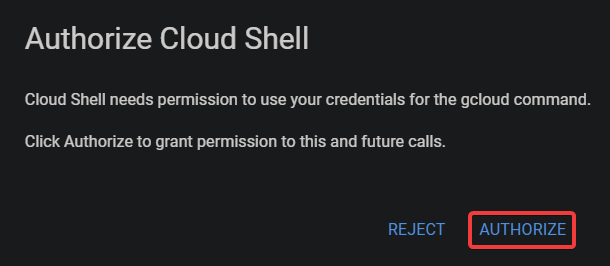
1. Click on the Activate Cloud Shell icon (upper-right) to activate the Google Cloud Shell. A shell terminal seems on the backside of your display, as proven under.

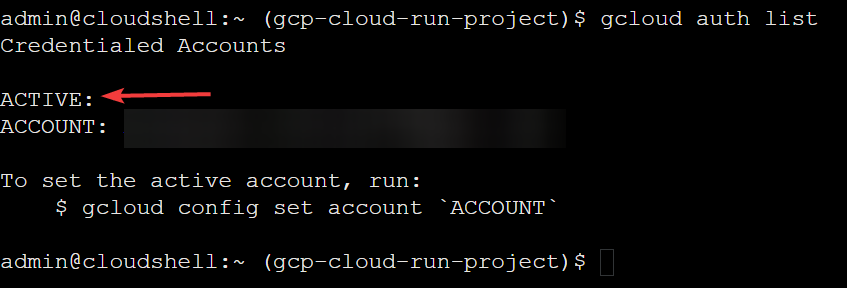
2. Subsequent, run the under gcloud auth record command to substantiate that your Google Cloud account is authenticated and lively.
Click on AUTHORIZE when prompted to authorize gcloud to entry your Google Cloud account.
As soon as authenticated, you will note an identical output as under.
3. Now, run the next gcloud config record command to confirm that the mission you created is ready as your present mission.
gcloud config record mission
4. As soon as your mission is verified, run the under gcloud config set command to set the area the place you wish to deploy the appliance. The area is default set to us-central1 however may be modified as wanted.
gcloud config set compute/area us-central1
5. Lastly, run the gcloud service allow command to allow Cloud Run API (run.googleapis.com).
gcloud companies allow run.googleapis.com
Getting ready a Node.js App for GCP Cloud Run Jobs
Now that your setting is ready up, making ready a pattern utility you possibly can deploy utilizing Cloud Run is the following step.
On this tutorial, you’ll deploy a fundamental Node.js “Hey World” utility powered by the Specific net framework. This app returns a easy “Hey World!” response triggered by an HTTP request.
1. Run the under instructions, which don’t present output, however create a brand new listing identify helloworld and transfer into that listing. This listing will maintain your supply code and different recordsdata associated to the appliance.
mkdir helloworld && cd helloworld2. Subsequent, create a bundle.json file in your most well-liked editor. This file defines the dependencies on your Node.js utility.
Add the next code to the bundle.json file, and save the modifications. This file defines the mission identify, model, and outline and offers directions on the best way to begin the appliance.
{
  "identify": "helloworld",
  "description": "Pattern hey world app in Nodejs",
  "model": "1.0.0",
  "predominant": "index.js",
  "scripts": {
    "begin": "node index.js"
  },
  "creator": "Google LLC",
  "license": "Apache-2.0",
  "dependencies": {
    "specific": "^4.17.1"
  }
}
3. Create one other file known as index.js file. This file accommodates the primary supply code on your Node.js utility, positioned in the identical listing (helloworld) because the bundle.json file.
Add the under code to the index.js file and save the modifications. This code is liable for establishing the Specific net server. On the similar time, this code defines a single route that may return a “Hey World!” response with the PORT setting variable.
const specific = require('specific');
const app = specific();
const port = course of.env.PORT || 8080;
app.get('/', (req, res) => {
  const identify = course of.env.NAME || 'World';
  res.ship(`Hey ${identify}!`);
});
app.hear(port, () => {
  console.log(`helloworld: listening on port ${port}`);
});
Containerizing and Importing Software to Artifact Registry
Your pattern utility and crucial configuration recordsdata are prepared. However you continue to want a spot the place you possibly can handle container pictures.
The Google Cloud Artifact Registry is a single place to handle your container pictures and is totally built-in with Google Cloud’s tooling and runtimes.
💡 The Artifact Registry comes with assist for native artifact protocols. Consequently, you possibly can shortly combine your utility together with your CI/CD tooling to arrange automated pipelines.
1. Create a Dockerfile in the identical listing (helloworld) as your different recordsdata.
Add the under code to the Dockerfile and save the modifications. This code specifies the configuration to construct and run your Node.js utility when executed in a container setting.
# Specifies the model of Node.js to make use of
FROM node:12-slim
# Units the working listing on your utility recordsdata,
WORKDIR /usr/src/app
# Copies your bundle info and supply code
COPY bundle*.json ./
# Installs manufacturing dependencies
RUN npm set up --only=manufacturing
# Copies your bundle info and supply code
COPY . ./
Runs your Node.js utility
CMD [ "npm", "start" ]
Subsequent, run the next gcloud builds submit command to containerize and add your Node.js utility to the Artifact Registry. Google Cloud Shell has pre-installed instruments named buildpack, which simplifies this course of.
💡 The minimal variety of containers is zero, whereas the higher restrict relies in your GCP mission’s quotas for Cloud Run. The default worth is 1000 (often sufficient for many use instances.), however you possibly can improve this restrict by submitting a request to GCP assist.
gcloud builds submit --tag gcr.io/$GOOGLE_CLOUD_PROJECT/helloworldAs soon as constructed, you will note successful message just like the one under, which confirms your container picture has been uploaded efficiently.

3. Run the under gcloud container command to record your present container pictures (pictures record) within the present mission. gcloud container pictures record
gcloud container pictures recordAs proven under, you will note the container picture you created in step two.

4. Now, execute the next docker run command to run your Node.js utility regionally on port 8080.
docker run -d -p 8080:8080 gcr.io/$GOOGLE_CLOUD_PROJECT/helloworld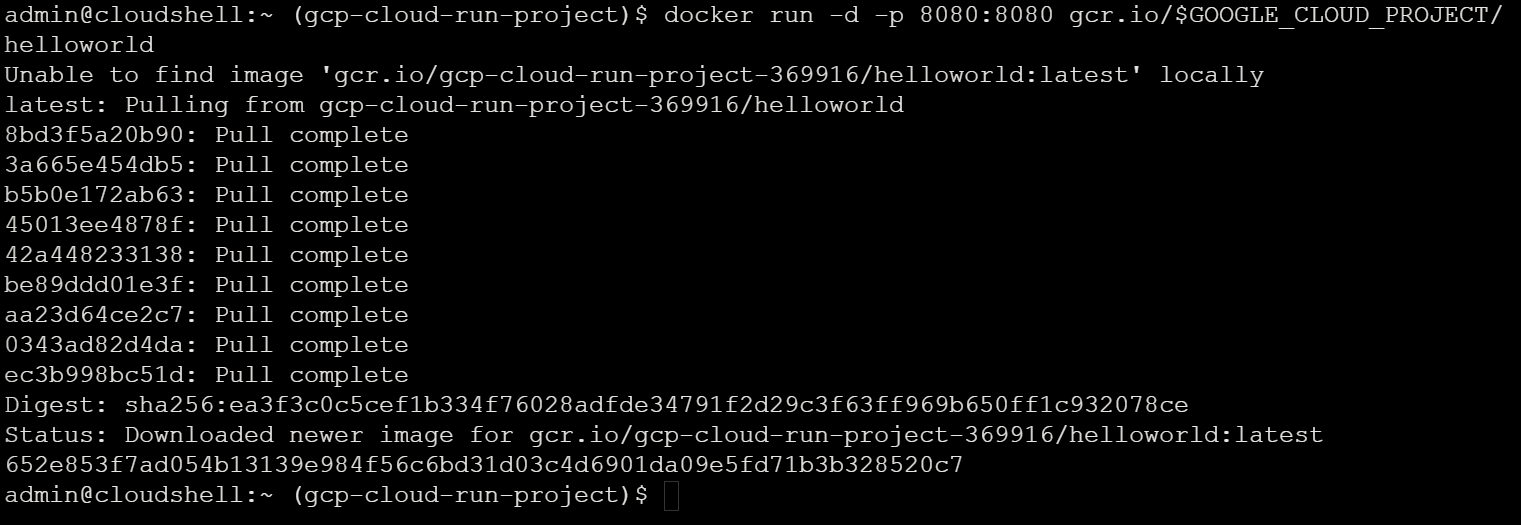
5. Lastly, run the curl command under to check your utility by making an HTTP request.
curl http://localhost:8080If all goes nicely, you will note the Hey World! response, as proven under. This output confirms that your Node.js utility works regionally as anticipated in a containerized setting.

Deploying the Container Picture to GCP Cloud Run
Now that you’ve containerized and examined your Node.js utility regionally, you possibly can deploy it to Cloud Run. As soon as deployed, you’ll later check your utility deployment by accessing your deployment’s service URL through your net browser.
1. Run the under gcloud run command to deploy your utility on Cloud Run.
gcloud run deploy --image gcr.io/$GOOGLE_CLOUD_PROJECT/helloworld --allow-unauthenticated --region=us-central1Press Enter to simply accept the service identify when prompted.

Wait till the deployment completes, and you will note successful message just like the one under. This output confirms your utility has been efficiently deployed.

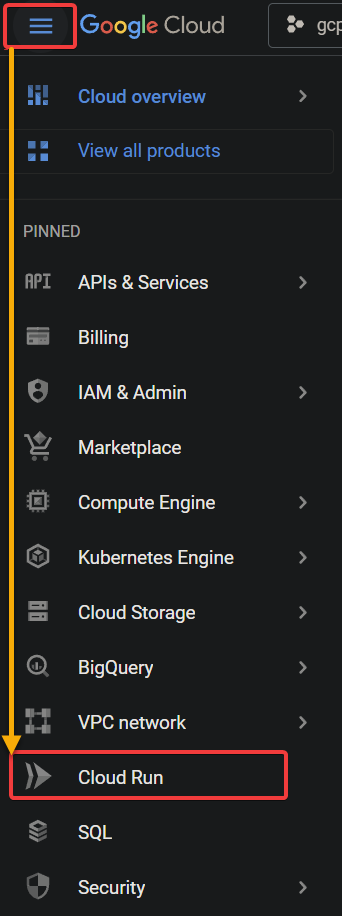
2. Subsequent, click on the hamburger menu (top-left) and choose Cloud Run to open the Cloud Run Dashboard.
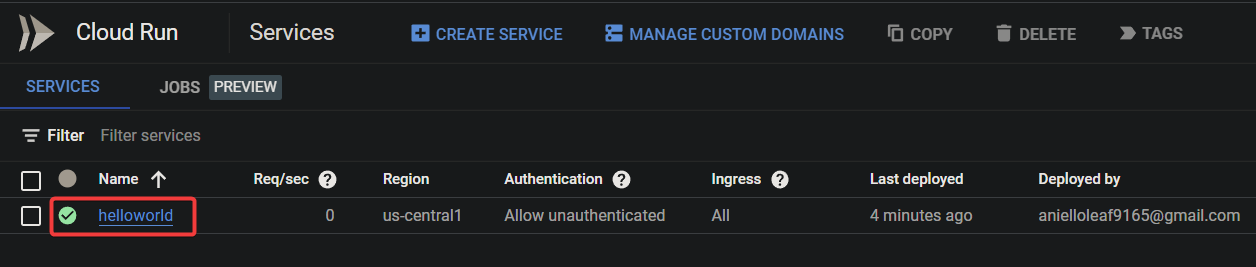
3. Click on in your hyperlinked service identify (helloworld). Doing so opens the Service particulars web page, which offers particulars in regards to the service, together with its URL and area mapping.
The inexperienced checkmark under signifies the service is working appropriately.
💡 In contrast to a Compute Engine or a Digital Machine (VM) occasion, you’ll not be charged for the idle time of your utility. As soon as both stops dealing with requests, Cloud Run will mechanically shut down its containers with no further value.
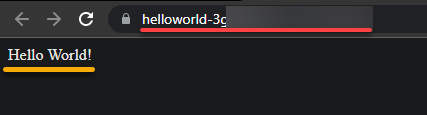
4. Click on on the copy icon to repeat the URL on the Service particulars web page, as proven under. This URL is what you’ll use to entry your utility.

5. Now, navigate to the URL you copied in step 4 to a brand new browser tab to entry your utility, and you will note the Hey World message as a response.
This output under confirms your utility is efficiently deployed and working on Cloud Run, as proven under.
At this level, GCP Cloud Run will mechanically scale up or down the variety of containers working your utility based mostly on the site visitors your utility receives. No want to fret about guide scaling or administration overhead.
Conclusion
Scalable containerized purposes are an important a part of any fashionable infrastructure. And on this tutorial, you could have realized the best way to use GCP Cloud Run to deploy and handle containerized purposes at scale shortly.
With the GCP Cloud Run, you get most efficiency with minimal prices as you would not have to supply the underlying compute sources —- you solely pay for what you utilize.
What you could have realized on this tutorial is simply the tip of the iceberg. Why not discover extra and begin deploying a Python service to Cloud Run?