

An appointment calendar can effectively handle and arrange affected person appointments in healthcare organizations. It permits healthcare professionals and employees members to simply view, observe, and handle affected person appointments.
In our earlier weblog, “Making a .NET MAUI Hospital Appointment Reserving App,” we noticed methods to allow sufferers to ebook appointments with their most well-liked docs. On this weblog, we’ll see methods to create a affected person appointment supervisor app for docs to simply preserve observe of their scheduled appointments utilizing Syncfusion .NET MAUI controls.
The app will include the next pages:
- Login: To enter the app utilizing credentials.
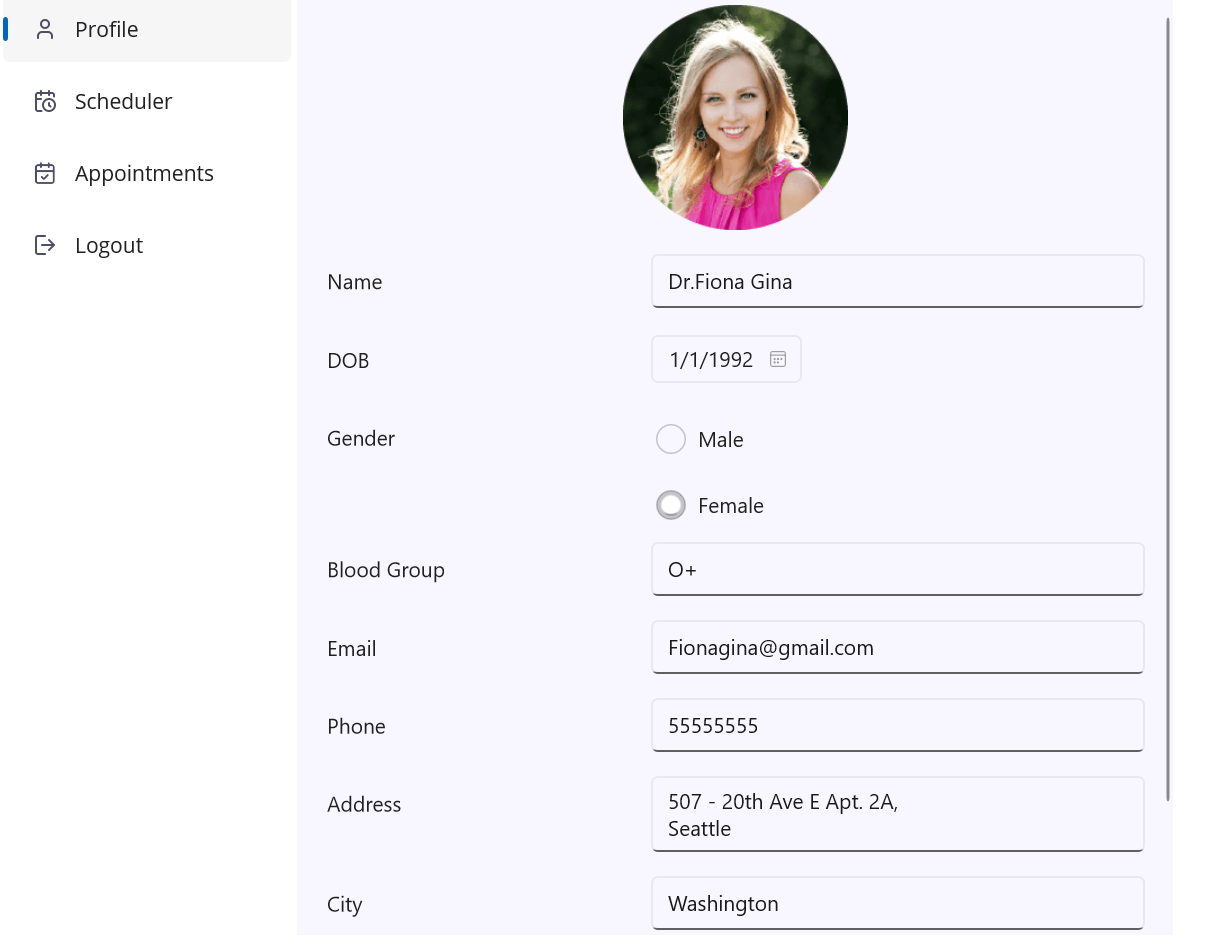
- Profile: To view the physician’s contact particulars for members of the group.
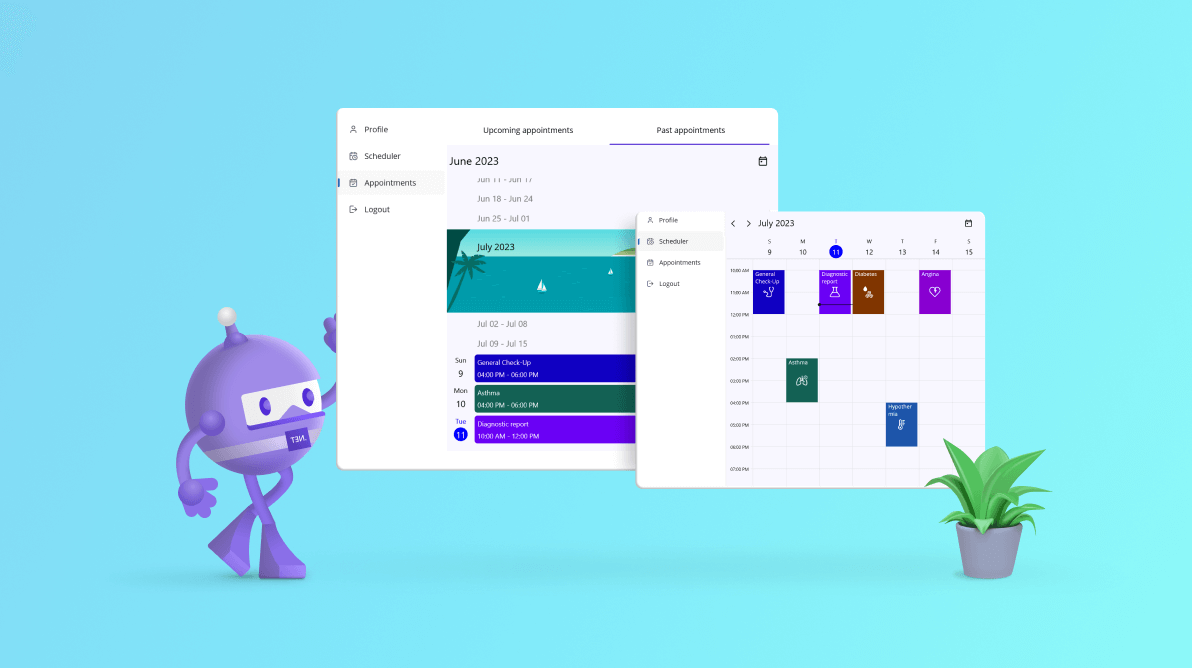
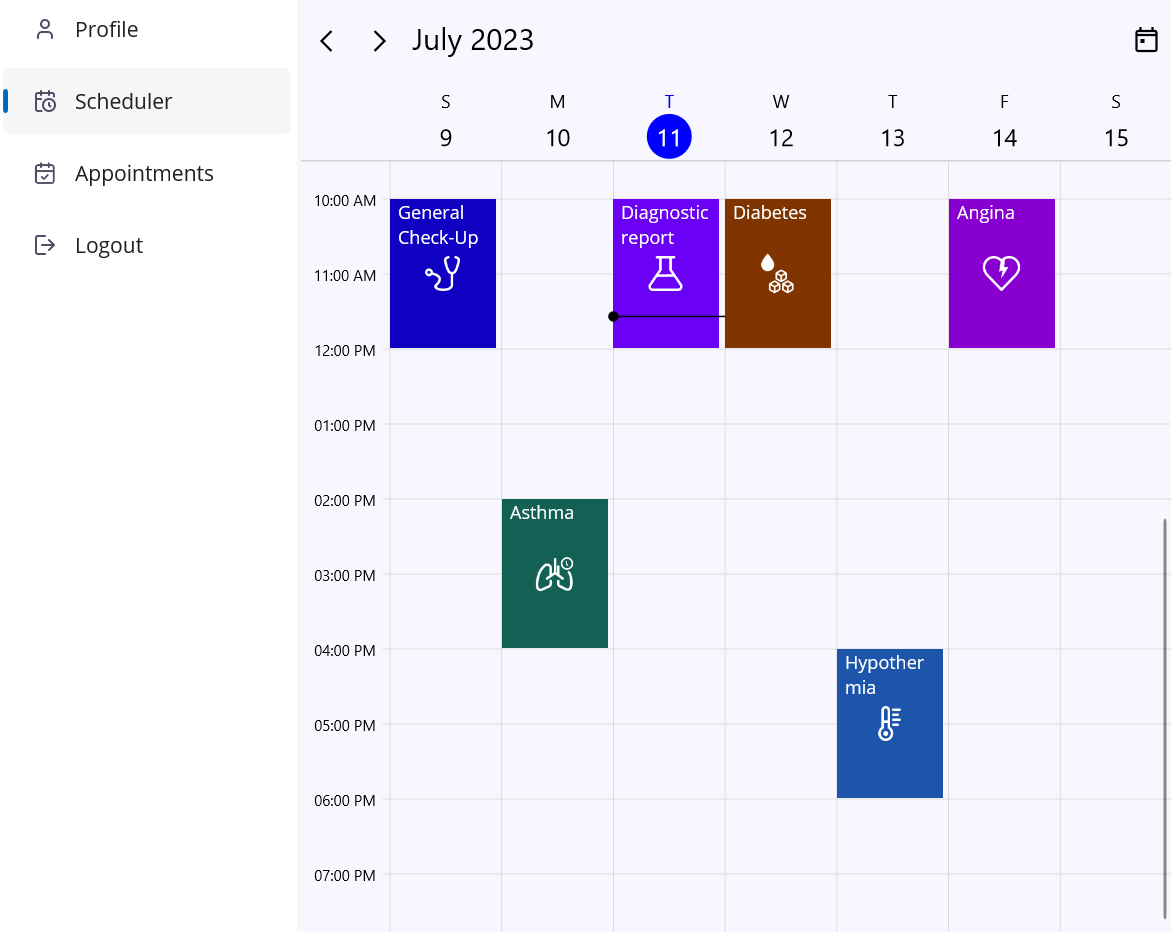
- Scheduler: To show the appointments booked for a day.
- Appointments: To summarize upcoming and previous appointments.
- Logout: To log off of the app.
Let’s see the steps to design the affected person appointment supervisor app utilizing Syncfusion .NET MAUI controls!
Step 1: Designing the Login web page
First, we have to create a login web page to permit healthcare professionals (docs) and employees members of the group to entry the app. Confer with the next code instance to create a login mannequin to get the credentials.
LoginFormModel.cs
public class LoginFormModel
{
   [Display(Prompt = "example@mail.com", Name = "Email")]
   [EmailAddress(ErrorMessage = "Enter your email - example@mail.com")]
   public string E-mail { get; set; }

   [Display(Name = "Password")]
   [DataType(DataType.Password)]
   [Required(ErrorMessage = "Enter the password")]
   public string Password { get; set; }
}
Then, initialize the login particulars.
ProfileViewModel.cs
public ProfileViewModel()
{
    this.LoginFormModel = new LoginFormModel();
}
Now, add the Syncfusion .NET MAUI DataForm management to create the login kind.
LoginPage.xaml
xmlns:dataForm="clr-namespace:Syncfusion.Maui.DataForm;meeting=Syncfusion.Maui.DataForm"
<ContentPage.BindingContext>
 <native:ProfileViewModel/>
</ContentPage.BindingContext>
<dataForm:SfDataForm x:Title="loginForm" LayoutType="TextInputLayout" Grid.Row="1" DataObject="{Binding LoginFormModel}"  TextInputLayoutSettings="{dataForm:TextInputLayoutSettings FocusedStroke=#a64dff}" ValidationMode="PropertyChanged">
</dataForm:SfDataForm>
Then, register the handler for Syncfusion Core within the MauiProgram.cs file.
MauiProgram.cs
public static MauiApp CreateMauiApp()
{
   var builder = MauiApp.CreateBuilder();
   builder.ConfigureSyncfusionCore();
}
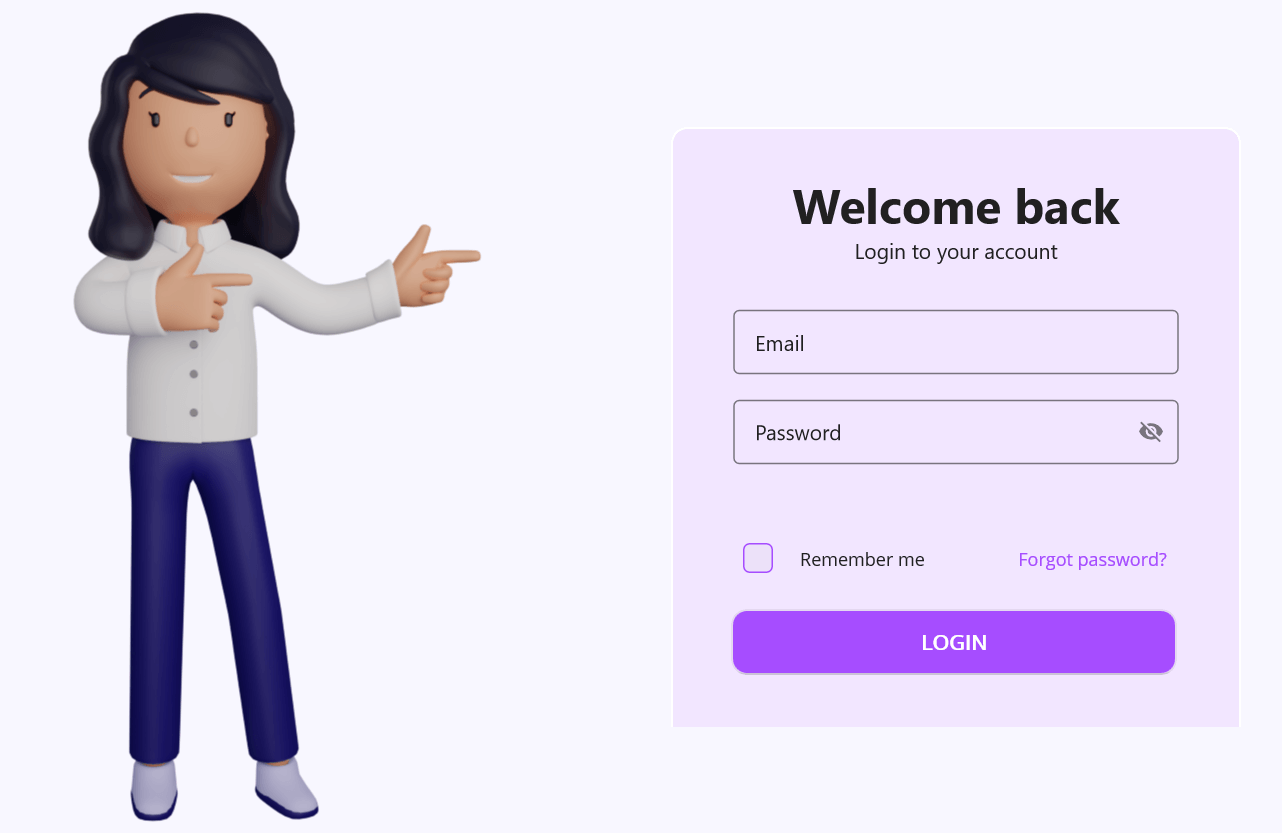
Confer with the next code instance to validate the consumer credentials when choosing the LOGIN button.
LoginPage.xaml.cs
non-public async void loginButton_Clicked(object sender, EventArgs e)
{
   if (this.loginForm != null && App.Present?.MainPage != null)
   {
       if (this.loginForm.Validate())
       {
           App.Present.MainPage = new NavigationPage();
           App.Present.MainPage.Navigation.PushAsync(new AppShell());
       }
   }
}
Word: For extra particulars, consult with the weblog “Create and Validate a Login Type in .NET MAUI.”
As soon as we enter the credentials and choose the LOGIN button, the consumer credentials will likely be validated. Then, the validated customers will likely be directed to the shell web page containing particulars of the Profile, Scheduler, Appointments, and Logout pages. We will add these pages into the shell web page with the assistance of FlyoutItem.
Confer with the next code instance.
AppShell.xaml
<Shell
 …..
 <FlyoutItem Title="Profile" Icon="profilepage.png">
  <ShellContent ContentTemplate="{DataTemplate native:ProfilePage}">
  </ShellContent>
 </FlyoutItem>
 <FlyoutItem Title="Scheduler" Icon="scheduler.png">
  <ShellContent ContentTemplate="{DataTemplate native:CalendarPage}"/>
 </FlyoutItem>

 <FlyoutItem Title="Appointments" Icon="appointments.png">
  <ShellContent ContentTemplate="{DataTemplate native:AppointmentsPage}"/>
 </FlyoutItem>

 <MenuItem Clicked="MenuItem_Clicked" IconImageSource="logout.png" Textual content="Logout"/>
Step 2: Designing the physician’s profile web page
After getting into the credentials and clicking the LOGIN button, the consumer will likely be directed to the physician’s Profile web page to view the physician’s contact info.
Confer with the next code instance to design the physician profile mannequin.
Profile.cs
public class ProfileDetails
{
    [DataFormDisplayOptions(ShowLabel =false)]
    public string Picture { get; set; }
    public string Title { get; set; }
    public DateTime DOB { get; set; }
    public string Gender { get; set; }

    [Display(Name = "Blood Group")]
    public string BloodGroup { get; set; }
    public string E-mail { get; set; }
    public string Telephone { get; set; }

    [DataType(DataType.MultilineText)]
    public string Tackle { get; set; }
    public string Metropolis { get; set; }
    public string State { get; set; }
    public string PostalCode { get; set; }
    public string Nation { get; set; }

    [Display(Name = "Emergency Contact Name")]
    public string EmergencyContactName { get; set; }

    [Display(Name = "Emergency Contact Number")]
    public string EmergencyContactNumber { get; set; }
}
Let’s initialize the physician’s profile particulars like within the following code instance.
ProfileViewModel.cs
public ProfileViewModel() {
   this.ProfileDetails = new ProfileDetails();
}
Right here, we’re going to show the physician’s profile utilizing the Syncfusion .NET MAUI DataForm management.
ProfilePage.xaml
xmlns:dataform="clr-namespace:Syncfusion.Maui.DataForm;meeting=Syncfusion.Maui.DataForm"
<ContentPage.BindingContext>
 <native:ProfileViewModel/>
</ContentPage.BindingContext>
<dataform:SfDataForm x:Title="dataForm" IsReadOnly="True"  Background="#f8f7ff" VerticalOptions="Fill"  DataObject="{Binding ProfileDetails}"/>
Step 3: Designing the scheduler web page
Then, create the Scheduler web page to view or edit the scheduled appointments utilizing the Syncfusion .NET MAUI Scheduler management.
To take action, first, create an occasion mannequin for the scheduler.
Appointment.cs
public class Appointment
{
    /// <abstract>
    /// Will get or units the worth to show the beginning date.
    /// </abstract>
    public DateTime From { get; set; }

    /// <abstract>
    /// Will get or units the worth to show the tip date.
    /// </abstract>
    public DateTime To { get; set; }

    /// <abstract>
    /// Will get or units the worth indicating whether or not the appointment is all-day.
    /// </abstract>
    public bool IsAllDay { get; set; }

    /// <abstract>
    /// Will get or units the worth to show the topic.
    /// </abstract>
    public string EventName { get; set; }

    /// <abstract>
    /// Will get or units the worth to show the background.
    /// </abstract>
    public Brush Background { get; set; }

    public string Location { get; set; }

}
Then, create the occasions, as seen within the following code instance.
SchedulerViewModel.cs
non-public void IntializeAppoitments()
{
    this.Occasions = new ObservableCollection<Appointment>();
    Random random = new();
    Record<int> randomTimeCollection = this.GettingTimeRanges();

    DateTime date;
    DateTime dateFrom = DateTime.Now.AddDays(-2);
    DateTime dateTo = DateTime.Now.AddDays(3);
    int i = 0;
    for (date = dateFrom; date < dateTo; date = date.AddDays(1))
    {
        var assembly = new Appointment();
        int hour = randomTimeCollection[random.Next(randomTimeCollection.Count)];
        assembly.From = new DateTime(date.12 months, date.Month, date.Day, hour, 0, 0);
        assembly.To = assembly.From.AddHours(2);
        assembly.EventName = this.topics.ElementAt(i);
        assembly.Background = this.GetColor(assembly.EventName);
        assembly.Location = this.GetImage(assembly.EventName);
        assembly.IsAllDay = false;
        this.Occasions.Add(assembly);
        i++;
    }
}
Now, bind the scheduler occasions to the AppointmentSource property.
CalendarPage.xaml
xmlns:scheduler="clr-namespace:Syncfusion.Maui.Scheduler;meeting=Syncfusion.Maui.Scheduler"

<ContentPage.BindingContext>
 <native:SchedulerViewModel/>
</ContentPage.BindingContext>

<scheduler:SfScheduler View="Week" AppointmentsSource="{Binding Occasions}" DisplayDate="{Binding DisplayDate}">
 <scheduler:SfScheduler.AppointmentMapping>
  <scheduler:SchedulerAppointmentMapping Topic="EventName" StartTime="From" EndTime="To" Background="Background" IsAllDay="IsAllDay"/>
 </scheduler:SfScheduler.AppointmentMapping>
</scheduler:SfScheduler>
We will additionally customise the looks of the scheduler appointments by including photographs, customizing the textual content colour, font dimension, and extra. Confer with the next code instance.
<ContentPage.Assets>
 <DataTemplate x:Key="dayAppointmentTemplate">
  <Grid RowDefinitions="0.35*,0.65*" Background="{Binding DataItem.Background}">
   <Label Textual content="{Binding DataItem.EventName}" VerticalOptions="Begin"  TextColor="White" LineBreakMode="WordWrap" Margin="5,0" FontSize="12"/>
   <Picture Side="AspectFit" VerticalOptions="Begin"  Grid.Row="1" HorizontalOptions="Middle" HeightRequest="30" WidthRequest="30" Supply="{Binding DataItem.Location}"/>
  </Grid>
 </DataTemplate>

</ContentPage.Assets>
…
<scheduler:SfScheduler.DaysView>
 <scheduler:SchedulerDaysView AppointmentTemplate="{StaticResource dayAppointmentTemplate}"/>
</scheduler:SfScheduler.DaysView>
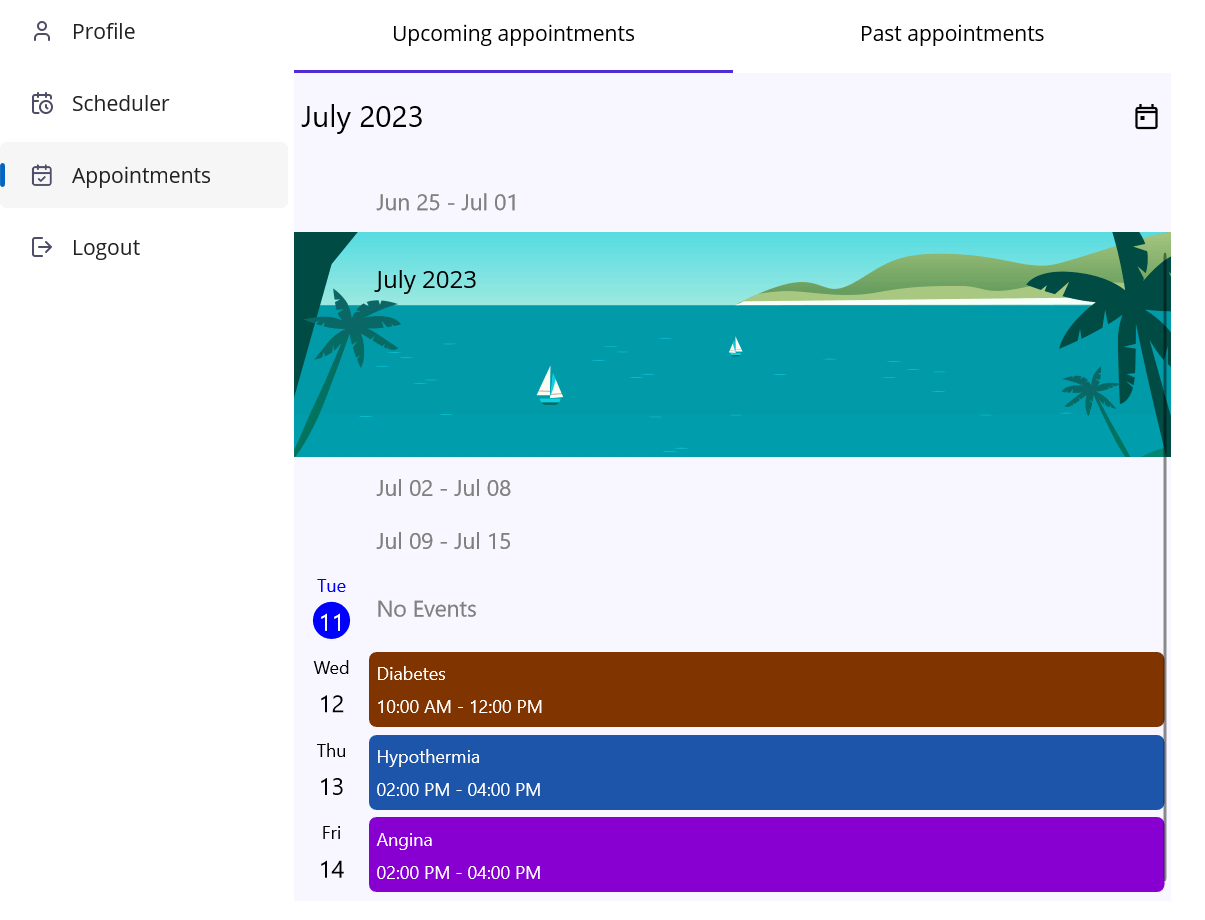
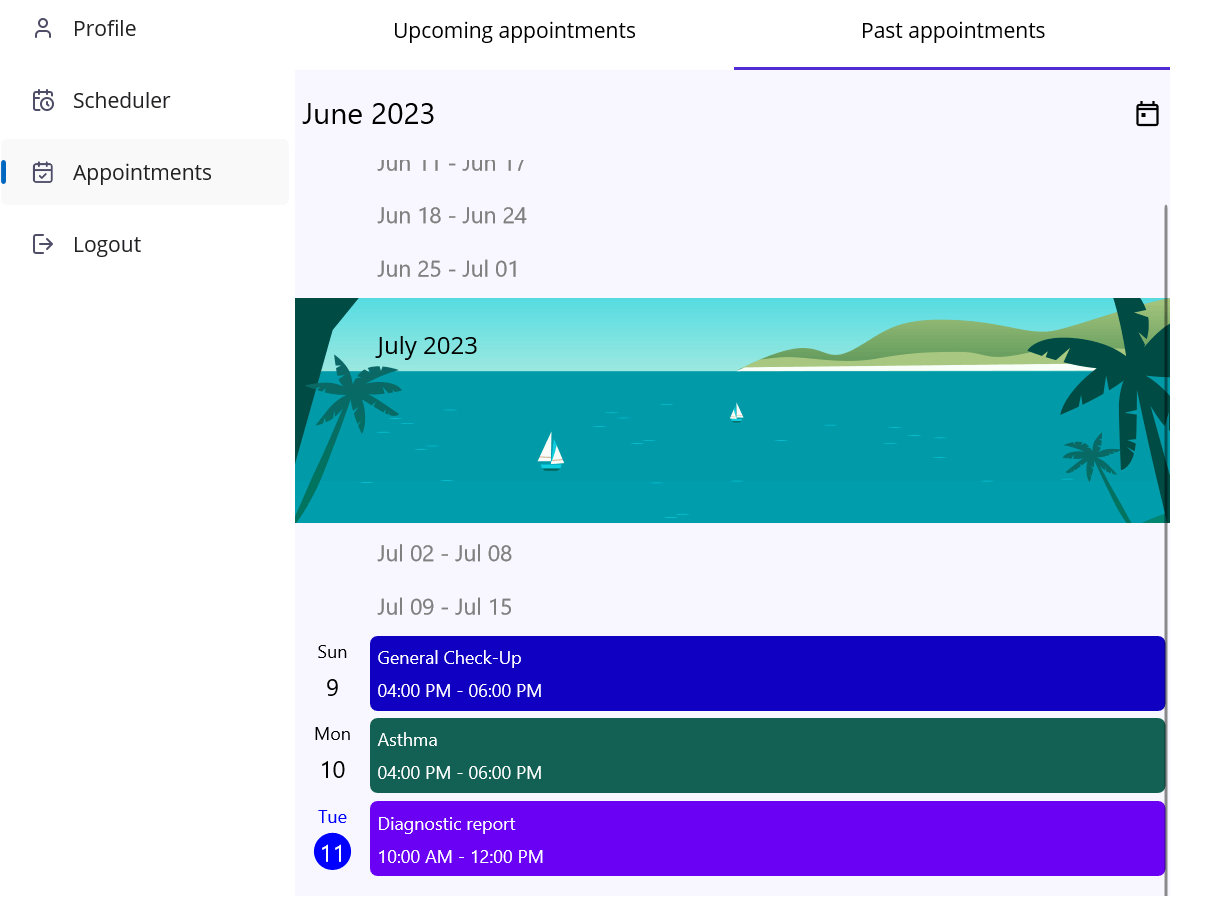
Step 4: Itemizing upcoming and previous appointments
Let’s design the Appointments web page to checklist and observe the upcoming and former appointments. Confer with the next code instance.
Right here, we’ll add appointments in an agenda view utilizing the Syncfusion .NET MAUI Scheduler’s agenda view.
AppointmentsPage.xaml
xmlns:scheduler="clr-namespace:Syncfusion.Maui.Scheduler;meeting=Syncfusion.Maui.Scheduler"

<ContentPage.BindingContext>
 <native:SchedulerViewModel/>
</ContentPage.BindingContext>

<scheduler:SfScheduler View="Agenda" x:Title="Scheduler" AppointmentsSource="{Binding Occasions}" DisplayDate="{Binding DisplayDate}">
 <scheduler:SfScheduler.AppointmentMapping>
  <scheduler:SchedulerAppointmentMapping Topic="EventName" StartTime="From" EndTime="To" Background="Background" IsAllDay="IsAllDay"/>
 </scheduler:SfScheduler.AppointmentMapping>
 <scheduler:SfScheduler.AgendaView>
  <scheduler:SchedulerAgendaView MonthHeaderTemplate="{StaticResource AgendaHeaderTemplate}"/>
 </scheduler:SfScheduler.AgendaView>
</scheduler:SfScheduler>
Then, design the Scheduler to show the previous and future appointments based mostly on the consumer’s selection.
non-public void Button_Clicked(object sender, EventArgs e)
{
    var button = sender as Button;
    var upcomingAppointmentBorder = this.FindByName("UpcomingBorder") as BoxView;
    var pastAppointmentBordeer = this.FindByName("PastBordeer") as BoxView;

    if (button != null && button.Textual content == "Upcoming appointments")
    {
       var upcomingEvents =  (this.BindingContext as SchedulerViewModel).Occasions.The place(x=>(x as Appointment).From > DateTime.Now).ToList();
       if(upcomingAppointmentBorder !=null)
       {
          upcomingAppointmentBorder.Colour = Colour.FromArgb("#512BD4");
       }
       if(pastAppointmentBordeer != null)
       {
          pastAppointmentBordeer.Colour = Colours.Clear;
       }
       this.Scheduler.AppointmentsSource = upcomingEvents;
       this.Scheduler.MinimumDateTime = DateTime.Now;
       this.Scheduler.MaximumDateTime = DateTime.Now.AddDays(30);
   }
   else if (button != null && button.Textual content == "Previous appointments")
   {
       var pastAppointments = (this.BindingContext as SchedulerViewModel).Occasions.The place(x => (x as Appointment).From < DateTime.Now).ToList();

        if (pastAppointmentBordeer != null)
        {
           pastAppointmentBordeer.Colour = Colour.FromArgb("#512BD4");
        }
        if(upcomingAppointmentBorder != null)
        {
           upcomingAppointmentBorder.Colour = Colours.Clear;
        }
        this.Scheduler.AppointmentsSource = pastAppointments;
        this.Scheduler.MinimumDateTime = DateTime.Now.AddDays(-30);
        this.Scheduler.MaximumDateTime = DateTime.Now;
   }

}
Step 5: Designing the logout web page
Lastly, let’s create a logout module to exit the appliance.
AppShell.xaml
<MenuItem Clicked="MenuItem_Clicked" IconImageSource="logout.png" Textual content="Logout"/>
Confer with the next code instance to navigate to the login web page by clicking the Logout possibility within the flyout merchandise.
AppShell.xaml.cs
non-public void MenuItem_Clicked(object sender, EventArgs e)
{
   App.Present.MainPage = new NavigationPage();
   App.Present.MainPage.Navigation.PushAsync(new LoginPage());
}
GitHub reference
Additionally, take a look at the whole instance for making a .NET MAUI affected person appointment supervisor app on GitHub.
Conclusion
Thanks for studying! On this weblog, we’ve seen methods to create a affected person appointment supervisor app utilizing Syncfusion .NET MAUI controls. We’d love to listen to your ideas, so check out the steps and please go away any suggestions or particular necessities within the feedback part under.
Should you’re not already a Syncfusion buyer, you’ll be able to obtain a free trial of Important Studio for .NET MAUI and begin evaluating its controls instantly. You too can contact us by our help discussion board, help portal, or suggestions portal. We’re all the time right here to help you!