


Energy BI is a formidable utility resulting from its skill to visualise information and make advanced relational desk calculations. And if it’s essential deal with aggregated information, the Energy BI measure fields characteristic is all you want!
On this tutorial, you’ll discover ways to add measure fields to your information to shortly mixture and analyze information with out going by advanced duties.
Keep tuned! Visualize, and dig by your information with Energy BI measure fields!
Conditions
This tutorial can be a hands-on demonstration. Should you’d wish to comply with alongside, make sure you could have the next:
Calculating Columns Utilizing Knowledge Evaluation Expression (DAX)
When creating an information mannequin, you possibly can add to your tables by creating new columns utilizing present ones. A brand new column makes use of DAX to make row-by-row calculations of the columns concerned. DAX is a components expression language utilized in Evaluation Companies, Energy BI, and Energy Pivot in Excel.
DAX permits you to carry out superior calculations utilizing its features, operators, and worth, which is essential in analyzing information.
To calculate information between columns in Energy BI:
1. Double-click on the Contoso Gross sales pattern information you downloaded to open it on Energy BI.
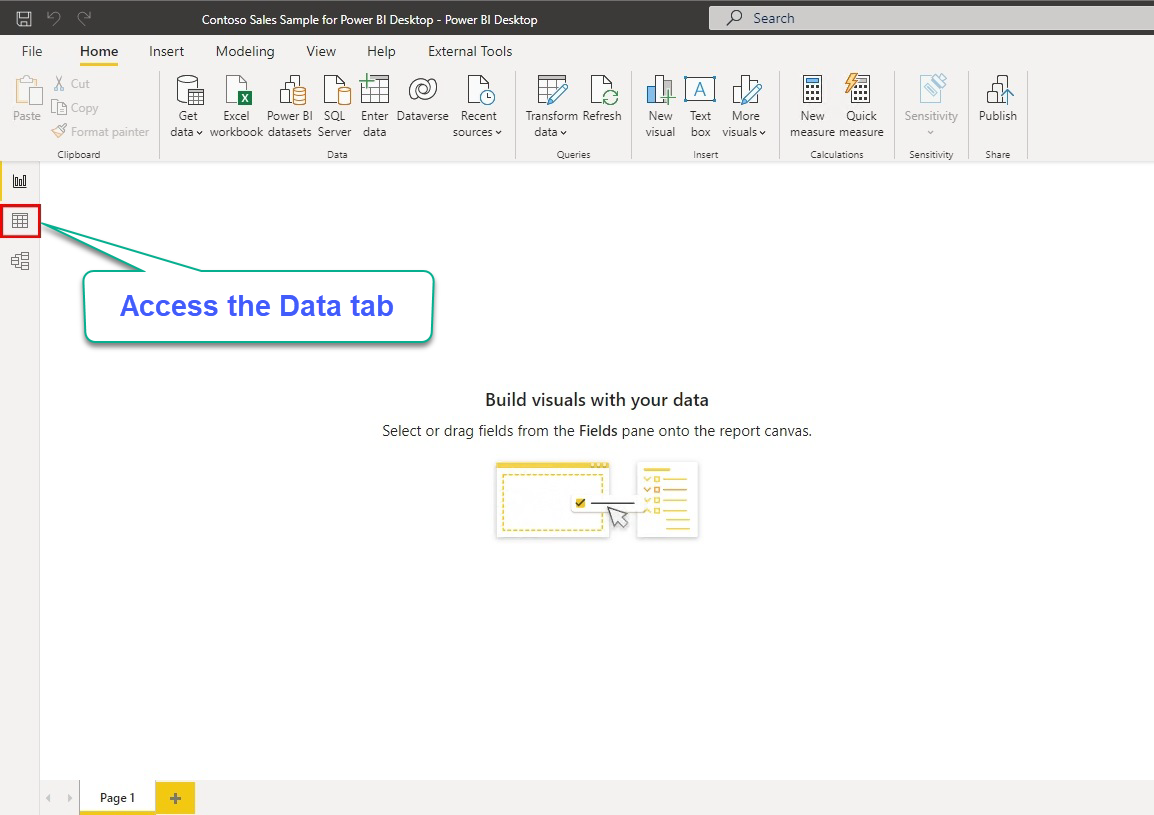
2. Click on on the Knowledge icon (left toolbar) to entry the information tab, which hundreds the information from the imported tables, as you will note within the following step.
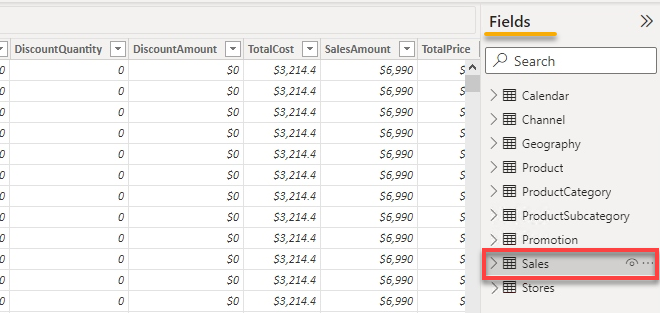
3. Subsequent, choose the Gross sales tables underneath the Fields pane (right-most) to load the desk’s information.
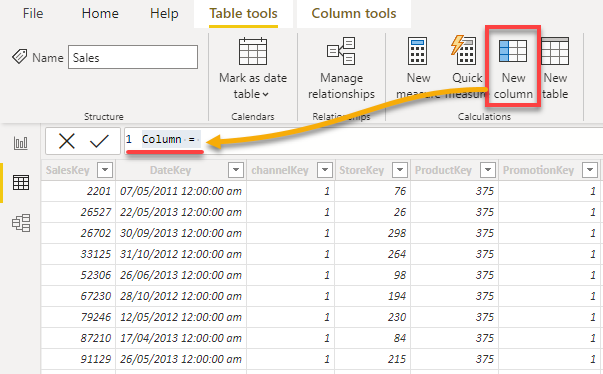
4. Now, click on New column from the ribbon toolbar to create a brand new column. By default, a newly-created column known as Column, as proven under.
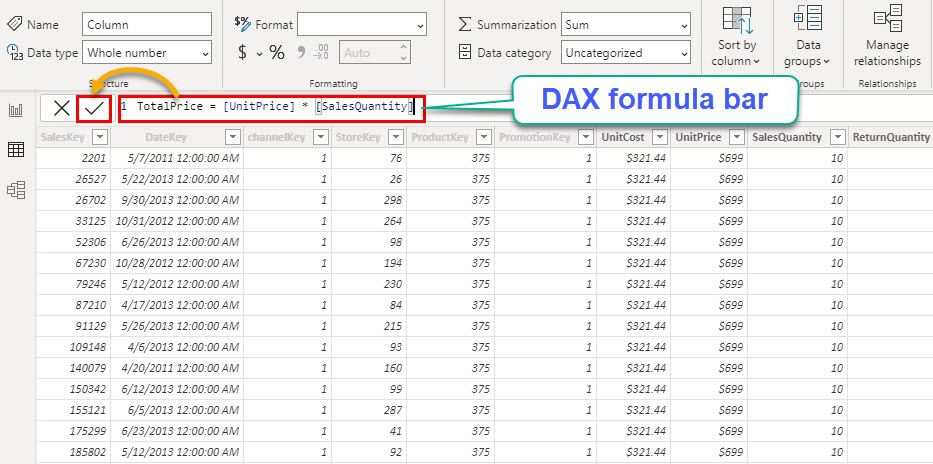
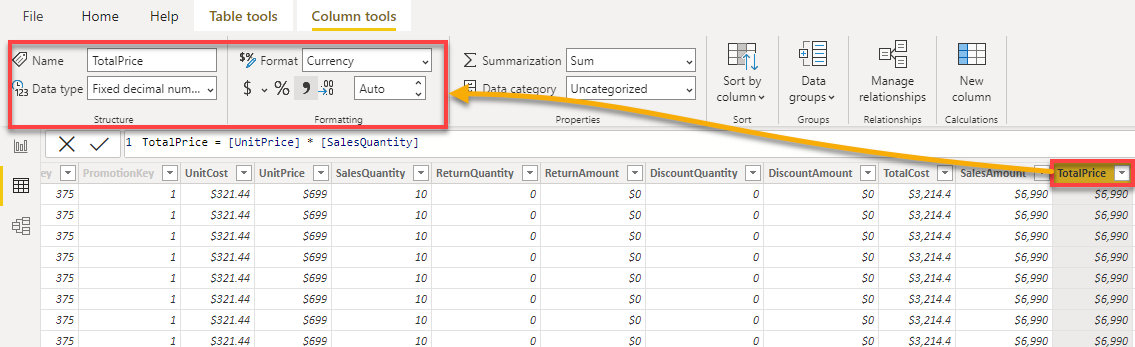
5. Exchange the content material of the DAX components bar with the next components.
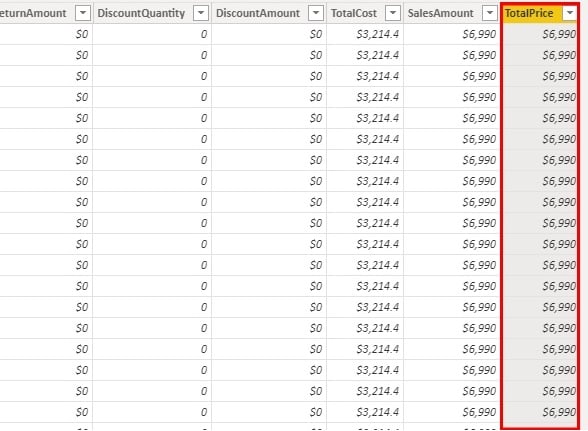
This components replaces the brand new column’s title from Column to TotalPrice, which returns the merchandise of every UnitPrice and SalesQuantity column.
TotalPrice = [UnitPrice] * [SalesQuantity]Click on the examine icon subsequent to the DAX components bar to use the components.
Like within the screenshot under, the brand new column (TotalPrice) seems because the final column.
6. Change the column’s format as you need by deciding on the column header and enjoying with completely different choices underneath the Column instruments ribbon tab.
7. Lastly, create one other column, populate the next components to the DAX components bar, and apply the components.
This components calculates and returns the revenue of each sale (Gross sales[TotalPrice] – Gross sales[TotalCost]).
Revenue = Gross sales[TotalPrice] - Gross sales[TotalCost]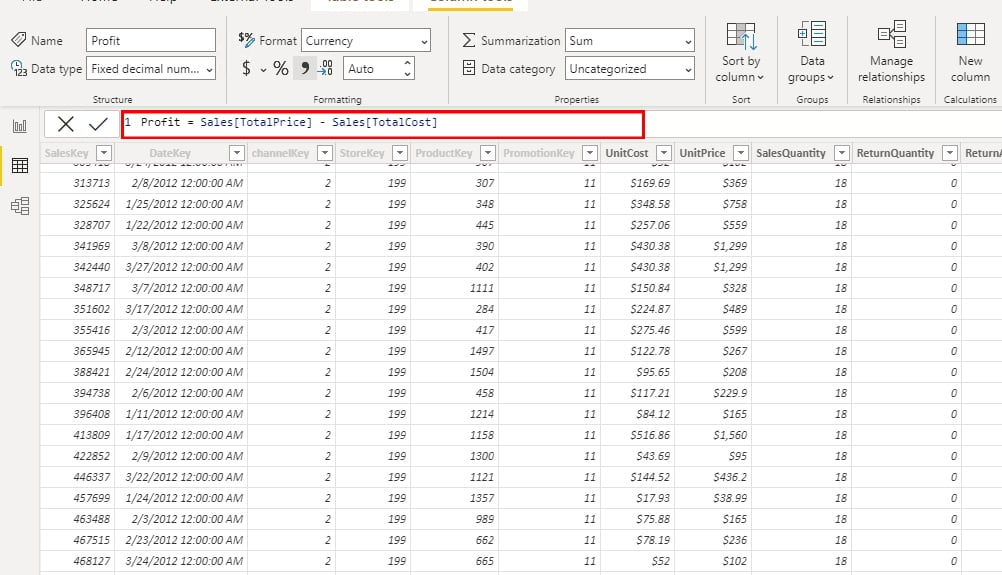
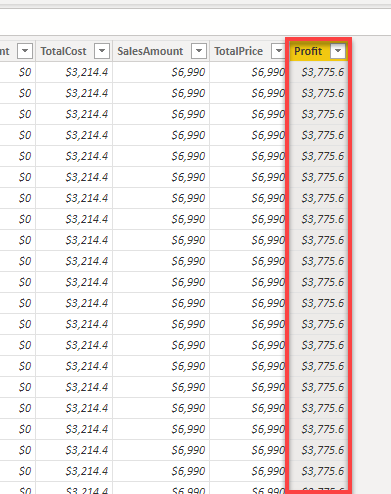
Under, you possibly can see the calculated results of earnings underneath the Revenue column.
Calculating Knowledge with Energy BI Measure Fields
You’ve seen that columns might help discover a row with probably the most revenue or any row-level question. However to reply extra advanced questions. Like, which retailer gained probably the most revenue? Or which salesperson made probably the most revenue? You will want a measure, and creating Energy BI measure fields will do the trick.
There are three varieties of measures in Energy BI, that are computerized measures, fast measures, and guide measures. However for a begin, you’ll dive into creating guide measures first.
Creating Handbook Measures
Creating guide measures might help nurture your DAX abilities if you realize the fundamentals. However when you’re uncertain how DAX works, begin utilizing computerized and fast measures within the following sections. That means, you possibly can study the DAX language virtually with out writing any DAX components.
1. Click on on New Measure and use DAX to create a brand new measure.

2. Subsequent, apply the under components to mixture the earnings information.
Profit_Measure = SUM(Gross sales[Profit])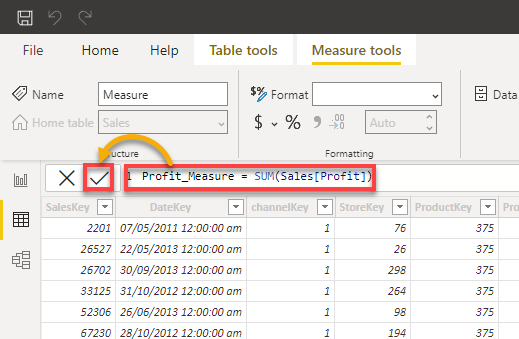
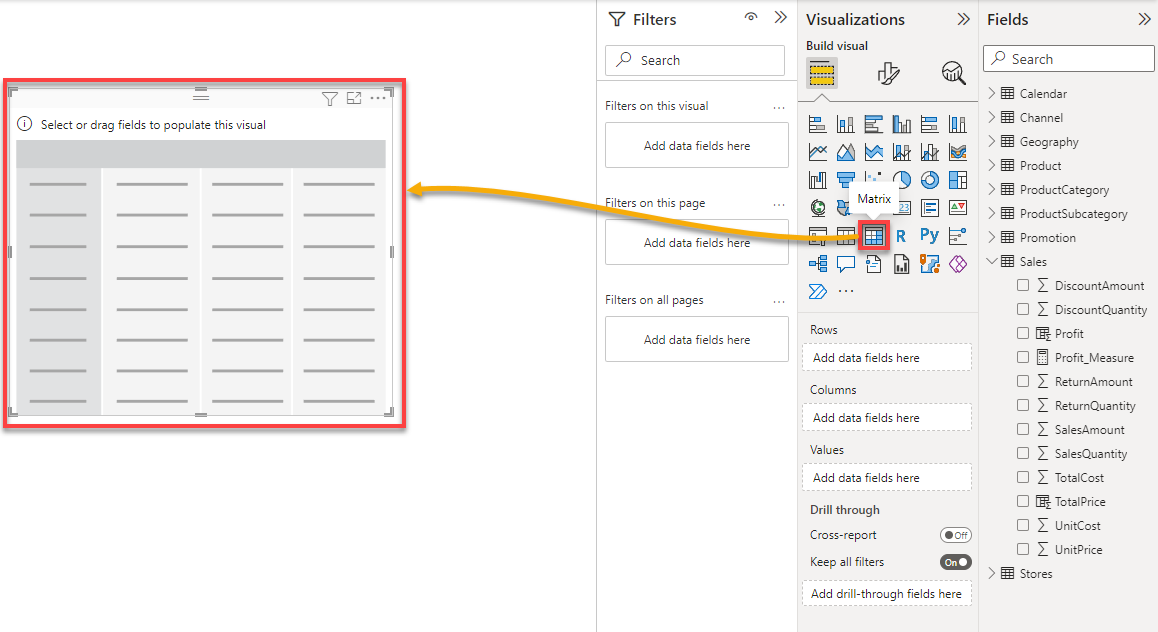
3. After including your measure, click on the Report icon (left toolbar) to entry the Report tab, the place you possibly can construct visuals along with your information.

4. Now, click on the Matrix visible kind icon underneath the Visualizations pane so as to add a visible to the dashboard, as proven under.
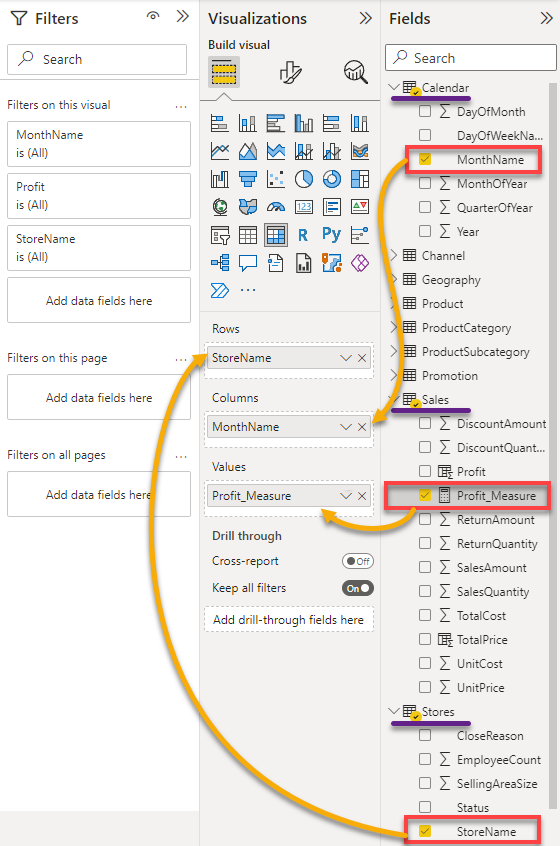
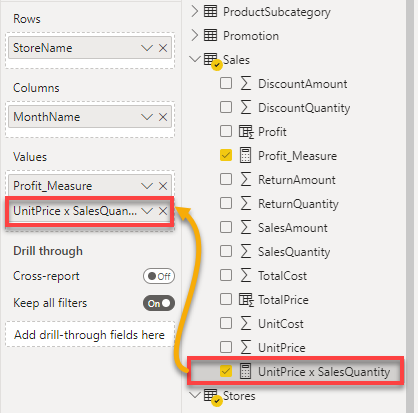
5. Add information to the Matrix visible with the next:
- Increase the fields (Tables) underneath the Fields pane.
- Drag and drop the columns from the Fields pane to the Rows, Columns, and Values dropdown contained in the Visualizations pane.
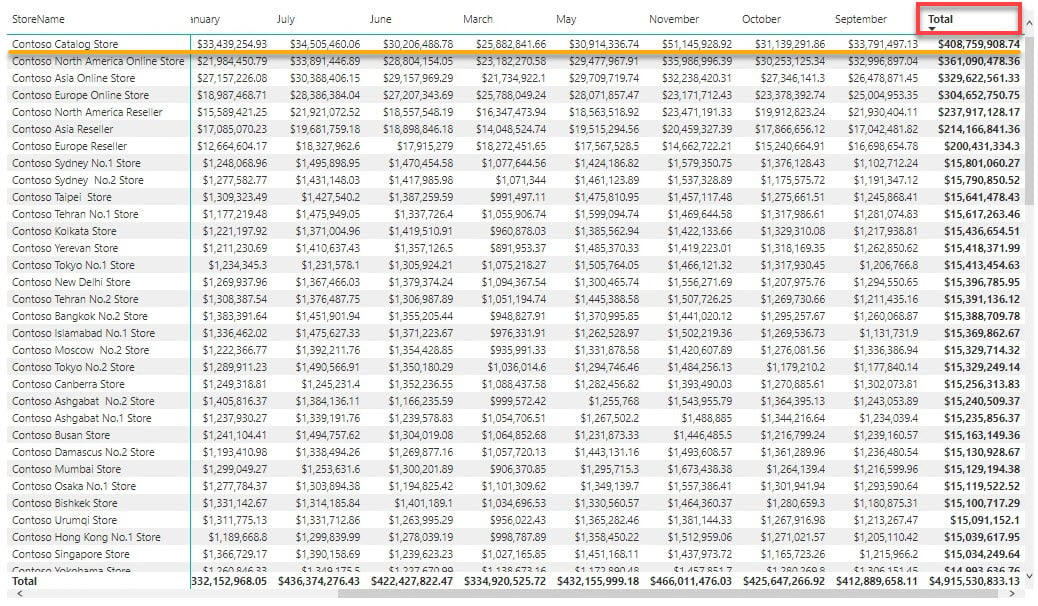
After including information to the Matrix, growth! You now see all of the earnings made by each retailer per thirty days.
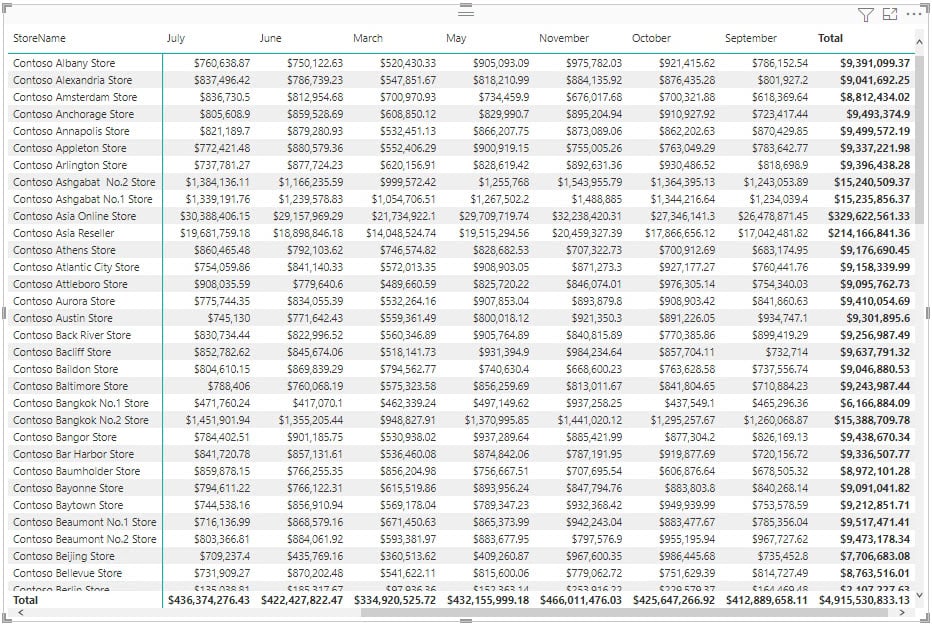
6. Lastly, click on on the Whole column header to kind the information by probably the most worthwhile retailer in descending order.
Under, you possibly can see that the Contoso Catalog Retailer is probably the most worthwhile.
Utilizing Computerized Measures
Energy BI creates computerized measures when your column’s information kind is a Quantity. The default computerized measure is SUM. Consequently, whenever you add a numeric column to a visible, Energy BI mechanically provides a “whole” column.
This conduct is useful whenever you need to make easy measures, but it surely additionally impacts columns you don’t want to be measured or summarized.
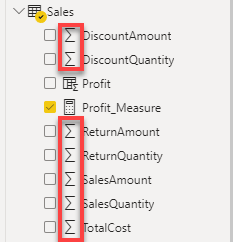
You’ll be able to determine if a desk has a measure by checking if there’s a sigma image subsequent to it, as proven under.
To see how computerized measures work:
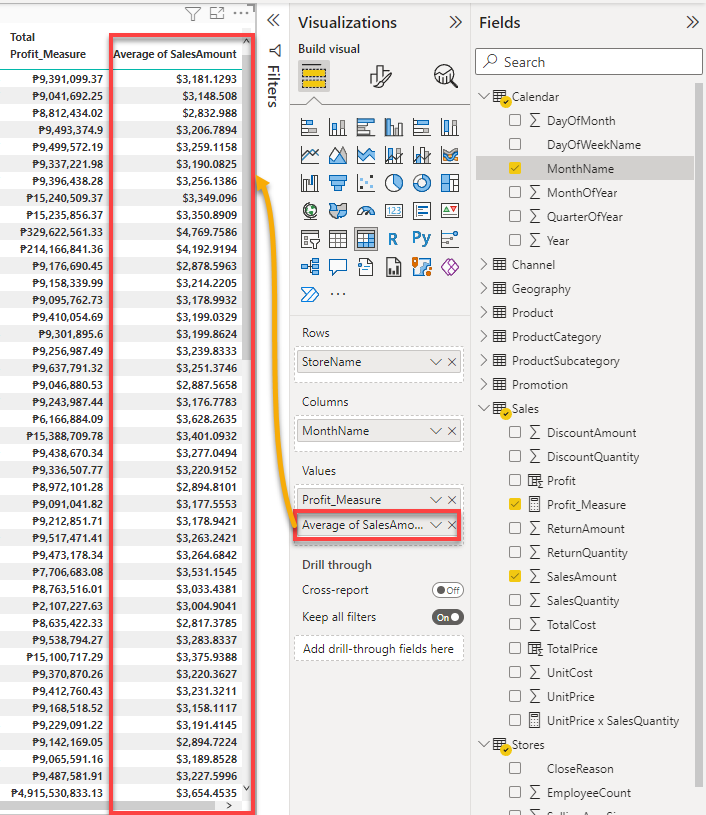
1. Add a column you don’t want to be summarized to your visible, on this case, SalesAmount.
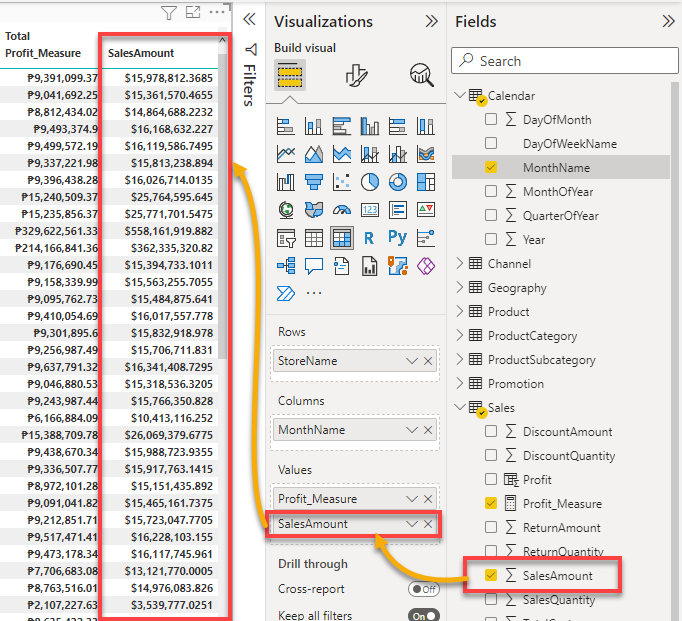
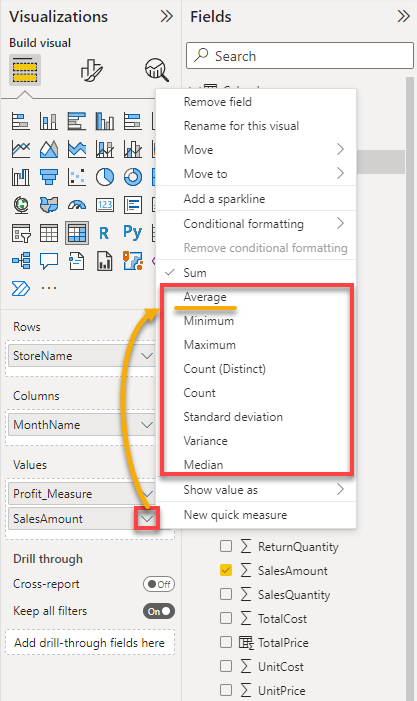
2. Subsequent, click on on the arrow-down icon subsequent to the column you added, and select a special measure for the column. However for this instance, choose Common.
3. Lastly, have a look at the final column in your visible and see the change of measure.
Creating Fast Measures
A fast measure might be useful when you find yourself getting began with DAX. This measure enables you to create calculations between your tables and present you the DAX expression on the calculation you picked afterward. All these with out a want for DAX information.
Maybe you purpose to get a complete value in a column however are uncertain how one can write an equal DAX expression. If that’s the case, creating a fast measure will get the job carried out.
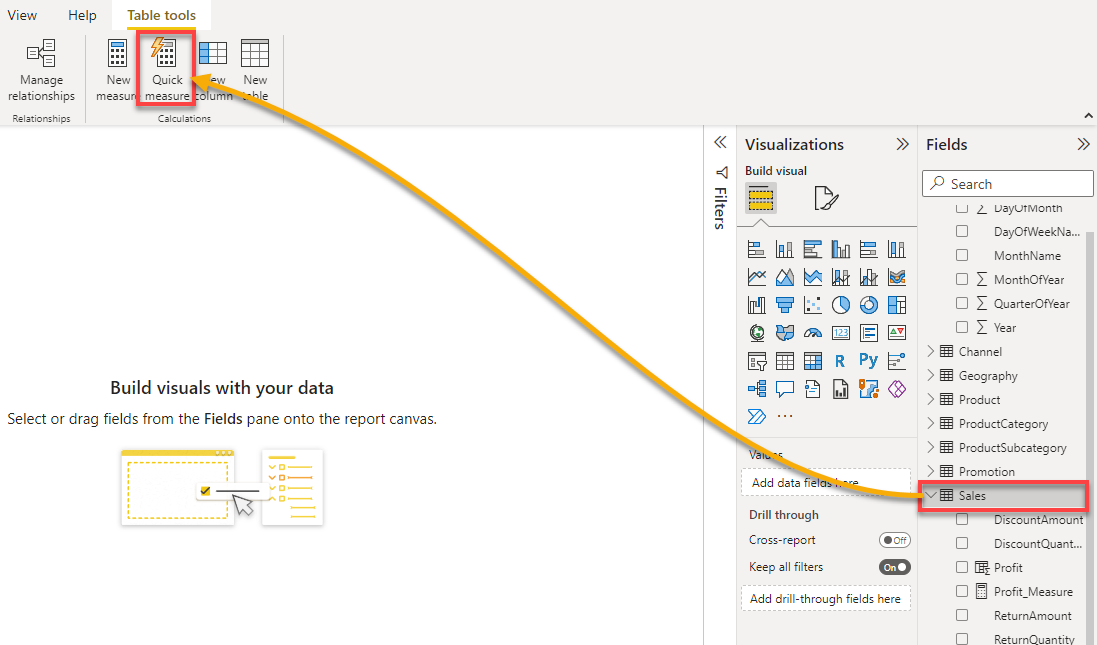
1. Click on on the sphere/desk to which you need to add the measure from the Fields pane and click on Fast measure, as proven under. A pop-up window seems the place you possibly can select which calculation to make use of for the fast measure (step two).
2. Subsequent, choose Multiplication within the Calculation dropdown subject, which shows two fields for the values to multiply.
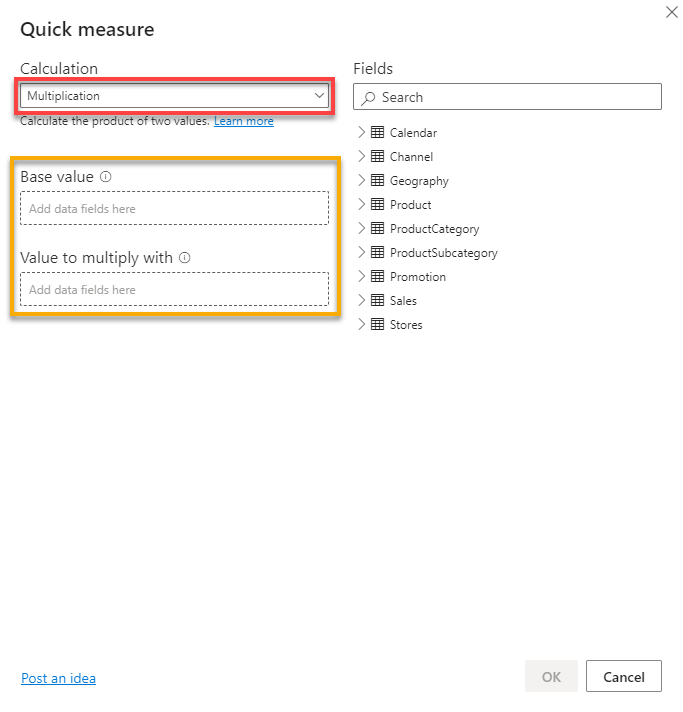
3. Lastly, specify columns with values to a number of as follows:
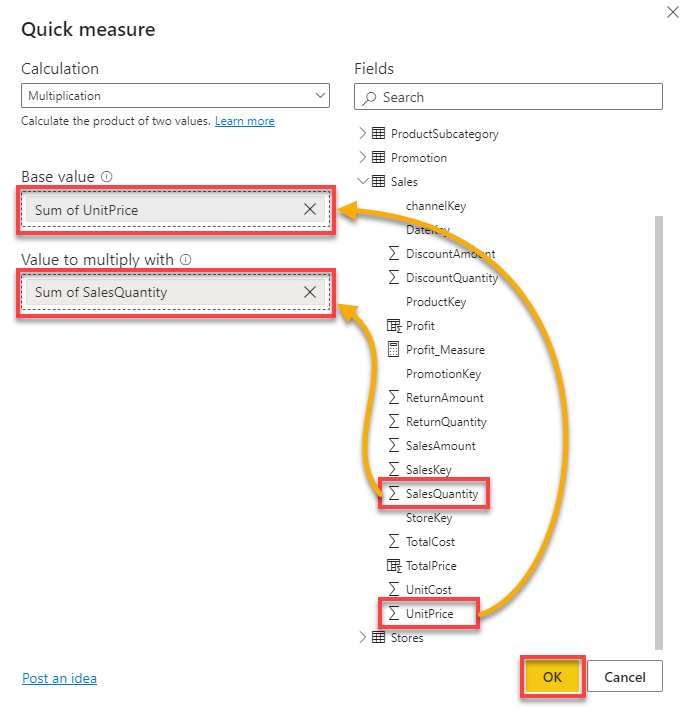
- Increase a subject/desk underneath the fields part that holds the worth you propose to multiply. On this case, the Gross sales desk.
- Drag and drop the UnitPrice column to the Base worth subject, and add the SalesQuantity column to the Worth to a number of with subject.
- Click on OK after specifying the columns so as to add the brand new measure.
Now you could have a brand new measure that you may add to your visible with out having to put in writing a DAX components, as proven under.
Filtering Knowledge by Slicing Visuals
Beforehand, you could have answered which retailer is most worthwhile. As a lot as the reply was informative, it’s not satisfying, or you’re getting an excessive amount of info.
What when you purpose to investigate who made probably the most earnings within the earlier 12 months? This half is the place slicers grow to be vital to your dashboard. Slicers assist cube your information into smaller items, serving to you acquire extra element and knowledge.
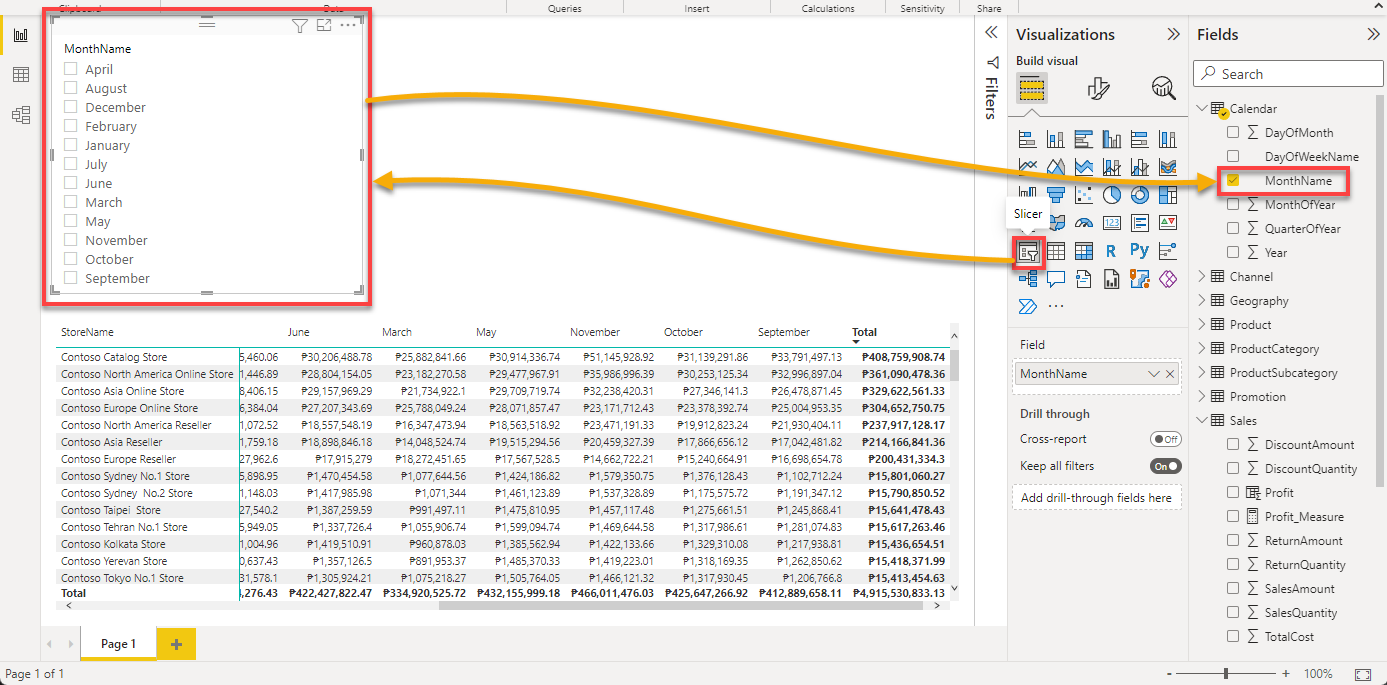
1. Add a slicer visible for the MonthName column with the next:
- Click on exterior the at present chosen slicer to de-select it.
- Choose the Slicer visible kind icon underneath the Visualizations pane so as to add a slicer to your dashboard.
- Tick the field within the MonthName column underneath the Calendar desk so as to add it to the slicer.
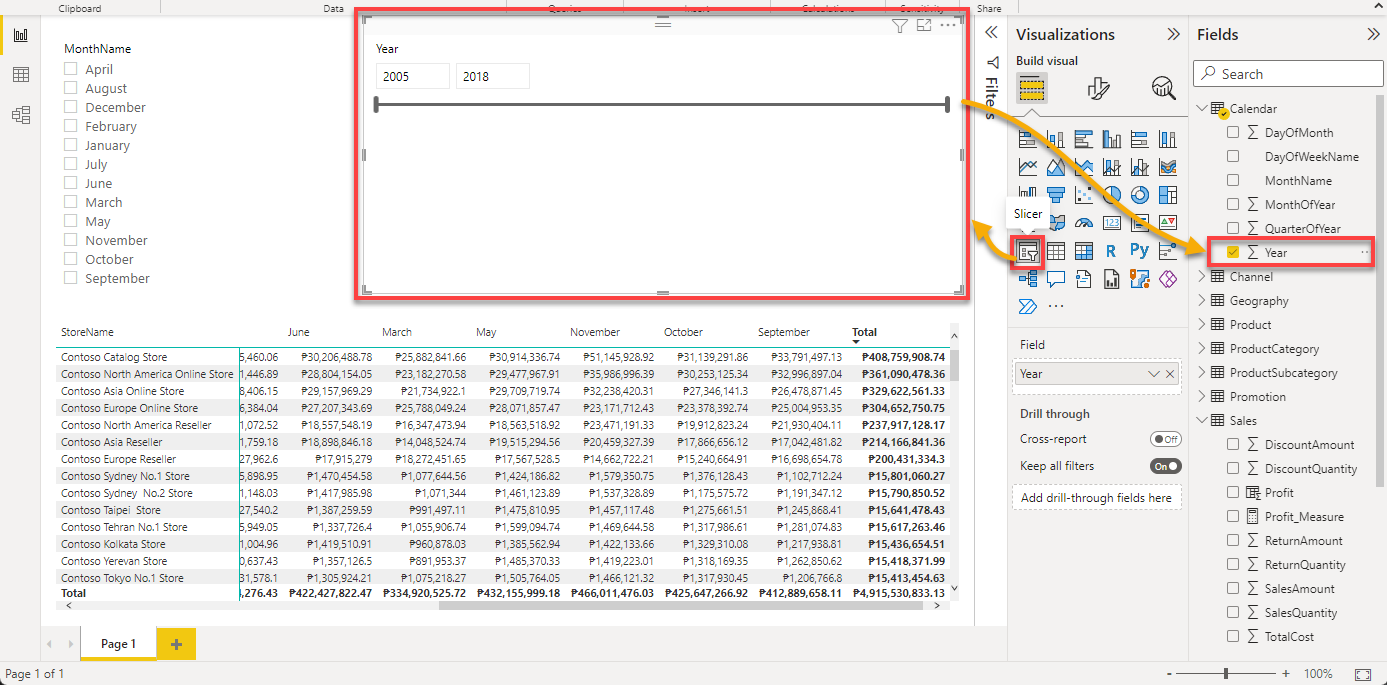
2. Subsequent, add one other slicer for the 12 months column:
- De-select the at present chosen slicer, and click on on the Slicer visible kind icon once more so as to add a brand new visible.
- Tick the field within the 12 months column so as to add the column to the slicer.
Because of the slicer, you have already got extra info, the place the information runs from 2005 to 2018, as proven under.
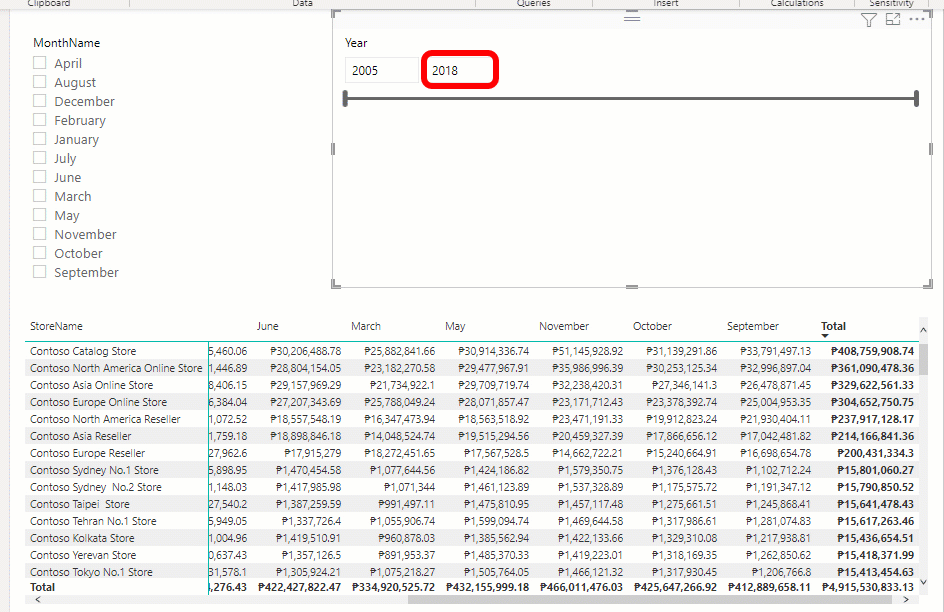
3. Drag the slider to scroll by the years. As quickly as you launch the slider, you will note the gross sales begin from 2011 to 2018.
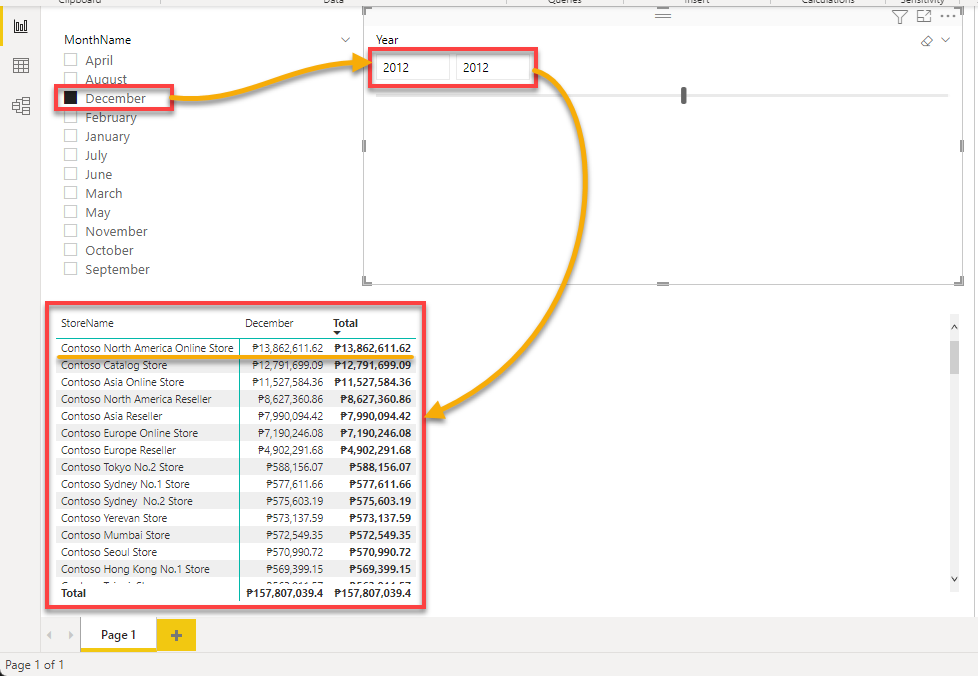
4. Now, filter the information on the Matrix visible with the next:
- Now, tick the field on December within the MonthName slicer.
- Put the 12 months 2012 on the fields within the 12 months slicer.
After these modifications, you possibly can examine which retailer made probably the most revenue in December 2012, as proven under: Contoso North America On-line Retailer.
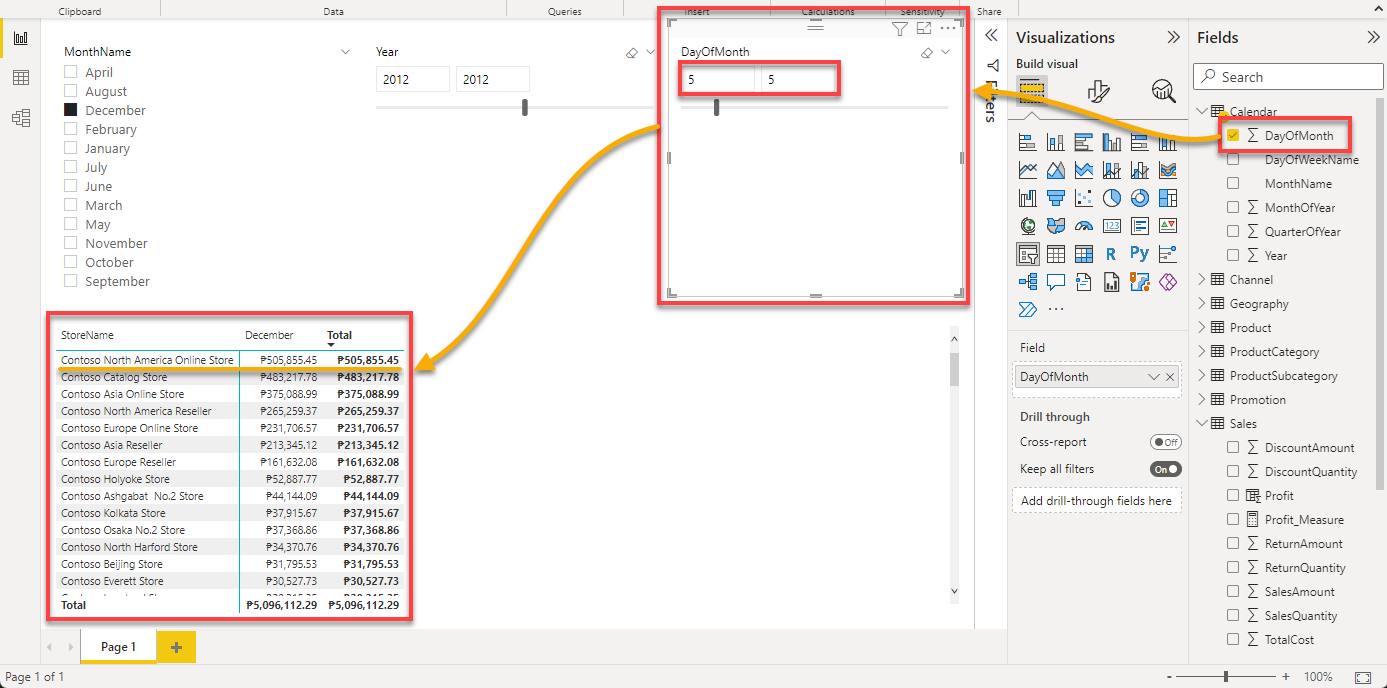
5. In the end, add one other slicer for the DayOfMonth column, and set subject values to five.
Verify your Matrix slicer, and you will note which retailer made probably the most revenue on December 5, 2012, which remains to be the Contoso North America On-line Retailer.
Conclusion
Measures provide you with an edge when viewing information, particularly these which embrace numbers. And on this tutorial, you could have discovered how Energy BI enables you to mixture these numbers. At this level, you have to be assured sufficient to reply quantity-driven questions by analyzing your information with Energy BI measure fields.
As nice as measures might be, you get extra particular particulars out of your information, as you probably did by including slicer visuals. This info can affect enterprise selections in a great way and is fast to implement.
With this newfound information, would you wish to dive deep into DAX to create guide measures for a extra personalised information visualization? Or would you go for both fast or computerized measures?