


Securing SSH entry is important to sustaining the integrity and safety of server infrastructure. If you’re grappling with securing server entry successfully, fret not. Gravitational Teleport emerges as a cutting-edge answer that revolutionizes how groups handle and fortify SSH safety.
On this tutorial, you’ll unravel the intricacies of Teleport, equipping you with the necessities to safeguard your server infrastructure. From seamless entry administration to sturdy security measures, you’ll discover how Teleport secures your server entry.
Grasp server safety with Gravitational Teleport and fortify your infrastructure!
Stipulations
Embarking on this Gravitational Teleport tutorial requires sure foundational information and assets. Thus, make sure the outlined conditions are met to observe together with this tutorial:
- Two Linux servers: One server (host) is used because the bastion host, and the opposite is used to limit SSH entry with Teleport – This tutorial makes use of two Ubuntu 22.04 EC2 situations.
- Allowed HTTPS ingress site visitors for the host server (see your cloud supplier’s documentation).
💡 Word: This tutorial makes use of AWS EC2 situations. The required modifications are made to Safety Group > Inbound Guidelines. See the AWS documentation on how you can configure safety group inbound guidelines.
- A registered area title with DNS A file pointing to your host server’s IP handle.
- A multi-factor authenticator app reminiscent of Authy, Google Authenticator, or Microsoft Authenticator.
Putting in and Configuring Gravitational Teleport on Ubuntu
Together with your DNS setup in place, you could equip your Ubuntu server with sturdy security measures—Gravitational Teleport. Like a citadel with gates vast open, with out the right safety measures, your server is susceptible to unauthorized entry and potential breaches.
Gravitational Teleport ensures sturdy fortification, permitting solely licensed people to entry your server fortress.
To put in and configure Gravitational Teleport, perform the next:
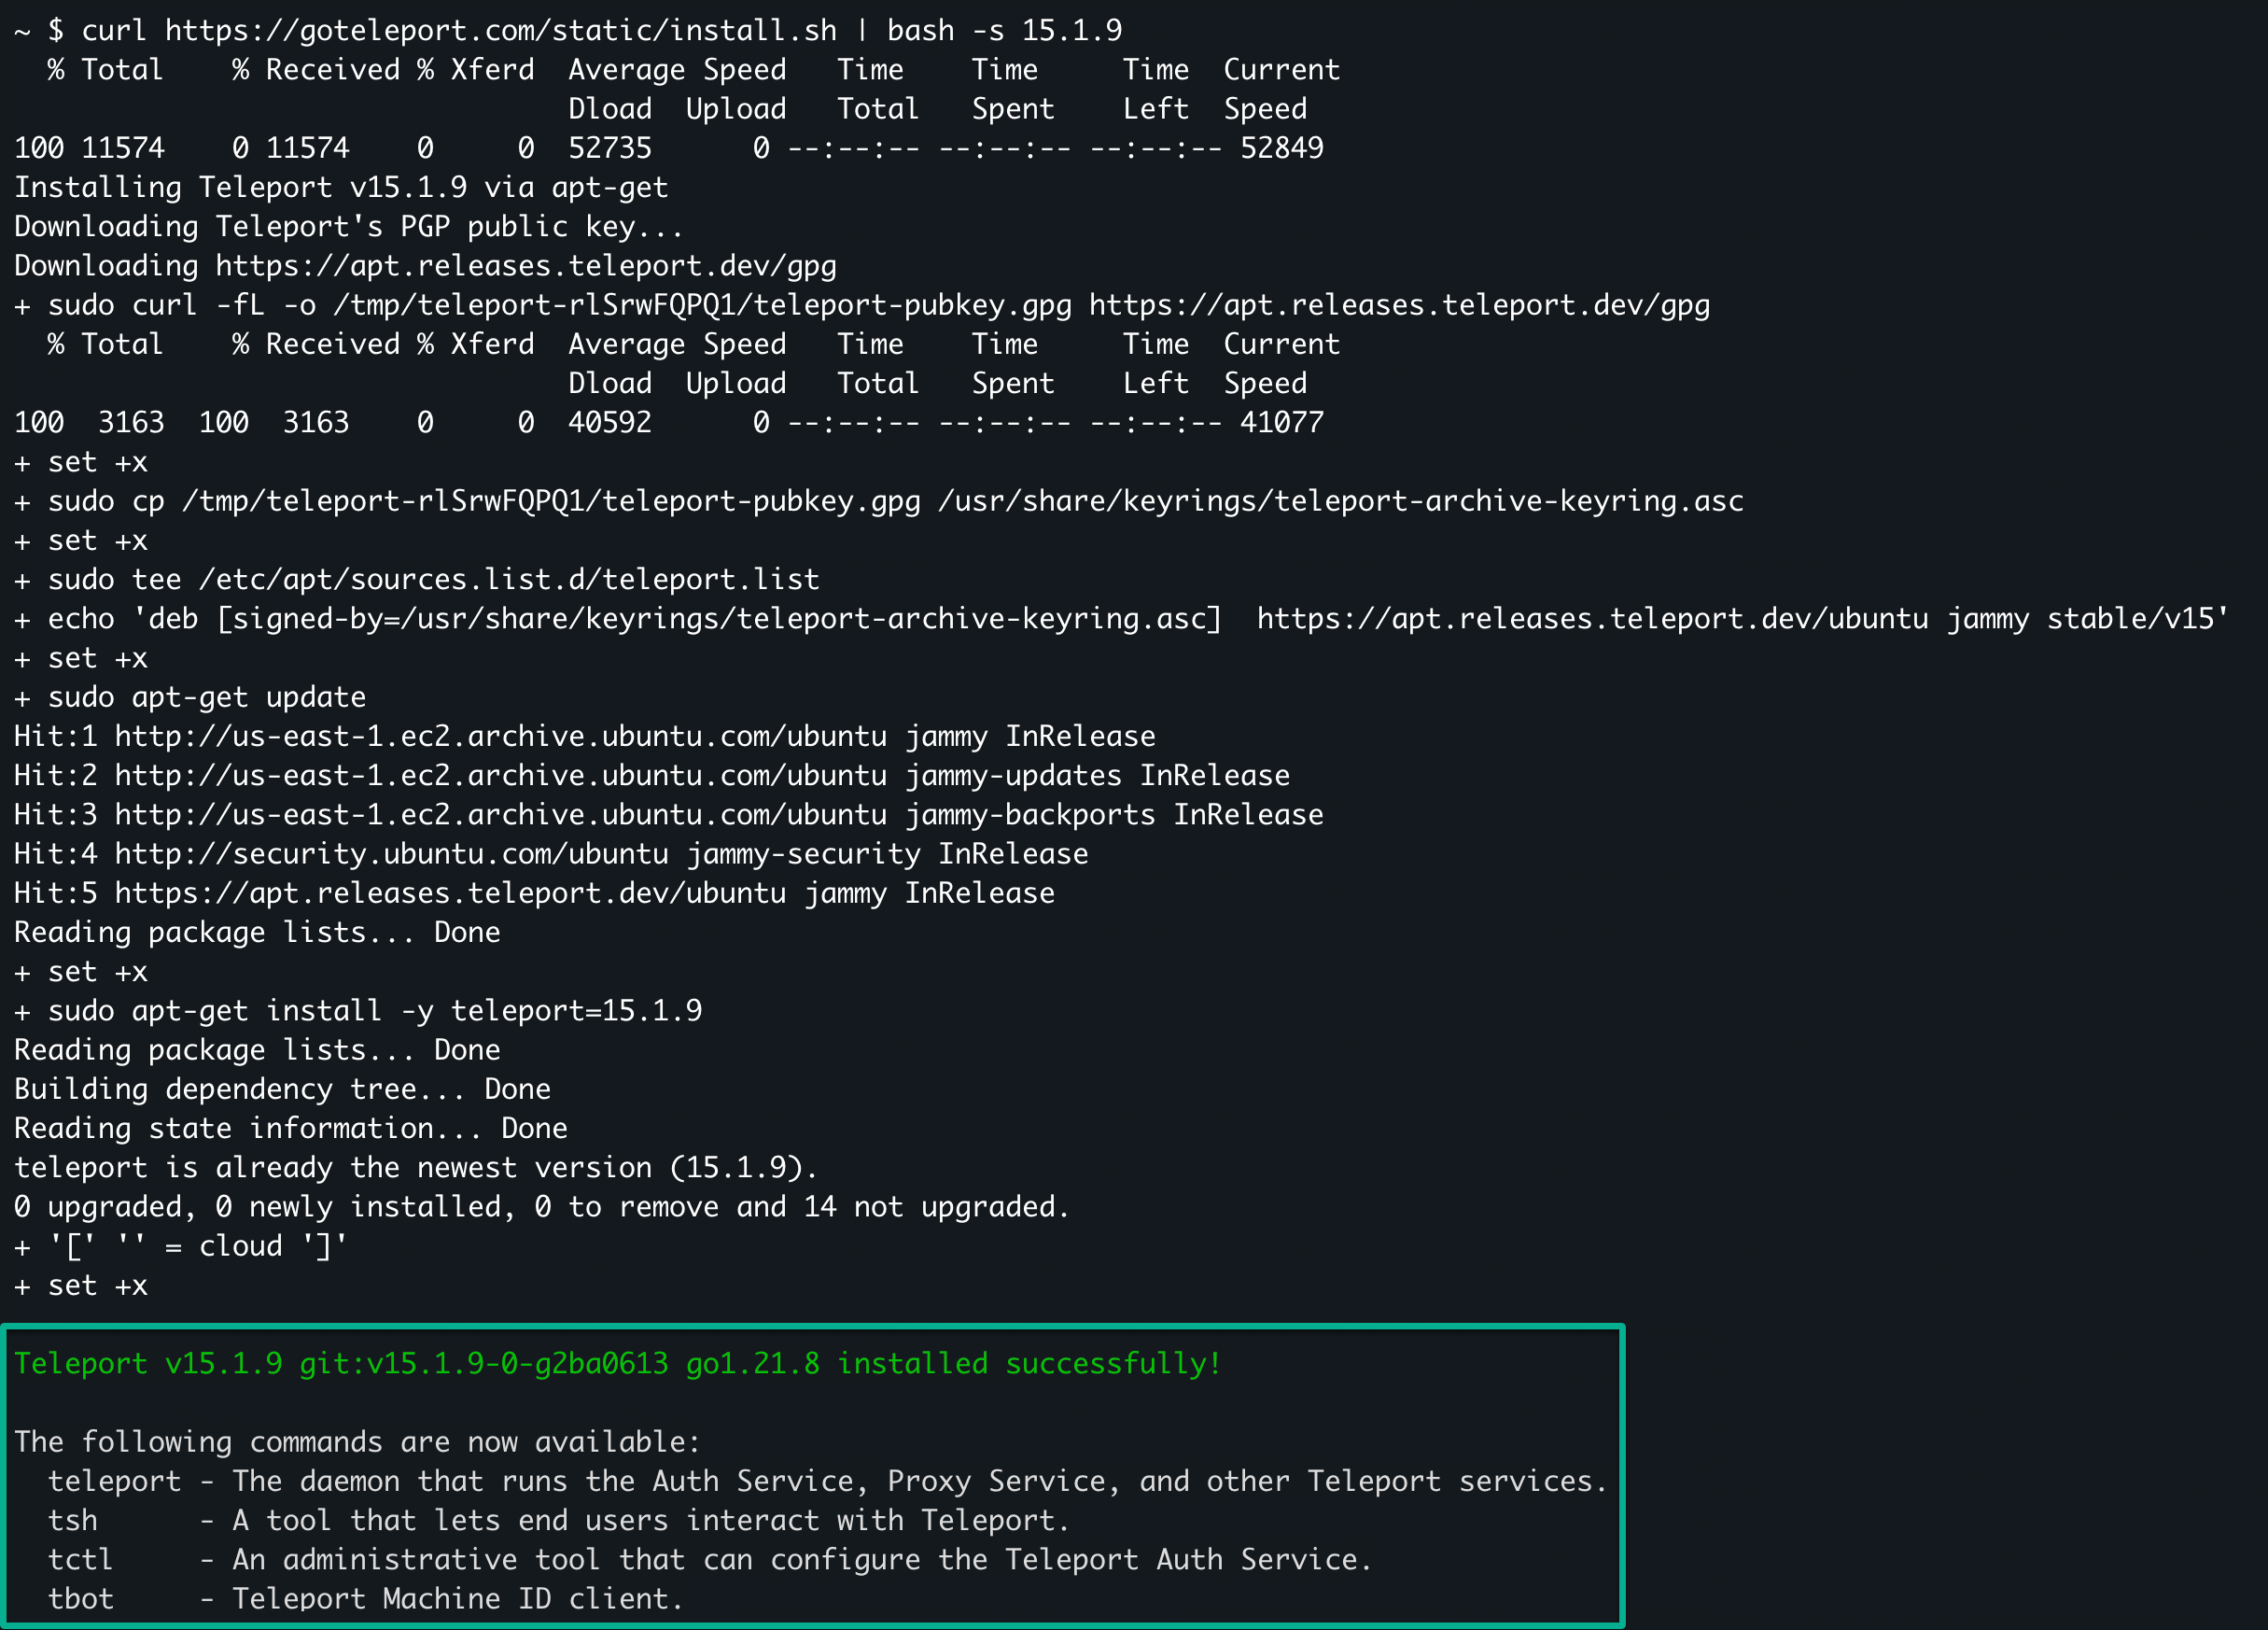
1. SSH into the host server, run the next command to replace the repository for the package deal supervisor, and set up Teleport. The most recent model is 15.1.9 presently of writing, however you may at all times have a look at all releases.
curl https://goteleport.com/static/set up.sh | bash -s 15.1.9💡 Word: This tutorial makes use of the Superior Bundle Software (APT) package deal supervisor. If the Teleport set up script doesn’t perform correctly, go to the official Teleport documentation for set up directions tailor-made to your package deal supervisor.
After operating the set up script above, you need to get an analogous output.
2. As soon as put in, execute the next systemctl command to confirm the standing of the teleport service.
systemctl standing teleportAs proven under, Teleport is presently not energetic and disabled.
Earlier than enabling and beginning the Teleport service, you could set some configurations for Teleport within the following steps.

3. Subsequent, run this teleport command to perform the next:
- Generate a configuration file referred to as
/and many others/teleport.yamlfor Teleport. The Teleport Systemd service, which was arrange throughout set up, requires this file to begin Teleport.
- Specify the e-mail handle (substitute
<YOUR_EMAIL>) for ACME certificates registration and notifications. The--acmeflag tells Teleport to routinely get certificates from Let’s Encrypt.
- Specify the Teleport
--cluster-name, usually represented by the URL of the Teleport proxy server (substitute<YOUR_TELEPORT_PROXY_URL>).
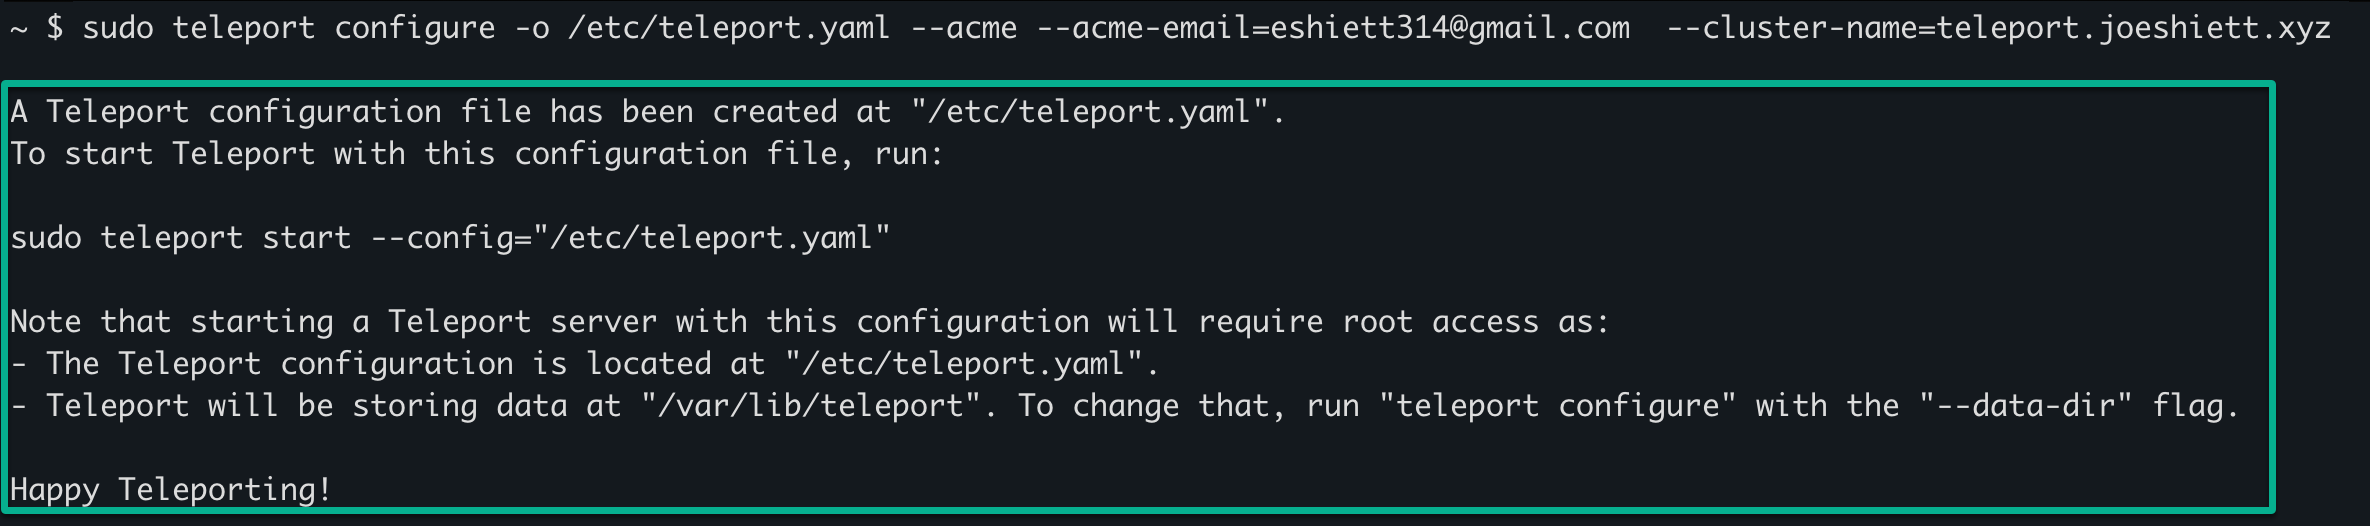
sudo teleport configure -o /and many others/teleport.yaml
--acme --acme-email=<YOUR_EMAIL>
--cluster-name=<YOUR_TELEPORT_PROXY_URL>
If configured appropriately, you will note the next output on the terminal.
4. Now, run every command under to allow and begin the Teleport service.
These instructions haven’t any output to the terminal, however you’ll confirm the modifications within the following step.
# Allow Teleport service to begin routinely on boot
sudo systemctl allow teleport# Begin the Teleport service
sudo systemctl begin teleport
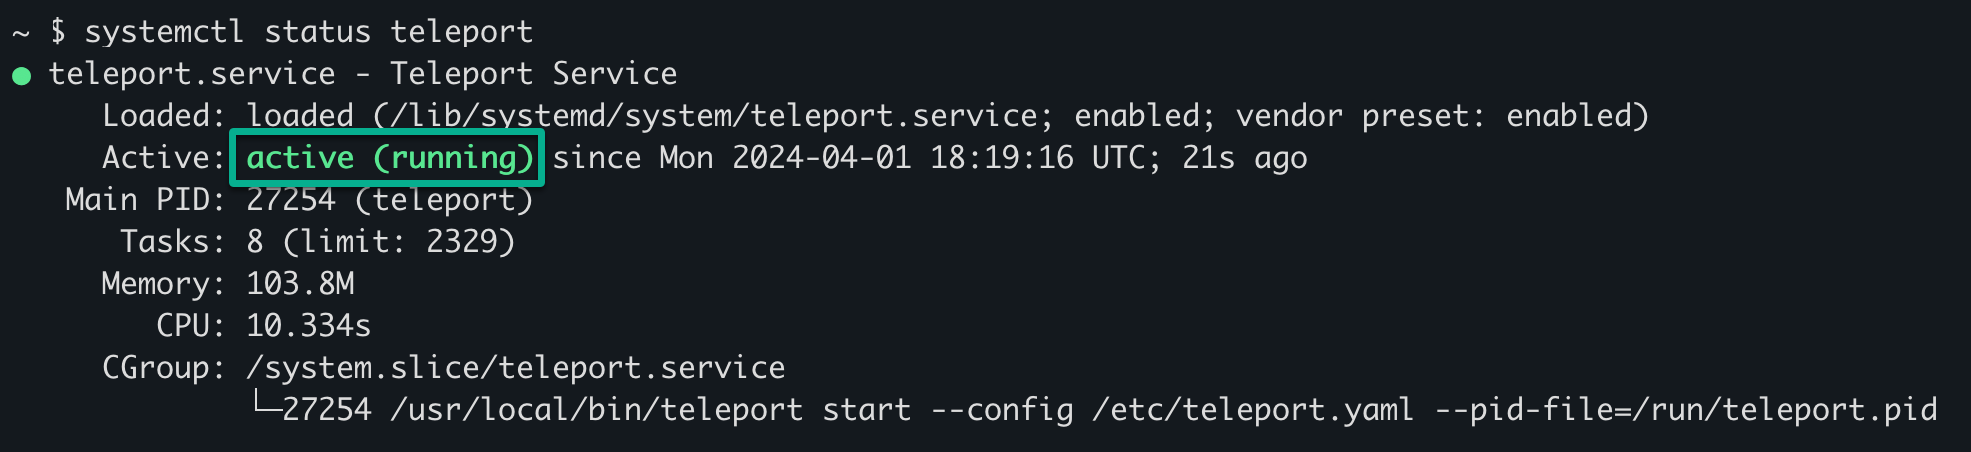
5. Lastly, run the under systemctl command to verify the standing of the Teleport service.
systemctl standing teleportThe output under confirms the Teleport service is energetic and operating, which signifies you may entry the UI and carry out operations.
Setting Up Teleport Internet UI Entry and Administrator Credentials
Teleport is up, however how do you seamlessly handle person entry, monitor periods, and oversee your server infrastructure? You may work together with Teleport from the consolation of your net browser with its net UI, however first, you could arrange the online UI entry and the admin person credentials.
To arrange the Teleport net UI entry and admin credentials, observe these steps:
1. Go to the Teleport proxy URL you configured in step three of the “Putting in and Configuring Gravitational Teleport on Ubuntu” part (i.e., https://teleport.instance.com).
If profitable, you may be greeted with the Teleport login web page under. Sadly, you can not register but. You need to arrange an admin person and two-factor authentication (step two).

2. In your host server, run the next Teleport CLI instrument (tctl) command to carry out the next:
- Create (
add) a devoted Teleportadminperson. - Enable the
adminperson to log into SSH hosts with the designated logins:root,ec2-user, andubuntu. - Assign the roles,
entry, andeditorto the admin person.
sudo tctl customers add admin --roles=entry,editor --logins=root,ec2-user,ubuntu As soon as added, copy the generated invite hyperlink from the output indicating profitable admin person creation as soon as added.

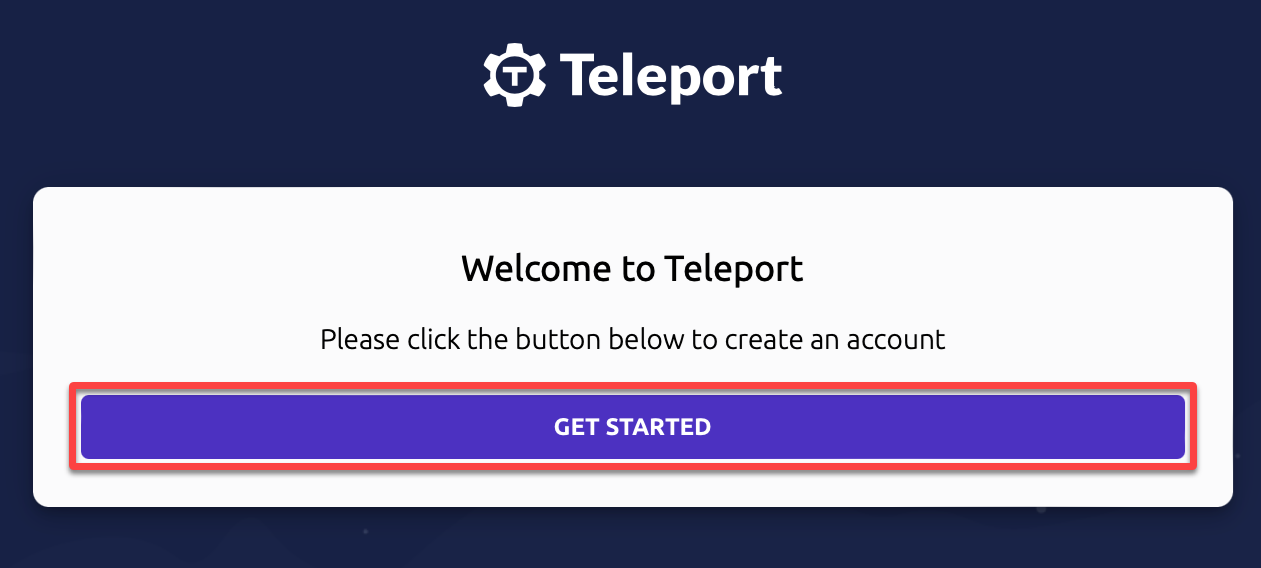
3. Navigate to the invite hyperlink you copied in step three to a brand new browser tab, then click on GET STARTED on the Welcome web page, as proven under. This motion helps you to get began in establishing the admin person.
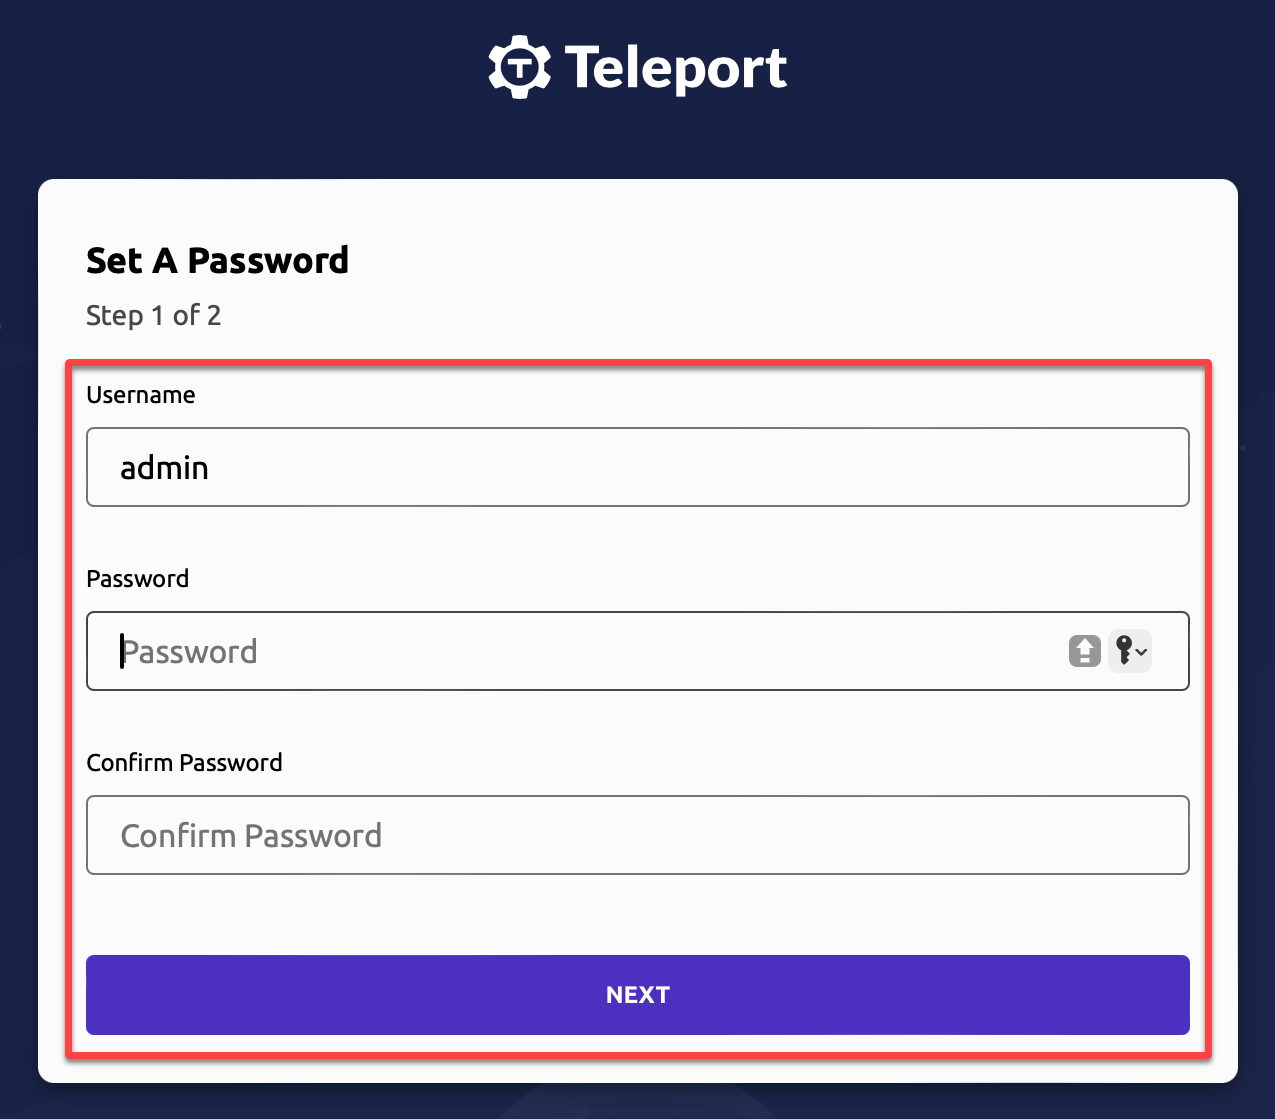
4. Subsequent, present and make sure a robust password for the admin person, and click on NEXT to proceed.
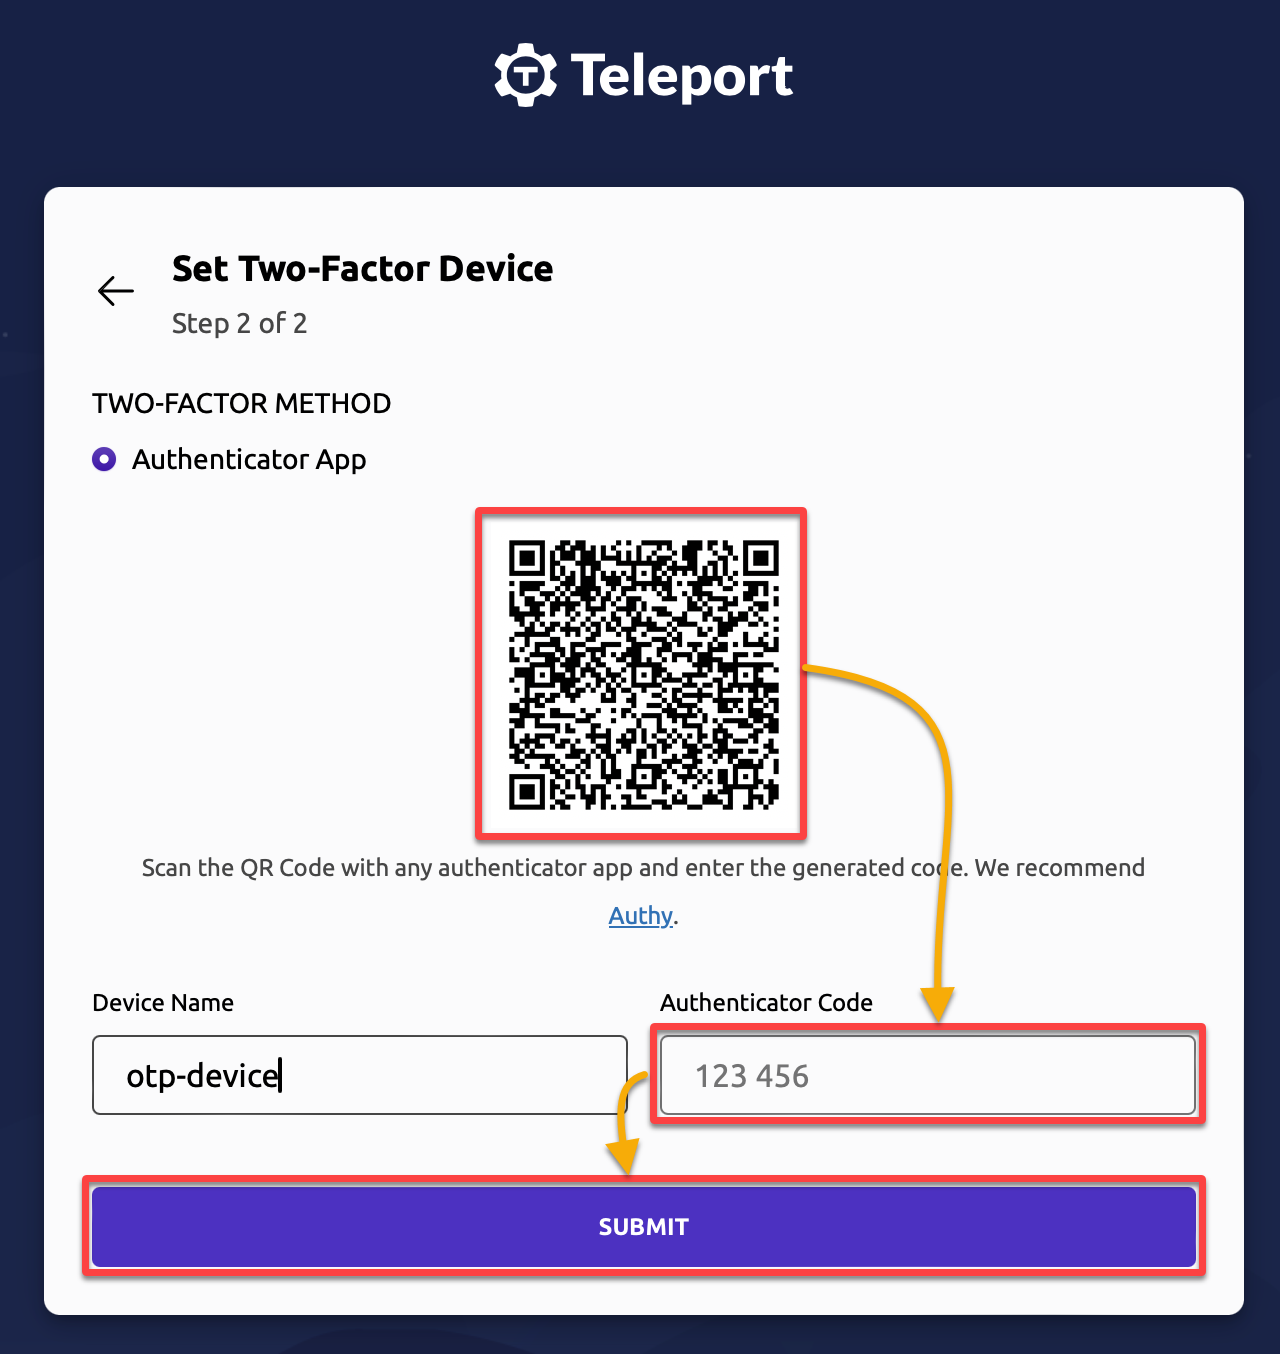
5. Open your authenticator app, scan the QR code, kind within the generated Authenticator Code within the required area, and click on SUBMIT.
This course of helps you to arrange two-factor authentication in your system for a further layer of safety.
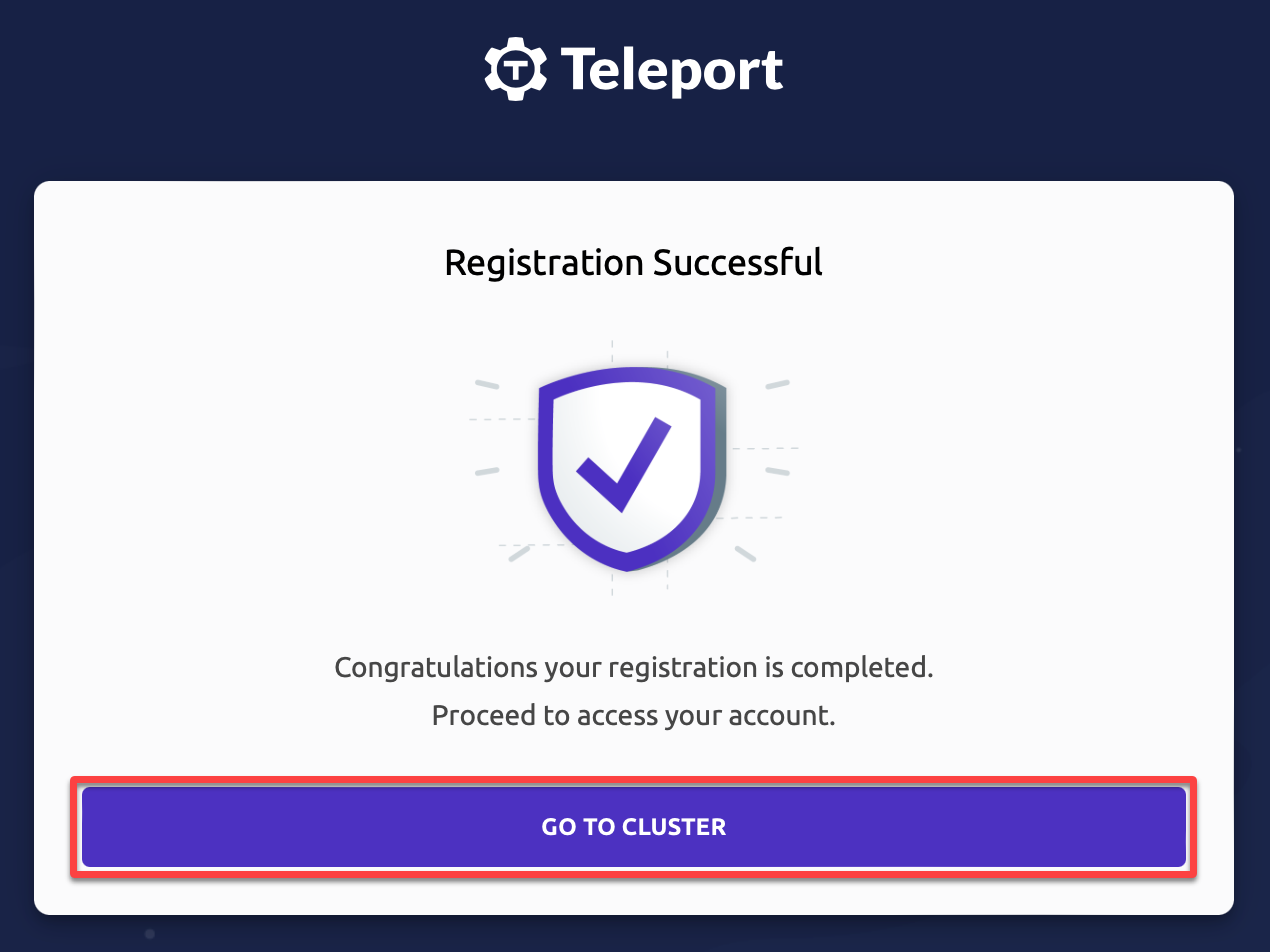
6. Now, click on GO TO CLUSTER to entry your Teleport account.
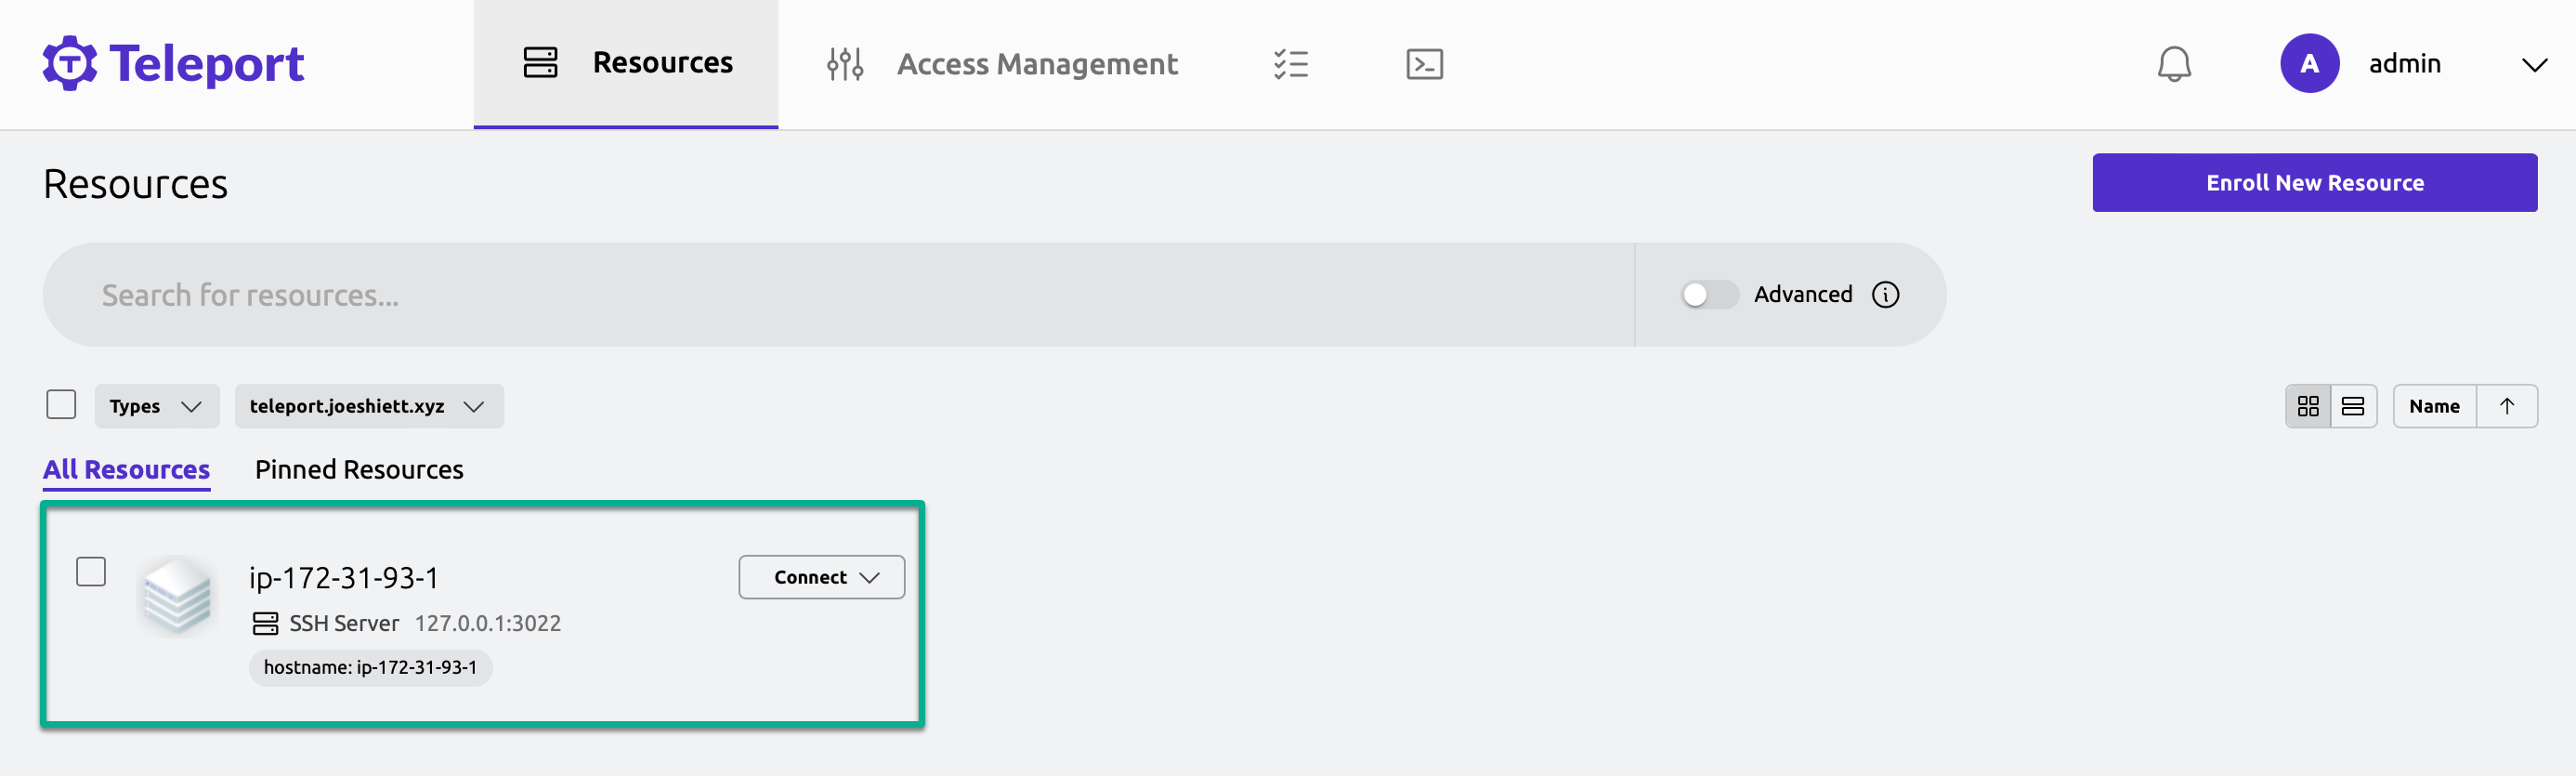
Your browser redirects to the Teleport dashboard just like the one under that exhibits your host server the place Teleport runs. Discover that your host server is the one obtainable useful resource presently being dealt with by Teleport.
Including and Managing Assets with Teleport
You now have entry to your Teleport dashboard, which has just one useful resource obtainable. However a centralized platform actually shines when you may handle a number of assets inside.
With Teleport’s highly effective useful resource administration capabilities, you may effortlessly onboard further servers, databases, or different infrastructure elements, all from a single interface.
To handle assets with Teleport, proceed as follows:
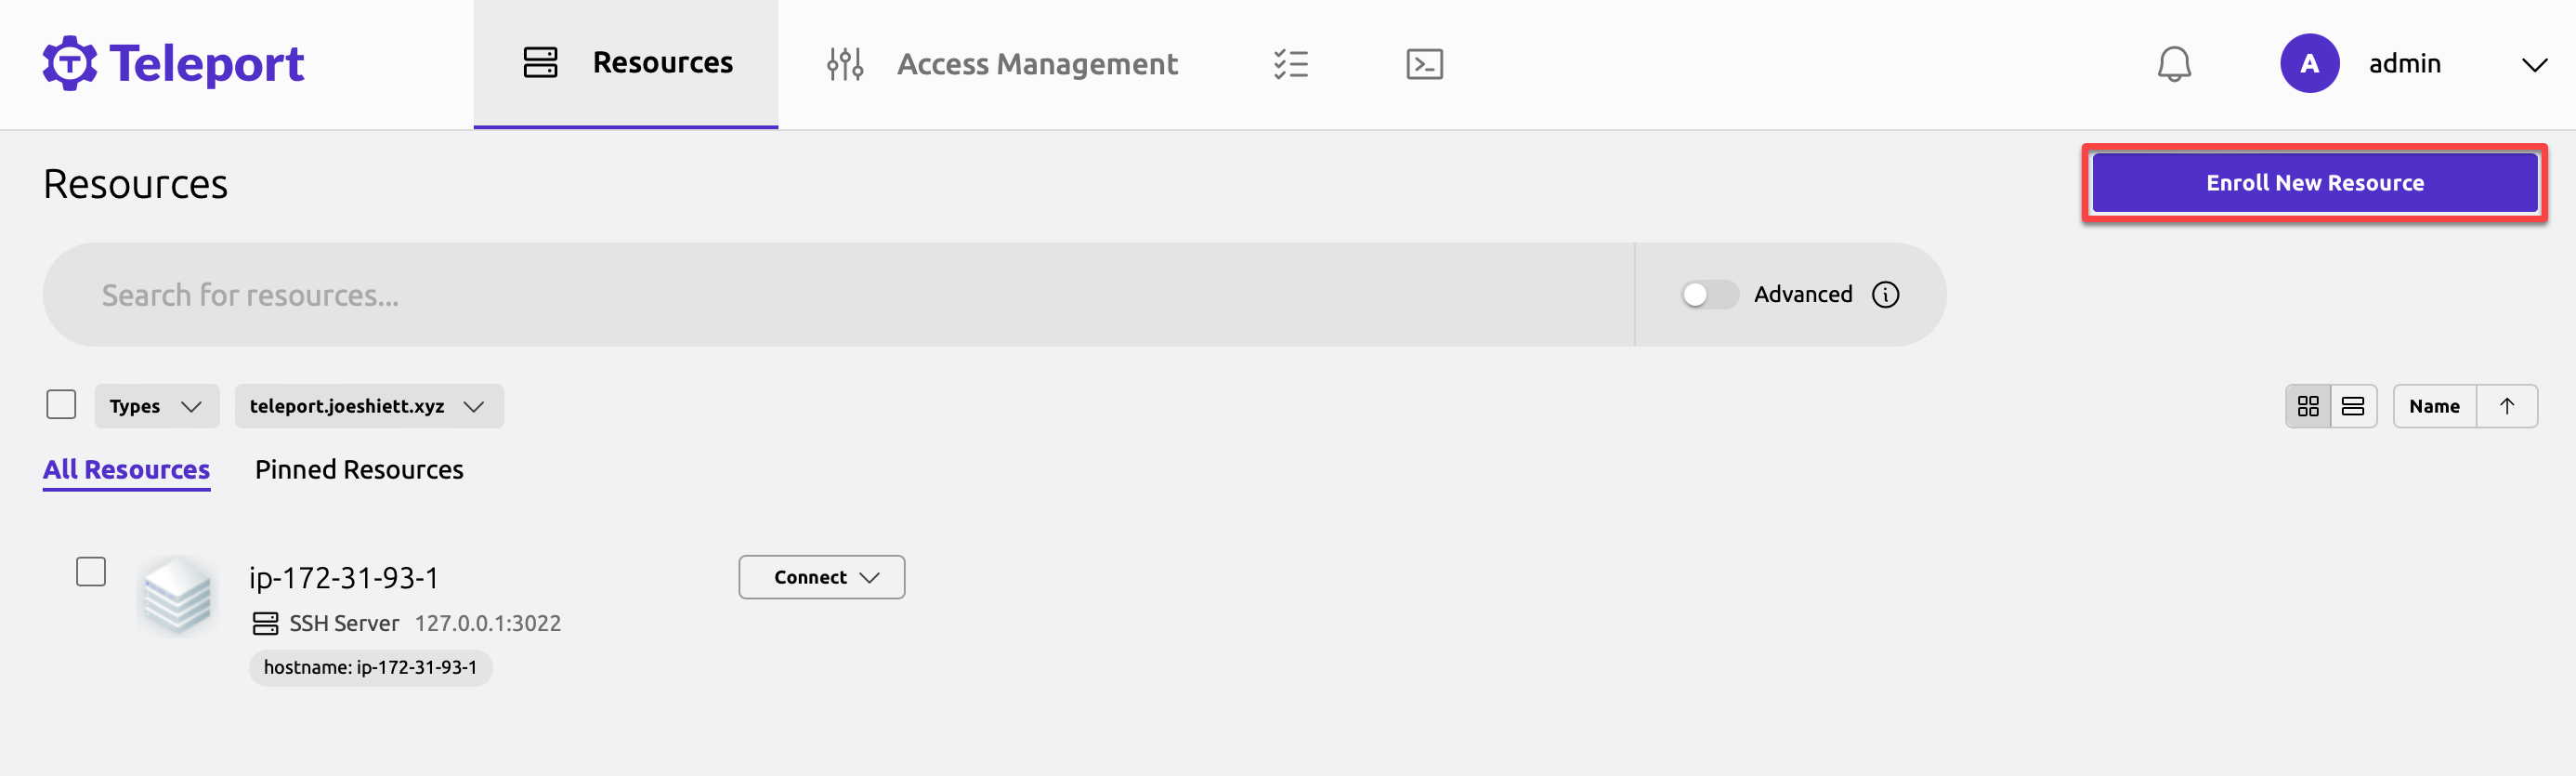
1. On the Teleport dashboard, click on Enroll New Useful resource (upper-right) to provoke enrolling a brand new useful resource.
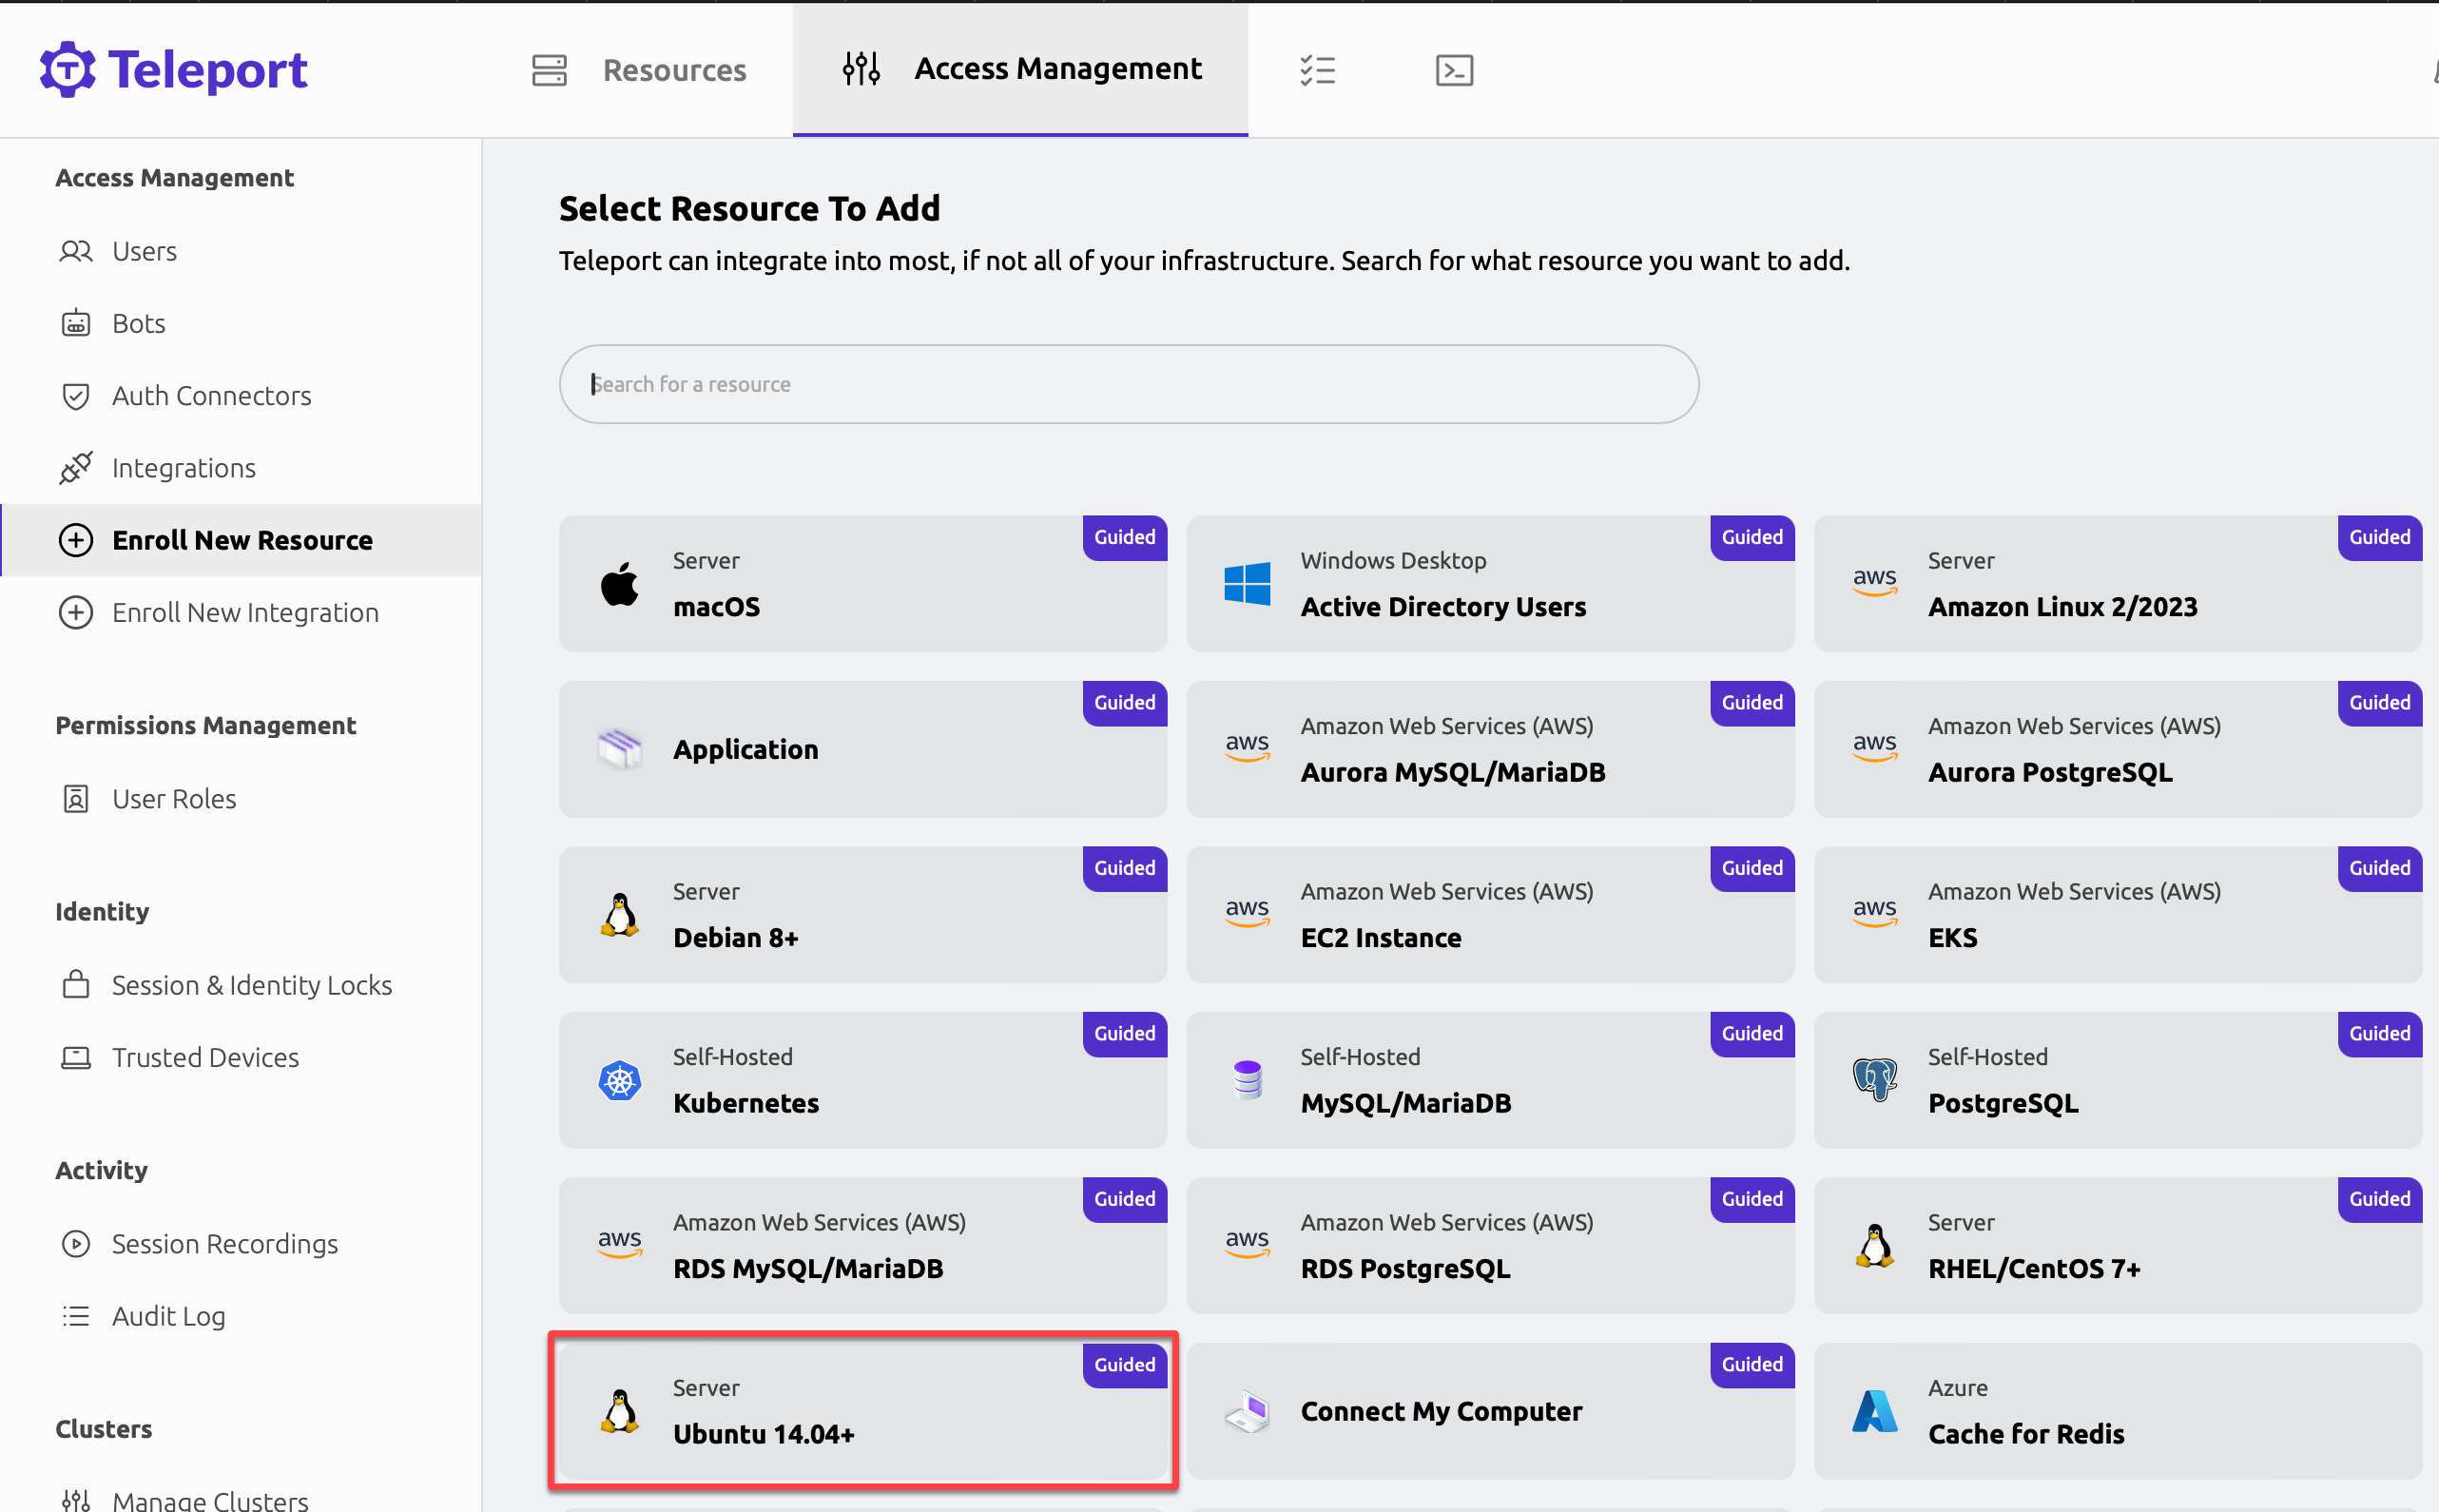
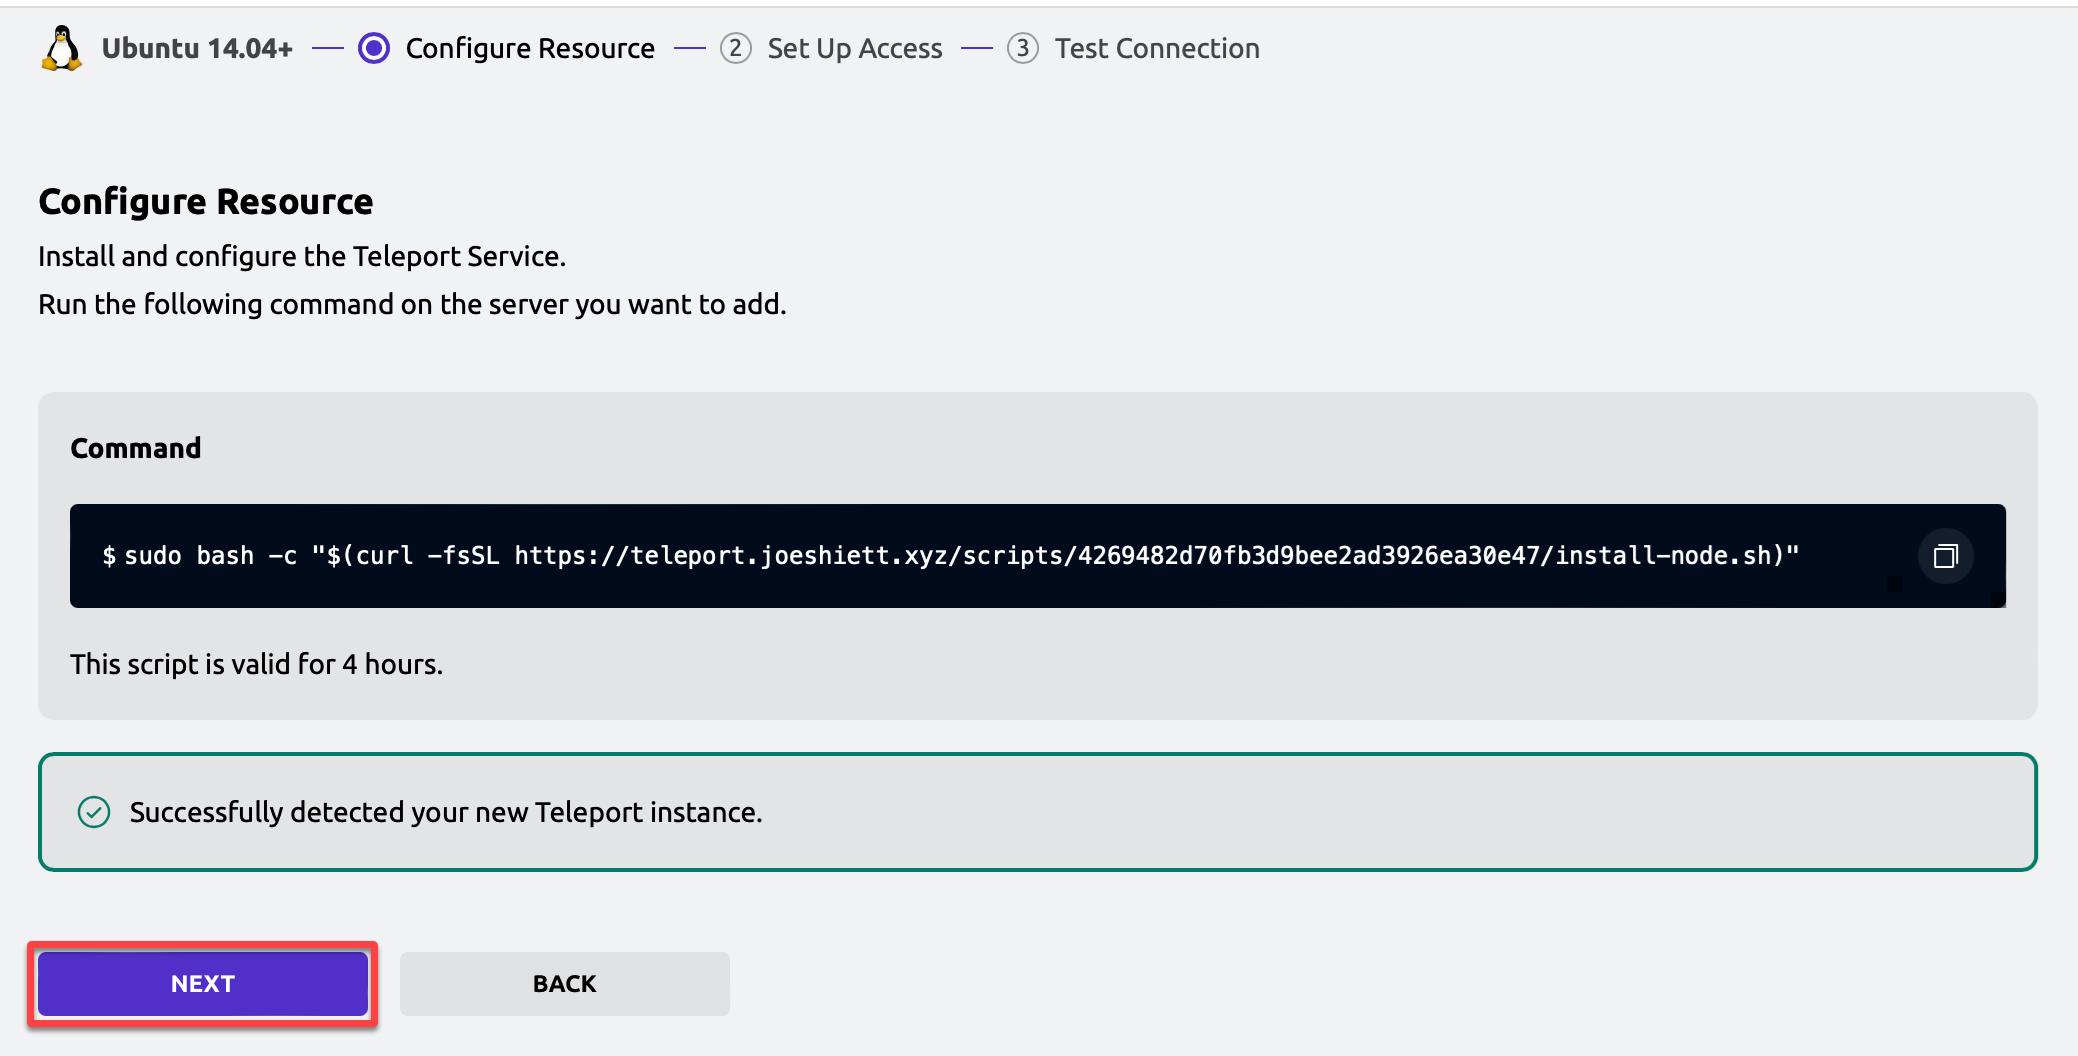
2. Choose one from the plethora of assets you may probably add to safe entry to utilizing Teleport. This tutorial’s selection is the Ubuntu 14.04+ Server, as indicated under.
3. Copy the command Teleport generated, which you’ll run within the following step.
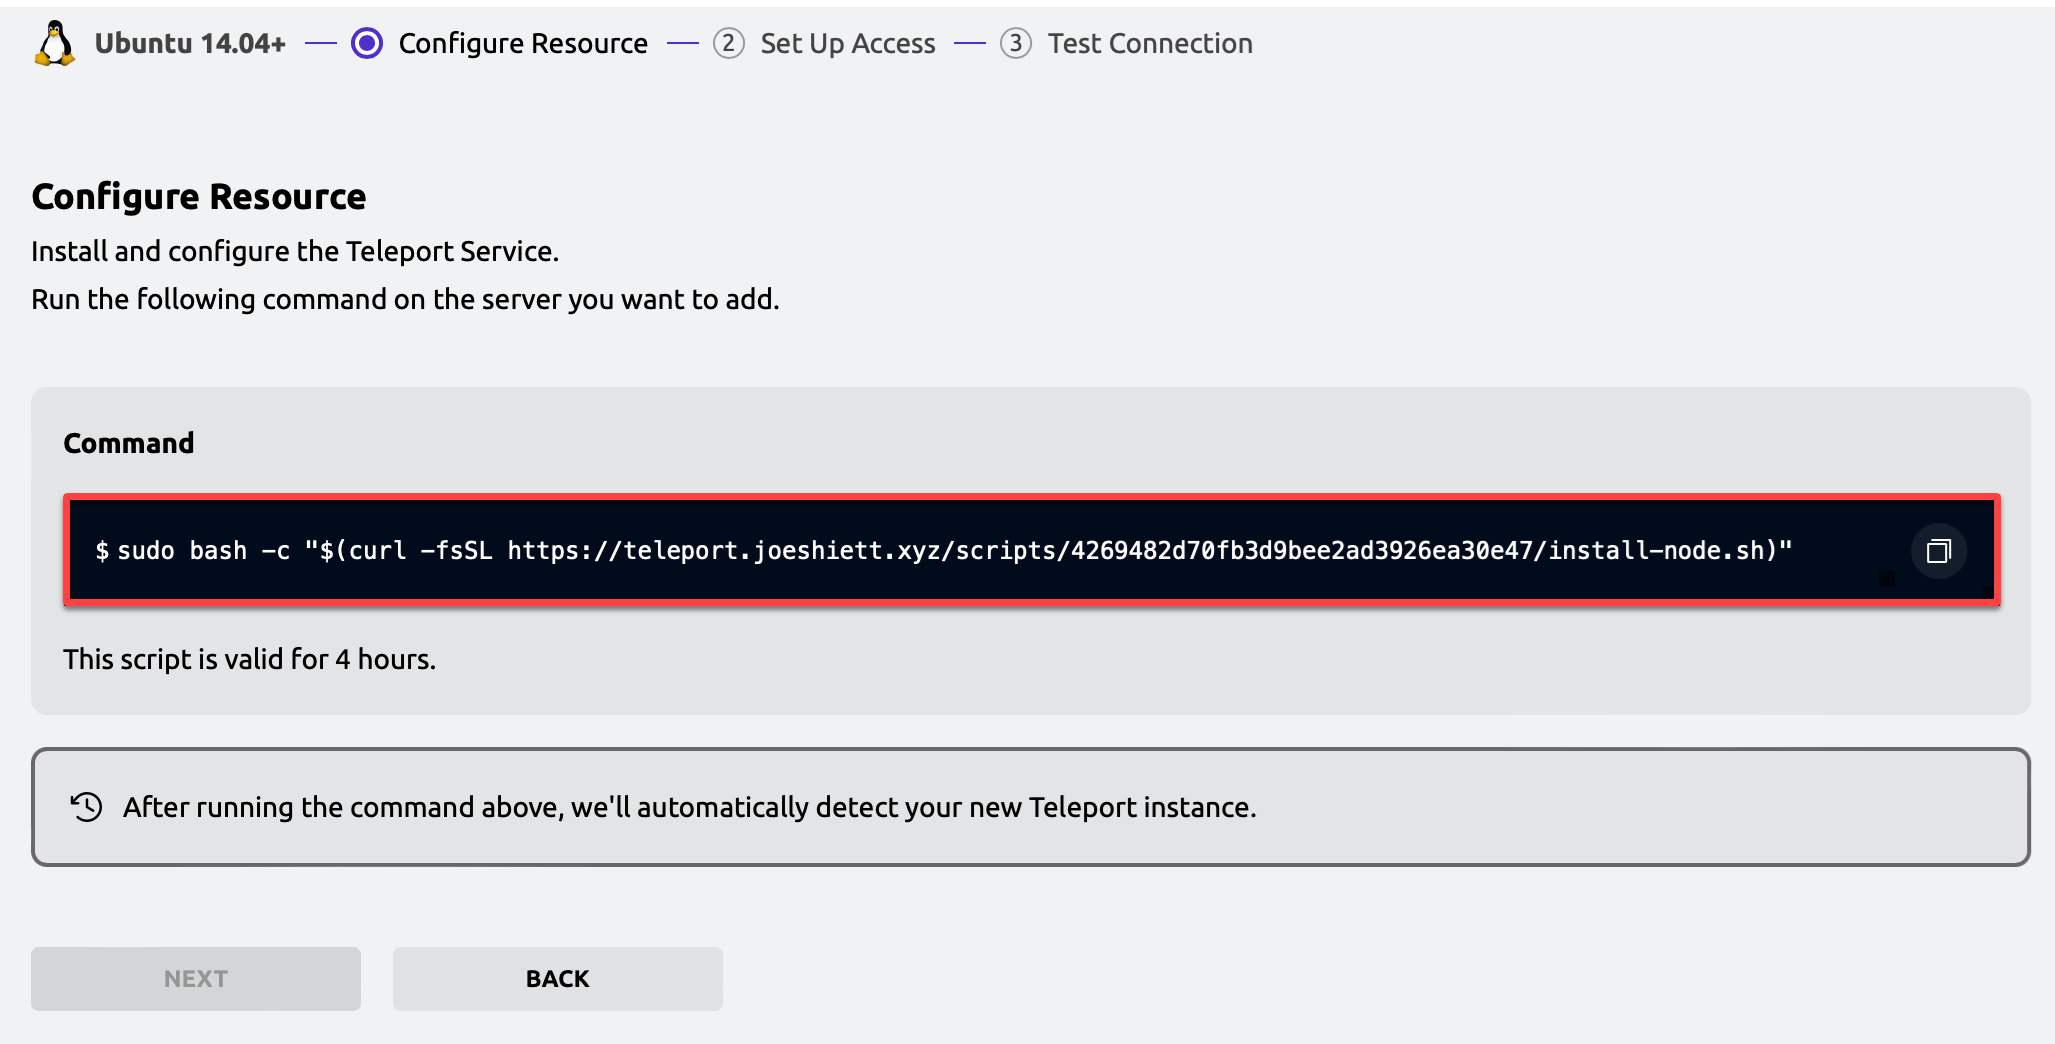
4. Now, open a terminal in your second server and run the command you copied in step three so as to add the server for entry administration.
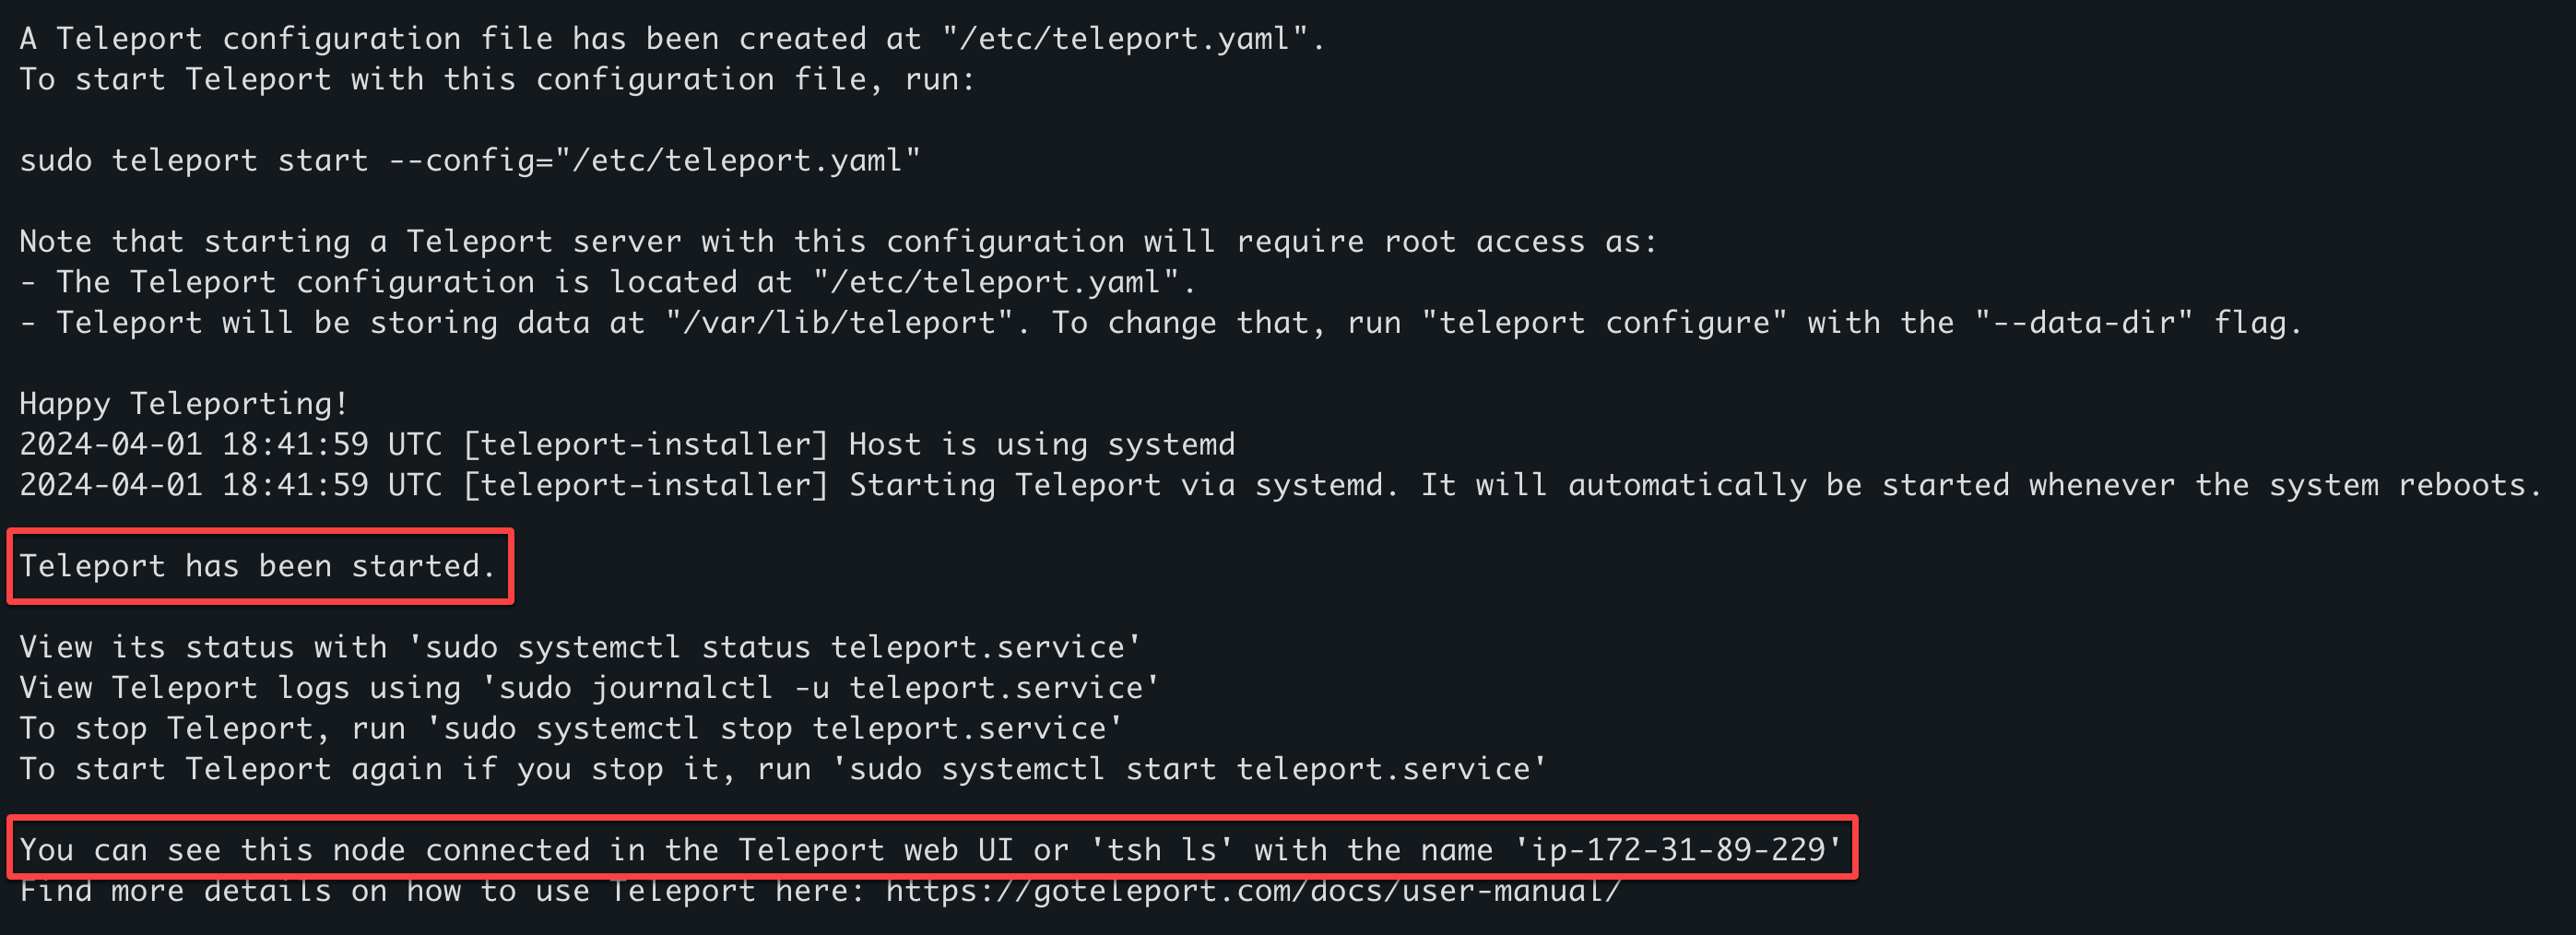
If profitable, you will note an output like within the screenshot under.
5. As soon as added, click on NEXT and full the consecutive prompts by clicking NEXT and FINISH.
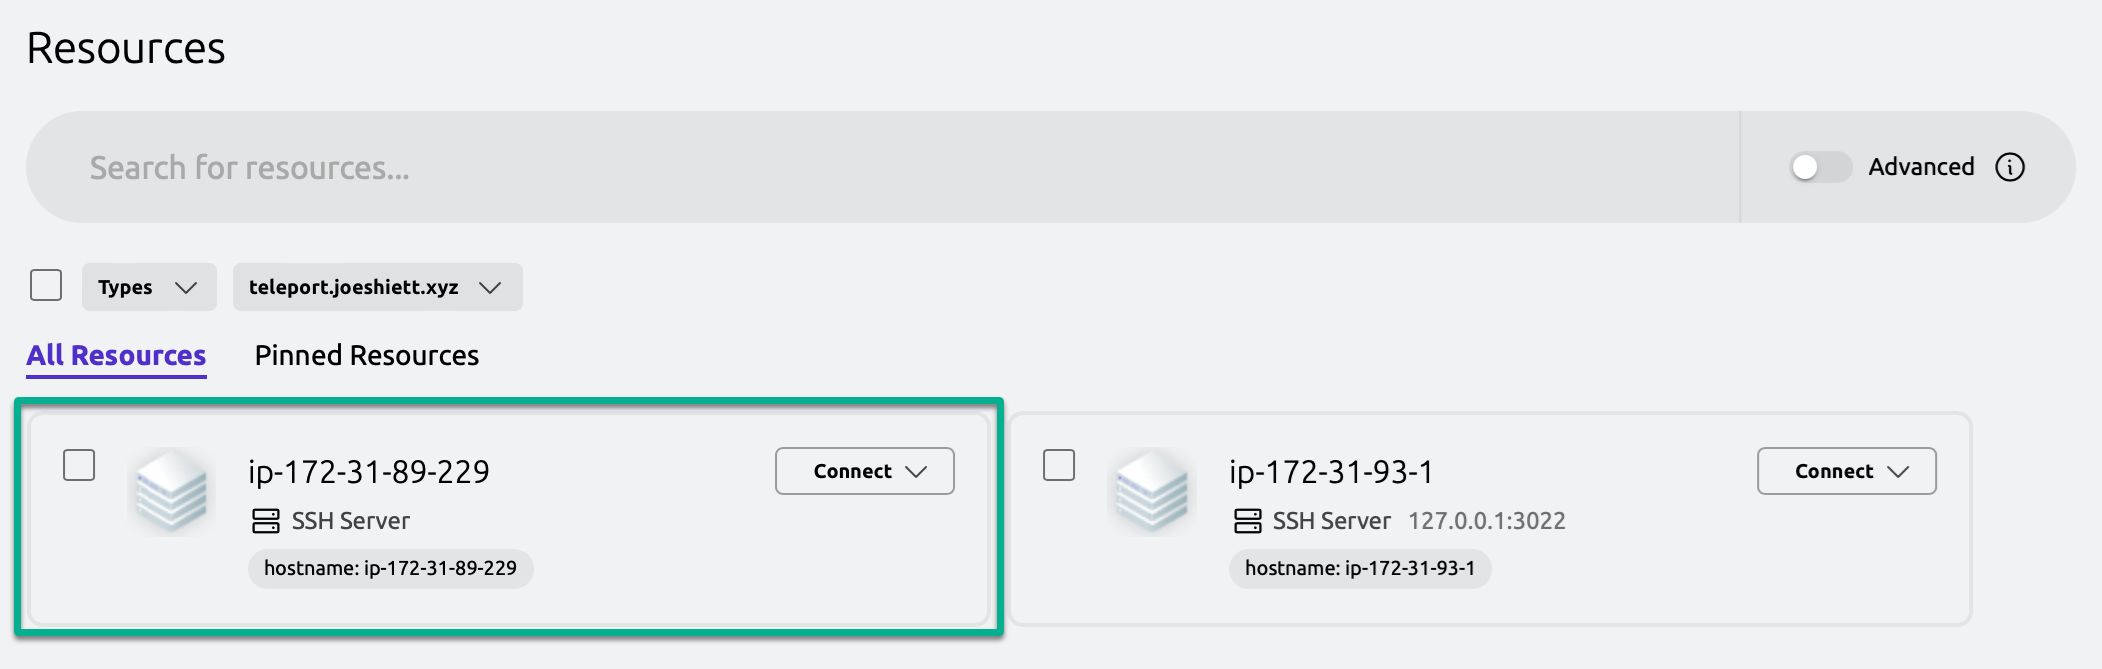
6. Lastly, navigate to your Teleport dashboard, and you will note your newly added occasion, as illustrated under.
Conclusion
There you have got it—efficiently put in and configured Gravitational Teleport, arrange the Teleport Internet UI, and established admin credentials. All through this tutorial, you have got gained helpful perception into securing and managing server entry successfully!
Now, why not take this newfound information up a notch? Set up the Teleport CLI (tsh) particularly in your native machine and connect with your Teleport server through CLI as a substitute of the UI.
Implement entry administration for extra assets reminiscent of Kubernetes Clusters and way more!