

Azure Information is a superb storage resolution once you want flexibility or have to entry your information from totally different places world wide. However it can by no means be as quick and seamless as an on-premise file server. That is the place Azure File Sync is available in.
It lets you cache your steadily accessed Azure Information in your on-premise file server. This may drastically cut back the entry time, giving your customers a greater expertise. It can be used to sync your information throughout a number of file servers, every in a special location.
On this article, we’re going to try the way to set up and configure Azure File Sync. Just be sure you have already got arrange an Azure File Share.
Benefits of Azure File Sync
Earlier than we begin with implementing Azure File Sync, let’s first have a look a quick take a look at the totally different use instances.
The commonest use case is native caching. When you’ve saved all of your information in an Azure File share, you then most likely have seen that there’s a latency once you entry a file. This isn’t an issue with information you don’t want usually, however it may be actually annoying with information that you simply want frequently.
That is the place Cloud tiering is available in. It lets you cache essentially the most steadily accessed information in your on-premise file server. You may decide how a lot disk area you wish to allocate for the caching. So that you don’t have to match the identical cupboard space domestically as you’ve in Azure.
Multi-site Sync
When you’ve a number of workplaces world wide and have to share the identical information, then Azure File Sync is a superb resolution to distribute the information. You may deploy an area file server in every Workplace, and make it a part of the sync deployment group.
Any modifications made domestically in one of many workplaces will robotically be synced to the opposite workplaces, conserving every little thing in sync.
Fast Catastrophe Restoration
Azure File Sync is out of the field not an actual backup resolution, as a result of it can sync all modifications out of your on-premise surroundings to the cloud. So any information which are deleted domestically may even be deleted within the cloud.
Nevertheless, we are able to use Azure Information to shortly restore a file server. Your on-premise server is nothing greater than an area cache of the information. So in case one thing occurs to your on-premise file server, you possibly can merely set up a brand new Home windows Server, deploy the Azure File Sync agent on it, and add it to the deployment group.
Arrange Azure File Sync
To arrange the Azure File Sync, we’re going to begin in Azure with deploying the Storage Sync Providers. Remember the fact that an on-premise server can solely be registered to at least one Storage Sync Service.
Deploy Storage Sync Service
When creating the Storage Sync Service, just be sure you choose the identical Azure subscription, useful resource group, and area as that used for Azure Information. In any other case, it received’t work.
- Open portal.azure.com
- Seek for Azure File Sync and choose it from the Market checklist. (or use this direct hyperlink: Deploy Azure File Sync – Microsoft Azure)
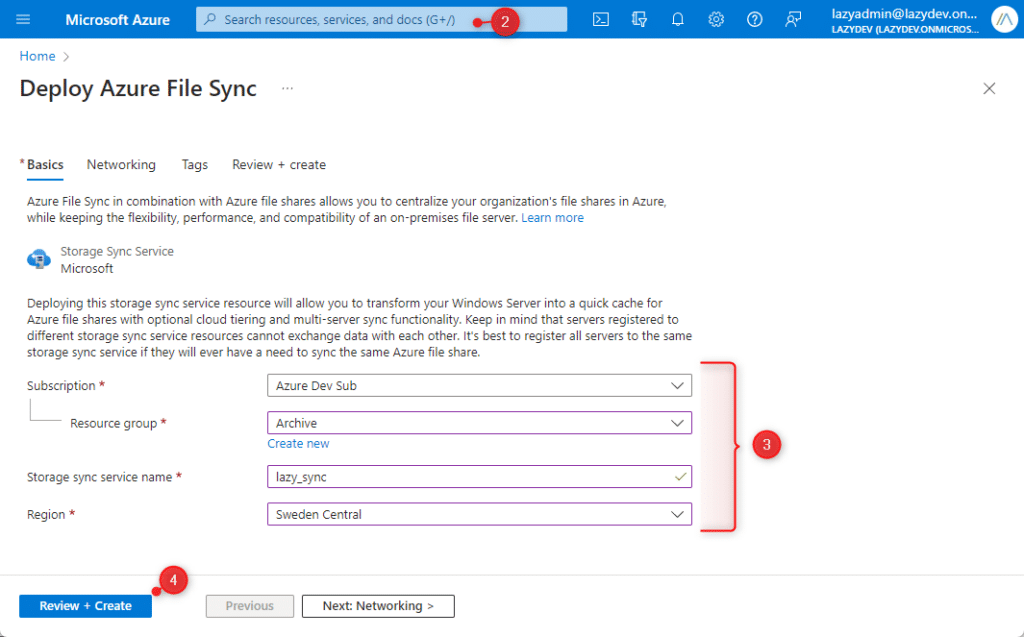
- Enter the fundamental particulars:
- Choose the identical subscription, useful resource group, and area as your Azure Information
- Storage sync service title have to be distinctive
- Click on on Evaluation + Create
Create a Sync Group
With the sync service deployed, we are going to now have to create a sync group. The sync group comprises all of the endpoints that we wish to maintain in sync. It might want to have at the least one cloud endpoint (Azure File Share) and one server endpoint.
- In Azure, go the Storage Sync Providers and open your newly created sync service
- Click on on + Sync group to create a brand new group
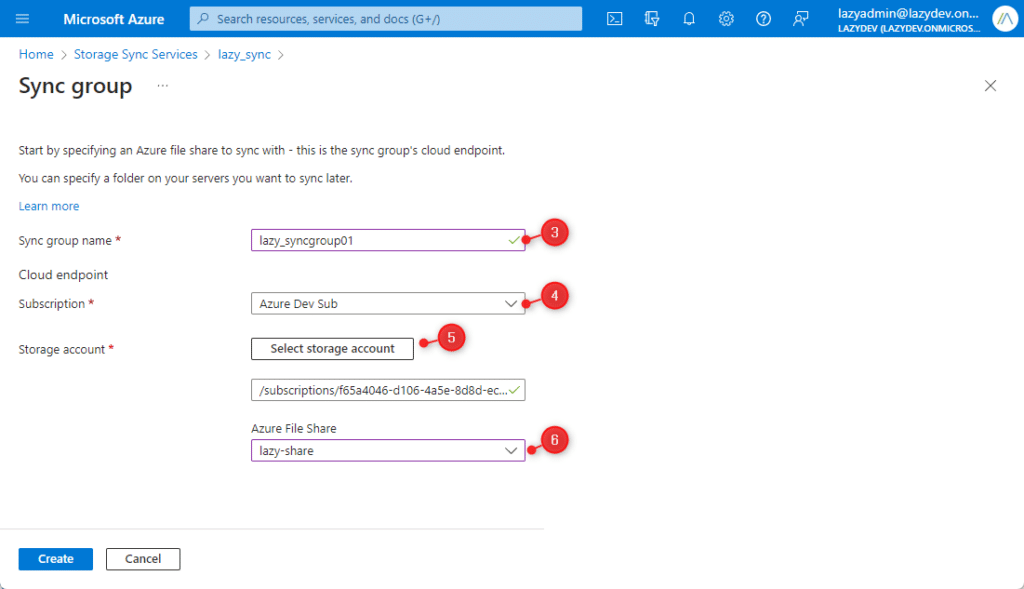
- Give your group a reputation
- Guarantee that the proper subscription is chosen (identical as your Azure File Share)
- Click on on Choose storage account, and choose your storage account
- Choose the Azure File Share that you simply wish to use
- Click on on Create
Will we want the sync group afterward, however first we have to set up the Azure File Sync Agent on the server.
Deploy Azure File Sync Agent
On the native server, we might want to set up the Azure File Sync Agent. This agent will connect with the Azure Storage Service and maintain all of the information in sync. First, we might want to guarantee that Web Explorer Enhanced Safety Configuration is disabled on the server.
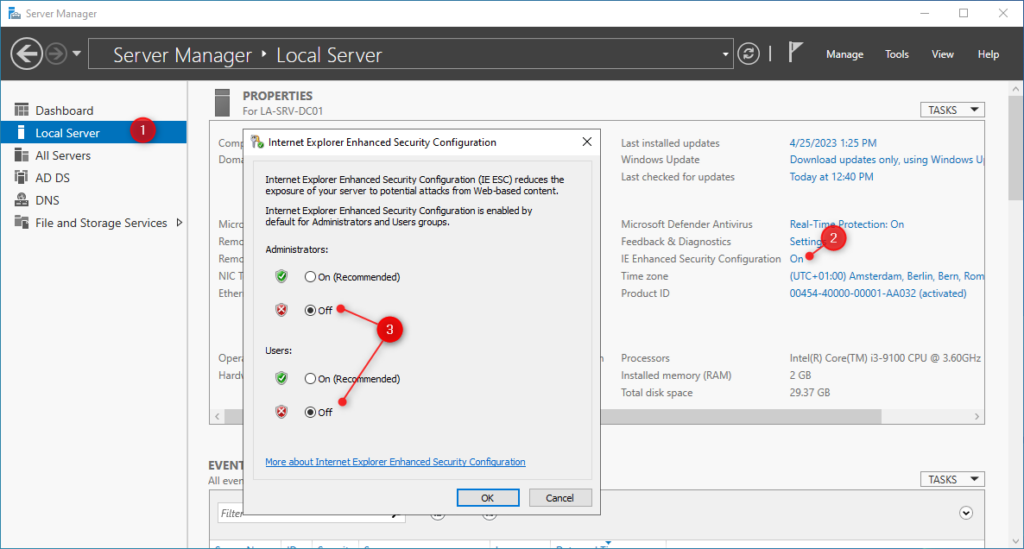
- Open the server supervisor and choose Native Server
- Click on on the hyperlink labeled On behind the IE Enhanced Safety Configuration
- Choose Off for each Directors and Customers
You may flip it again on if you’d like after we accomplished the registration of the agent. We are able to proceed with putting in the agent on the server
- Obtain the Agent from the Microsoft Obtain Middle
- Set up the agent, utilizing the default settings
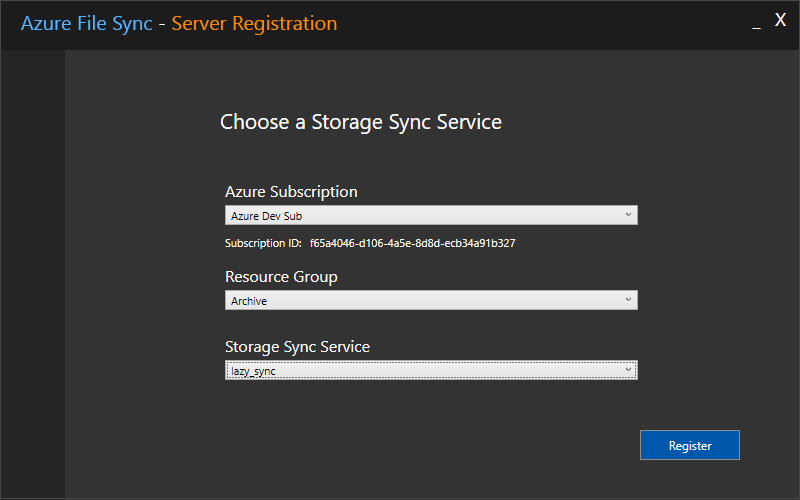
After the agent is put in, we are able to register the Home windows server within the Storage Sync Service. This may create a belief relation between your server and the Azure Storage Service. The sync agent will robotically begin after the set up.
- Choose your Azure Surroundings (typically AzureCloud) and click on on Signal In
- Check in along with your Azure Credentials
- Choose the Azure Subscription, Useful resource Group and Storage Sync Service, simply as we used/created earlier
- Click on on Register
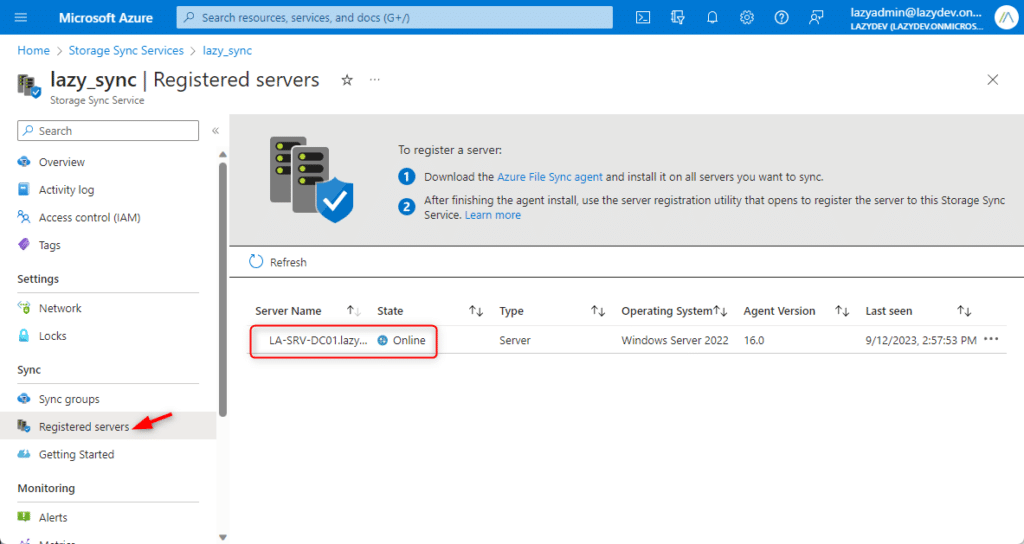
It may take a second to register your server. Wait till you see that the registration was profitable and the community connectivity check is handed.
We are able to confirm the registration within the Azure Storage Sync Service. Open your sync service and click on on registered servers. The server ought to be listed and marked On-line:
Configuring the Server Endpoint
Now we have now put in all of the parts, however nonetheless have to tie all of it collectively. We do that by including a server endpoint within the Storage Sync Group, that we created earlier.
- In your Storage Sync Providers, go to Sync Teams
- Open the sync group
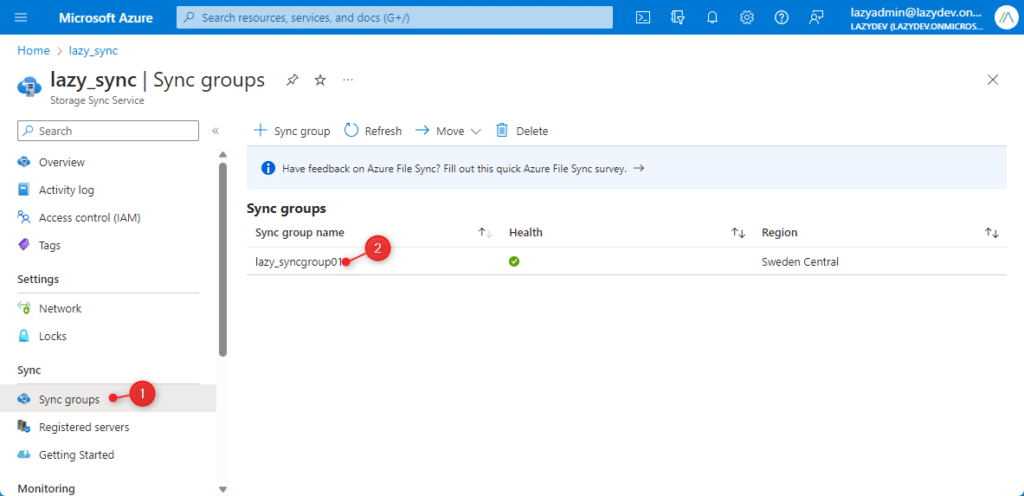
Right here you will notice the Azure File Share that now we have linked earlier (below the Cloud endpoint). As you possibly can see, the server endpoints are nonetheless empty. That is the place will add the native server(s).
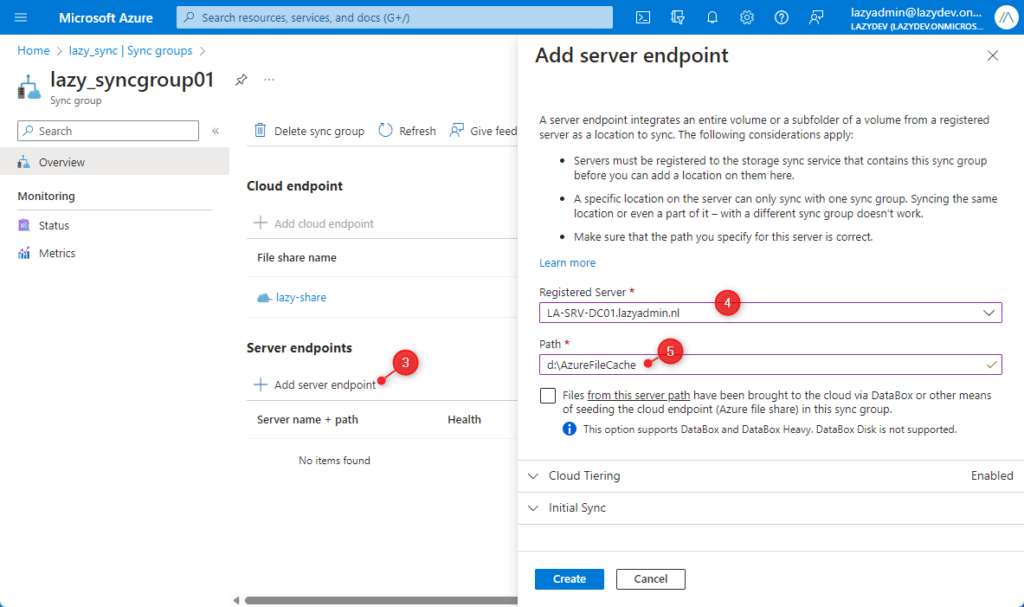
- Click on on Add server endpoint
- Choose your server below Registered Server
- Enter the trail the place you wish to retailer the Azure File cache, for instance
d:ord:azurefilecache
Subsequent, now we have a few selections to make. This may decide which, what number of, and when the Azure information are synced.
Cloud Tiering
As defined at first, with Cloud Tiering, you possibly can flip your server into an area cache of your Azure File share. Cloud Tiering is barely potential when utilizing a separate quantity, you possibly can’t use it if you wish to retailer the information on the identical disk as the place you’ve your OS put in on.
When enabled, you possibly can set how a lot cupboard space you wish to maintain free. Another choice is to allow Date Coverage. This lets you cache solely the information which are accessed the final x days (for instance, the final 15 days).
Preliminary Sync
The preliminary sync is a vital need to try. Which possibility it is best to select actually will depend on the place you’ve your information saved proper now.
- Merge – This merges the contents of Azure Information along with your native folder. If a file exists in each places, then each variations will likely be stored.
- Authoritatively overwrite – When your Azure Information are empty (or outdated), and you’ve got solely information in your native server, then select this selection.
Preliminary Obtain
The final possibility that you will want to try is the preliminary obtain possibility. You may select to obtain solely the namespace of the file or to obtain as many information as potential.
The primary possibility is much like how OneDrive works as of late. You will note all of the information, however they’re solely downloaded once you entry them. That is the best choice if you wish to maintain as a lot space-free as potential domestically.
When efficiency is essential, you then may wish to obtain as many information as potential upfront. This may cut back the latency to your customers.
End the Server endpoint configuration
After you’ve made your selections, click on on Create. The server endpoint will likely be provisioned. It may take a few minutes till the preliminary up- and obtain will begin. In case you click on on the server, you possibly can view extra particulars concerning the sync standing and any errors which may have occurred.
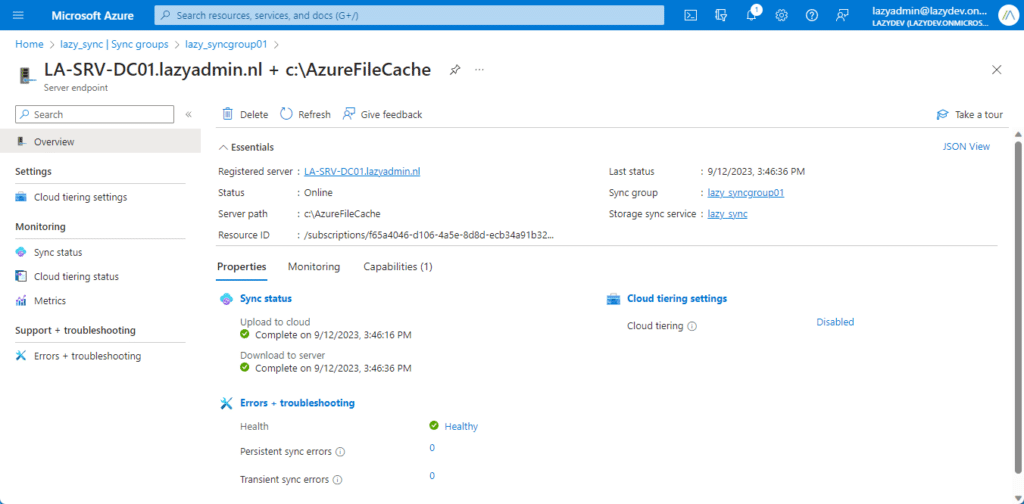
When Azure Information is the supply of the information, then you will notice that each one the information and folders are shortly listed on the server. Relying in your configuration, it could actually then nonetheless take a while till they’re really downloaded to your server.
Wrapping Up
Azure File Sync together with Cloud Tiering is a superb possibility when SharePoint isn’t an possibility for your online business case, however you continue to wish to retailer your knowledge centrally within the cloud. The Cloud Tiering will guarantee that your customers can shortly entry the file that they frequently want, making working with it as seamless as potential.
I hope you want this text, if in case you have any questions, simply drop a remark under.