


Uncertain learn how to set up Java on Mac? As a developer, having completely different programming languages, like Java, put in in your laptop is essential. Java, one of the well-liked programming languages, permits you to develop internet, cellular, and desktop purposes.
On this tutorial, you’ll be taught to put in Java on a Mac in some ways and create a easy venture to get you began in your Java journey.
Learn on to broaden your programming language repertoire!
Prerequisite
This tutorial contains of hands-on demonstration. To observe alongside, guarantee you’ve got the next:
A Mac laptop – This tutorial makes use of Large Sur, however any Mac operating macOS 11.0 or greater will work.
Homebrew put in.
A code editor – This tutorial makes use of Visible Studio Code (VS Code), however any code editor will work.
Associated: The best way to Set up Visible Studio Code on Mac
Utilizing Homebrew to Set up Java on Mac
One of many some ways you may set up Java on Mac is through the use of Homebrew, a package deal supervisor for macOS. Homebrew permits you to shortly set up varied software program, like Java, in your Mac with a number of instructions.
Homebrew is the appropriate package deal supervisor for you in case you are extra of a command-line particular person. And on this tutorial, you’ll set up the newest and outdated/particular variations of Java on Mac.
Putting in the Newest Model
Putting in a number of variations of Java in your Mac works with none battle. However the newest model is all the time beneficial because it comprises the newest safety updates.
To put in the newest model of Java in your Mac:
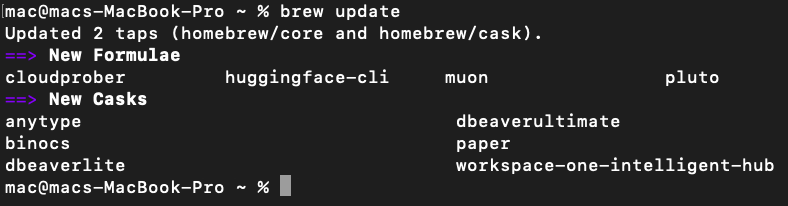
1. Run the beneath brew replace command to replace Homebrew.
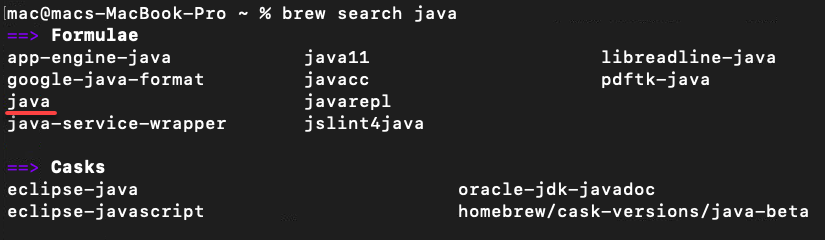
2. Subsequent, run the next command to search for the accessible java system. Homebrew makes use of formulation to handle packages and purposes.
You possibly can see beneath that there are lots of variations of Java accessible. The java system is the alias for the newest launch.
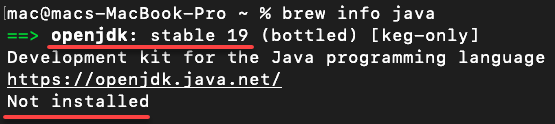
3. Run the beneath command to get detailed data (data) in regards to the java system.
As you may see beneath, presently of writing, the newest Java launch is nineteen, which isn’t put in but.
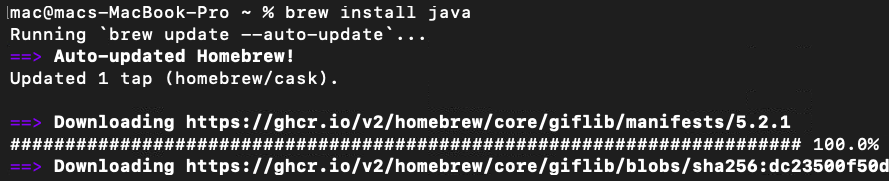
4. Now, run the next brew set up command to put in java in your Mac.
5. As soon as put in, run the beneath ln command to create a symbolic hyperlink (symlink) that factors to the put in Java model.
Within the command beneath, the next paths are as follows:
- /usr/native/choose/openjdk/libexec/openjdk.jdk – The created symlink.
- /Library/Java/JavaVirtualMachines/openjdk.jdk – The trail the place the symlink factors to.
Making a symlink is important as some purposes solely work accurately if they’ll discover a Java set up in the usual location.
sudo ln -sfn /usr/native/choose/openjdk/libexec/openjdk.jdk /Library/Java/JavaVirtualMachines/openjdk.jdkEnter your password when prompted to finish the method.

6. Lastly, run the beneath command to print the put in Java model.
The output beneath confirms you’ve got efficiently put in the newest model of Java in your Mac, the place:
- OpenJDK is an open-source implementation of the Java platform.
- JDK is the Java Growth Package, a set of instruments for creating Java purposes.
Congratulations! You’ve efficiently put in the newest Java launch in your Mac.

Putting in an Older or a Particular Model
The newest model of your Java set up ought to be high-quality and all. However “model compatibility” is a factor when constructing or creating packages. The excellent news is which you can set up older or particular variations of Java alongside different variations.
To put in an older or a selected Java model, you first have to search out the accessible ones:
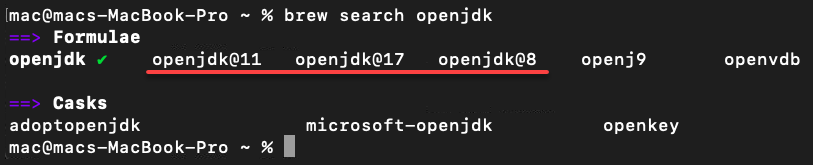
1. Run the beneath command to go looking the openjdk system for all accessible Java variations. This system normally comprises a lot older variations of Java than the java system.
Decide one from the accessible variations beneath ([email protected], 11, and 17) that you just want to set up.
💡 The [email protected] is the most recent LTS model, and a few purposes won’t assist it but.
2. Subsequent, run the beneath command to put in a selected Java model, changing <java_version> together with your most popular one.
brew set up <java_version>As you see beneath, this tutorial’s alternative is the [email protected] model since [email protected] is simply too outdated and isn’t beneficial anymore.

3. As soon as the set up completes, run the beneath command, which doesn’t present output however creates a symlink.
sudo ln -sfn /usr/native/choose/[email protected]/libexec/openjdk.jdk /Library/Java/JavaVirtualMachines/openjdk-11.jdk4. Lastly, run the precise java command beneath to confirm the model of your Java set up.

Putting in Java by way of the DMG Bundle
Should you fancy a GUI as a substitute of a command-line surroundings, you need to strive putting in Java with a DMG package deal (a disk picture file). A DMG package deal acts as a digital optical disc containing compressed software program set up information and different knowledge like bootable photos.
Putting in Java by way of a DMG package deal is a bit of bit extra guide work. However hey, clicking via a fundamental set up wizard wouldn’t damage.
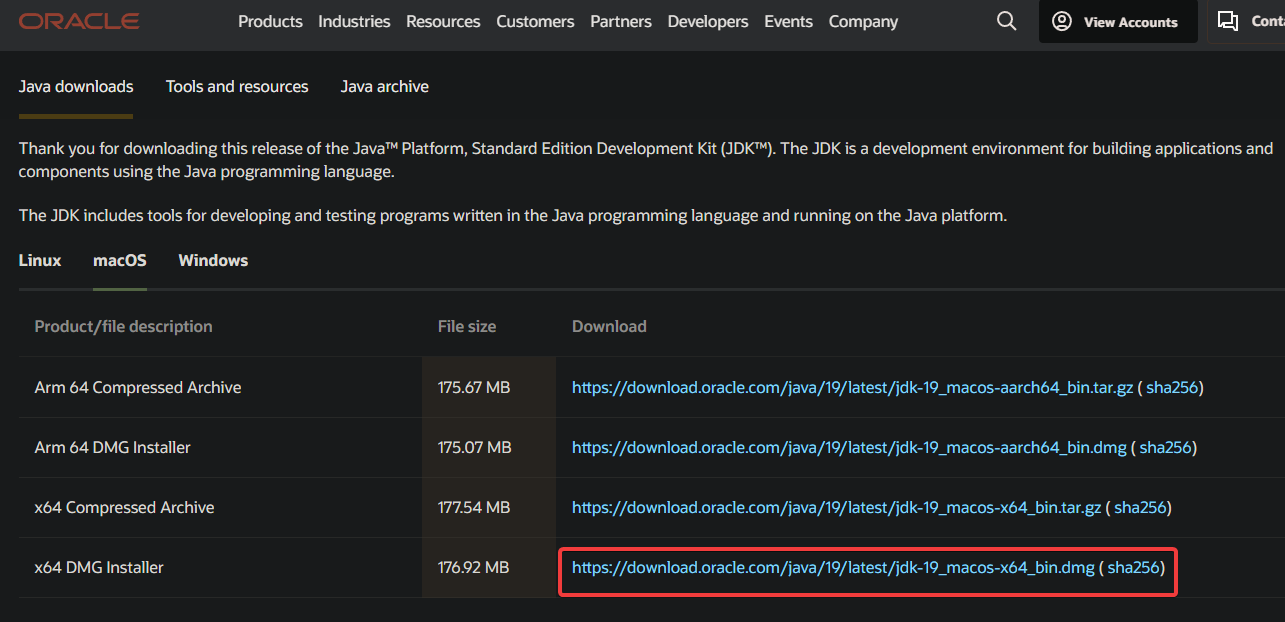
1. Open your favourite internet browser, and navigate to Oracle’s official Java downloads web page.
2. Subsequent, click on on the DMG hyperlink for the JDK model you need to set up to obtain its DMG package deal to your Downloads listing. The tutorial goes with Java 19, the newest model on the time of this writing.
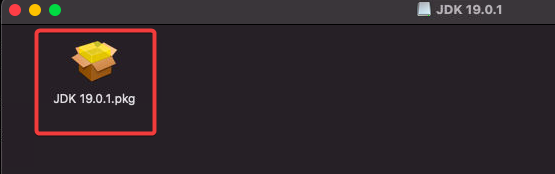
3. As soon as downloaded, double-click the DMG file to launch the installer.
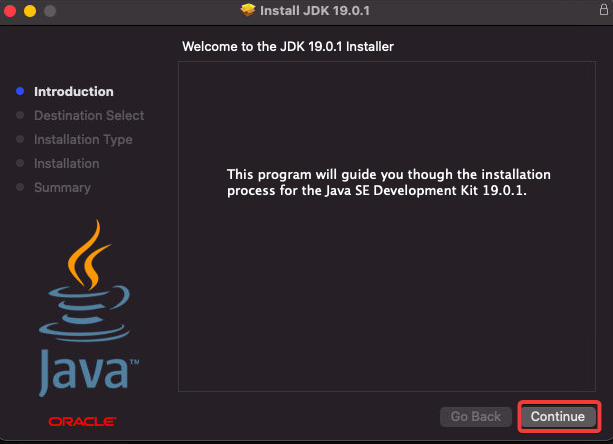
4. On the Introduction tab, click on Proceed to acknowledge the welcome web page.
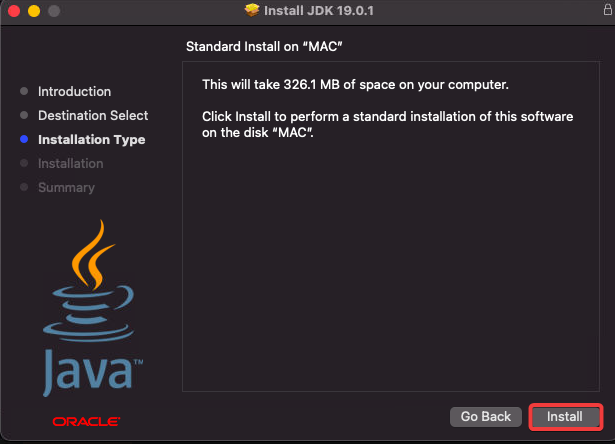
5. Now, click on Set up to the set up course of.
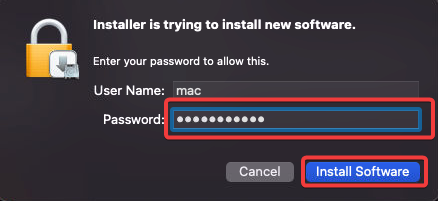
6. Enter your password when prompted and click on Set up Software program to authorize the set up.
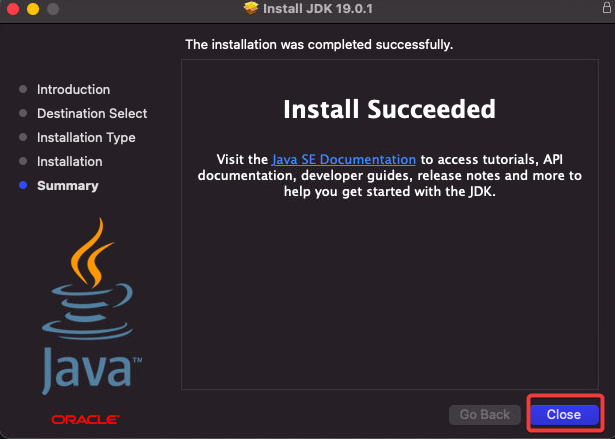
7. As soon as put in, click on Shut to shut the set up wizard.
And that’s it! You’ve now efficiently put in Java in your Mac by way of the DMG package deal.
8. Lastly, run the beneath command for the final time to verify the put in Java model.

Switching Between Java Variations
Suppose one venture requires Java 11, however one other requires Java 19. If that’s the case, how do you turn between the 2 Java variations? Fear not! You possibly can work on completely different Java variations, switching between every, in your Mac at will.
To modify between Java variations:
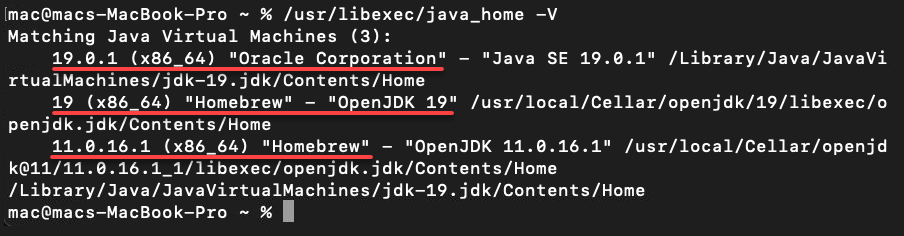
1. Run the beneath command to search out out the accessible variations of Java put in in your laptop.
/usr/libexec/java_home -VDecide one model you need to change to, as proven beneath.
2. Subsequent, run the beneath command to search out the present default Java model.
As you may see beneath, Oracle JDK 19 is presently the energetic or default Java model.

3. Run the beneath echo command to search out the present shell ($SHELL).
Discover within the output beneath that this tutorial makes use of the ZSH shell.

4. Now, run the beneath command to modify to a special Java model, changing <model> together with your most popular model.
These instructions carry out the next:
- export the trail of a selected Java model to the JAVA_HOME surroundings variable, which tells Java to make use of the model you specified.
- supply the profile and apply the adjustments.
💡 Maybe you’re on a Bash shell. If that’s the case, run the supply ~/.bashrc command as a substitute to supply the profile.
export JAVA_HOME=`/usr/libexec/java_home -v <model>`💡 Switching to a different Java model doesn’t present output, however you’ll later confirm if the change is successful.
5. Lastly, run the beneath instructions to confirm the present Java -version.
echo $JAVA_HOME
java -version
The output beneath confirms the model change is successful, as the present model is ready to OpenJDK 11.

Creating Your First Java Undertaking on Mac
Efficiently putting in Java and switching between variations don’t inform if Java is working accurately. How do you check if Java works in your Mac? You’ll create a fundamental “howdy world” program and use Java to compile and run this system.
To create a Java venture:
1. Run the next instructions to create a listing (mkdir) to your venture (hello-world), and alter the working listing (cd) into that listing.
These instructions don’t present output, however you’ll confirm the venture information within the following steps.
# Create the hello-world listing
mkdir hello-world
# Change the working listing
cd hello-world
2. Subsequent, create a file named HelloWorld.java in your most popular code editor, add the code beneath to the file, save the adjustments and shut the file.
The code beneath is a straightforward Java program that prints the Hey World message to the console.
# Create the hello-world listing
mkdir hello-world
# Change the working listing
cd hello-world
3. Run the next javac command, which doesn’t present output, however compiles your program (HelloWorld.java).
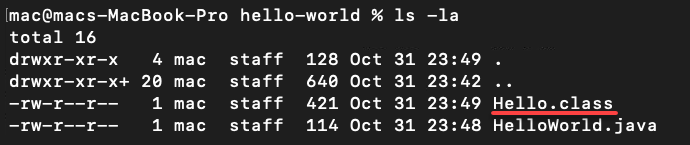
4. Now, run the command beneath to checklist (ls) all contents (-la) of the working listing (~/hello-world).
You will notice a brand new file named Hey.class is generated, as proven beneath. This file comprises the bytecode to your program.
5. Lastly, execute the beneath command to run your program (Hey).
This command calls the Java Runtime Setting to execute your program, the place the Hey class is loaded, and the primary methodology is executed.
The output beneath confirms that your program is working as anticipated and your Java set up is profitable.

Conclusion
On this tutorial, you’ve got discovered some ways learn how to set up Java on Mac and create a easy Java venture. Java is among the hottest programming languages on the earth. Each nook and nook of the tech business makes use of Java indirectly or the opposite.
And at this level, now you can confidently construct your tasks. Furthermore, since you may shortly change between variations, you by no means have to fret about model compatibility.
With this newfound information, why not construct your individual Java software and see the way it works?