


The Energetic Listing Customers and Computer systems (ADUC) console is used to handle your Energetic Listing. It’s put in by default on a site controller, however you can too set up ADUC on different servers and computer systems as properly.
ADUC is a part of the Distant Server Administration Instruments (RSAT), which lets you simply set up the required administration console with only some clicks. This lets you handle your Energetic Listing from your personal Home windows 11 workstation for instance.
On this article, we are going to take a look at learn how to set up Energetic Listing Customers and Computer systems on different servers and set up ADUC with the assistance of the RSAT instruments on Home windows 10 and 11. We will even take a look at a number of the foundation options and I’ve a time saver tip for you!
Set up Energetic Listing Customers and Computer systems
Whenever you set up a site controller, the Energetic Listing Customers and Computer systems console is added by default. However you most likely don’t need to give all of your helpdesk technicians entry to the area controller to solely create a brand new person or reset a password for instance.
We are able to set up the ADUC console on any member server and even on Home windows 10 and 11. When utilizing Home windows 10 or 11, you’ll need to just be sure you are utilizing the Skilled or Enterprise version. The house model is in fact not supported as a result of you may’t be a part of it to a site.
To put in the Energetic Listing Customers and Computer systems console, we’re going to add the RSAT function, which stands for Distant Server Administration Device. RSAT exists out of 27 instruments in whole, however we’re going to set up solely the next instruments:
- Energetic Listing Customers and Computer systems (ADUC) – To handle and create person and pc objects within the Energetic Listing
- PowerShell Energetic Listing Module – Can help you use PowerShell to handle your Energetic Listing
- Energetic Listing Domains and Trusts – Create and handle trusts between domains and forests
- Energetic Listing Websites and Companies – Used to handle websites and companies
- ADSI Edit – Lets you modify AD Objects on attribute degree
- Energetic Listing Administrative Middle – View the historical past of PowerShell instructions which are used to handle the AD. Configure password insurance policies and consider AD Trash
Set up ADUC on Home windows Server
So as to add the ADUC console to a Home windows Server we’re going to use the Server Supervisor.
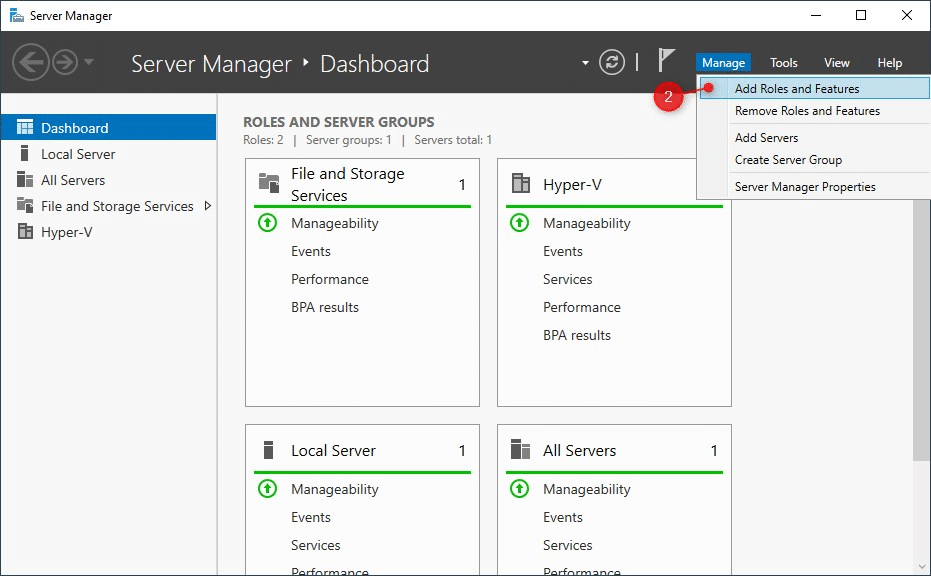
- Open the Server Supervisor (you will discover it in Begin or on the taskbar)
- Click on on Handle > Add Roles and Options
- Click on Subsequent (4x)till you’re at Options
- Increase the Distant Server Administration Instruments
- Increase Function Administration Instruments and AD DS and AD LDS Instruments
- Choose AD DS Instruments and I like to recommend putting in the Energetic Listing module for PowerShell as properly
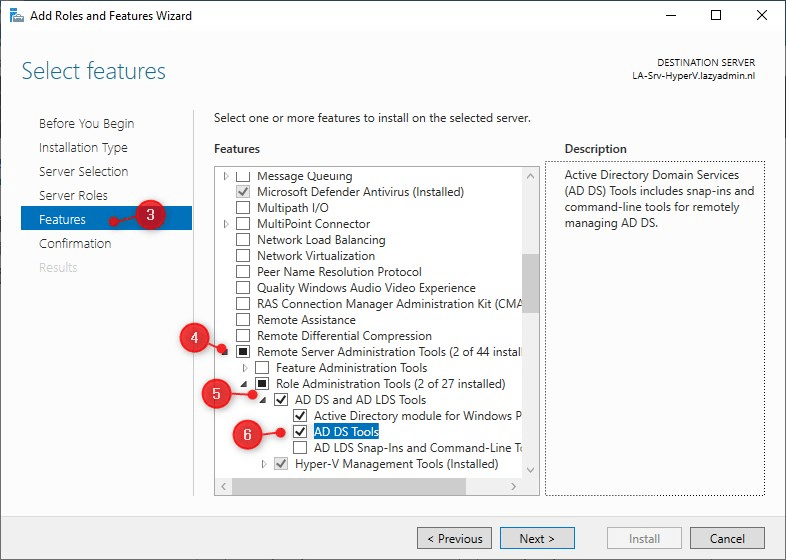
- Click on and Set up to put in the ADUC software.
It should take a minute or two to put in the brand new function. When it’s accomplished, you will discover the Energetic Listing Consumer and Computer systems console within the begin menu below Home windows Administrative Instruments.
Energetic Listing Customers and Computer systems on Home windows 11
You too can use Home windows 10 or 11 to handle your Energetic Listing. This fashion you don’t must check in on the Area Controller each time you have to create or modify a person object for instance.
To handle your AD from Home windows 11, you’ll need to put in ADUC with the assistance of the RSAT instruments. Similar to on a server, it is a function that we will simply add.
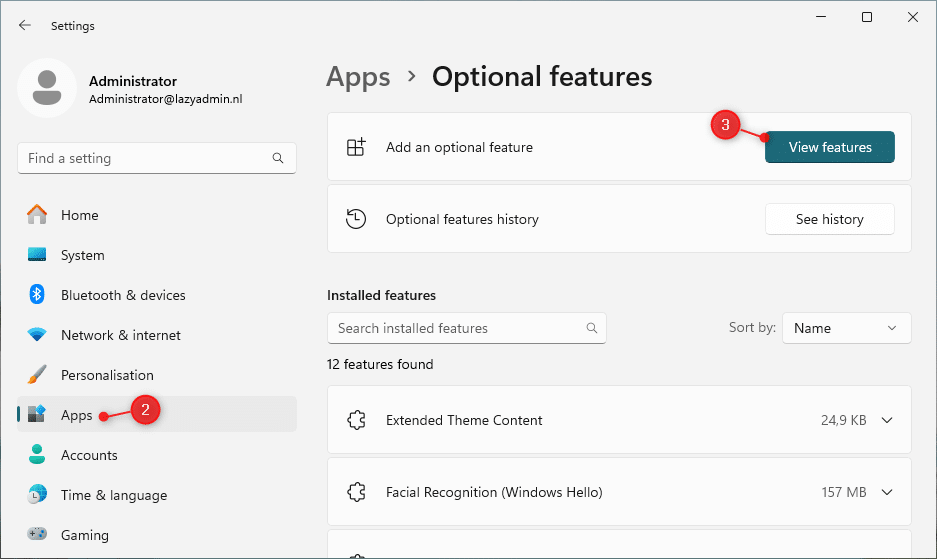
- Proper-click on Begin and open the Settings
- Go to Apps and select Non-obligatory Options
- Click on on View Options
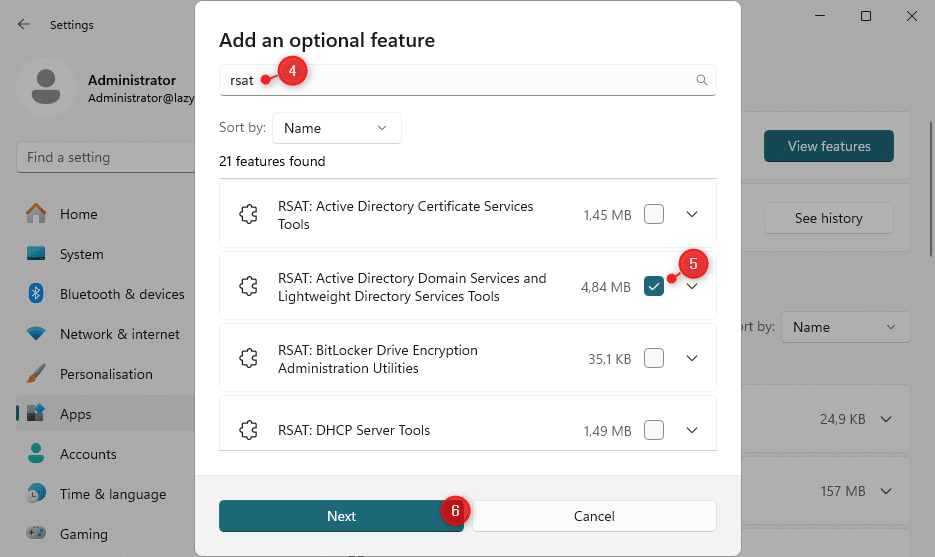
- Seek for RSAT
- Choose RSAT: Energetic Listing Area Companies and Light-weight…
- Click on on Subsequent and Set up to put in the function
After you’ve put in the RSAT function, you will see the Energetic Listing Customers and Computer systems console in your Home windows 11 begin menu.
Utilizing PowerShell
We are able to additionally set up the RSAT instruments with the assistance of PowerShell. The benefit of utilizing PowerShell is which you can simply add the instruments to distant servers, with out the necessity to of logging in on every machine.
To put in the ADUC instruments on Home windows 11 with PowerShell, you need to use the next command:
Add-WindowsCapability -On-line -Title Rsat.ActiveDirectory.DS-LDS.Instruments~~~~0.0.1.0
You’ll be able to confirm the set up with:
Get-WindowsCapability -Title "Rsat.ActiveDirectory*" -On-line | Choose-Object -Property DisplayName, State

# Outcome
DisplayName                                                                         State
-----------                                                                         -----
RSAT: Energetic Listing Area Companies and Light-weight Listing Companies Instruments Put in
To put in the ADUC instruments on Home windows Server with PowerShell, you need to use the next PowerShell command:
Set up-WindowsFeature RSAT-AD-PowerShell
Utilizing Energetic Listing Consumer and Computer systems
The ADUC is principally used to create and handle person accounts, pc objects, group membership and reset passwords. In small environments, all these duties are sometimes carried out by a single IT member, however the bigger the atmosphere, the extra you need to work with restricted roles and delegation.
Let’s check out learn how to carry out a few of these duties within the ADUC.
Creating Consumer Account
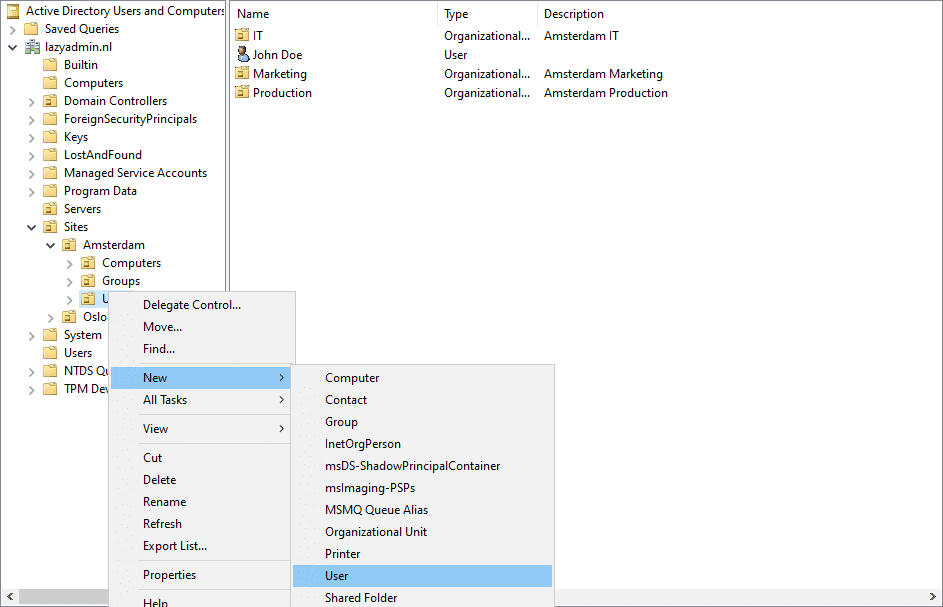
Creating a brand new person is among the frequent duties that you are able to do throughout the Energetic Listing Customers and Computer systems. First, navigate to the OU or container the place you need to create the brand new person account.
- Proper-click on the container or organizational unit (OU), and select New > Consumer
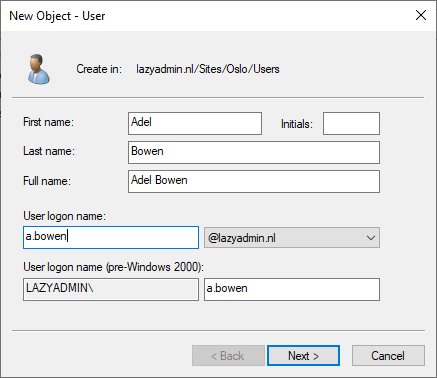
- Enter all the small print within the New Object – Consumer dialog, just like the title, and logon title.
- On the following display screen, enter a password. The perfect apply is to set a short lived password, and allow “Consumer should change password at subsequent logon”. This fashion the person can configure a robust password that solely she or he is aware of.
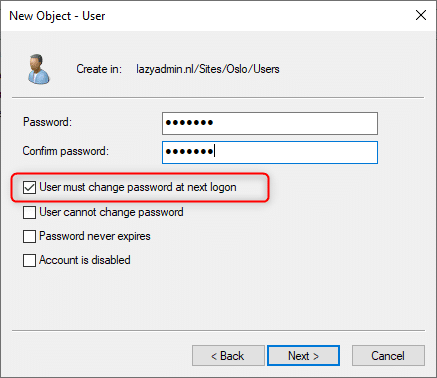
- Click on Subsequent and End to create the person.
The person account is now created, however you’re usually not completed but. Should you open the newly created person object, you will note which you can enter extra details about the person, like contact particulars and job title.
Additionally, you will usually must make the person a member of particular teams so the person has entry to all of the required sources.
A better solution to create a brand new person is usually to repeat an present person. This fashion all of the group memberships are copied, and in addition the deal with particulars from the corporate, for instance, are copied to the brand new person.
Reset, Allow, and Disable Accounts
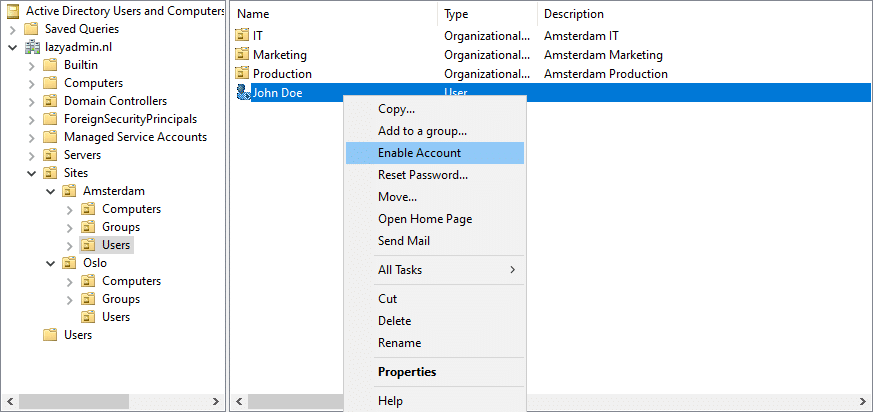
When a person enters a password unsuitable greater than 5 instances, the account can get blocked by the Energetic Listing. We are able to merely allow the account, or disable it, by opening the context menu of the person object within the ADUC.
- Proper-click on the person
- Select Allow Account
The identical technique will also be used to disable an account or reset a password. With the latter, you’ll need to enter a brand new non permanent password for the person.
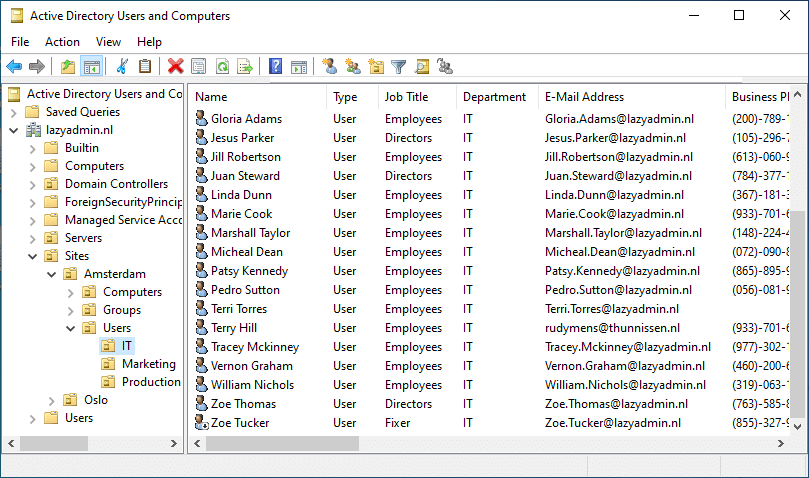
Including Collums
By default, the Energetic Listing Customers and Computer systems will solely present the title of the person, object kind, and outline. It will probably, nonetheless, be helpful so as to add extra columns to the overview. For instance, you may present the division, job title, or telephone variety of the person within the overview.
This fashion you don’t must open each use when you simply need to test or confirm a number of the info.
To vary the column, click on on View > Add/Take away Columns and choose the columns that you simply need to embody.
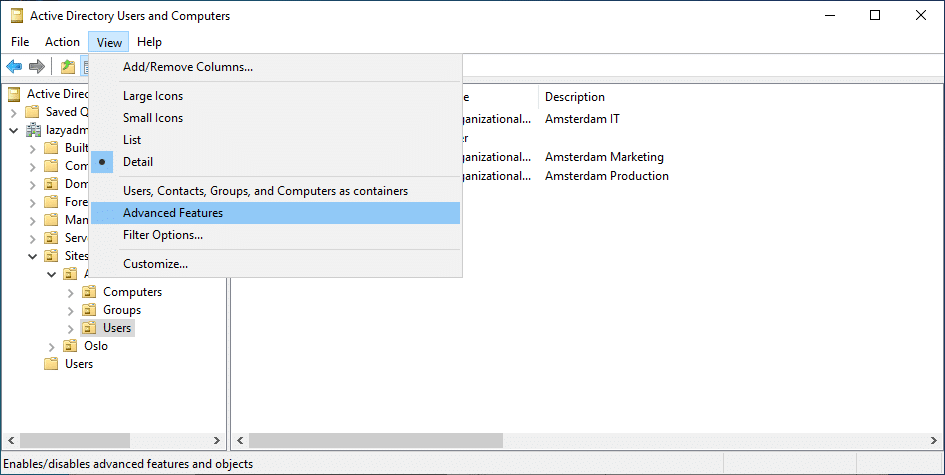
Exhibiting Superior Properties
By default, the ADUC will present you the fundamental containers and properties of objects. For many instances, this will probably be sufficient, however in some events, you’ll need to switch particular attributes. For instance, when you have to set the proxyAddresses attribute.
To view all properties and containers, you’ll need to allow the Superior Options in ADUC. Click on on View > Superior Options to allow it.
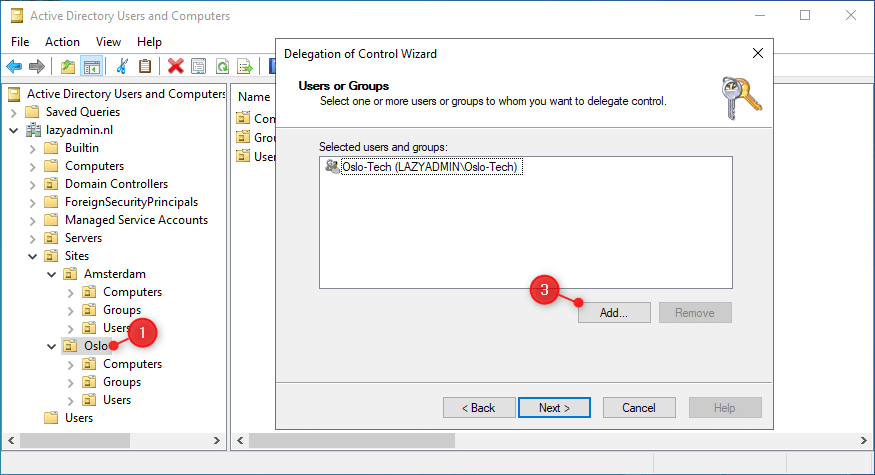
Setting Up Delegated Entry
Delegated entry permits you to give permission to customers or teams to handle a particular set of customers, computer systems, teams, or different objects within the Energetic Listing.
For instance, we’ve two websites in our Energetic Listing, Amsterdam and Olso. We solely need to give the IT guys in Oslo entry to the AD objects of Oslo.
- Proper-click on the OU the place you need to give delegated entry on
- Select Delegated Management
- Click on Subsequent, Add the person(s) or safety group to which you need to give entry, and click on Subsequent
- Choose the permissions that you simply need to give, for instance, solely reset person passwords, or full entry to create and delete accounts. You too can create customized duties if wanted.
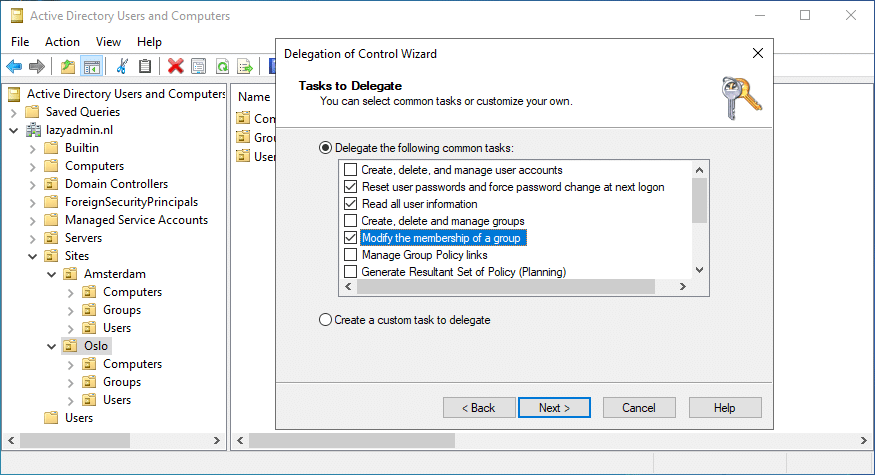
- After you’ve chosen the permissions, click on Subsequent and End to assign the permissions.
Discovering Objects
In bigger environments, it might probably generally be tough to search out that particular pc or person. As a substitute of clicking by way of all OU’s or Containers, you can too use the search operate in Energetic Listing Customers and Computer systems to rapidly discover it.
The search operate works from the chosen container or OU down. So if you choose the default Customers container, then it’s going to solely search within the customers.
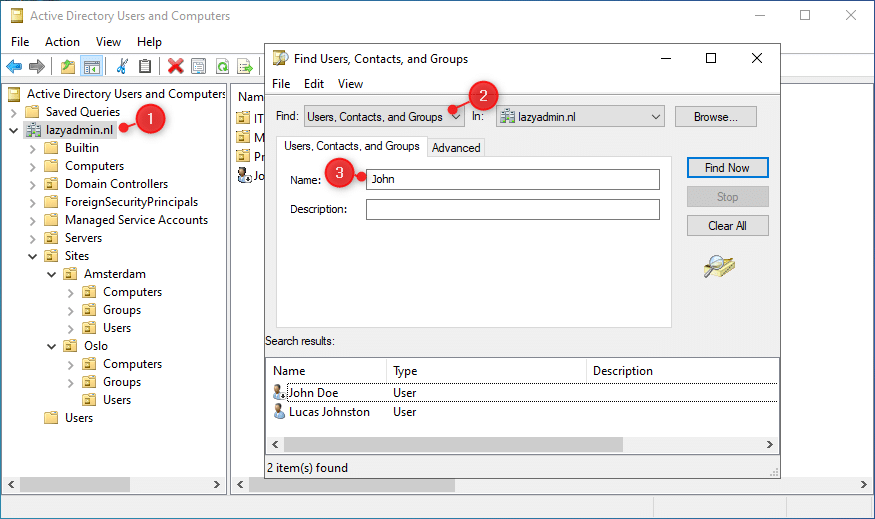
Personally, I search at all times on the area degree. For this, merely right-click in your area title (1) and choose Discover.
Within the Discover dialog, you’ll need to pick out what you’re trying to find (2). By default, Customers, Contacts, and Teams are chosen. However you can too seek for Computer systems, Printers, or Organizational Models for instance.
Enter the title, or part of, that you’re trying to find and click on on Discover Now
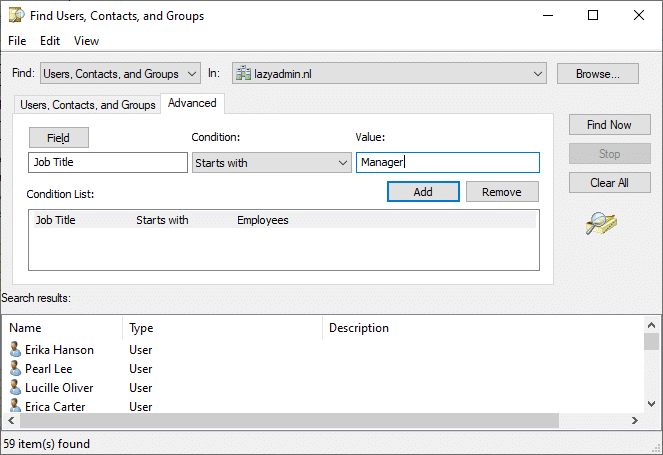
You too can use the Superior search choice, which lets you specify a number of circumstances to look on. For instance, we will discover all staff which have a particular job title:
Utilizing Queries
The Saved Queries within the Energetic Listing Customers and Computer systems is usually an ignored function that’s actually useful. It permits you to create customized search queries in your Energetic Listing and save them.
You need to use a number of the built-in queries, use the superior search options, and even create your personal LDAP question for the search folders.
A easy instance to create is the Inactive accounts queries:
- Proper-click on Saved Queries and select New > Question
- Enter a title (that is how it is going to be displayed within the sidebar)
- Choose the folder on which you need to run the question, for instance, your customers
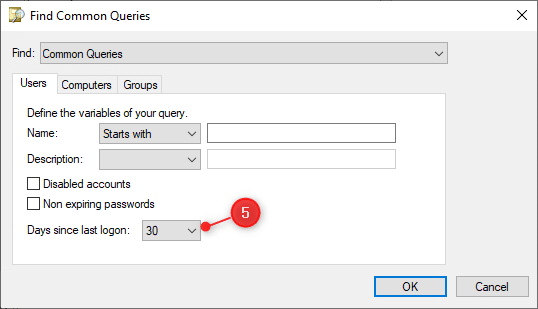
- Click on on Outline Question

- Choose days since final logon, and set it to 30 days for instance.
- Click on Okay (twice) to create the search question and consider the outcomes.
Wrapping Up
By putting in the Energetic Listing Customers and Computer systems in your pc you may simply handle your Energetic Listing with out the necessity of logging in on the area controller each time.
In case you are not utilizing PowerShell quite a bit, then just be sure you check out the Saved Queries function to create your personal assortment. These can actually be time savers in your every day work.
I hope you discovered this text useful, when you’ve got any questions, simply drop a remark under.