


So, you’re grappling with hybrid or multi-cloud deployments utilizing Azure Arc? Sustaining safety and compliance throughout a number of environments whereas holding observe of prices can rapidly develop into overwhelming. You could be considering, if solely there was a method to handle these blended environments in a constant, uniform system.
Properly, you’re in luck! With Azure Arc, you acquire centralized administration for assets deployed on-premises or with different cloud suppliers. On this information, we’ll delve deep into how one can put it to use to effectively handle your hybrid or multi-cloud setting.
Conditions for Utilizing Azure Arc
For a productive, hands-on expertise with this tutorial, be sure to’re arrange with the next stipulations:
- An Azure account with an lively subscription. Should you’re new to Azure, you possibly can simply create a free account.
- An on-premises Linux machine or a Linux server hosted by one other cloud supplier. For the needs of this information, we’ll deal with an on-premises Ubuntu 18.04 setup.
- Make sure that any firewall in place in your server permits port 443. That is essential for the Azure Arc agent to keep up safe communication with Azure over HTTPS.
Registering Azure Useful resource Suppliers
Earlier than diving into its functionalities, you should arrange two integral Azure Useful resource Suppliers:
Microsoft.HybridCompute – This useful resource supplier caters to hybrid machine assets inside Azure Arc.
Microsoft.GuestConfiguration – That is very important for implementing Azure Coverage on non-Azure (Visitor) machines.
Nevertheless, earlier than harnessing these useful resource suppliers, it’s essential to register them together with your Azure subscription. Whereas there are a number of avenues to register Azure Useful resource Suppliers (just like the Azure Portal or Azure CLI), for the scope of this tutorial, we’ll use PowerShell throughout the Azure Cloud Shell.
Right here’s a step-by-step rundown on how one can register these important useful resource suppliers:
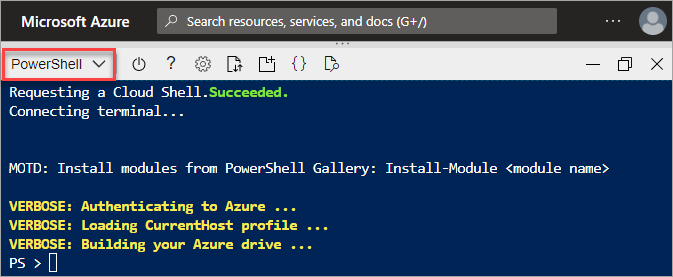
1. Launch an internet browser and authenticate into the Azure Cloud Shell utilizing your Azure credentials.
2. Go for PowerShell as your shell setting of selection, moderately than Bash.
3. As soon as inside, execute the next command within the Cloud Shell. This may enlist all of the Azure subscriptions tied to your account, with the –output desk parameter guaranteeing the output is introduced in an simply digestible desk format.
az account listing --output deskExecuting this command will show a listing of Azure subscriptions linked to your account, as illustrated under.
It’s essential to notice your subscription title or subscription ID. If managing a number of subscriptions, choose the one finest suited to this tutorial.

4. Execute the az account set --subscription command, guaranteeing to interchange <subscription Title or ID> with the precise title or ID you jotted down within the earlier step.
az account set --subscription <subscription Title or ID>5. With the specified subscription lively, proceed to run the next instructions to register the important useful resource suppliers.
# Register the Azure Arc Useful resource Suppliers
az supplier register --namespace 'Microsoft.HybridCompute'
az supplier register --namespace 'Microsoft.GuestConfiguration'
6. Lastly, to make sure all the things’s arrange appropriately, run the next instructions to validate the registration standing of every useful resource supplier.
# Validate the registration state of every Azure Arc useful resource supplier
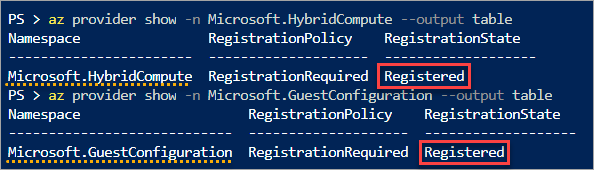
az supplier present -n Microsoft.HybridCompute --output desk
az supplier present -n Microsoft.GuestConfiguration --output deskDouble-check that the RegistrationState shows ‘Registered’, as showcased under.
If it’s at the moment indicating ‘Registering’, it’s nonetheless in progress. Pause for a second, then re-run the instructions for an up to date standing.
Crafting an Azure Arc Deployment Script
With all the mandatory useful resource suppliers registered, it’s time to create your script. This script, basically a JSON file, holds the blueprint of an Azure useful resource. On this phase, we’ll information you on crafting a deployment script by the Azure Portal.
To craft this deployment script, comply with the steps under:
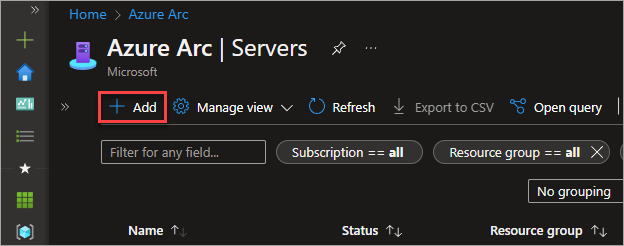
1. Head to the Azure Arc – Servers blade throughout the Azure Portal.
2. Hit the Add button to begin crafting your deployment script.
3. As this tutorial focuses on a single server, choose the Generate script button discovered contained in the ‘Add a single server’ card.
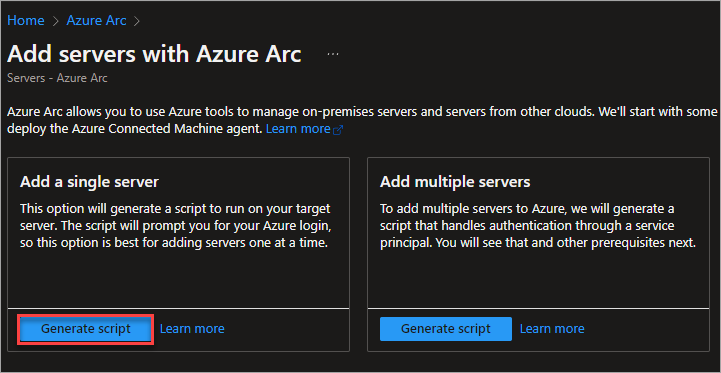
Different out there choices embody:
- Add a number of servers – Deploy the agent on quite a few machines.
- Add servers from Replace Administration (preview) – Deploy the Azure Arc agent on non-Azure servers managed by the Replace Administration service.
- Add servers with Azure Migrate – Make the most of Azure Arc to deploy the agent on VMware vSphere servers by way of Azure Migrate.
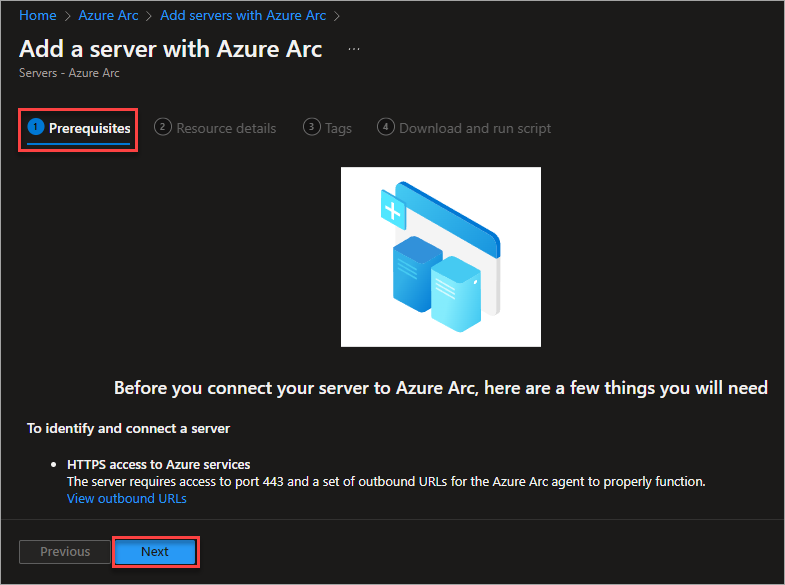
4. Through the Conditions step, retain the default settings and click on Subsequent.
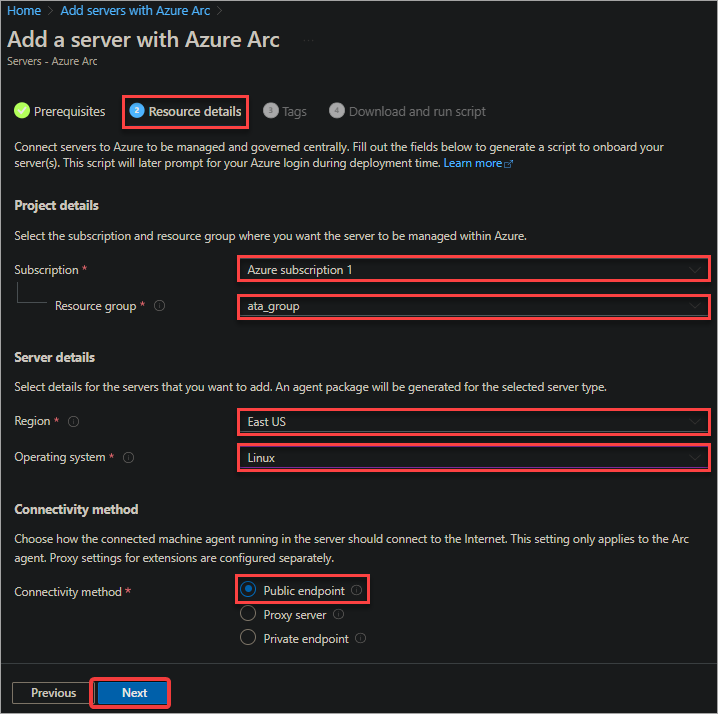
5. Within the Useful resource particulars step, present the next info.
Subscription – The Azure subscription you’d like to make use of for the Azure Arc deployment.
Useful resource group – The useful resource group the place you purpose to deploy the Azure Arc agent.
Area – Specify the Azure area for deploying the Azure Arc agent. This area will home your Arc metadata.
Working system – Outline the OS of your deployment goal. Choices embody Home windows and Linux. For this information, we’ll choose Linux.
Connectivity methodology – Select your required connectivity methodology for this Azure Arc deployment. Go for the Public endpoint, as this doesn’t necessitate any further community configurations.
Different strategies, resembling Proxy server and Personal endpoint, demand particular community setups, which this Azure Arc tutorial gained’t cowl.
After filling within the required particulars, click on Subsequent.
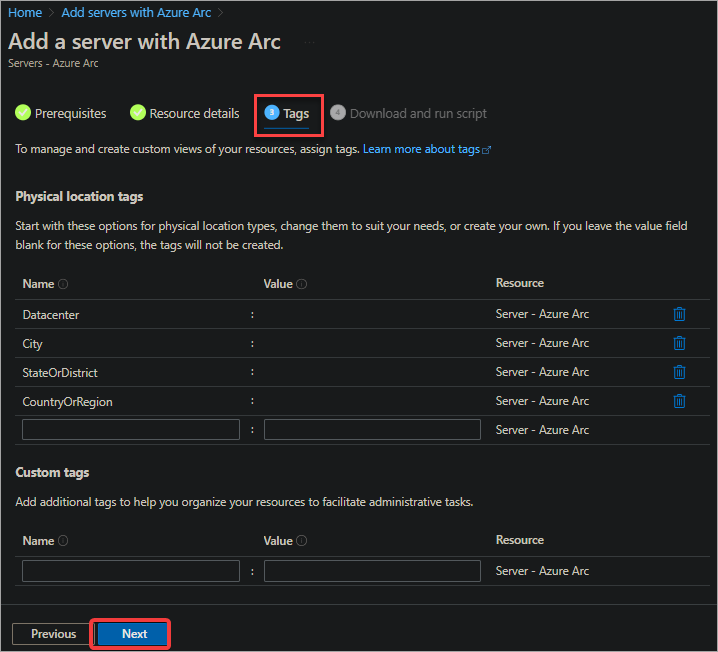
6. Within the Tags step, for now, keep the present tags and proceed by clicking Subsequent.
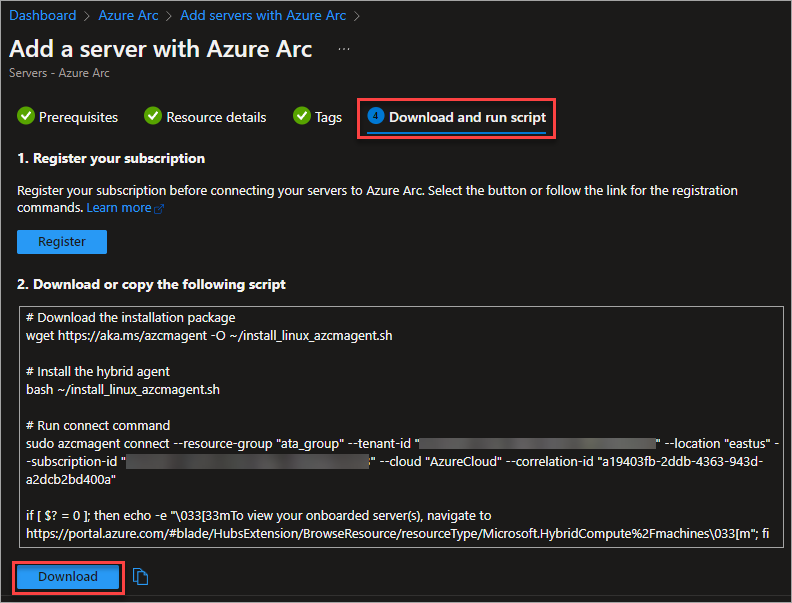
7. On the next display, you’ll view the script, auto-generated primarily based in your inputs. Faucet the Obtain button to acquire this Azure Arc script. By default, the script’s filename shall be OnboardingScript.sh.
8. Lastly, transport the script to your on-premises Linux server. The technique of transferring the script stays your choice. The next command copies the script by way of SCP to the /root listing in your Linux server. You may alter the goal listing as per your necessities.
scp .OnboardingScript.sh root@ubuntu:/root
The best way to Deploy the Azure Arc Agent on Linux
With the deployment script in hand and it efficiently copied to your on-premises Linux server, you’re poised to deploy the Azure Arc agent. Right here’s a step-by-step information to stroll you thru.
1. First, login to your Linux server. Double-check that your consumer account can entry the listing containing the script file.
2. Earlier than continuing, it’s a good suggestion to replace your native bundle listing. You’ll be putting in new packages, and this ensures you’re pulling the newest variations. Use the command under:
3. As soon as that’s carried out, navigate to the listing housing the deployment script (/root in our instance). From there, execute the Azure Arc deployment script named OnboardingScript.sh.
cd /root
bash OnboardingScript.sh
Keep affected person and look ahead to the script to supply a message. This message prompts you to open an internet site and enter a selected code for authentication.

4. Open your net browser, head over to the Azure Gadget Login web page, punch within the code supplied by the script, and hit Subsequent.
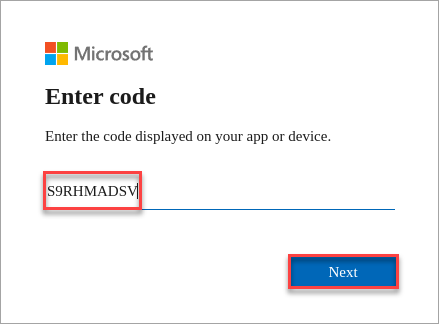
Upon profitable authentication, a “Efficiently Onboarded” message will grace your terminal display.

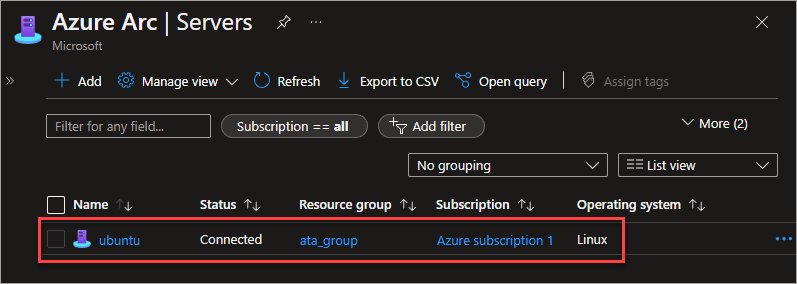
5. To spherical off, entry the Azure Arc – Servers part in your net browser. Verify to see in case your Linux server seems on the servers listing. Ideally, you must spot a Linux server named ‘ubuntu’ tagged as Linked, as proven under.
Azure Arc Servers Administration Necessities
Efficiently onboarding your Linux server to Azure Arc is simply the place to begin. So, what’s subsequent? Now you can harness the facility of Azure to handle this on-premises server, be it by the Azure Portal, Azure CLI, or Azure PowerShell instructions.
For this information, we’ll delve into how one can make use of the Azure Portal for widespread administration duties associated to Azure Arc.
1. From the Azure Arc – Servers web page, click on on the title of your server to discover its particulars.
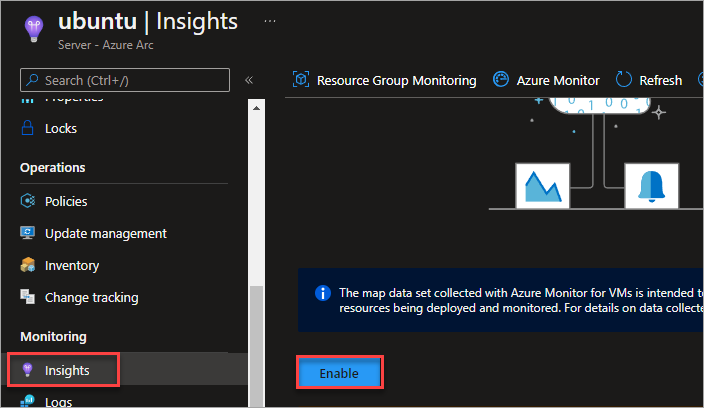
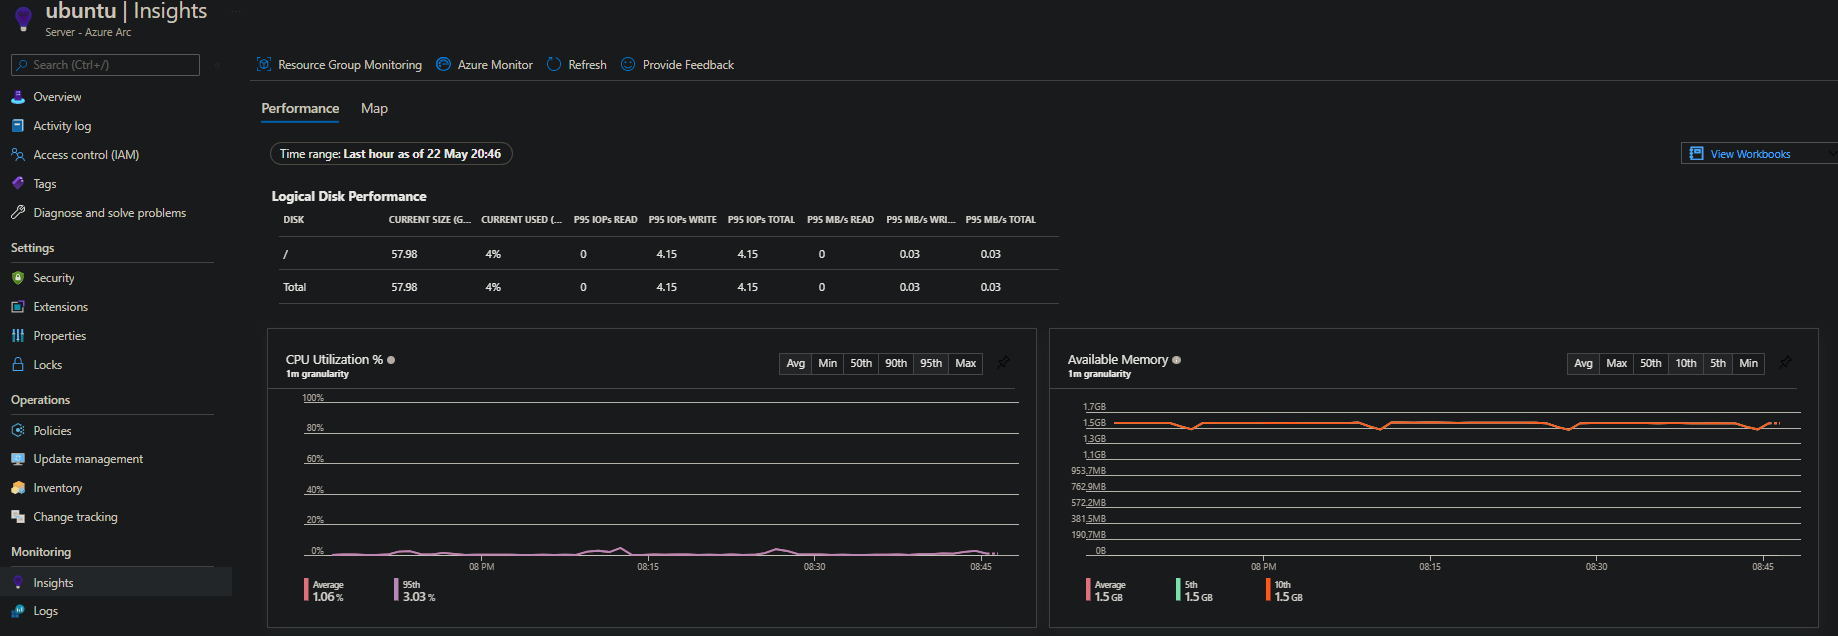
2. Underneath the ‘Monitoring’ part, choose ‘Insights’ and click on the ‘Allow’ possibility. This allows you to collect complete insights in your server’s efficiency and well being, proper from Azure.
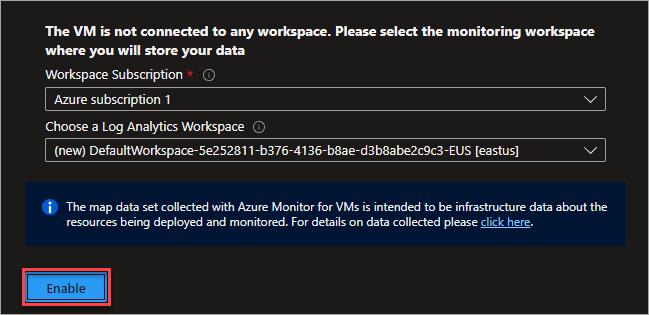
3. Subsequent, Azure will immediate you to pick out a subscription. This determines the place your monitoring information will reside. Hold the default settings and click on ‘Allow’ to proceed.
4. Give it a couple of minutes, and you must start to see information populating the insights web page. This information gives insights into metrics like CPU and RAM utilization in your Azure Arc-enabled server.
5. There’s extra to discover! Click on on the ‘Map’ tab, and also you’ll be introduced with an interactive map in your display, showcasing varied parts related to your server.
For a more in-depth look, click on on the ‘Purchasers’ object. It’ll reveal all of the consumer IP addresses which might be speaking together with your server.
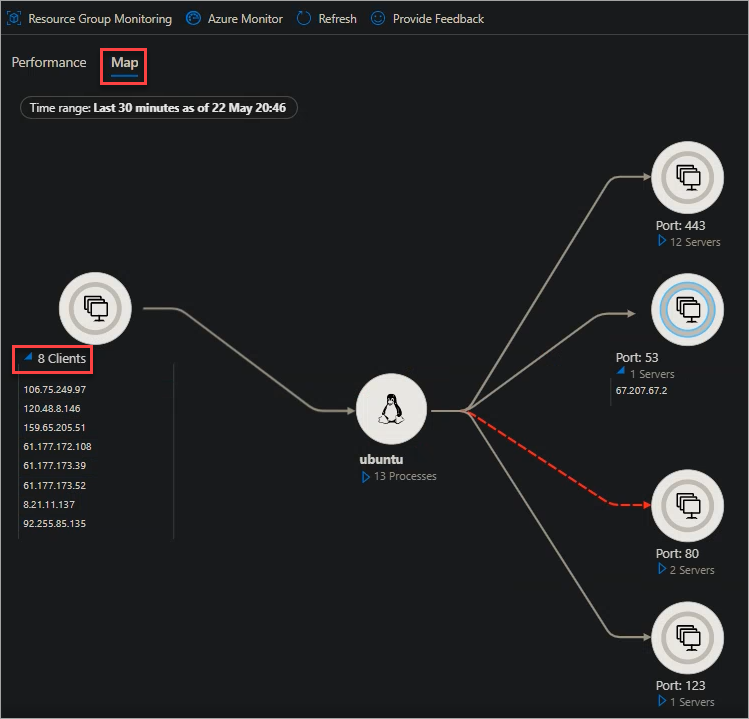
That’s not all; you can too acquire insights into the processes working in your server. Simply click on on the ‘Processes’ object.

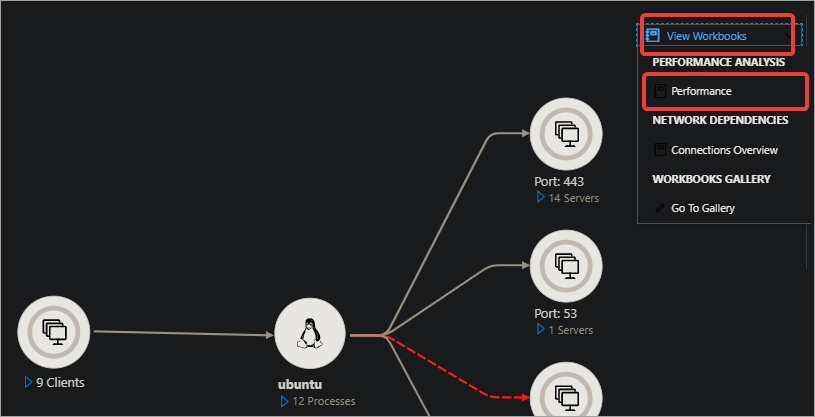
6. Dive deeper by clicking ‘View Workbooks’ adopted by ‘Efficiency’.
You’ll be introduced with a Efficiency Evaluation pattern chart of your server, providing insights into its operation over time.
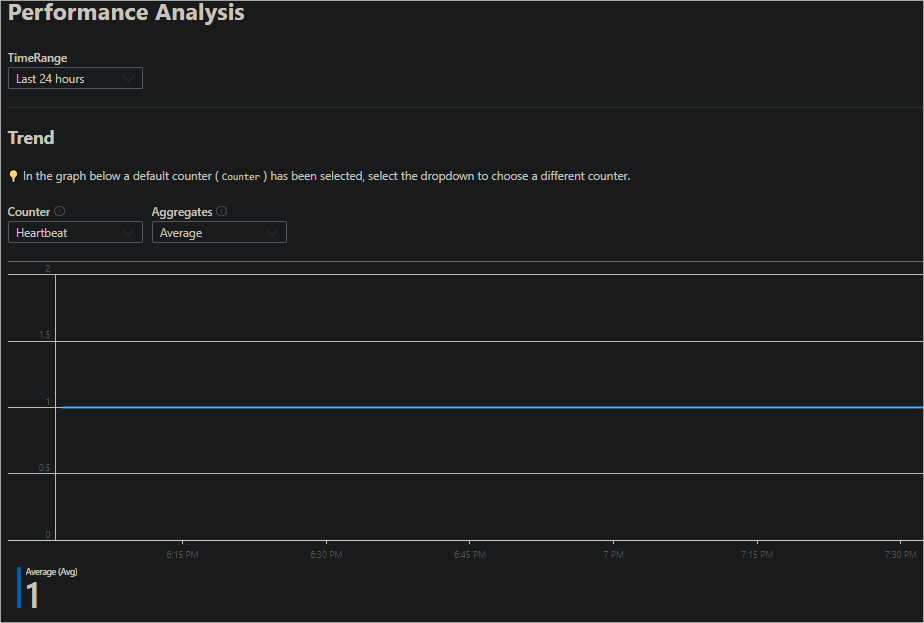
Scroll down additional to uncover detailed CPU and Reminiscence Efficiency Charts, providing a snapshot of your server’s effectivity.

Wrapping Up With Azure Arc
You’ve efficiently navigated the set up and configuration of the Azure Arc agent for hybrid and multi-cloud administration. Furthermore, you’ve uncovered how one can make the most of the Azure Portal for hands-on administration of Azure Arc-enabled assets.
It transforms the way you oversee on-premises machines and assets, bringing them beneath the Azure umbrella. This highly effective answer paves the way in which for adopting and thriving with hybrid and multi-cloud methods.
So, take a leap. Experiment and unravel its huge options, and if you’re set, delve into different Azure guides to join your assets seamlessly throughout platforms.