


Verifying the Reboot Restore Rx’s Performance
Reboot Restore Rx is totally set, however how have you learnt it really works? Sustaining your pc’s stability and safety is paramount. Thus, verifying the operational standing of Reboot Restore Rx post-installation is a essential step.
To make sure Reboot Restore Rx is successfully safeguarding your system’s integrity, proceed with the next:
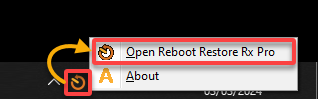
1. Proper click on the Reboot Restore Rx icon within the system tray, and choose the choice to Open Reboot Restore Rx Professional, as proven under.
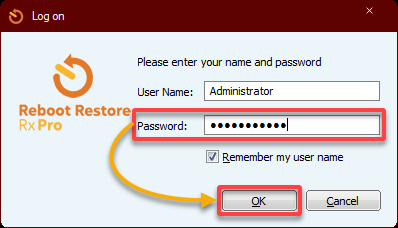
2. When prompted, hold the Consumer Identify, present the Password you set through the set up, and click on OK to entry the Reboot Restore Rx Professional dashboard (step three).
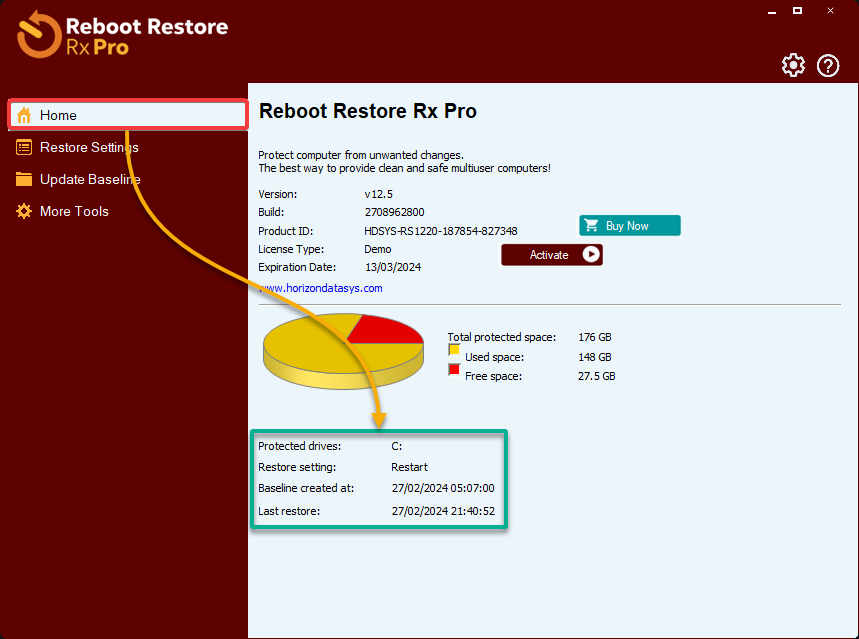
3. Within the dashboard, navigate to House (left pane) and ensure the next:
- Search for a line that states, Baseline created at…, which confirms a profitable baseline snapshot of your system. This baseline is created robotically throughout set up.
- Your root C: drive is listed as protected, guaranteeing it’s safeguarded.
- The restore setting is ready to Restart, which signifies the C: drive will reset to the baseline state with each system reboot.
4. Now, open PowerShell and execute the next New-Merchandise command to alter the protected C: drive intentionally by creating a brand new listing (test_dir).
New-Merchandise -ItemType Listing -Path c:test_dir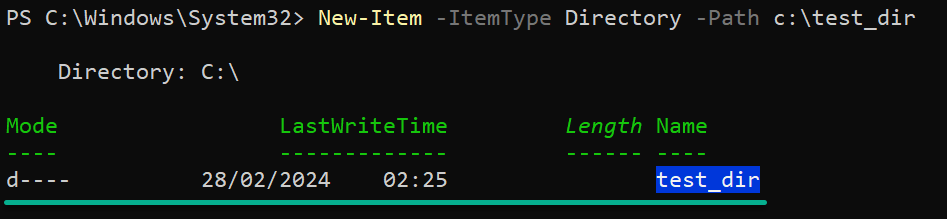
5. Restart your pc, and you’ll discover the newly created test_dir listing is not current. This final result signifies that Reboot Restore Rx has reset the system’s baseline state.
6. Lastly, execute the next Check-Path command to confirm the c:test_dir listing has been eliminated.
The anticipated output is False, as proven under, which confirms the test_dir listing has been eliminated by Reboot Restore Rx.
You may relaxation assured that Reboot Restore Rx capabilities as supposed, retaining your system’s configuration intact and safe in opposition to undesirable modifications.
