


Are you a techniques and community administrator working with Home windows-centric purchasers, servers, and networked companies? In that case, likelihood is you might have already seen the favored Linux command line device referred to as Sudo. However how does the Linux Sudo Home windows port work in PowerShell?
On this tutorial, you’ll learn to set up the Linux Sudo Home windows port in PowerShell. Get your self a strong useful resource combining benefits to your every day operations.
Prepared? Dive in to get the very best of each worlds!
Stipulations
This tutorial contains hands-on demonstrations. Guarantee you might have the next in place to observe alongside:
- A Home windows system with PowerShell put in – This tutorial makes use of Home windows 10 with PowerShell 7 put in.
Putting in the Linux Sudo Home windows Port
In recent times, the facility of Sudo, a necessary open-source device, has been ported to Home windows. In consequence, a extra complete suite of instruments for on a regular basis IT duties has been created. However nonetheless, Sudo doesn’t come put in along with your Home windows system by default.
To put in Sudo for Home windows, observe these steps:
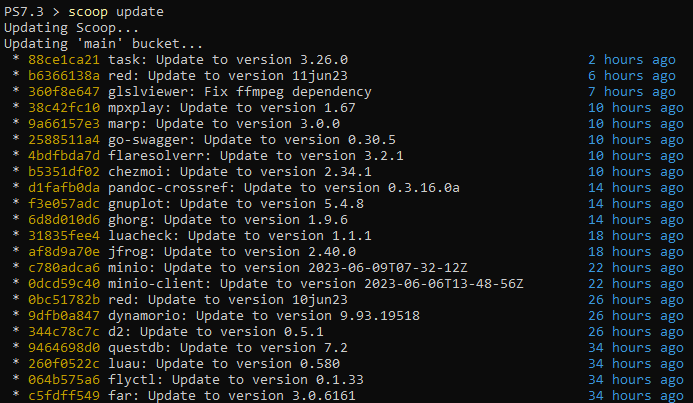
1. Launch PowerShell, and execute the next scoop command to replace Scoop.
This command ensures that Scoop, the package deal supervisor for Home windows (like apt for Ubuntu), is updated with the most recent packages and dependencies.
2. As soon as up to date, run the beneath command to set up sudo for Home windows.

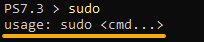
3. Lastly, run the sudo command beneath with out arguments to confirm the set up.
The output of the sudo utilization assertion beneath confirms that Sudo has been efficiently put in.
Elevating Privileges with Sudo in PowerShell
With Sudo put in in your Home windows system, now you can use its performance inside your PowerShell scripts. Sudo turns out to be useful when executing instructions requiring administrative privileges, however the shell presently runs with common consumer privileges.
In such instances, you would want to restart PowerShell as administrator to proceed. However with Sudo, you possibly can execute instructions with elevated privileges with out restarting the shell. This effectivity is much like the performance supplied by the sudo command in Linux.
To see how Sudo works in PowerShell, beneath are some examples that allow you to invoke a PowerShell command with administrator privileges:
1. Execute the next Set-Content material command as an everyday consumer.
This command appends the content material worth of 127.0.0.1 localhost to the file referred to as hosts2 within the C:WindowsSystem32driversetc listing.
Set-Content material -Path C:WindowsSystem32driversetchosts2 -Worth "127.0.0.1 localhost"Beneath, the command fails and provides out an “Entry Denied” error. This error is anticipated since opening and modifying the hosts2 file in C:WindowsSystem32driversetc requires administrator privileges.

2. Subsequent, execute the identical command beneath, however this time, as an administrator by appending sudo.
sudo Set-Content material -Path C:WindowsSystem32driversetchosts2 -Worth "127.0.0.1 localhost"Discover that the command gives no output, which signifies the execution is profitable and the specified content material has been appended to the hosts2 file with out error.

sudo)3. Now, run the Get-Content material command beneath to view the content material of the hosts2 file.
Get-Content material -Path C:WindowsSystem32driversetchosts2You will notice that the 127.0.0.1 localhost line was added to the hosts2 file, as proven beneath.
This output confirms that Sudo works as supposed in elevating privileges if you run a PowerShell command.

sudo commandPutting in and Utilizing gsudo as an Various to sudo
Having fun with sudo to date? As well as, a substitute for sudo referred to as gsudo gives some benefits. For instance, gsudo can detect your present shell and elevate privileges accordingly, treating instructions as native shell instructions.
This characteristic makes gsudo appropriate with varied shells, akin to CMD, PowerShell, WSL, git-bash, and extra. However like sudo, it’s essential to first set up gsudo earlier than you should utilize it to raise privileges.
To put in and use gsudo on Home windows, observe the steps beneath:
1. Run the next command to units the execution coverage to RemoteSigned (if not already set).
This command ensures the TLS 1.2 protocol (Tls12) is used, downloads, and executes the gsudo set up script (installgsudo.ps1) from the desired URL.
PowerShell -Command "Set-ExecutionPolicy RemoteSigned -scope Course of; [Net.ServicePointManager]::SecurityProtocol="Tls12"; iwr -useb https://uncooked.githubusercontent.com/gerardog/gsudo/grasp/installgsudo.ps1 | iex"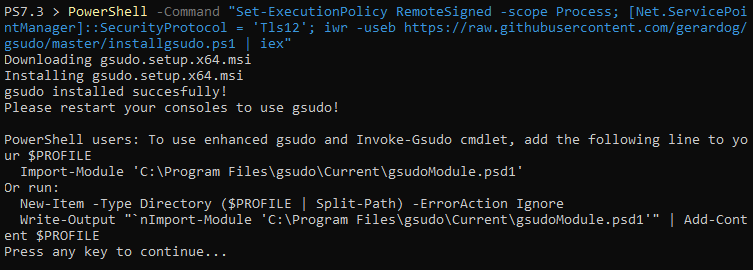
gsudo on Home windows2. Subsequent, execute the beneath gsudo command to examine the model put in.
The output beneath confirms you might have put in gsudo in your Home windows system. At this level, you possibly can already use gsudo as a substitute for sudo.
However nonetheless, it’s essential to take a look at if gsudo works as supposed (step three).

gsudo3. Execute the command beneath to open the hosts2 file in notepad.
Whenever you run the command, gsudo routinely detects your present shell and elevates the command accordingly.
gsudo notepad C:WindowsSystem32driversetchosts2
gsudo as a substitute for sudo4. Lastly, edit the hosts2 file and save the adjustments.
For those who open the file with elevated privileges, saving the adjustments goes easily, as proven beneath.
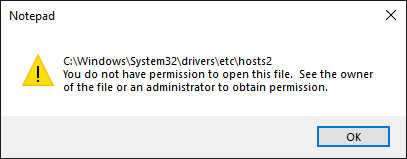
However with out utilizing gsudo to open the file, the next message pops up if you save the adjustments.
Conclusion
On this tutorial, you might have discovered to put in and configure the Linux Sudo Home windows port in PowerShell. With Sudo put in, now you can effortlessly execute administrative instructions out of your common consumer shell, eliminating the necessity to restart as an administrator.
In addition to sudo, you additionally discovered to make use of gsudo instead command that provides superior options, akin to automated shell detection and treating instructions as native shell instructions.
This tutorial is just the start of your journey. Proceed increasing your experience. Why not create PowerShell aliases for sudo and gsudo instructions to make them simpler to make use of?