


In case you are stressing over information evaluation and manually finishing up question statements or handbook imports, why not think about using the Energy BI Knowledge Gateway? With Energy BI Knowledge Gateway, you’ll be able to simplify and virtualize information evaluation.
On this tutorial, you’ll learn to arrange information sources seamlessly and effectively utilizing Azure SQL Server and On-premises information gateway.
Enhance your day-to-day information visualization by connecting sources to your Energy BI Knowledge Gateway!
Conditions
This tutorial shall be a hands-on demonstration. To observe alongside, make certain you’ve got the next:
- Energy BI put in in your native machine, the model on this tutorial is 2.97.
Connecting On-premises to Energy Bi Knowledge Gateway
On-premises information gateway bridges the hole between Energy-Bi and cloud-related apps or software program, making a path the place you’ll be able to securely transfer your information from one finish to a different. Though the gateway isn’t chargeable for transferring information, the gateway creates a server or a medium to switch your information.
Earlier than connecting the on-premises information gateway to Energy BI, you should set up the usual gateway in your native machine.
Examine the necessities for On-Premises Gateway set up.
1. Obtain the commonplace gateway file, and open the installer as soon as downloaded.
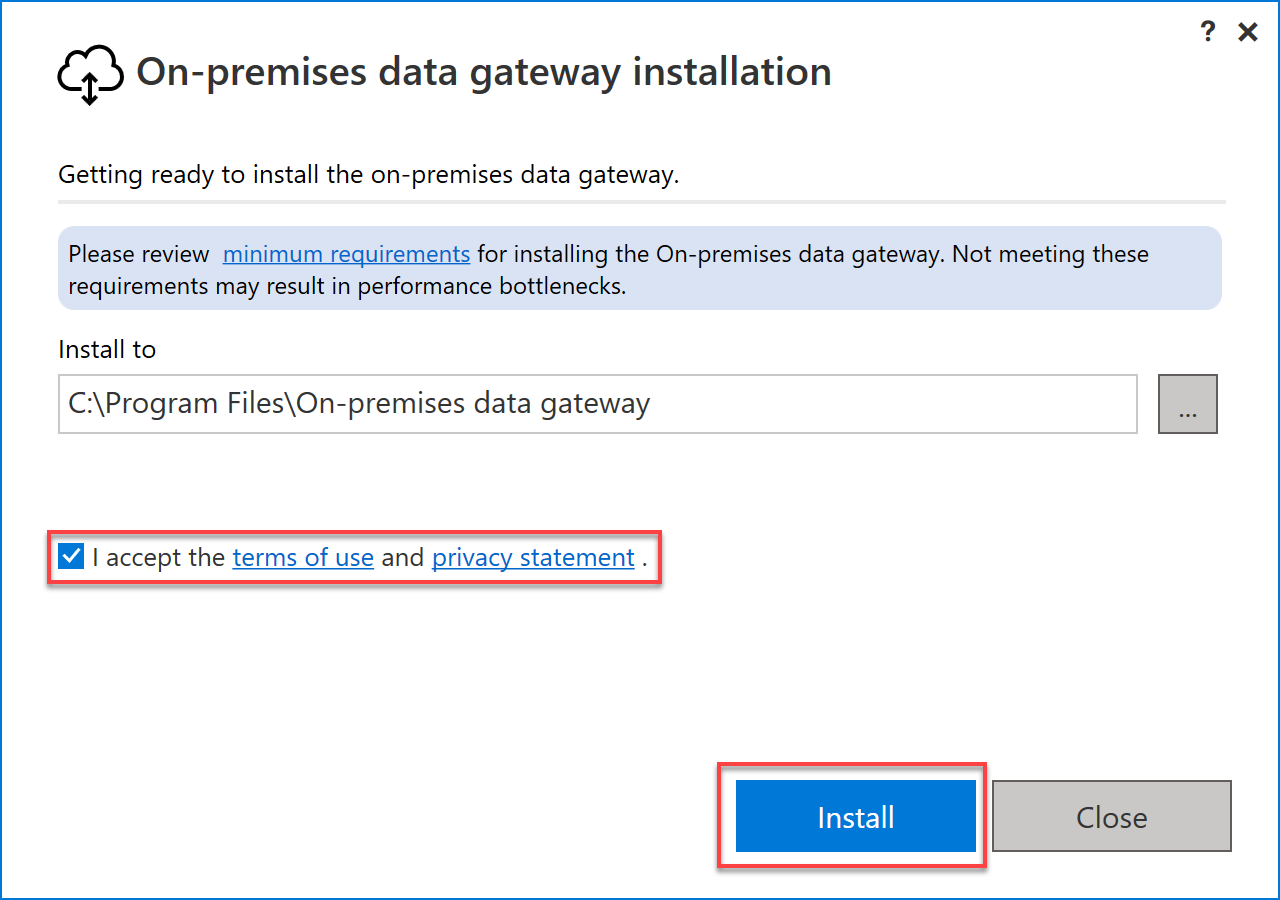
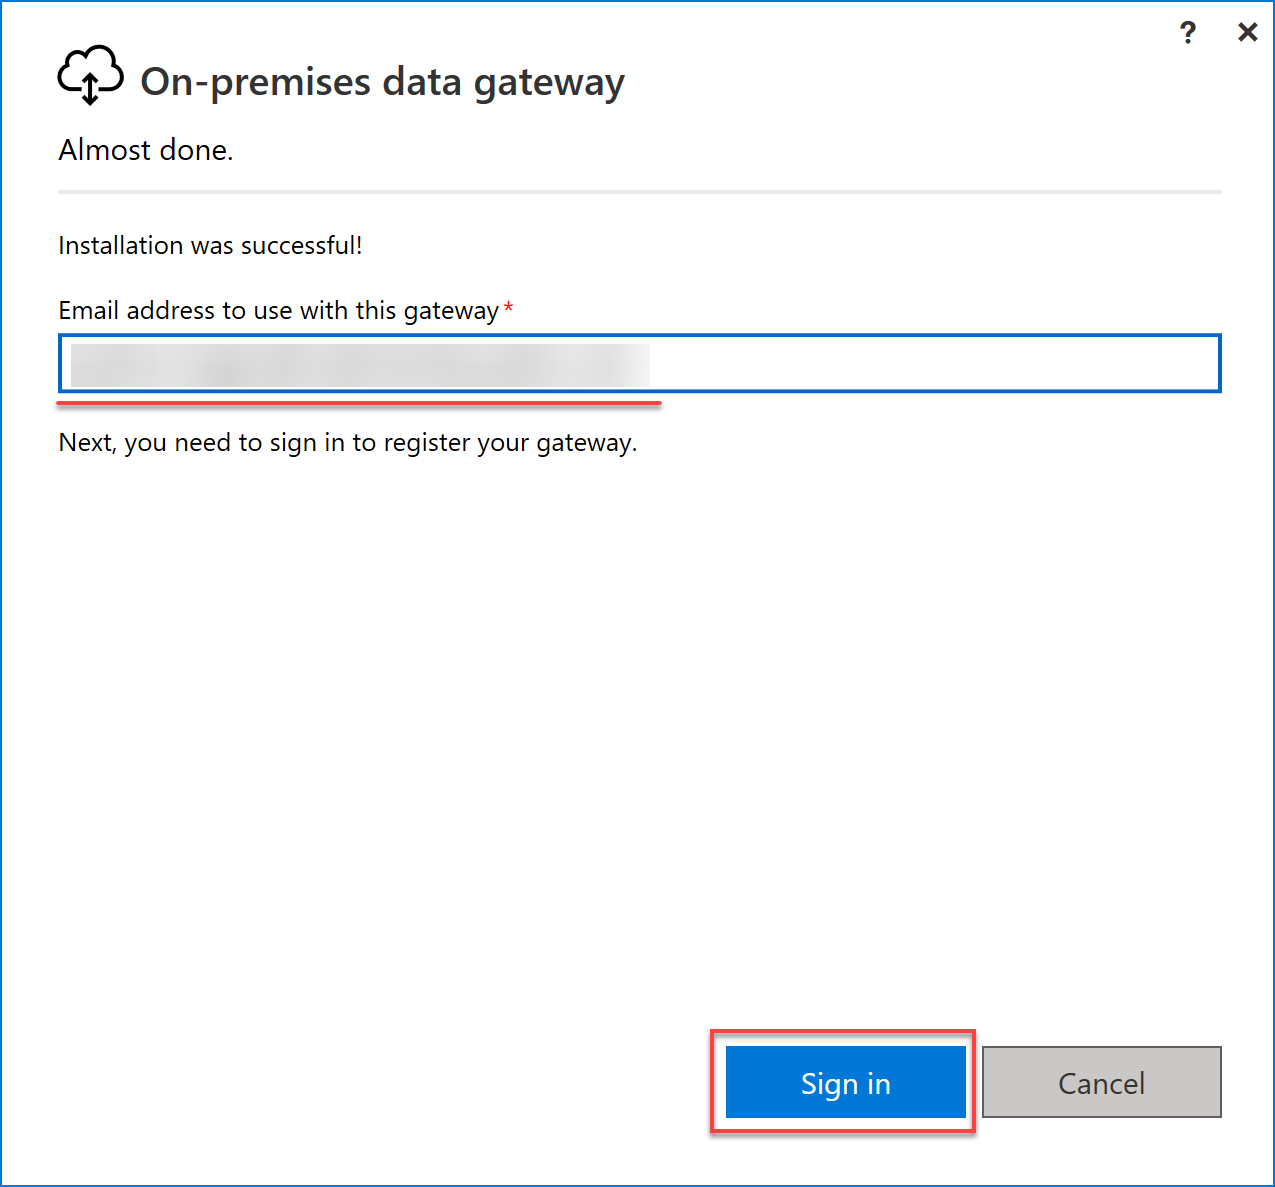
2. Subsequent, present the e-mail deal with you wish to hook up with the gateway and click on Signal In. Guarantee the e-mail deal with is identical because the one related to your Energy Bi account.
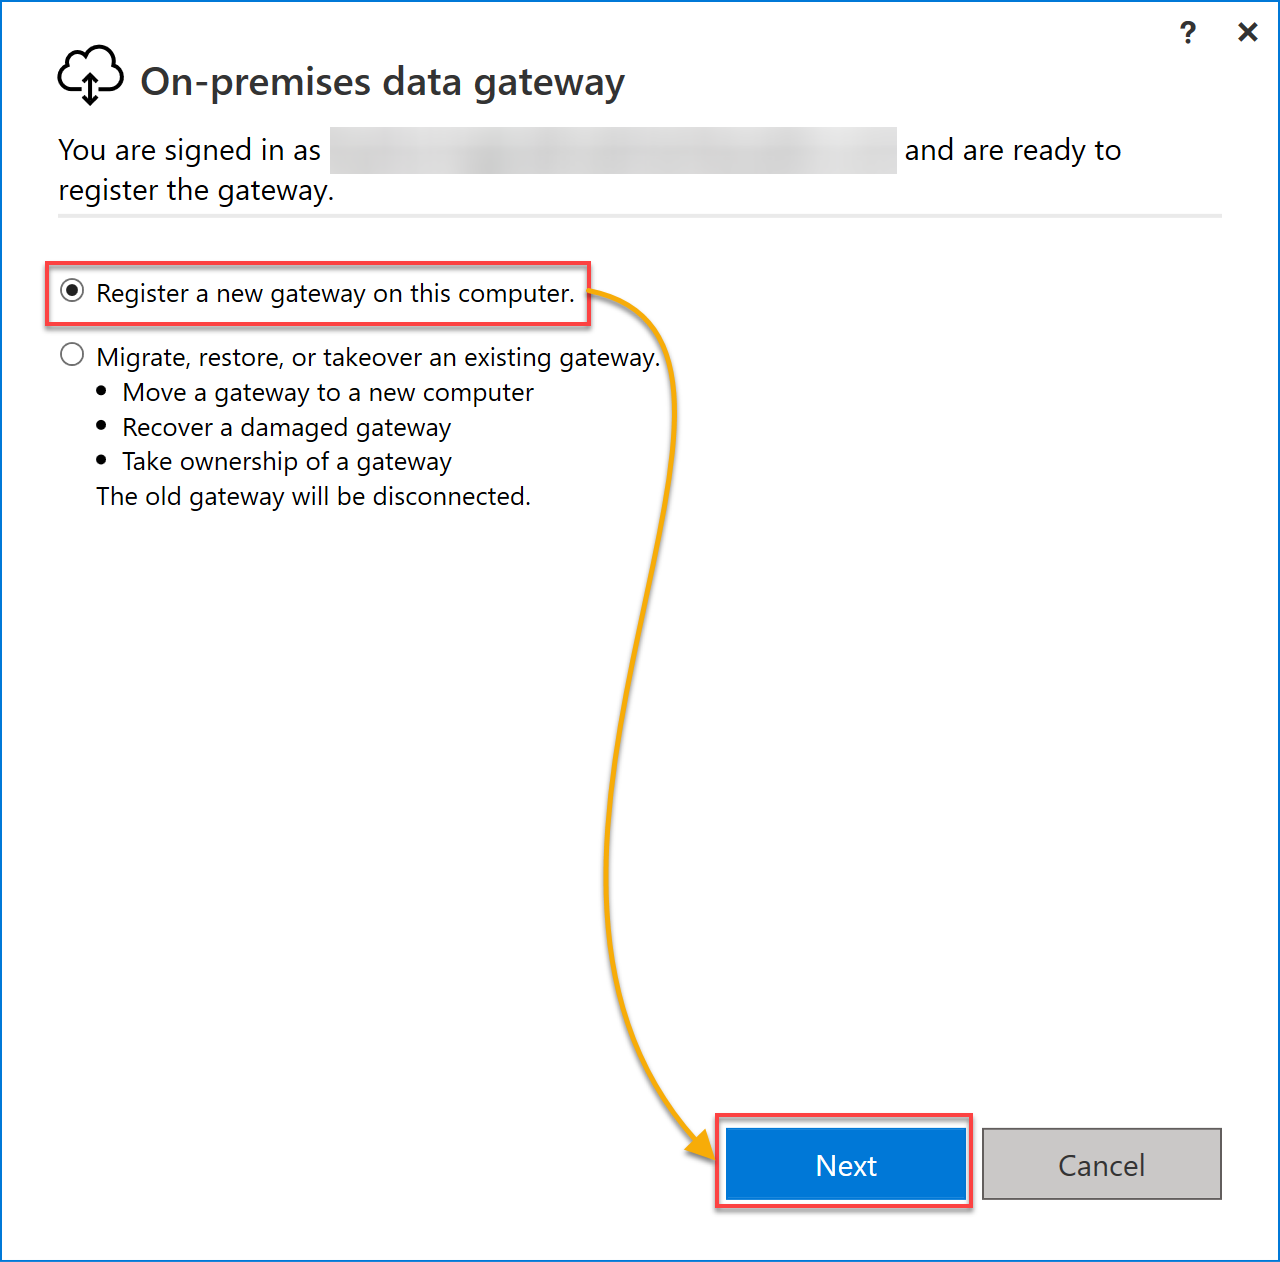
3. As soon as signed in, select the Register a brand new gateway on this pc possibility, and click on Subsequent. This selection creates a brand new gateway on the On-premises information gateway.
4. Now, configure the on-premises information gateway with the next:
- Present an on-premises information gateway title.
Optionally, tick the Add to an present gateway cluster field so as to add the information gateway to an present cluster.
- Present, and make sure a Restoration key that consists of a minimal of eight characters. This key’s saved and used to confirm your possession whenever you lose entry to the on-premises gateway.
- Click on Configure to avoid wasting your settings and arrange your created on-premises information gateway.
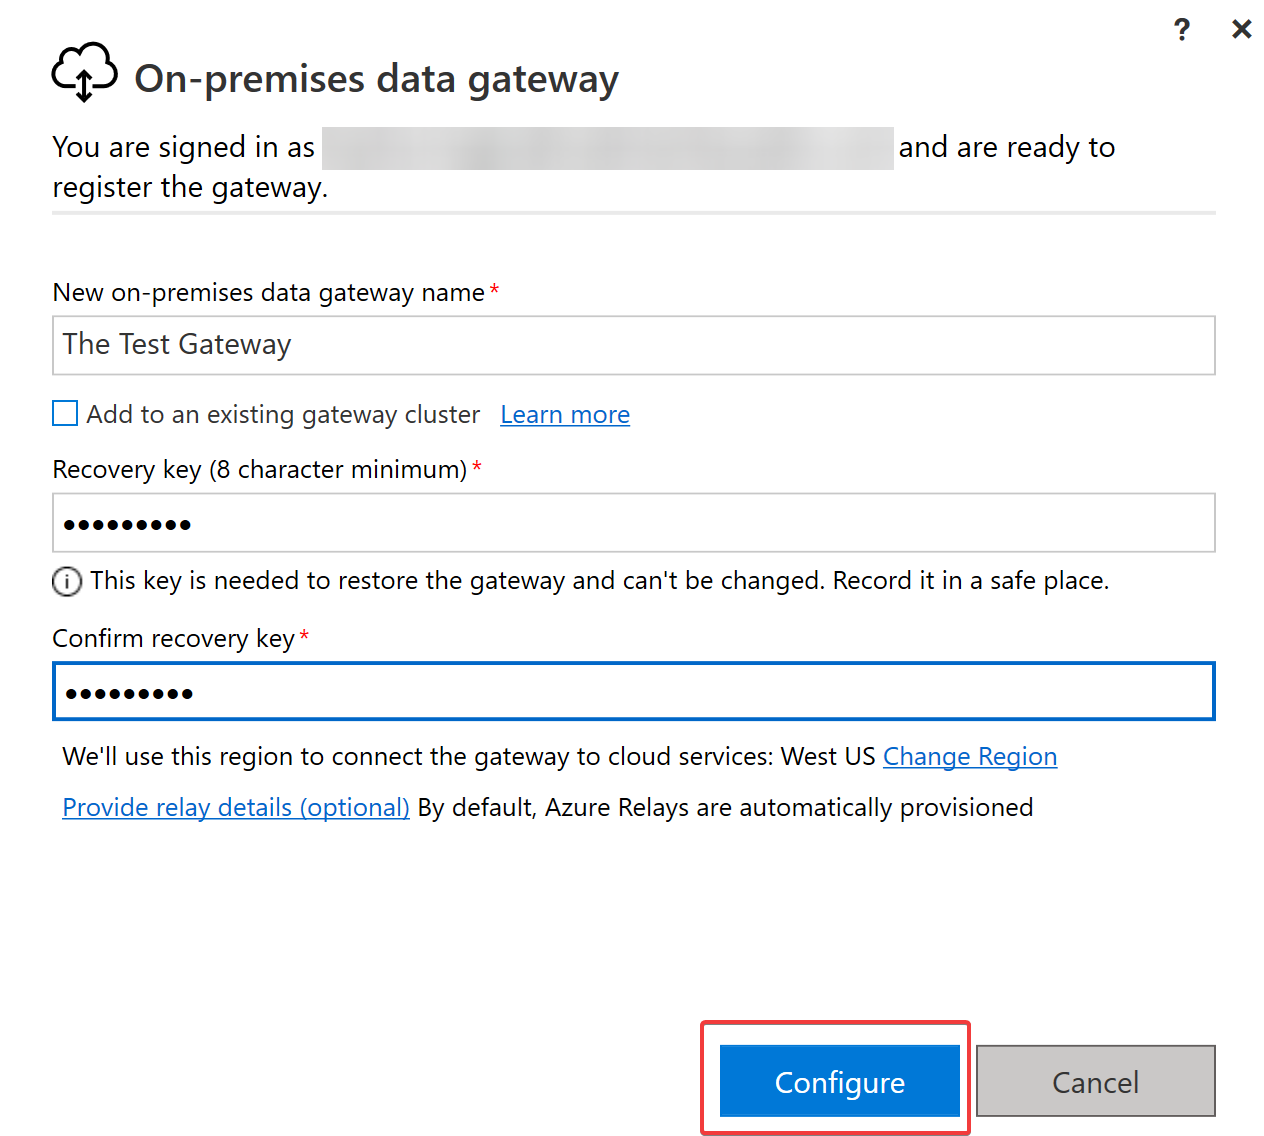
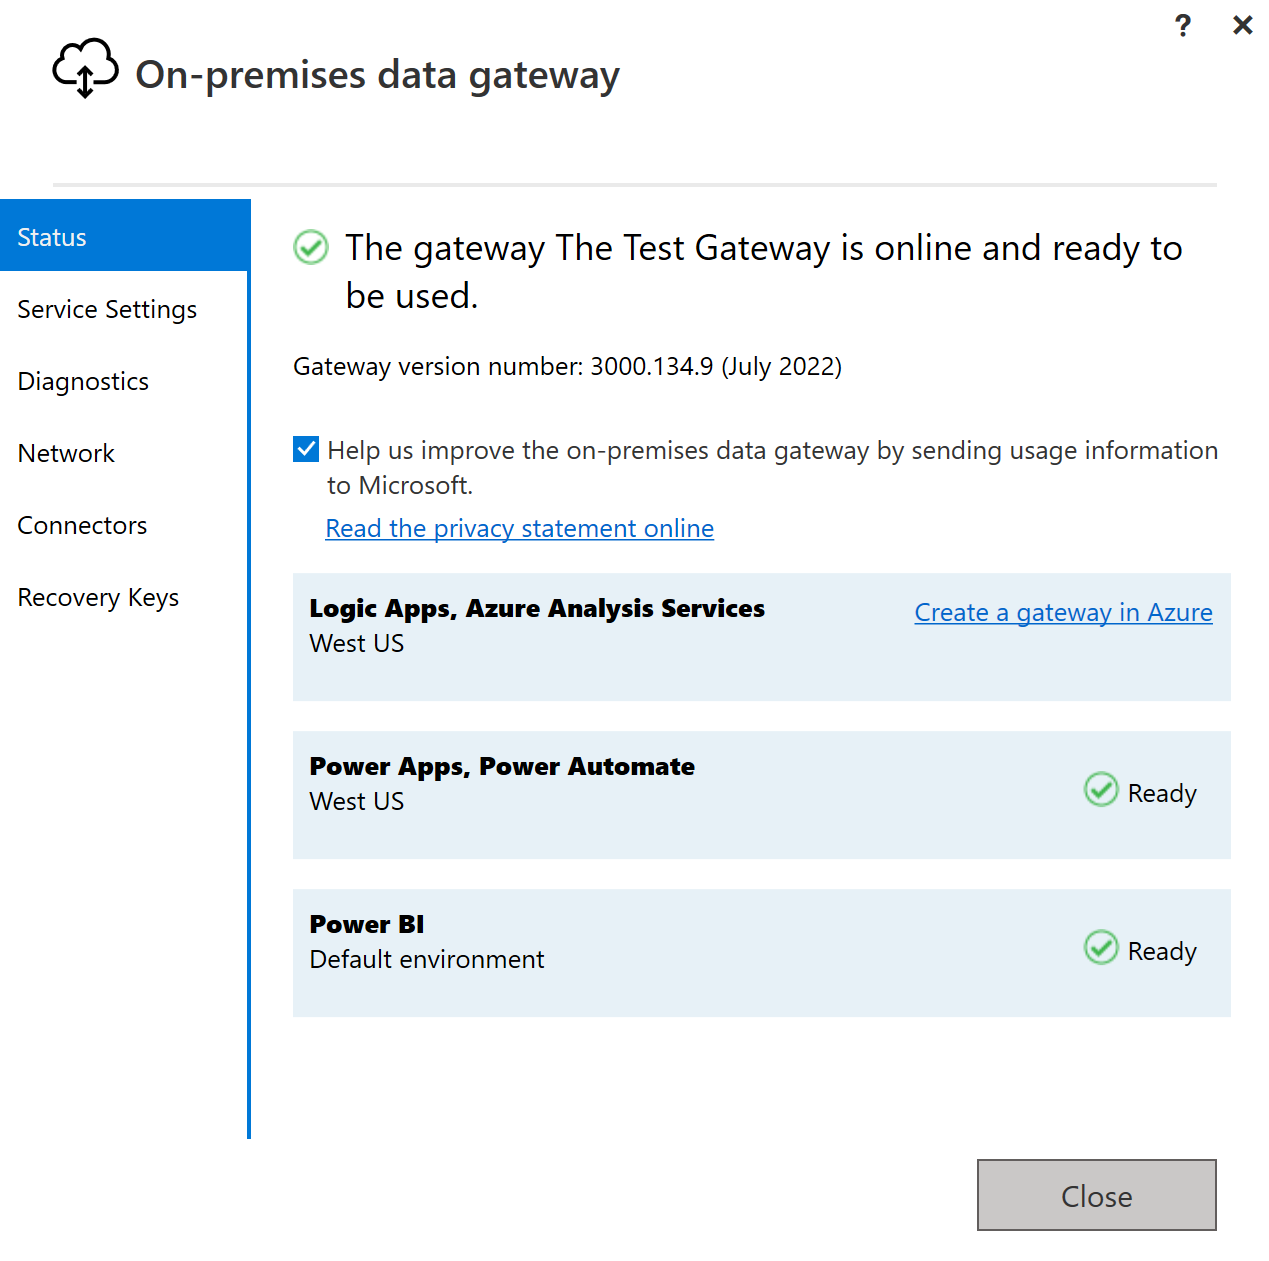
Beneath, you’ll be able to see a web page that confirms your gateway has been configured and is prepared to be used.
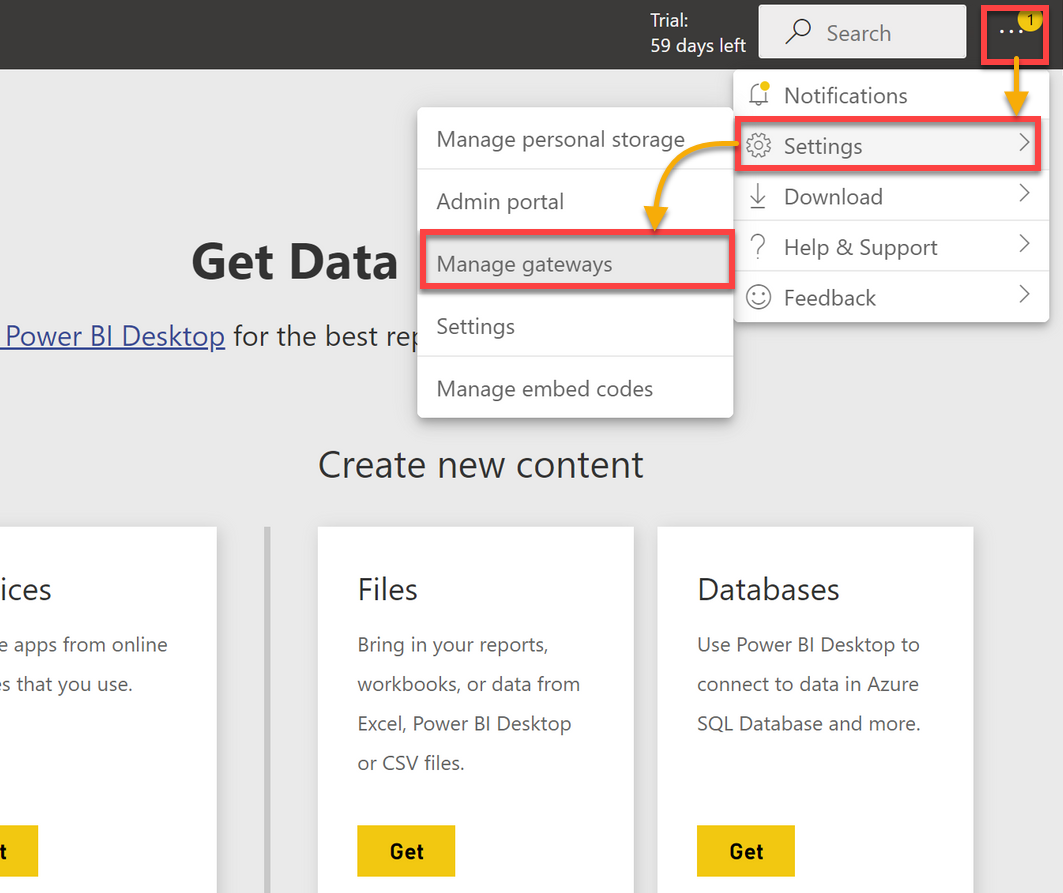
5. Open your Energy BI app or workspace, click on on the ellipsis (three dots) on the top-right → Settings → Handle gateways to entry all of your related gateways or information sources.
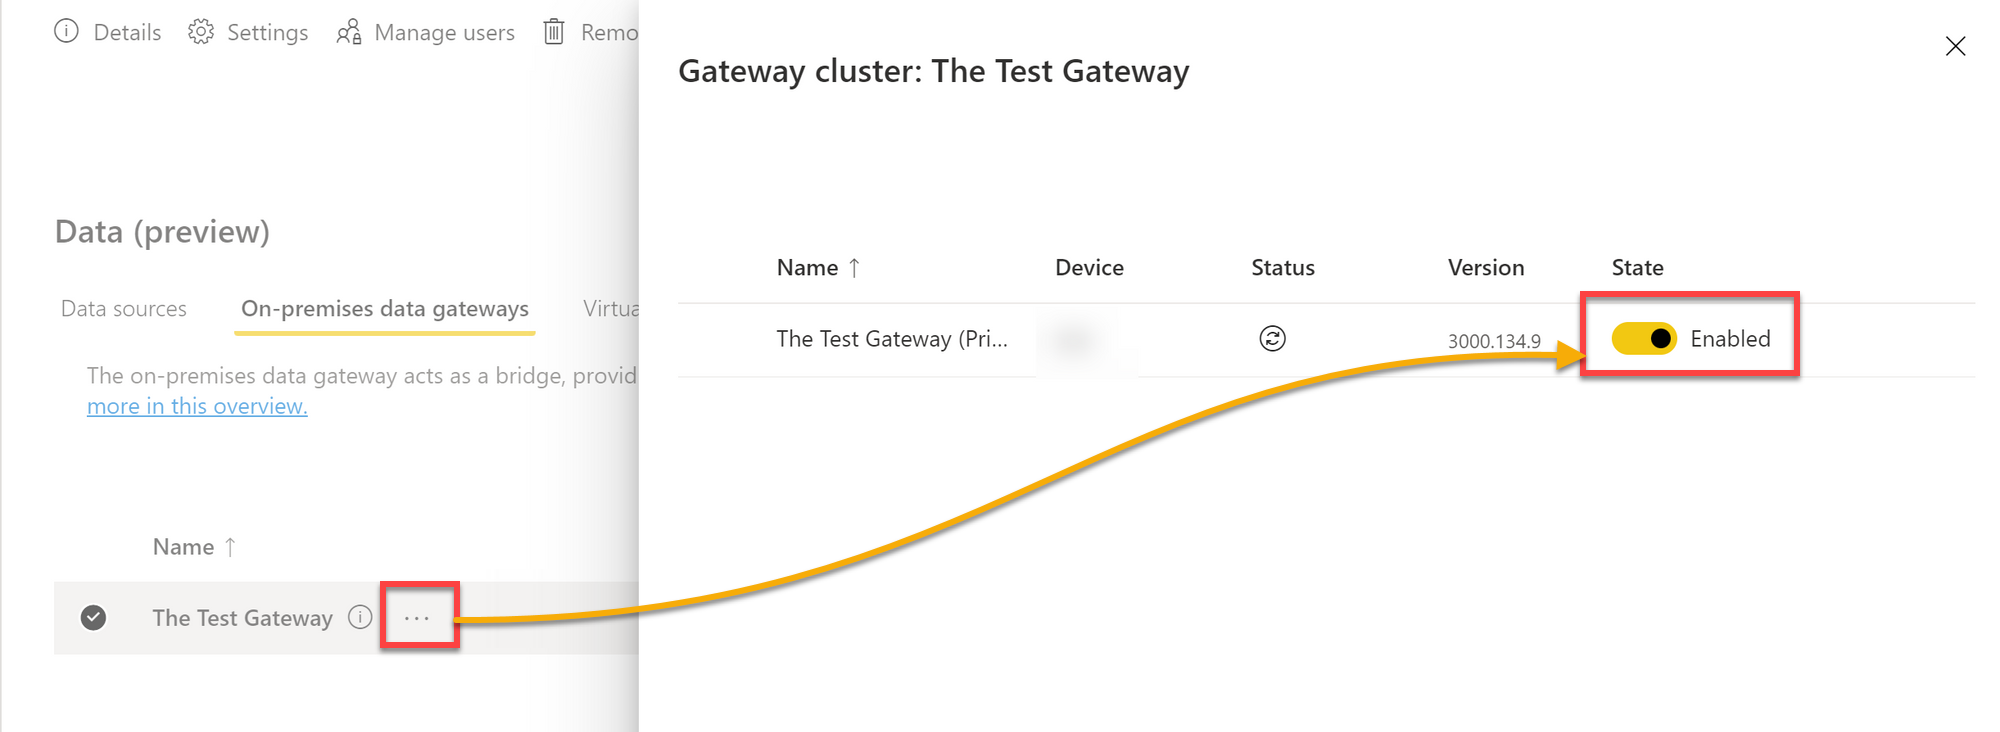
6. Click on the ellipsis subsequent to your information gateway’s title and make sure the gateway is enabled from the blade that opens to the appropriate.
The Enabled standing, as proven beneath, signifies the gateway is lively and on-line.
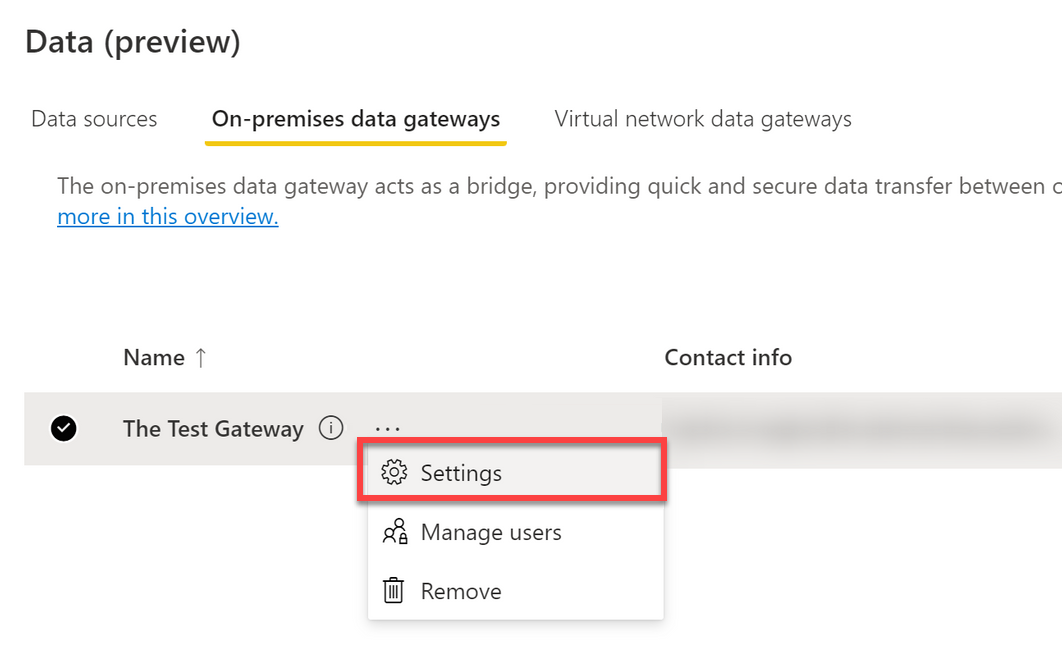
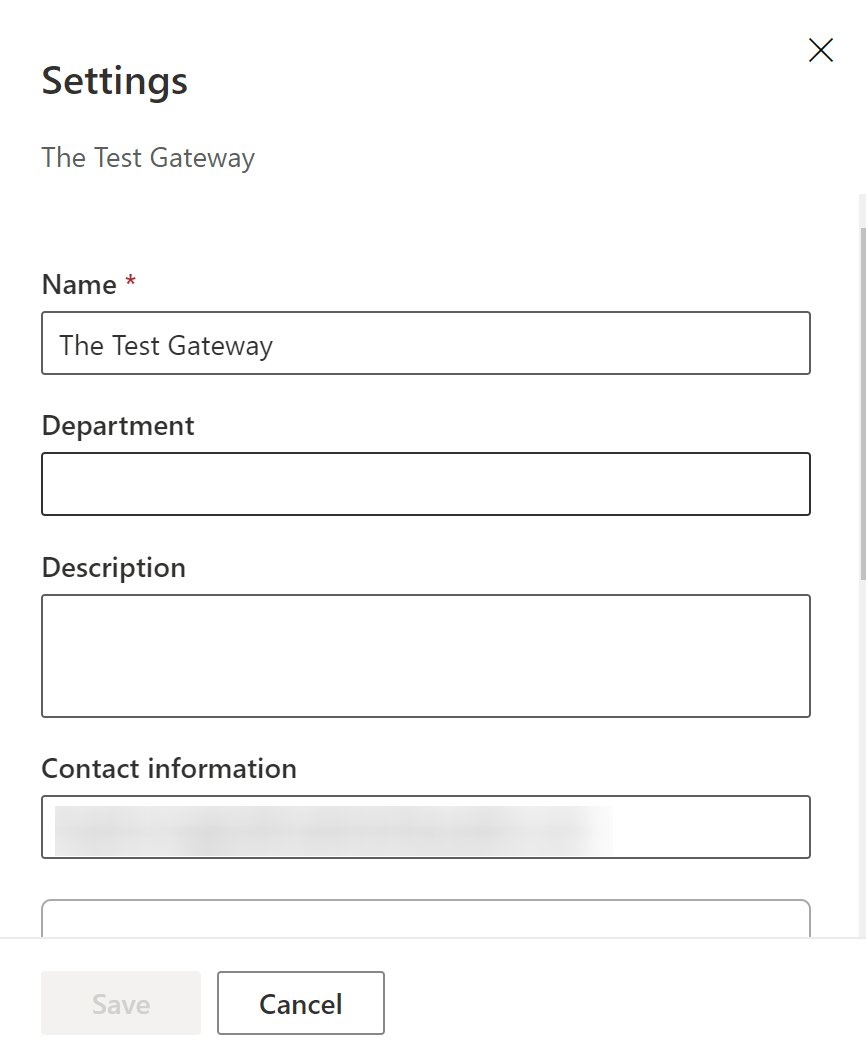
7. Subsequent, click on on the ellipsis once more beside the information gateway and select Settings to configure your gateway cluster settings.
8. Configure the settings beneath, however depart the Description and Division fields empty.
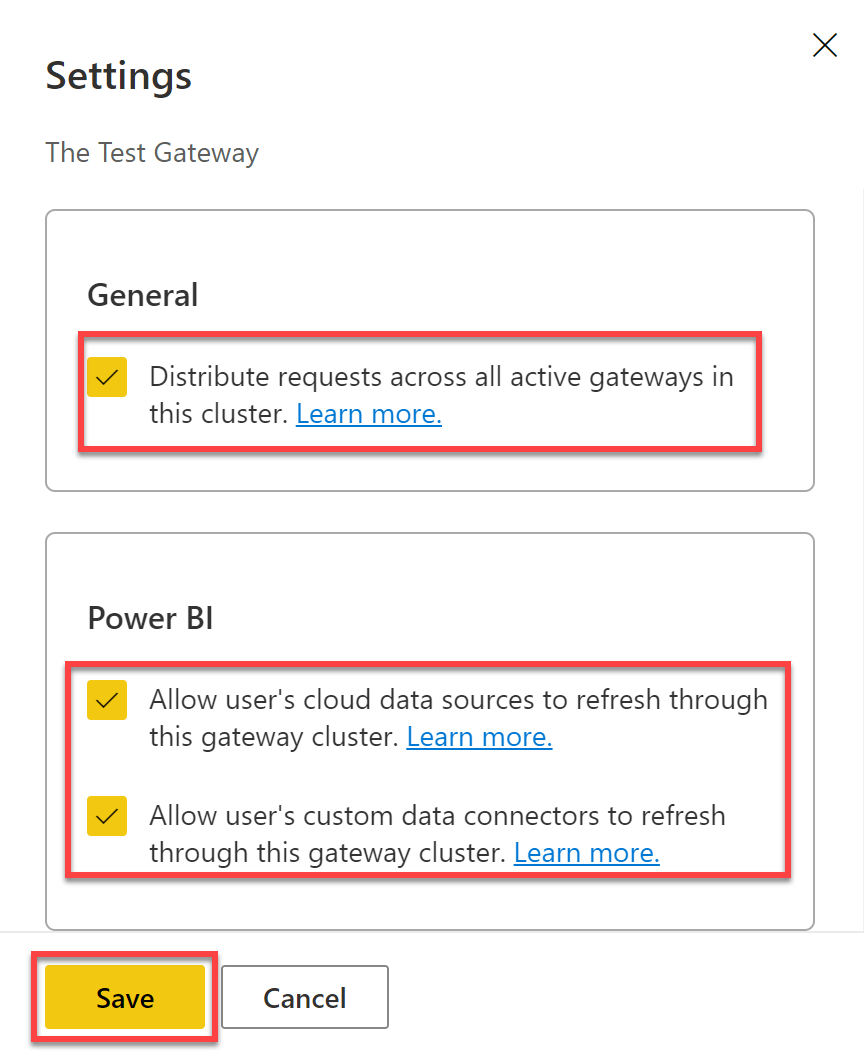
9. Lastly, tick all of the containers, and click on Save to avoid wasting the settings, and you’ve got efficiently related the on-premises information gateway supply to your Energy BI account.
Now, you’ll be able to simply ship information via this supply utilizing SQL Server, Azure, or AWS information sources.
Connecting Azure SQL Database to Energy BI
By connecting Azure and Energy BI, you’ll be able to carry out information processing into analytics and report that gives real-time perception into any enterprise or firm. They each can develop complicated enterprise and mental options utilizing built-in connectivity.
Don’t fear. You don’t want to write down code to attach Azure instruments and software program to Energy BI.
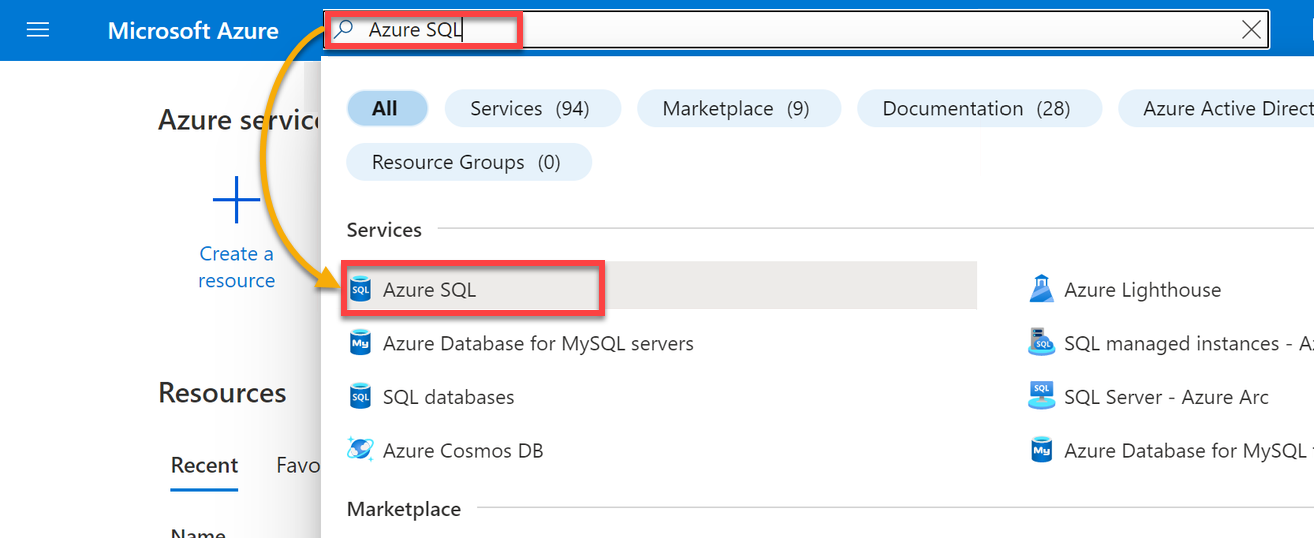
1. On the Azure Portal, seek for Azure SQL and choose the Azure SQL service that comes as much as entry Azure SQL.
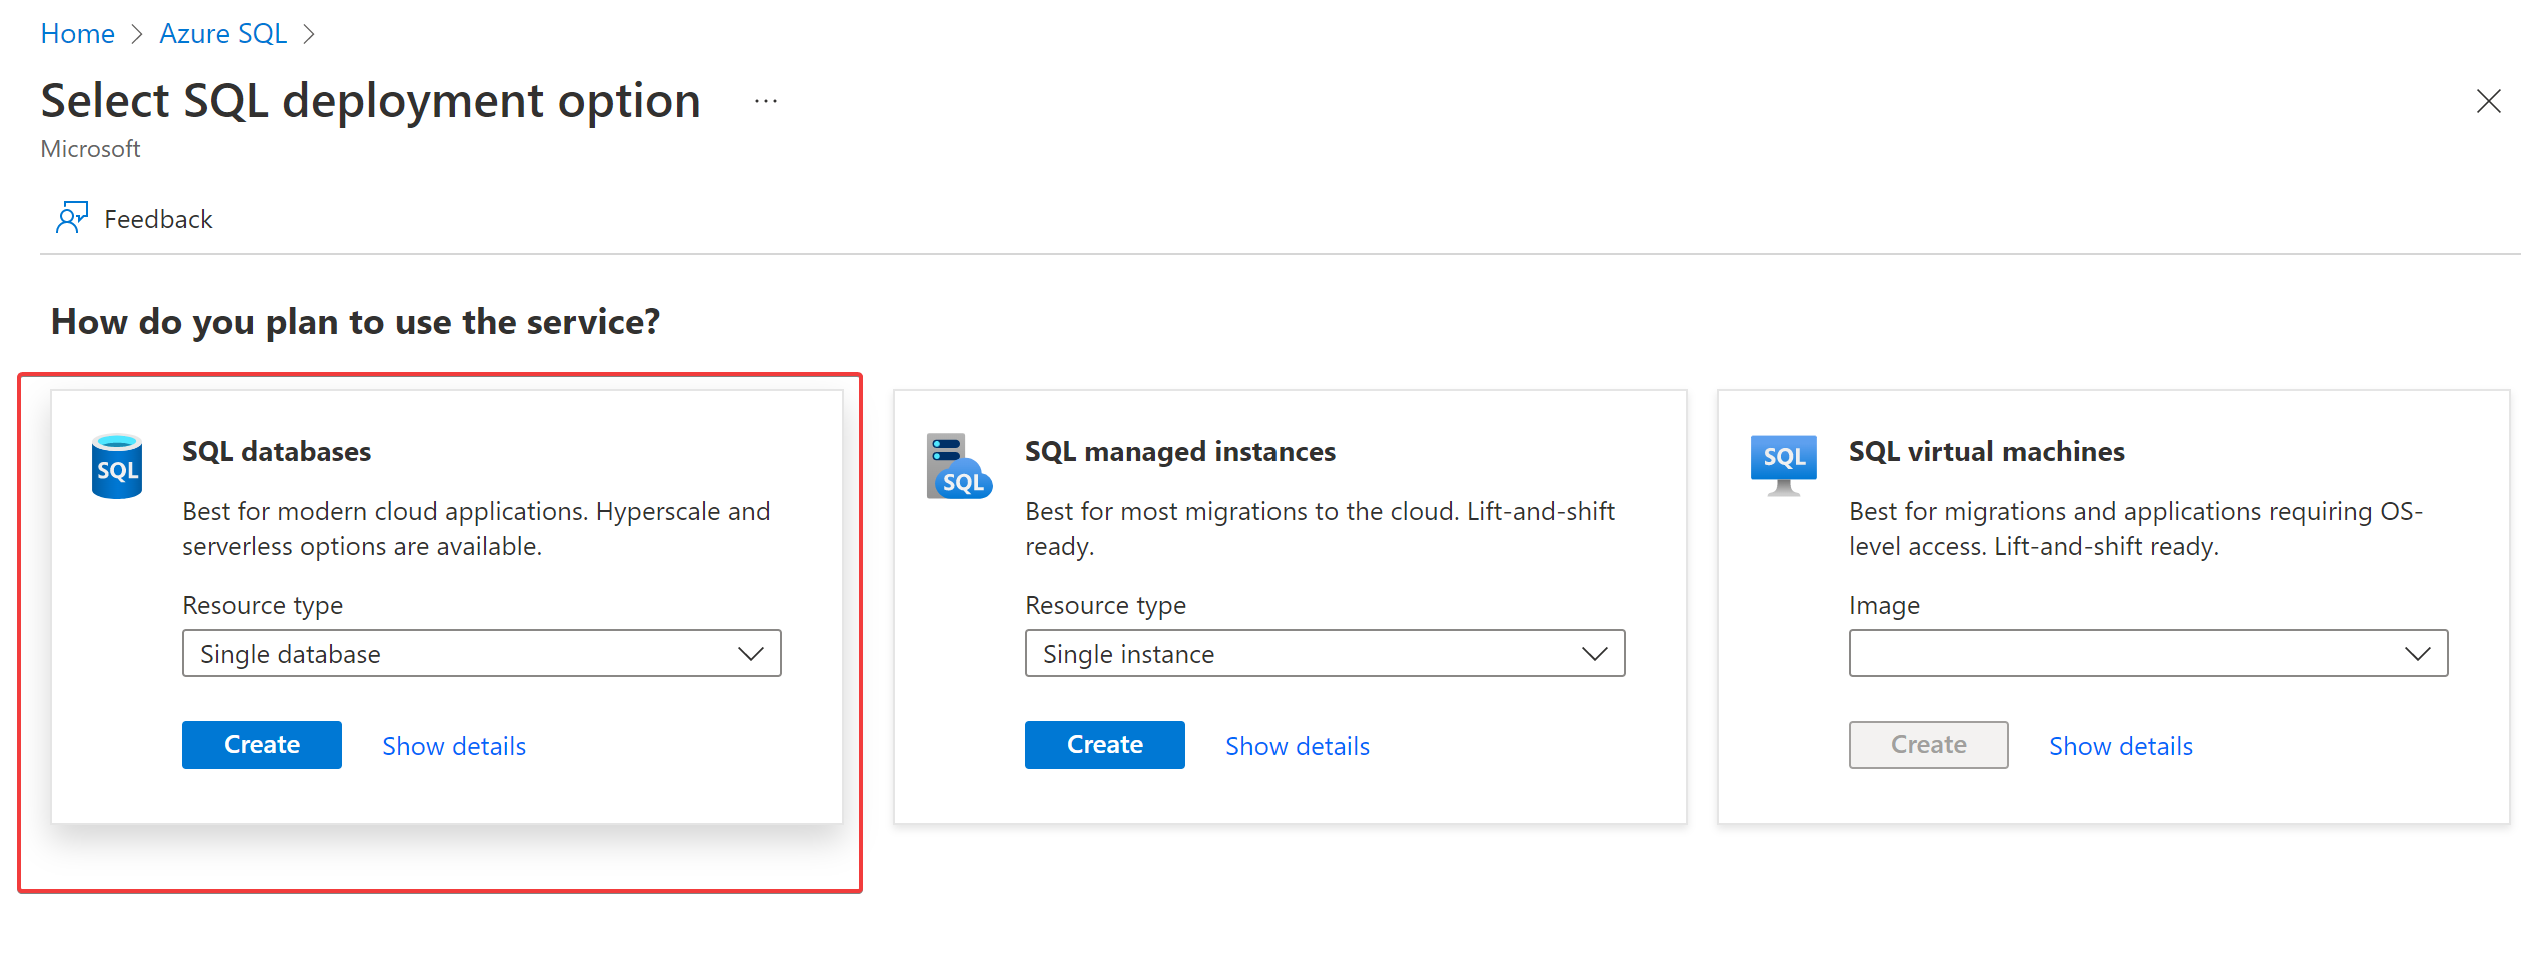
2. On the Azure SQL web page, click on Create Azure SQL useful resource, which opens a configuration setting for the Azure SQL useful resource web page.

3. Click on Create below SQL databases to create a single database.
4. Present a descriptive Database title, and click on on the Create new hyperlink to create a brand new server first.
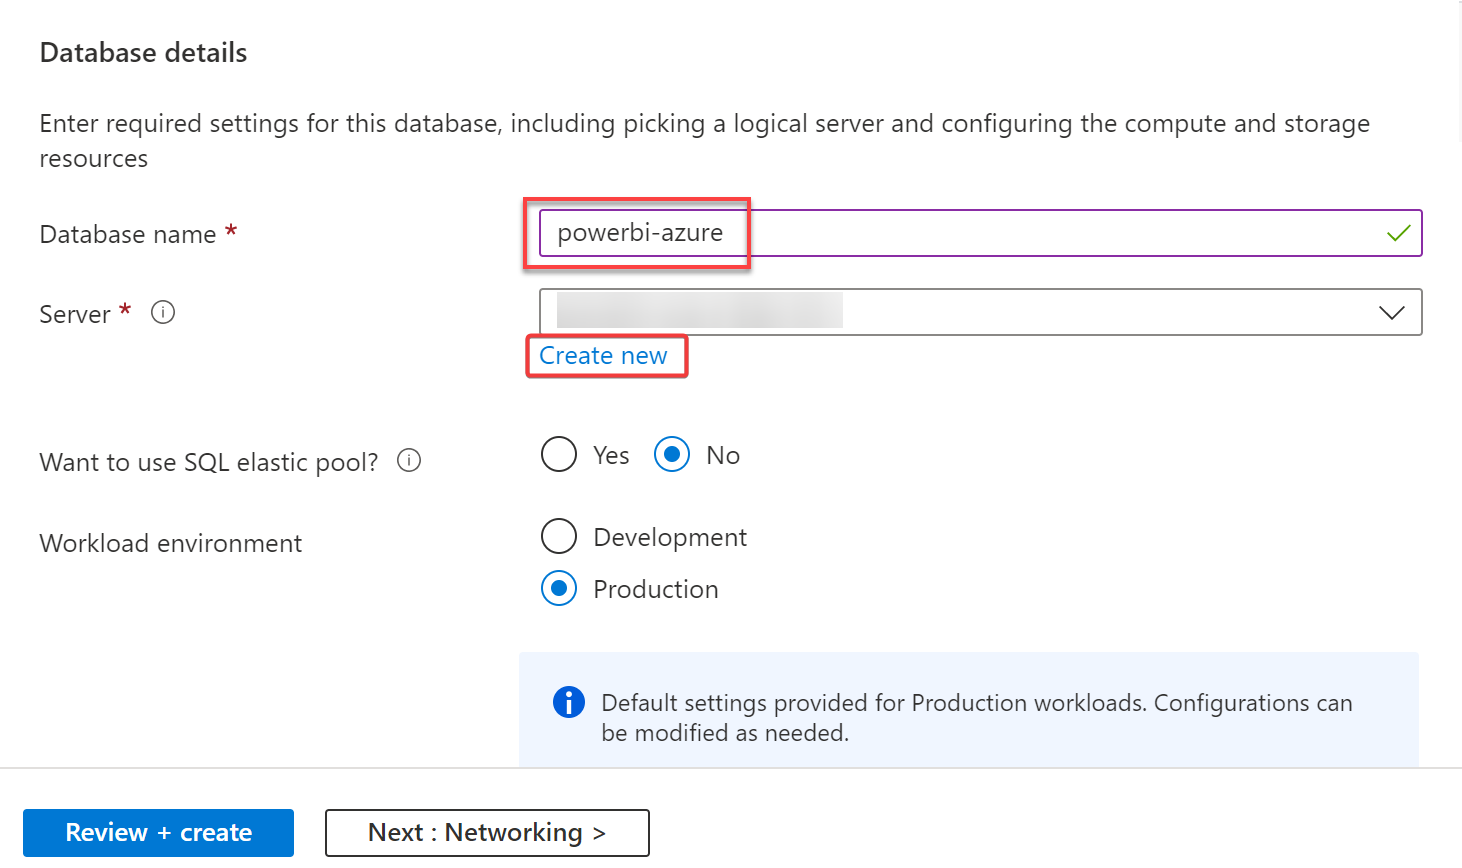
5. Enter a novel server title, and choose a location nearest to you.
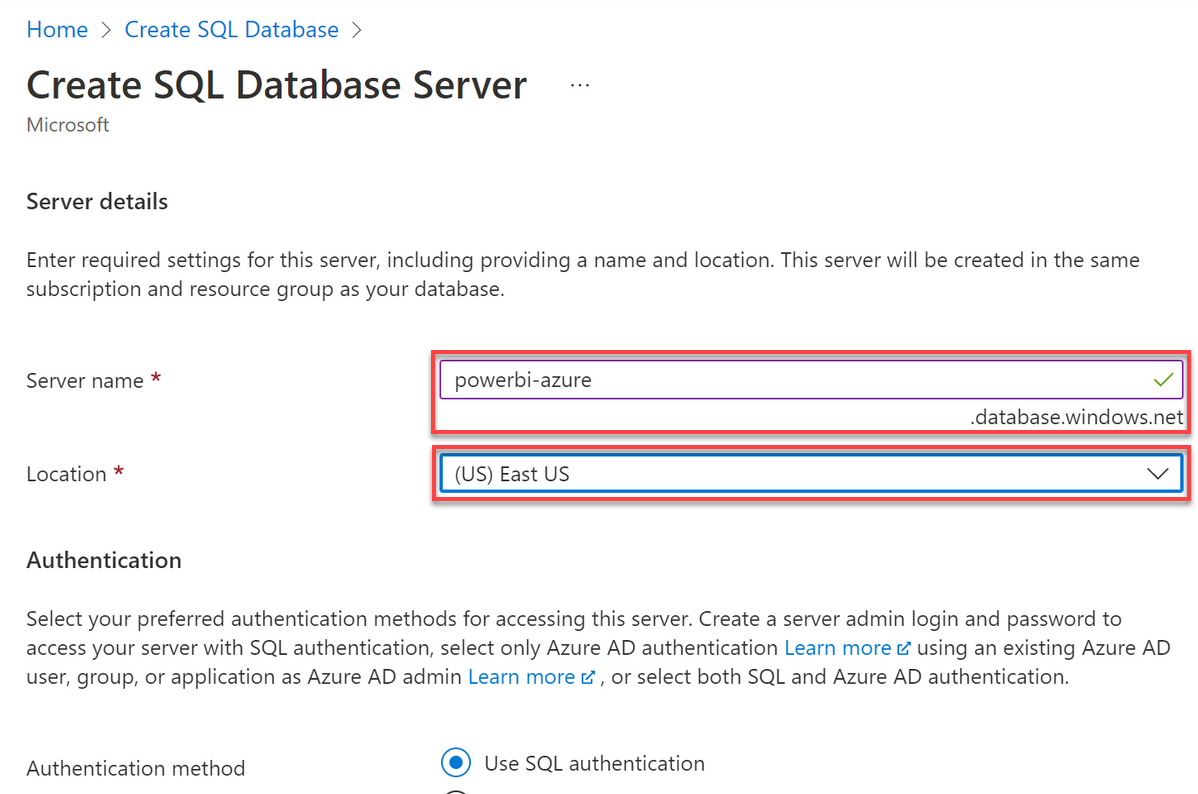
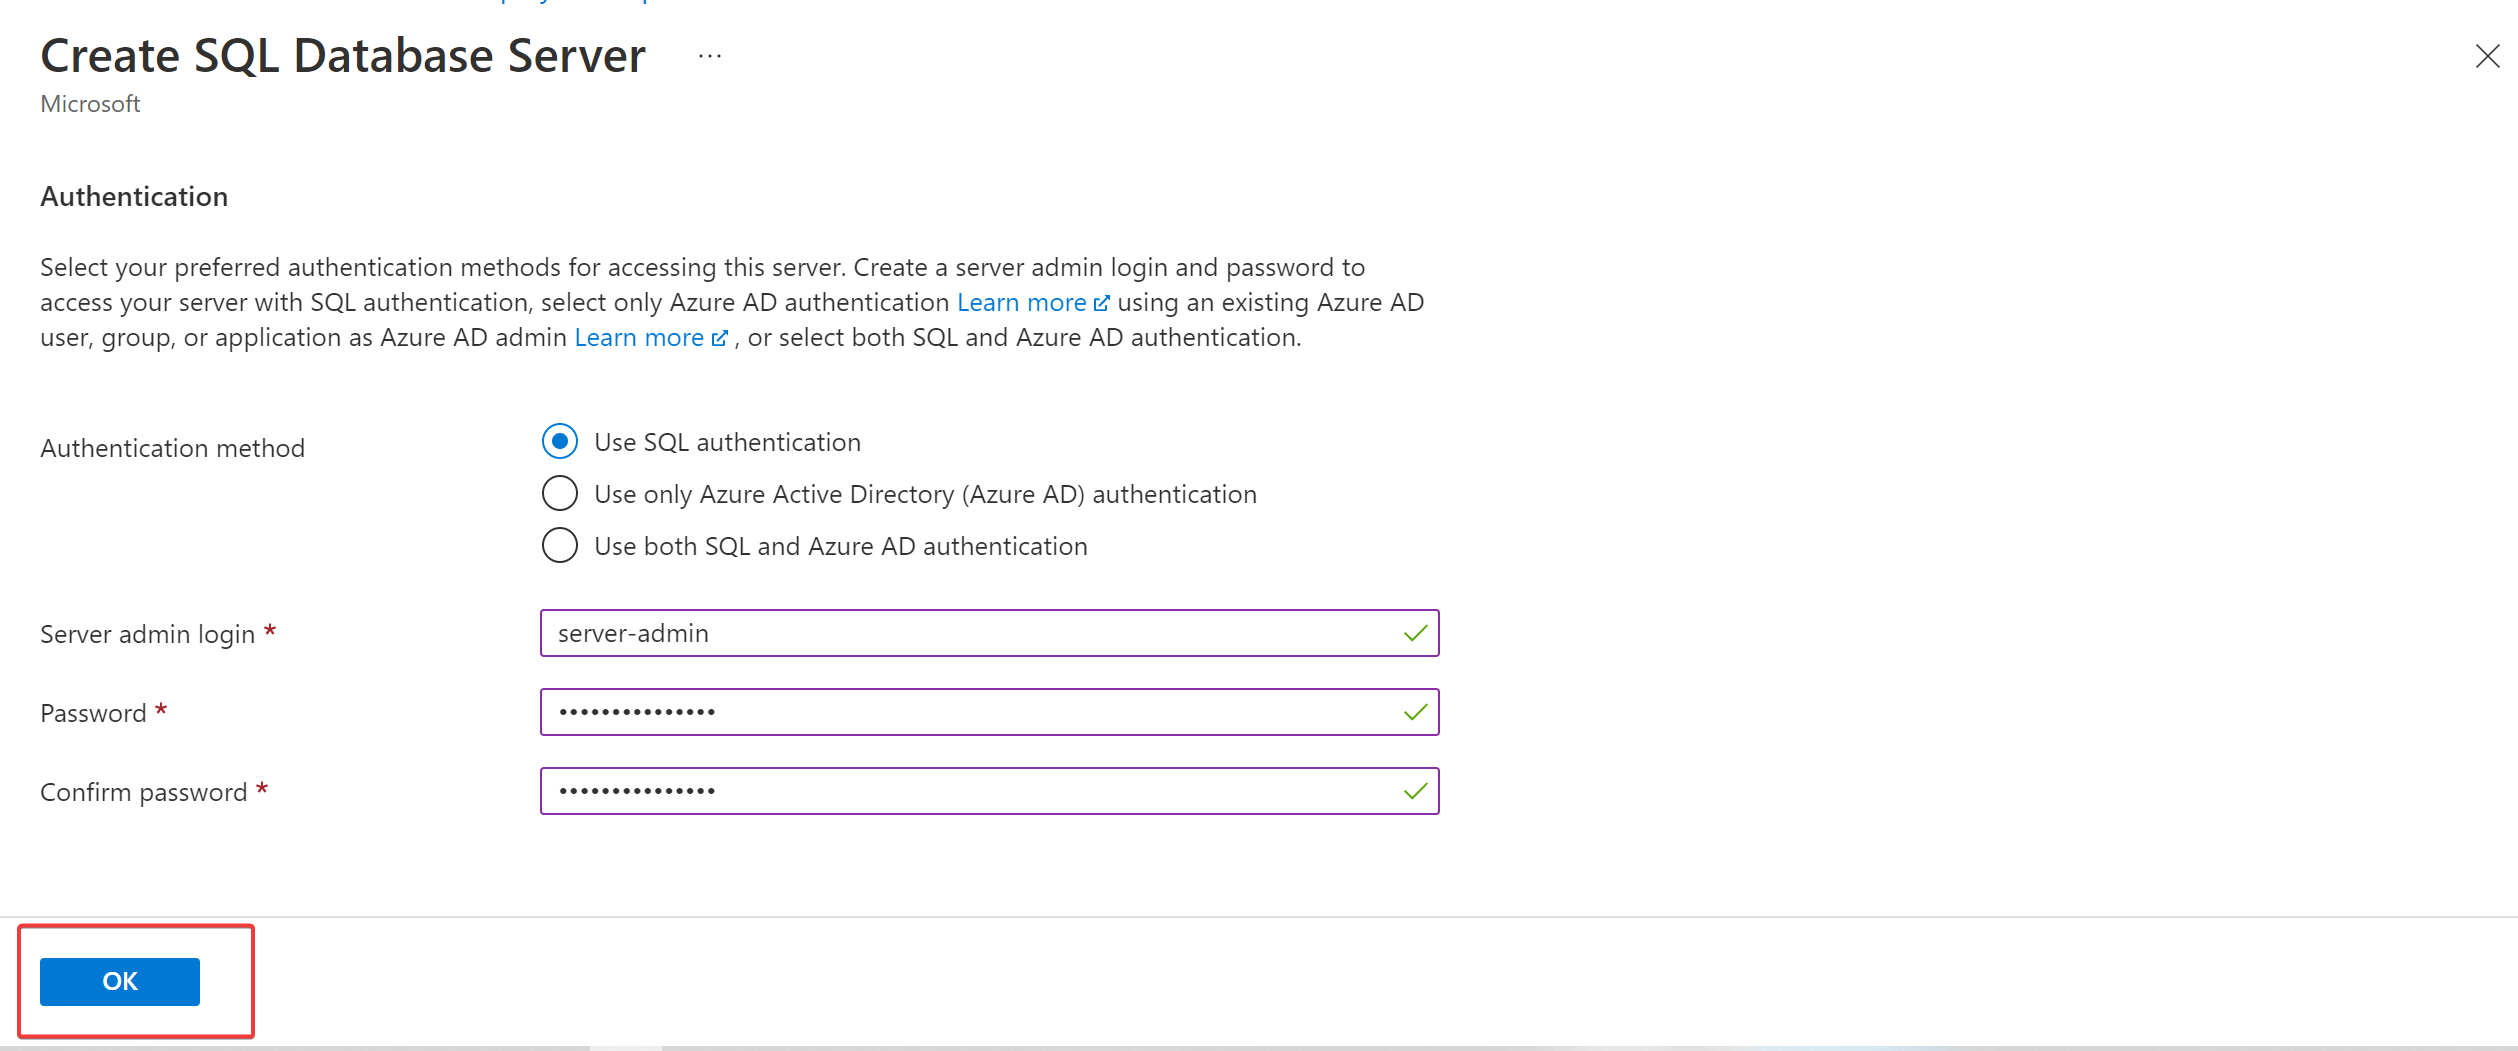
6. Scroll all the way down to the Authentication part, and configure the authentication with the next:
- Authentication technique – Select the Use SQL authentication.
- Server admin login, Password, Affirm password – Present an admin title (server-admin) and password.
- Click on OK to create SQL admin particulars for our SQL database.
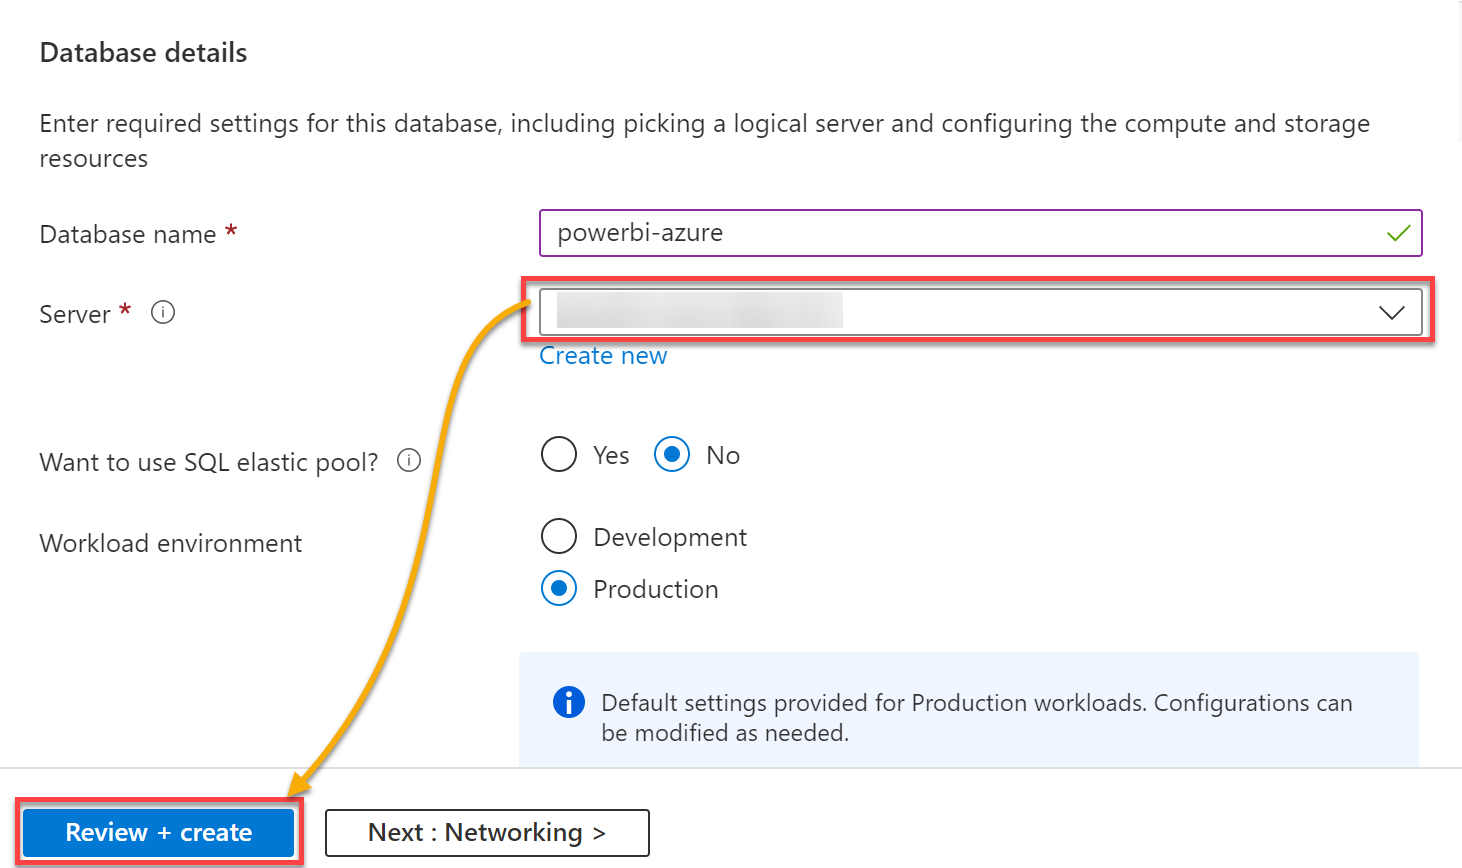
7. Again to the database settings, choose the created server because the server, depart different choices on default, and click on Overview + Create.
Your browser redirects to a web page the place you’ll be able to evaluation the configured settings for the database (step eight).
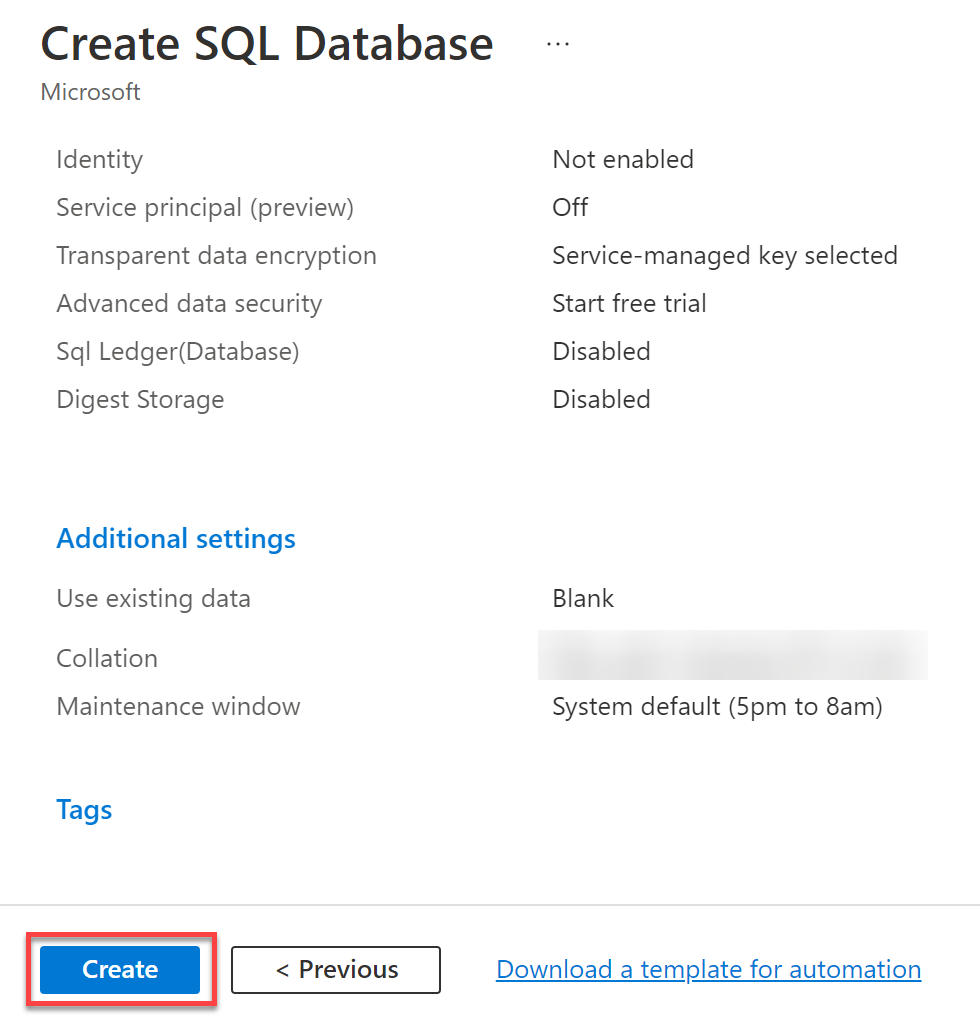
8. Overview the configured settings to your database and click on Create to create the SQL database, which takes a while to finish.
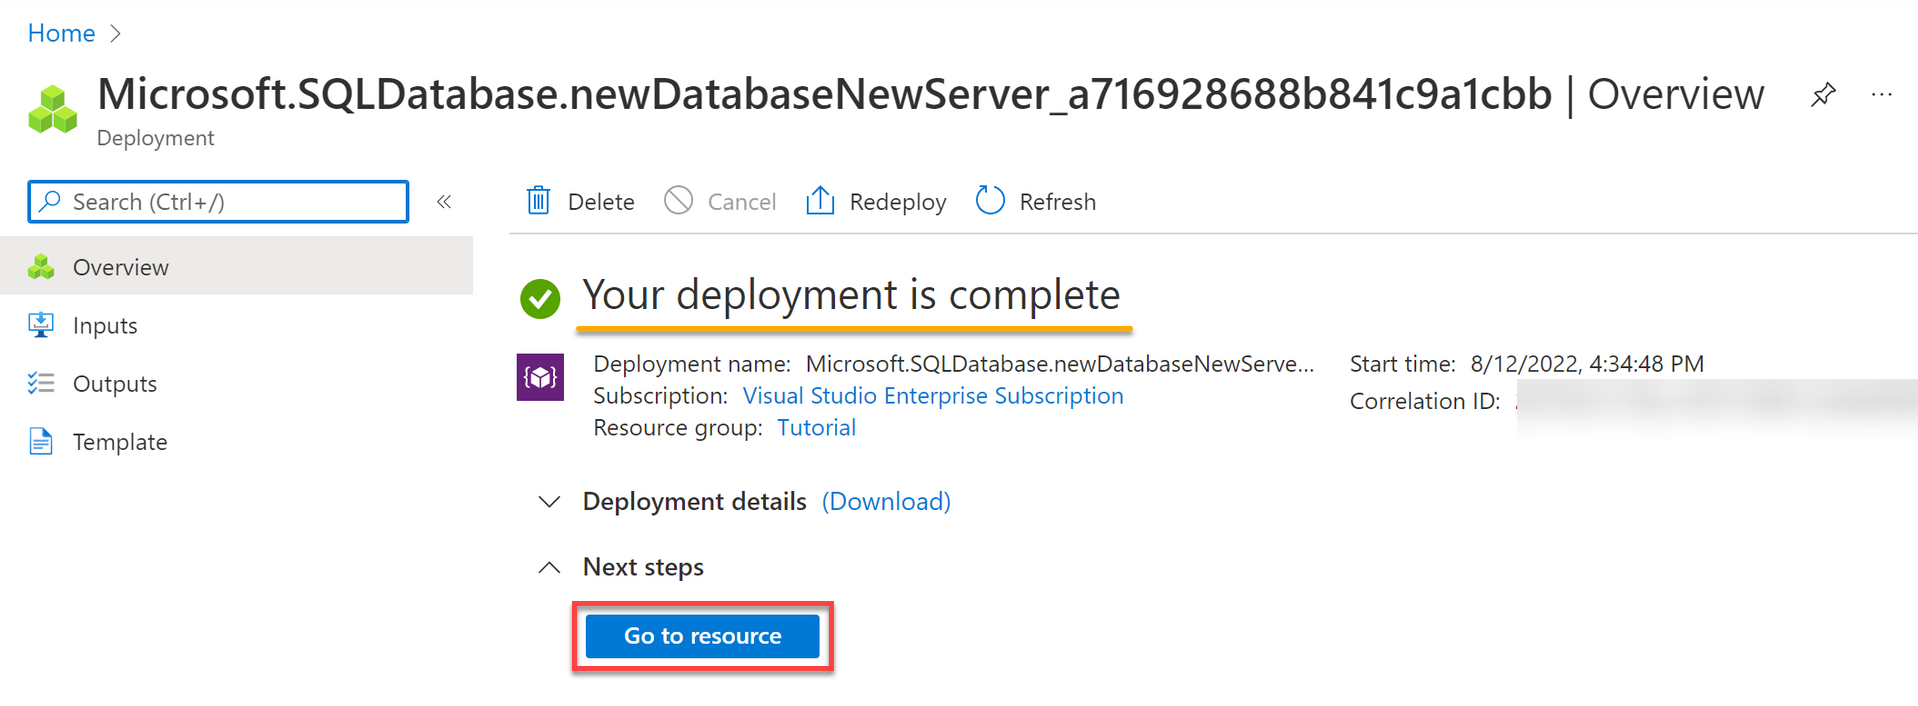
As soon as created, your browser redirects to a web page the place you’ll be able to see the deployment standing (step 9).
9. After profitable deployment, click on Go to useful resource to entry the newly-created useful resource.
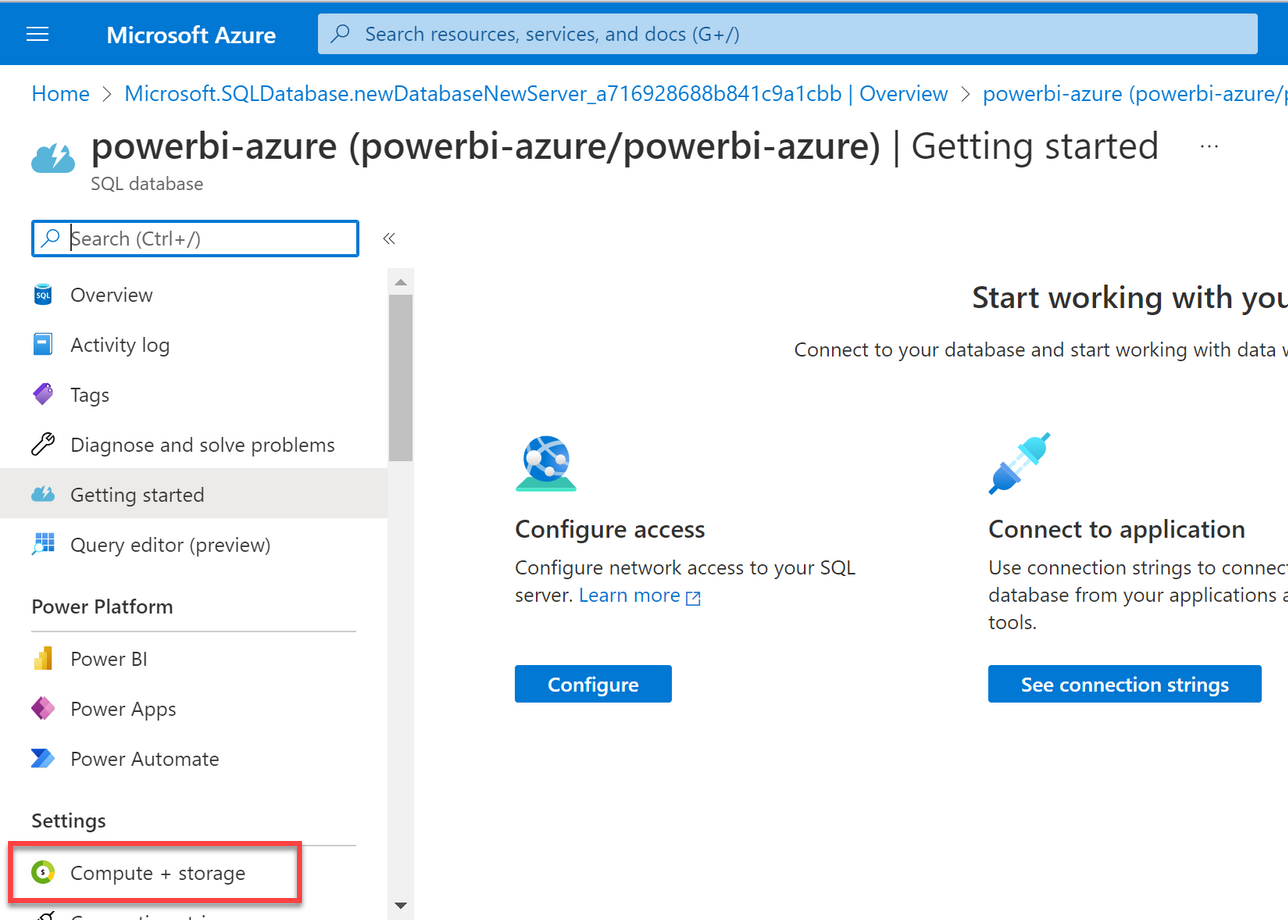
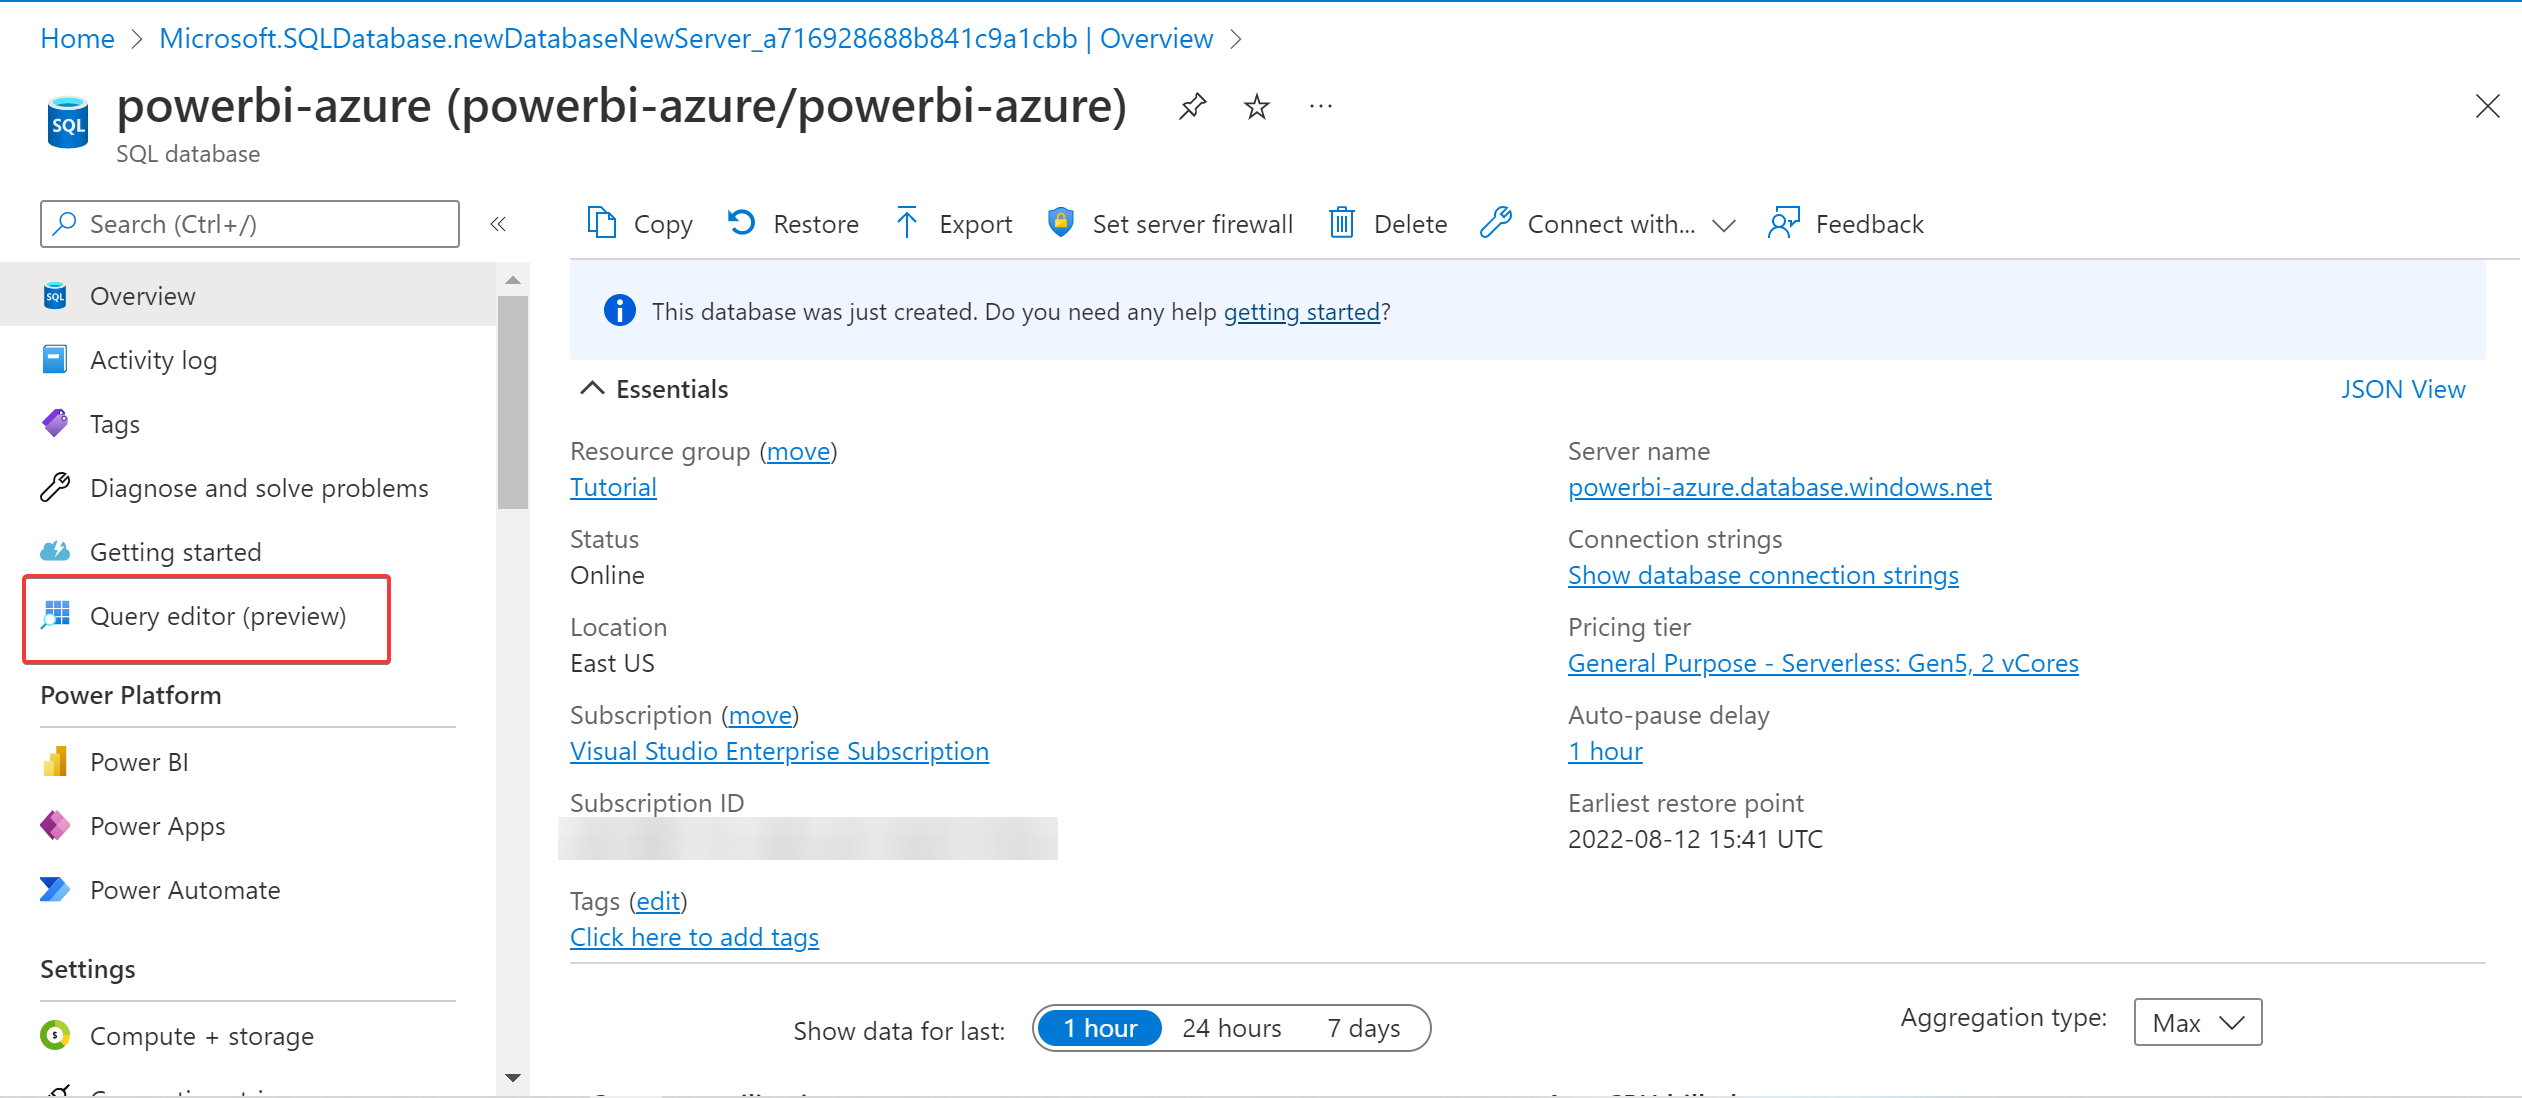
10. As soon as the useful resource’s dashboard, click on Compute + Storage below the Settings part (left panel) to provoke configuring your SQL server storage settings.
11. Now, choose the Serverless choice to make your database auto-scale and price much less.
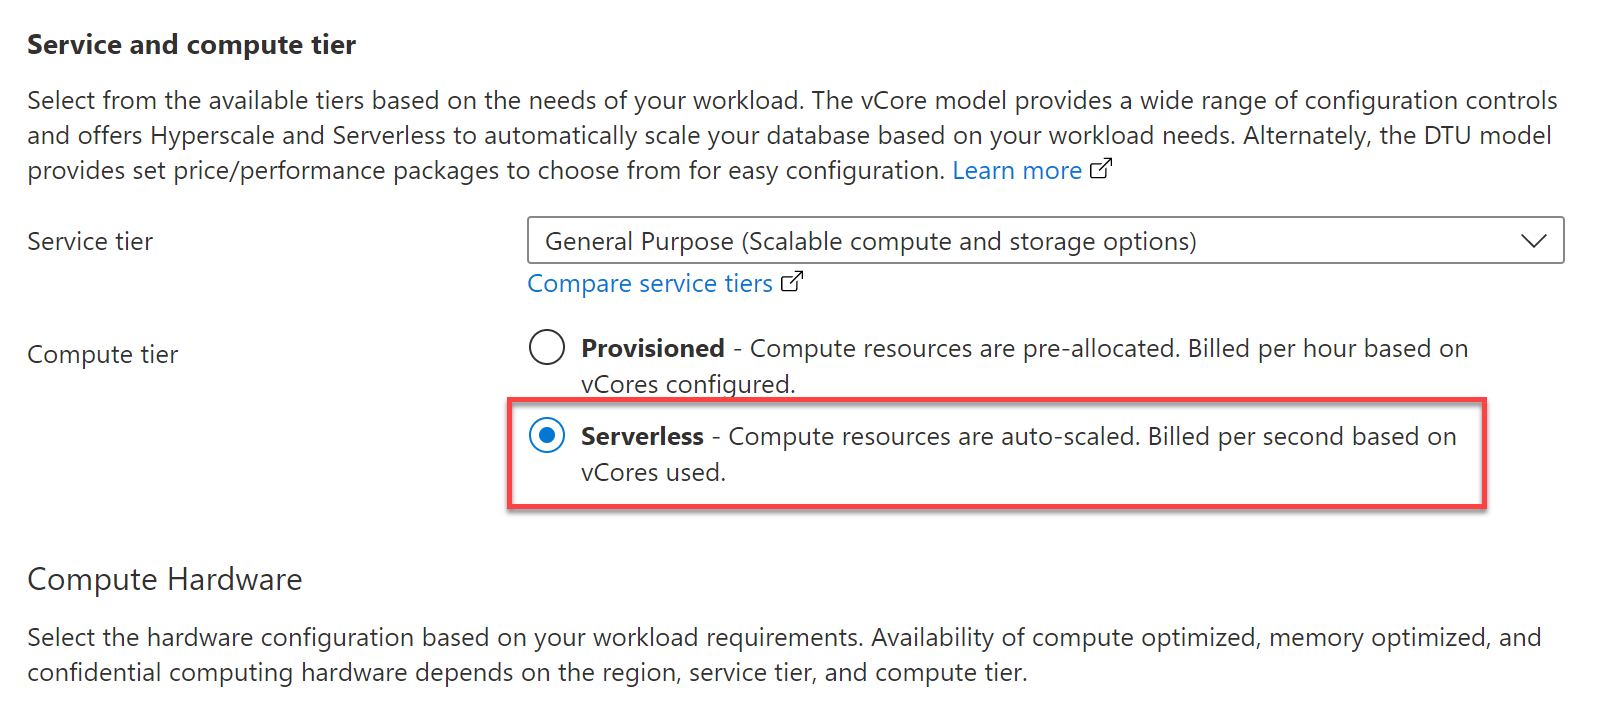
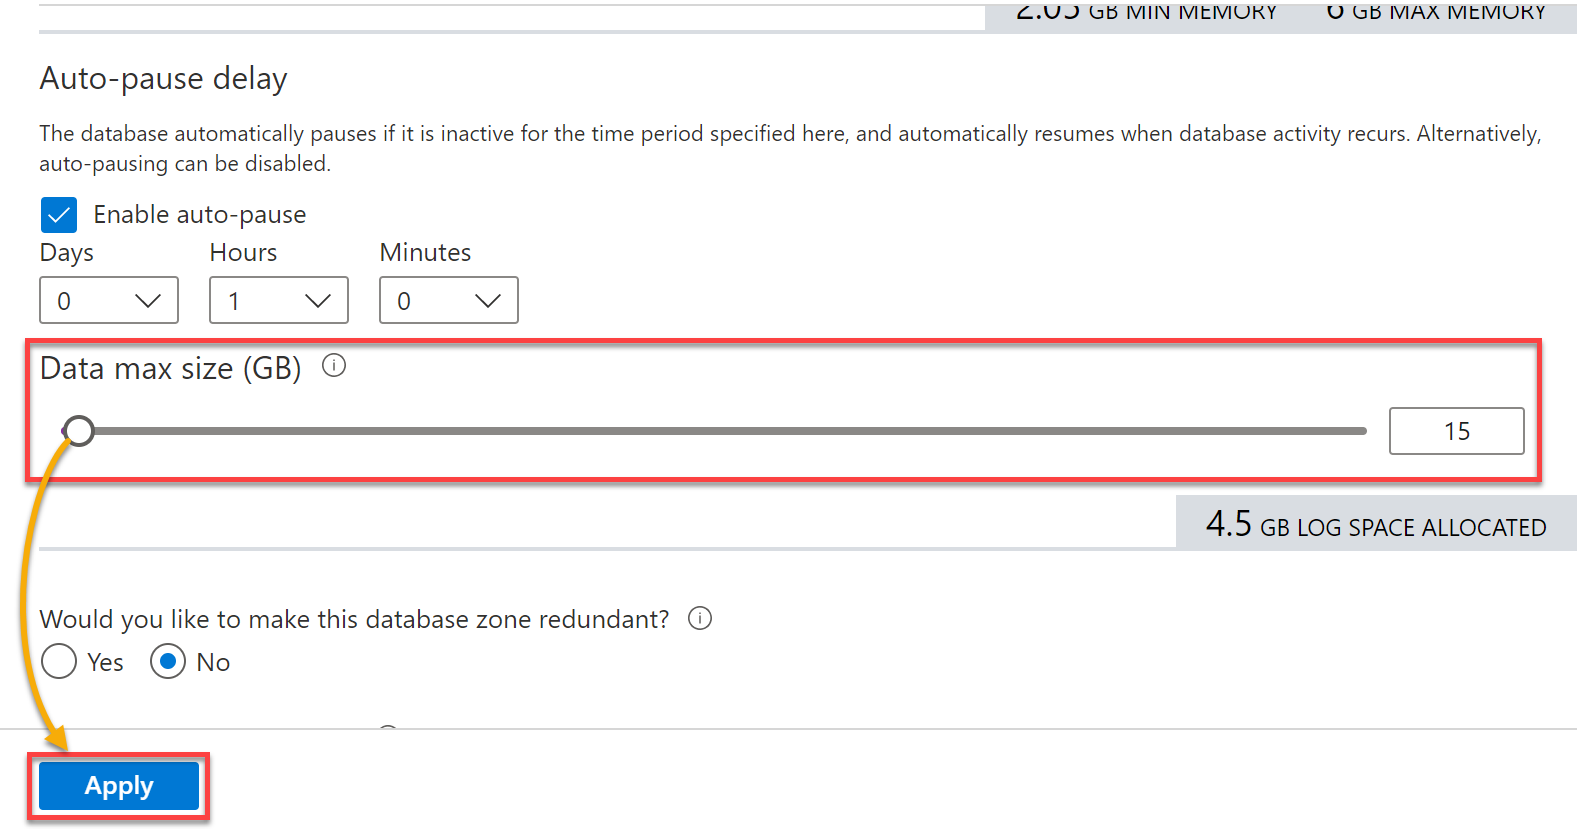
12. Drag the slider to reduce the information dimension, as proven beneath, and click on Apply to avoid wasting the settings. This tutorial makes use of 15GB for demonstration.
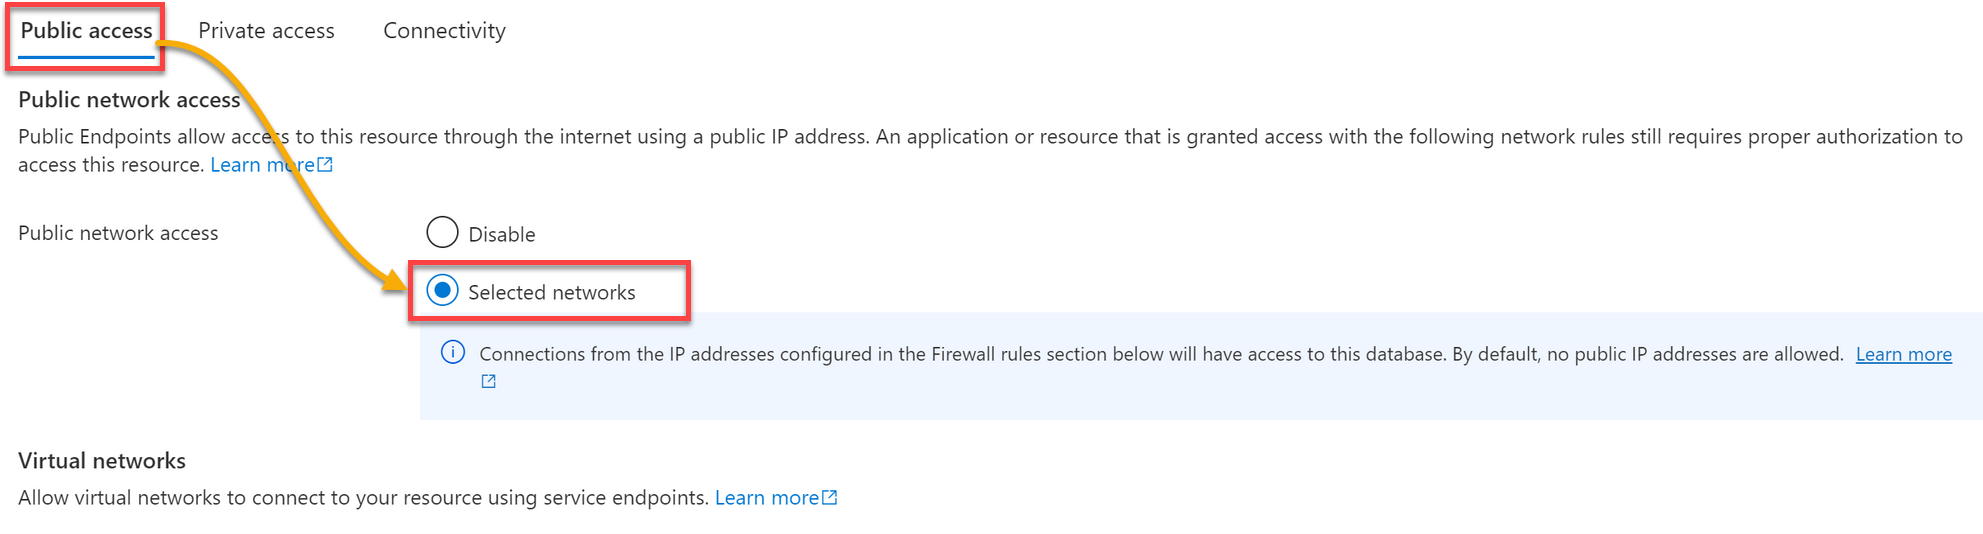
13. Again to the useful resource’s dashboard, click on on Set server firewall to provoke organising a firewall to entry your information from the Energy BI desktop and visualize your information.

14. Underneath the Public entry tab, click on Chosen networks so as to add an IP deal with.
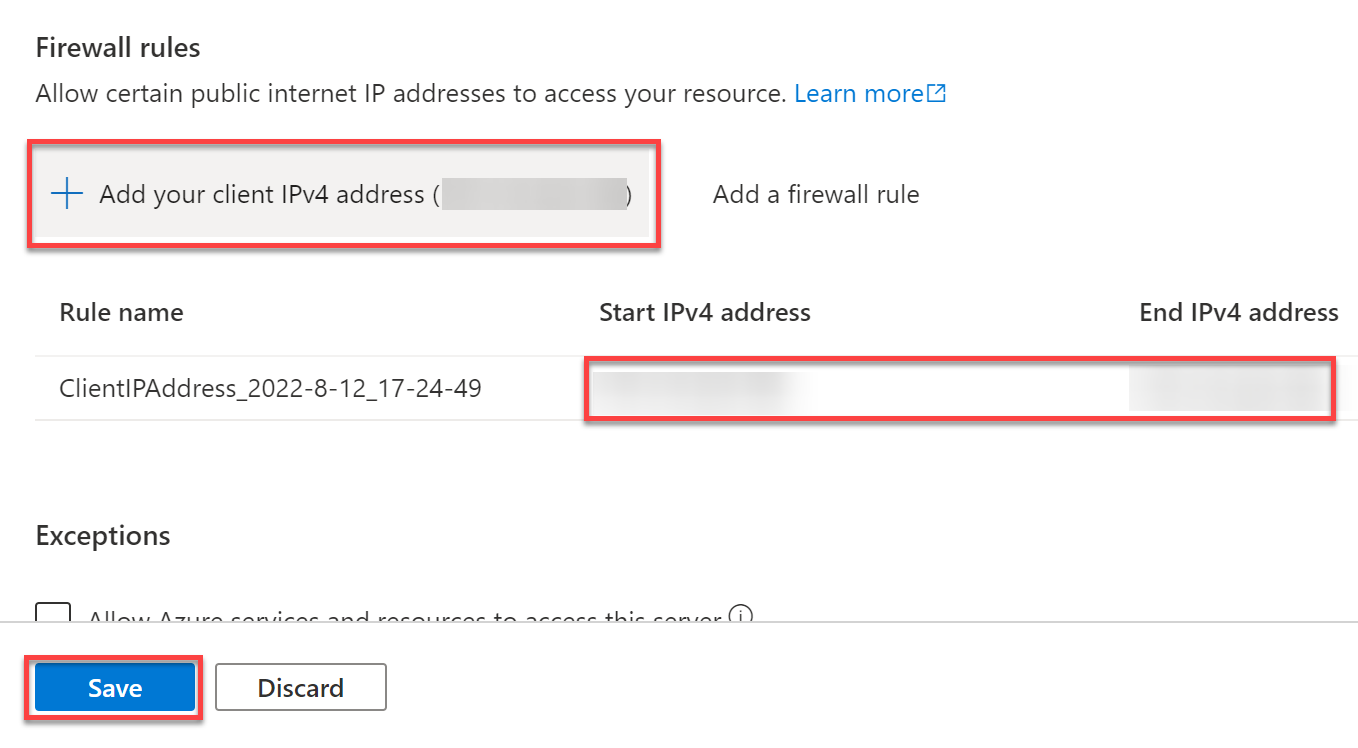
15. Subsequent, scroll all the way down to the Firewall guidelines part, click on on Add your shopper IPv4 deal with or set the beginning IP deal with and finish IP deal with to 0.0.0.0.
When you’ve added your shopper IP deal with, click on Save to avoid wasting the configuration.
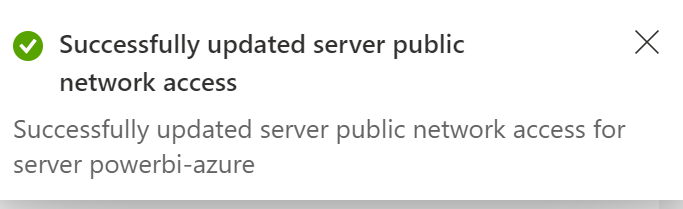
As soon as executed, you will notice the affirmation message proven beneath.
Creating Knowledge in Azure SQL Database to Visualize
You now have an Azure SQL database and a server, and also you’re able to dig into creating information or querying the database to visualise on Energy BI. The Azure SQL server affords a question editor that allows you to write queries, create tables, and add information to created tables.
To start out creating information in Azure SQL database:
1. In your useful resource’s dashboard, click on Question editor so as to add a question.
2. When prompted, present the SQL admin particulars you set in step six of the “Connecting Azure SQL Database to Energy BI” part, and click on OK to register.
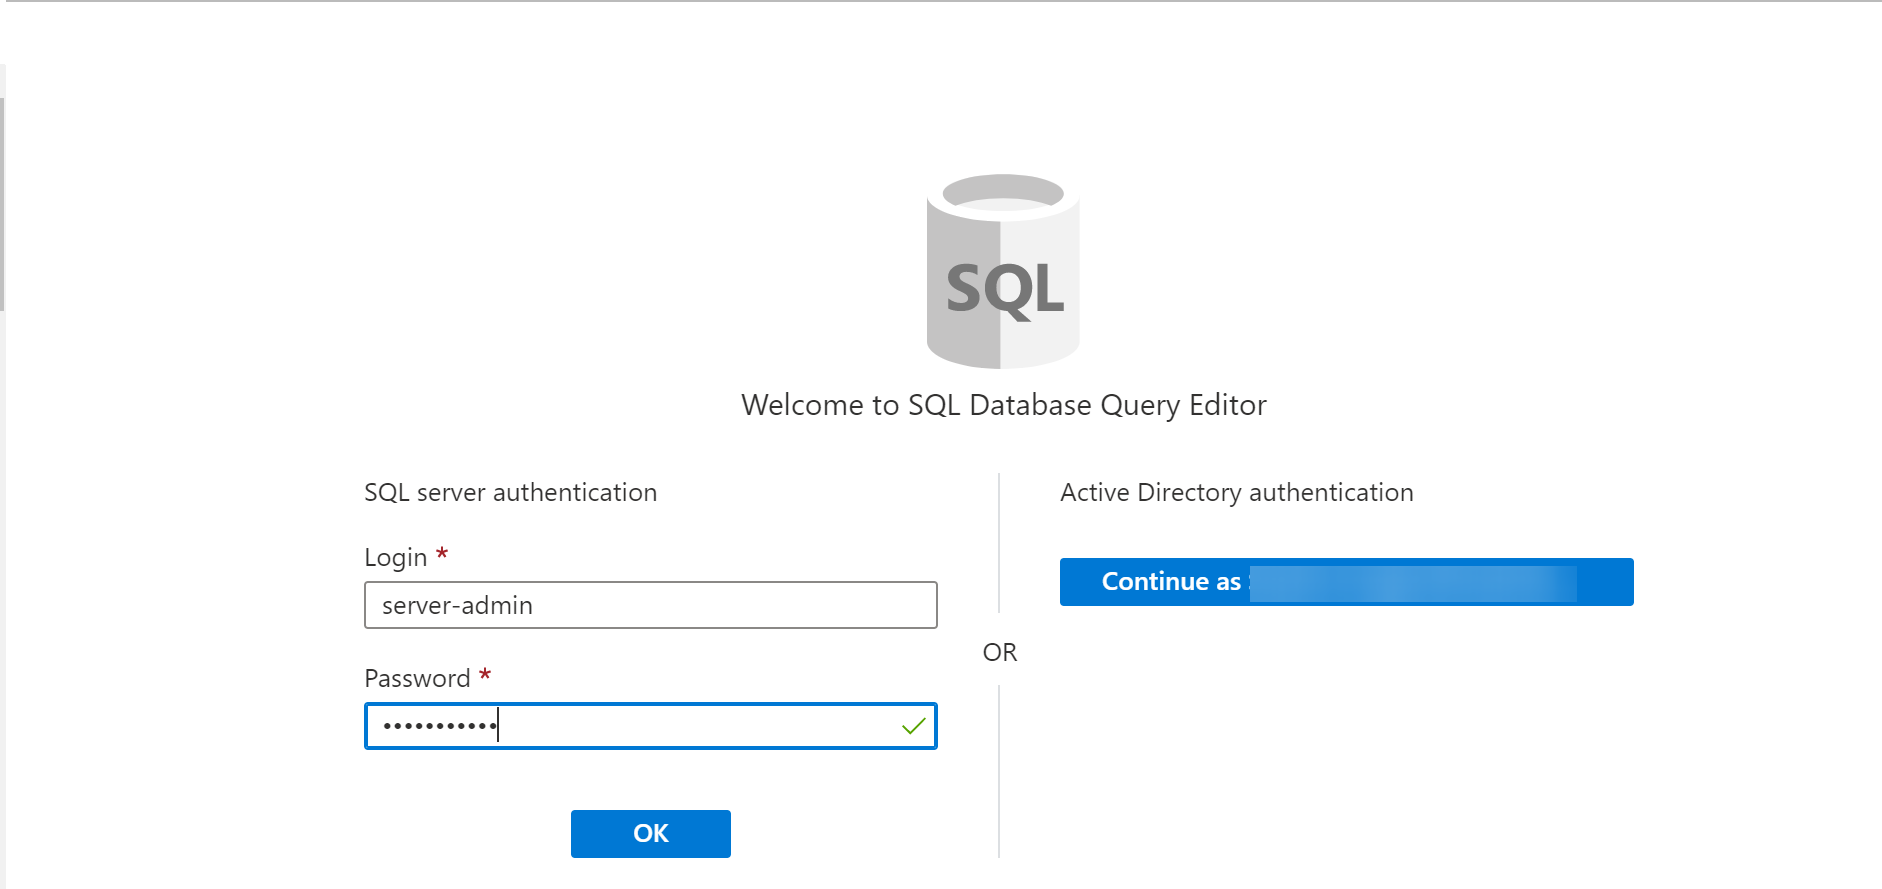
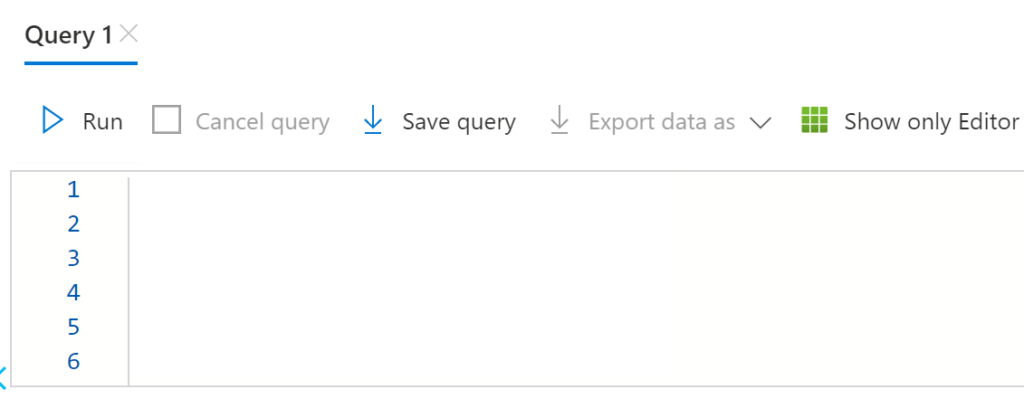
As soon as signed in, you will notice a question editor just like the one beneath.
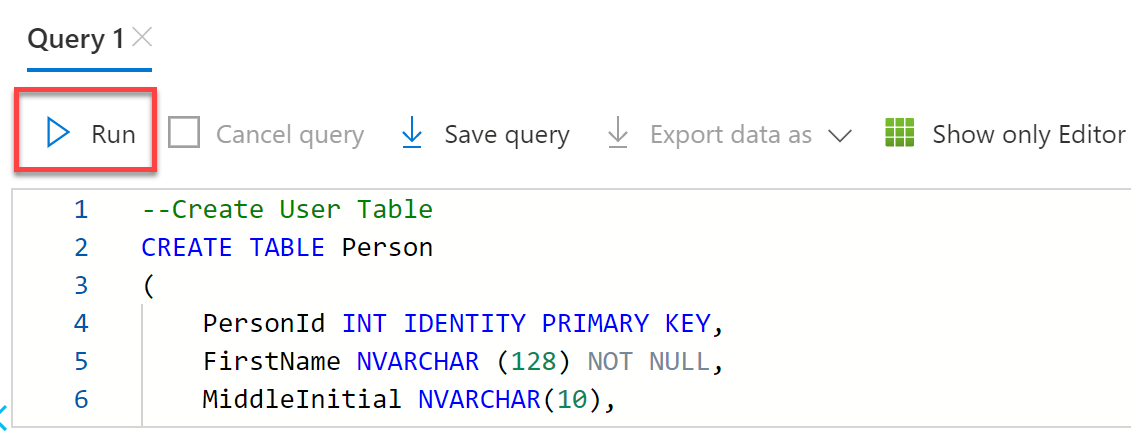
3. Copy and paste the next question to the SQL question editor, which creates 4 tables named Individual, Pupil, Course, and Credit score.
-- Create a Person Desk
CREATE TABLE Individual
(
PersonId INT IDENTITY PRIMARY KEY,
FirstName NVARCHAR (128) NOT NULL,
MiddleInitial NVARCHAR(10),
LastName NVARCHAR(128) NOT NULL,
DateOfBirth Date NOT NULL,
)
-- Create Pupil Desk
CREATE TABLE Pupil
(
StudentId INT IDENTITY PRIMARY KEY,
PersonId INT REFERENCES Individual (PersonId),
E mail NVARCHAR(256),
)
-- Create a Course Desk
CREATE TABLE Course
(
CourseId INT IDENTITY PRIMARY KEY,
Identify NVARCHAR(50) NOT NULL,
Instructor NVARCHAR (256) NOT NULL,
)
-- Create Credit score Desk
CREATE TABLE Credit score
(
StudentId INT REFERENCES Pupil (StudentId),
CourseId INT REFERENCES Course (CourseId),
Grade DECIMAL(5,2) CHECK (Grade <= 100),
Try TINYINT,
CONSTRAINT [UQ_studentgrades] UNIQUE CLUSTERED
(
StudentId, CourseId, Grade, Try
)
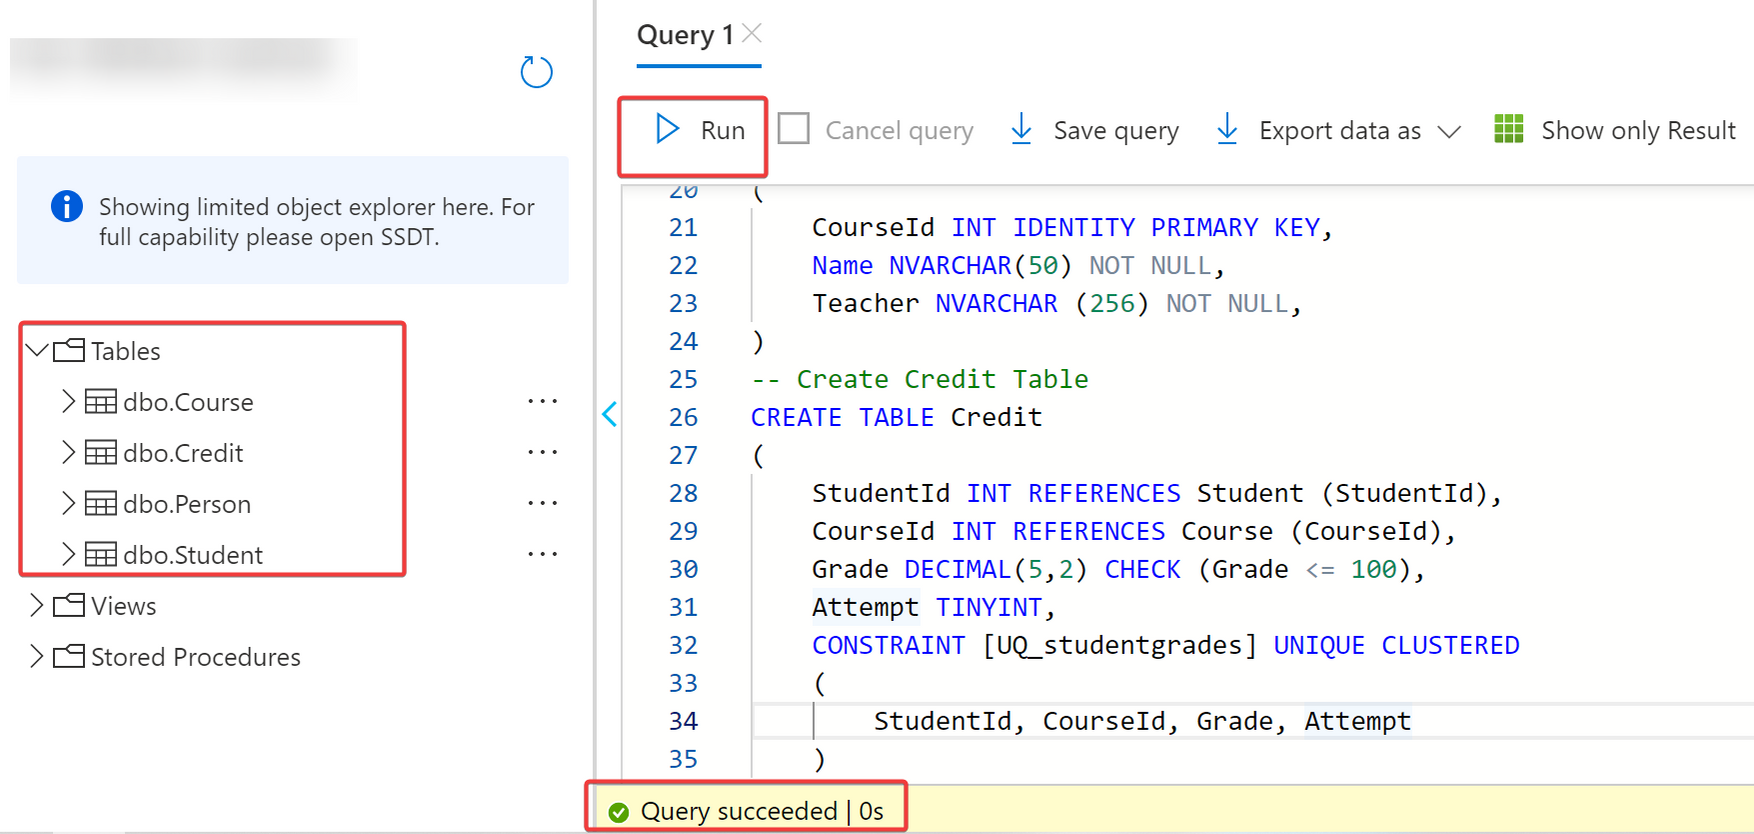
)4. Now, click on on Run to execute the question.
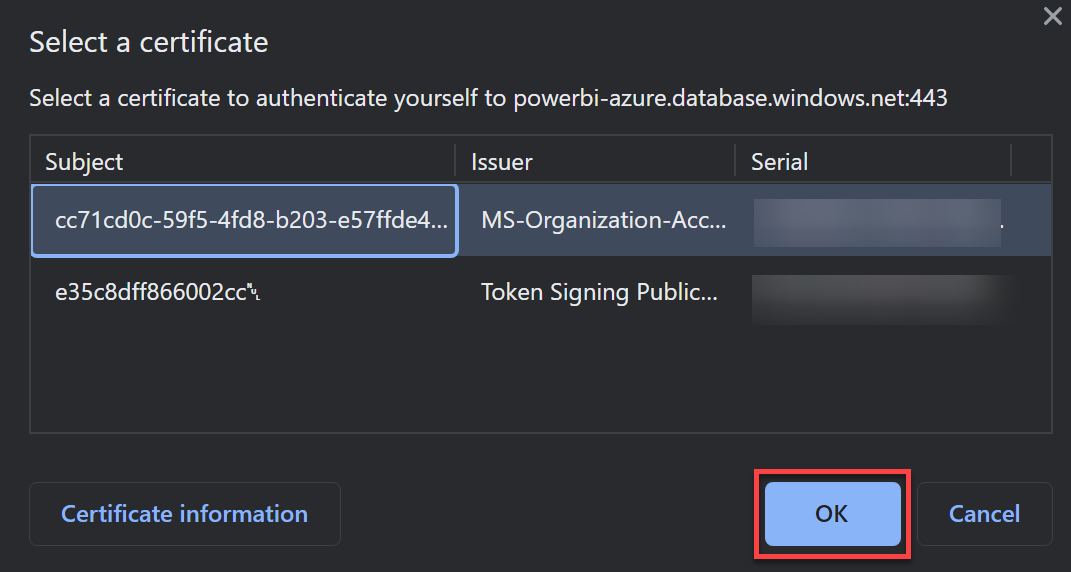
5. Click on OK to shut and proceed querying when prompted with the certificates related together with your Azure account, as proven beneath.
6. Subsequent, click on Run once more to execute the question within the editor. As soon as profitable, you will notice the Question succeeded message on the backside of the question editor part.
You possibly can see the tables created after working the question on the left panel.
7. Choose the dbo.Course desk, and run the next question, which returns 100 data.
SELECT TOP (100) * FROM [dbo].[Course];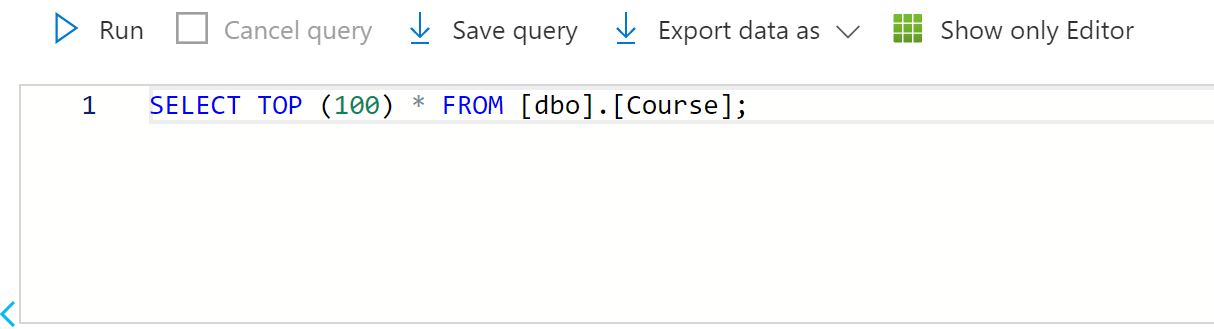
8. Now, choose the dbo.Course below Tables (left panel), click on the ellipsis (three dots) → Edit Knowledge (Preview) to entry the desk’s information.
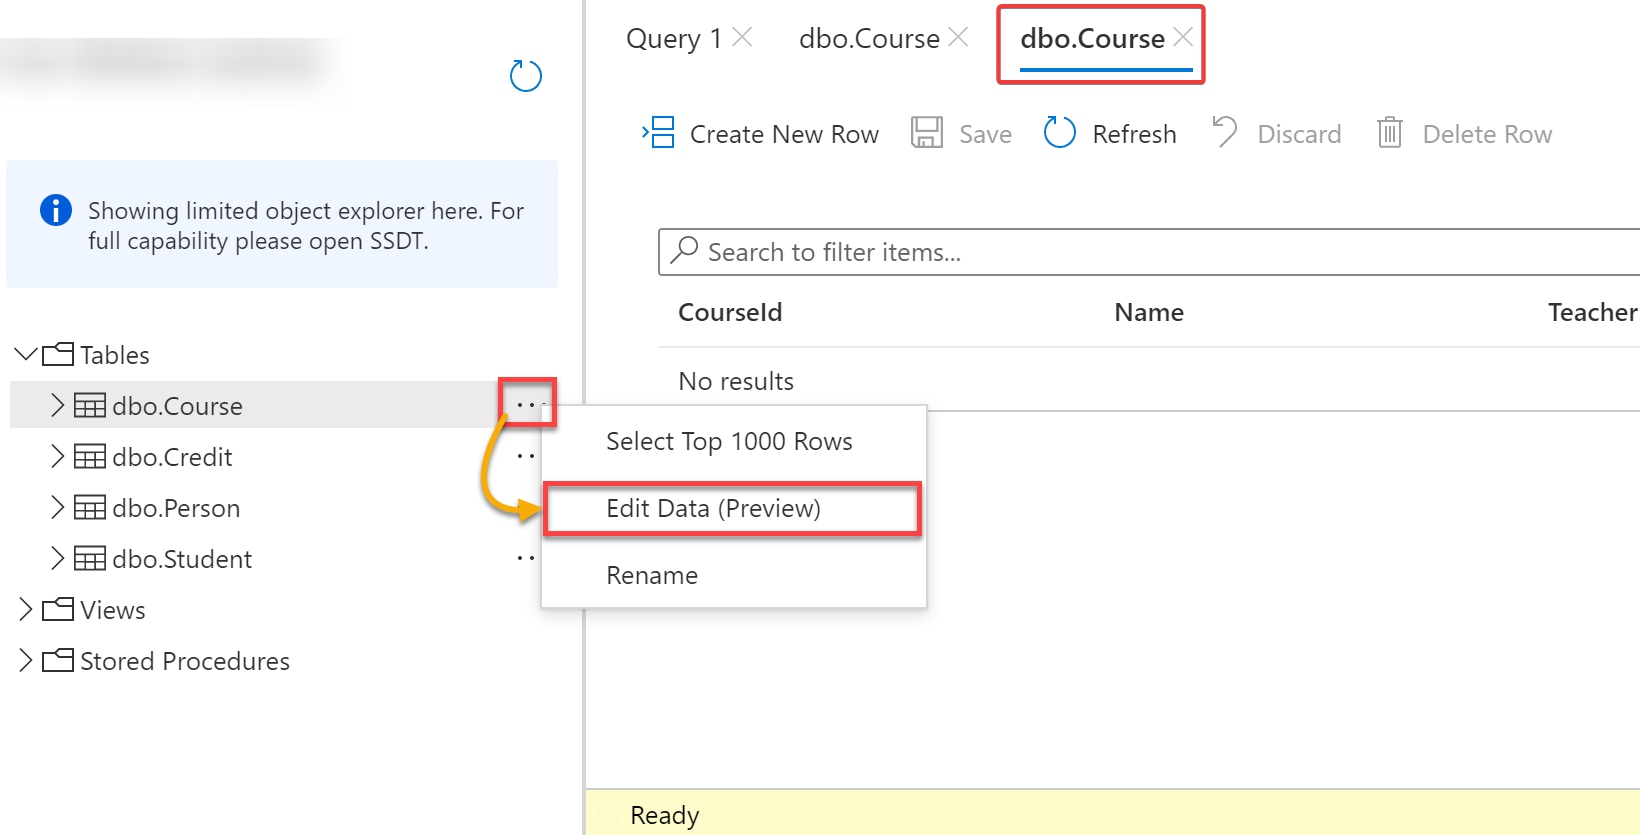
9. Lastly, click on Create New Row so as to add information to the desk, and click on on the Save button to avoid wasting the brand new information.

Visualizing Knowledge from Azure SQL Database to Energy BI
What higher methods to attain information evaluation? Visualizing information from Azure SQL database to Energy BI will certainly pique your curiosity.
To visualise your information on Energy BI:
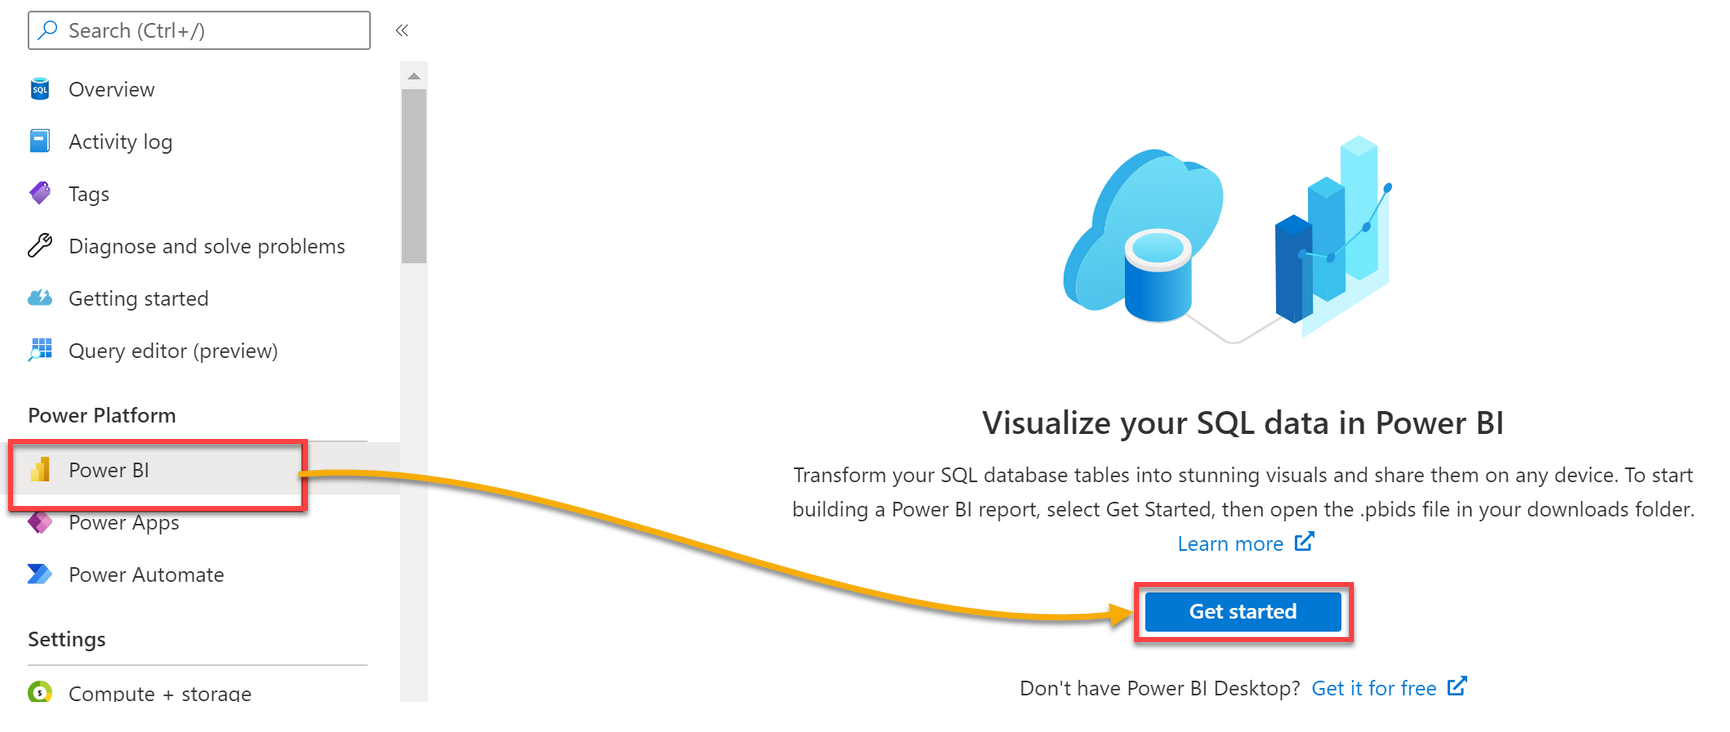
1. Click on Energy BI in your Azure Portal’s overview web page → Get began, and a .pbids file shall be downloaded.
Double-click on the downloaded .pbids file to open it in your Energy BI desktop.
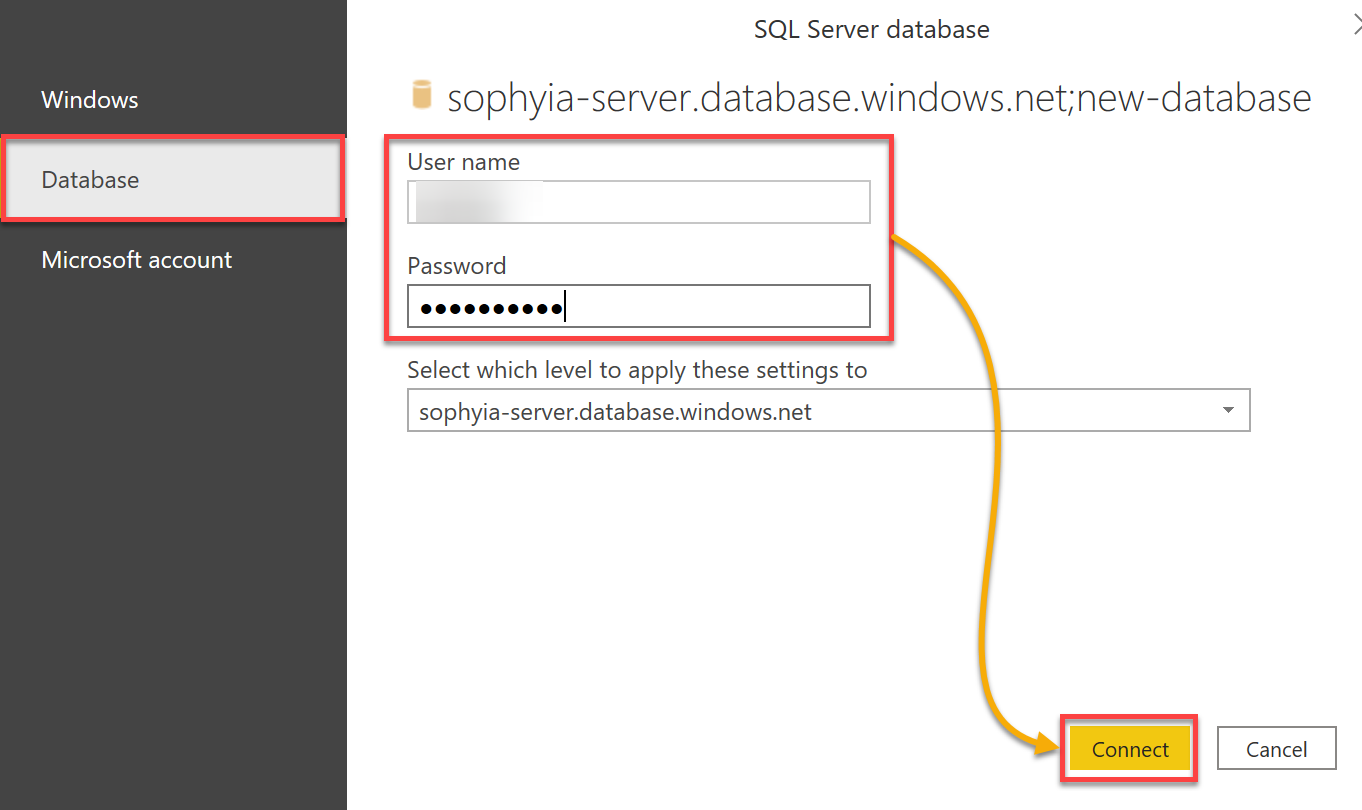
2. Subsequent, choose Database (left panel), present your SQL admin and password and click on Join to connect with your SQL Azure database.
As soon as related, a brand new web page pops as much as see the information in your Azure SQL database (step three).
3. Tick the field of the Course desk, and click on Load to load the desk’s information on Energy BI.

You will discover your loaded information below the Fields part on the appropriate facet of your Energy Bi desktop.
4. Lastly, choose all columns on the Course desk below the Fields part, and a visible pop-up displaying the chosen desk’s information, as proven beneath.
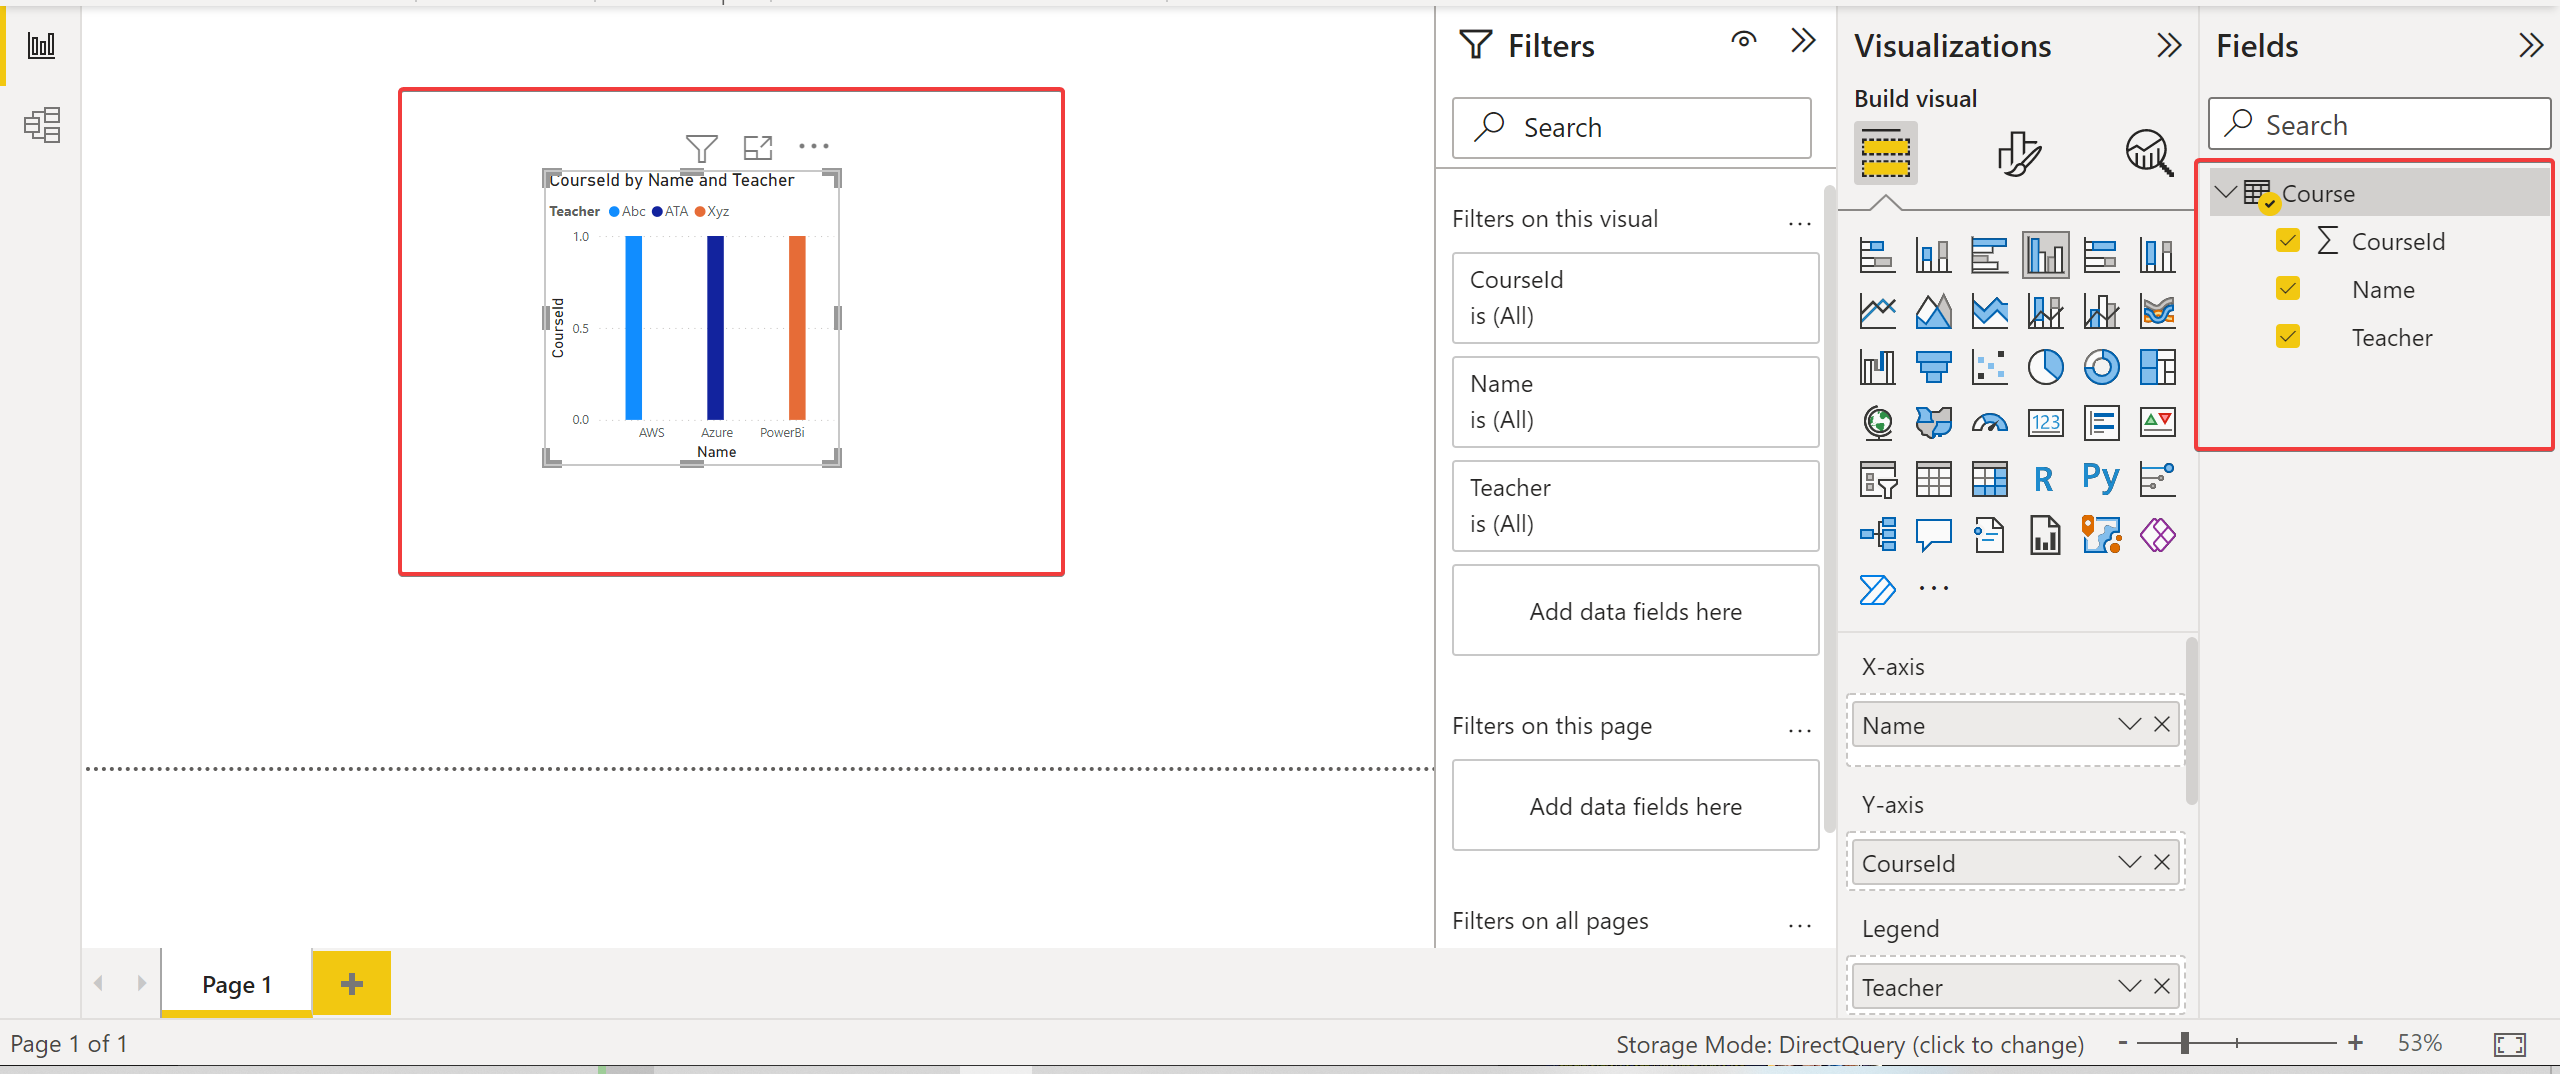
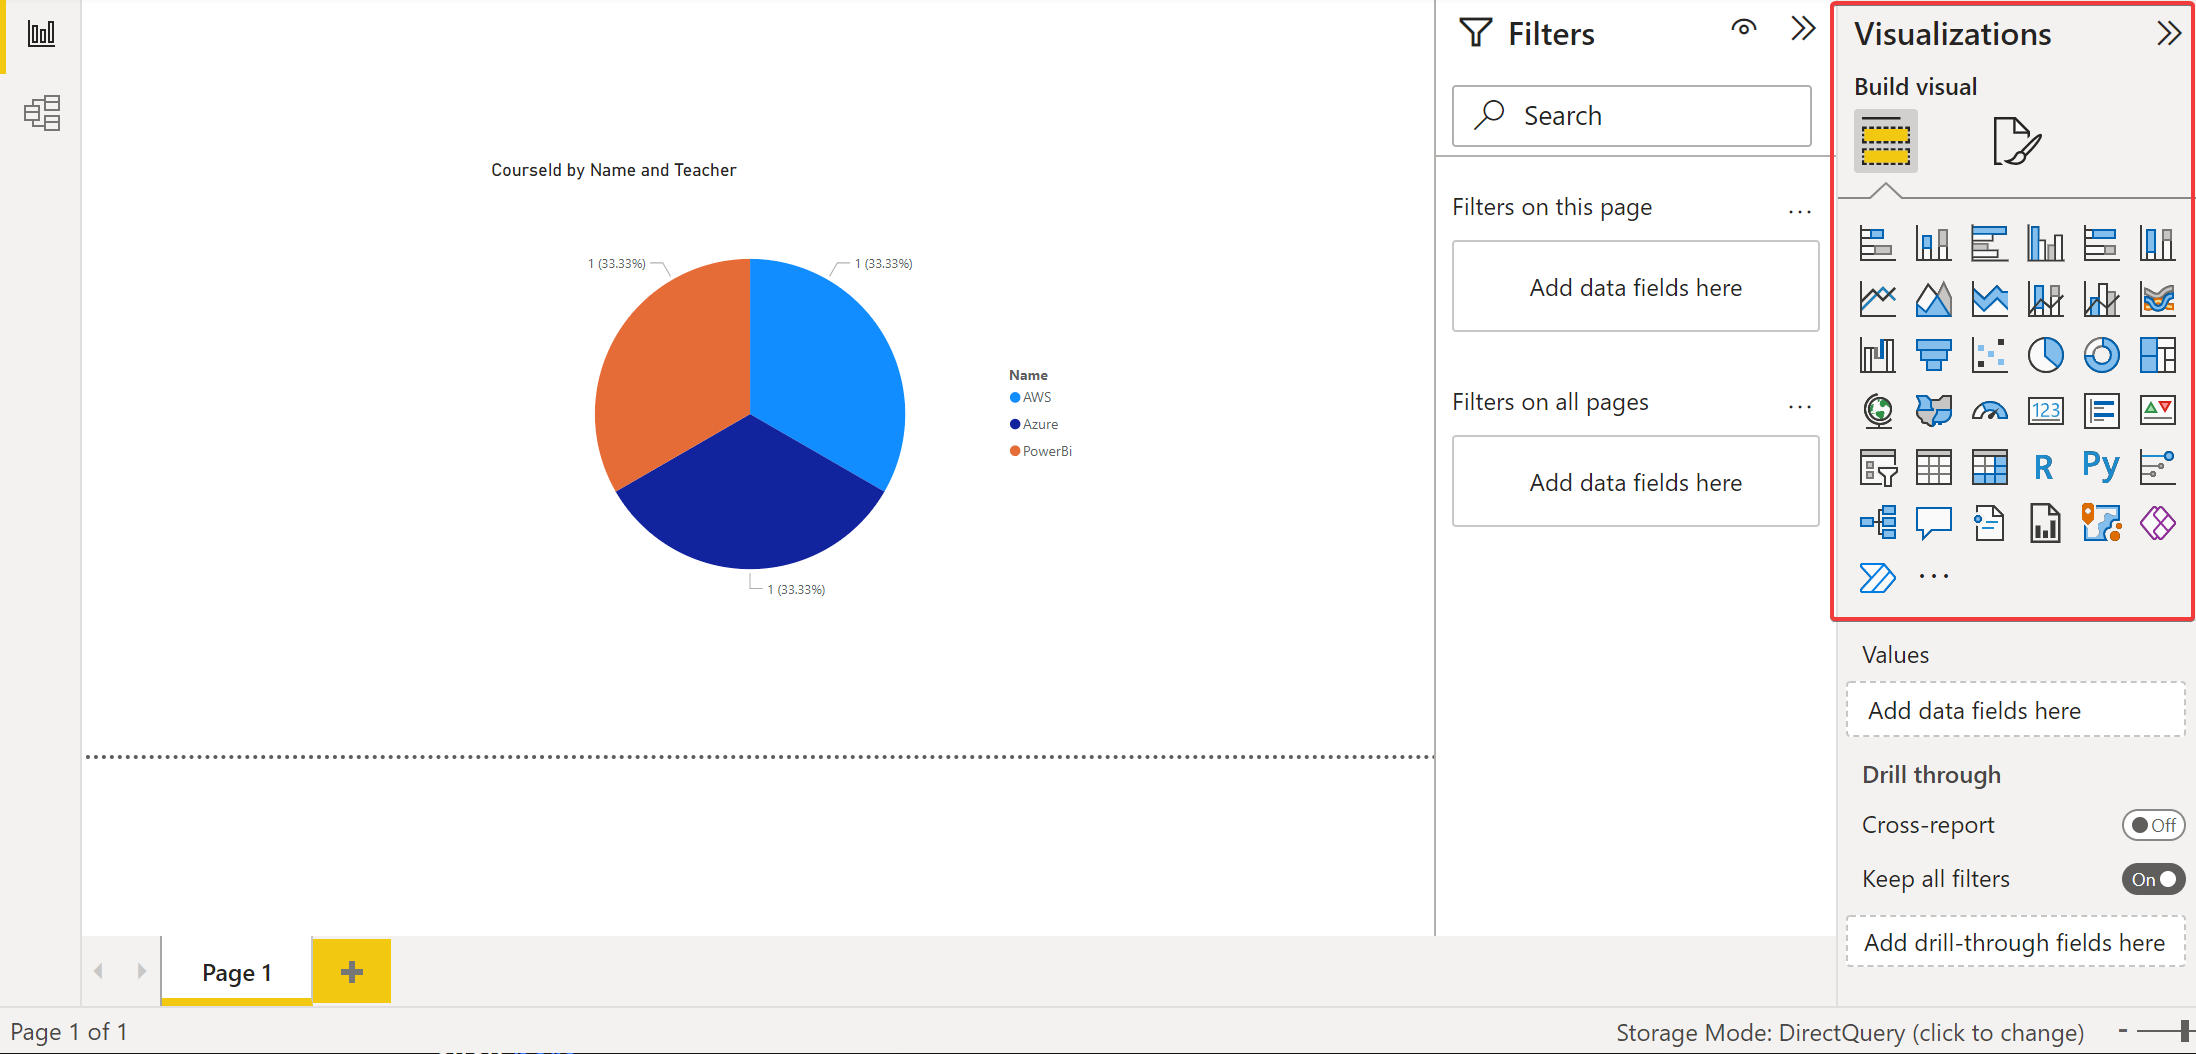
Maybe you want to alter how you can visualize your information. If that’s the case, choose a visible kind (like a Pie chart) below the Visualizations panel, as proven beneath.
Conclusion
Energy BI has greater than twenty information sources. However with this tutorial, connecting your Azure information has by no means been simpler. At this level, now you can shortly ship your information from SQL Server utilizing the on-premises information gateway to Energy BI.
At this level, you by no means have to fret about visualizing information from Azure or SQL servers. In addition to utilizing Energy BI Knowledge Gateway for companies, will you think about this software superbly visualizing information to your IT monitoring instruments?