


Are you on the lookout for a Mail Switch Agent (MTA) to switch/ship mail from one server to a different however don’t have the price range to get one? Why not contemplate being part of the 25% of all the general public servers utilizing Postfix? Postfix is a free and open-source MTA that routes and delivers email correspondence.
On this tutorial, you’ll discover ways to set up and configure Postfix on an Ubuntu server and later take a look at if Postfix accurately sends your emails.
Learn on and ship your emails with out spending!
Conditions
This put up will probably be a step-by-step tutorial. To observe alongside, guarantee you have got a pc operating no less than Ubuntu 14.04.4 LTS. This tutorial makes use of Ubuntu 20.04.4 LTS.
Putting in Postfix on an Ubuntu machine
Postfix is a message switch agent (MTA) that transfers emails between the computer systems of a sender and a recipient. One other nice characteristic of Postfix is that it’s appropriate with all main Unix working methods however doesn’t come put in by default.
To put in Postfix on an Ubuntu machine, you have got two choices; remotely through SSH or straight on the Ubuntu VM console through the Ubuntu terminal. However for this tutorial, you’ll set up Postfix remotely over SSH.
1. SSH into your Ubuntu VM utilizing your favourite SSH shopper.
2. Subsequent, run the apt replace command under to make sure your system has all the newest bundle sources obtainable.
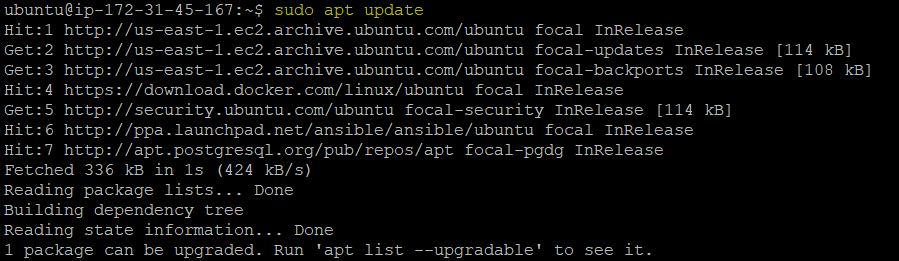
3. Run the next apt set up command to put in the postfix bundle.
Within the command under, you move the DEBIAN_PRIORITY=low environmental variable, permitting you to configure extra choices additional.
After operating the command, you’ll see the Postfix Configuration display (step 4).
sudo DEBIAN_PRIORITY=low apt set up postfix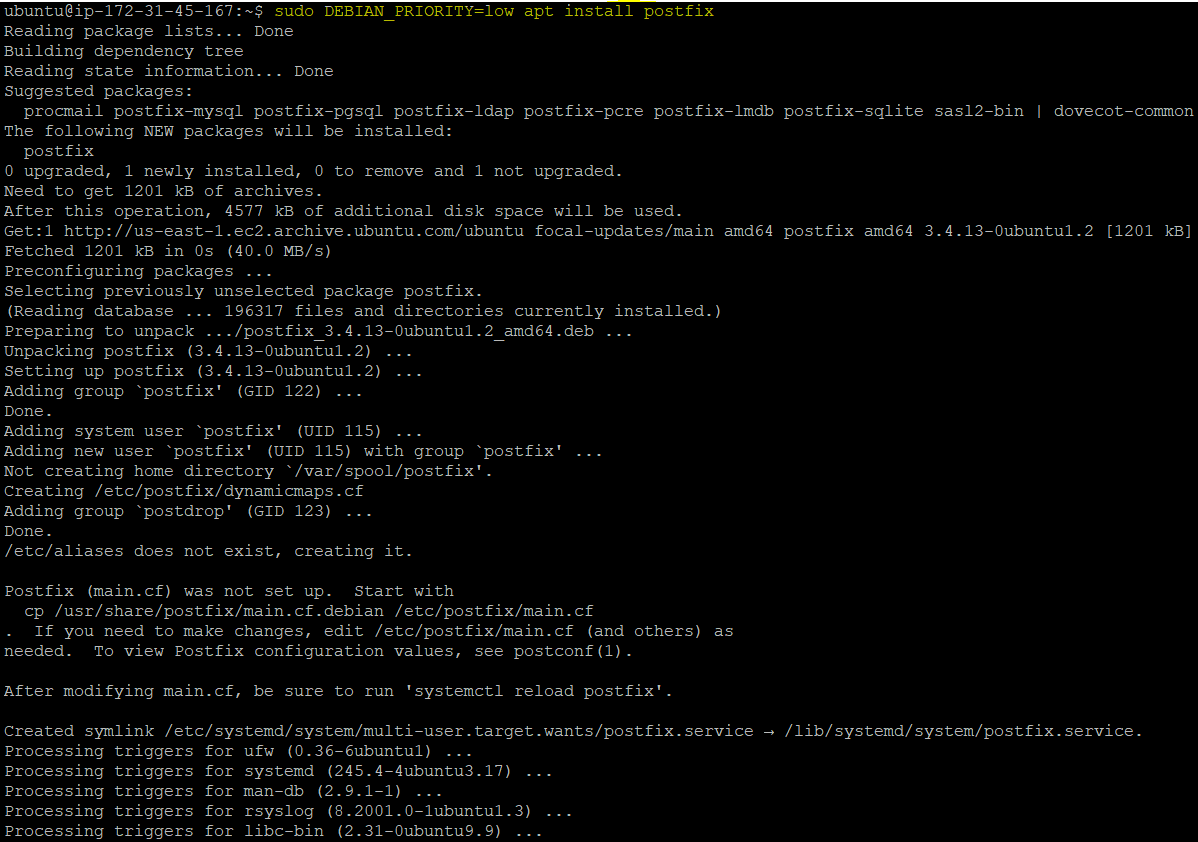
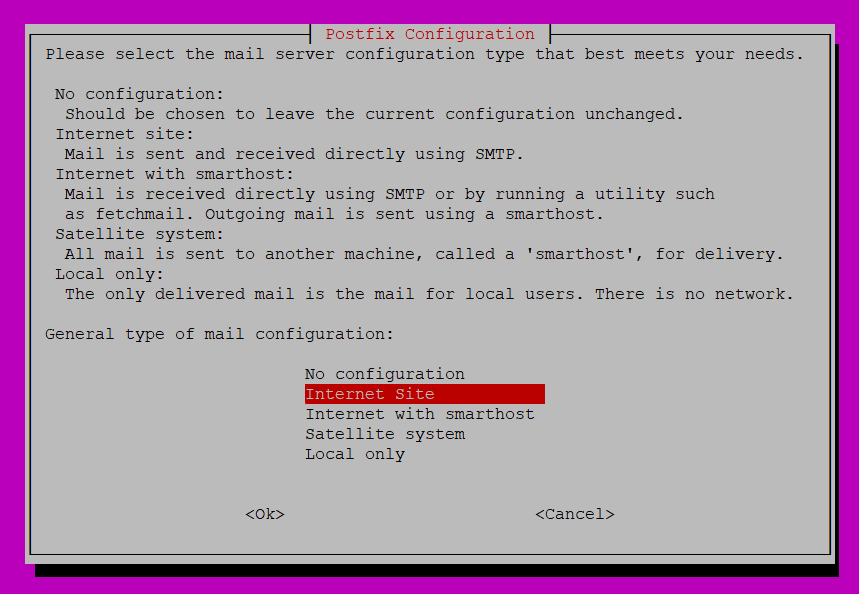
4. Now, spotlight the mail server configuration sort (Web Website), as proven under, and press Enter.
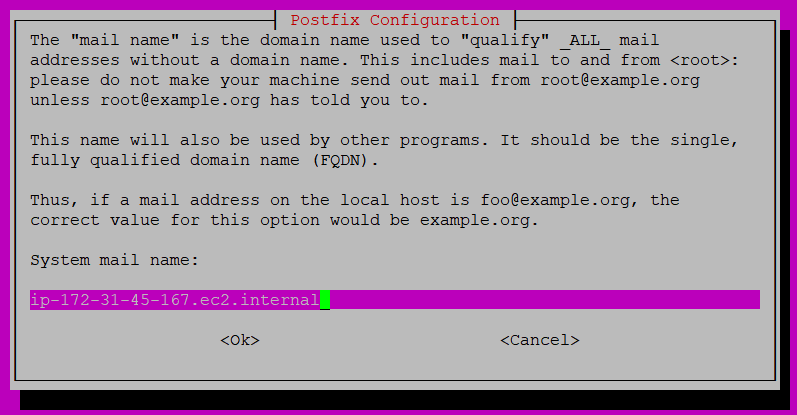
5. Now, specify the System mail title or absolutely certified area title (FQDN), and press Enter. This tutorial makes use of the hostname of the Ubuntu machine. However you possibly can select no matter is appropriate for you or your registered area.
To seek out the hostname of the ubuntu machine, run the hostname command.
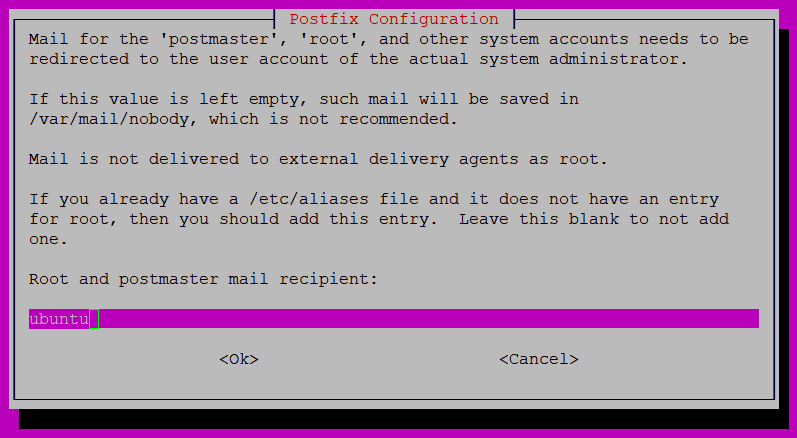
6. Subsequent, set your root and postmaster mail recipient (ubuntu) with no matter you want, and press Enter. This root and postmaster is the Linux account the place your emails will probably be despatched.
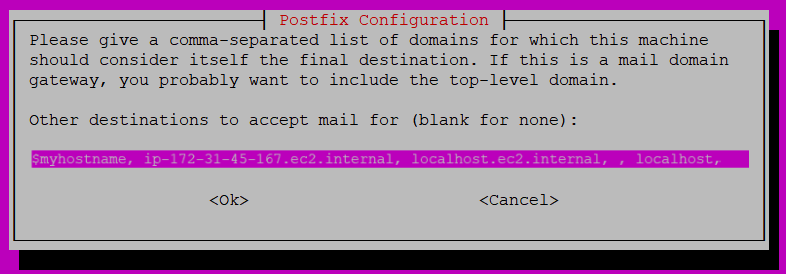
7. Set the domains for which your mail server will settle for the emails. You possibly can add a number of domains and press Enter.
The under configuration makes use of default e-mail domains, similar to localhost, ip-172-31-45-167.ec2.inside.
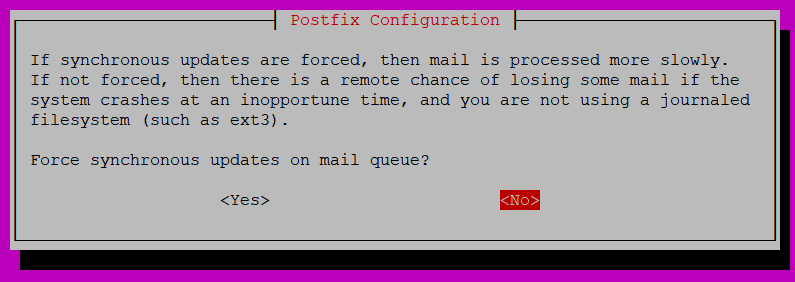
8. Select whether or not you wish to drive synchronous updates of the mail queue or not. However on this case, choose the default (<No>) and press Enter.
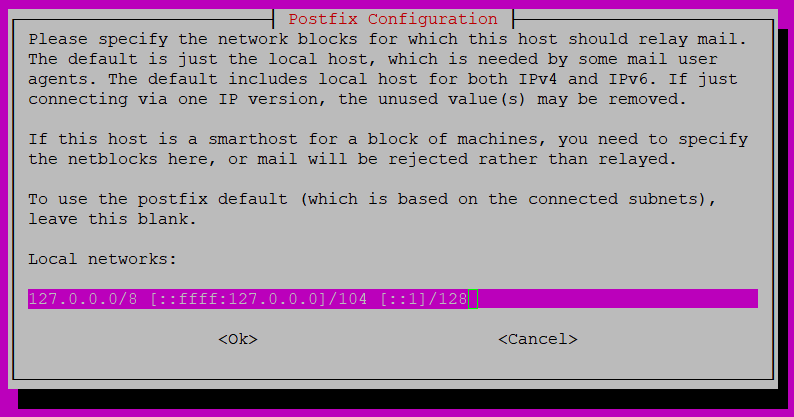
9. Set the native community, which is able to permit emails to be despatched/obtained in your machine, and press Enter. This tutorial makes use of the default community with those offered already within the enter field.
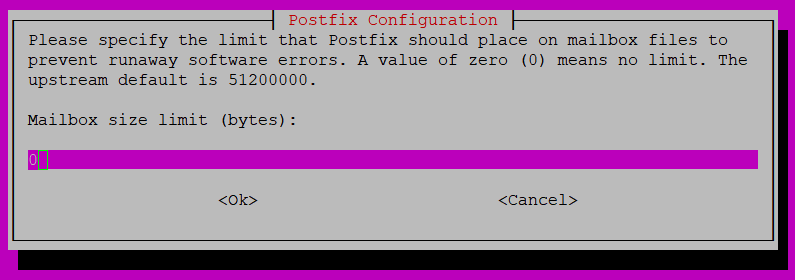
10. Now specify the restrict Postfix ought to have for the mailbox, so that you don’t get any errors. For this tutorial, set the default as 0 bytes and press Enter.
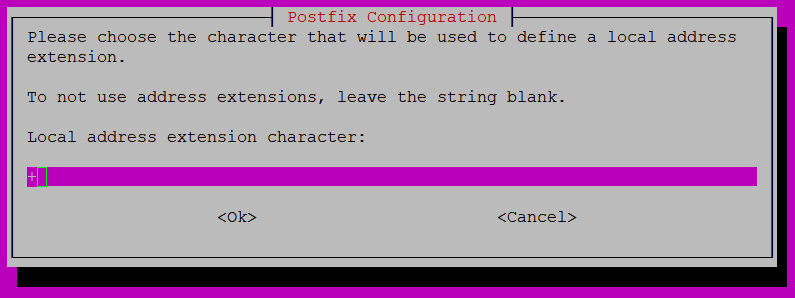
11. After setting the mailbox measurement restrict, specify a personality (+) that you simply’ll use to outline an area tackle extension.
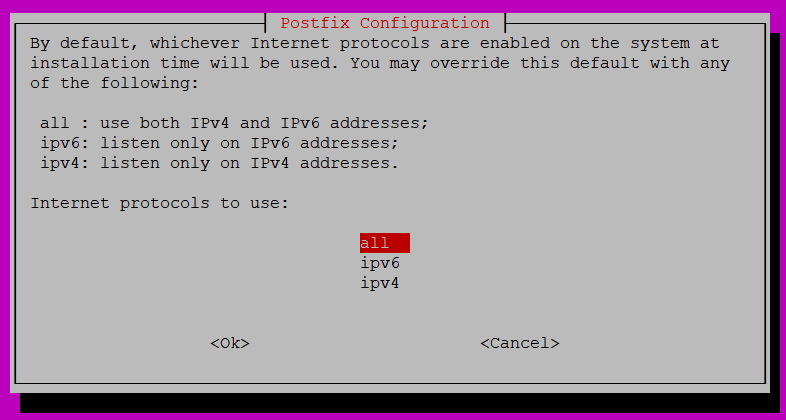
12. Select the Web Protocols to make use of with Postfix, and press Enter. This tutorial’s selection is all, which incorporates each ipv4 and ipv6.
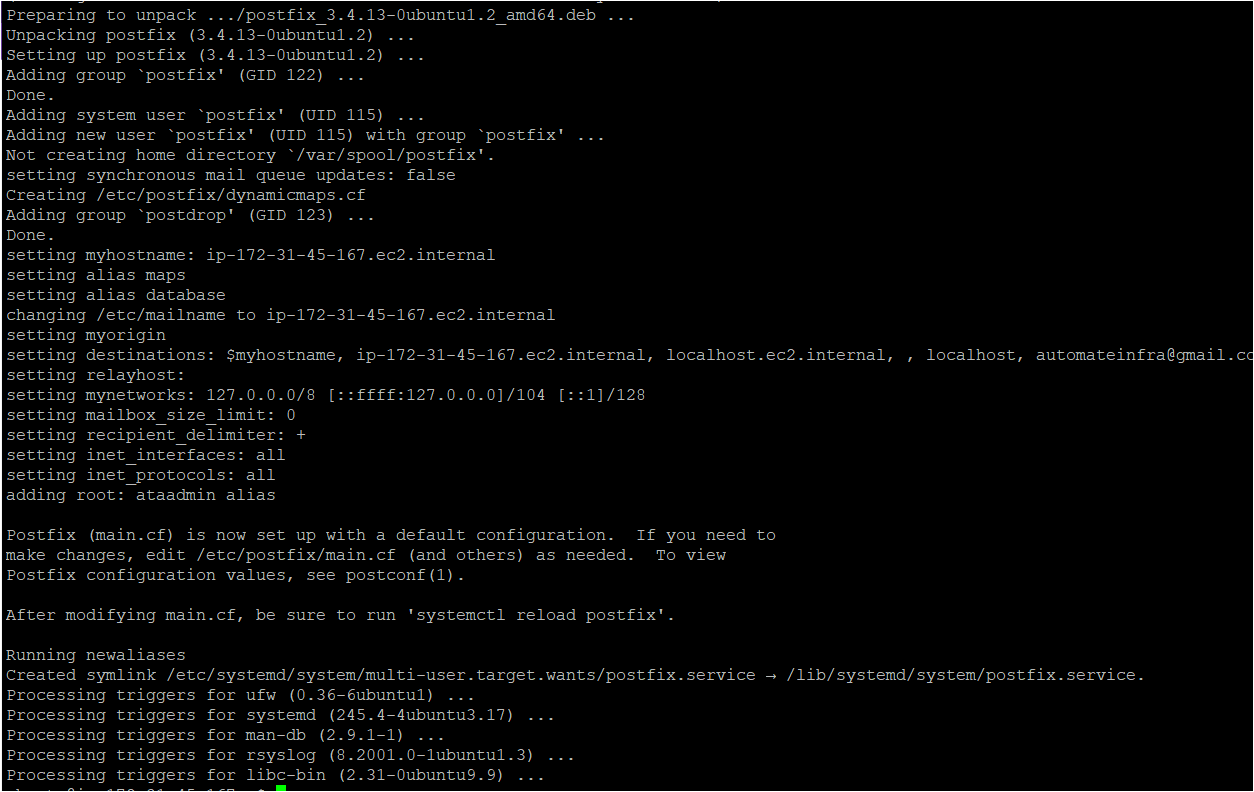
After making all of the configuration modifications, you’ll discover in your terminal that Postfix pulls all these configuration modifications and routinely installs them. By now, your Postfix software program ought to be put in efficiently.
13. Lastly, run the systemctl command under to confirm the Postfix software program in your Ubuntu machine.
sudo systemctl standing postfixThe energetic (exited) standing under signifies Postfix was efficiently put in and is at the moment operating.

Mapping E-mail Addresses
You’ve efficiently put in and configured Postfix in your Ubuntu machine, and that’s an enormous step in direction of benefiting from Postfix. However there are nonetheless extra configurations and settings you’ll care for, like mapping e-mail addresses so you possibly can ship emails in your Linux machine.
To obtain an e-mail from any of the outlined e-mail addresses in your Linux machine, map the e-mail tackle related to a Linux Account:
1. Edit the /and so on/postfix/digital file in your most well-liked textual content editor.
2. Subsequent, add the next line to the digital file, save the modifications, and shut the editor.
ubuntu (on the finish) is the consumer on the Linux machine, whereas [email protected] is the From and To e-mail tackle.
3. Subsequent, run the under instructions, which don’t present output, however apply the e-mail mapping (postmap), and restart postfix for the modifications you made in the 1st step to take impact.
sudo postmap /and so on/postfix/digital
sudo systemctl restart postfix4. As soon as Postfix restarts, run the next command to permit Postfix in your UFW firewall. Doing so lets you ship emails with out getting blocked wherever in your machine.

5. Lastly, run the postconf command under to set the preliminary mailbox location (home_mailbox = Maildir/), which you’ll change later anytime.
sudo postconf -e 'home_mailbox= Maildir/'Putting in Mail Shopper to Ship Emails on a Linux Machine
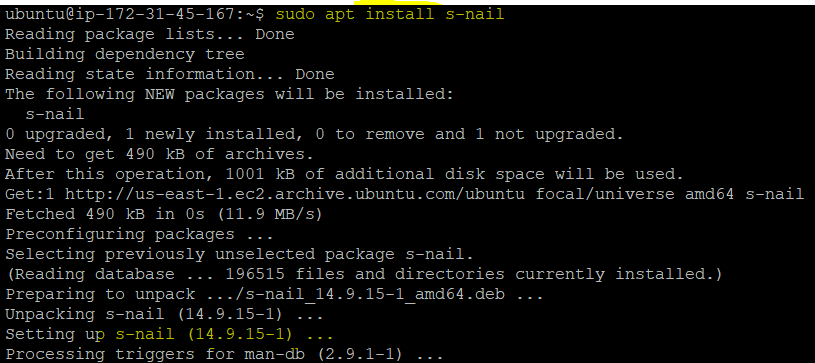
Now that you simply’ve completely configured Postfix, it’s time to check in case your Ubuntu machine receives emails. However first, you’ll have to put in an e-mail shopper, s-nail, one of the broadly and Ubuntu appropriate mail shoppers.
1. Run the command under to offer a mailbox listing (MAIL=~/Maildir) the place emails are obtained.
This command tells Postfix to obtain emails within the present session (/and so on/bash.bashrc) and completely (/and so on/profile.d/mail.sh) within the ~/Maildir listing.
The tee command reads the usual enter and writes it to each the usual output and a number of information.
echo 'export MAIL=~/Maildir' | sudo tee -a /and so on/bash.bashrc | sudo tee -a /and so on/profile.d/mail.sh
2. Subsequent, run the apt set up command to put in s-nail in your machine utilizing the MAIL variable.
3. Edit the s-nail shopper configuration (/and so on/s-nail.rc) in your editor, and add the next instructions.
These instructions permit the s-nail shopper to open the empty inbox (emptystart), set the mailbox location as a listing path (folder=Maildir), and generate a despatched mailbox file (document=+despatched).
set emptystart
set folder=Maildir
set document=+despatched
4. Now, run the command under to ship an e-mail utilizing the -Snorecord possibility, which generates the correct listing construction inside your configured mailbox listing (/Maildir).
This command doesn’t present output, however you’ll confirm the listing construction within the following step.
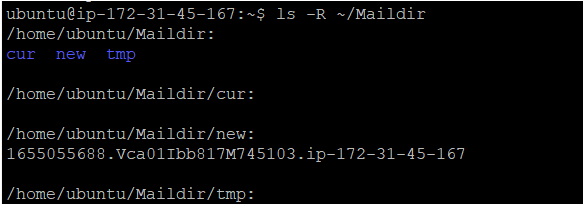
echo 'init' | s-nail -s 'init' -Snorecord ubuntu5. Run the next ls command to confirm if the listing construction has been created efficiently.
If profitable, you’ll see the listing construction created, as proven under.
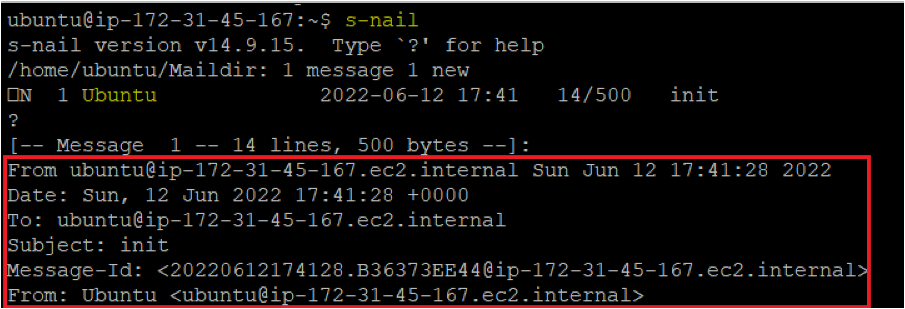
6. Lastly, run the s-nail command under to test your inbox.
As you execute the s-nail command, you’ll discover that the e-mail (in step 4) was efficiently despatched utilizing the next configurations you set.
Configuring Postfix to Ship Emails to Exterior Relay (Google)
You’ve simply discovered how an e-mail is distributed on an area machine utilizing Postfix. However is Postfix able to sending emails outdoors your native machine? Sure! You’ll configure Postfix to make use of an exterior SMTP relay to ship emails.
Earlier than configuring Postfix, see the diagram under to grasp the e-mail workflow when utilizing an exterior SMTP.

To configure Postfix to make use of an exterior SMTP:
1. Edit the /and so on/postfix/sasl/sasl_passwd file and add the next line containing your SMTP relay e-mail tackle, google e-mail tackle, and password.
2. Subsequent, run the postmap command under in order that the credentials you configured in the 1st step are encrypted. This command creates a password file (sasl_passwd.db) in the identical location.
sudo postmap /and so on/postfix/sasl_passwd3. Run every of the next instructions, which don’t present output, however change the safety and possession of the password file (sasl_passwd.db). These instructions prohibit root consumer entry and read-write solely.
sudo chown root:root /and so on/postfix/sasl_passwd /and so on/postfix/sasl_passwd.db
sudo chmod 0600 /and so on/postfix/sasl_passwd /and so on/postfix/sasl_passwd.db
4. Now, edit the /and so on/postfix/important.cf file and add the next configuration, which lets you securely ship an e-mail.
relayhost = [smtp.gmail.com]:587
smtp_sasl_security_options = noanonymous
smtp_sasl_auth_enable = sure
header_size_limit = 4096
smtp_sasl_password_maps = hash:/and so on/postfix/sasl/sasl_passwd
smtp_tls_security_level = encrypt
smtp_tls_CAfile = /and so on/ssl/certs/ca-certificates.crt
smtp_use_tls = sure
smtp_sasl_tls_security_options = noanonymous
5. Run the under command, which doesn’t present output, however will restart the postfix service. Restarting the Postfix service ensures configurations you made within the /and so on/postfix/important.cf file in step 4 will take impact.
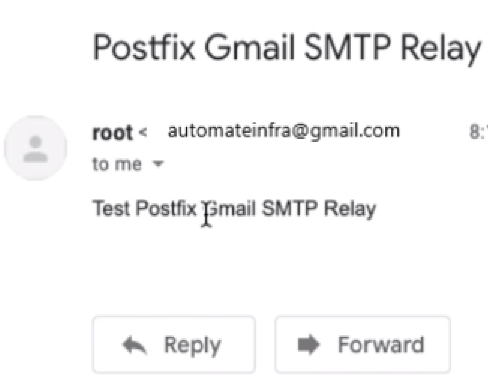
sudo service postfix restart 6. Lastly, run the instructions under to ship an e-mail (echo) to your Google account and confirm your machine’s logs (tail).
echo "Check Postfix Gmail SMTP Relay" | mail -s "Postfix Gmail SMTP Relay " [email protected]
sudo tail /var/log/mail.log
As you possibly can see under, the e-mail has been despatched to the Google relay efficiently.

Alternatively, navigate to your Gmail account, and you must see an e-mail much like the one under.
Conclusion
On this tutorial, you’ve discovered to arrange and configure Postfix on an Ubuntu machine. You’ve put in and built-in a mail shopper with Postfix to ship uncooked emails utilizing an e-mail tackle mapped to a Linux account.
At this level, you’re assured sufficient to make use of Postfix as a useful e-mail agent to route and ship emails safely.
There are different methods of sending emails, similar to utilizing APIs and SDKs. However when you want to ship e-mail messages on the native community, combining Postfix with s-nail could be finest fitted to growth functions.