


Backing up your knowledge is at all times a good suggestion, and you must at all times have a minimum of two backups of your knowledge: one native and one off-site. You by no means know what might occur to your knowledge, proper? So is there an ideal device for knowledge backup? With Amazon Relational Database Service (RDS), you possibly can create an RDS snapshot (storage quantity snapshot) of your DB occasion.
On this tutorial, you’ll discover ways to create an AWS RDS Snapshot to get an entire backup of your DB occasion and all its knowledge.
Keep tuned, and safe your knowledge with AWS RDS Snapshots!
Conditions
This tutorial will probably be a hands-on demonstration. For those who’d wish to comply with alongside, make sure you’ve the next.
- An AWS account with energetic billing – For those who shouldn’t have an AWS account, you possibly can create one without cost.
- An IAM person with AWS Entry Key ID and Secret Entry Key – This tutorial makes use of an IAM person referred to as rds-cli-user.
- An Amazon RDS DB occasion working – The occasion generally is a MySQL, PostgreSQL, MariaDB, Oracle, or Microsoft SQL Server DB occasion.
Creating an RDS Snapshot through the Amazon RDS Administration Console
As an alternative of particular person databases, Amazon RDS creates a snapshot of your DB occasion. This habits backs up your whole DB occasion together with all its knowledge.
You should use the Amazon RDS Administration Console, AWS CLI, or Amazon RDS API to create an RDS snapshot. However on this tutorial, you’ll begin with the Amazon RDS Administration Console (a GUI) that lets you create, view, and handle your Amazon RDS assets.
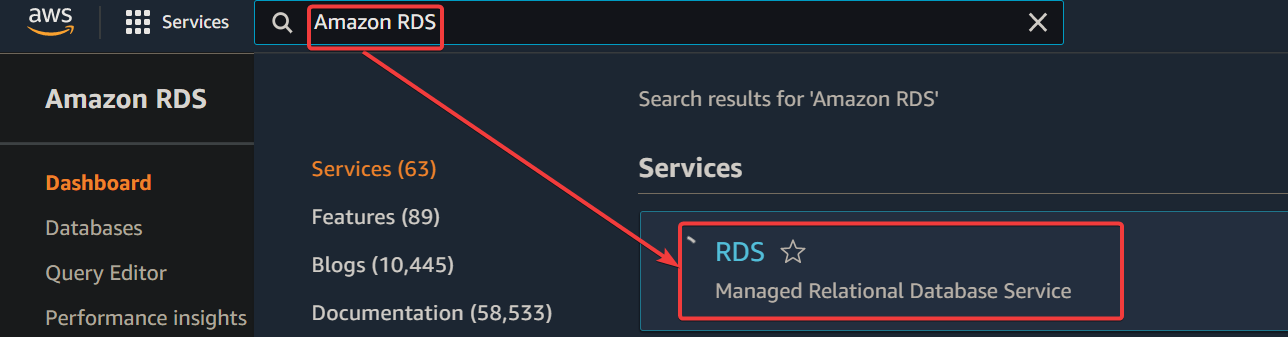
1. Log in to the AWS Console, seek for Amazon RDS, and choose RDS from the checklist, as proven beneath, to entry the Amazon RDS Dashboard (step two).
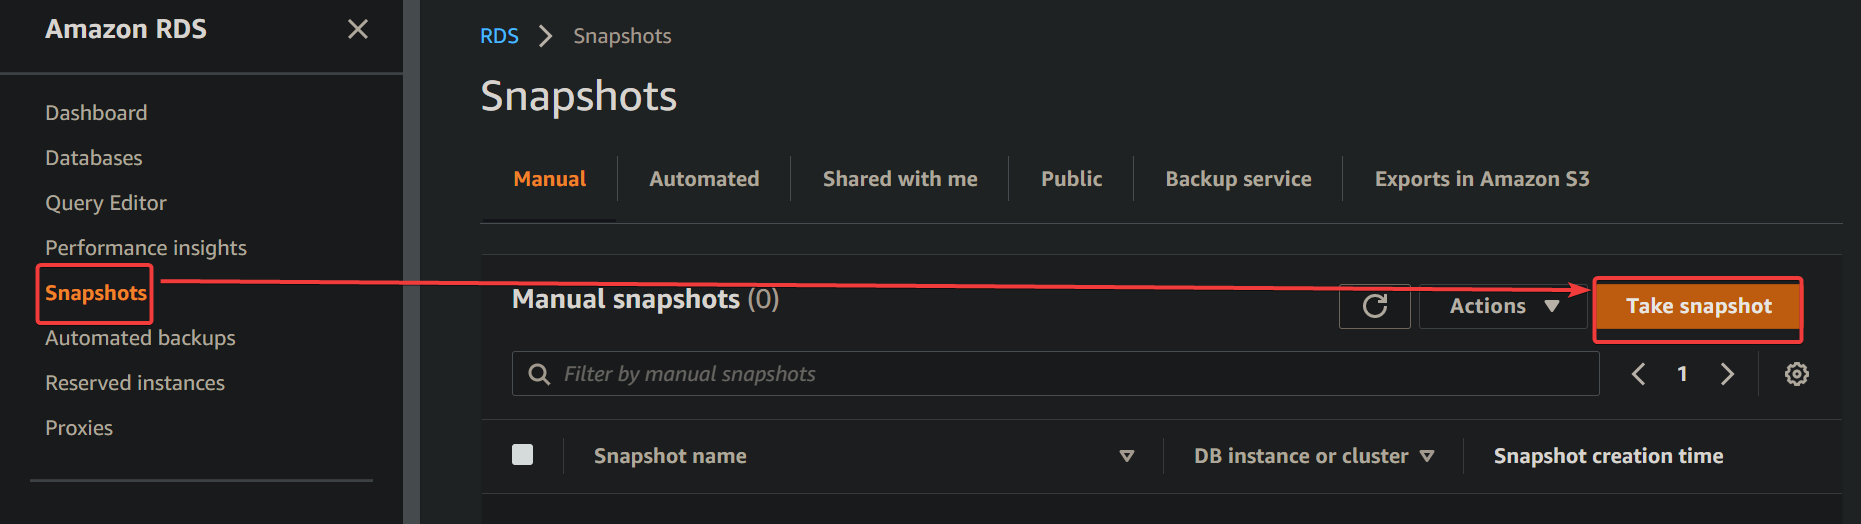
2. Subsequent, click on on Snapshots within the left sidebar → Take Snapshot to open the Take DB Snapshot web page the place you possibly can take a snapshot.
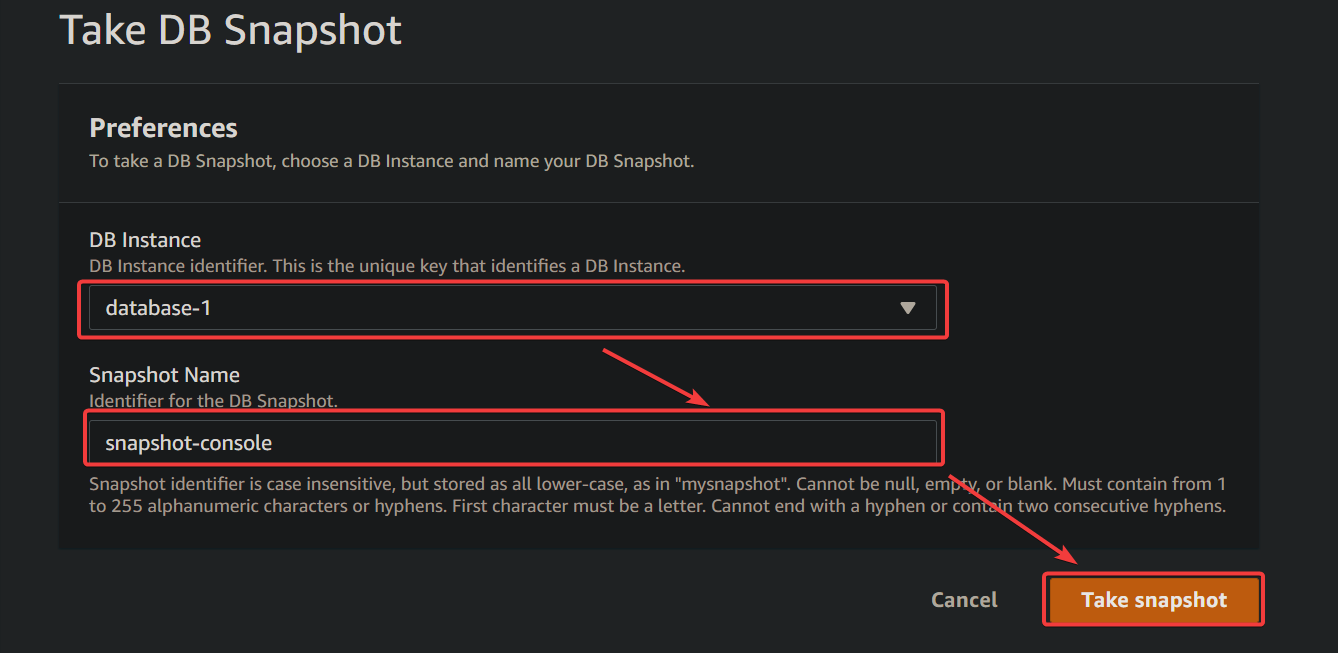
3. Take a DB Snapshot with the next:
- DB Occasion – Choose the DB occasion you wish to take a snapshot of from the drop-down area.
- Snapshot Identify – Present a snapshot identify (distinctive in your AWS account and area) within the area supplied.
The size of the snapshot identify should be between one and 255 characters, together with upper-case, lower-case letters, digits, and hyphens (-).
- Click on Take snapshot (bottom-right) to create a snapshot of your chosen DB occasion. The Snapshots web page seems, displaying all of the snapshots you’ve created (step 4).
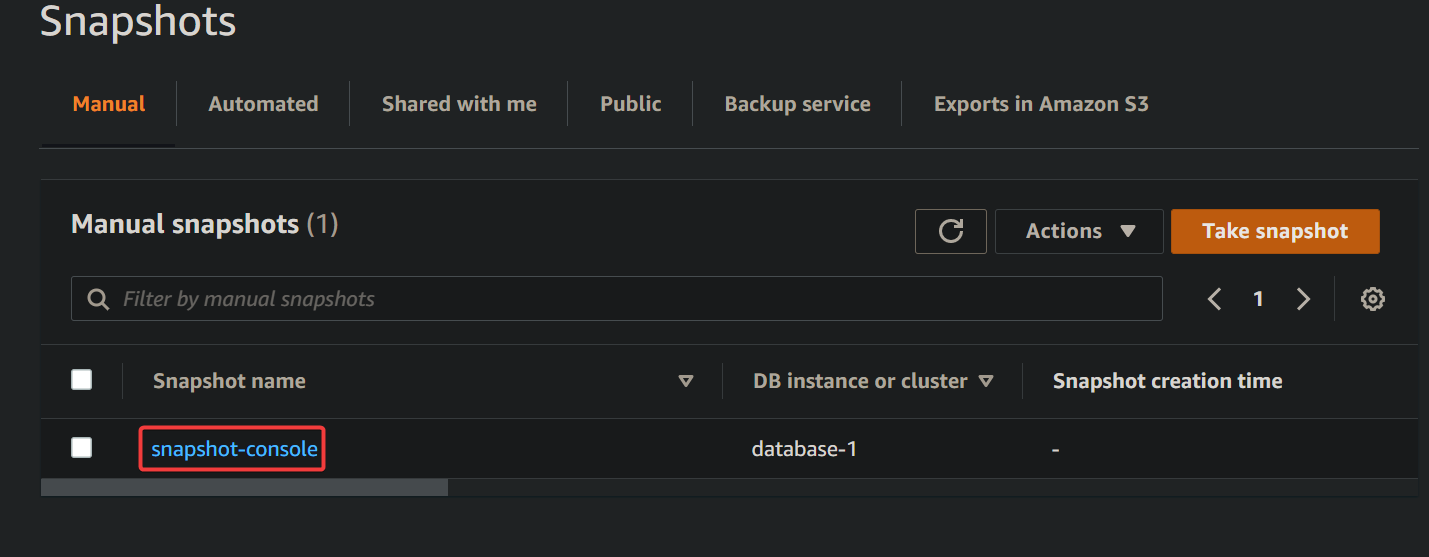
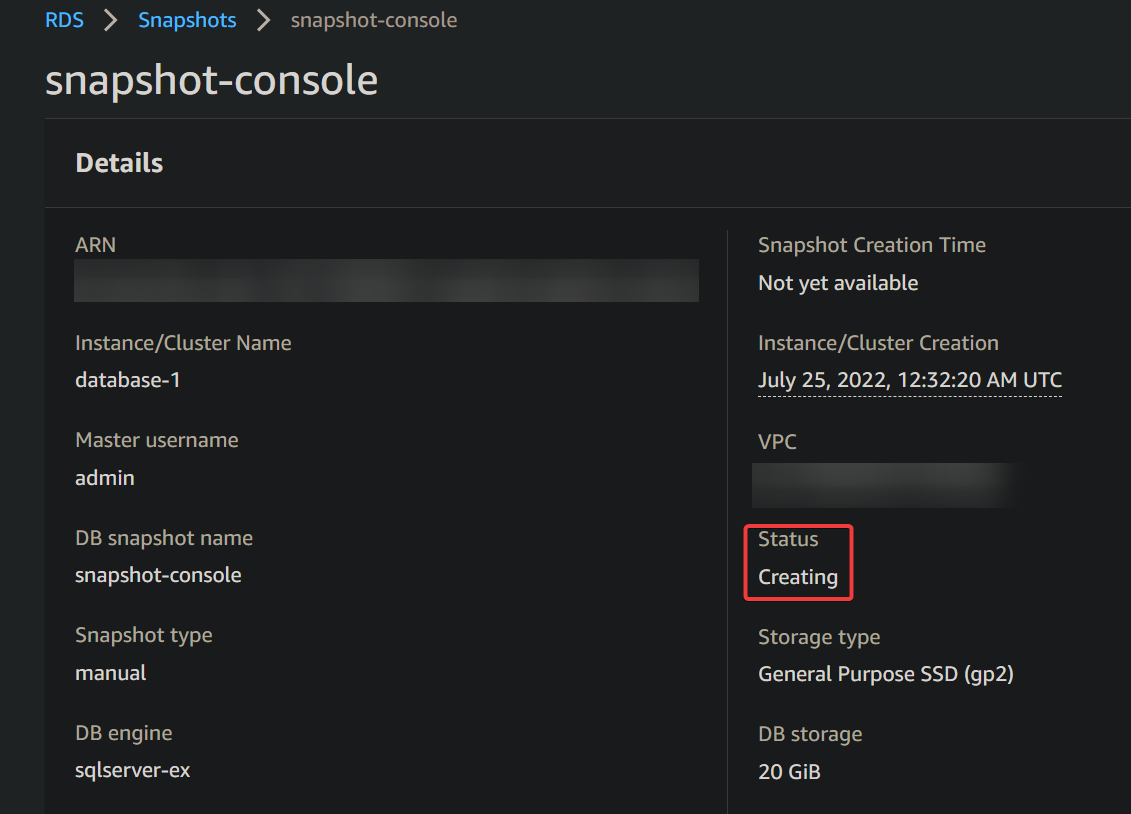
4. Lastly, click on on the hyperlinked snapshot identify (snapshot-console). Doing so opens the Snapshot Particulars web page that shows details about your snapshot, akin to when it was created, its measurement, and its standing.
You’ll be able to see within the screenshot beneath that the snapshot standing is Creating, indicating that the snapshot is being created.
The creation takes time, relying on the scale of your DB occasion. Normally, the method takes nearly quarter-hour to create a snapshot round 20GB in measurement.
As soon as the standing modifications to Out there, the snapshot has been efficiently created and is now obtainable to be used.
Unlogged knowledge tables in MySQL, PostgreSQL, and MariaDB DB cases may not be replicated to the snapshot. Therefore, unlogged knowledge is just not included within the snapshot.
For long-term backup storage, saving your snapshot to an S3 bucket is most advisable. Snapshots that exist solely on Amazon EBS volumes may be misplaced if the underlying quantity fails, is deleted, or its knowledge turns into corrupted.
Creating an RDS Snapshot through the AWS CLI
You’ve efficiently created an RDS snapshot through the Amazon RDS Administration Console. However when you’re largely engaged on a command line atmosphere, creating an RDS snapshot through the AWS CLI can also be attainable. AWS CLI lets you handle your AWS assets on a terminal.
The Amazon RDS Administration Console is nice for easy, one-off duties however doesn’t provide a lot flexibility when it’s essential to script or automate duties, not like AWS CLI. You should use AWS CLI to script repetitive operations, like a CI/CD pipeline, making your work simpler and fewer time-consuming.
To create an RDS Snapshot through the AWS CLI, it’s essential to first connect a coverage with mandatory permissions to your IAM person.
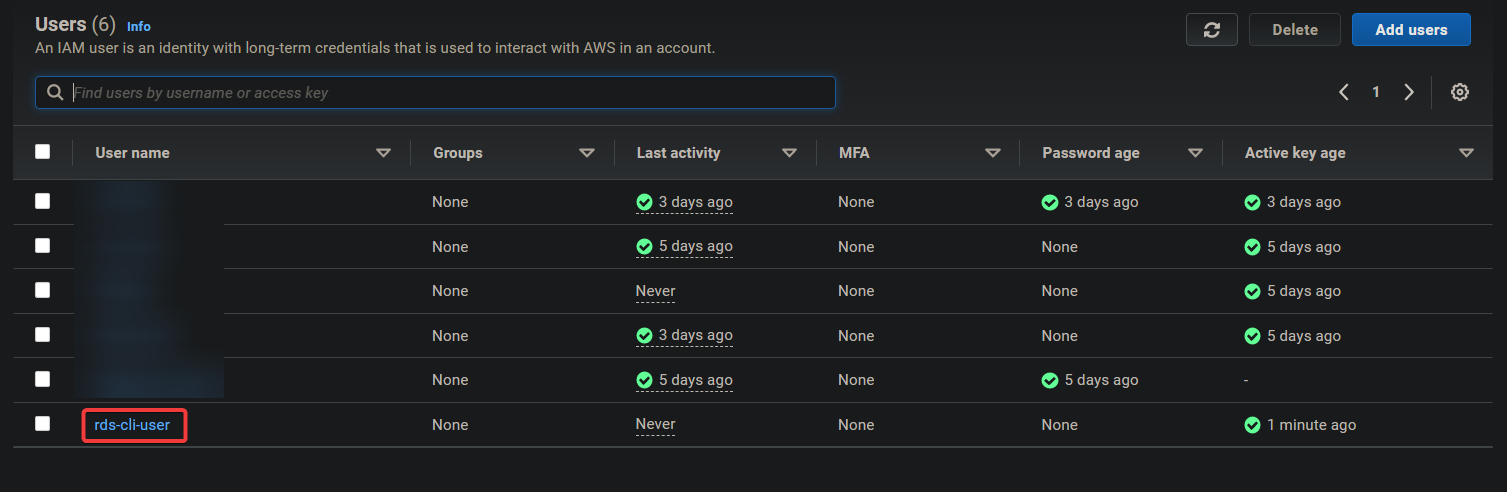
1. On AWS Administration Console, navigate to the Customers web page and click on in your hyperlinked person identify (rds-cli-user) to entry the person abstract web page (step two).
2. Subsequent, click on on Add inline insurance policies beneath the Permissions tab, as proven beneath, to initialize making a coverage.

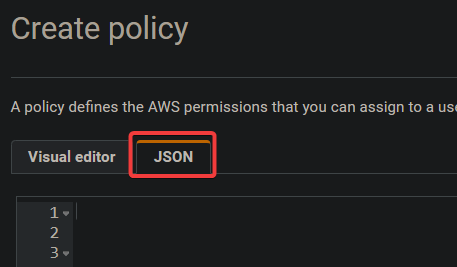
3. On the Create coverage web page, click on the JSON tab to decide on so as to add insurance policies in JSON format.
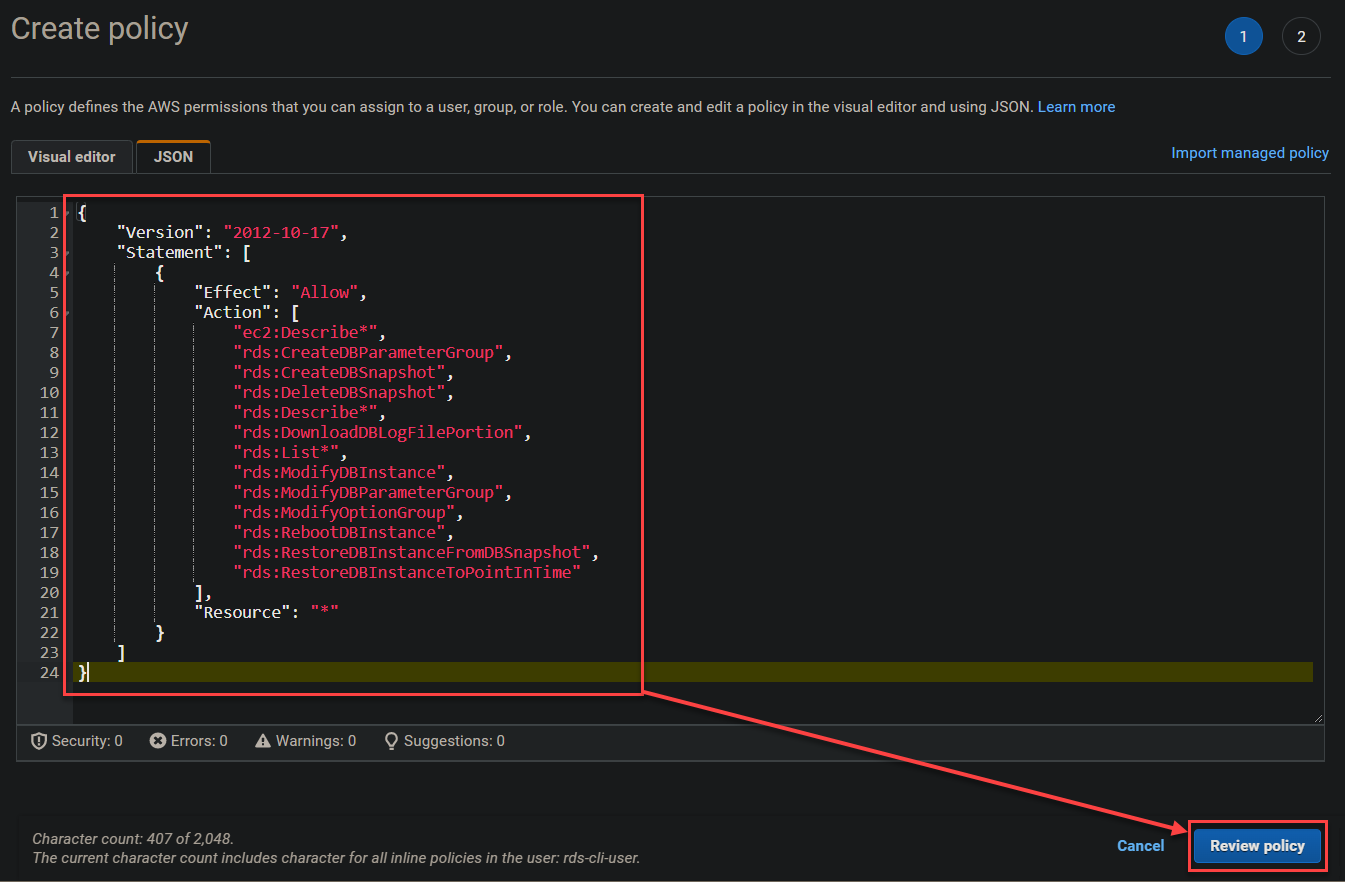
4. Add the next coverage to the coverage editor, and click on on Evaluation coverage.
This coverage offers your IAM person the mandatory permissions to carry out varied actions on RDS assets and EC2 assets like the next:
- Describing an present snapshot
- Deleting an present snapshot
- Itemizing EC2 cases, and so forth.
{
    "Model": "2012-10-17",
    "Assertion": [
        {
            "Effect": "Allow",
            "Action": [
                "ec2:Describe*",
                "rds:CreateDBParameterGroup",
                "rds:CreateDBSnapshot",
                "rds:DeleteDBSnapshot",
                "rds:Describe*",
                "rds:DownloadDBLogFilePortion",
                "rds:List*",
                "rds:ModifyDBInstance",
                "rds:ModifyDBParameterGroup",
                "rds:ModifyOptionGroup",
                "rds:RebootDBInstance",
                "rds:RestoreDBInstanceFromDBSnapshot",
                "rds:RestoreDBInstanceToPointInTime"
            ],
            "Useful resource": "*"
        }
    ]
}
After including the coverage, click on the Evaluation coverage button (bottom-right).
5. Present a novel identify for the coverage (rds-cli-policy), and click on on Create coverage to finalize creating the brand new coverage.
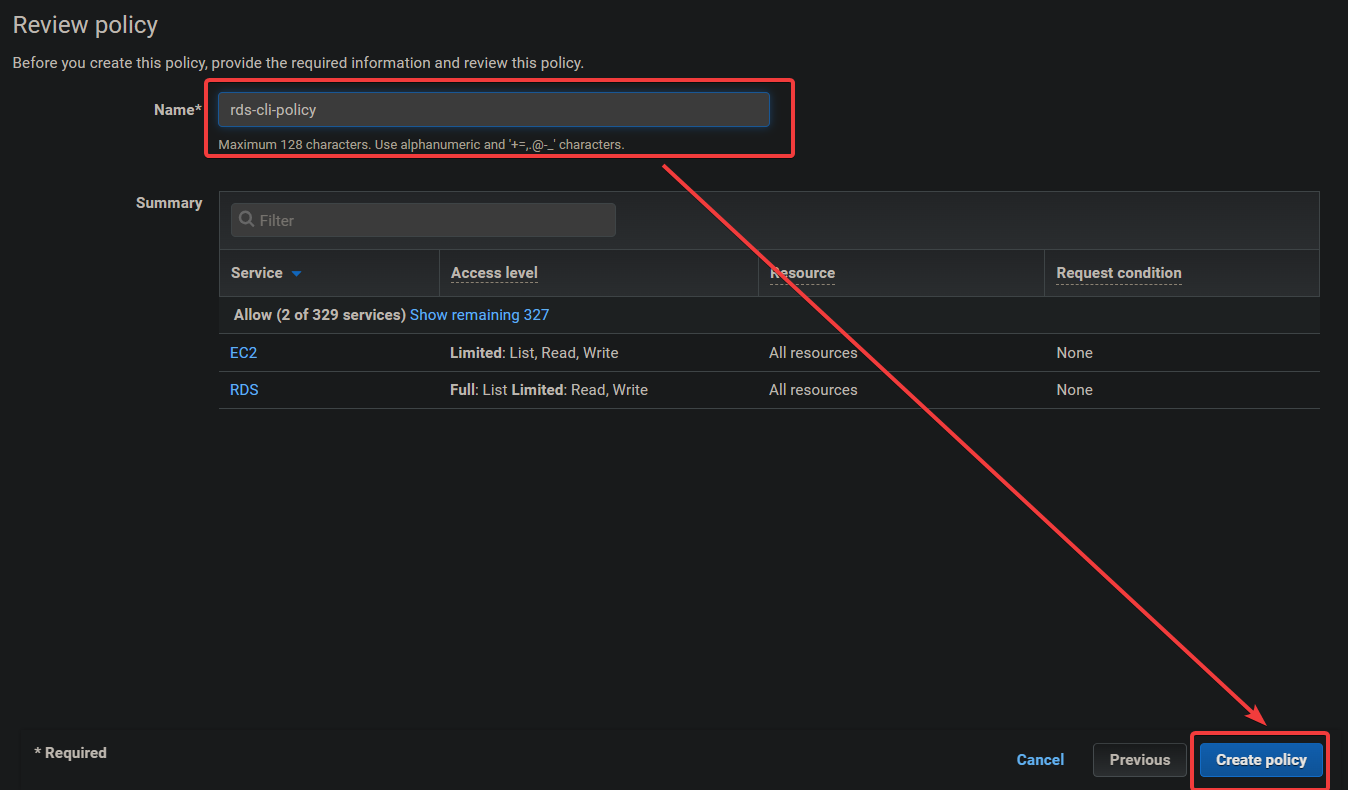
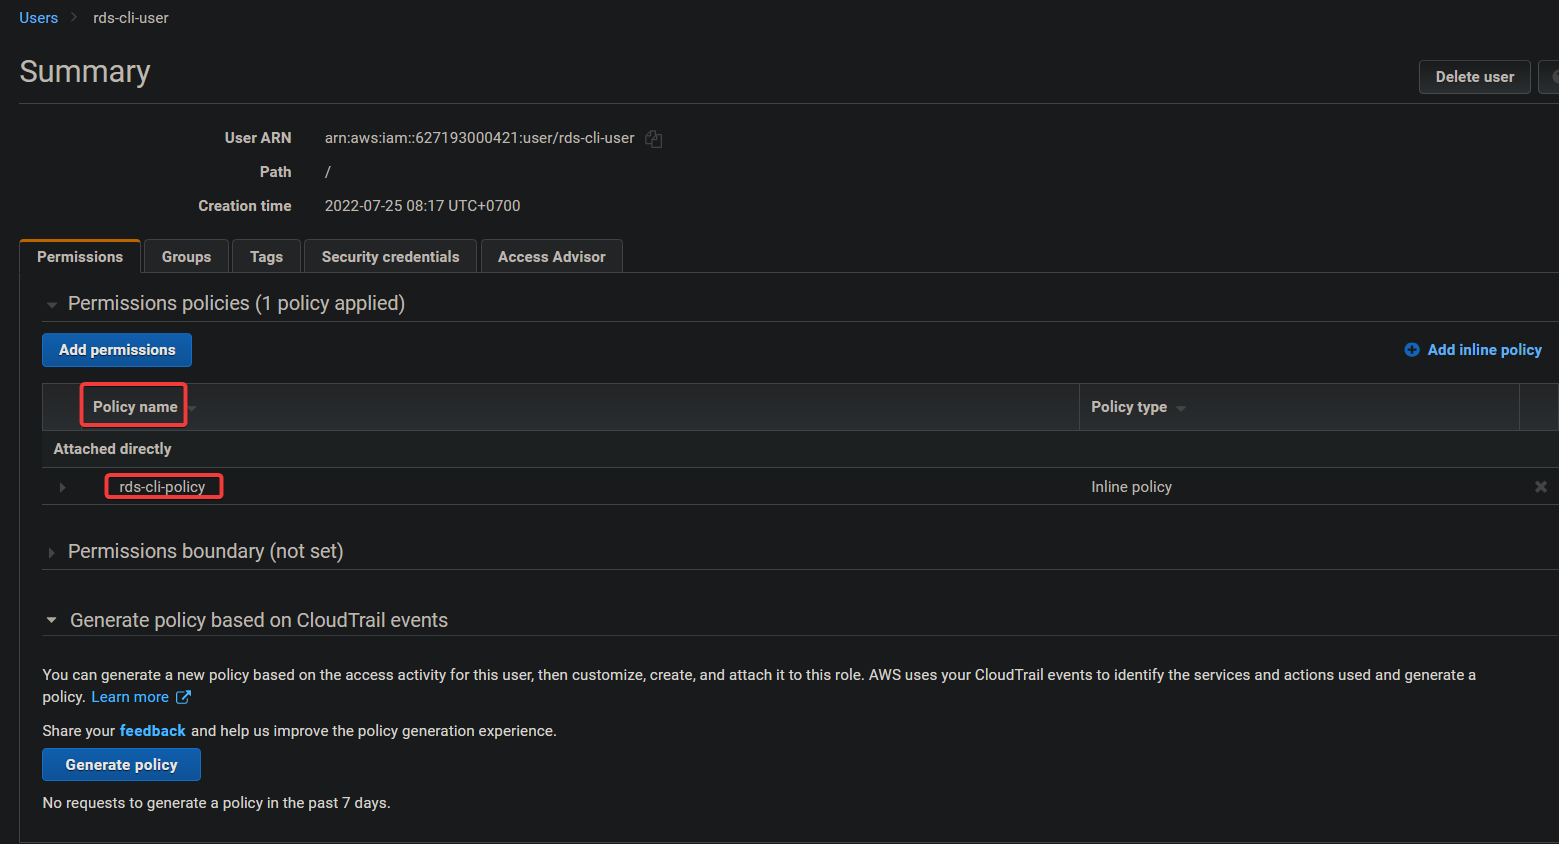
You’ll see the newly-created coverage beneath the Coverage identify column on the Abstract web page, as proven beneath.
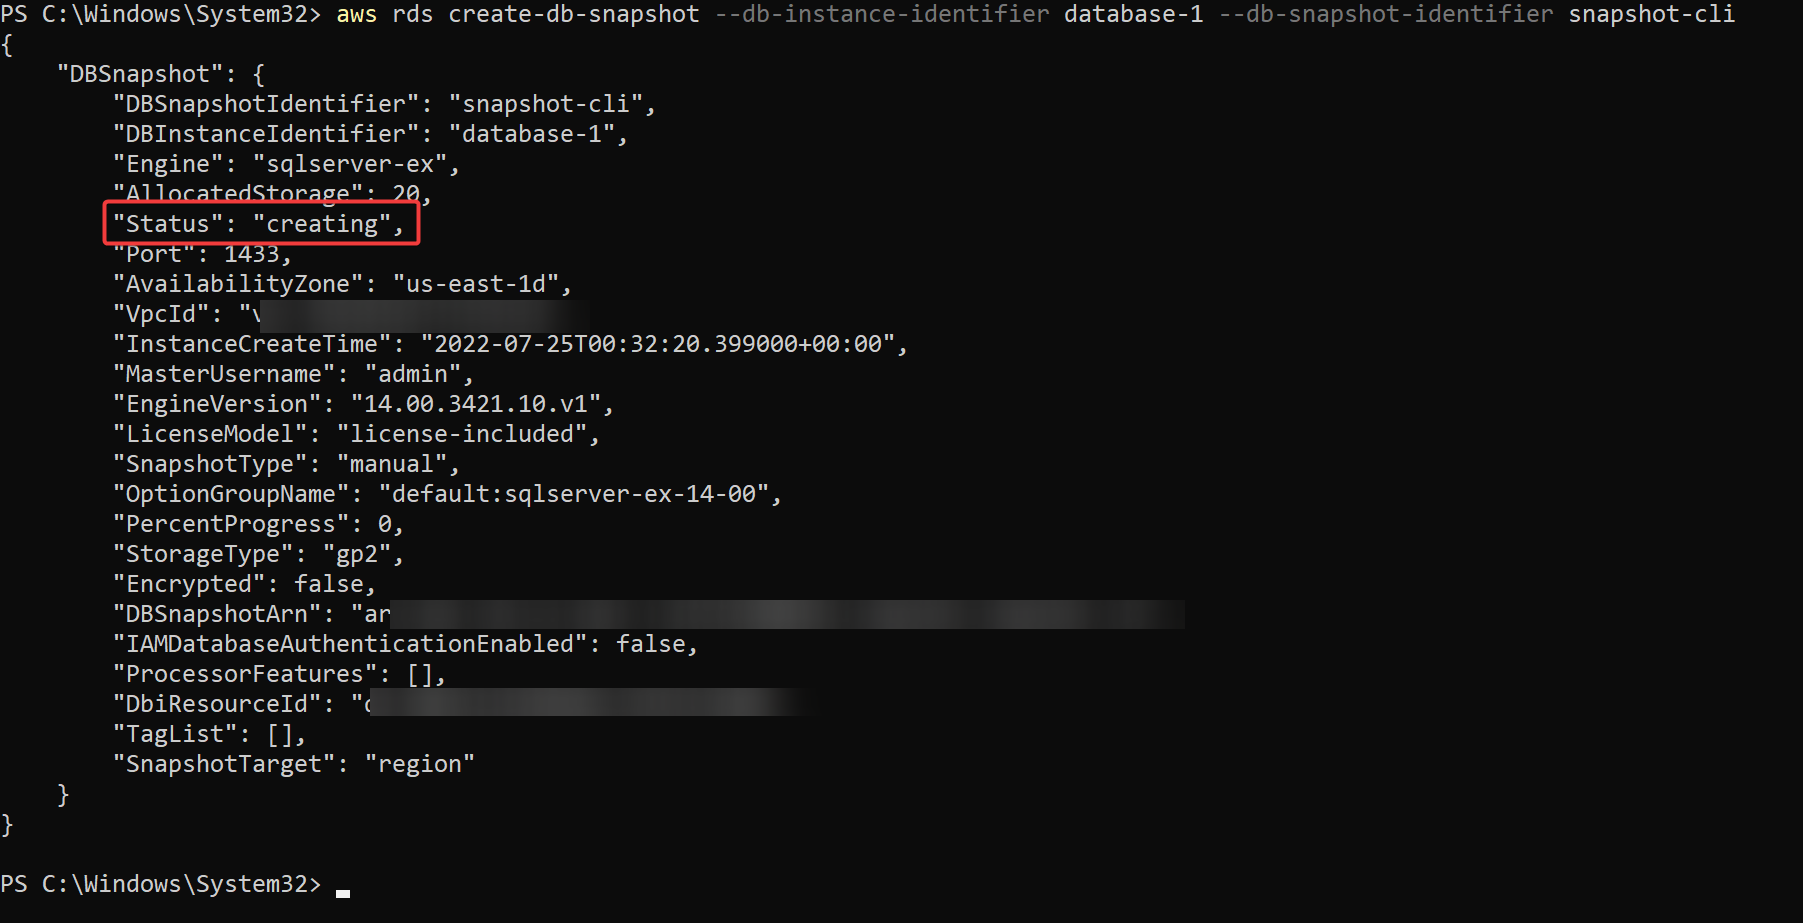
6. Subsequent, run the next create-db-snapshot command to create an RDS snapshot of your DB occasion (database-1) and identify the snapshot as snapshot-cli. You’ll be able to change snapshot-cli along with your most well-liked snapshot identify because it’s arbitrary.
aws rds create-db-snapshot --db-instance-identifier database-1 --db-snapshot-identifier snapshot-cliUnder, you possibly can see that the snapshot exhibits the creating state and isn’t but prepared for use.
The method takes time full as a full backup of your database is carried out first earlier than creating the snapshot.
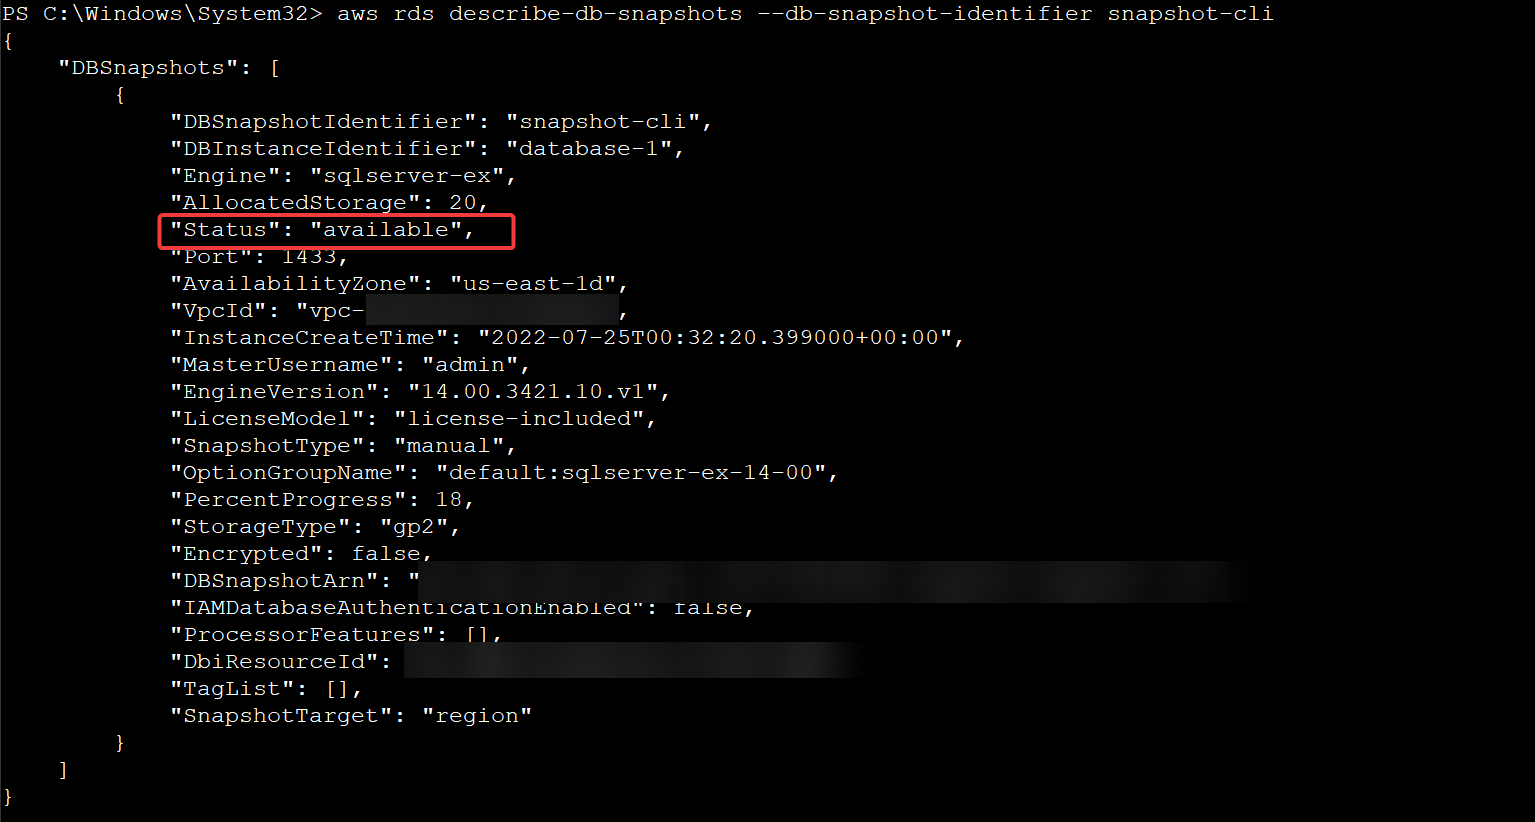
7. Now, run the beneath describe-db-snapshots command to verify the standing of your snapshot.
aws rds describe-db-snapshots --db-snapshot-identifier snapshot-cliAs you possibly can see beneath, the standing modified to obtainable, indicating the snapshot is prepared for use and that your inline coverage works as meant.
Restoring Knowledge From an RDS Snapshot
You’ve created your RDS snapshot, so your knowledge is protected and safe. However suppose your server has crashed, and also you need to use the snapshot to revive your database. How do you restore your knowledge?
You’ll be able to restore your knowledge through the Amazon RDS Administration console or AWS CLI. However for a begin, you’ll restore knowledge with the previous.
Restoring through the Amazon RDS Administration Console
1. Register to the AWS Administration Console and navigate the RDS service web page.
2. Subsequent, provoke restoring knowledge utilizing a snapshot with the next:
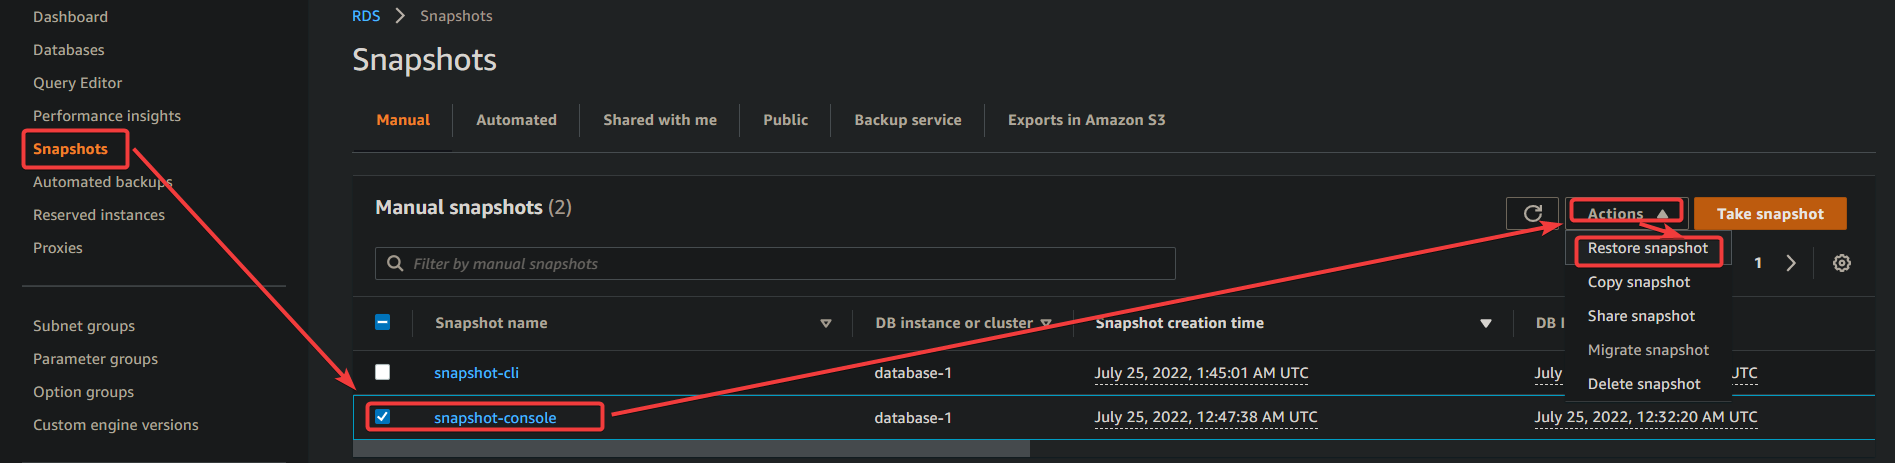
- Click on Snapshots to entry the checklist of snapshots obtainable.
- Tick the checkbox subsequent to the snapshot you’ll use for restoring your database.
- Click on on the Motion drop-down button, and select Restore snapshot. This motion opens the Restore DB occasion web page.
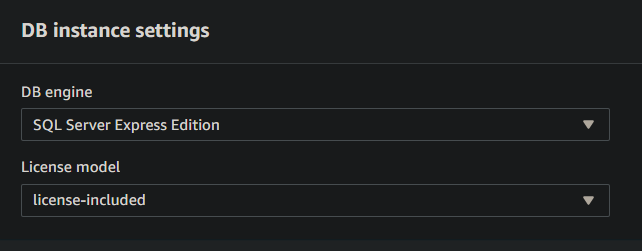
3. Preserve the default settings for the DB engine and License mannequin. These values are pre-populated based mostly in your snapshot.
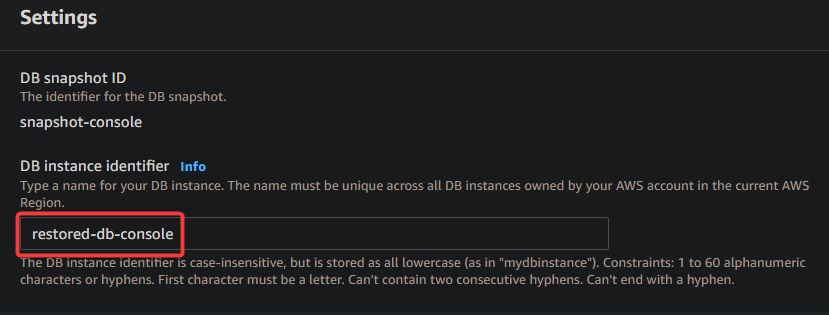
4. Now, beneath the Settings part, set a reputation in your new database occasion within the DB occasion identifier area.
You may use the outdated identify when you deleted the outdated database occasion after you took a snapshot. However it’s advisable that you simply use a brand new identify to keep away from any confusion.
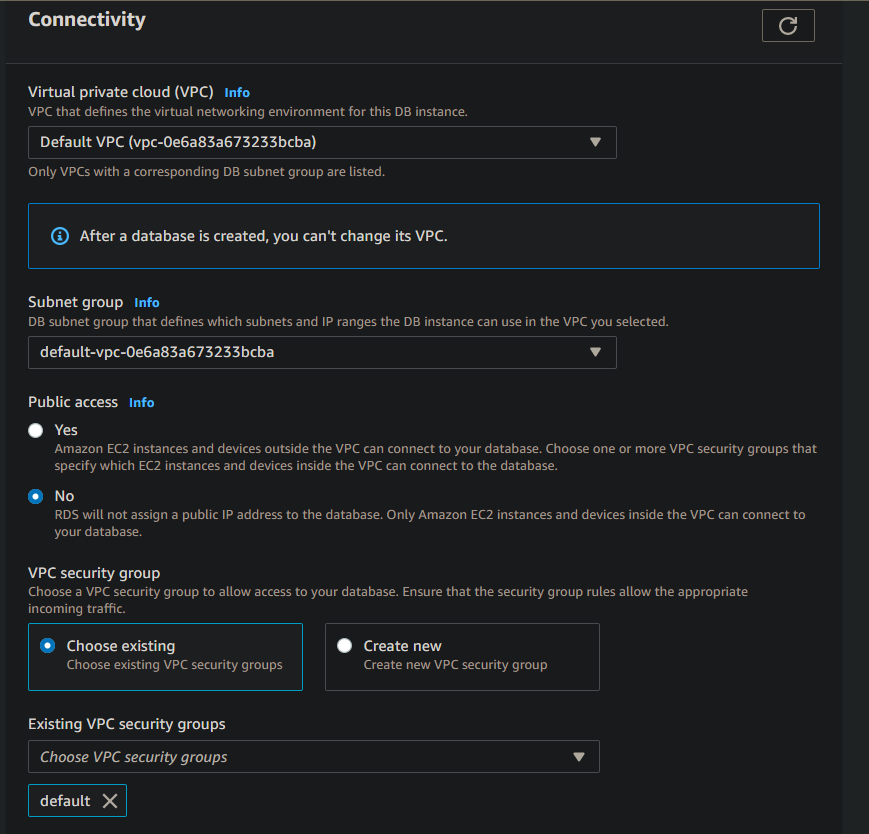
5. Depart the default settings beneath the Connectivity part as they’re based mostly on the values of your snapshot. However you possibly can change these settings as you see match.
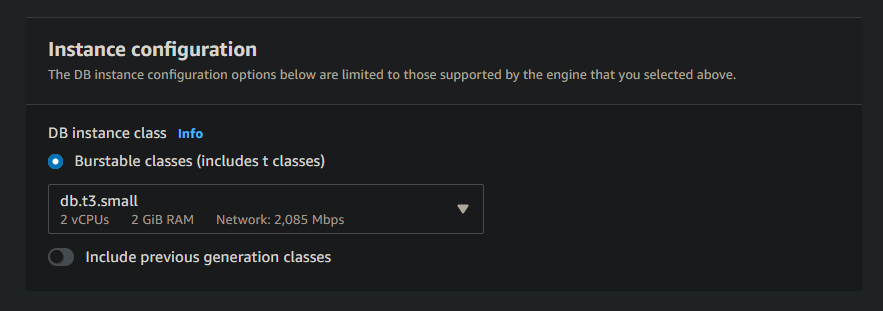
6. Choose the occasion class and storage kind based mostly in your wants on the Occasion configuration web page from the drop-down area.
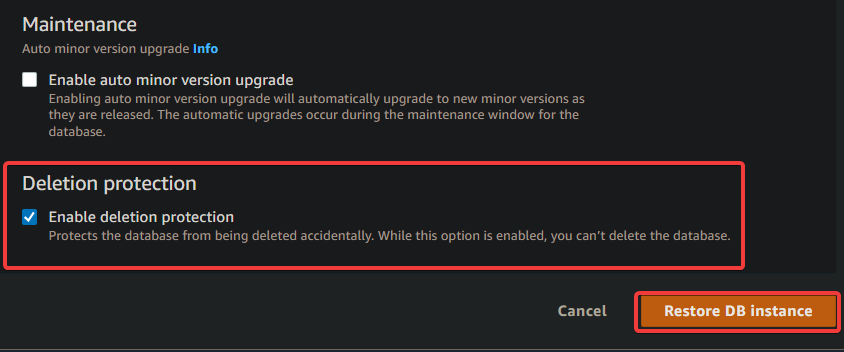
7. Lastly, tick the Deletion safety choice beneath the Upkeep part to guard your database occasion from unintentional deletion.
Preserve all different settings on default, and click on Restore DB occasion to revive your database from the chosen snapshot.
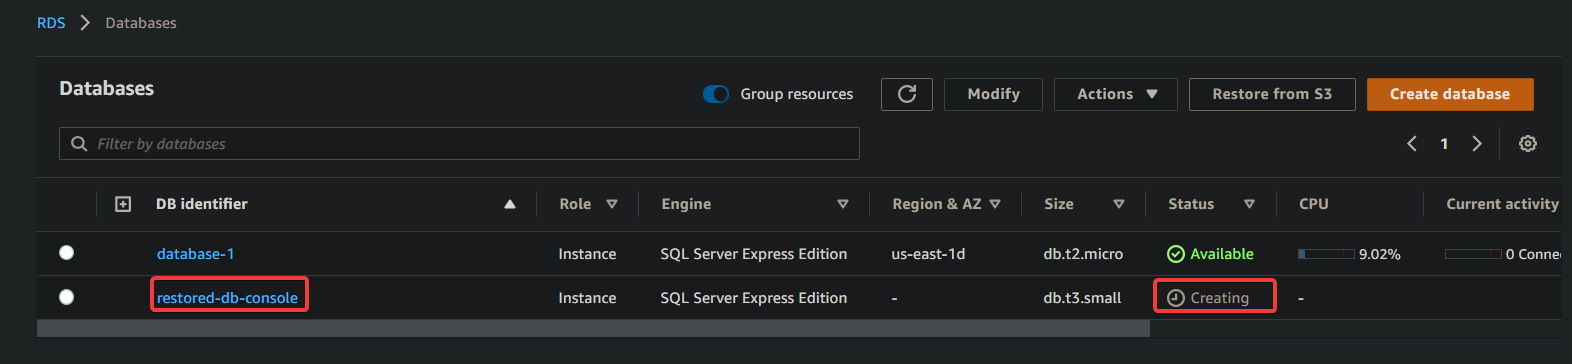
As soon as accomplished, you’ll see an inventory of all DB cases, together with the one you simply restored, as proven beneath.
The brand new occasion will probably be within the Creating state and finally modifications to Out there, and you may hook up with your database and use it as typical.
Restoring through the AWS CLI
Little question restoring knowledge from a snapshot utilizing the Amazon RDS Administration Console works. However then once more, you’ll must click on on the GUI simply to revive your knowledge manually.
Fortunately, you possibly can obtain the identical aim utilizing AWS CLI and working a number of instructions. AWS CLI allows you to restore knowledge from a snapshot as long as you understand the snapshot’s identify.
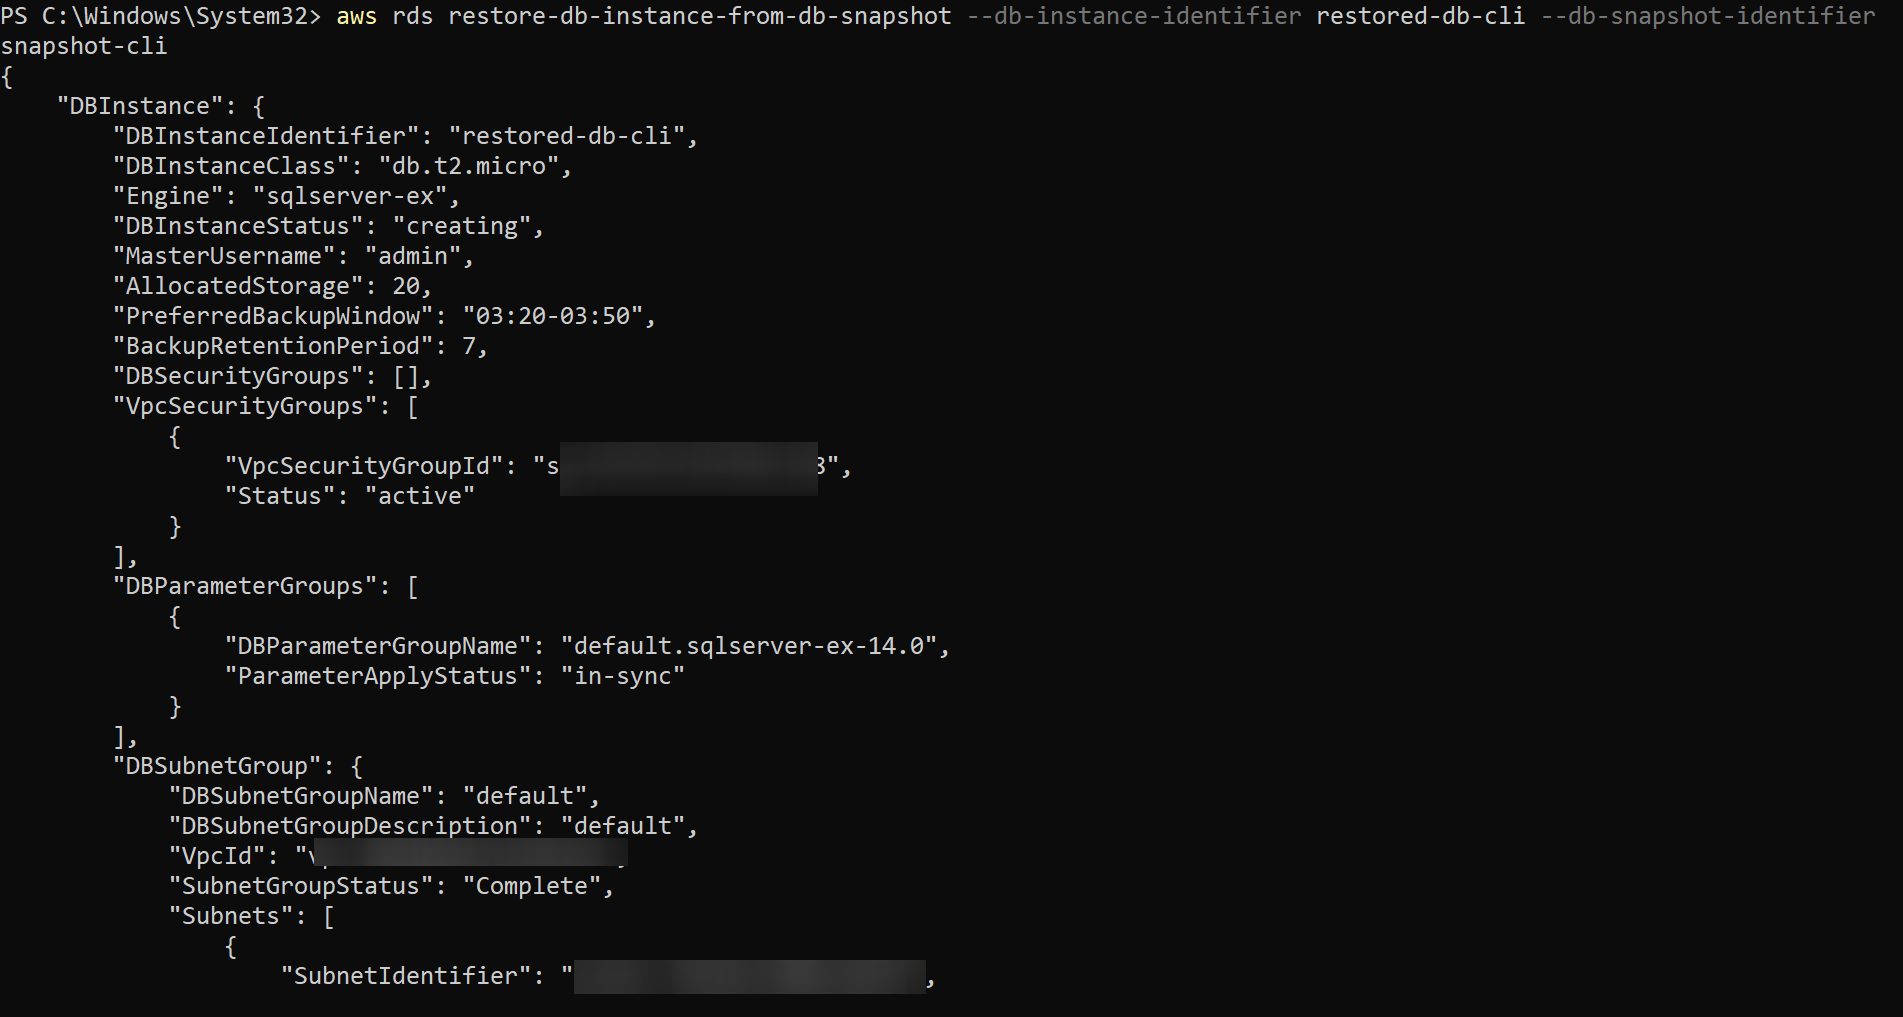
Run the beneath restore-db-instance-from-db-snapshot command to revive your database occasion (snapshot-cli) named restored-db-cli. This command makes use of the default values for all different settings.
aws rds restore-db-instance-from-db-snapshot --db-instance-identifier restored-db-cli --db-snapshot-identifier snapshot-cli
Subsequent, run the next command to verify the standing of your new database occasion (restored-db-cli).
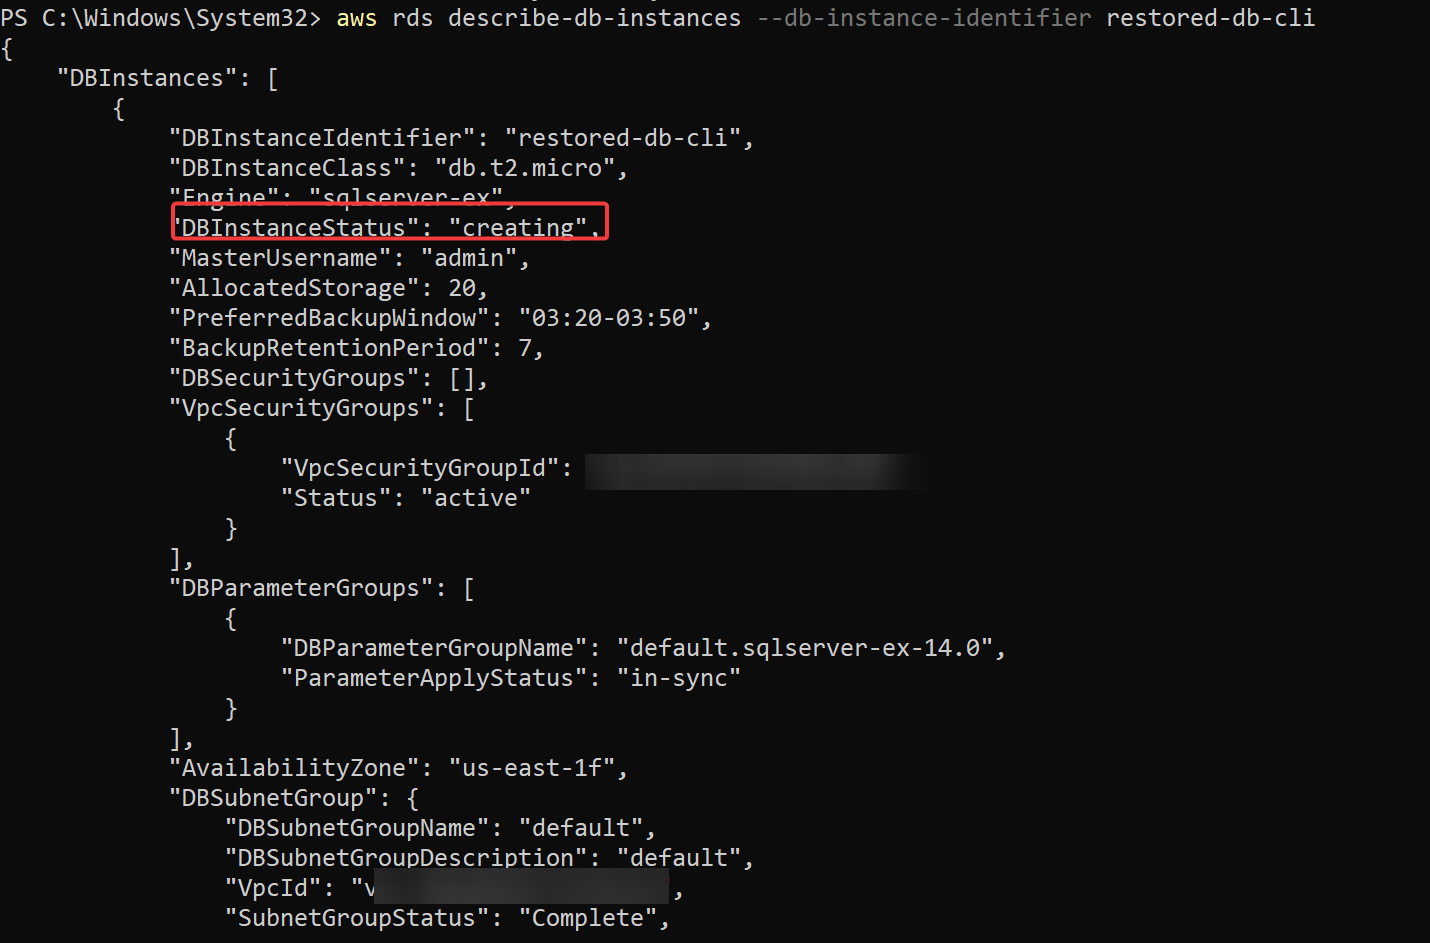
aws rds describe-db-instances --db-instance-identifier restored-db-cli
Like with the Amazon RDS Administration Console, the output beneath exhibits the brand new database occasion is within the creating state. As soon as the standing modifications to obtainable, you possibly can hook up with your database and use it as typical.
Cleansing Up Sources
For those who now not want the RDS snapshot and database occasion, there’s no must hold them. Clear up your assets by deleting them to keep away from incurring any fees.
The payment for storing an RDS snapshot is as much as $0.10 per GB/month on the time of this writing. So in case your snapshot is 50 GB in measurement, you can be charged $5 per thirty days. You’re additionally charged for the storage utilized by your database occasion. The speed depends upon the storage kind and area you employ.
To wash up your assets:
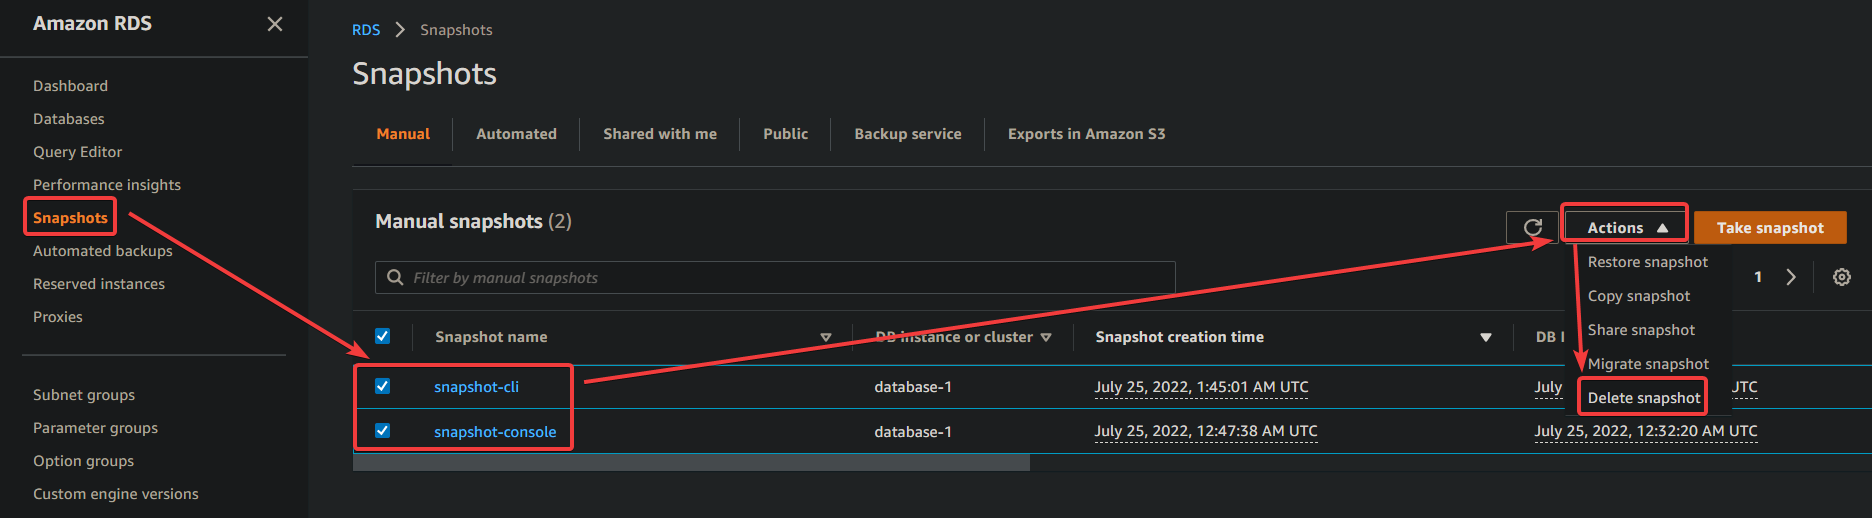
1. In your Amazon RDS web page, provoke deleting your snapshots with the next:
- Choose Snapshots (left sidebar) to entry the checklist of snapshots obtainable.
- Tick the checkbox subsequent to the snapshot you need to delete.
- Click on on the Motion drop-down button, and select Delete snapshot to delete the chosen snapshots.
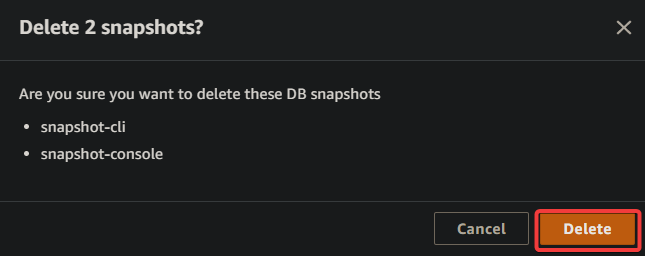
2. Subsequent, assessment the checklist of snapshots to delete, and click on the Delete button to verify deleting the snapshots.
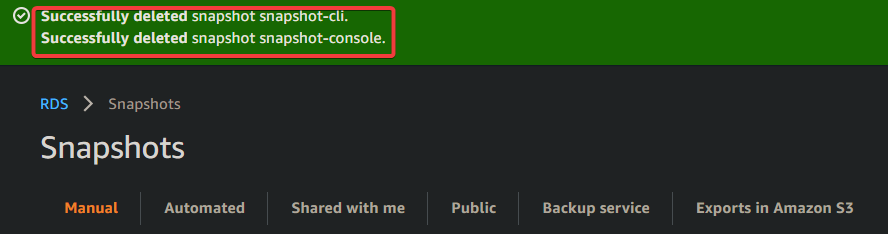
The notification on the screenshot beneath confirms the snapshots have been efficiently deleted.
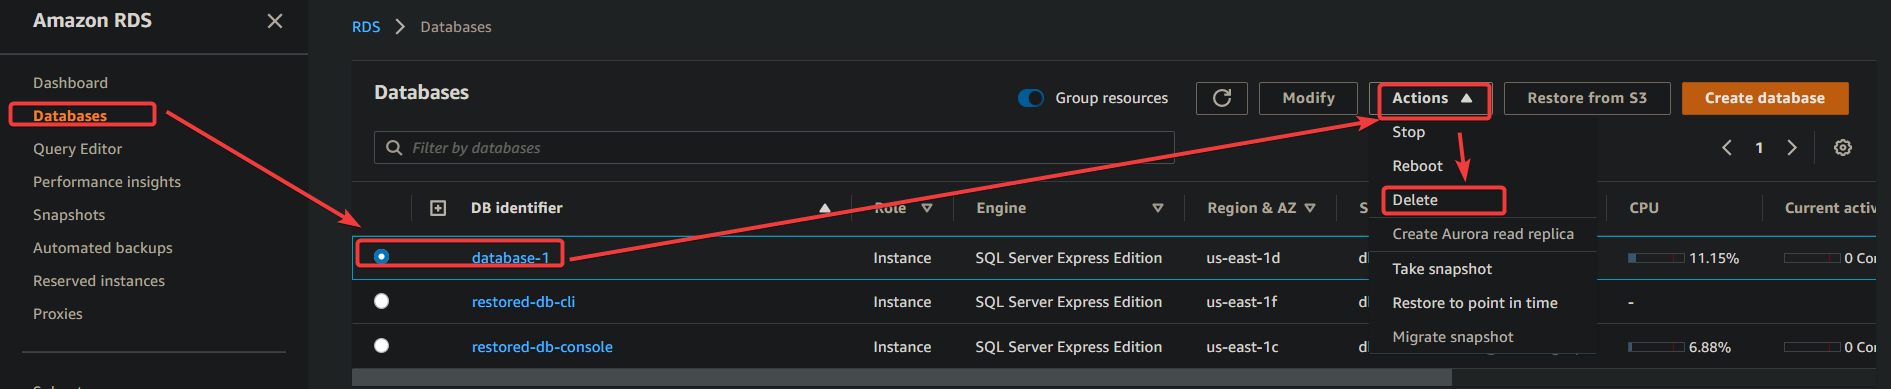
3. Provoke deleting the database occasion with the next:
- Navigate to the Databases web page, the place you possibly can see the checklist of accessible databases.
- Tick the radio button subsequent to the occasion you need to delete.
- Click on on the Motion drop-down button, and select the Delete choice to delete the chosen database.
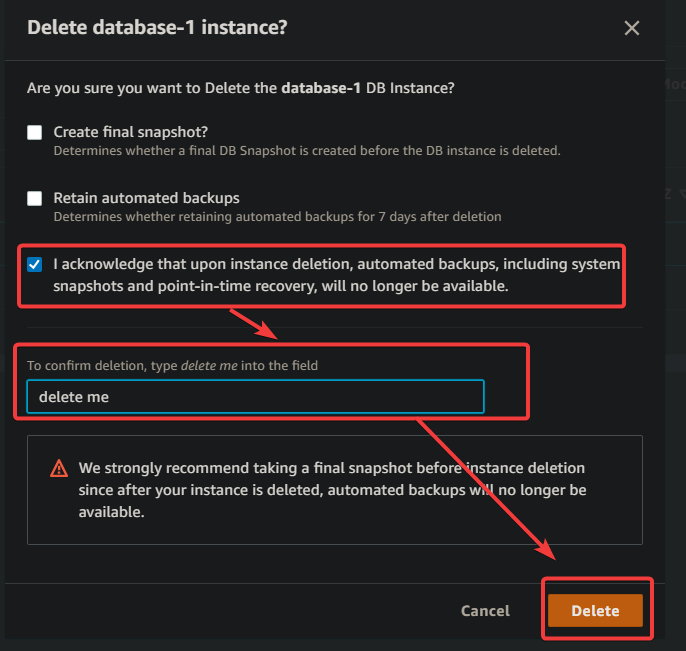
4. Now, tick the acknowledgment choice, kind delete me within the textual content field, as proven beneath, and click on Delete (bottom-right) to delete the chosen database occasion.
Conclusion
Dropping or discovering out your knowledge has been corrupted may be catastrophic. However with creating an AWS RDS Snapshot, relaxation assured that your knowledge is in good arms. On this tutorial, you’ve realized methods to create and restore an RDS snapshot utilizing the AWS Console and AWS CLI.
At this level, if one thing goes mistaken, you possibly can confidently use your snapshots to again up your database and restore them anytime.
With this newfound data, why not create a multi-AZ RDS occasion for much more safety? Or check out a number of the different storage varieties obtainable? There are numerous potentialities, so get inventive and experiment with AWS RDS to see what you possibly can give you!