

When you’ve got distant entry enabled in your UniFi Gateway, then you’ll be able to all the time entry your UniFi console via unifi.ui.com. However to attach exterior UniFi gadgets to your console, you’ll need to make use of your public IP Tackle. With Dynamic DNS nevertheless, we will use a hostname.
Dynamic DNS is a superb possibility when you’ve got a dynamic public IP Tackle. Not all web suppliers provide you with a static public IP Tackle. They’re assigned dynamically while you (re)boot your modem/router.
On this article, I’ll clarify how one can configure Dynamic DNS on your UniFi gateway.
UniFi Dynamic DNS
Dynamic DNS is simple to configure lately within the UniFi Community app. It’s a part of the superior web settings and helps the most well-liked Dynamic DNS suppliers. The UniFi Community app will routinely replace the general public IP tackle within the DDNS supplier when it’s appropriately configured.
To make use of DDNS you’ll need to guarantee that your UniFi Gateway has a public IP Tackle. When the UniFi Gateway is related behind a modem or router from the ISP, you’ll need to guarantee that the modem is configured in Bridge Mode and forwards the general public IP tackle. You will discover the assigned IP Tackle within the UniFi Community dashboard:
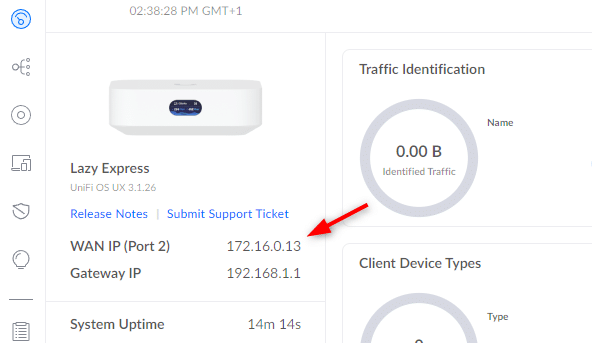
The IP Tackle within the screenshot above gained’t work, as a result of it falls within the personal IP tackle vary (RFC 1918).
To configure DDNS you’ll need to create an account with one of many DDNS suppliers. Within the instance beneath we shall be utilizing No-IP, which is free to make use of. If you have already got a website, then you may as well use Cloudflare, which I’ll present you as properly.
Technique 1 – Utilizing Free DDNS Supplier NoIp
Earlier than we will configure Dynamic DNS in UniFi, we first have to create an account. As talked about, we shall be utilizing the free DDNS supplier No-IP. When creating the account, just be sure you write down the username and password, as a result of we’ll want that later.
- Create an account at https://www.noip.com/sign-up
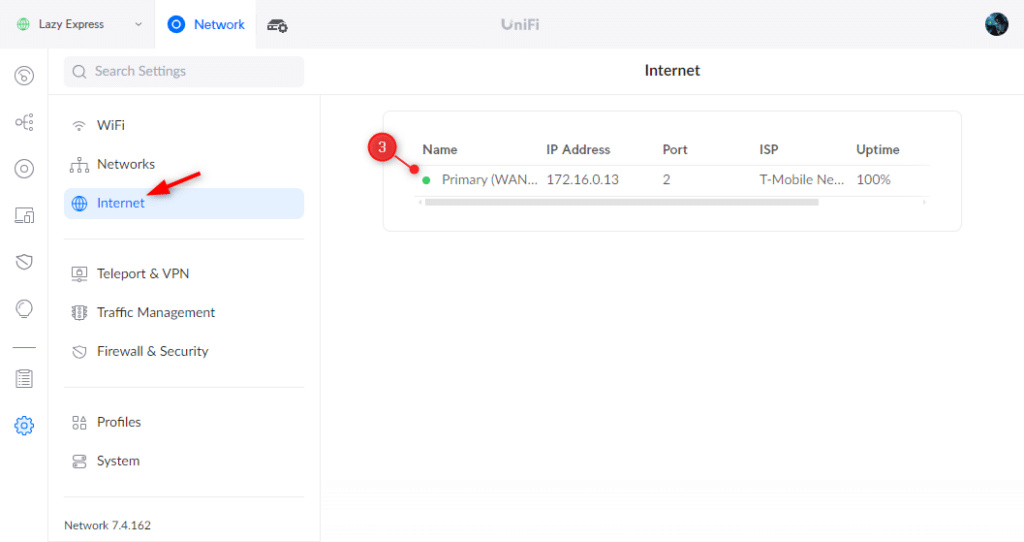
- Open your UniFi Community Console
- Go to Settings > Web and choose your Main WAN connection
- Enabled Superior Settings
- Click on on Create New Dynamic DNS
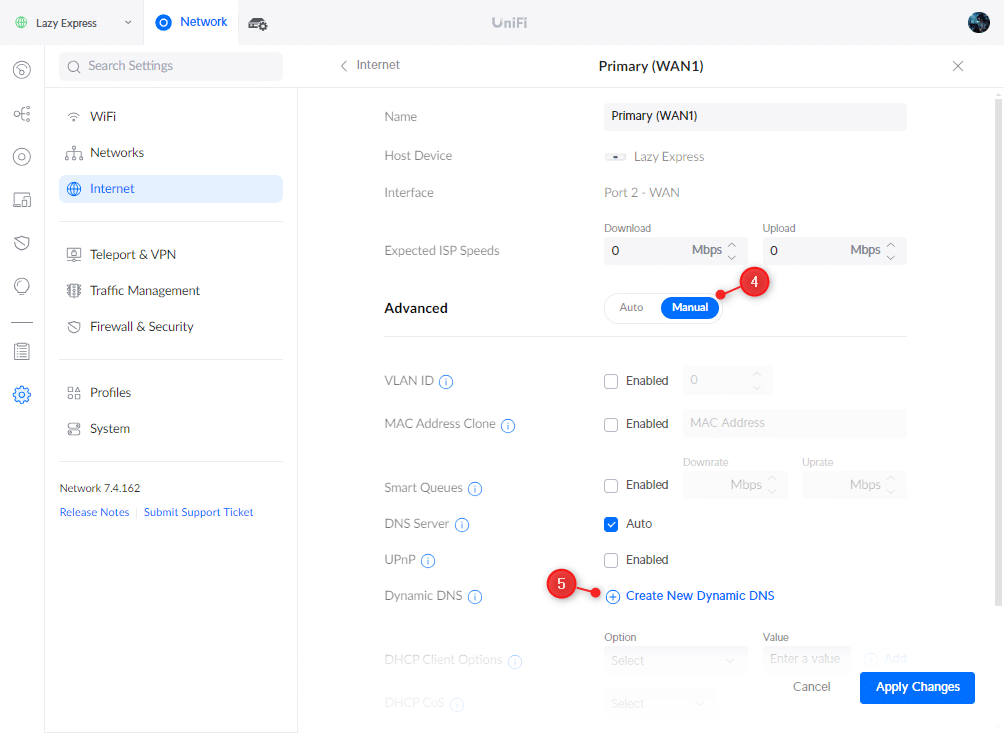
Notice
For the credetials, you’ll need to make use of the username and password that you just use to sign up at No-IP.com. The username is not your e mail tackle!
- Configure the Dynamic DNS
- Service – NoIP
- Hostname – yourhostname.ddns.web
- Usersname – The username out of your No-IP account (not your e mail tackle)
- Password – The password out of your No-IP account
- Server – Go away clean!

- Click on on Create and Apply Modifications
It may take a few minutes for the DDNS file to replace. Remember that UniFi will solely replace the data in case your WAN IP Tackle modifications.
As soon as every thing is configured, you should use the hostname to attach exterior UniFi gadgets to your community or use the hostname for VPN connections for instance.
Technique 2 – Cloudflare
You probably have your individual area title, then you definitely most likely wish to use that or a subdomain on it on your hostname. There are some DDNS suppliers supported the place you should use your individual area title, like NameCheap, however they require that your DNS data are additionally managed by them.
I favor to make use of Cloudflare to handle my DNS data, however Cloudflare is sadly not supported by default in UniFi for Dynamic DNS. We will nevertheless nonetheless use Cloudflare, by utilizing an open-source Cloudflare employee script.
The steps to set this are up completely defined on the linked web page. The one factor good to know is that you’ll want to make use of Dyn because the DNS service supplier as a substitute of DynDNS.
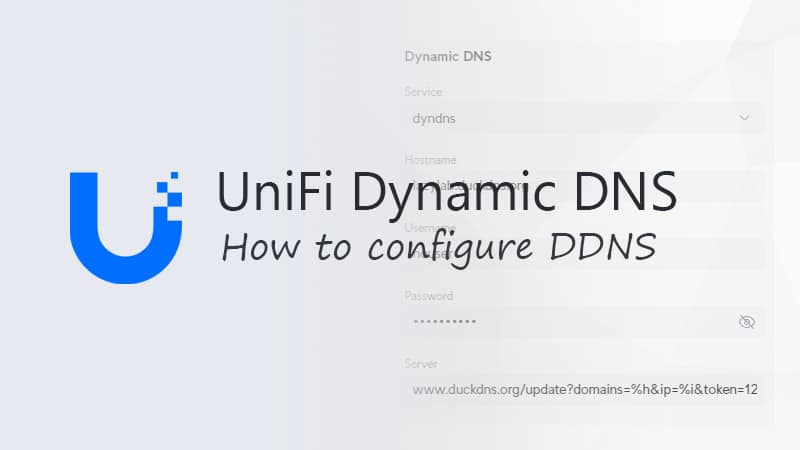
Technique 3 – DuckDNS
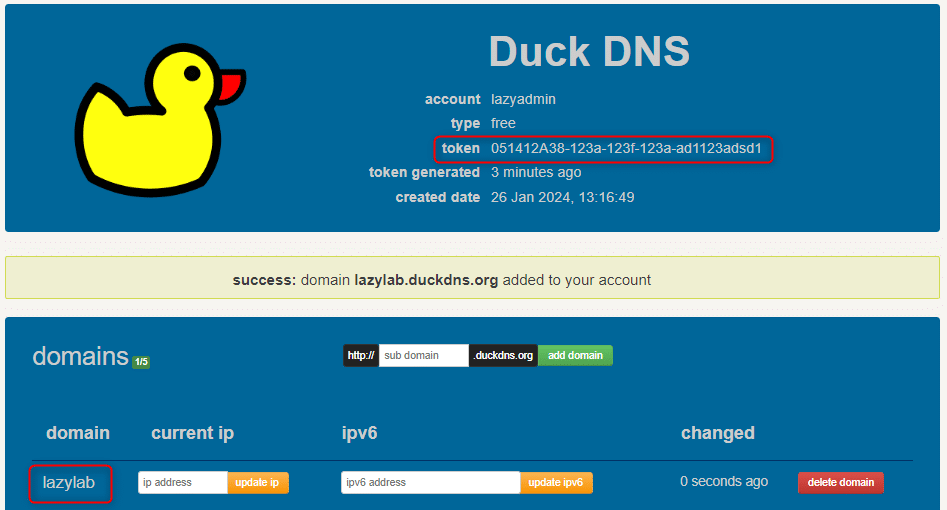
One other well-liked free Dynamic DNS service is DuckDNS. With the most recent UniFi Community replace, we will now additionally use DuckDNS as a DDNS service in UniFi.
- Create an account at DuckDNS
- Register a hostname (subdomain)
- Notice the token and subdomain title
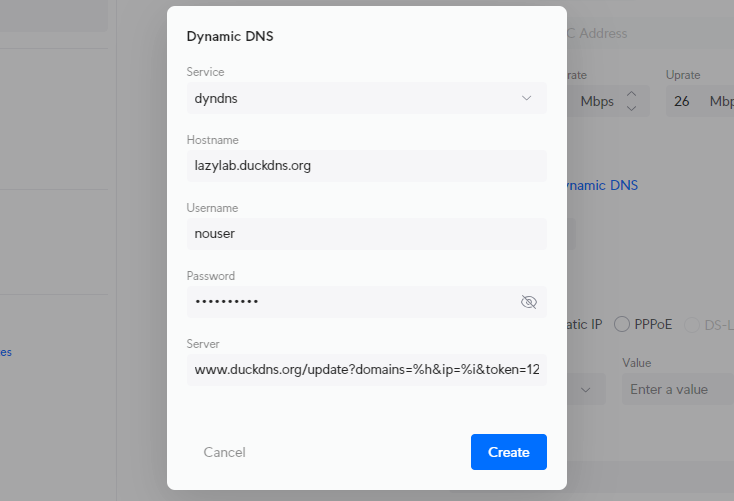
With the DuckDNS registration accomplished, we will now go over to the UniFi Community app. I’ll simply present the Dynamic DNS settings right here, examine Technique 1 for detailed steps to allow DDNS.
- Go to the superior WAN settings (Settings > Web > WAN connection > Allow Superior)
- Click on on Create Dynamic DNS
- Configure it as follows: (exchange [token] together with your DuckDNS token)
- Service: dyndns
- Hostname: yourdomain.duckdns.org
- Username: nouser
- Password: nopassword
- Server: www.duckdns.org/replace?domains=%h&ip=%i&token=[token]
- Click on on Save
Wrapping Up
Utilizing Dynamic DNS is a good way to simply entry your UniFi community from exterior. Particularly you probably have a number of VPN shoppers or exterior gadgets and don’t have a static public IP Tackle.
The free DDNS suppliers are sometimes adequate. The Cloudflare possibility is nice you probably have your individual area, however it’s a bit extra work to set every thing up. For residence use, I might merely go for one of many free companies.
I hope you discovered this text useful, you probably have any questions, simply drop a remark beneath.