


In case you are searching for a greater solution to handle software program in your Linux system, it’s possible you’ll wish to take a look at Snapcraft. With Snapcraft, you’ll be able to seek for, set up, and handle software program with just a few clicks whereas discovering, sharing, and creating new snaps with the neighborhood.
On this tutorial, you’ll learn to set up Snapcraft, create a fundamental snap and set up it in your Linux system.
Prepared? Keep tuned and discover how Snapcraft could make your software program administration life simpler!
Stipulations
This tutorial shall be a hands-on demonstration, and you will want a Linux system to comply with alongside. This tutorial makes use of Ubuntu 20.04, however any derivatives will work.
Putting in Snapd (Snap Daemon) and Snapcraft
Earlier than creating and even working snaps, you first want to put in Snapd, a daemon required to run snaps. Snapd additionally enables you to set up and allow Snapcraft in your system.
To put in Snapd on Ubuntu:
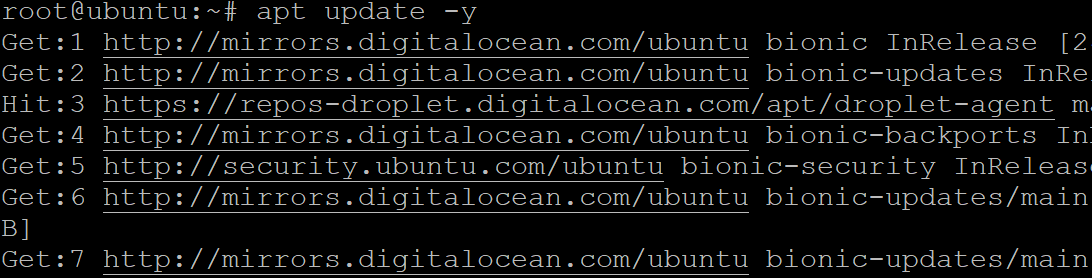
1. Run the following apt replace command to replace your Ubuntu repositories.
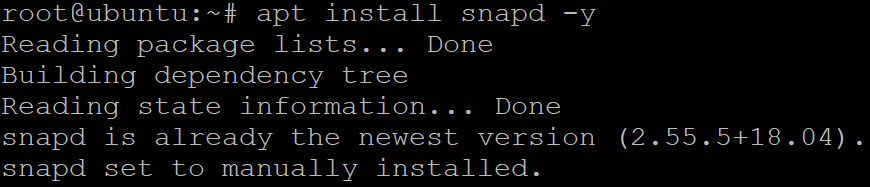
2. Subsequent, run the under apt set up command to put in Snapd.
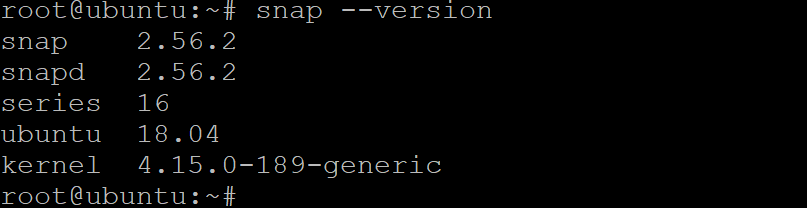
3. As soon as put in, run the snap command under to examine the model of Snapd put in in your system.
4. Lastly, run the snap set up command under to put in snapcraft.
Snapcraft is a strong software that allows you to create snaps for numerous purposes. You simply must declare the dependencies on your snap, and Snapcraft will do the remaining.
snap set up --classic snapcraftUnder, you’ll be able to see the output confirms Snapcraft has been put in efficiently.

Initializing a Snap Undertaking with Snapcraft
Now that you’ve got Snapcraft put in, you’re able to create snaps. A snap is a self-contained utility bundle that features all of the dependencies and libraries required to run an utility. With a snap (pun meant), you’ll be able to rapidly set up and handle purposes on Linux.
Snaps are additionally safe and remoted from the remainder of your system, which helps hold your system protected from malware. You may even add your snaps to the Snap Retailer for others to make use of, or you’ll be able to obtain snaps from the Snap Retailer to make use of in your system.
To see how Snapcraft works in motion, you’ll create a easy snap for a “whats up world” utility. However first, you want a venture listing to initialize a Snapcraft venture:
1. Run the next instructions to create a listing (mkdir) on your snap and transfer into that listing (cd). This listing will maintain all information associated to your snap, the place additionally, you will run all the next instructions.
You need to omit areas in your listing names when working with Snapcraft to keep away from issues, similar to construct failures.
# Create a venture listing
mkdir -p ~/mysnaps/whats up
# Change the working listing
cd ~/mysnaps/whats up
2. Now, run the snapcraft command under to initialize (init) your Snapcraft venture.
This command creates a snapcraft.yaml and different surroundings information within the present listing. This file is used to declare dependencies and completely different settings on your snap.

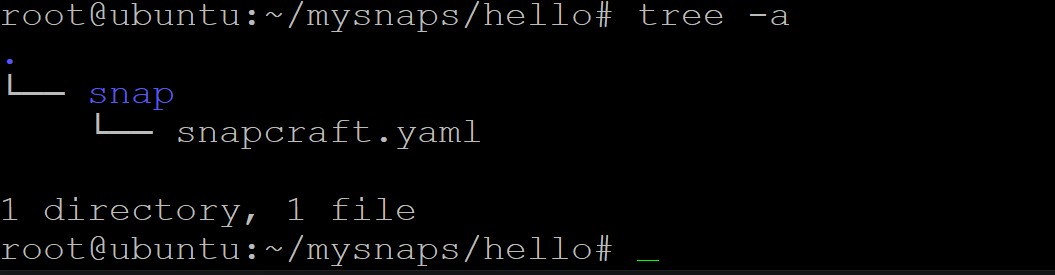
3. Lastly, run the under tree command to examine your snap listing. tree -a
At this level, you must have a listing construction that appears just like the one under. This construction is called a snap tree.
Configuring and Constructing a Snap
After initializing your Snapcraft venture, you’re nearly able to create your snap with Snapcraft. However first, you must declare some metadata on your snap. This metadata contains the title, model, abstract, and outline of your snap. And you too can specify the license on your snap and confinement degree.
How? By enhancing the mechanically generated snapcraft.yaml file if you initialized your venture.
1. Open the snapcraft.yaml file in your most popular textual content editor.
2. Subsequent, exchange the pre-generated contents of the file with the next traces to declare metadata on your snap.
However don’t shut the file but since you’ll add elements of the configuration separately to know higher how the snap is configured.
# Your snap's title (should be in lowercase) and may include letters, numbers, and hyphens.
title: whats up
# The bottom snap that your snap shall be constructed on prime of.
# core18 base relies on Ubuntu 18.04 (Bionic Beaver).
base: core18
# The present snap's model (incremental)
model: '2.10'
# One-line snap description
abstract: GNU Hiya, the "whats up world" snap
# Lengthy snap description. It might span a number of traces and may include Markdown formatting.
description: |

 GNU whats up prints a pleasant greeting.

# Units the snap's safety grade (devel).
# devel grade - used for improvement snaps that aren't for basic launch.
# secure grade - used for snaps thought-about prepared for manufacturing use.
# candidate grade - used for snaps prepared for ultimate testing (earlier than secure grade).
grade: devel
# Units the snap's confinement degree (devmode)
# devmode - the least safe degree the place snap has full entry to the host system.
# strict - essentially the most safe degree the place snap has restricted entry to the host system.
# traditional - someplace in between the place snap has restricted entry to the host system
          # with some security measures disabled.
confinement: devmode
3. Add the next code under the confinement line to reveal an app.
This code tells Snapcraft that your snap accommodates an app known as whats up that may be run with the bin/whats up command.
apps:

 whats up:

  command: bin/whats up
4. Now, add the next code on the finish of the snapcraft.yaml file which provides an element to your snap. A component describes the parts of your snap, how they need to be constructed, and the place they are often discovered.
This code provides an element known as gnu-hello, primarily based on the official whats up bundle from Ubuntu 18.04.
Observe that your snap can include a number of elements, however you’ll simply want one on this tutorial.
elements:
  gnu-hello:
    supply: http://ftp.gnu.org/gnu/whats up/hello-2.10.tar.gz
    plugin: autotools
At this level, you must have a snapcraft.yaml file that appears just like the one under. Save the adjustments and shut the file.
# Your snap's title (should be in lowercase) and may include letters, numbers, and hyphens.
title: whats up
# The bottom snap that your snap shall be constructed on prime of.
# core18 base, which relies on Ubuntu 18.04 (Bionic Beaver).
base: core18
# The present snap's model (incremental)
model: '2.10'
# One-line snap description
abstract: GNU Hiya, the "whats up world" snap
# Lengthy snap description. It might span a number of traces and may include Markdown formatting.
description: |

 GNU whats up prints a pleasant greeting.

# Units the snap's safety grade (devel).
# devel grade - used for improvement snaps that aren't for basic launch.
# secure grade - used for snaps thought-about prepared for manufacturing use.
# candidate grade - used for snaps prepared for ultimate testing (earlier than secure grade).
grade: devel
# Units the snap's confinement degree (devmode)
# devmode - the least safe degree the place snap has full entry to the host system.
# strict - essentially the most safe degree the place snap has restricted entry to the host system.
# traditional - someplace in between the place snap has restricted entry to the host system
          # with some security measures disabled.
confinement: devmode

# Expose an utility known as "whats up" that may be run with the bin/whats up command.
apps:

 whats up:

  command: bin/whats up

# Including elements to explain the parts of your snap,
  # how they need to be constructed and the place they are often discovered.
elements:
  gnu-hello:
    supply: http://ftp.gnu.org/gnu/whats up/hello-2.10.tar.gz
    plugin: autotools
5. Lastly, run the under snapcraft command after all of the arduous work to construct your first snap.
The primary time you run the snapcraft command, you may be prompted to put in Multipass, as proven under. Multipass manages digital machines for constructing snaps, and Snapcraft makes use of digital machines to construct snaps in a clear and remoted surroundings.
Kind y and press Enter to proceed.

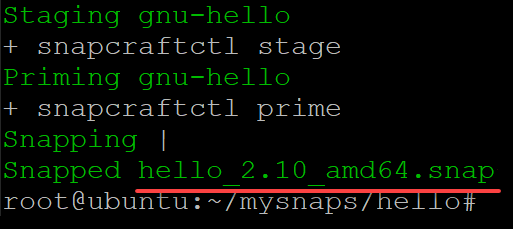
The constructing course of downloads all dependencies and builds them from the supply, which takes some time to finish. As soon as constructed, you will note an output much like the one under.
As you’ll be able to see, hello_2.10_amd64.snap is the bundle that was created, which is your snap bundle and may now be put in on any Linux distribution that helps snaps.
Testing Your Snap
You may have efficiently constructed your snap, however how have you learnt it really works? Put your newly-created snap to the take a look at by putting in it in your system and working your “whats up world” utility.
1. Run the next snap command to set up your newly-created snap bundle (hello_2.10_amd64.snap) in your system.
snap set up --devmode hello_2.10_amd64.snap
2. Subsequent, execute the whats up command under, which you declared within the snapcraft.yaml file to run the whats up app included in your snap.
If the whole lot labored as anticipated, you must see the “Hiya, world!” message printed on the display screen as proven.

3. Lastly, run the snap record command under to get the put in snap’s (whats up) info.

Conclusion
Software program administration could be tedious work except you’ve a reliable software at your disposal. And on this tutorial, you discovered tips on how to set up and use Snapcraft to create a easy snap to handle and set up software program in your Linux system with out problem.
After seeing how Snapcraft works, why not begin creating extra advanced snaps and add them to the Snap Retailer for others to put in and use?