

Has your workforce invested loads of effort in manually packaging code? In that case, it’s about time you utilize GitHub Actions Artifacts, so your workforce can automate this process. On the similar time, you cut back launch variability and save time to work on different essential duties.
GitHub Actions Artifacts permits you to successfully switch information from one lively job to a different, eliminating the repetitious and time-consuming duties concerned in deployment. On this tutorial, you’ll discover ways to use and handle artifacts for deploying a React software to Netlify.
Learn on and begin creating constant deployments!
Stipulations
This tutorial will likely be a hands-on demonstration. When you’d wish to comply with alongside, ensure you’ve got a easy React software and a GitHub repository. This tutorial makes use of a React Counter App repository.
Constructing a CI/CD Workflow
When a job in a GitHub Actions workflow ends, so does the info they course of and generate. Knowledge referred to as artifacts could be retained on the repository web page after jobs have been accomplished and could be uploaded utilizing the upload-artifact motion.
However earlier than utilizing GitHub Actions artifacts in your deploy releases, it’s essential to first construct a CI/CD workflow in your software:
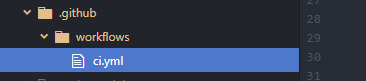
1. Create a .github folder within the root listing of your software and create a sub-folder referred to as workflows.
2. Subsequent, create the workflow file (a .yml file) within the workflows folder. You’ll be able to identify the file as you want. However for this tutorial, the file is called ci.yml.
Your file workflow useful resource construction ought to appear like the one beneath.
3. Add the next code into the ci.yml file and save the adjustments. The code beneath creates a workflow referred to as CI with a construct job for the applying.
identify: CI
on:
push:
branches: [ "main" ]
pull_request:
branches: [ "main" ]
# The workflow will likely be triggered on a push or pull occasion on the principle department
jobs:
construct:
identify: Construct
runs-on: ubuntu-latest
# Working System to run on
technique:
matrix:
node-version: [12.x, 14.x, 16.x]
steps:
- makes use of: actions/[email protected]
# Get code from the repository
- identify: Use Node.js ${{ matrix.node-version }}
makes use of: actions/[email protected]
with:
node-version: ${{ matrix.node-version }}
- identify: Set up dependencies
run: npm ci
- identify: Construct app
run: npm run construct
- identify: Run exams
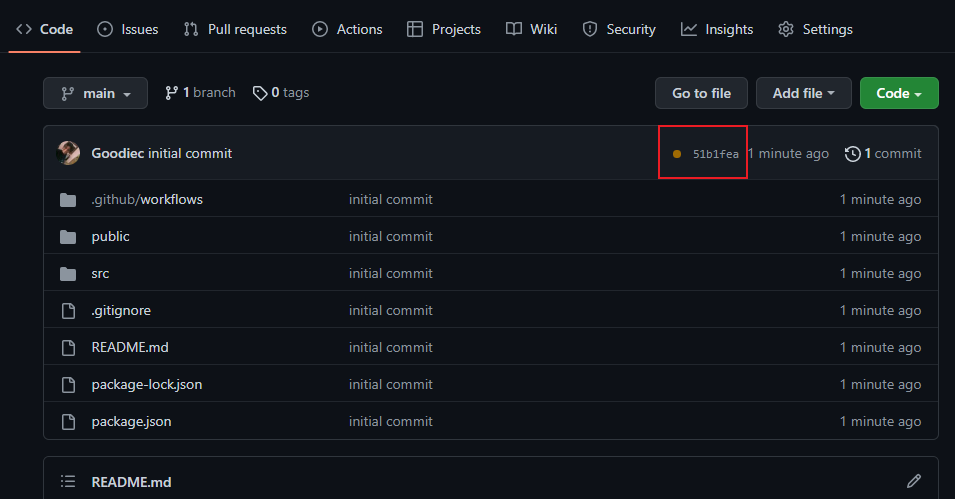
run: npm run take a look at4. Now, add and commit the adjustments, and push them to your distant GitHub repository.
If the push had been profitable, you’d see the commit with an amber-colored circle, as proven beneath, indicating that the workflow is working.
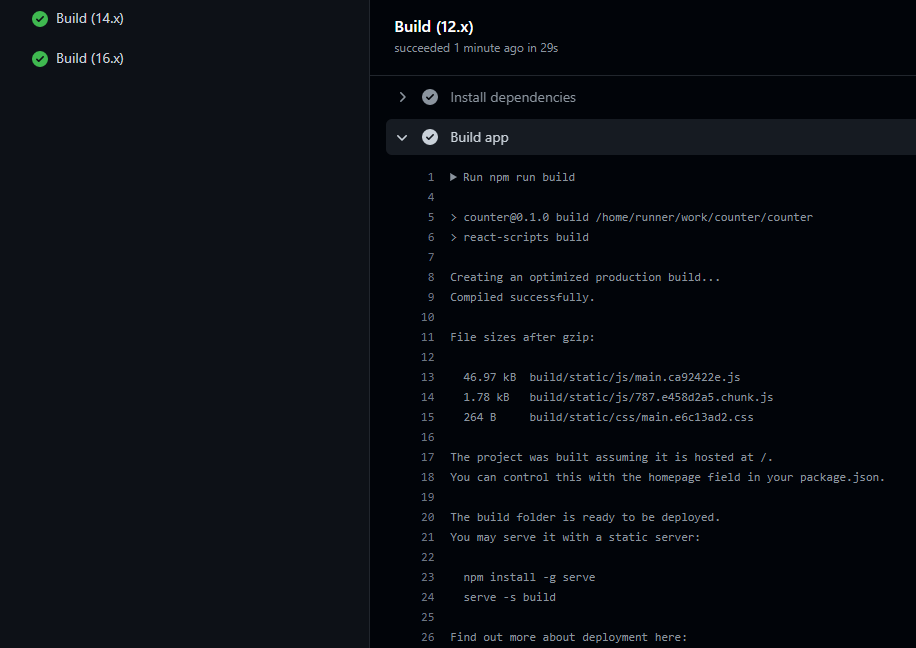
5. Click on on the Actions tab to view the workflow.
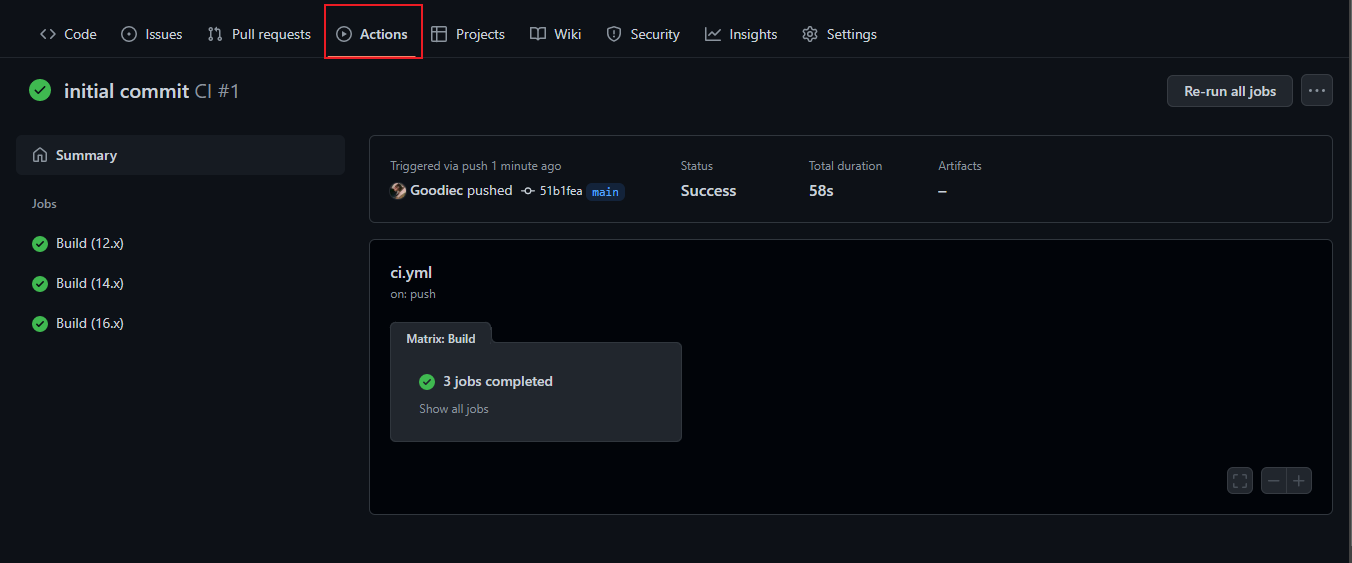
6. Click on on any construct jobs on the left-hand facet and broaden the Construct app job. You’ll see the construct job’s information (static recordsdata) generated. These are the recordsdata you want for deployment.
These generated recordsdata are misplaced when the server working the job is disposed of (or when the job ends). Because you’ll want these recordsdata for deployment, you’ll implement a step to take these recordsdata and add them as an artifact within the following part.
7. Lastly, add the next code after your run exams below the steps block in your construct job.
The code beneath uploads an artifact named manufacturing from the construct listing utilizing the actions/[email protected] motion.
The generated recordsdata are misplaced when the server working the job is disposed of or when the job ends. Because you’ll want these recordsdata for deployment, the code beneath implements a step to take them and add them as an artifact.
# Add Artifact
- identify: Add production-ready construct recordsdata
  makes use of: actions/[email protected]
  with:
    identify: manufacturing
    path: ./construct
Configuring a Customized Artifact Retention Interval
Artifacts are saved for 90 days by default earlier than being erased. However relying on the kind of repository, you’ll be able to alter this retention interval.
Under are the values you’ll be able to set for customizing an artifact retention interval:
- Non-public Repository – Any worth between
1and400days. - Public Repository – Any worth between
1and90days solely.
To set a customized artifact retention interval, replace your workflow YAML file by together with retention-days: 2 in your # Add Artifact step.
# Add Artifact
- identify: Add production-ready construct recordsdata
  makes use of: actions/[email protected]
  with:
    identify: manufacturing
    path: ./construct
    # Customise Artifact Retention Interval
		retention-days: 2
Alternatively, configure the artifact retention interval with the next by means of GitHub:
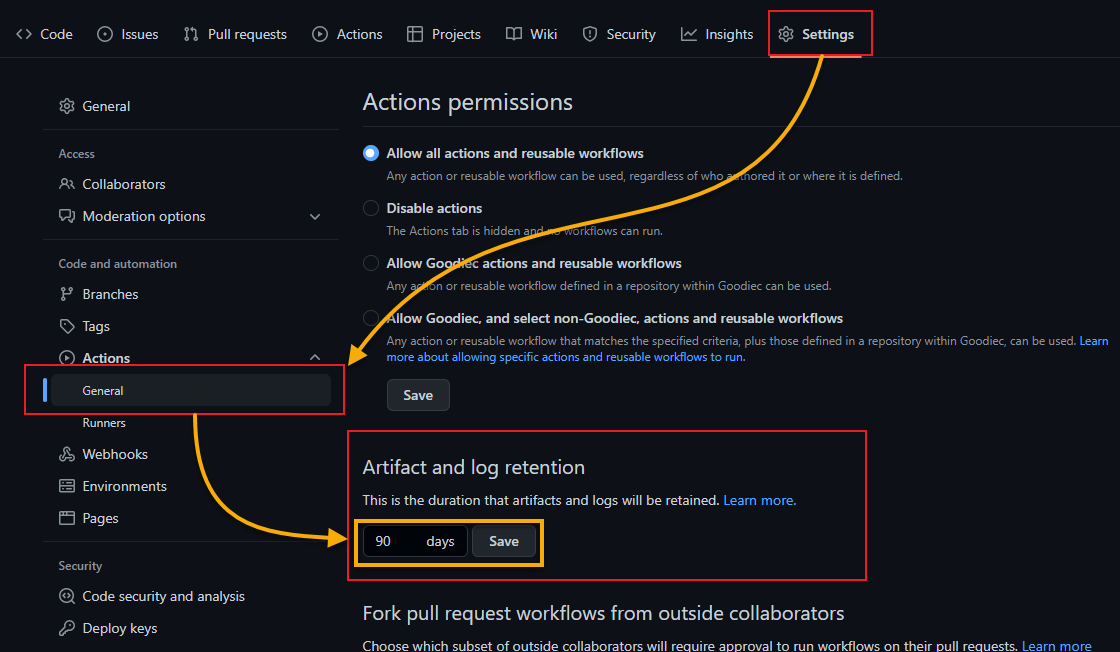
- Navigate the Settings tab within the repository.
- Click on on Motion (left panel) to broaden the dropdown, and choose Normal.
- Enter the variety of days you wish to hold the artifact below the Artifact and log retention part proven beneath, and click on Save.
Importing a Challenge from Git Repository to Netlify
The construct artifact can now be accessed in one other job within the workflow by being downloaded as a result of you’ve got a step to add the artifact, lowering the workflow completion time. You’ll add a deploy job to your workflow, and one of many steps in that job downloads the uploaded merchandise.
However earlier than updating your workflow, you’ll arrange Netlify for the app deployment:
1. Open your favourite internet browser, navigate to Netlify and log in along with your GitHub.
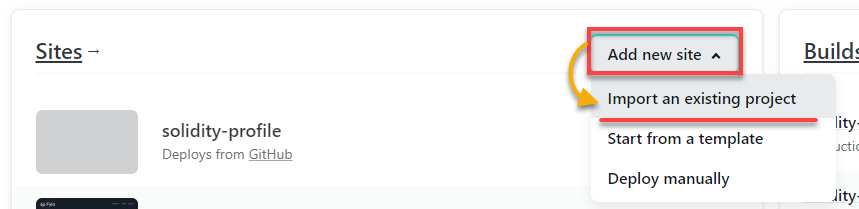
2. As soon as logged in, click on on Add new web site within the Websites part, and choose Import an current undertaking to provoke importing your undertaking.
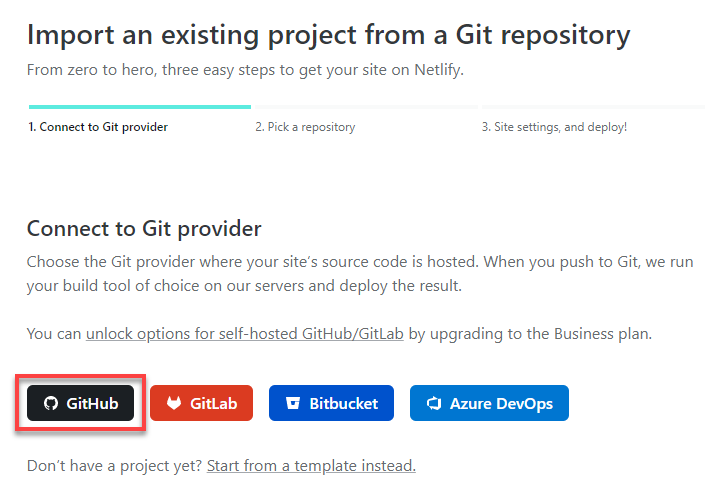
3. Click on on GitHub because you’ll use the repository you created for this tutorial on GitHub. A pop-up window seems the place you’ll authorize Netlify entry to your GitHub id.
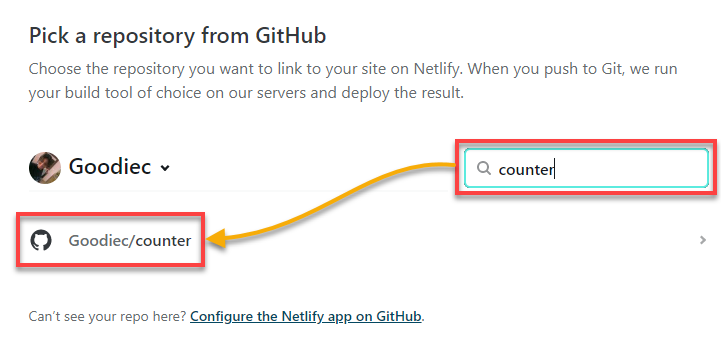
4. As soon as licensed, search, and choose the repository you wish to import the undertaking from.
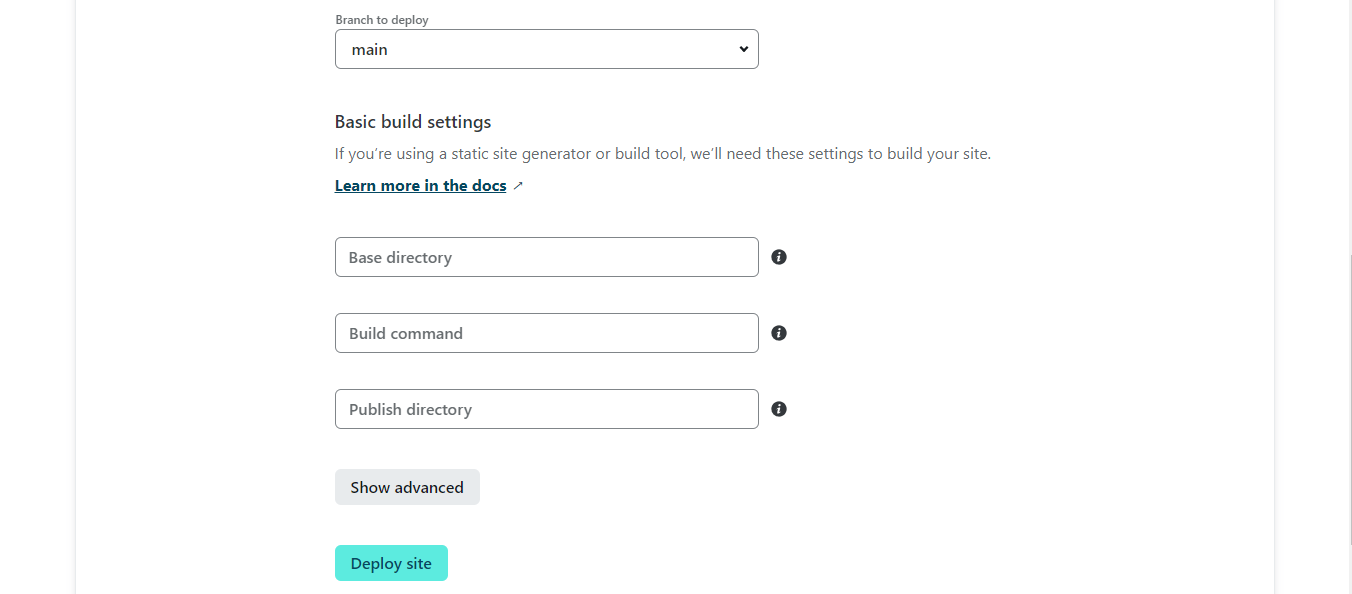
5. On the brand new web page, configure the essential construct settings for the location, such because the department you wish to deploy from and the construct command. However because you’ll be deploying utilizing GitHub actions, depart the construct command, and publish listing fields clean.
Click on on Deploy web site after configuring the construct settings, and you will note that the location is being deployed. As soon as deployed, a reside hyperlink will likely be generated for the location.
When you left the construct command area clean, going to the hyperlink will show a 404 web page because the app didn’t construct.
6. Subsequent, click on on Web site settings to overview the location info (step six).

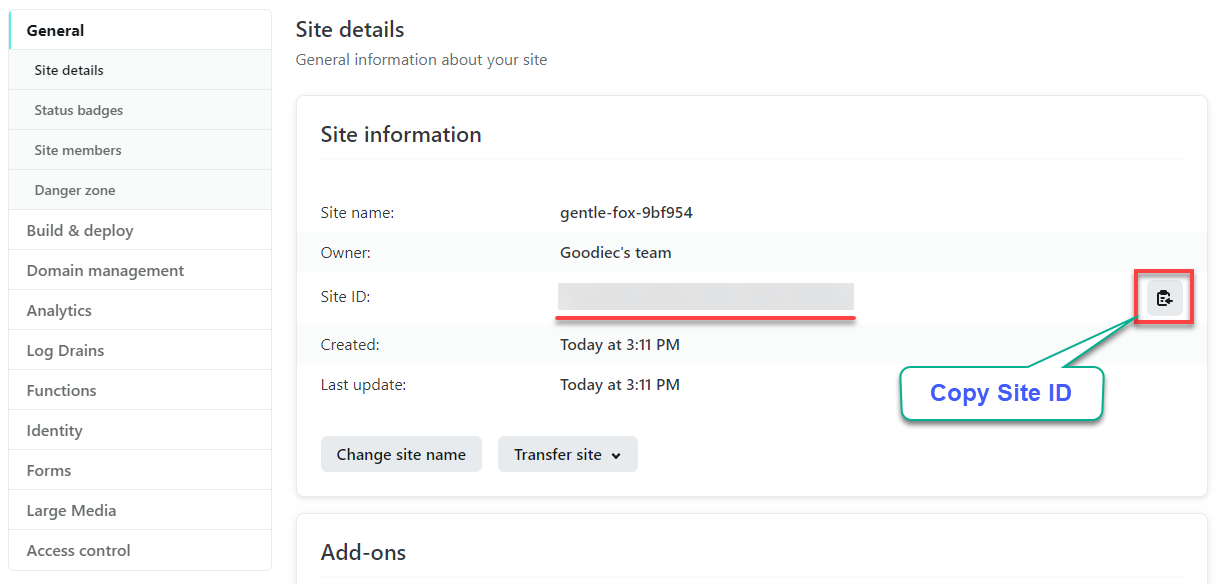
7. Lastly, on the Web site particulars web page, observe down the Web site ID beneath below the Web site info part for later use.
Making a Private Entry Token
Now that you’ve your web site ID, it’s essential to get an entry token. The non-public entry token will grant entry to your Netlify account in order that GitHub Actions carry out the deployment on Netlify.
1. Click on in your profile icon (top-right), and select Person settings to entry your profile settings.

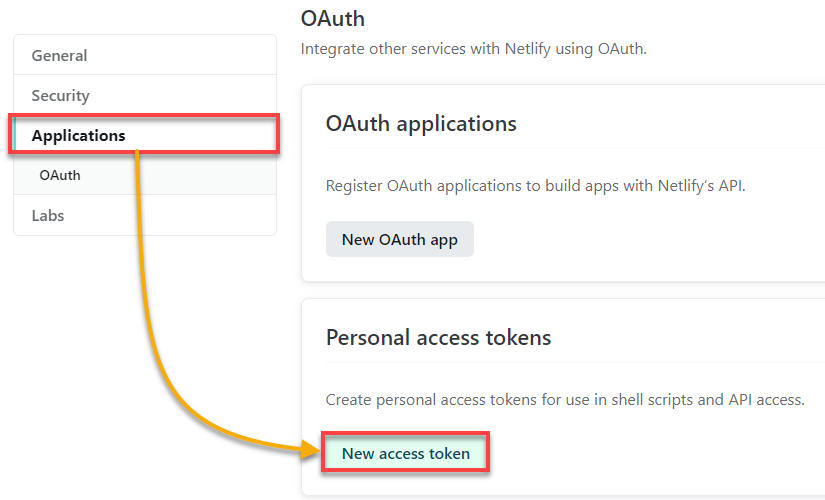
2. On the brand new web page, click on on Functions (left panel) → New entry token (below Private entry tokens part) to provoke creating a brand new entry token.
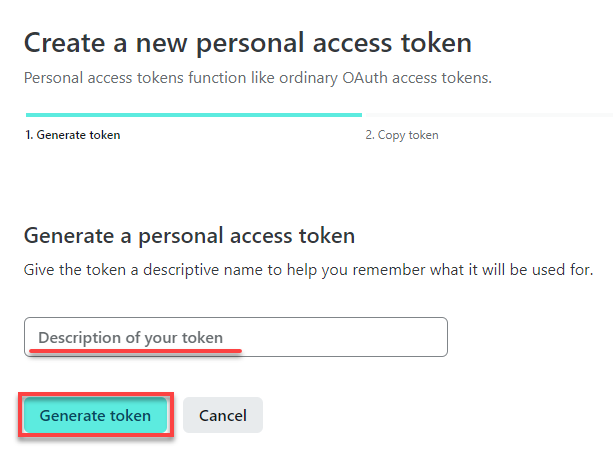
3. On the brand new web page, enter a descriptive identify for the token and click on on Generate token.
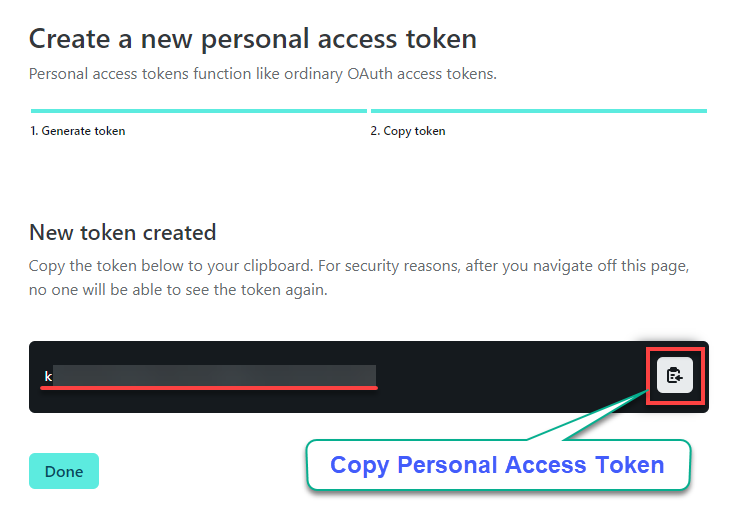
4. Now, copy the token to a secure place.
Securing Web site ID and Entry Token by Creating Secrets and techniques
Now that you’ve the location ID and entry token from Netlify, you’ll be able to add them to your repository for use within the actions workflow. However first, you’ll must safe your web site ID and entry token by creating secrets and techniques.
1. Navigate to your GitHub repository in your browser.
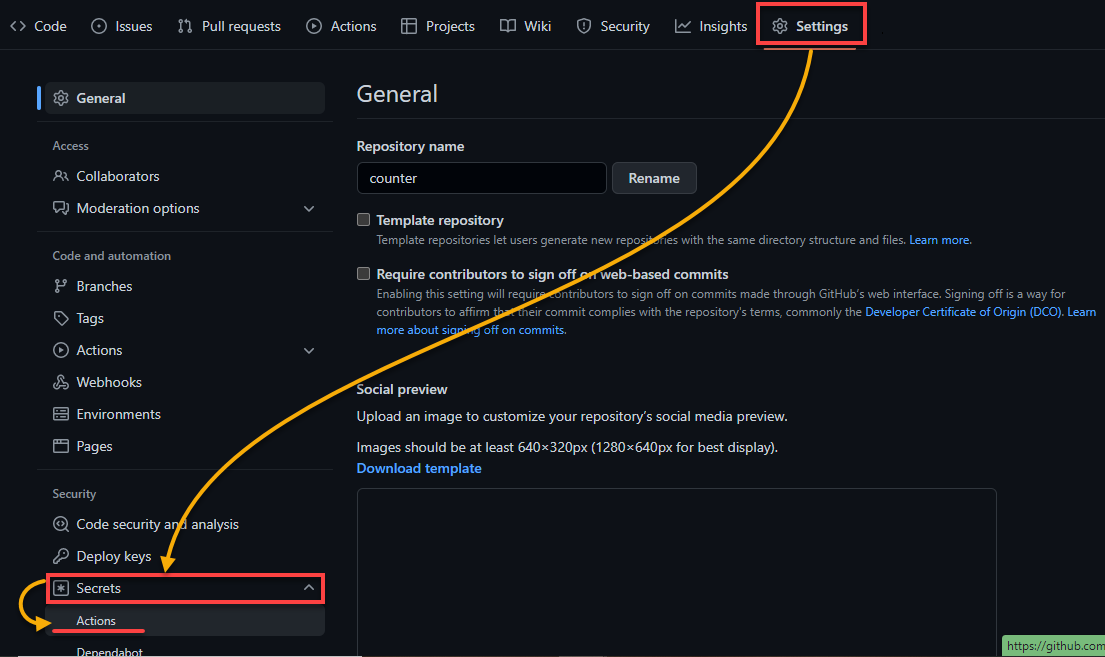
2. Subsequent, click on on the Settings tab → Secrets and techniques (left panel) → Actions (below Secrets and techniques) to entry the checklist of actions accessible in your repository.
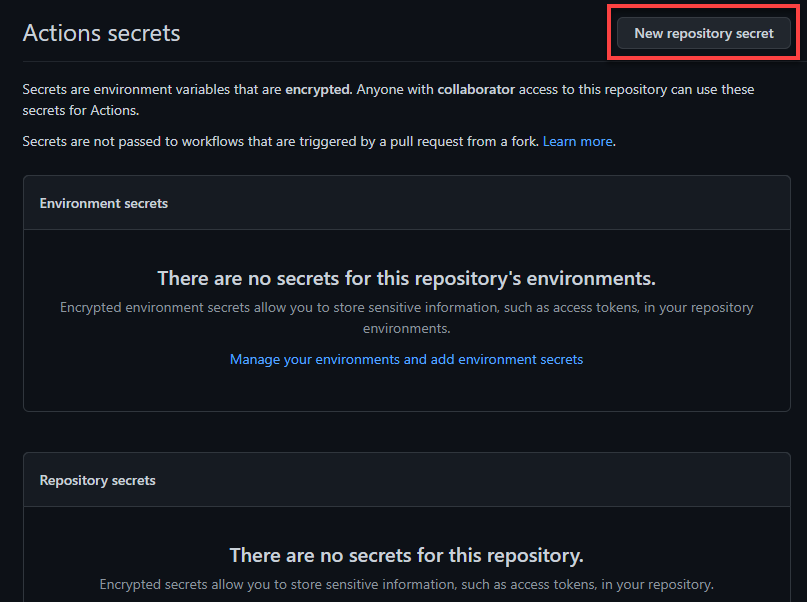
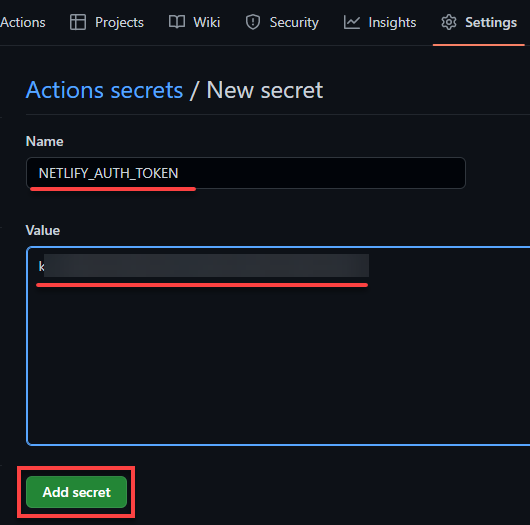
3. Click on the New repository secret on the Actions secrets and techniques web page to provoke including a secret.
4. Now, present a descriptive Title for the brand new secret. However this tutorial makes use of NETLIFY_AUTH_TOKEN as the key identify.
Add your entry token because the Worth and click on on Add secret to create the brand new secret.
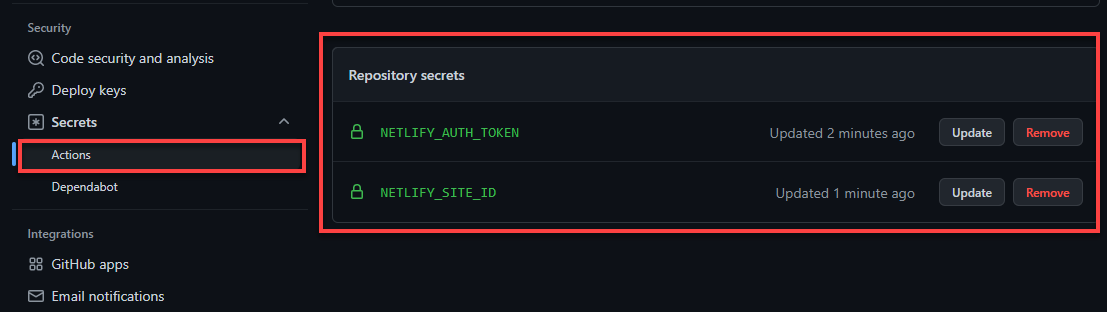
5. Lastly, repeat step 4, however this time, add a secret in your web site ID.
As soon as added, you’ll see the secrets and techniques within the Repository secrets and techniques part, as proven beneath.
Downloading and Deploying Artifact to Netlify
Now that your Netlify web site and secrets and techniques are arrange, you’ll embody a step in your workflow to deploy to Netlify utilizing your secrets and techniques.
1. Replace your workflow by including the code beneath containing the deploy job.
The next code accommodates steps to obtain the uploaded artifact and one other step to deploy it to Netlify.
You will discover the whole code for the ci.yml file in ATA’s GitHub repository.
deploy:
  identify: Deploy #Job identify
  wants: construct # The construct job has to run efficiently for the deploy job to run
  runs-on: ubuntu-latest

  steps:
  - identify: Obtain artifact
    makes use of: actions/[email protected]
# Downloads the uploaded recordsdata
    with:
      identify: manufacturing
      path: ./construct

  - identify: Deploy to Netlify
    makes use of: netlify/actions/[email protected]
# Step to deploy to Netlify
    env:
      NETLIFY_AUTH_TOKEN: ${{ secrets and techniques.NETLIFY_AUTH_TOKEN }}
      NETLIFY_SITE_ID: ${{ secrets and techniques.NETLIFY_SITE_ID }}
# Secrets and techniques for authentication
    with:
      args: deploy --dir=construct --prod
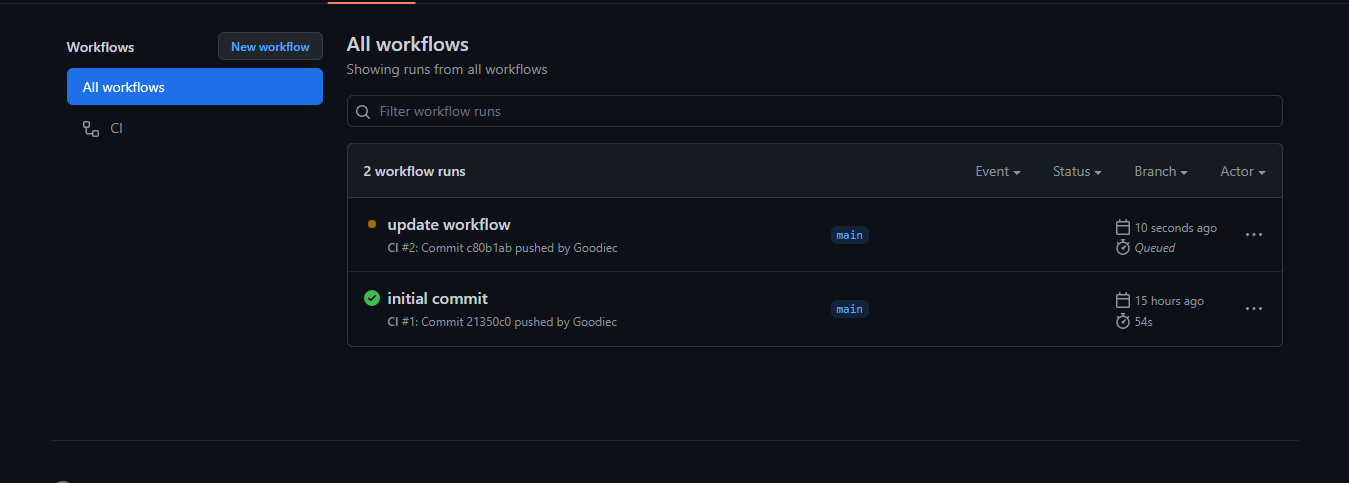
2. Subsequent, add and push the adjustments to the distant repository.
It’s best to see the newest commit being run on the workflows web page on the repository, as proven beneath.
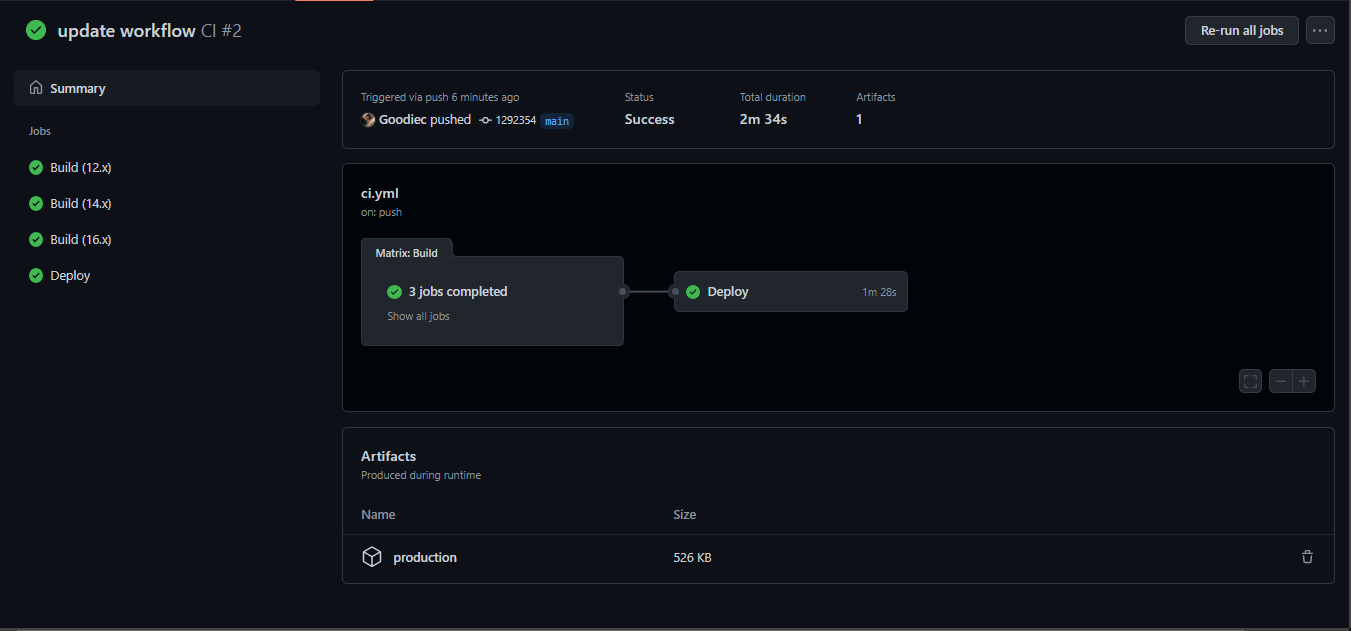
As soon as dedicated, click on on the newest run to view extra particulars.
If the roles run efficiently, you’ll see a inexperienced examine beside the roles and the manufacturing artifact on the backside of the web page.
3. Now, click on on the Deploy job (left panel), and broaden the Deploy to Netlify job. You’ll see the output of the step, which accommodates the web site URL.
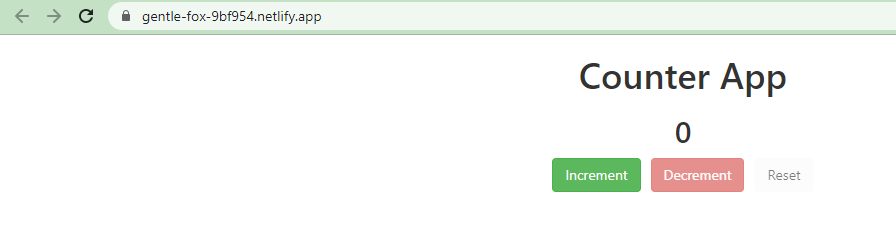
Click on on the Web site URL to confirm the location works and is accessible.
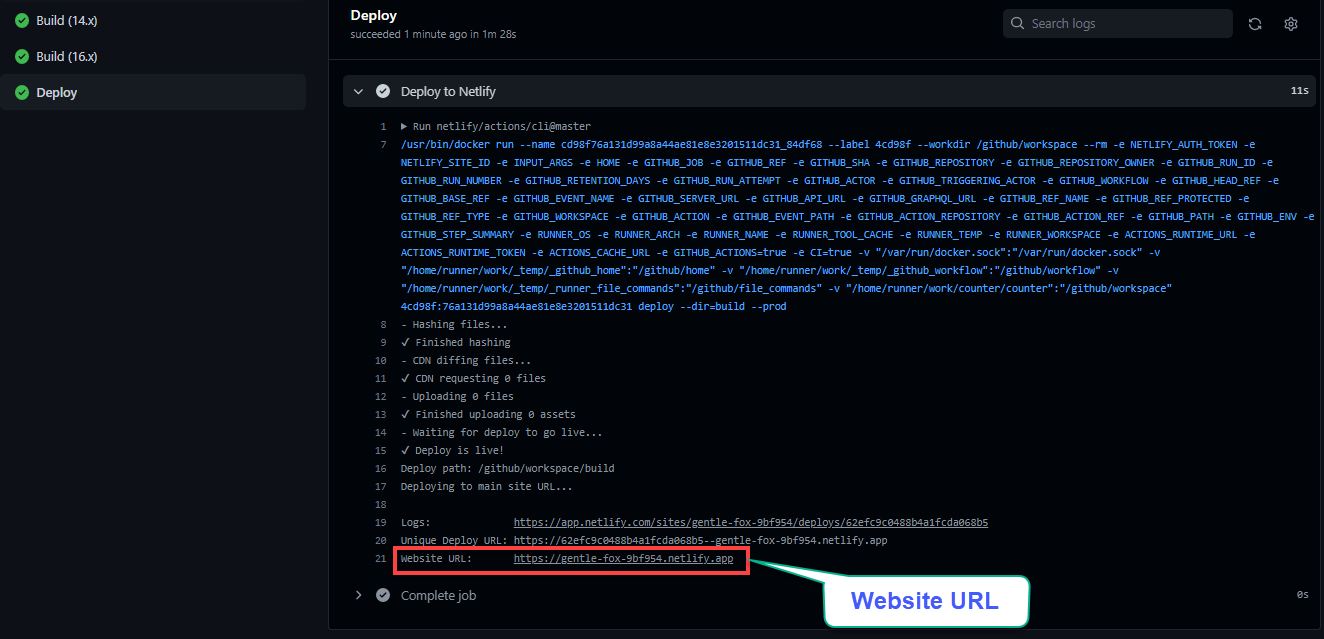
The URL mechanically opens in a brand new tab in your internet browser, as proven beneath. This output signifies that your web site is working appropriately.
Deleting Unused Artifacts to Save House
After every launch, you utilize extra disk house once you add and obtain new releases. How do you save house? Deleting unused artifacts is probably the most viable answer. You will need to restrict the variety of launch artifacts residing on every server to stop the buildup of hundreds of releases and a full disk.
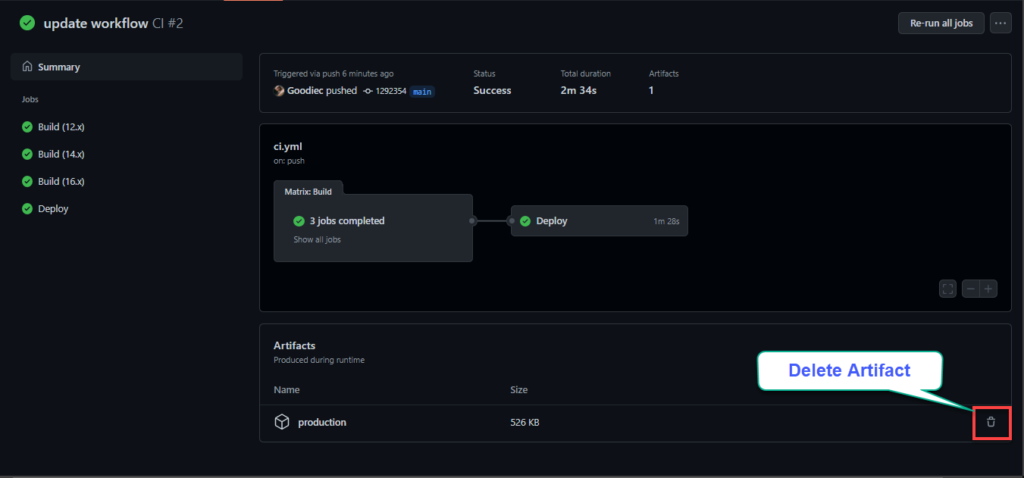
Apart from utilizing the retention interval setting to delete artifacts after a while, you too can delete the artifact from the workflows web page on GitHub:
In your workflow web page, click on on the delete icon beside the artifact to delete it.
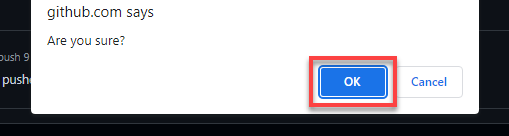
Now, click on OK on the immediate (topmost) to substantiate deleting the artifact.
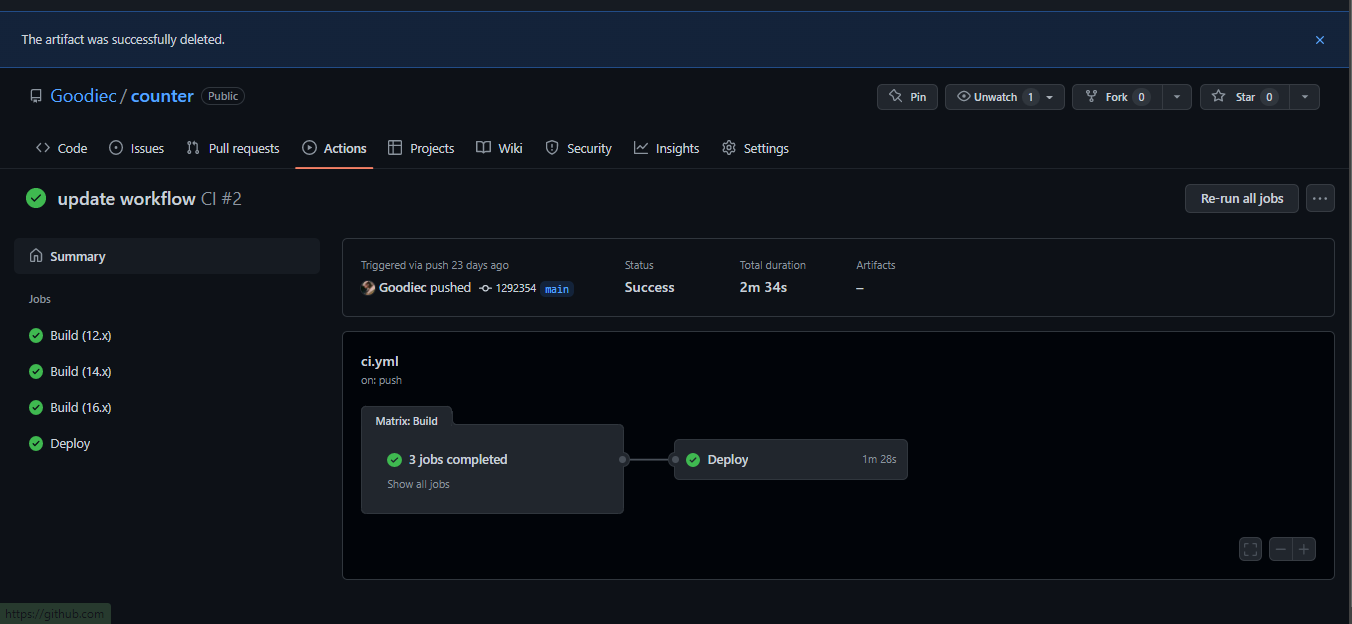
Discover beneath that the artifact shouldn’t be on the web page anymore, confirming it has been deleted efficiently.
Conclusion
You’ve seen how artifacts make it easier to develop extra intricate automation by which one workflow offers info to a different. At this level, you need to now have a greater understanding of GitHub Actions artifacts and the way they can be utilized in your deploy releases.
With this newfound data, why not benefit from GitHub actions for the workflow automation of your subsequent undertaking?