


Hello individuals! 👋 This submit is about methods to arrange electronic mail notifications for brand new feedback in your weblog utilizing staticman. This manner if somebody posts a touch upon an article can robotically get up to date in case another person makes a brand new touch upon the identical article.
It took me some time to determine methods to do it correctly. I’ll take you thru every step so that you simply don’t need to bang your head towards a wall.
Step 1: Arrange a Mailgun Account
Staticman makes use of Mailgun to truly ship out notifications so you should arrange a Mailgun account. It’s tremendous easy. Go to https://www.mailgun.com/ and join utilizing your electronic mail/password and arrange a customized area.
Observe the directions within the photographs under for simpler steering 😊
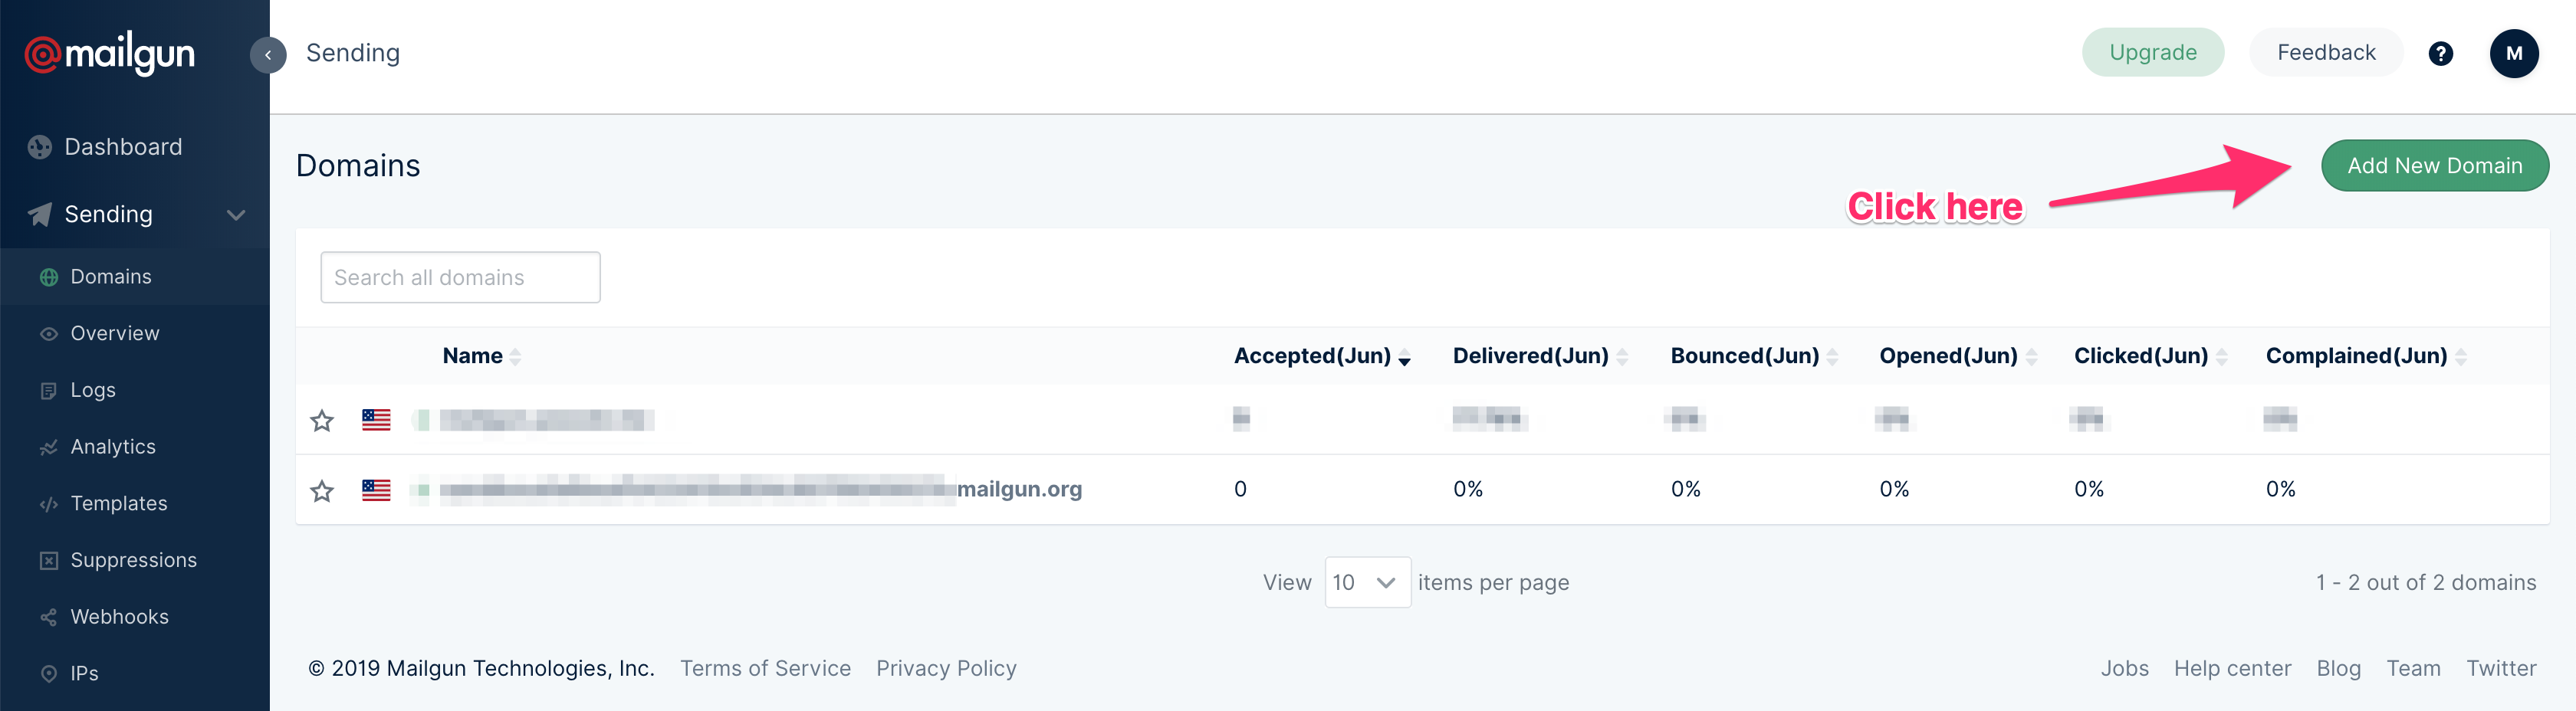
Go to Mailgun homepage after signing up and click on on domains within the sidebar on the left facet. After the web page opens click on on “Add New Area” within the high proper nook.
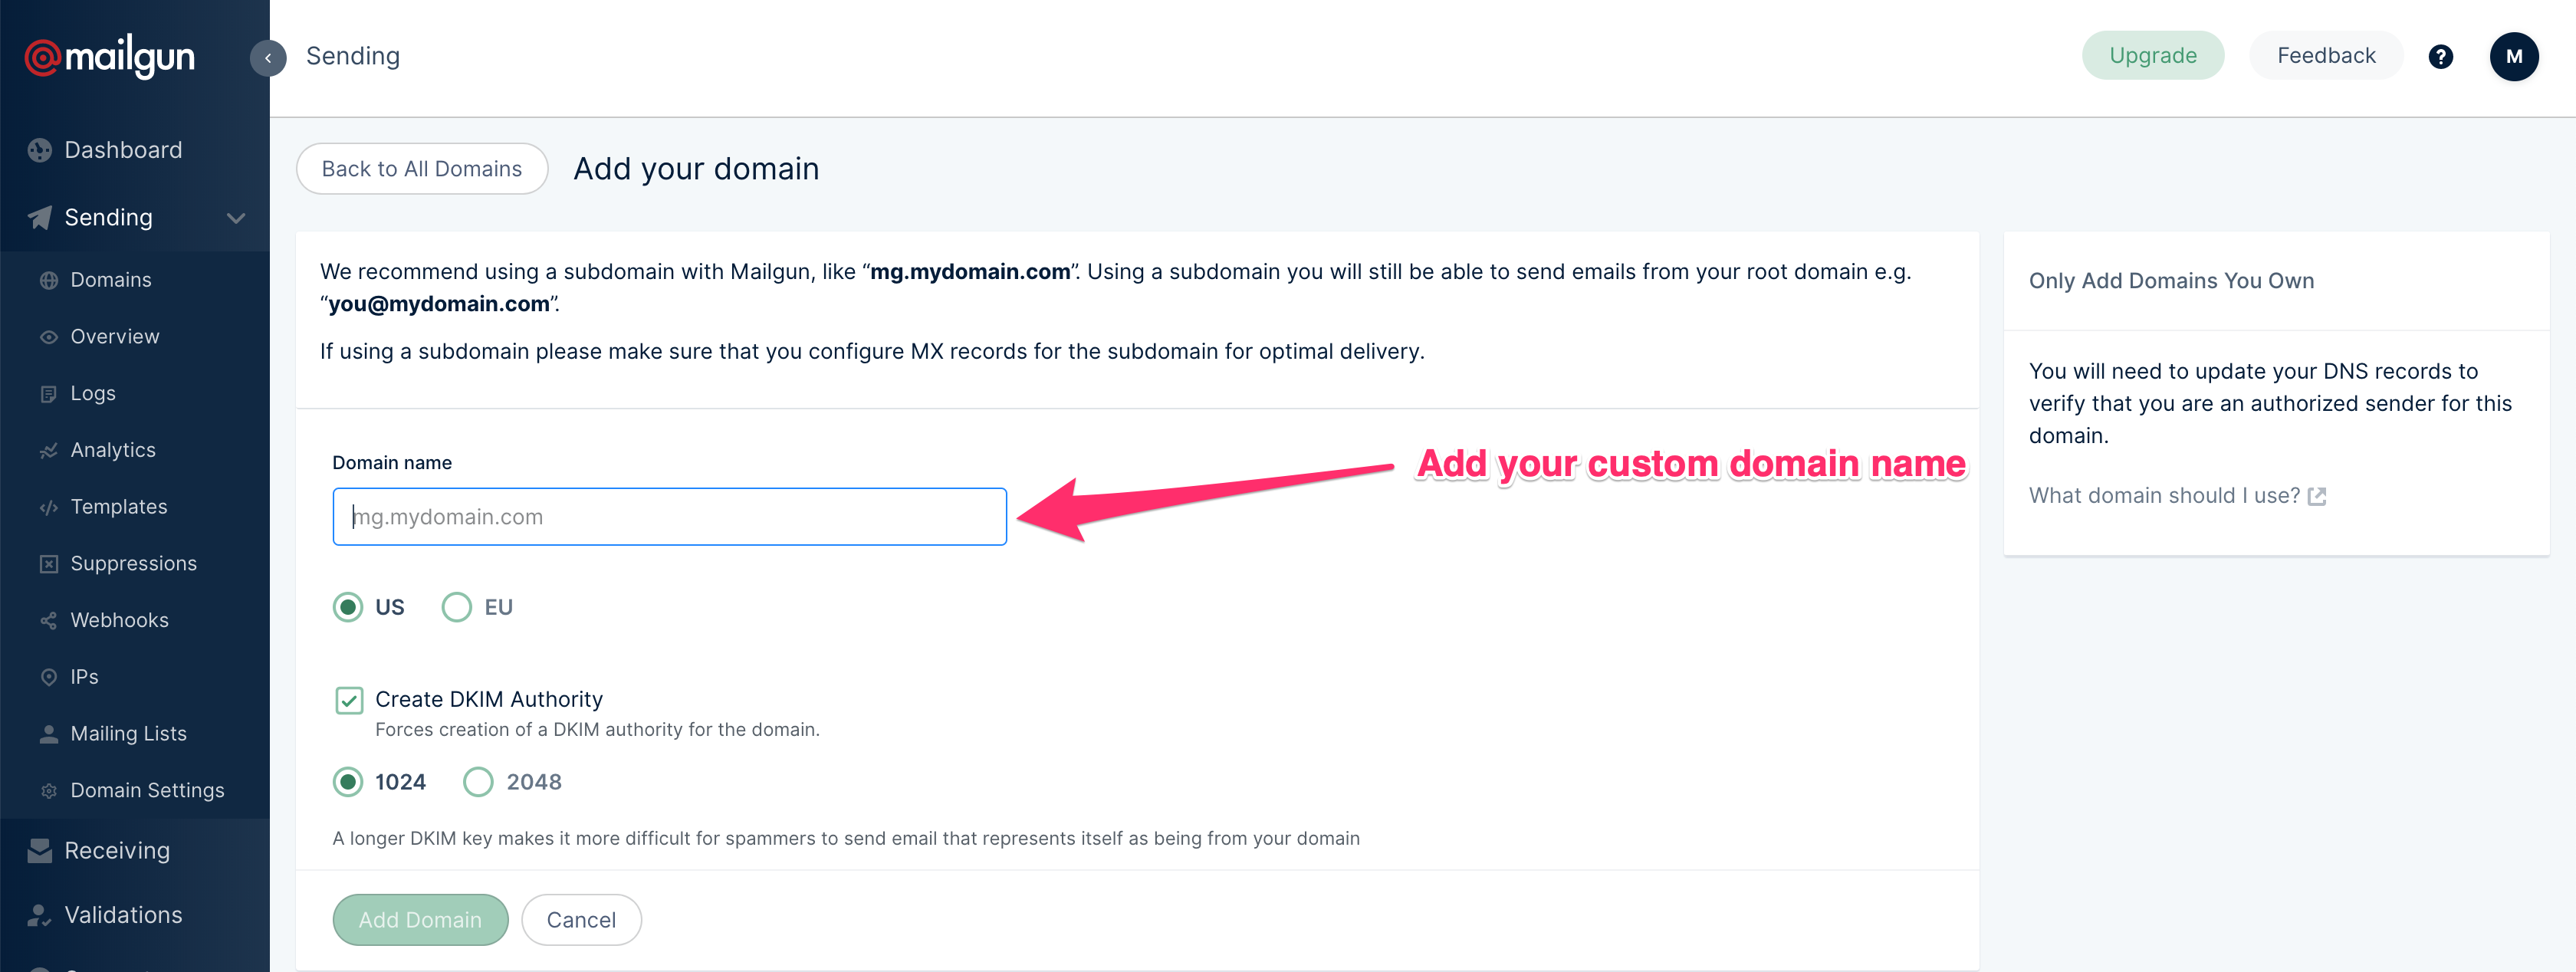
Subsequent, add your customized area identify within the “Area Title” textual content enter. Mailgun suggests utilizing a sub-domain like mg.mydomain.com. You should utilize no matter you need. For the needs of this submit, I used “holi.yasoob.me”.
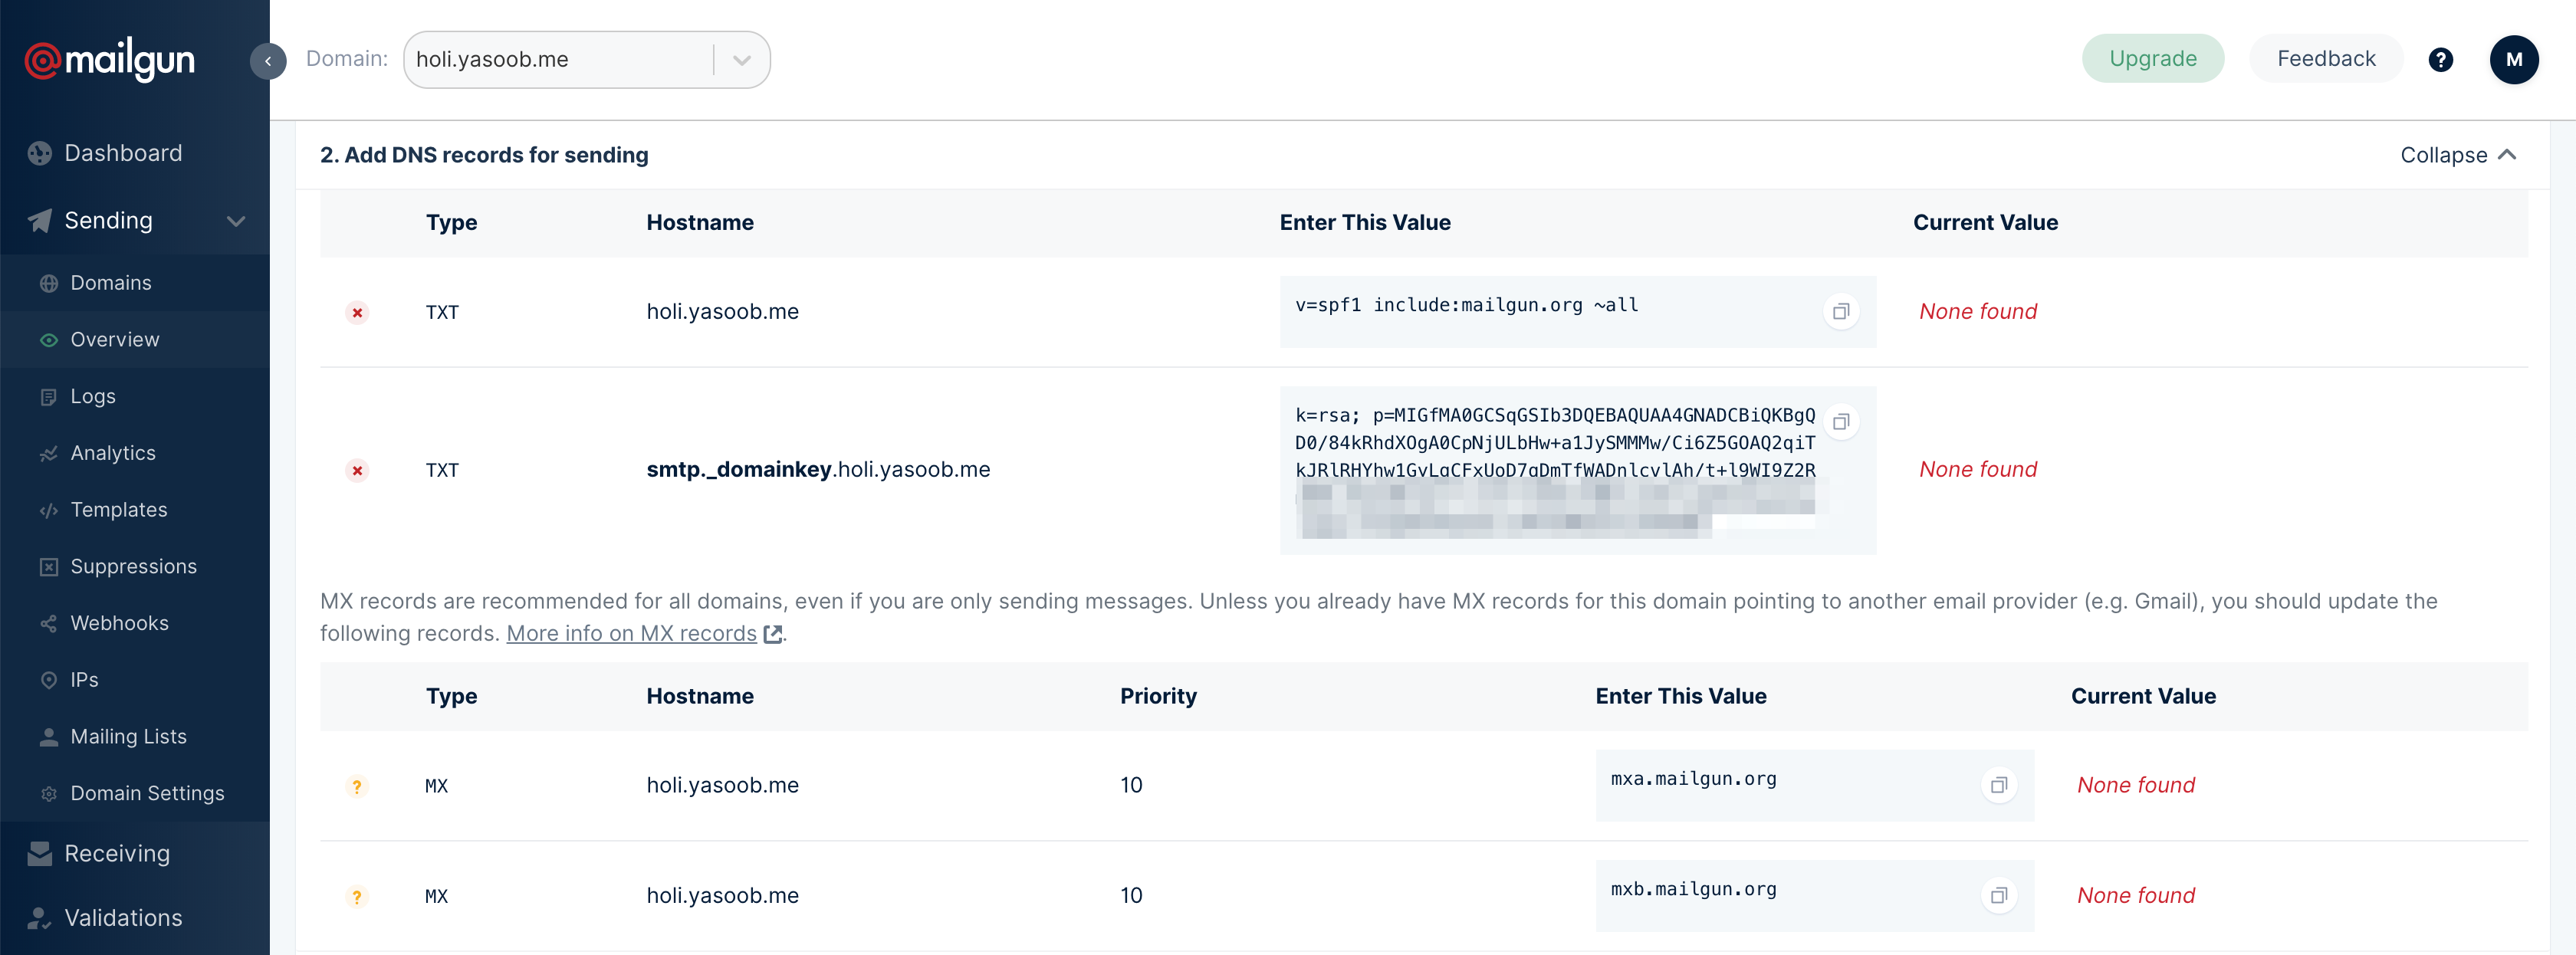
Now Mailgun will offer you some config which it’s important to add to the DNS config of your customized area. Copy these for the following step.
Step 2: Making DNS Modifications to Namecheap
So my area registrar is Namecheap and I’ll tailor these particulars to that. Yours is perhaps completely different however the steps ought to be the identical.
I opened up Namecheap and went to the “Superior DNS” tab and added the small print like this:
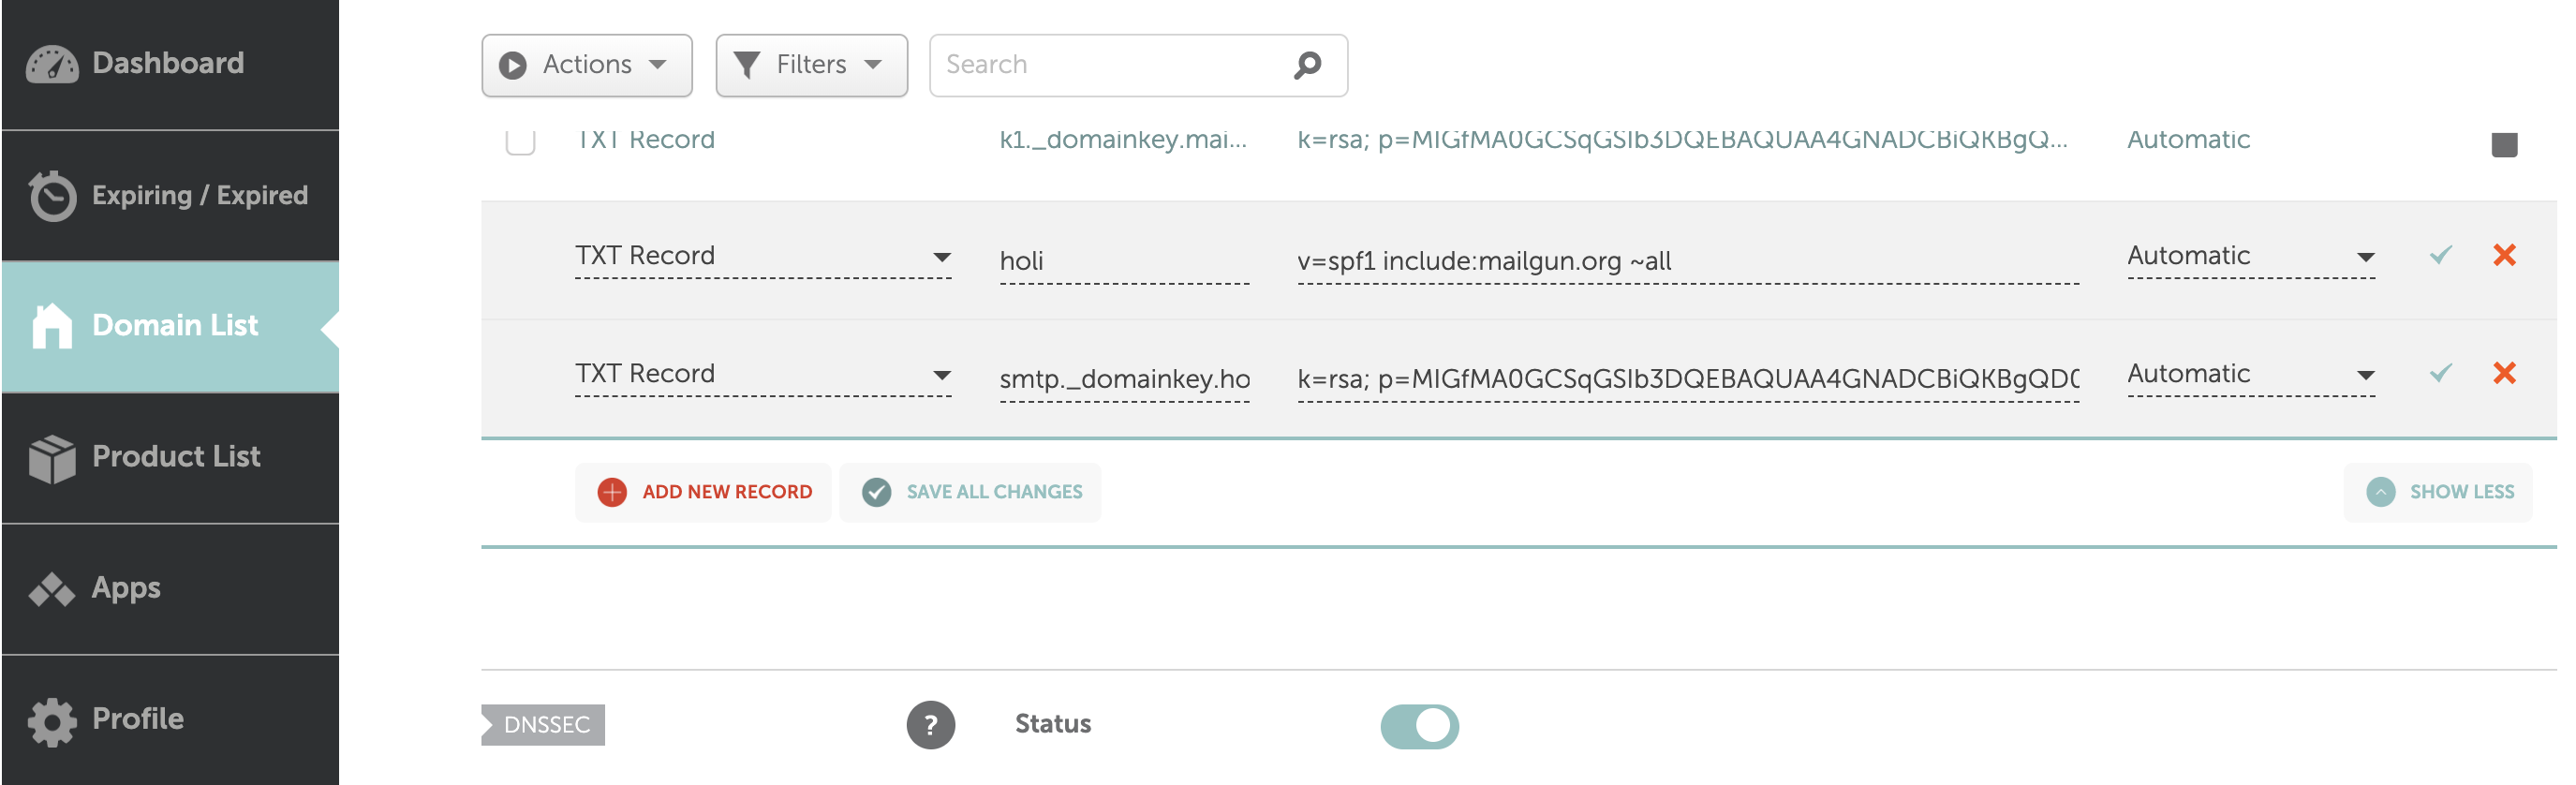
Once I began out I made an enormous mistake on this web page. As a substitute of typing in solely “holi” within the host subject, I used to be typing in “holi.yasoob.me”. That was incorrect and I needed to get in contact with assist to determine that out. In hindsight, it ought to have been apparent as a result of I’ve another customized DNS config as properly they usually all comply with that sample.
The DNS propagation ought to take a few minutes after which you possibly can return to Mailgun and click on on the “Confirm DNS Settings” button and the area ought to be verified. We are able to arrange the remainder of the code throughout this time.
In your feedback.html partial which you employ to render the remark field, you should add a brand new subject:
<enter kind="checkbox" identify="choices[subscribe]" worth="electronic mail">
Ship me an electronic mail when somebody feedback on this submit.
If somebody needs to obtain electronic mail updates for brand new feedback, they will verify this field. You may fashion this in any manner you need. You solely have to make it possible for the identify stays the identical. Commit these modifications however don’t push them on-line simply now. We’ll try this after the following step.
Step 4: Updating staticman.yml
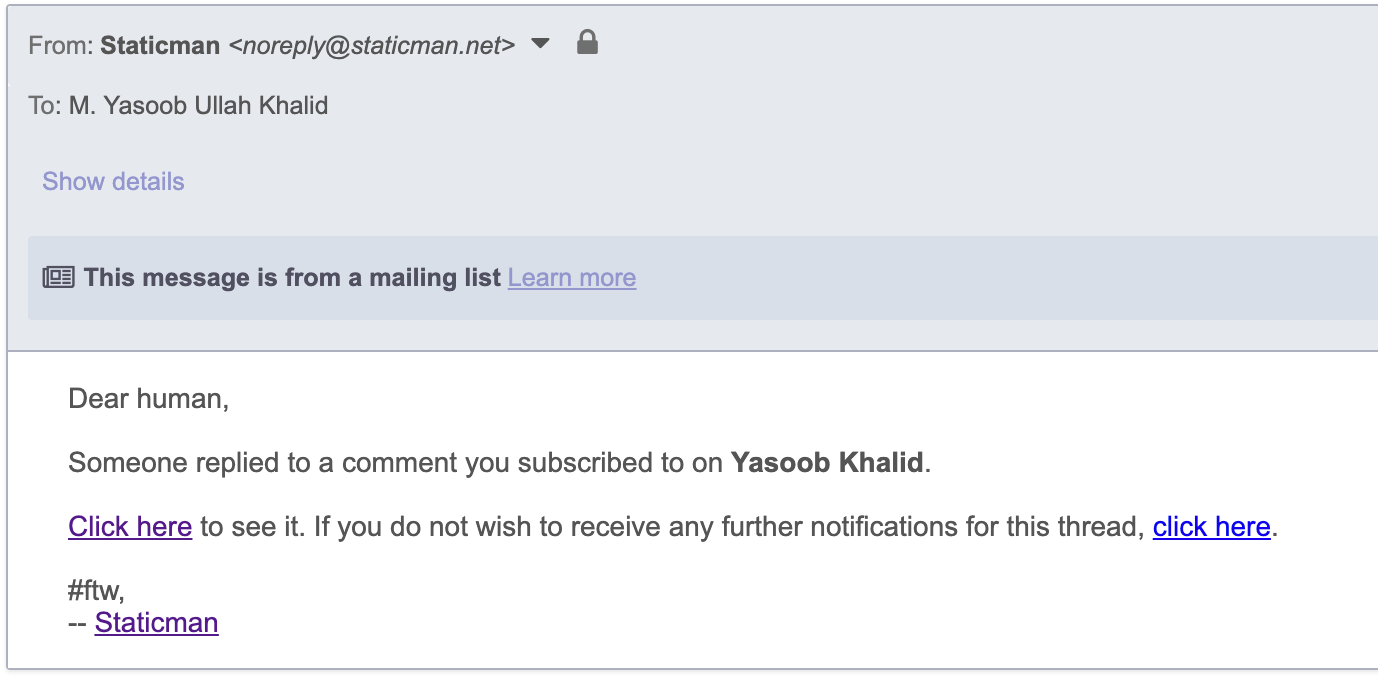
The final half includes updating staticman.yml. We have to add 4 keys. The primary one is “identify”. The worth of this subject can be mirrored within the electronic mail which staticman sends to individuals on new remark. I’ll present you what it seems to be like in an precise electronic mail later.
Subsequent, we have to add a key known as “enabled” below notifications to truly inform Staticman to ship notifications. And lastly, we have to add our Mailgun API key and area identify on this config. We is not going to add a plaintext model of those two configs however relatively an encrypted model.
To be able to encrypt one thing utilizing the RSA key you uploaded to Staticman whereas setting it up, you should append the info on the finish of this URL and open it. This will provide you with an encrypted model of the textual content you move it. Use this endpoint to encrypt your Mailgun API key and area and add them to your staticman.yml file. My staticman.yml seems to be considerably like this:
---
feedback:
  identify: "Yasoob Khalid"
  # ...
  notifications:
    enabled: true
    apiKey: "Kf3+7eqt0zog+RadxaAD=="
    area: "BL4Dq9fXgfsg+YWMqHsQ=="
Now you possibly can commit these modifications to Git and push them on-line. Any further if anybody makes a remark and checks the “subscribe” field, they’ll get electronic mail notifications of every subsequent remark.
The e-mail will look one thing like this:
And that’s it! I hope you realized one thing new on this submit. I needed to stumble to get this to work. Hopefully, your journey can be a lot smoother now. ❤️
In case you have any feedback/options/considerations, please point out them within the feedback under! Until subsequent time. 👋