


Apart from updating system packages, why not replace the Kernel in Ubuntu system? As your Ubuntu system’s core, updating the Kernel is essential in sustaining safety and stability.
On this tutorial, you’ll be taught to soundly replace your Kernel and take away problematic ones in your Ubuntu system.
Learn on to maintain your system safe and steady!
Stipulations
This tutorial homes hands-on demonstrations. If you happen to want to comply with alongside, be certain you will have a system working Ubuntu Linux 18 or later, however this tutorial makes use of Ubuntu 20.04 LTS.
Putting in the Mainline Kernel Installer
The Mainline Kernel Installer is a graphical software that permits you to rapidly and safely set up your Ubuntu system’s newest mainline Linux kernel. However identical to different instruments, you could first set up the Mainline Kernel Installer in your system.
To put in the Mainline Kernel Installer, comply with these steps:
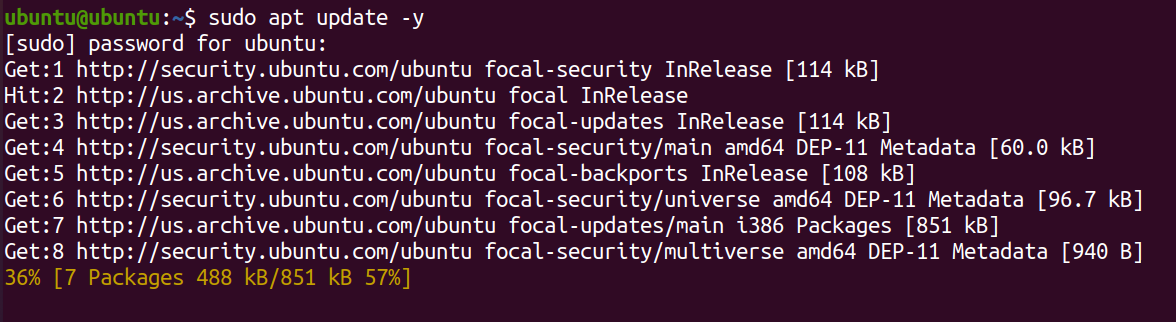
1. Open a terminal and run the under apt replace command to make sure your system has all the most recent bundle indexes.
2. Subsequent, execute the under add-apt-repository command so as to add the Cappelikan Private Package deal Archive (PPA) (ppa:cappelikan/ppa) to your system’s repository record. A PPA lets you entry extra software program packages not included within the official Ubuntu repositories.
The Cappelikan PPA accommodates packages associated to the Linux kernel, together with mainline kernel builds and backported kernels.
sudo add-apt-repository ppa:cappelikan/ppa -y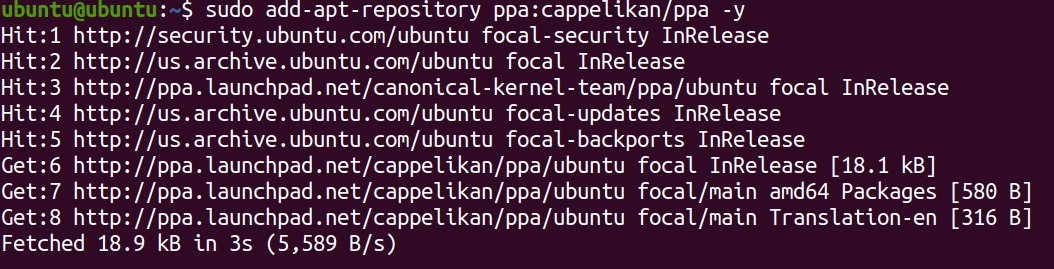
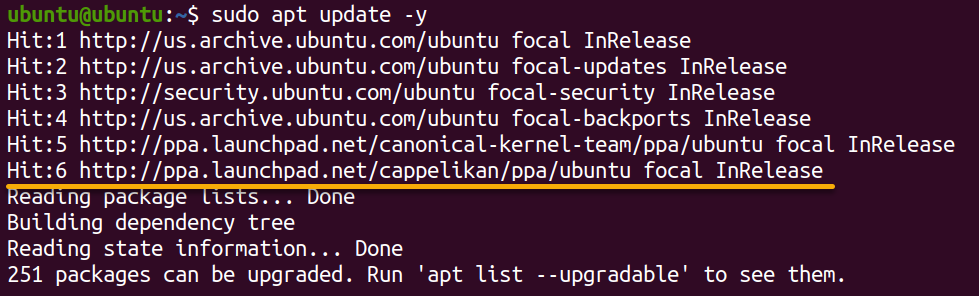
3. Run the next command to replace the packages record once more to make sure your system now consists of the packages from the Cappelikan PPA.
4. Lastly, execute the apt set up command under to put in the mainline Kernel Installer.
sudo apt set up mainline -y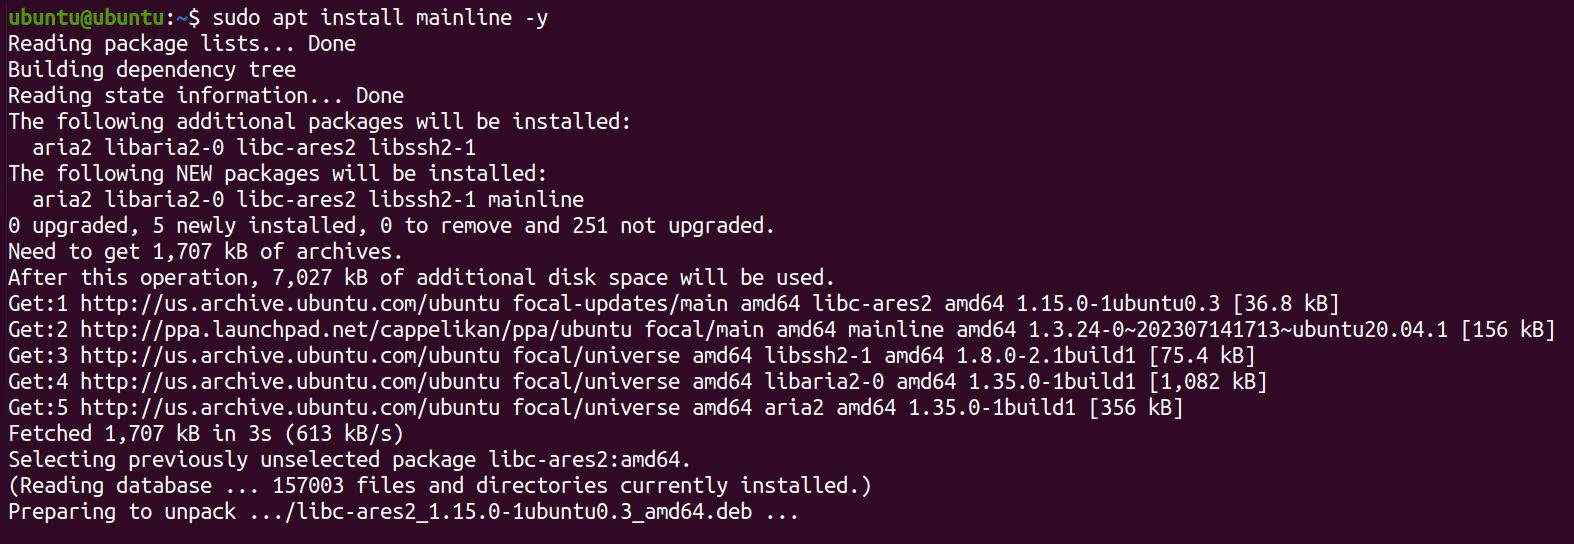
Updating Ubuntu Kernel through the Mainline Kernel Installer
Now that the Mainline Kernel Installer is put in, it’s time to get your palms soiled updating your system’s Kernel to the most recent model. The Mainline Kernel Installer simplifies the mainline kernel’s set up course of by offering a graphical interface that guides you thru the set up.
How this installer works is that it fetches the most recent kernel information from the Ubuntu mainline kernel repository, downloads, verifies, and installs them in your system.
To replace your Ubuntu Kernel through the Mainline Kernel Installer:
1. Run the under uname command to get the details about your present Kernel.
You will note the same output under with the next:
- Linux – Signifies the OS you might be working, which is Linux.
- 5.15.0-76-generic – Represents the particular kernel model you will have put in in your system.
- x86_64 – Refers to your system’s structure, on this case, 64-bit (amd64).

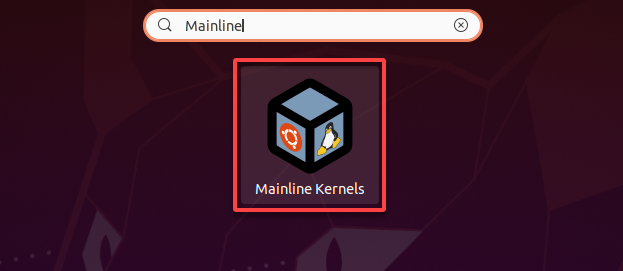
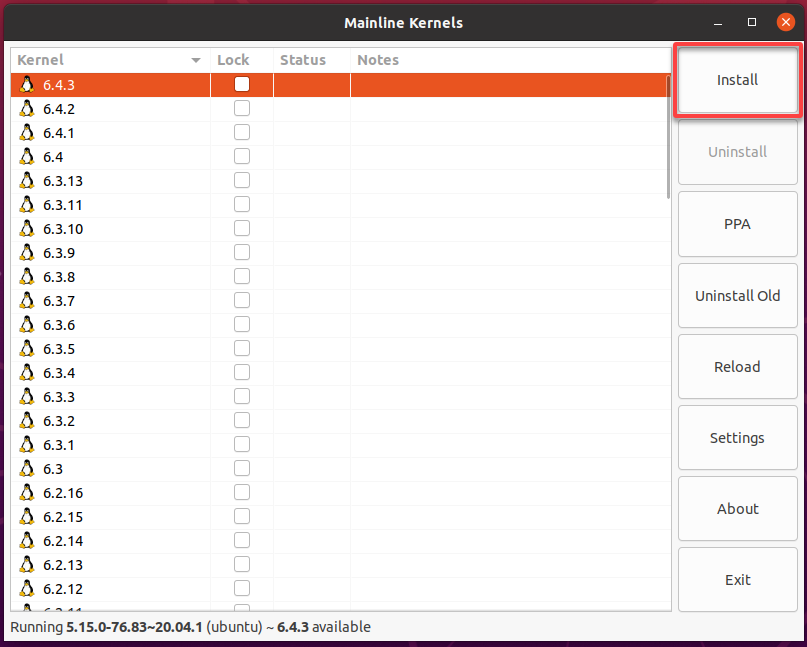
2. Subsequent, open the Mainline Kernel Installer (Mainline Kernels) from the Ubuntu Utility Launcher, as proven under.
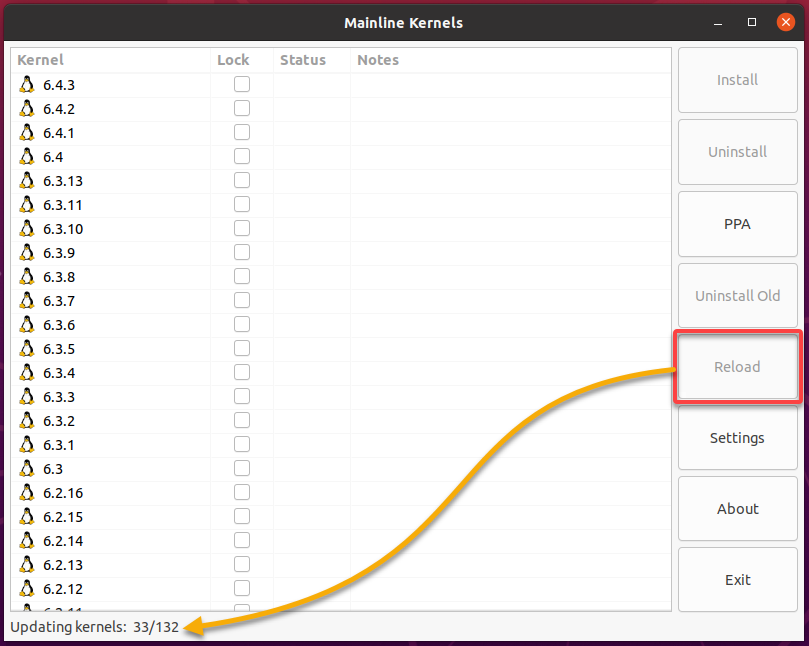
3. When the Mainline Kernel Installer opens, click on Reload to fetch the most recent accessible Kernel variations from the mainline kernel repository.
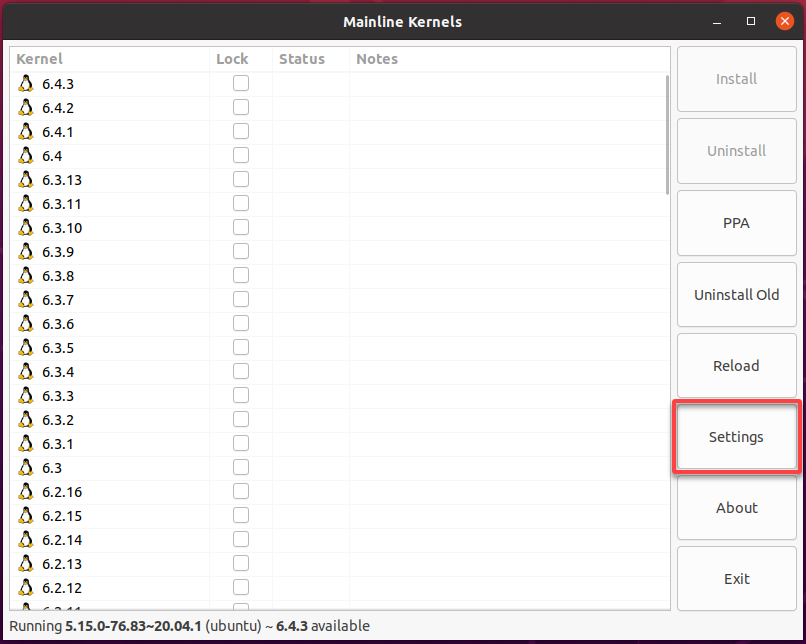
4. As soon as reloaded, click on Settings to entry the Mainline Kernels settings.
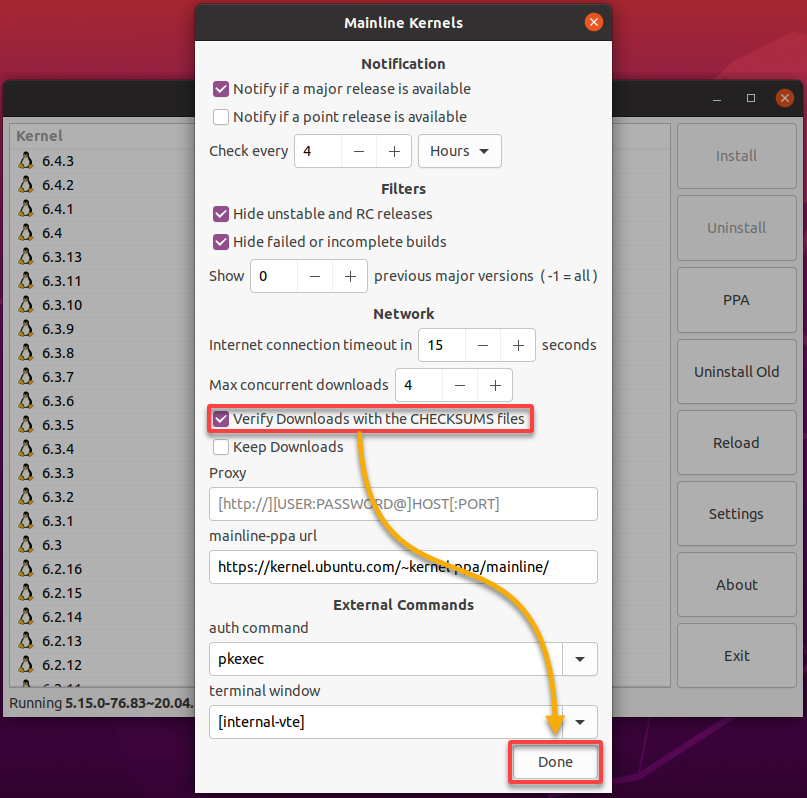
5. Now, tick the Confirm Downloads with the CHECKSUM information field, and click on Carried out.
This characteristic ensures the downloaded Kernels are legitimate and never corrupted.
6. Oble Kernels are downloaded and listed, choose a desired model from the record and click on Set up.
The newest model is strongly advisable, which at the moment of writing is 6.4.3.
A brand new Mainline Kernels terminal seems, indicating the set up course of begins, which can take time to finish.
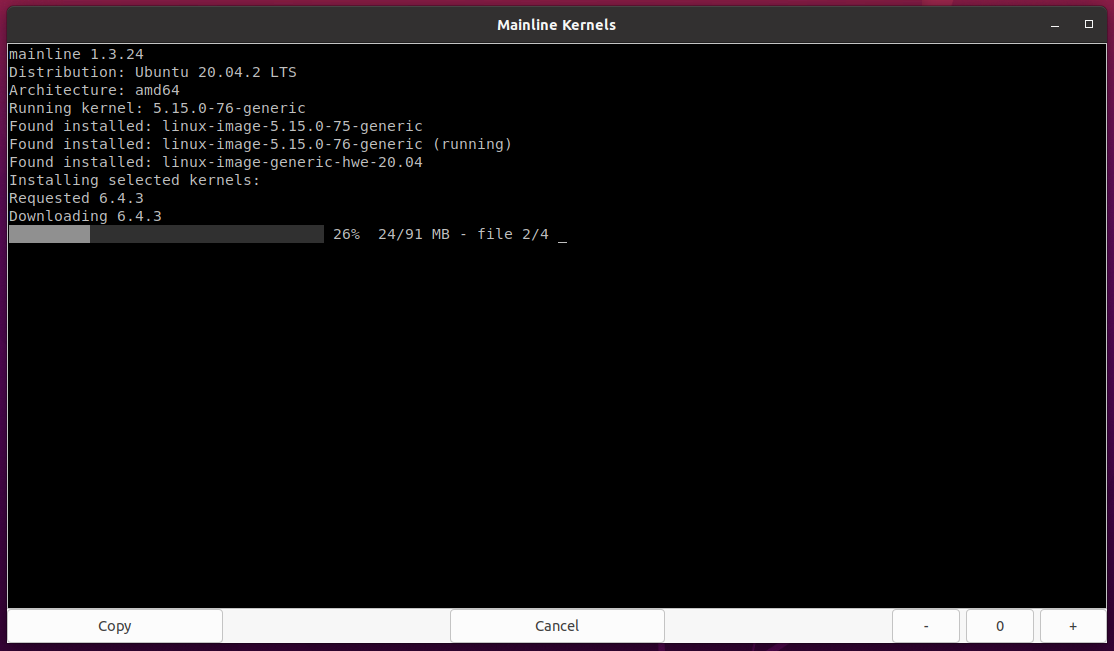
7. When prompted, enter your password to authenticate and proceed with the set up.

8. Lastly, as soon as the set up finishes, reboot your system for the adjustments to take impact, and un the under grep command to confirm the brand new Kernel model is working.
sudo dmesg | grep "Linux model"You will note your present Kernel model, as proven under.

Updating the Ubuntu Kernel through DEB Packages
In case you are uncomfortable updating your Kernels through the Mainline Kernel Installer’s GUI, another choice by downloading and putting in the Kernel’s DEB packages.
These DEB packages present the most recent launch candidate (RC) builds of the Kernel, that are unavailable by the mainline Kernels. RC builds are pre-release Kernel variations made accessible for testing and analysis earlier than the ultimate steady launch.
💡 Notice that these kernel builds could not have handed all exams and may include bugs.
To replace your Kernel through the DEB packages:
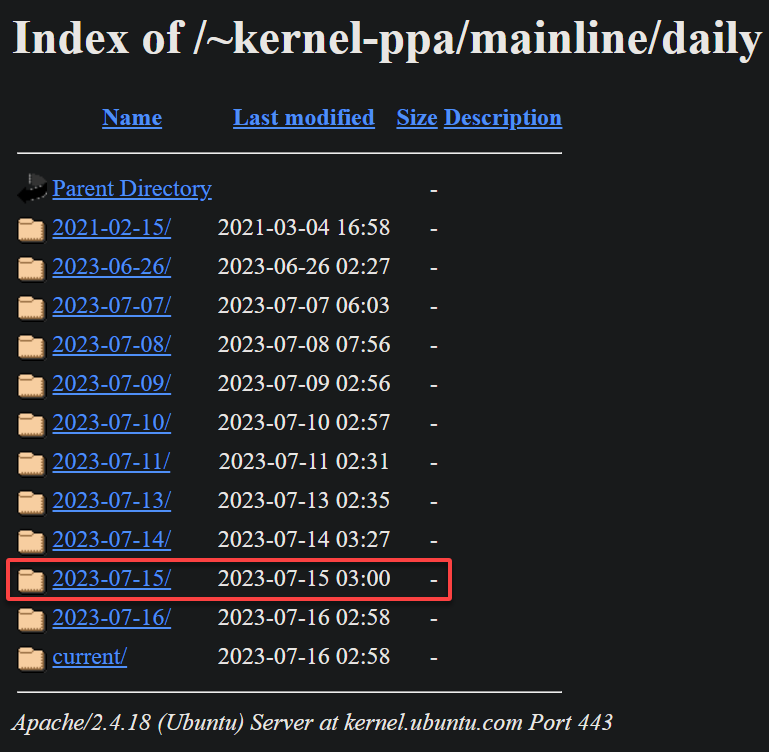
1. Open your favourite net browser (like Firefox or Google Chrome), and go to the official Ubuntu Kernel web page.
2. From the record of accessible releases, click on the most recent one which has handed all exams efficiently and has no reported points.
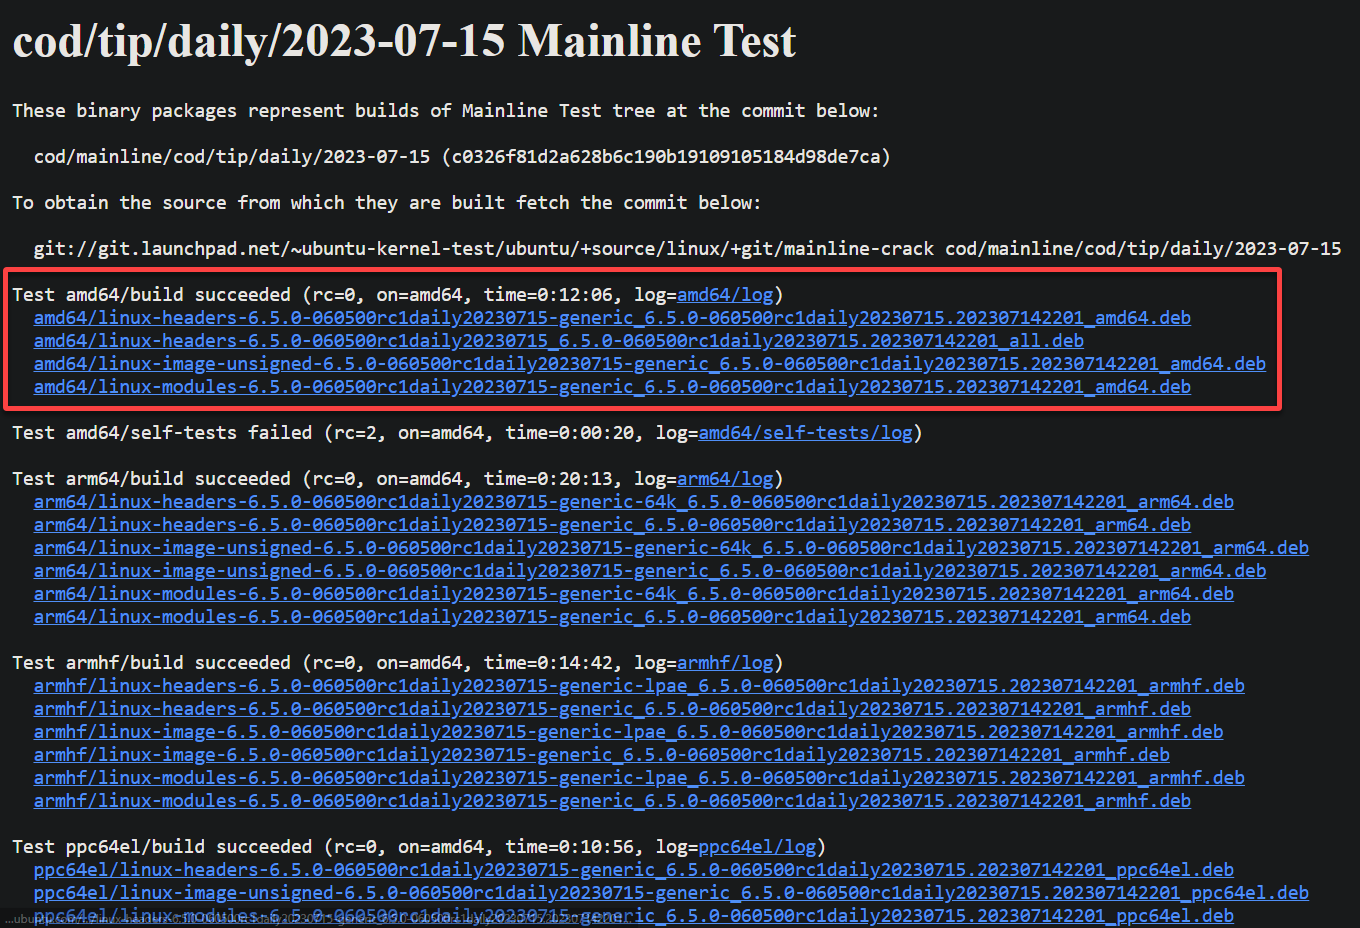
As of this time of writing, the most recent launch is 2023-07-15.
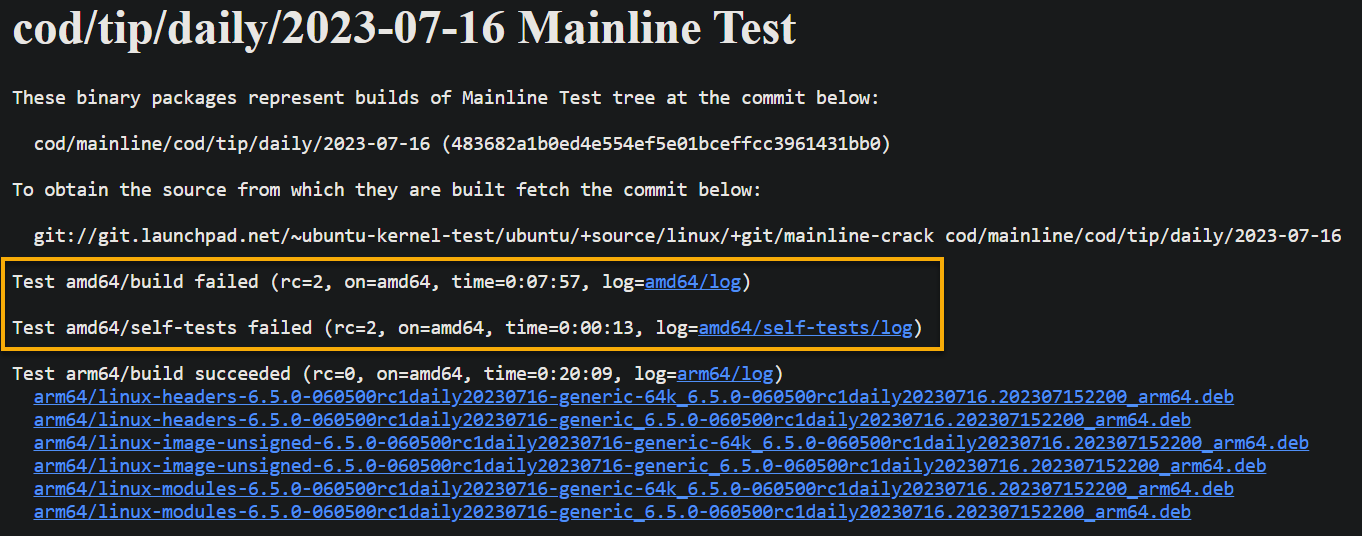
💡 Don’t choose the 2023-07-16 launch since each Take a look at amd64/self-tests and Take a look at amd64/construct failed, as proven under. Make sure you select a launch with out recognized take a look at failures to keep away from potential points.
3. Obtain the required DEB bundle as follows:
- On the chosen launch web page, search for a pack appropriate in your system structure (i.e., amd64 for 64-bit methods).
- Click on on every hyperlink to obtain all of the DEB packages to your ~/Obtain listing. Every downloaded bundle file could have a .deb extension.
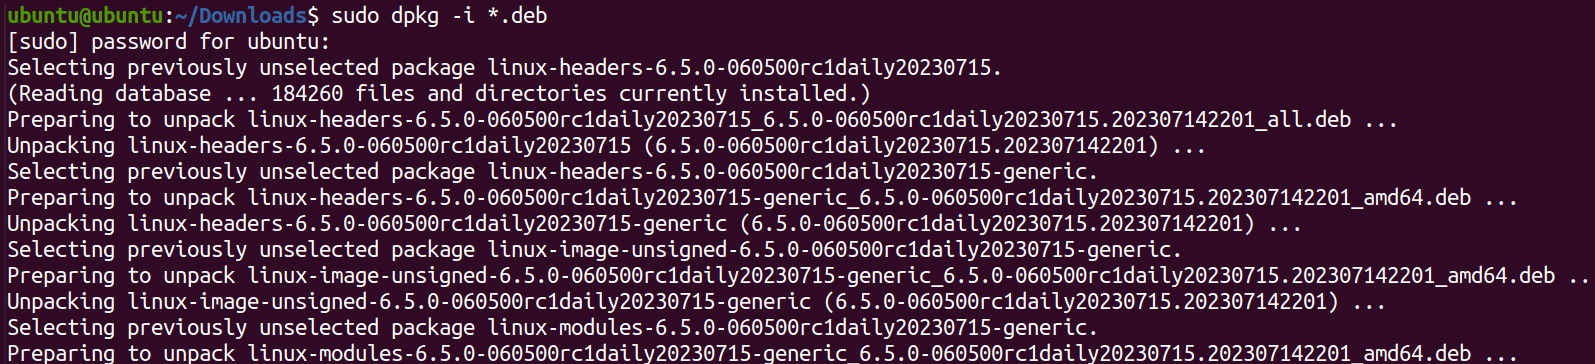
4. Open a terminal, navigate to the ~/Obtain listing, and run the under dpkg command to put in all *.deb packages.
Anticipate the set up to complete, and reboot your system afterward to use the adjustments.
5. Now, run the under command to test the Kernel model put in.
You now have the most recent launch candidate Kernel model (6.5.0) working in your system, as proven under.

Rolling Again to a Earlier Kernel Model
You’ve simply up to date your Kernel to the most recent model, which is superior. However as you might know, not all Kernel updates are profitable.
Compatibility points, bugs, or conflicts with sure {hardware} or software program configurations get in the way in which of Kernel updates. These points can lead to system instability and boot failures. In such instances, you might have to roll again to the earlier model, which helps restore system stability and performance.
To roll again to a earlier Kernel in your Ubuntu system:
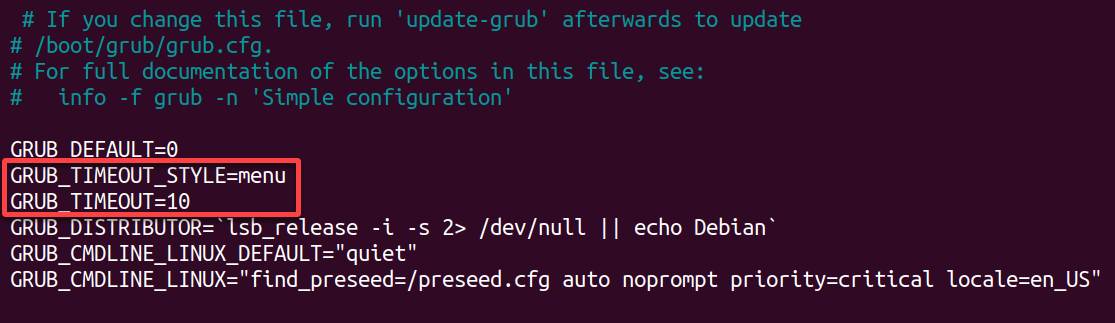
1. Open the /and many others/default/grub file in your most popular textual content editor. This file lets you management the default boot conduct and choose totally different kernel variations and boot choices.
2. Subsequent, configure the next:
GRUB_TIMEOUT_STYLE=menu– Helps you to outline the type of the GRUB timeout conduct. When the worth is about tomenu, the GRUB menu shows and waits for person enter inside the outlined timeout interval. This conduct lets you choose the specified Kernel in addition manually.
GRUB_TIMEOUT=10– Units the period (in seconds) for which the GRUB menu will probably be displayed earlier than mechanically booting the default entry.
On this case, the worth is about to10seconds. Throughout this era, you’ll be able to press any key to interrupt the countdown and entry the GRUB menu.
As soon as configured, save the adjustments and shut the file.
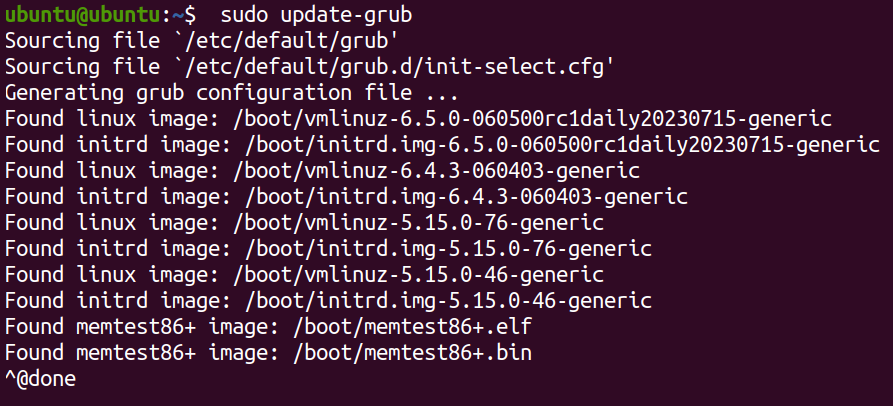
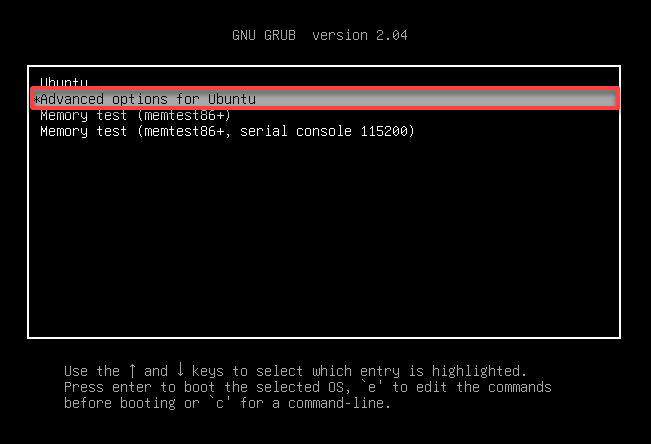
3. Execute the under update-grub command and reboot your system for the modifications to take impact. As soon as your system boots up, the GRUB menu seems with all of your put in OSes (step 4).
4. Now, use the arrow keys in your keyboard to spotlight the second choice (Superior choices for Ubuntu), and press Enter to pick out it.
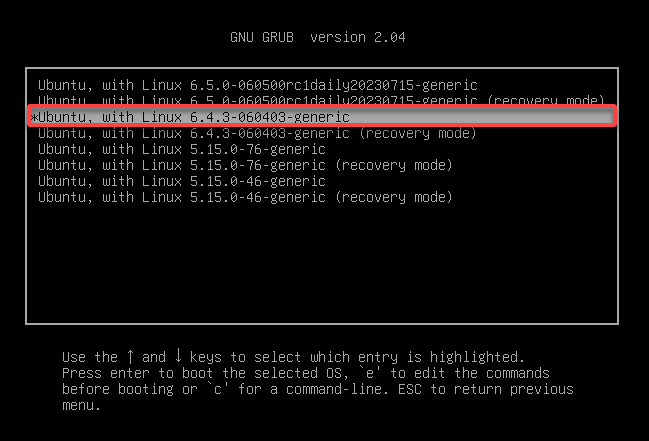
5. Choose the earlier Kernel model in addition into, and press Enter to verify your choice.
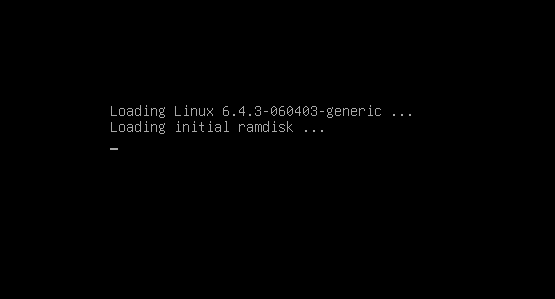
You’ll now be logged into the chosen Kernel and may use Ubuntu as normal.
6. Lastly, log in along with your credentials to entry your Ubuntu desktop take a look at if every thing works usually.

Eradicating Problematic Kernels
If you happen to discover that booting right into a earlier Kernel has resolved your concern, you now not have to hold the problematic Kernel. Doing so helps save disk house by eliminating undesirable problematic Kernels.
To take away problematic Kernels, comply with the steps under:
1. Execute the under command to record all of your --installed Kernels (linux-image).
sudo apt record --installed | grep linux-imageSearch for the problematic Kernel model, and observe down its bundle title for later use.
The bundle title ought to be within the type of linux-image-VERSION-generic, as proven under.

2. Subsequent, run the next command to take away the problematic Kernel. Be sure you change kernel-name with the bundle title you famous within the earlier step.
sudo apt take away kernel-name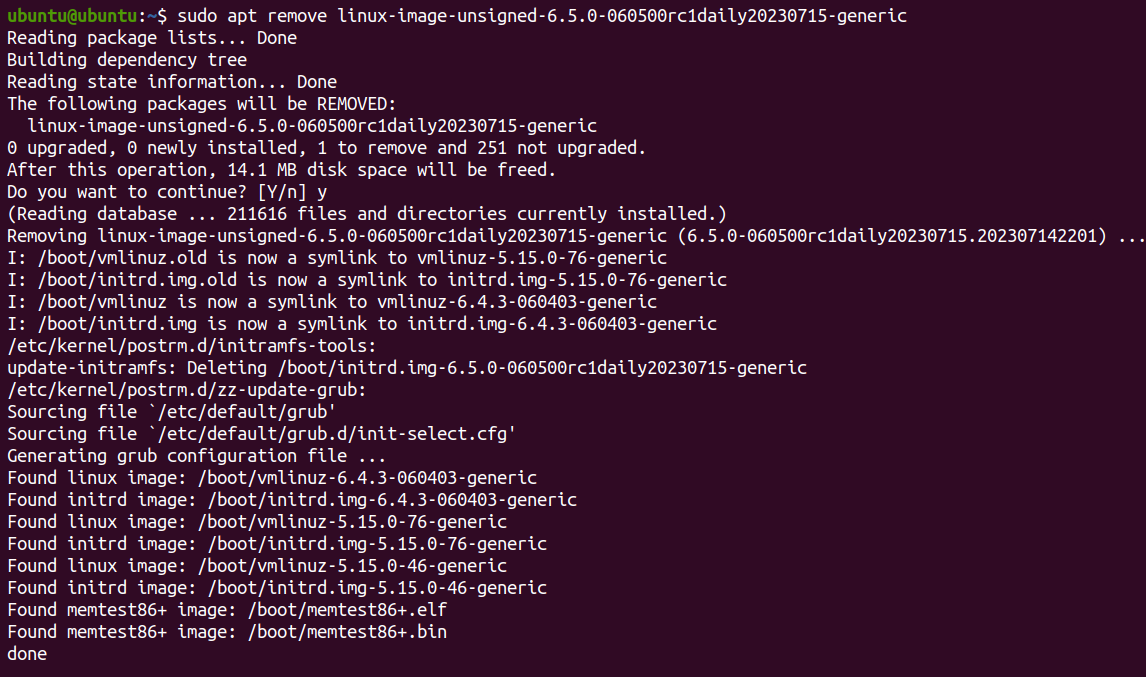
3. Lastly, reboot your system to use the adjustments, and rerun the command under to record all put in Kernels.
sudo apt record --installed | grep linux-imageUnder, you’ll be able to confirm the problematic Kernel (6.5.0) has been eliminated.

Conclusion
All through this tutorial, you will have realized to soundly replace your Kernel and take away undesirable ones to maintain your system working easily. Sustaining a secure and dependable surroundings is now inside your attain.
At this level, you’ll be able to confidently hold your Kernel up-to-date through the Mainline Kernel Installer or set up the most recent RC DEB bundle builds.
Problematic Kernels is one factor, however Ubuntu startup points can get in your nerve too. Why not be taught to repair Ubuntu startup points with Ubuntu Boot Restore effortlessly?