


In any managed digital surroundings, person and group administration is one among directors’ commonest time sinks. How do you get rid of this technological beast of burden? Automation! Google has launched dynamic teams to the enterprise model of Workspace to permit directors to “set it and overlook it” for ongoing group administration.
With the question builder (or writing your personal CEL question), you may construct a dynamic group as soon as to kind and manage customers based mostly on attributes, and the group will then handle itself! And on this tutorial, you’ll be taught the fundamentals of making and managing dynamic teams in Google Workspace Admin Console.
Keep tuned and prepare to stage up your person and group administration expertise!
Stipulations
This tutorial will likely be a hands-on demonstration. When you’d prefer to observe alongside, make sure you have got the next:
- A Google account with any of those subscriptions lively: Google Workspace Enterprise Customary, Enterprise Plus, Enterprise for Schooling, and Cloud Id.
- A tremendous admin account, or an account with the correct group administration and person administration roles, in an lively Google Workspace surroundings.
- A minimum of 5 different customers within the Google Workspace listing you may assign to teams (for testing) and have attributes presently assigned to them.
Getting ready and Documenting Customers’ Attributes for Group Project
Dynamic teams in Google are created based mostly on assigned person attributes. Figuring out which attributes ought to be used for queries when creating dynamic teams is as much as the admin.
Typically, these attributes are assigned to customers throughout preliminary enrollment right into a Google Workspace listing. Relying on the person creation methodology used inside your area, the quantity and worth of attributes will differ.
A number of the person attributes you need to use in dynamic group queries are as follows:
- Key phrases, Division, Constructing ID, Organizational Unit, Electronic mail format.
- Location (metropolis, state, zip, and many others.), and Domains/Subdomains.
These examples are solely a small portion of accessible person attributes. A whole checklist of person attributes and the way they are often assigned is accessible on Google’s cloud identification webpage.
However earlier than creating dynamic teams within the Google Admin console, you should evaluate the customers in your Workspace Listing and notice which attributes will likely be used for queries.
To search out these person attributes:
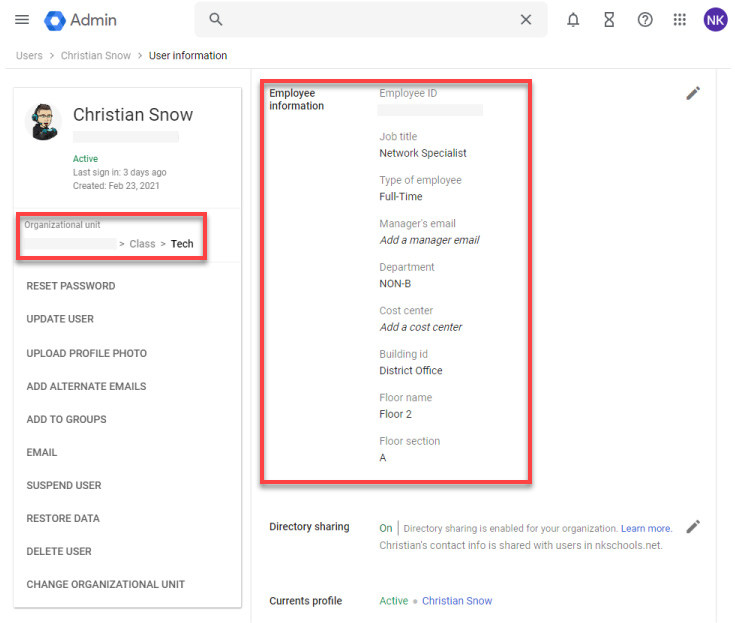
1. Log in to the Google Workspace Admin Console in your workspace area.
2. Subsequent, increase Listing (left panel), click on on Customers, and choose any person from the listing checklist.
3. Now, increase the Consumer Info panel, and also you’ll see a few of the presently assigned attributes, as proven beneath.
Creating Dynamic Group Assignments in Google Admin
There are numerous advantages to dynamic teams. Most notable amongst these advantages is the self-management of person task based mostly on attributes.
However there are a few notable variations between dynamic and customary teams:
| Limitations | Particulars |
| Dynamic teams can not have managers or homeowners assigned to them. | The teams are managed by Workspace directors, much like Google’s “Shared Drives.” |
| Dynamic teams don’t enable for nesting different teams (customary or dynamic). | Solely customers could be members of a dynamic group. |
| Customers can’t be added manually to dynamic teams. | Membership can solely be modified by modifying the question. |
To create a dynamic group, observe the steps beneath:
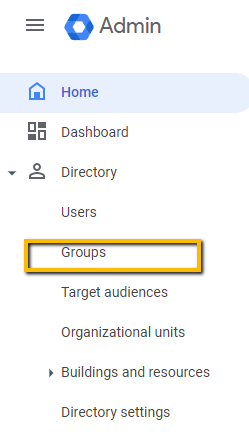
1. Develop Listing (left panel) on the Google Workspace Admin Console, and choose Teams. Doing so opens the Teams web page the place you may handle teams.
If the Teams app doesn’t seem in your sidebar, it could be that the app must be enabled in your area.
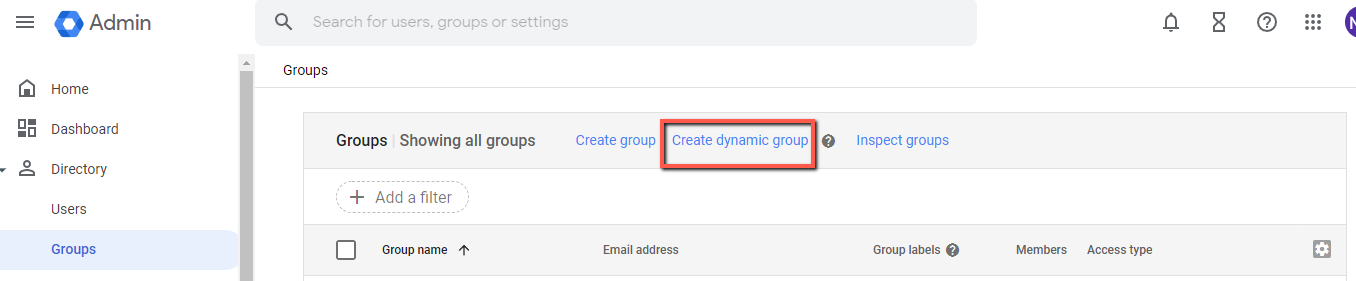
2. Subsequent, click on Create Dynamic Group on the Teams web page to entry the Membership Question web page.
3. On the Membership question web page, click on on the Situation dropdown discipline and choose a person attribute kind. This attribute would be the main attribute used within the question.
As soon as chosen, two new fields seem on the proper facet of the dropdown discipline (step 4).

4. Now, choose a logic operator for the question within the center dropdown discipline.
The kinds of logic operators on this discipline rely upon the kind of situation chosen within the dropdown (leftmost). Probably the most steadily used operators are Begins With, Equals, and/or Equals Ignore Case.
The primary obtainable logic operator at all times populates this discipline by default. Within the screenshot beneath, the logic operator has been set to Equals Ignore Case.
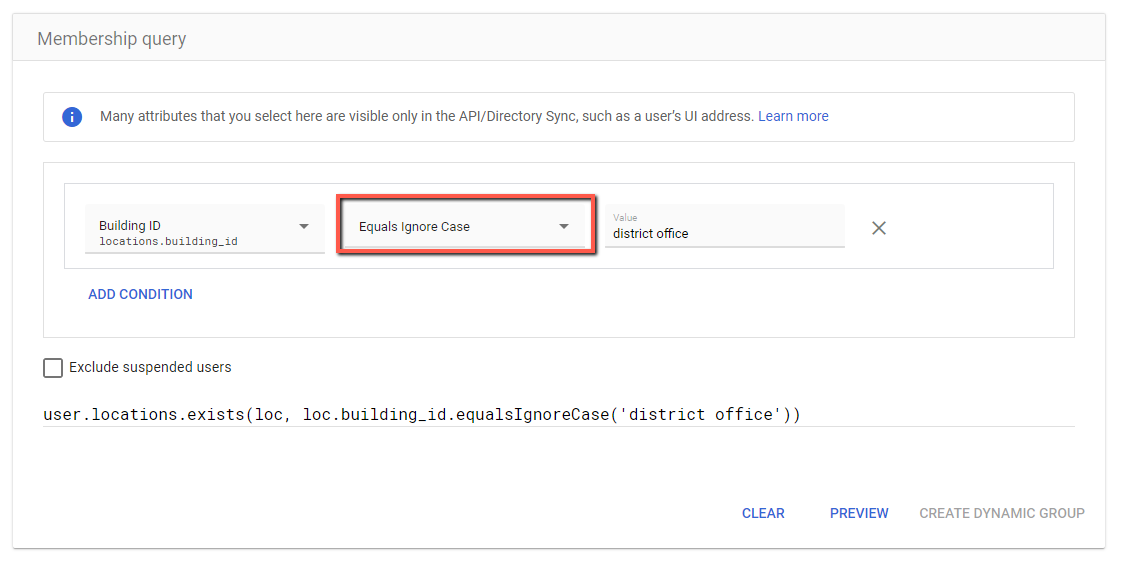
5. Populate the Worth discipline with the time period to seek for within the question. On this case, the worth is ready to district workplace.
The Equals Ignore Case logic operator ensures the outcomes are returned for any attribute matching the string “district workplace” no matter capitalization.
If you do not need outcomes to return customers marked as suspended, tick the Exclude suspended customers checkbox beneath the question builder.
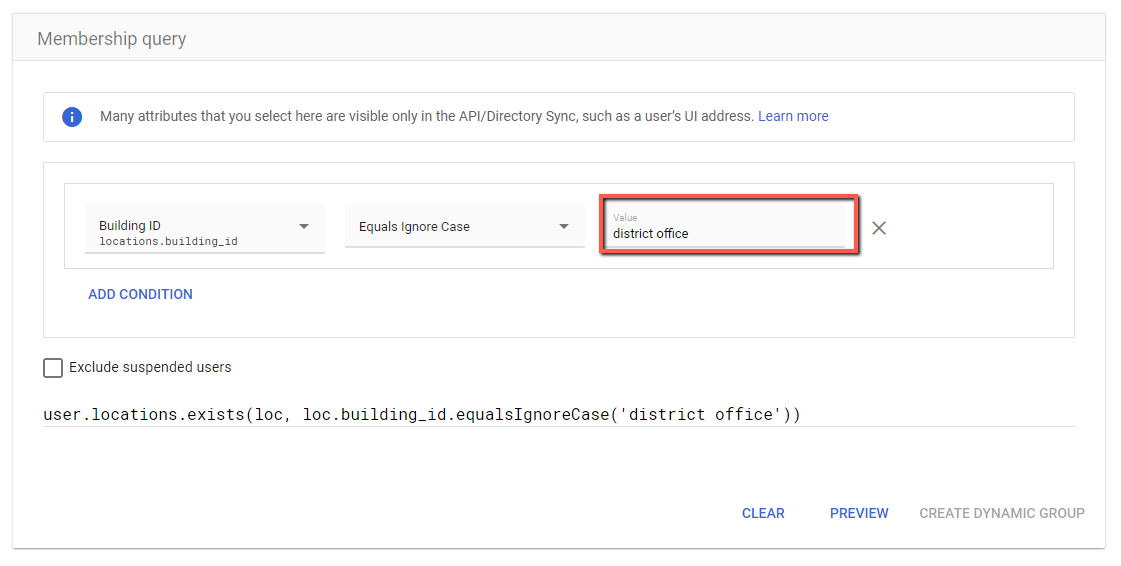
As you populate the question builder, a question string populates, as proven beneath.
The question is constructed utilizing the Frequent Expression Language and references a restricted checklist of Legitimate Consumer fields for Dynamic Teams created by Google. Writing customized question strings is past the scope of this information.

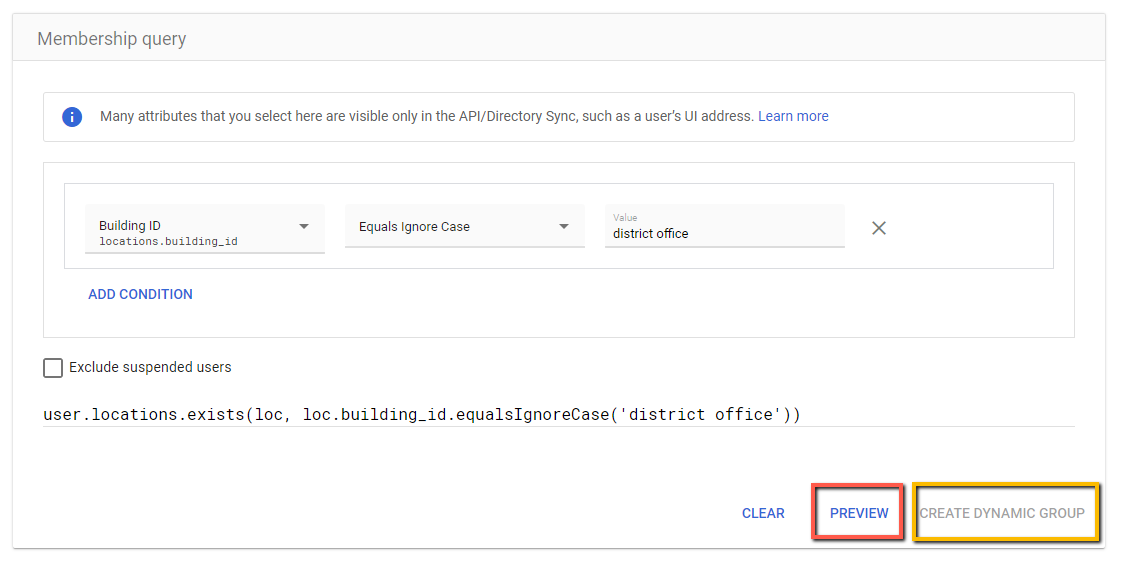
6. Subsequent, click on on the Preview button to check the group question.
The Create Dynamic Group button will likely be grayed till the group membership previews. This habits ensures your question has been constructed and examined appropriately earlier than publishing.
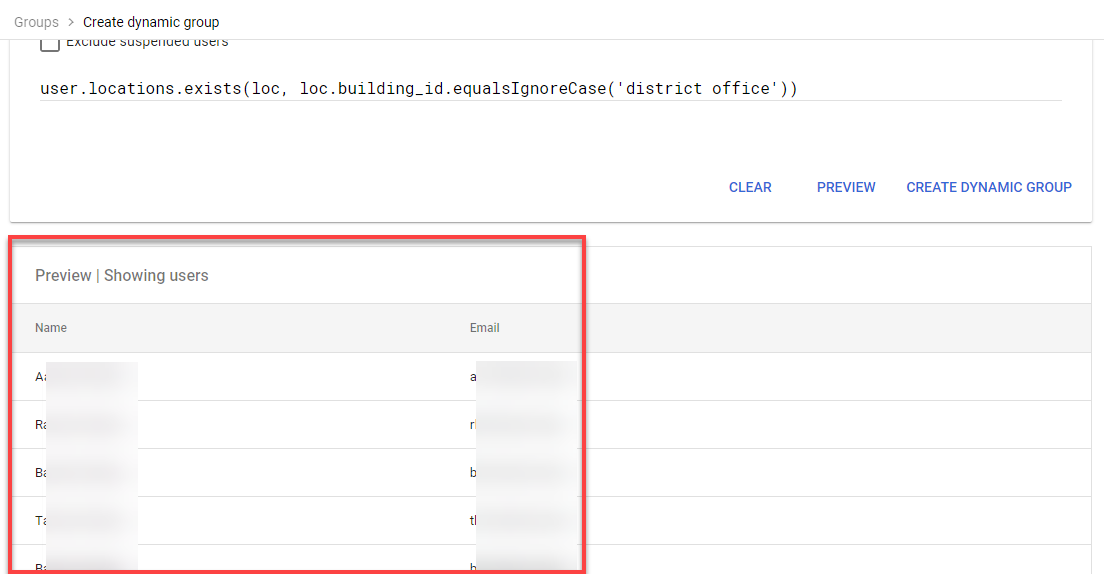
A listing of outcomes seems beneath the membership question builder space. Within the output beneath, you may see a number of outcomes returned based mostly in your question.
On this case, the outcomes returned every person with a Constructing ID attribute of District Workplace assigned to their profile.
7. As soon as glad with the outcomes, click on the Create Dynamic Group button to provoke creating the group.
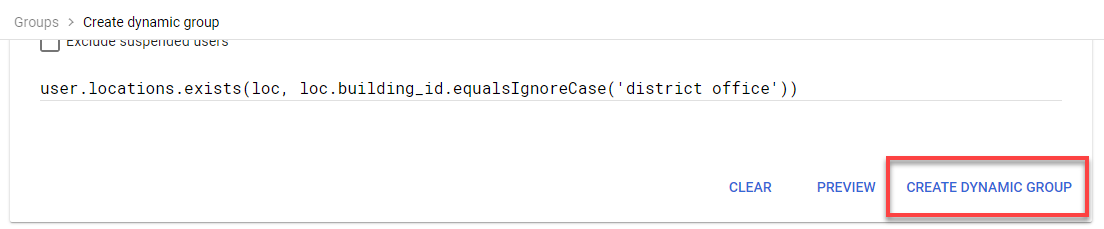
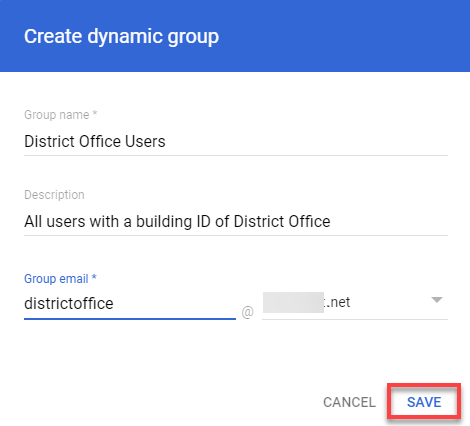
8. Lastly, configure the brand new dynamic group with the next:
- Group identify – Present a novel identify for the brand new dynamic group. This tutorial’s alternative is District Workplace Customers.
- Description – Add an outline that distinguishes this dynamic group from the others.
- Group electronic mail – All teams should be assigned a novel electronic mail handle. Group electronic mail addresses embrace letters, numbers, underscores, and/or hyphens.
- Click on on the Save button to save lots of the brand new dynamic group.
Setting Dynamic Teams Permissions
After creating dynamic teams, permissions could be set for every group. And as new customers are swept into place by the dynamic question you already constructed, they inherit permissions routinely. This habits leaves you with time to deal with far more important duties.
Since dynamic teams would not have conventional managers or homeowners, these settings should be modified by a workspace administrator. All group sorts and their settings could be modified manually by the admin console or their group settings web page and thru automation instruments like GAM.
When making adjustments manually, there are two locations the place permissions should be set for every dynamic group:
- The primary location is within the Google Workspace Admin Console, the listing, and the group profile web page.
- The second location is throughout the Group’s settings web page on the Google Teams for Enterprise app web page. Google’s Help web page for Group Settings applies to dynamic and customary group settings.
However on this tutorial, you’ll make the adjustments within the first location:
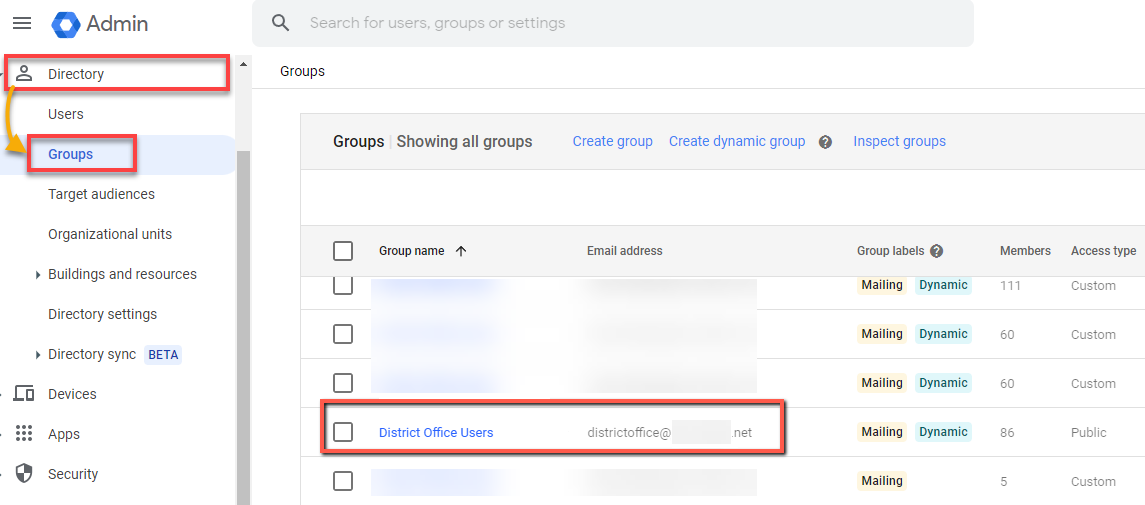
1. Develop Listing (left panel) within the Google Workspace Admin Console, and choose Teams.
Seek for the group you need to modify within the search field (or scroll by the checklist), and click on on the group profile to entry the group’s info web page.
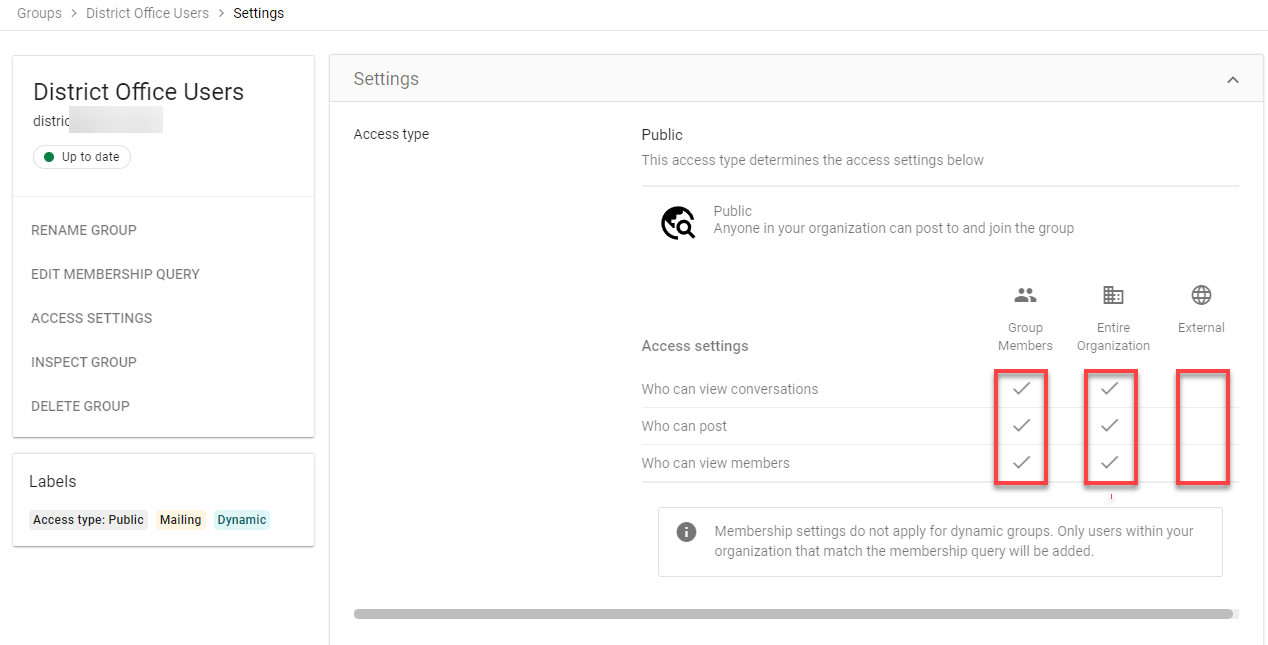
2. Subsequent, increase the Entry Settings to change the primary set of group permissions.
For every of the settings, there are three ranges of permission obtainable:
| Permission Degree | Description |
| Group Members | Solely direct members of the group. |
| Total Group | All customers within the area. |
| Exterior | Any exterior person that’s not a person inside your Google Workspace area. |
Tick the checkboxes for every row proven beneath to set permissions based mostly in your coverage or wants. These permissions are essentially the most crucial for all Teams throughout the area as they decide who can:
- View conversations from the group’s web page.
- View members within the group.
Google Workspace can now additionally assign Workspace App privileges based mostly on Group membership. But when your area has greater than 50 lively customers, assigning privileges utilizing Organizational Models is a way more viable possibility.
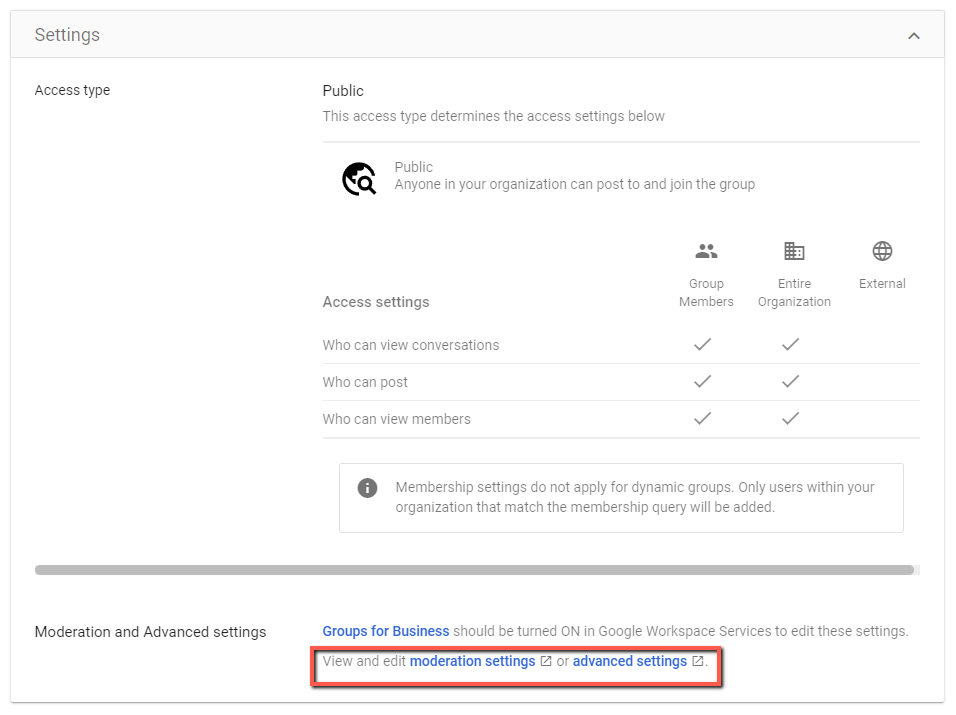
3. Lastly, modify the remaining settings throughout the Teams Superior Settings web page (accessed through the Moderation Settings or Superior Settings hyperlink on the backside).
The superior settings for dynamic teams are equivalent to the settings for traditional teams.
Conclusion
Dynamic teams are a non-permanent change. You’ll be able to preview, save, and destroy the teams with out affecting the customers included. And on this tutorial, you’ve discovered how you can create dynamic teams and set particular permission ranges.
By leveraging the ability of dynamic group queries and person attributes, you get rid of the necessity for handbook intervention (largely). Relaxation assured that the proper permissions are utilized as new customers are added to the workspace.
Why not take this newfound data to a different stage? Maybe make much more refined teams by nesting conditionals or strive writing your personal CEL question? See what outcomes come again!