


On this article, we’re going to deploy an Airflow software in a Conda surroundings and safe the appliance utilizing Nginx and request SSL certificates from Let’s Encrypt.
Airflow is a well-liked instrument that we are able to use to outline, schedule, and monitor our complicated workflows. We are able to create Directed Acyclic Graphs (DAGs) to automate duties throughout our work platforms, and being open-source, Airflow has a neighborhood to supply assist and enhance constantly.
It is a sponsored article by Vultr. Vultr is the world’s largest privately-held cloud computing platform. A favourite with builders, Vultr has served over 1.5 million clients throughout 185 nations with versatile, scalable, world Cloud Compute, Cloud GPU, Naked Steel, and Cloud Storage options. Be taught extra about Vultr.
Deploying a Server on Vultr
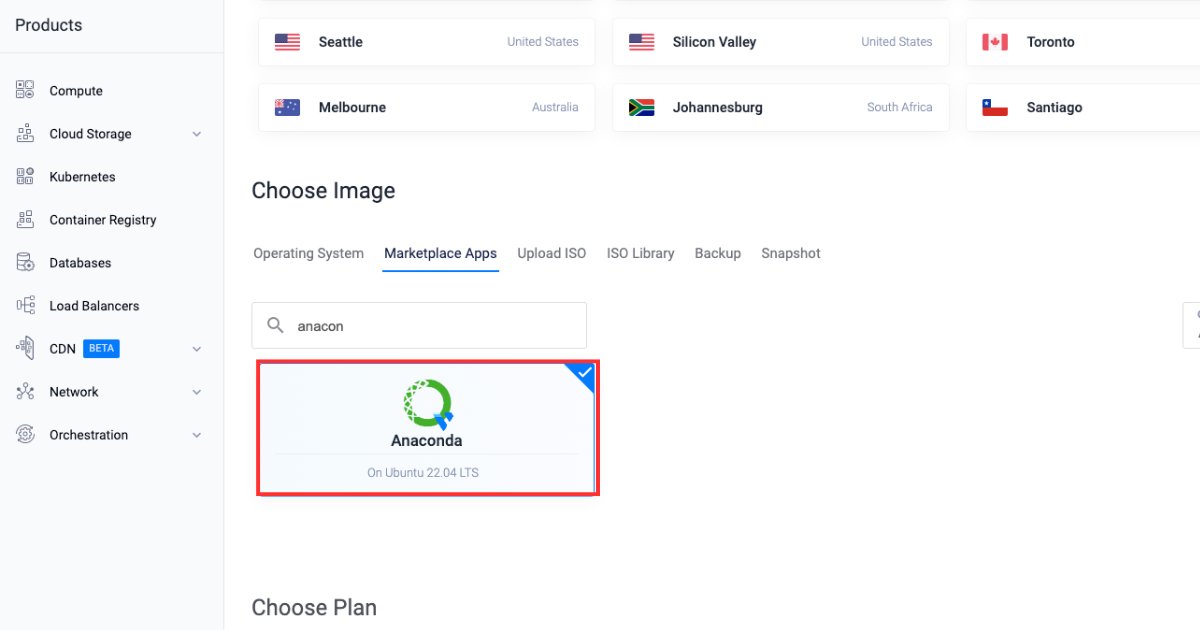
Let’s begin by deploying a Vultr server with the Anaconda market software.
-
Join and log in to the Vultr Buyer Portal.
-
Navigate to the Merchandise web page.
-
Choose Compute from the facet menu.
-
Click on Deploy Server.
-
Choose Cloud Compute because the server sort.
-
Select a Location.
-
Choose Anaconda amongst market functions.
-
Select a Plan.
-
Choose any extra options as required within the “Further Options” part.
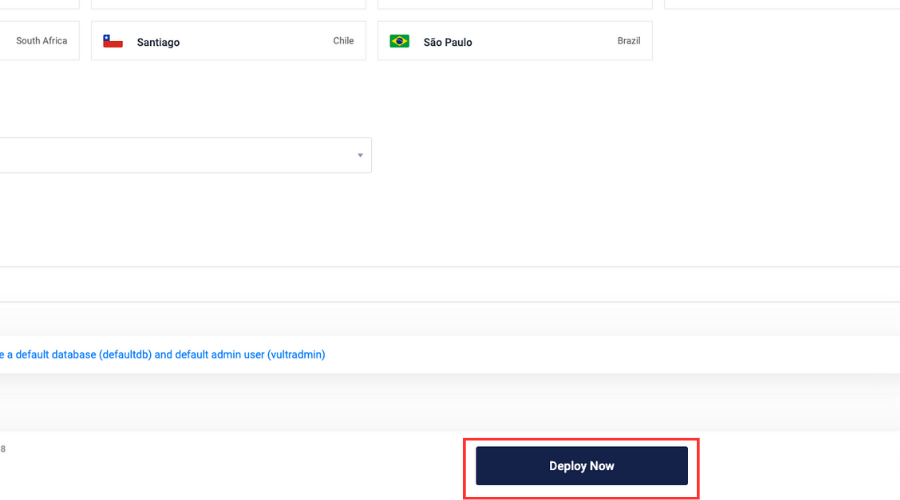
-
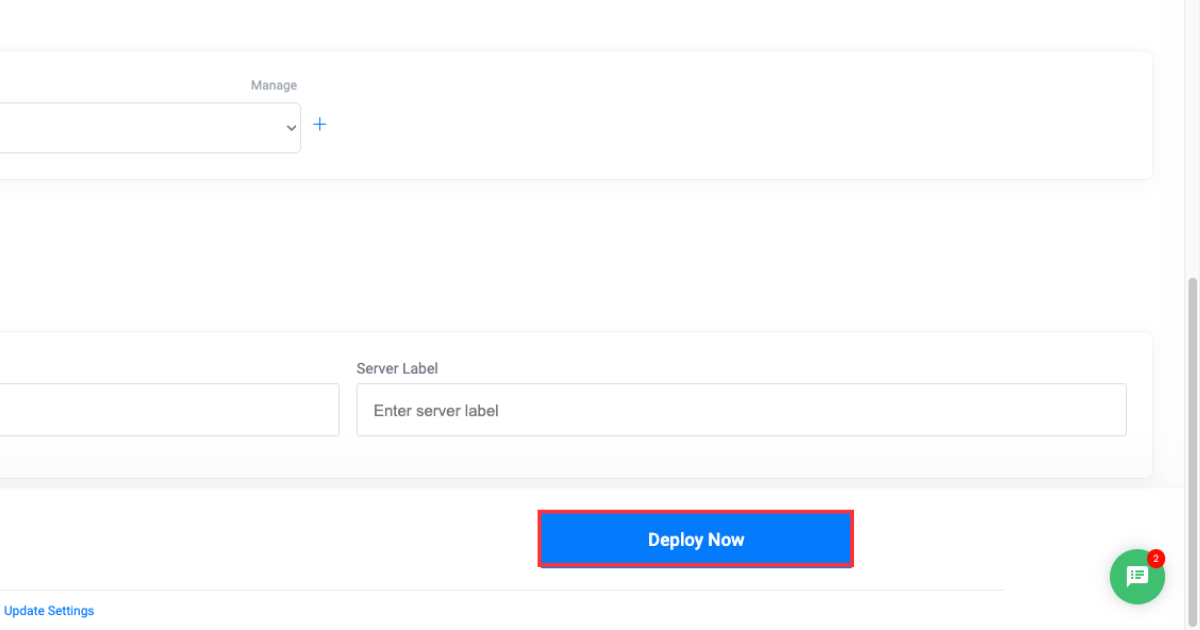
Click on the Deploy Now button.
Making a Vultr Managed Database
After deploying a Vultr server, we’ll subsequent deploy a Vultr-managed PostgreSQL Database. We’ll additionally create two new databases in our database occasion that will likely be used to attach with our Airflow software later within the weblog.
-
Open the Vultr Buyer Portal.
-
Click on the Merchandise menu group and navigate to Databases to create a PostgreSQL managed database.

-
Click on Add Managed Databases.
-
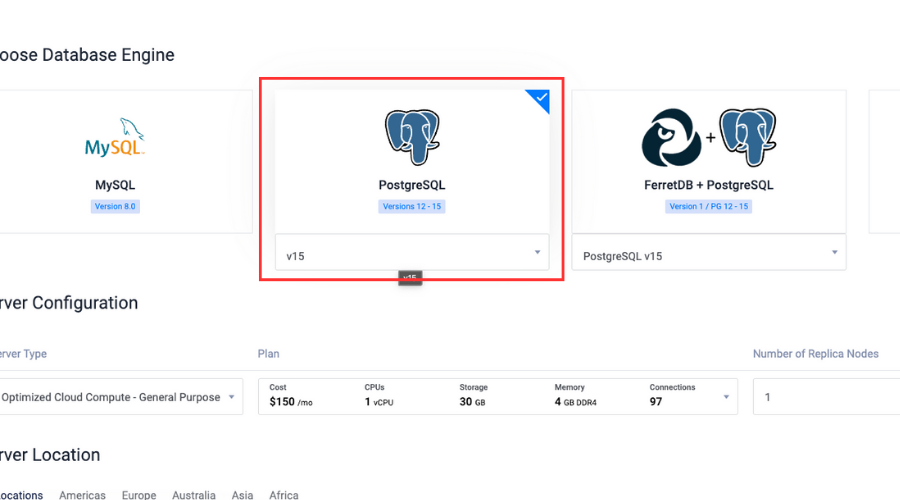
Choose PostgreSQL with the newest model because the database engine.
-
Choose Server Configuration and Server Location.
-
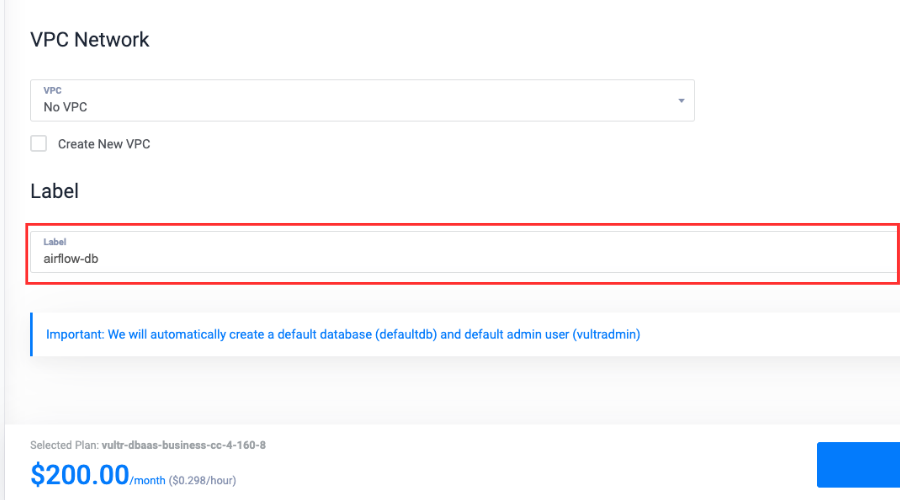
Write a Label for the service.
-
Click on Deploy Now.
-
After the database is deployed, choose Customers & Databases.
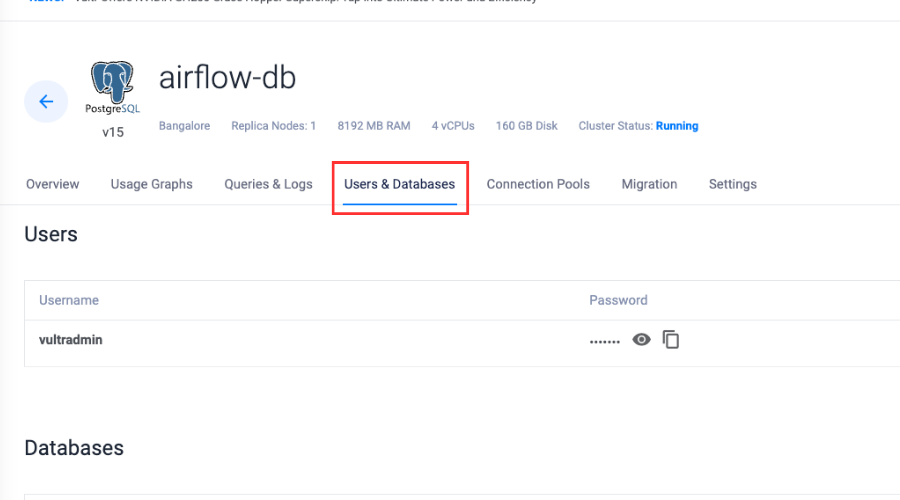
-
Click on Add New Database.
-
Kind in a reputation, click on Add Database and title it
airflow-pgsql. -
Repeat steps 9 and 10 so as to add one other database in the identical managed database and title it
airflow-celery.
Getting Began with Conda and Airflow
Now that we’ve created a Vultr-managed PostgreSQL occasion, we’ll use the Vultr server to create a Conda surroundings and set up the required dependencies.
-
Test for the Conda model:
-
Create a Conda surroundings:
$ conda create -n airflow python=3.8 -
Activate the surroundings:
-
Set up Redis server:
(airflow) $ apt set up -y redis-server -
Allow the Redis server:
(airflow) $ sudo systemctl allow redis-server -
Test the standing:
(airflow) $ sudo systemctl standing redis-server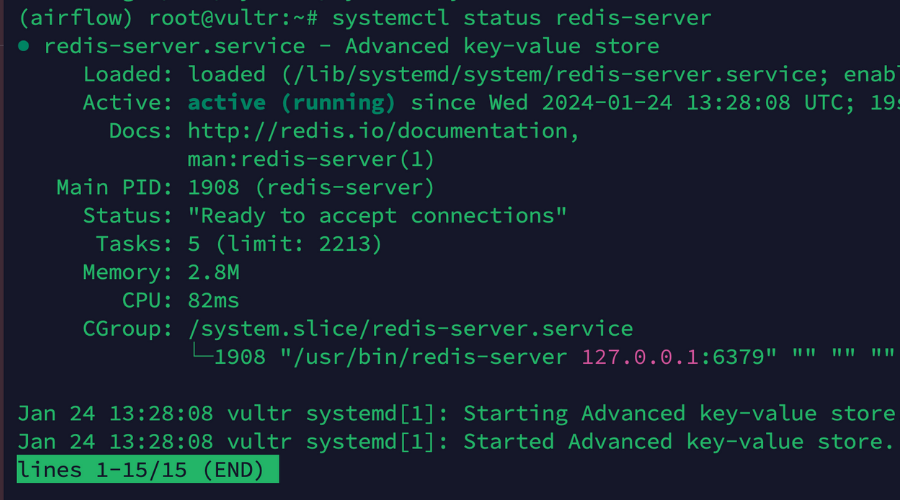
-
Set up the Python bundle supervisor:
(airflow) $ conda set up pip -
Set up the required dependencies:
(airflow) $ pip set up psycopg2-binary virtualenv redis -
Set up Airflow within the Conda surroundings:
(airflow) $ pip set up "apache-airflow[celery]==2.8.1" --constraint "https://uncooked.githubusercontent.com/apache/airflow/constraints-2.8.1/constraints-3.8.txt"
Connecting Airflow with Vultr Managed Database
After getting ready the surroundings, now let’s join our Airflow software with the 2 databases we created earlier inside our database occasion and make essential modifications to the Airflow configuration to make our software production-ready.
-
Set surroundings variable for database connection:
(airflow) $ export AIRFLOW__DATABASE__SQL_ALCHEMY_CONN="postgresql://person:password@hostname:port/db_name"Make sure that to exchange the
person,password,hostname, andportwith the precise values within the connection particulars part by choosing theairflow-pgsqldatabase. Change thedb_namewithairflow-pgsql.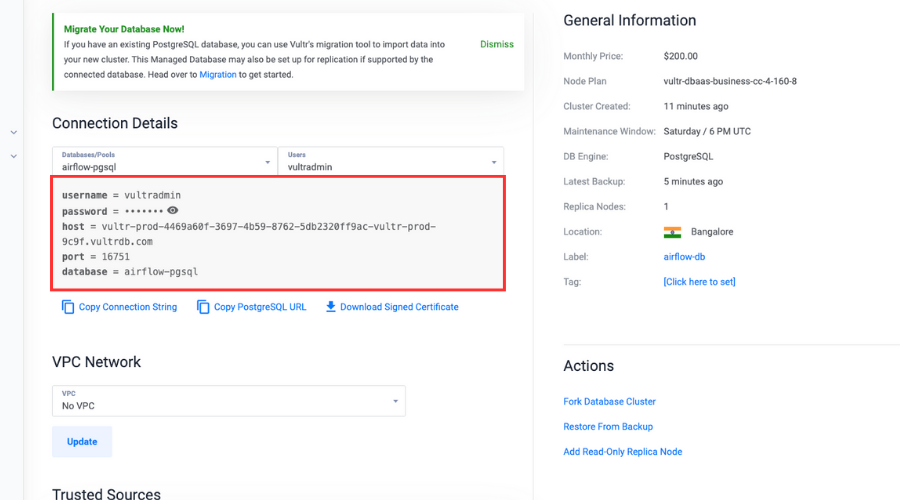
-
Initialize the metadata database.
We should initialize a metadata database for Airflow to create essential tables and schema that shops data like DAGs and data associated to our workflows:
(airflow) $ airflow db init -
Open the Airflow configuration file:
(airflow) $ sudo nano ~/airflow/airflow.cfg -
Scroll down and alter the
executor:executor = CeleryExecutor -
Hyperlink the Vultr-managed PostgreSQL database, and alter the worth of
sql_alchemy_conn:sql_alchemy_conn = "postgresql://person:password@hostname:port/db_name"Make sure that to exchange the
person,password,hostname, and port with the precise values within the connection particulars part by choosing theairflow-pgsqldatabase. Change thedb_namewithairflow-pgsql. -
Scroll down and alter the employee and set off log ports:
worker_log_server_port = 8794 trigger_log_server_port = 8795 -
Change the
broker_url:broker_url = redis://localhost:6379/0 -
Take away the
#and alter theresult_backend:result_backend = db+postgresql://person:password@hostname:port/db_nameMake sure that to exchange the
person,password,hostname, andportwith the precise values within the connection particulars part by choosing theairflow-celerydatabase. Change thedb_namewithairflow-celery.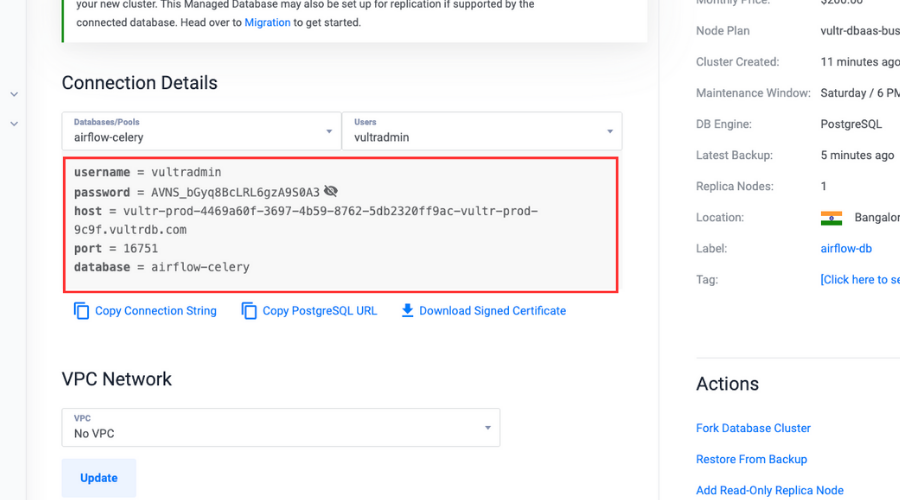
-
Save and exit the file.
-
Create an Airflow person:
(airflow) $ airflow customers create n --username admin n --firstname Peter n --lastname Parker n --role Admin n --email spiderman@superhero.orgMake sure that to exchange all of the variable values with the precise values.
Enter a password when prompted to set it for the person whereas accessing the dashboard.
Daemonizing the Airflow Software
Now let’s daemonize our Airflow software in order that it runs within the background and continues to run independently even once we shut the terminal and sign off.
These steps may even assist us to create a persistent service for the Airflow webserver, scheduler, and celery staff.
-
View the
airflowpath:(airflow) $ which airflowCopy and paste the trail into the clipboard.
-
Create an Airflow webserver service file:
(airflow) $ sudo nano /and so on/systemd/system/airflow-webserver.service -
Paste the service configurations within the file.
airflow webserveris chargeable for offering a web-based person interface that may permit us to work together and handle our workflows. These configurations will make a background working service for our Airflow webserver:[Unit] Description="Airflow Webserver" After=community.goal [Service] Consumer=example_user Group=example_user ExecStart=/house/example_user/.native/bin/airflow webserver [Install] WantedBy=multi-user.goalMake sure that to exchange
ConsumerandGrouptogether with your precise non-root sudo person account particulars, and change theExecStartpath with the precise Airflow path together with the executable binary we copied earlier within the clipboard. -
Save and shut the file.
-
Allow the
airflow-webserverservice, in order that the webserver routinely begins up through the system boot course of:(airflow) $ systemctl allow airflow-webserver -
Begin the service:
(airflow) $ sudo systemctl begin airflow-webserver -
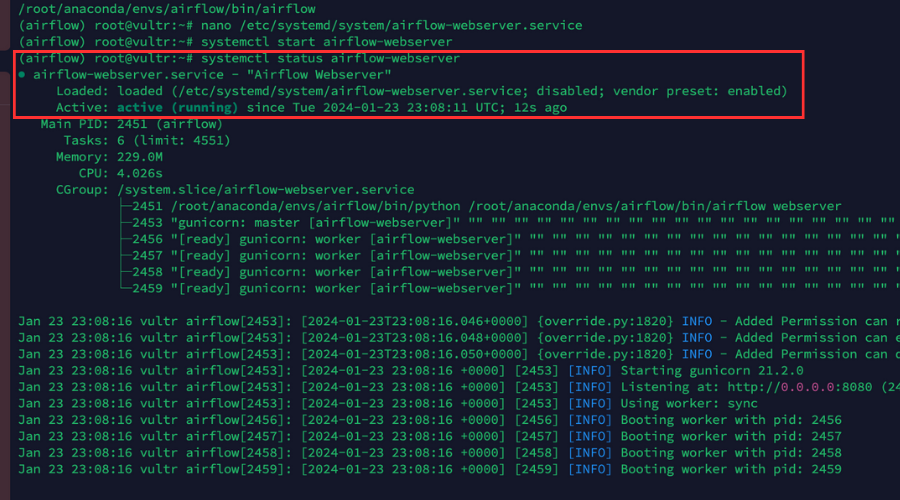
Be sure that the service is up and working:
(airflow) $ sudo systemctl standing airflow-webserverOur output ought to seem just like the one pictured beneath.
-
Create an Airflow Celery service file:
(airflow) $ sudo nano /and so on/systemd/system/airflow-celery.service -
Paste the service configurations within the file.
airflow celery employeebegins a Celery employee. Celery is a distributed activity queue that may permit us to distribute and execute duties throughout a number of staff. The employees connect with our Redis server to obtain and execute duties:[Unit] Description="Airflow Celery" After=community.goal [Service] Consumer=example_user Group=example_user ExecStart=/house/example_user/.native/bin/airflow celery employee [Install] WantedBy=multi-user.goalMake sure that to exchange
ConsumerandGrouptogether with your precise non-root sudo person account particulars, and change theExecStartpath with the precise Airflow path together with the executable binary we copied earlier within the clipboard. -
Save and shut the file.
-
Allow the
airflow-celeryservice:(airflow) $ sudo systemctl allow airflow-celery -
Begin the service:
(airflow) $ sudo systemctl begin airflow-celery -
Be sure that the service is up and working:
(airflow) $ sudo systemctl standing airflow-celery -
Create an Airflow scheduler service file:
(airflow) $ sudo nano /and so on/systemd/system/airflow-scheduler.service -
Paste the service configurations within the file.
airflow scheduleris chargeable for scheduling and triggering the DAGs and the duties outlined in them. It additionally checks the standing of DAGs and duties periodically:[Unit] Description="Airflow Scheduler" After=community.goal [Service] Consumer=example_user Group=example_user ExecStart=/house/example_user/.native/bin/airflow scheduler [Install] WantedBy=multi-user.goalMake sure that to exchange
ConsumerandGrouptogether with your precise non-root sudo person account particulars, and change theExecStartpath with the precise Airflow path together with the executable binary we copied earlier within the clipboard. -
Save and shut the file.
-
Allow the
airflow-schedulerservice:(airflow) $ sudo systemctl allow airflow-scheduler -
Begin the service:
(airflow) $ sudo systemctl begin airflow-scheduler -
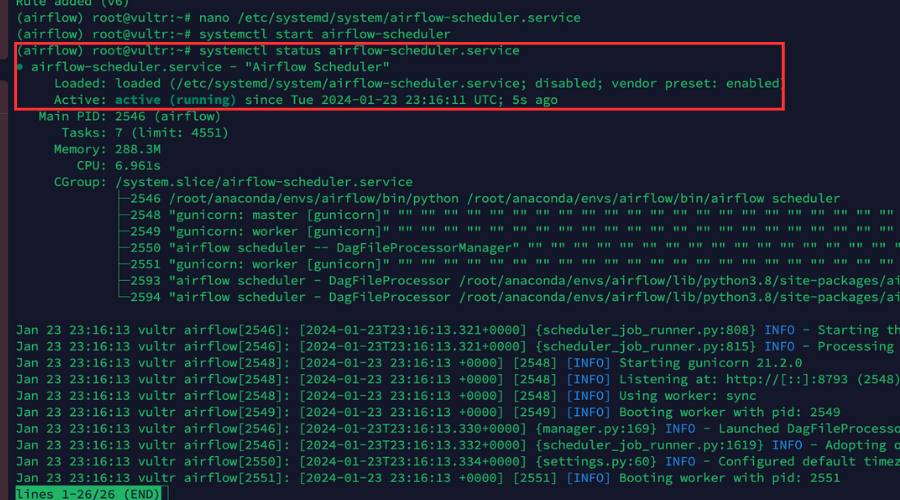
Be sure that the service is up and working:
(airflow) $ sudo systemctl standing airflow-schedulerOur output ought to seem like that pictured beneath.
Organising Nginx as a Reverse Proxy
We’ve created persistent providers for the Airflow software, so now we’ll arrange Nginx as a reverse proxy to boost our software’s safety and scalability following the steps outlined beneath.
-
Log in to the Vultr Buyer Portal.
-
Navigate to the Merchandise web page.
-
From the facet menu, broaden the Community drop down, and choose DNS.
-
Click on the Add Area button within the heart.
-
Comply with the setup process so as to add your area title by choosing the IP tackle of your server.
-
Set the next hostnames as your area’s main and secondary nameservers together with your area registrar:
- ns1.vultr.com
- ns2.vultr.com
-
Set up Nginx:
(airflow) $ apt set up nginx -
Make sure that to verify if the Nginx server is up and working:
(airflow) $ sudo systemctl standing nginx -
Create a brand new Nginx digital host configuration file within the
sites-availablelisting:(airflow) $ sudo nano /and so on/nginx/sites-available/airflow.conf -
Add the configurations to the file.
These configurations will direct the visitors on our software from the precise area to the backend server at
http://127.0.0.1:8080utilizing a proxy move:server { pay attention 80; pay attention [::]:80; server_name airflow.instance.com; location / { proxy_pass http://127.0.0.1:8080; } }Make sure that to exchange
airflow.instance.comwith the precise area we added within the Vultr dashboard. -
Save and shut the file.
-
Hyperlink the configuration file to the
sites-enabledlisting to activate the configuration file:(airflow) $ sudo ln -s /and so on/nginx/sites-available/airflow.conf /and so on/nginx/sites-enabled/ -
Make sure that to verify the configuration for errors:
(airflow) $ sudo nginx -tOur output ought to seem like that pictured beneath.

-
Restart Nginx to use modifications:
(airflow) $ sudo systemctl reload nginx -
Permit the HTTP port
80by the firewall for all of the incoming connections:(airflow) $ sudo ufw permit 80/tcp -
Permit the HTTPS port
443by the firewall for all incoming connections:(airflow) $ sudo ufw permit 443/tcp -
Reload firewall guidelines to avoid wasting modifications:
(airflow) $ sudo ufw reload
Making use of Let’s Encrypt SSL Certificates to the Airflow Software
The final step is to use a Let’s Encrypt SSL Certificates to our Airflow software in order that it turns into far more safe and saves our software from undesirable assaults.
-
Utilizing Snap, set up the Certbot Let’s Encrypt consumer:
(airflow) $ snap set up --classic certbot -
Get a brand new SSL certificates for our area:
(airflow) $ certbot --nginx -d airflow.instance.comMake sure that to exchange
airflow.instance.comwith our precise area title.
And when prompted enter an e-mail tackle and press Y to simply accept the Let’s Encrypt phrases. -
Take a look at that the SSL certificates auto-renews upon expiry.
Auto-renewal makes positive our SSL certificates are updated, decreasing the danger of certificates expiry and sustaining the safety of our software:
(airflow) $ certbot renew --dry-run -
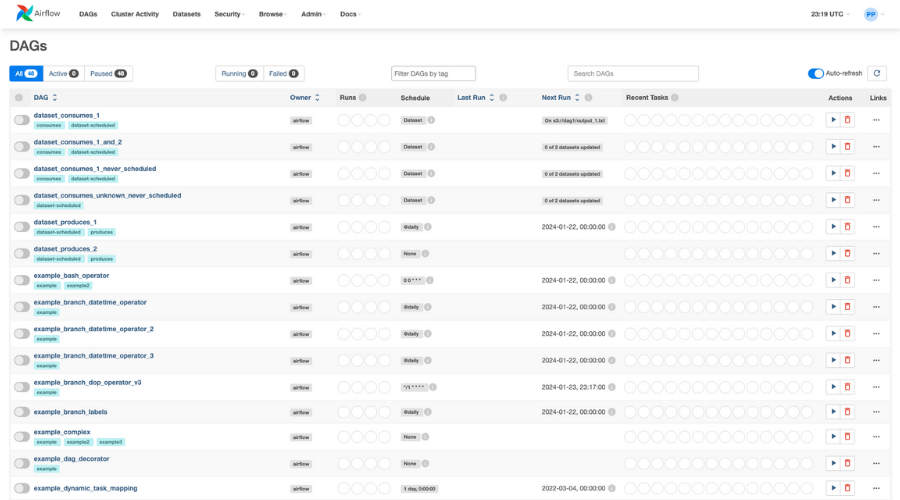
Use an online browser to open our Airflow software:
https://airflow.instance.com.When prompted, enter the username and password we created earlier.
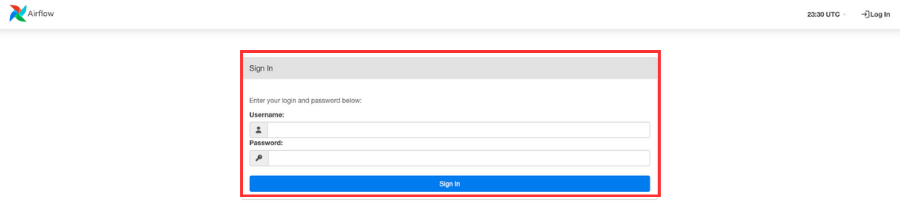
Upon accessing the dashboard, all of the DAGs will likely be seen which might be offered by default.
Conclusion
On this article, we demonstrated create Conda environments, deploy a production-ready Airflow software, and enhance the efficiency and safety of an software.