


As a Linux community administrator, you might be prone to come throughout numerous issues that may be solved with the Linux dig (Area Data Groper) command. Undecided how the dig command works? No worries! You’re in for a deal with!
On this tutorial, you’ll study a number of helpful examples of find out how to use dig to resolve real-world issues.
Dig in, and befriend this highly effective device!
Conditions
This tutorial might be a hands-on demonstration. When you’d prefer to observe alongside, make certain you’ve a Linux system. This tutorial makes use of Ubuntu 20.04, however any trendy Linux distribution will work.
Putting in the Linux dig Command
The Linux dig command permits you to collect DNS info that may be useful with troubleshooting DNS issues. However earlier than digging identify servers, you first have to put in dig in your machine.
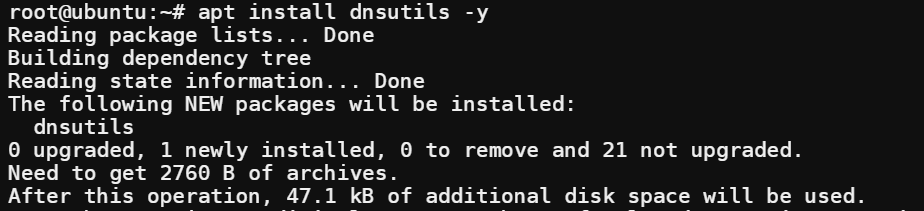
1. Run the apt replace command under to replace your system’s bundle index.

2. Subsequent, run the next apt set up command to put in dnsutils in your machine. DiG is a part of a DNS utility bundle (dnsutils) put in with BIND identify servers.
dnsutils is a set of instruments the Ubuntu crew supplies that incorporates numerous client-side DNS utilities, like dig.
3. Lastly, run the dig command under to confirm your DiG set up.
Beneath, DiG’s model reveals 9.16.1, however yours could also be completely different.

Attempting Linux Dig for a Primary DNS Question
Now that you’ve got dig put in, you may check out the dig command for a fundamental DNS question. The dig command permits you to question DNS servers to assemble a handful of knowledge you need to use to troubleshoot and repair DNS issues.
The syntax for a fundamental DNS question is as follows the place:
server– The DNS server to question an IP handle or a site identify. DiG will use your laptop’s pre-configured DNS when you don’t specify a server.identify– The area identify or IP handle to search for.kind– The kind of DNS file you might be on the lookout for.
dig [server] [name] [type]
Now, run the next command to question the DNS data for google.com.
If you run the dig command with none flags or arguments, dig performs a DNS question as an argument and returns the A file for the desired hostname.
dig [google.com](<http://google.com/>)
A fundamental DNS question utilizing dig is beneficial for a number of completely different duties, reminiscent of:
- Checking the DNS data for a site.
- Discovering out which DNS server is used for a site.
- Examine in case your laptop is utilizing the proper DNS server.
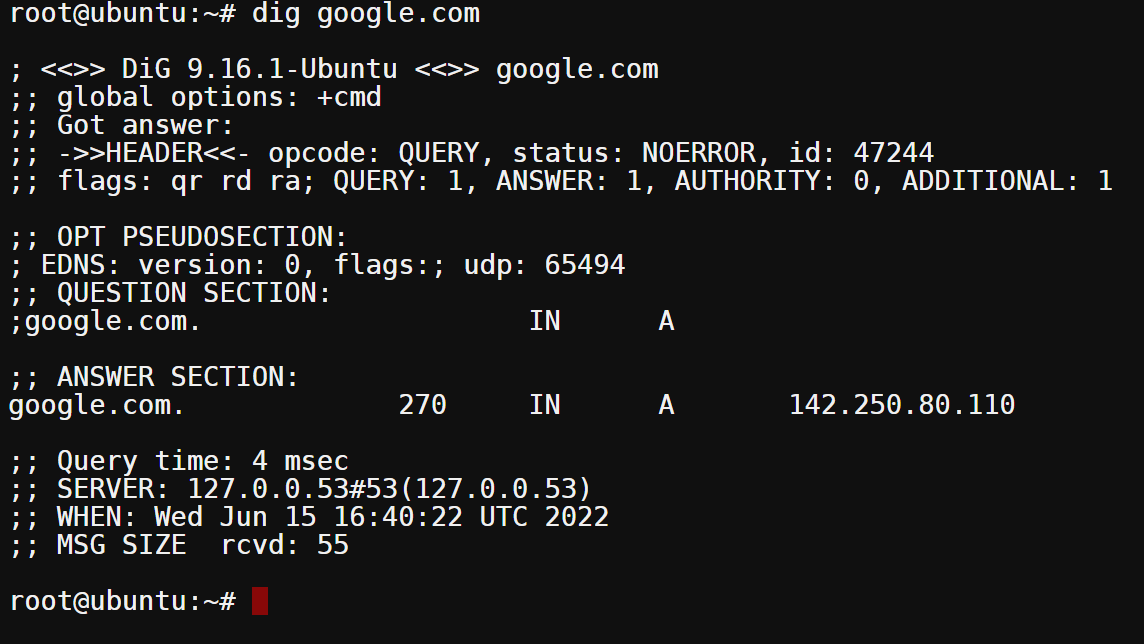
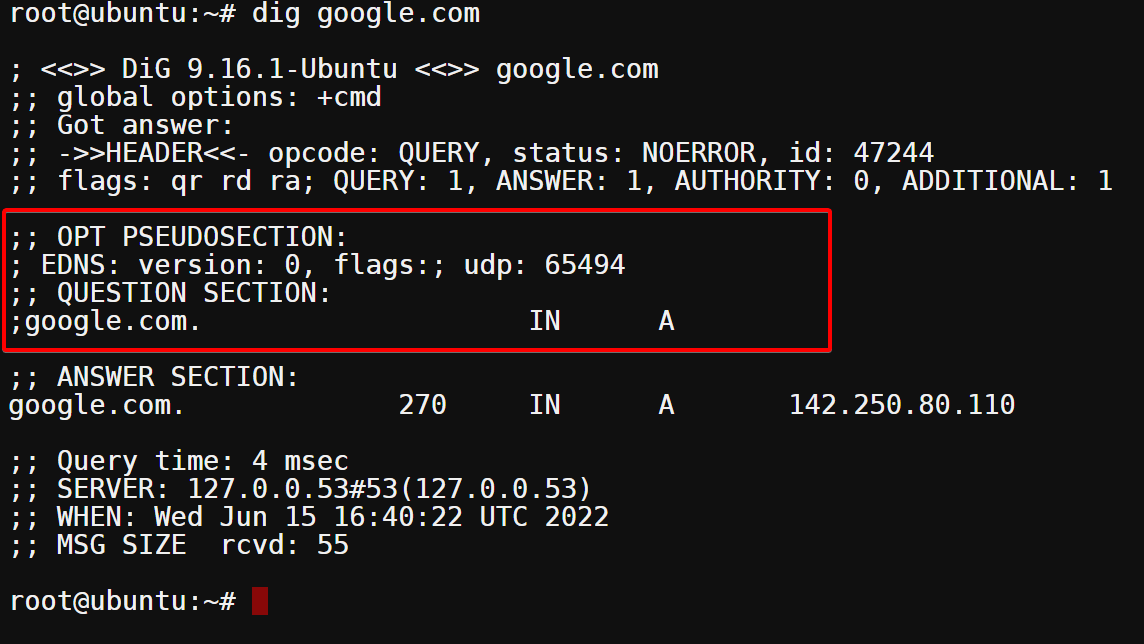
Querying google.com
Understanding the Output of a Primary DNS Question
Contemplating DiG returned a lot of details about the area identify you queried, you may already see what’s taking place with that area. Or no? Most likely not. However don’t fear. You’ll stroll by a breakdown of every part you’ll see on a fundamental DNS question output.
Beneath, the primary line reveals the model of DiG and the queried area identify (google.com). On the identical time, the second line reveals the worldwide choices used to run the question.
On this case, the one choice used was +cmd, which tells DiG to print the instructions that had been run as DiG executes them.
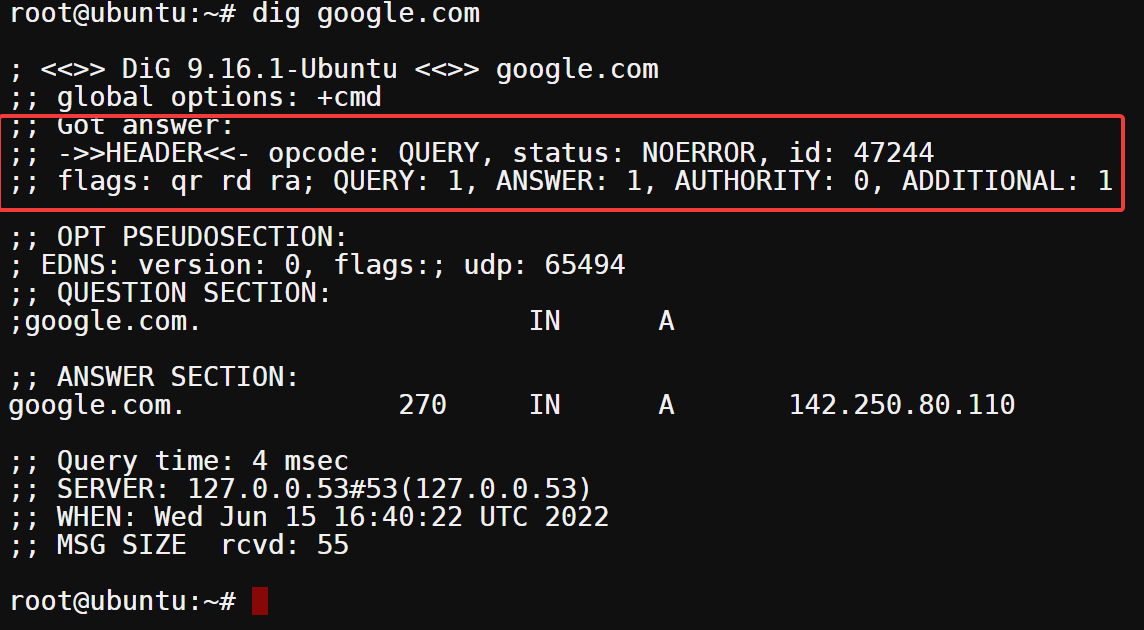
The next part (HEADER) reveals you the technical particulars of the question:
- The primary line specifies the opcode used for the question (on this case, QUERY), adopted by the standing: NOERROR of the question and the id quantity(47244). The NOERROR standing signifies that the DNS server processed the question and efficiently returned a solution. When you get a SERVFAIL standing, there was some DNS server error, leading to a failed question.
- The flags part reveals you which of them flags had been set for the question. On this case, qr (question response), rd (recursion was not desired), and ra (recursion is on the market).
- The final line tells you what number of queries (QUERY) had been made (1). You’ll additionally see what number of ANSWERs (1), AUTHORITY data (0), and ADDITIONAL data(1) DiG returned.
The OPT PSEUDOSECTION under signifies that the DNS message has been prolonged utilizing the EDNS0 protocol. The flags subject is empty as a result of no choices have been set, whereas the udp subject specifies the utmost dimension of the DNS message, which is 65,494 bytes.
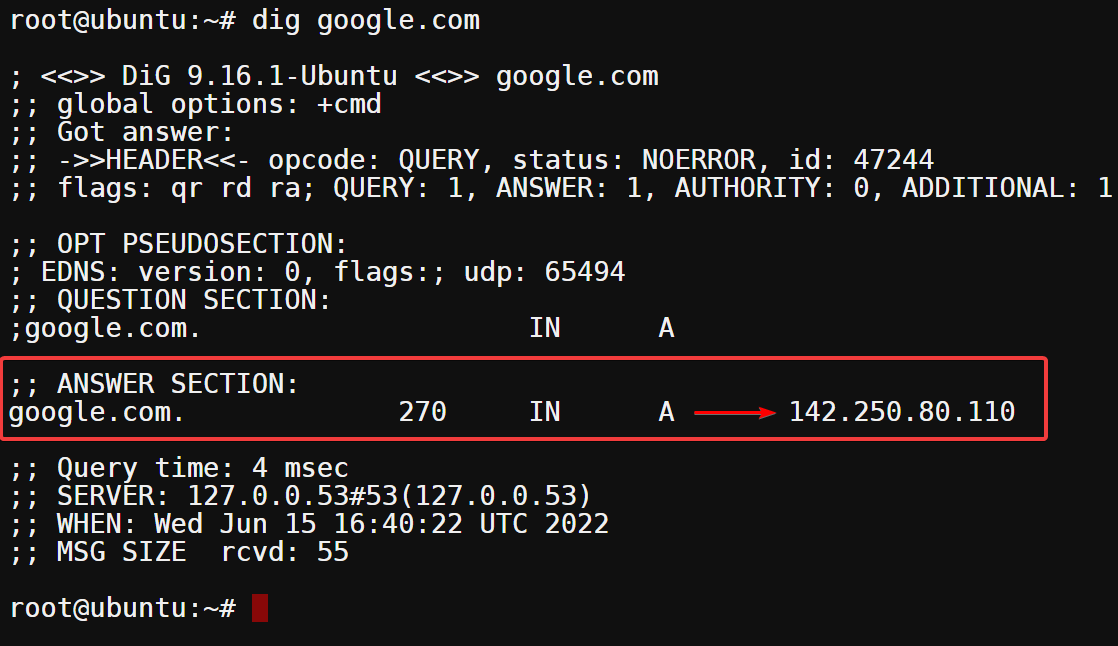
Now, the ANSWER part under reveals you the reply returned for the question. On this case, you queried for the A file of google.com, and the DNS server returned an IP handle of 142.250.80.110. You may see google.com’s A file factors to that IP handle.
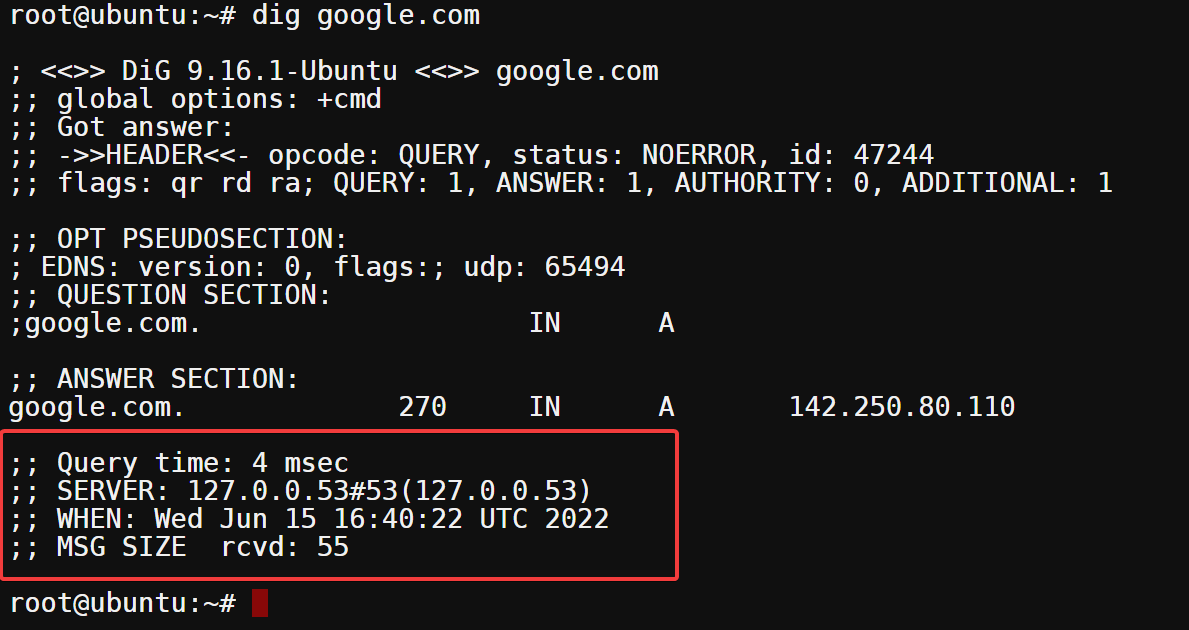
Lastly, the final part incorporates details about the question time and the server used to course of the question. Beneath, you may see the question took 4 milliseconds (4 msec) to finish, and the SERVER used had an IP handle of 127.0.0.53.
The much less time the DNS server takes to course of a question and return a solution, the higher. You don’t need your customers to attend lengthy for DNS queries to resolve. The lengthy wait can result in a foul person expertise.
Fetching Quick and Detailed Solutions
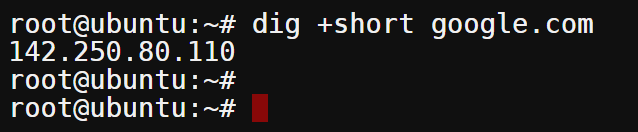
You’ve simply queried a DNS that returned a handful of knowledge. However are you able to management which output you get? Sure, by appending flags (+brief, +noall, and +reply) to the dig command.
Suppose you’re querying for an A file. The DNS server returns each an A and an AAAA file. However with the +brief flag, the DNS solely returns the A file. The +brief flag could be helpful for getting a fast reply from DNS servers with out sifting by all the additional info.
Run the under command to question google.com once more. However this time, append the +brief flag to get a brief reply solely.
Beneath, you’ll see that DiG solely returned a brief reply, which is Google’s server handle.
Now, run the next command to question google.com, returning an in depth reply. The +noall flag omits all of the default info displayed when working the dig command, apart from the reply part (+reply).
dig google.com +noall +reply

Specifying Nameservers to Resolve Area Names
To date, you’ve seen find out how to use the dig command with its default settings. However suppose you wish to check if a selected nameserver can resolve a site identify or not. In such circumstances, specifying which DNS server DiG makes use of when working the dig command may also help.
By default, the dig command makes use of the DNS servers specified within the /and so on/resolv.conf file, as proven under.
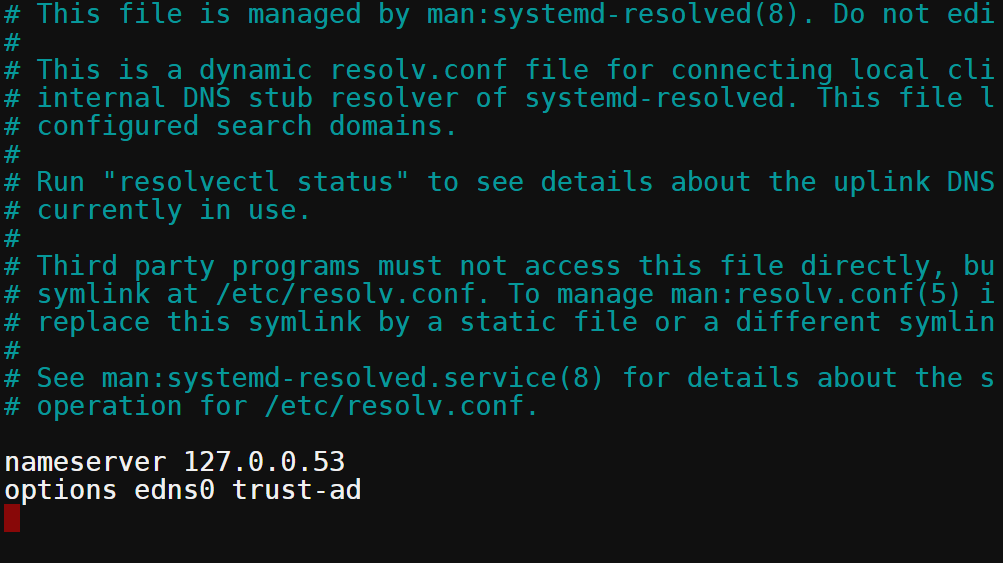
To override which DNS server DiG makes use of when resolving a site identify, you’ll append the @ image adopted by the DNS server or IP.
Run the under command to question a site identify (server) utilizing your most popular DNS server(dns-or-ip). Be sure you exchange dns-or-ip along with your DNS server, however this tutorial makes use of 8.8.8.8.
dig server +noall +reply @dns-or-ip
You may see under that the DNS server resolved the area identify efficiently and returned solutions intimately.

Querying Particular Document Sorts
By default, the dig command queries for an A file when you don’t specify any file kind. However DiG additionally permits you to question different kinds of DNS data, reminiscent of MX, NS, TXT, and so forth.
To specify a file kind, you append the file kind proper after the area identify you’re wanting up, like within the following instance.
Run the command under to question google.com for MX data.
dig +noall +reply google.com mx
You may see under that the MX file for google.com is smtp.google.com.

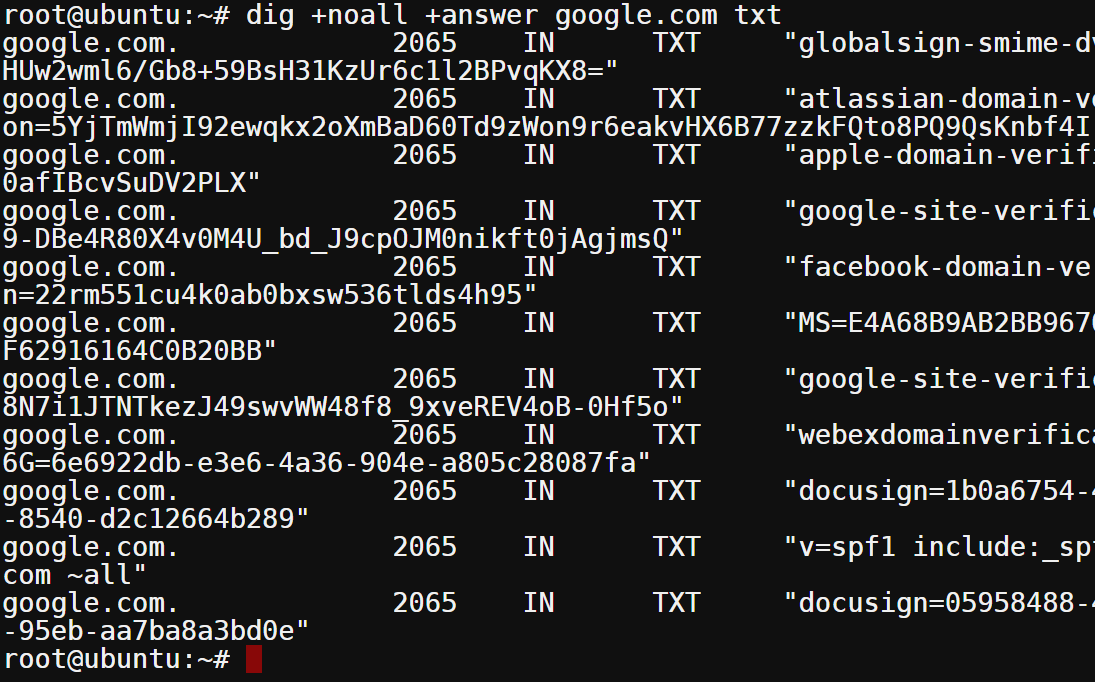
Now, run the next command to question google.com for TXT data
dig +noall +reply google.com txt
The output under reveals all TXT data for google.com, as proven under.
Performing Queries in Batch Mode
Suppose you wish to search for DNS info for a number of domains. Querying info one after the other for every area identify could be tedious and time-consuming.
Luckily, the dig command helps a batch mode, the place you may specify a file containing a listing of domains. DiG will carry out DNS queries for all domains listed in that file in batch mode.
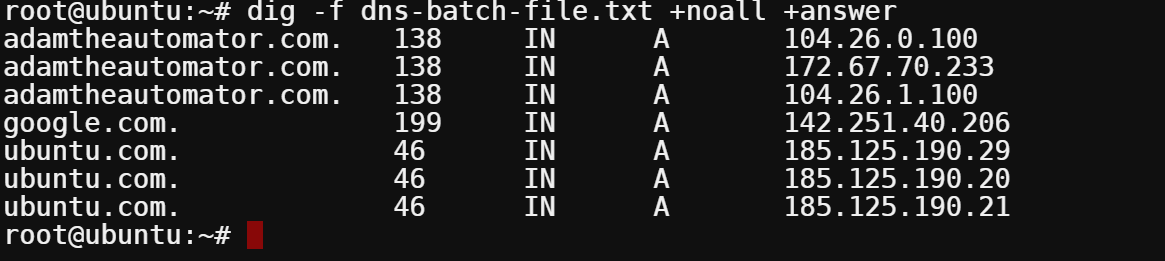
Open a brand new textual content file named dns-batch-file.txt in your most popular textual content editor, and add the domains (one per line), as proven under. When you’re proud of the listing, save the file and shut the editor.

Now, run the next command to question all domains listed within the specified (-f) dns-batch-file.txt file in batch mode.
dig -f dns-batch-file.txt +noall +reply
As you may see under, the DNS info for all domains has been queried and displayed in a tabular format.
Controlling DiG’s Habits Utilizing the .digrc File
DiG reads numerous settings from the ~/.digrc file if you run the dig command. This file incorporates numerous settings that allow you to management how the dig command behaves. With the ~/.digrc file, you may set the default DNS server that the dig command ought to question or set the default file kind to question when you don’t specify any.
Maybe you goal to get an in depth reply and ignore all different sections more often than not when working the dig command. In such circumstances, you need to use the ~./digrc file to set the default output type for the dig command, like within the following instance.
Run the echo command under, which doesn’t present output, however provides the +noall +reply line to the ~/.digrc file.
echo "+noall +reply" > ~/.digrc
Now, run the dig command to question a site identify with out arguments. Change area along with your most popular area identify.
You may see that the output now solely incorporates the reply part, as proven under. DiG would use the +noall +reply flags from the ~/.digrc file even when you didn’t append any flags if you ran the dig command.

Conclusion
On this article, you’ve realized numerous options of the Linux dig command to question DNS servers successfully. You’ve additionally touched on customizing your required dig command output utilizing a number of flags.
At this level, you already know find out how to benefit from the Linux dig command in your day-to-day work, particularly when troubleshooting community issues.
Don’t cease right here, although. There’s extra to what you may accomplish with the Linux dig command. Why not use the dig command to carry out a reverse DNS bathroomkup to discover a area identify related to an IP handle?