


Hello folks! For those who learn the final article you could be conscious that I’m exploring raspberry pi proper now. I’ve Pi 3B+ and I’m utilizing it to work on some distant sensors. The largest concern I’ve with the Pi is that I don’t have an exterior monitor, mouse, and keyboard useful to make use of with the Pi. I needed to have a headless interface with the Raspberry pi.
As I’m exploring electronics and sensors, I occur to have entry to a low-cost CP2102 USB 2.0 to TTL UART converter.

I made a decision to interface with my RPi over TTL UART. Many of the tutorials on-line use ftdi so when you use CP2102 this is without doubt one of the few tutorials which concentrate on it.
Step 1: Flashing contemporary Rasbpian
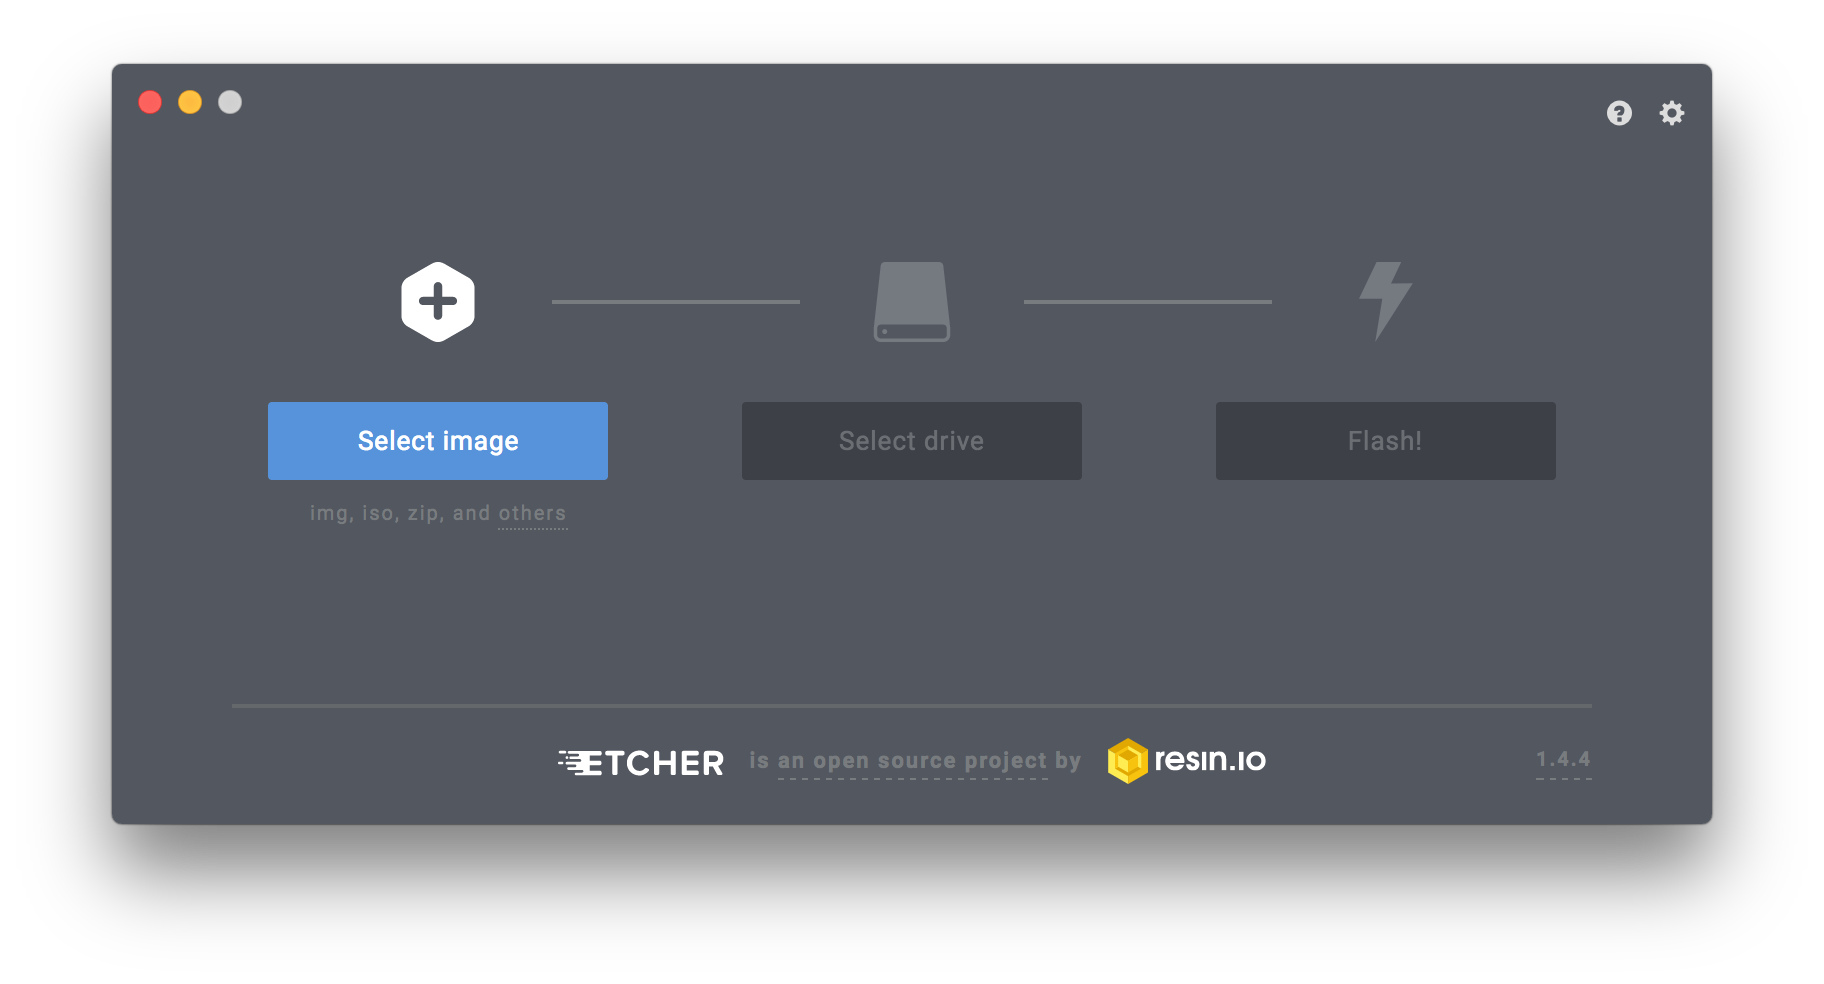
Flash a contemporary Raspbian picture on a micro-sd card utilizing Etcher.
Step 2: Updating Config
Edit config.txt file within the boot partition on the sd card. Add the next line on the finish of the file:
enable_uart=1
Step 3: Connecting CP2102
Wire up the Raspberry Pi and CP2102 collectively based mostly on the diagram beneath.
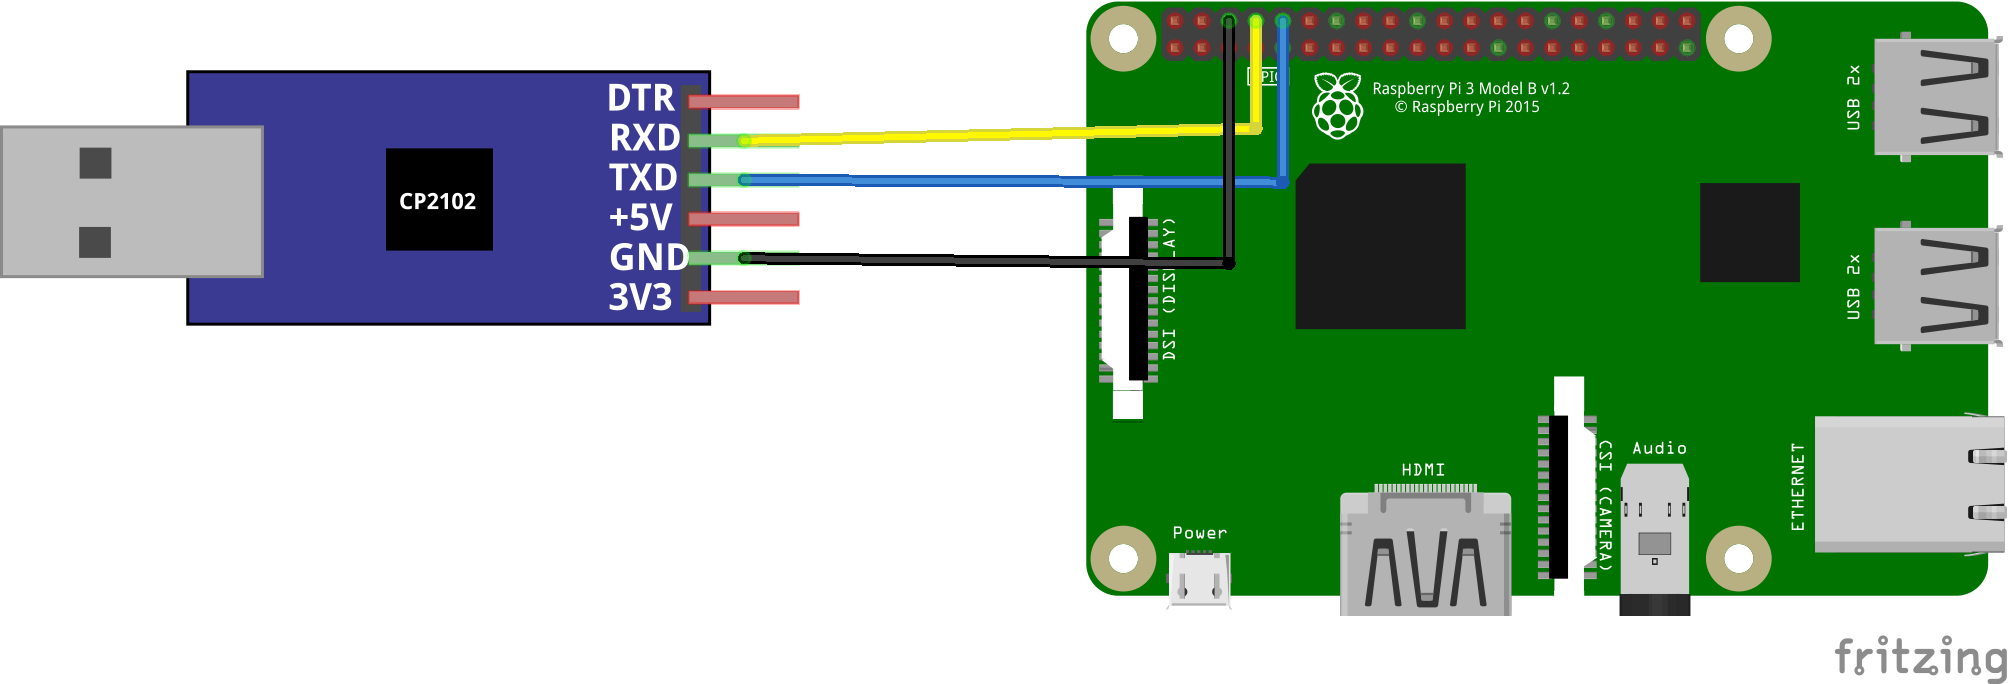
Plug within the CP2102 along with your laptop computer.
Step 4: Utilizing Display to interface with Pi
Work out which interface it’s worthwhile to hook up with for interfacing with the mini-UART. You possibly can determine that out by typing this within the terminal on a mac:
$ ls /dev/tty.*
It’s essential to search for one thing alongside the traces of /dev/tty.SLAB_USBtoUART. After figuring that out you should utilize display screen to interface with the raspberry pi.
$ display screen /dev/tty.SLAB_USBtoUART 115200
The quantity on the finish (baud fee) is vital as a result of each gadgets must be sending and receiving knowledge on the identical fee for this work. Raspberry Pi sends and receives knowledge at 115200 bps.
After opening up display screen the raspberry pi will ask you for person and move. The default person/move is pi/raspberry.
Observe: If you wish to allow SSH by default on the primary boot of Raspberry Pi, it’s a must to create an empty ssh file within the boot listing once you flash a contemporary Raspbian picture. This file shouldn’t have any extension. Observe the Connecting Raspberry Pi to Eduroam Wifi article to mechanically hook up with the WiFi on boot.