


Defending your information within the cloud could be worrisome whenever you don’t use any service to maintain your secrets and techniques protected. The excellent news is that Azure Key Vaults present a mechanism for securely storing and accessing secrets and techniques. Unsure how the Key Vaults work? No worries! This tutorial has acquired you coated with Azure Key Vault finest practices.
With Key Vaults, you’ll be able to be certain that solely licensed individuals and sources can entry and work together along with your secrets and techniques. And on this tutorial, you’ll be taught to guard your Key Vaults from assaults or undesirable exposures.
Keep tuned so you’ll be able to maintain your secrets and techniques, effectively, a secret (pun meant)!
Conditions
This tutorial might be a hands-on demonstration. For those who’d prefer to comply with alongside, make certain you might have the next:
- An Azure AD group the place you’ll be able to assign entry coverage – This tutorial makes use of an AD group known as Key Vault – Key, secret, and Certificates Supervisor.
Making a Key Vault to Use for Azure Key Vault Greatest Practices
When creating Azure Key Vaults, a finest apply is having a separate key vault per utility and atmosphere. Separating Key Vaults this fashion gives the next benefits versus bigger, shared key vaults:
- A safety boundary between secrets and techniques which have completely different functions.
- Decreases the “blast radius” within the unlucky case of a safety occasion, comparable to a malicious attacker.
- Prevents misconfigured code from accessing secrets and techniques meant for an additional atmosphere.
To create a brand new Azure Key Vault, comply with these steps:
1. Launch your favourite internet browser and navigate to the Azure Portal.
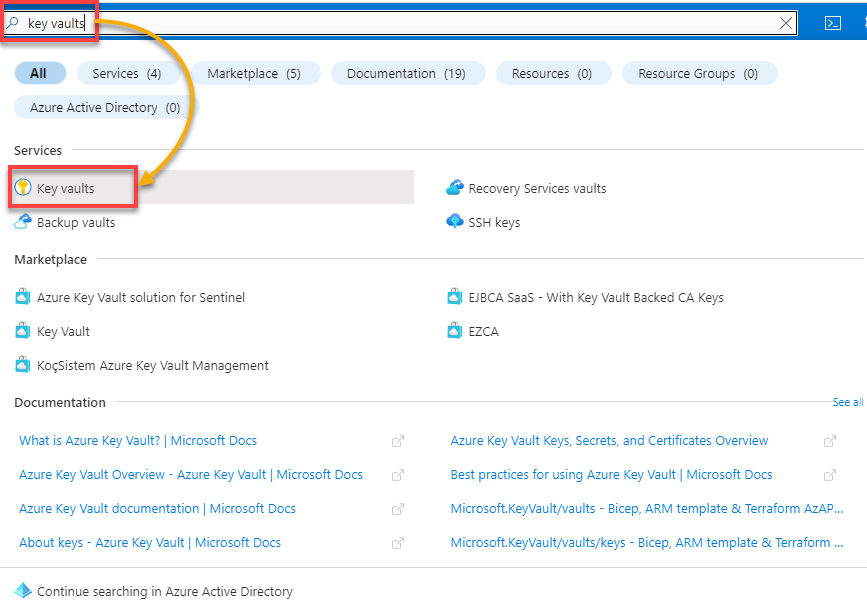
2. Within the Azure Portal, seek for key vaults within the search bar, and select Key vaults beneath Companies within the search outcome, as proven under.
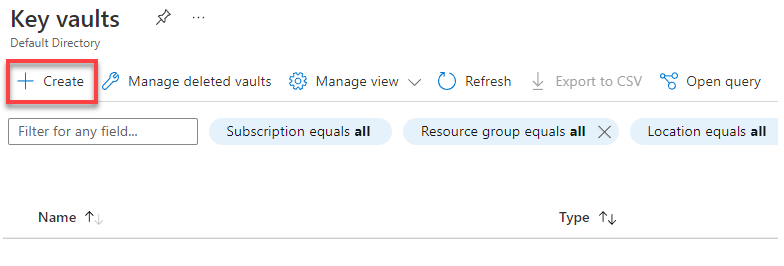
3. On the Key vaults web page, click on on Create to provoke making a Key Vault.
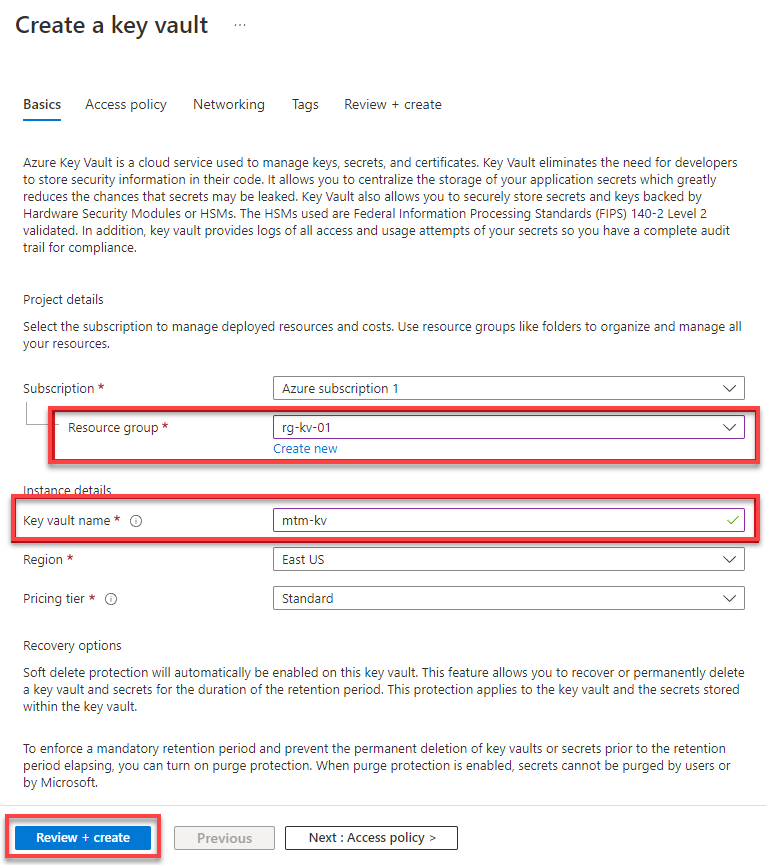
4. Now, configure the brand new Key Vault’s fundamental settings with the next:
- Select an current useful resource group or create a brand new one the place this Key Vault might be saved.
- Specify a singular title for the brand new Key Vault. Understand that Key Vault names have to be globally distinctive throughout Azure.
- Click on on Evaluate + Create (bottom-left) to evaluation and validate the settings.
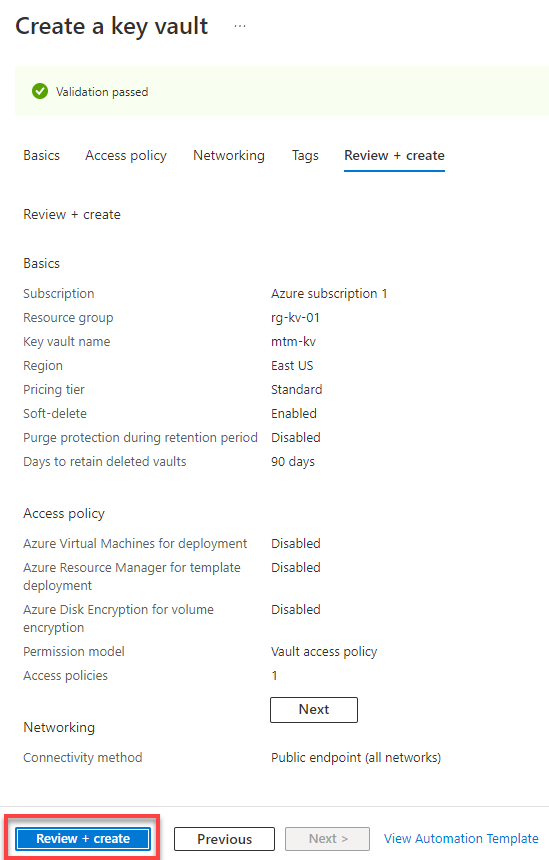
5. Confirm the validation has handed, and click on on Evaluate + Create once more (bottom-left) to finalize creating the brand new Key Vault.
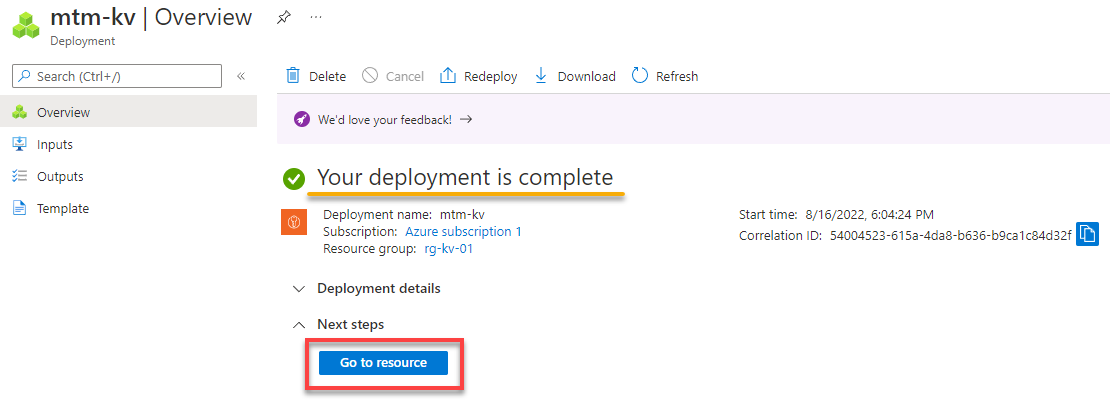
As soon as created, your browser redirects to the deployment overview web page (step six).
6. Lastly, confirm that the deployment was accomplished efficiently, and click on on Go to Useful resource to view the brand new Key Vault.
Controlling Entry to the Key Vault
Creating siloed Key Vaults is simply step one in defending delicate and business-critical keys and secrets and techniques. Controlling who and what can entry a Key Vault helps be certain that secrets and techniques don’t find yourself within the flawed arms, maliciously or in any other case.
When organising entry to a Key Vault, an necessary distinction is the variations between Management Airplane and Information Airplane permissions.
| Permission | Description |
| Management Airplane | Permits you to handle sources within the Azure subscription, together with creating and deleting sources, retrieving the properties of a useful resource, and configuring position assignments to the useful resource. |
| Information Airplane | Handles actions that happen inside a given useful resource, comparable to creating or deleting secrets and techniques inside a Key Vault. |
Learn on to see other ways you’ll be able to management entry to your Key Vaults.
Vault Entry Coverage
With an entry coverage, you’ll be able to specify actions {that a} principal (person, group, service principal, or managed id) can carry out, like for keys, secrets and techniques, and certificates. Vault Entry Coverage permits information aircraft entry to the secrets and techniques saved in Azure Key Vaults.
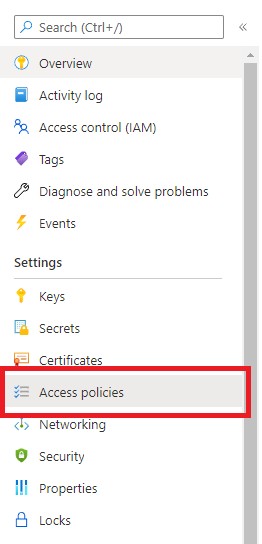
1. From the newly created Key Vault’s web page, click on on Entry insurance policies (left panel) to entry the settings for Vault Entry Coverage.
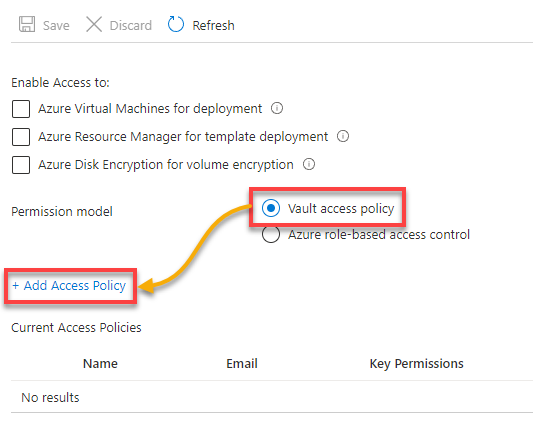
2. On the Entry Insurance policies web page, maintain the default choice (Vault Entry Coverage) chosen for the permission mannequin and click on on Add Entry Coverage to create a brand new coverage.
3. Select permissions for the entry coverage relying in your wants.
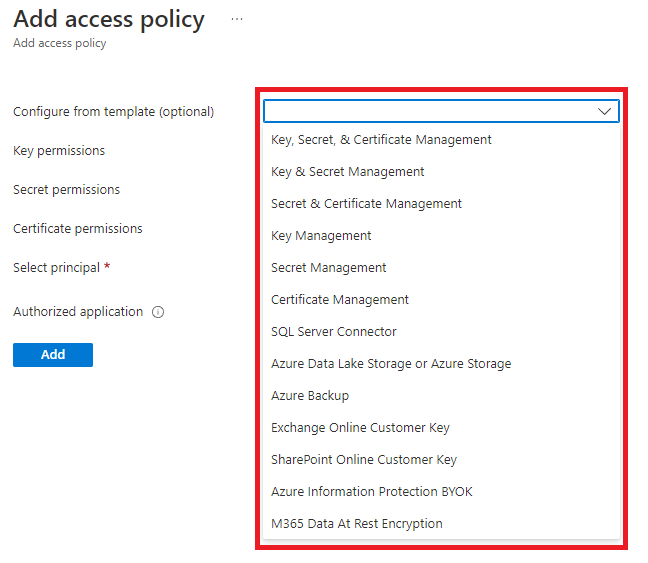
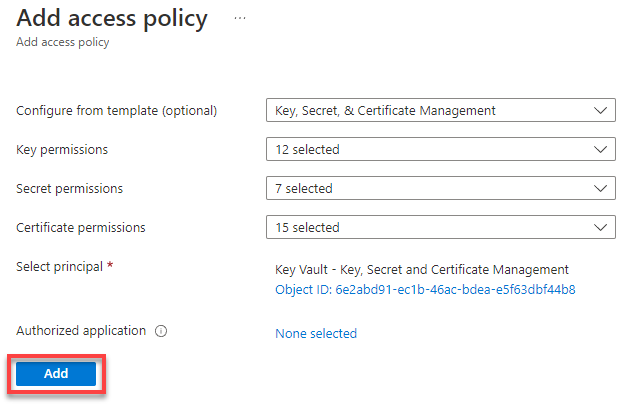
The Add entry coverage blade manages three sorts of permissions, Key Permissions, Secret Permissions, and Certificates Permissions.
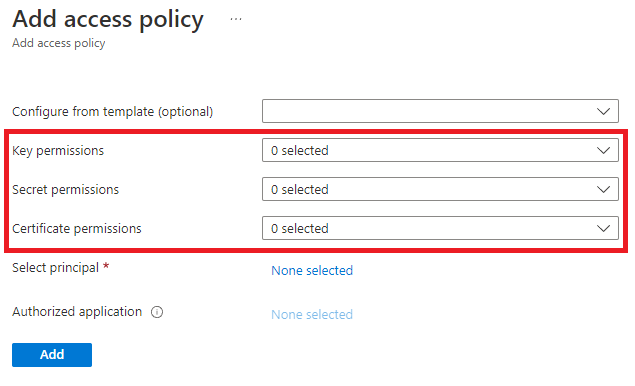
Optionally, choose a template from the Configure from template dropdown area, robotically assigning the suitable permissions throughout the three classes.
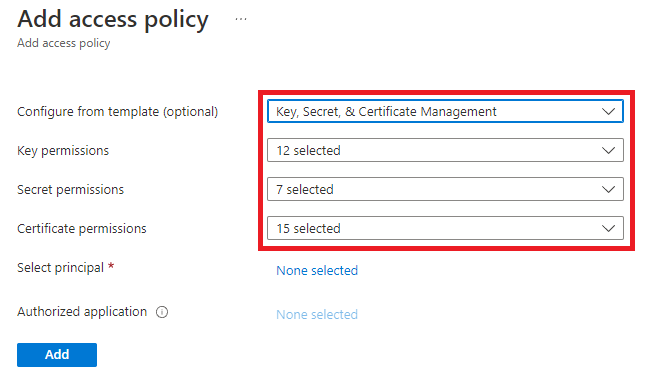
This tutorial makes use of the Key, Secret, & Certificates Administration template.
After choosing a template, three dropdown fields robotically populate, as proven under.
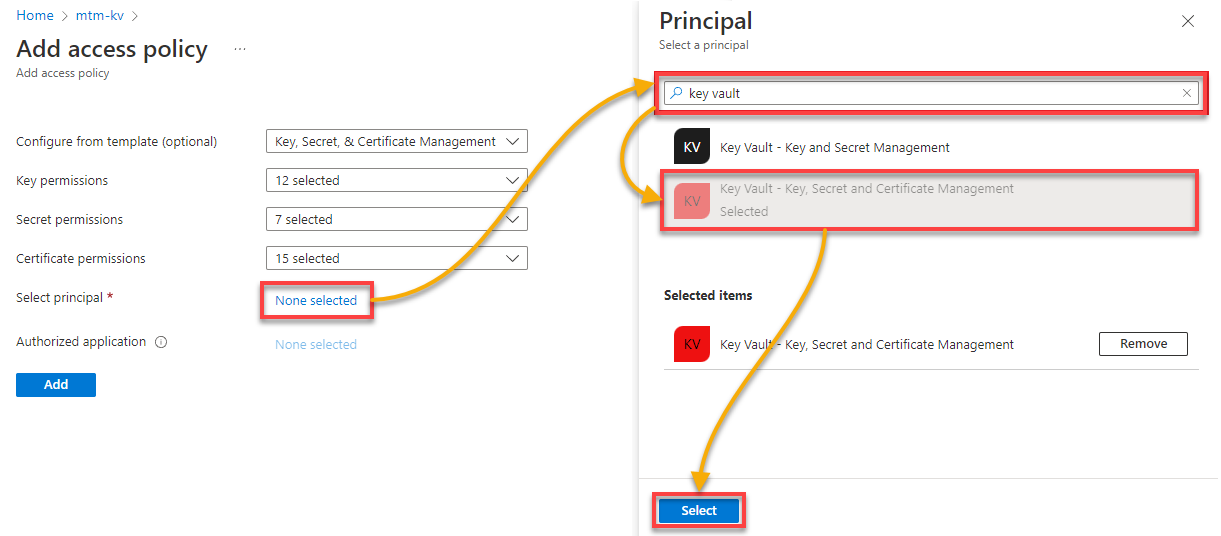
4. Now, assign a principal, which generally is a person account, Azure Energetic Listing group, utility, or service, to this new entry coverage with the next:
- Click on the None Chosen hyperlink on the Add entry coverage blade, which opens the Principal blade (rightmost).
- Seek for the AD group or person (key vault) to assign to this coverage within the Principal blade’s search bar.
Utilizing Azure AD teams is advisable to forestall the necessity to replace all Key Vaults a person has entry to. This conduct happens every time their position modifications or they transfer on.
- Select your goal group or person (because the principal), and click on Choose.
Optionally, click on on None chosen proven under to assign an utility that might be licensed to run the duties specified by the permissions on the person’s or group’s behalf.
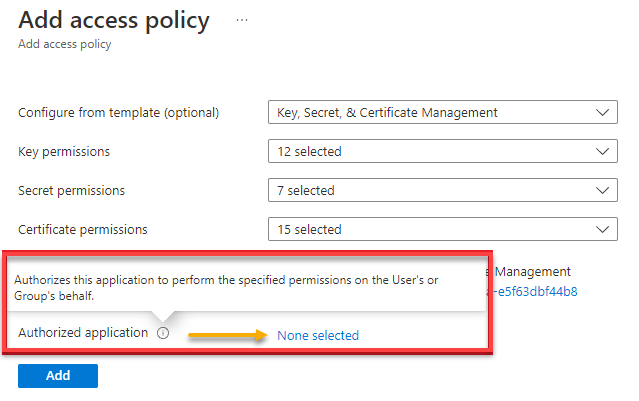
5. Click on on Add when you’ve specified all permissions and chosen a principal.
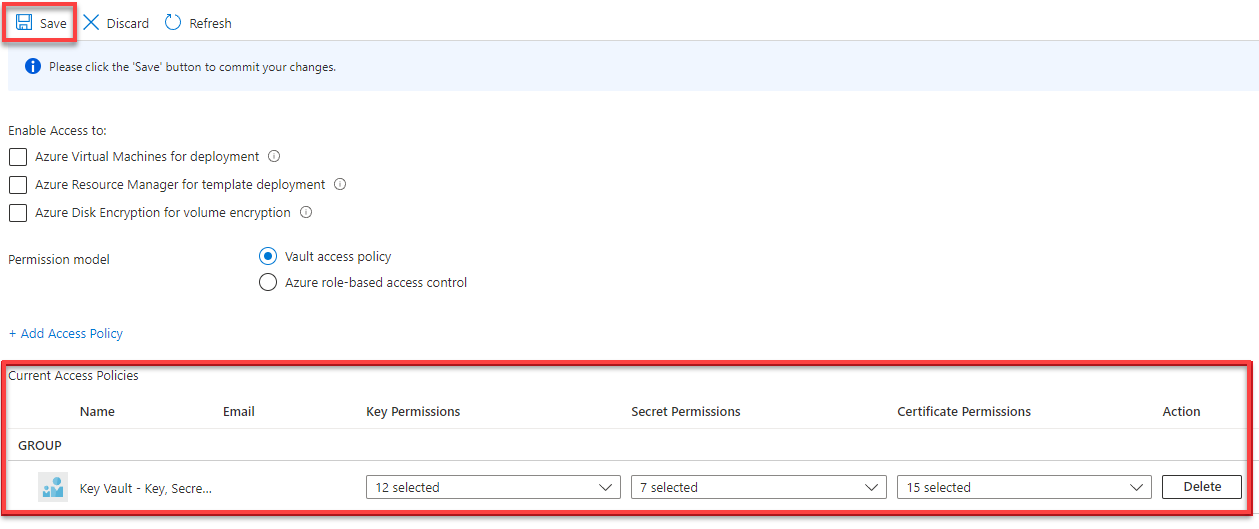
The brand new coverage seems beneath the Present Entry Insurance policies listing (step six).
6. Lastly, modify the permissions beneath Present Entry Insurance policies if desired, and click on the Save button to avoid wasting the modifications.
Azure Function-Based mostly Entry Management (RBAC)
RBAC for Key Vaults is an alternative choice to the Vault Entry Coverage mannequin. This entry management is constructed on the Azure Useful resource Supervisor, which helps you to configure entry throughout sources in Azure.
This characteristic permits permissions to secrets and techniques, keys, and certificates to be managed utilizing Function Assignments beneath Entry Management (IAM). On this instance, you’ll replace an current Key Vault to make use of Azure Function-Based mostly Entry Management.
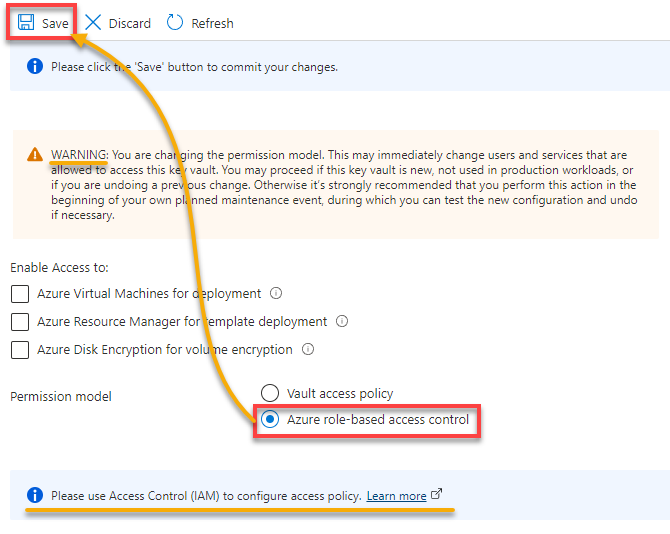
1. Navigate to the Entry Insurance policies web page once more as you probably did in steps one to 2 of the “Vault Entry Coverage” part. However this time, select Azure Function-Based mostly Entry Management for the Permission mannequin and click on Save to avoid wasting the modifications.
You’ll see that the Present Entry Insurance policies part is changed by an data message that claims entry insurance policies are actually being managed beneath the Entry Management (IAM) blade.
There might be a WARNING that claims altering the permission mannequin might affect any current permissions. So, proceed with warning if this isn’t a brand new Key Vault.
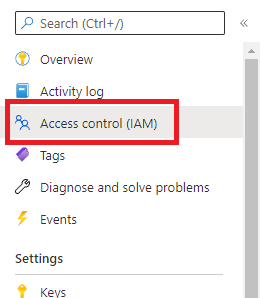
2. As soon as saved, click on on Entry management (IAM) on the left panel to entry the web page the place you’ll be able to handle IAM entry.
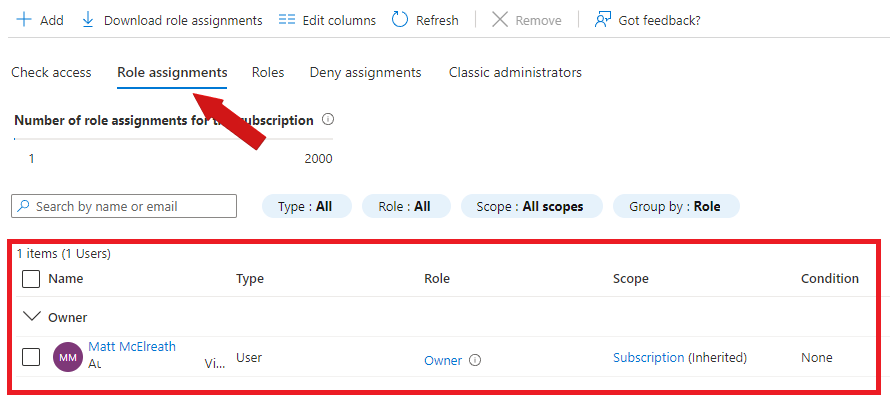
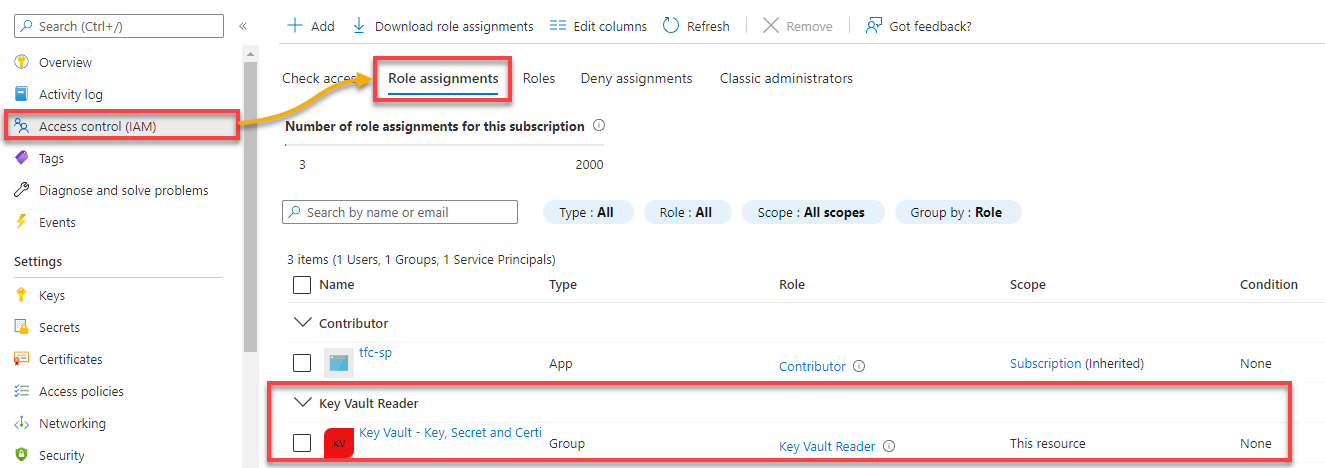
3. Click on on the Function Assignments tab to view the present position assignments, as proven under.
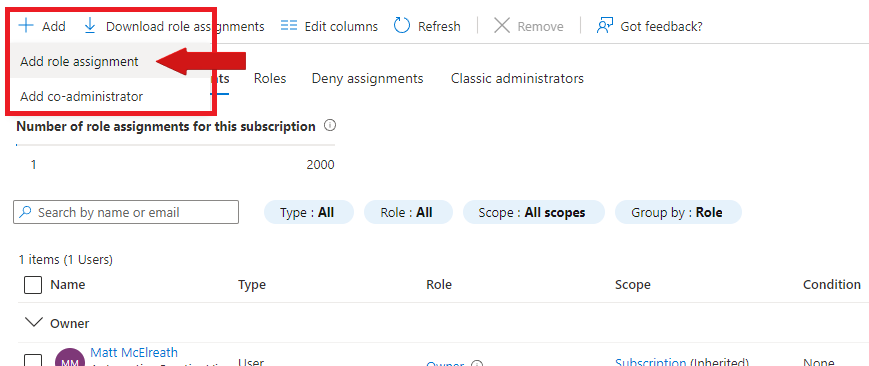
4. Now, click on Add → Add position task to configure a brand new position task for this Key Vault.
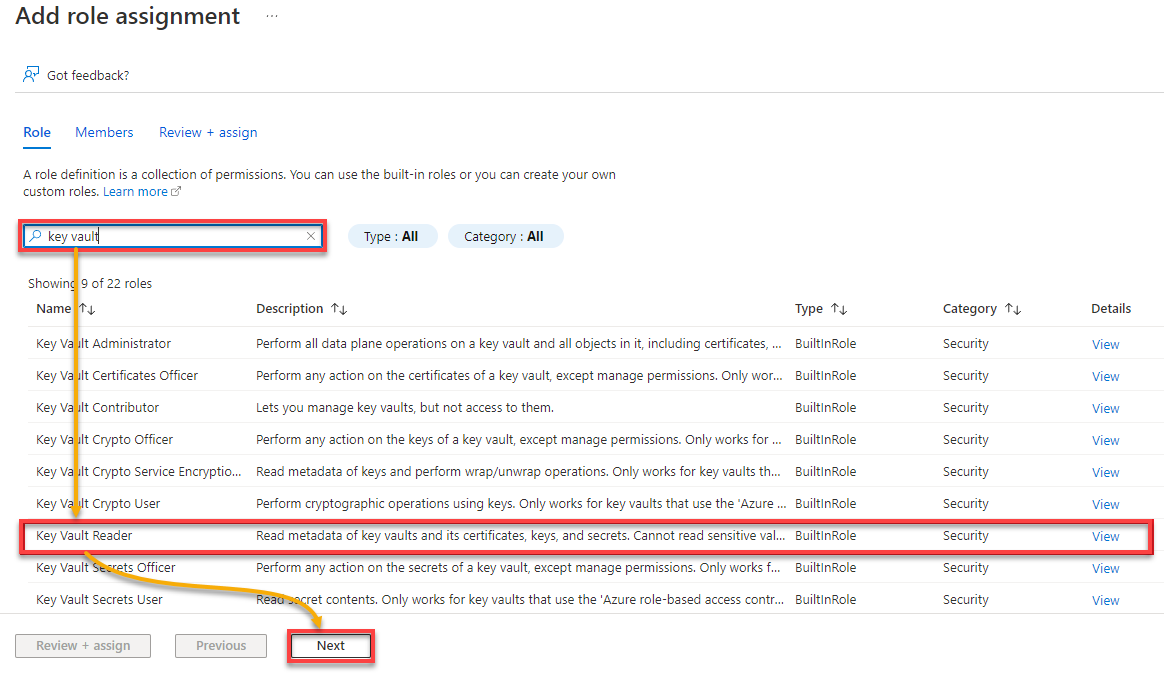
5. On the Add position task web page, seek for key vault, choose Key Vault Reader from the outcome listing and click on Subsequent.
Selecting Key Vault Reader offers the member(s) assigned to this position task entry to see the Key Vault on the Management Airplane stage.
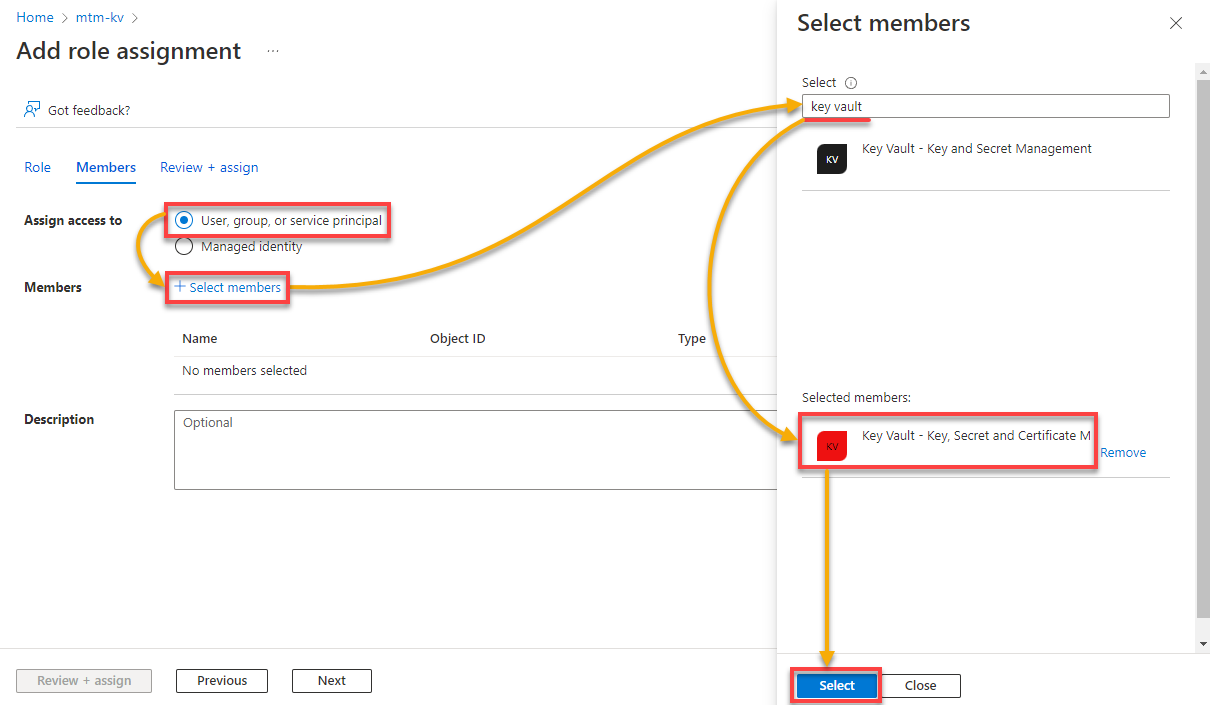
4. Add members to this position task with the next:
- Choose Person, group, or service principal beneath Assign Entry to.
- Click on Choose members, and the Choose Members blade (rightmost) opens.
- Seek for the group or person to assign to this coverage within the Choose Members blade.
- Choose your goal group or person, and click on Choose.
7. As soon as all right members have been added, click on Evaluate + Assign twice to create the brand new position task.

8. Lastly, navigate the Entry management (IAM) web page, and click on on the Function assignments tab.
The brand new position task is now listed beneath Key Vault Reader, as proven under.
Secret Function Assignments
In contrast to Vault Entry Insurance policies, you’ll be able to assign position assignments to particular secrets and techniques with the Azure Function-Based mostly Entry Management for Key Vaults.
When utilizing Vault Entry Insurance policies, if a person or principal is given entry to view or change secrets and techniques, that person may have that very same entry throughout all secrets and techniques within the Key Vault. This feature could also be acceptable in sure conditions. However there could also be a must set some safety boundaries between secrets and techniques in a vault.
To configure position assignments for a specific secret, assuming the Azure Function-Based mostly Entry Management is enabled on the Key Vault:
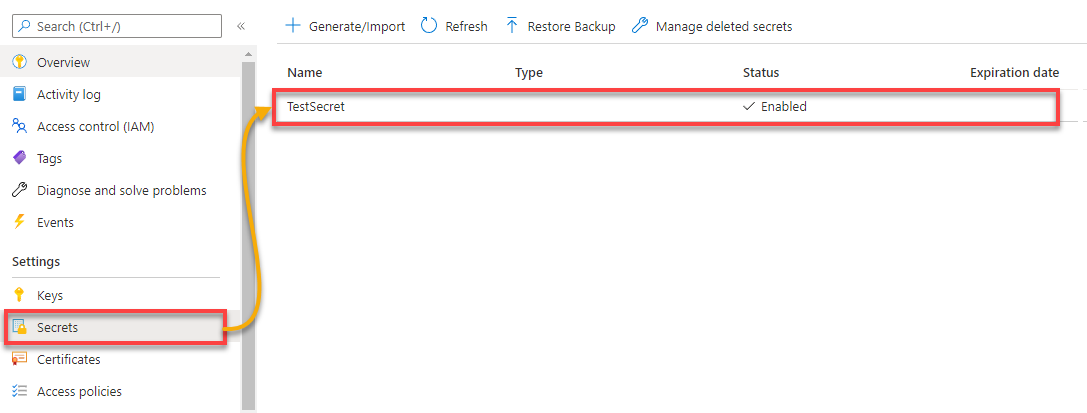
1. Navigate to Secrets and techniques (left panel), and click on on an current secret to open the key’s Overview web page.
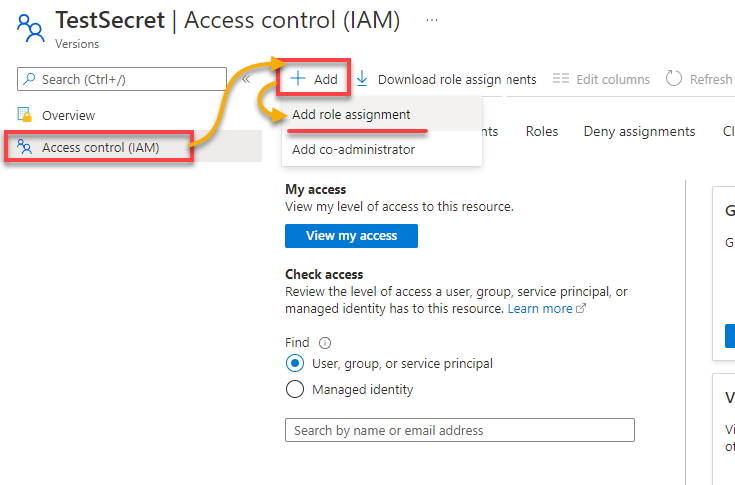
2. Subsequent, click on on Entry Management (IAM) on the left panel → Add → Add position task to create a brand new position task to use to the key chosen.
3. Finally, comply with steps 5 to eight of the “Azure Function-Based mostly Entry Management” part. However this time, seek for and choose Key Vault Secrets and techniques Officer position to assign.
The Key Vault Reader position task within the Azure Function-Based mostly Entry Management part gave the principal learn entry to secret contents (like metadata) on this Key Vault. However not delicate values.
As soon as chosen, select the identical AD group to assign the position task, and click on Evaluate + Assign to validate the settings.
As soon as the Key Vault Secrets and techniques Officer position task is created, the customers can see the delicate worth of this secret solely. The one manner they will see different secret values is that if a job task is created for these particular secrets and techniques, creating safety boundaries between the important thing vault’s secrets and techniques.
Networking Greatest Follow
You’ve seen other ways to handle Azure Key Vaults. However there’s one other finest apply you will need to know, proscribing entry to solely specified digital networks or IP addresses.
1. Allow the Azure firewall on a Key Vault:
- Navigate to the specified Key Vault and click on on Networking (left panel) beneath the Settings part.
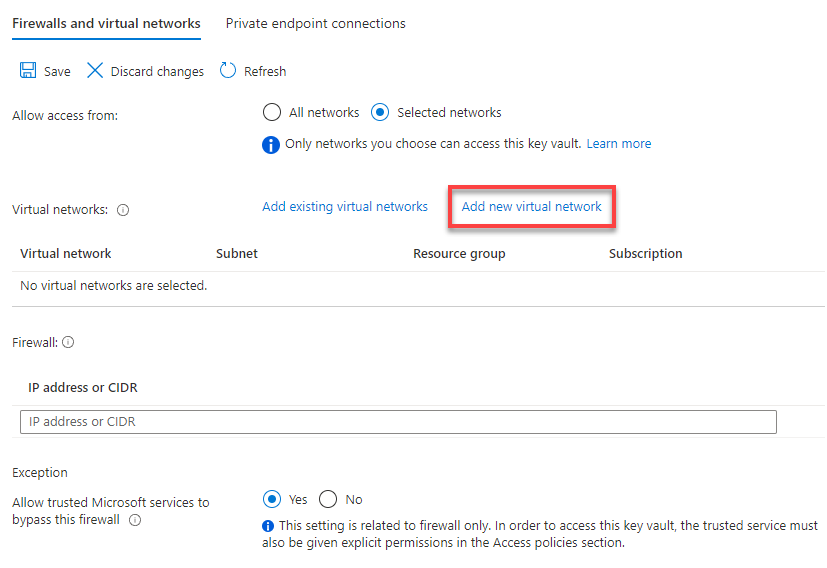
- Click on on the Firewalls and digital networks tab, and choose the Chosen networks choice because you’ll limit entry to particular IP addresses.
As soon as chosen, extra choices turn into out there, as proven under.
2. Resolve whether or not so as to add an current digital community or create a brand new one. However for this tutorial, click on on Add new digital community to provoke making a digital community.
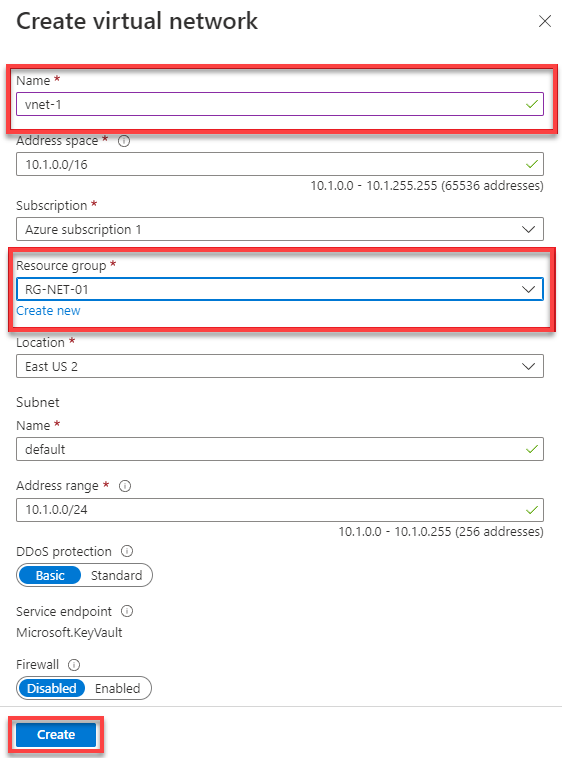
3. Configure the brand new digital community on the Create digital community blade (rightmost) with the next:
- Specify a descriptive title for the brand new digital community (i.e., vnet-01).
- Deal with area and Subscription fields may have default values and could be left as-is.
- Select a Useful resource Group the place the digital community might be created or create a brand new one.
- Go away the remainder of the fields with their default values, and click on Create to create and deploy the brand new digital community.
4. Verify that the brand new digital community is within the listing beneath the Digital networks part, as proven under.
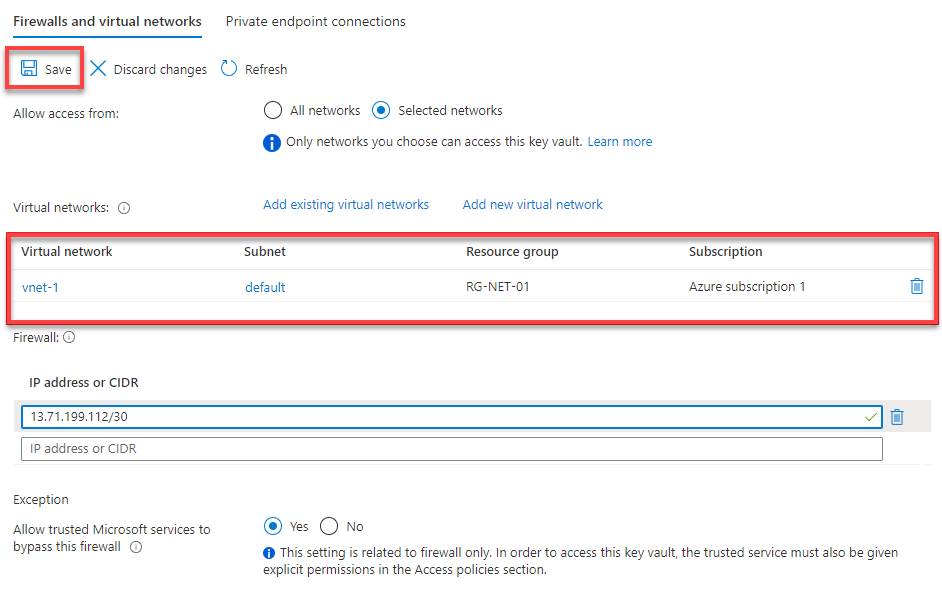
5. Subsequent, beneath Firewall, IP addresses could be added from the general public Web or an on-premises community:
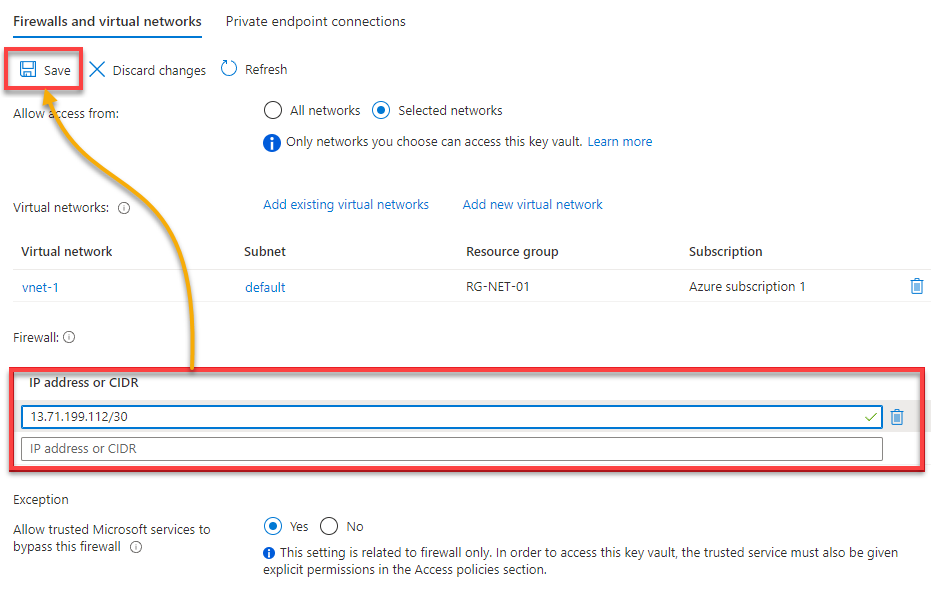
- For this demo, enter 13.71.199.112/30 (public Azure IP vary). The IP deal with or CIDR area accepts an IP Deal with or CIDR block.
- Click on the Save button to avoid wasting the modifications.
Confirm that vnet-1 is listed beneath Digital Networks and the Azure IP CIDR block is listed beneath Firewall. Now, solely site visitors that originates from the default subnet in vnet-1 or the general public vary can talk with this Key Vault.
Enabling Restoration Choices
Within the unlucky state of affairs {that a} Key Vault or Key Vault object useful resource is inadvertently or maliciously deleted, enabling restoration choices on the important thing vault is the most effective apply. Key Vaults provide each soft-delete and purge safety choices to permit objects to be shortly recovered.
Navigate to Properties beneath the Settings part (left panel) to entry the properties of the Key Vault.
Beneath, you’ll be able to see that Smooth-delete is enabled by default (upon Key Vault creation). When soft-delete is enabled, deleted sources are retained for a while. 90 days is the default retention interval, however you’ll be able to set the worth anyplace between 7 and 90 days.
Be aware that you may solely change the retention interval throughout Key Vault creation. As soon as created, the retention interval can’t be modified anymore.

For brand spanking new Key Vaults, Smooth-delete, Purge safety, and retention interval could be configured beneath the Restoration choices part.
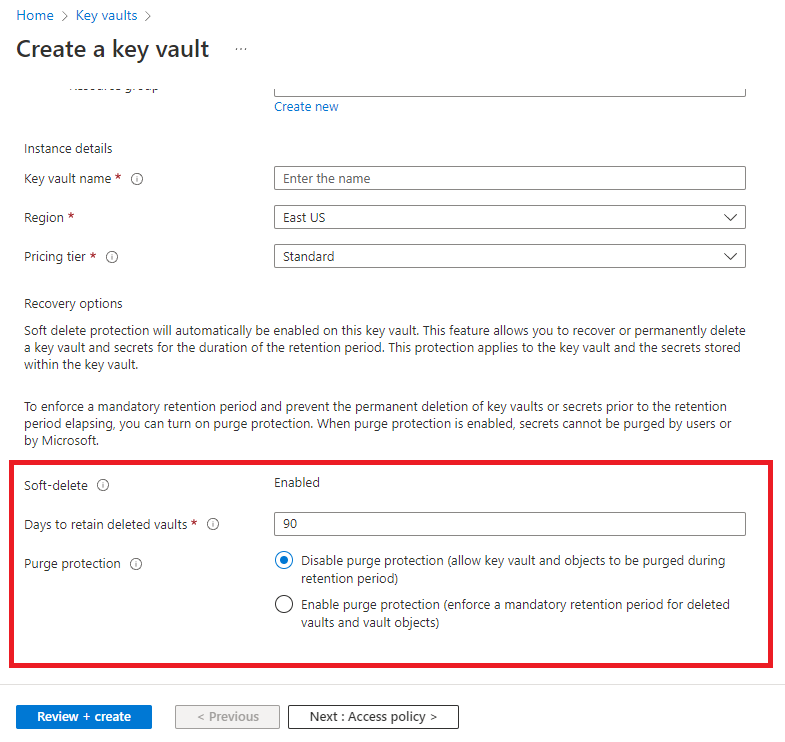
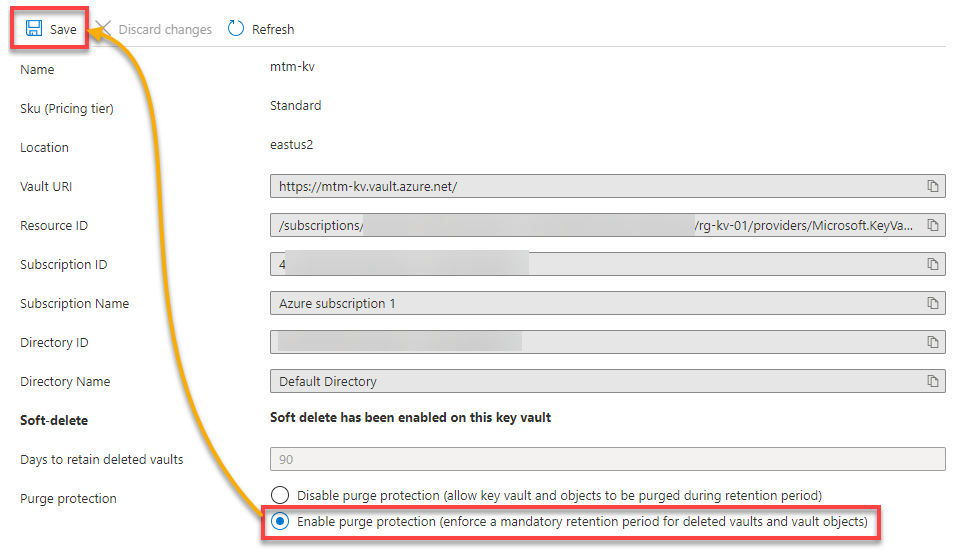
Now, select the Allow purge safety choice, which permits purge safety for the Key Vault, and click on Save. Be aware that when enabled, purge safety can’t be disabled once more.
Enabling purge safety allows you to keep away from shedding necessary information. A compulsory retention interval is utilized to the deleted Key Vault and Key Vault objects. In consequence, a Key Vault or one among its objects (even when deleted) can’t be absolutely purged till the retention interval has expired.
Enabling Platform Logging
As soon as an Azure Key Vault is created, you want a technique to monitor how and when a Key Vault is accessed. Logging must be enabled to assist with this activity. Enabling platform logging gives visibility into the operations carried out throughout the Key Vault and could be accessed for troubleshooting functions.
To allow platform logging on a Key Vault:
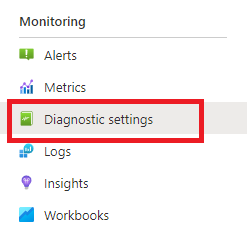
1. Click on on Diagnostic settings beneath Monitoring to entry the Diagnostic settings web page.
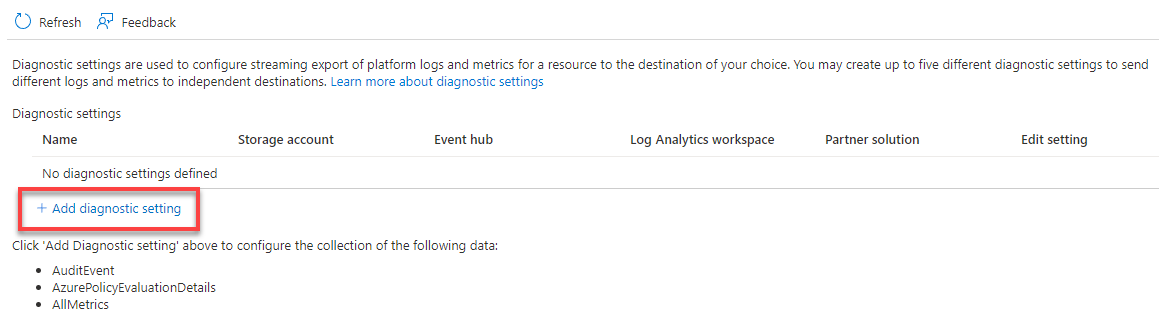
2. Subsequent, click on the Add diagnostic setting hyperlink to configure logging for the Key Vault.
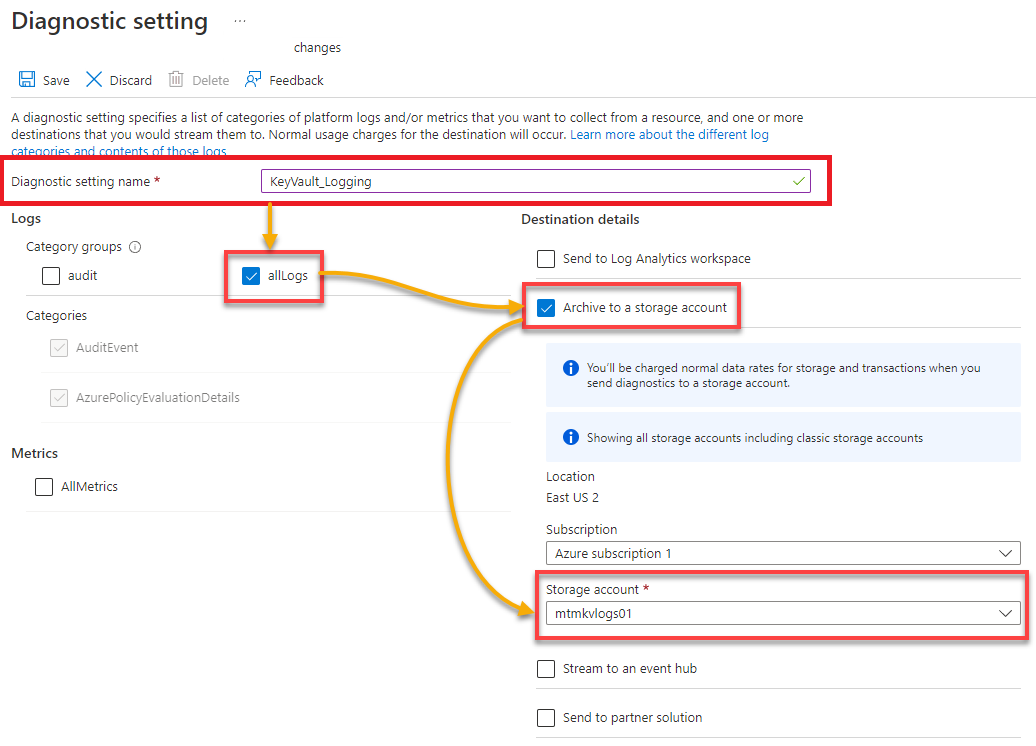
3. Configure the diagnostic settings as follows:
- Specify a singular Diagnostic setting title (i.e., KeyVault_Logging).
- Tick the allLogs field to pick all out there classes. Logging can then be configured for various classes based mostly on the useful resource kind.
Beneath are the out there choices for the vacation spot the place these logs might be despatched to and saved:
- Ship to Log Analytics workspace – Logs could be saved in an current Log Analytics Workspace the place they are often consolidated, correlated, and queried.
- Archive to a storage account – Logs could be saved as blob storage in an current storage account.
- Stream to an occasion hub – Integrates logs with third-party Safety Data and Occasion Administration (SIEM) instruments like Splunk and QRadar.
- Ship to accomplice resolution – Logs could be despatched to a accomplice resolution within the Azure Market.
However for simplicity on this tutorial, tick the Archive to a storage account field. Within the Storage account dropdown, specify an current storage account the place these logs must be saved, and click on Save.
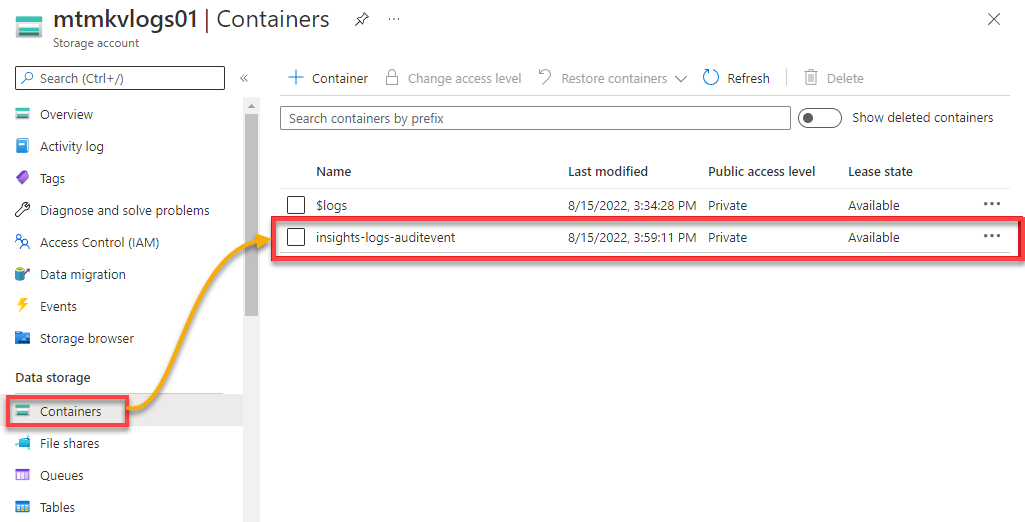
4. Lastly, navigate to Containers beneath the Information storage part (left panel) to see the container known as insights-logs-auditevent, the place the logs are saved, as proven under.
Backing Up Key Vaults
The restoration choices out there for Azure Key Vaults helps stop the lack of delicate and necessary information. However backing up business-critical secrets and techniques, keys, and certificates when up to date or modified is the most effective apply to keep away from doable information loss.
There are some issues to take when backing up Key Vault objects. Azure doesn’t presently present a technique to again up whole Key Vaults by means of the portal or command line. So secrets and techniques should be backed up individually if desired.
To again up an current secret:
1. Navigate to Secrets and techniques beneath the Settings part within the Key Vault dashboard, and click on on the key to be backed up.

2. Subsequent, click on on Obtain Backup to start the method of downloading a backup of the chosen secret.

3. Lastly, click on Obtain on the pop-up message to obtain a backup of the key.
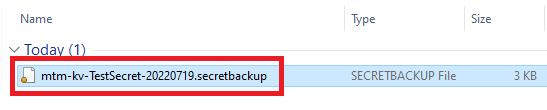
The pop-up message under explains the key might be encrypted and may solely be restored to a different Key Vault in the identical subscription.
Be aware that the key have to be restored in the identical Azure Geography. Why? A secret can solely be restored in the identical nation the place that secret was backed up.

The key might be downloaded as an encrypted block with an extension of .secretbackup, which might solely be decrypted inside Azure.
Study extra about backing up and restoring to an Azure Key Vault.
Conclusion
This tutorial’s objective was to show the Azure Key Vault finest practices out there in Azure. You realized the significance of separating Key Vaults based mostly on their goal, the other ways you’ll be able to configure entry insurance policies for Key Vaults, and networking and firewall issues.
By enabling purge safety, you’ve additionally protected Key Vaults and sources from unintended or malicious deletion. On the similar time, you realized to again up Key Vault secrets and techniques.
However the most effective practices you’ve realized on this tutorial solely scratch the floor concerning sustaining protected and safe Key Vaults in your atmosphere. Everybody’s wants are completely different, so why not dive deeper into all these ideas? Make the appropriate selections based mostly by yourself wants.