


Are you planning to develop your cloud potentialities and pondering of utilizing AWS with full management over your disk? In that case, you need to contemplate Amazon Elastic Block Storage (EBS).
Amazon EBS offers block-level storage volumes to retailer the info persistently, not like the non permanent EC2 situations. These volumes are properly fitted to file methods, databases, or utility use circumstances requiring low-level information management.
Able to discover the ability of EBS? Dive proper in!
Conditions
This tutorial shall be a hands-on demonstration. When you’d prefer to comply with alongside, make sure you may have the next:
- Your AWS root account or an IAM consumer with AmazonEC2FullAccess coverage connected to it. This tutorial will use an IAM consumer named amazon-ebs-user all through.
- An Amazon EC2 occasion the place you’ll connect the Amazon EBS quantity. This tutorial makes use of a free-tier Ubuntu 20.04 occasion within the east-us-2b availability zone for demonstration.
Creating an Amazon EBS Quantity
You can create an EBS quantity by way of the command line (AWS CLI) or from the AWS Console. Contemplating that this tutorial covers the fundamentals, you’ll do each activity within the AWS Console. This fashion, you received’t must do any CLI preparations and dive straight into the Amazon EBS creation.
Observe the beneath steps to create an Amazon EBS Quantity.
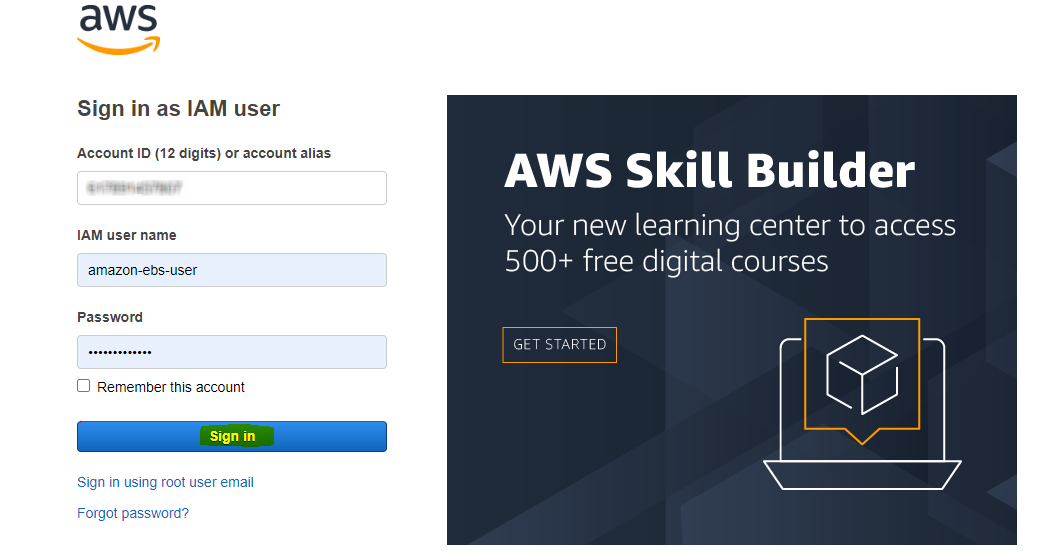
1. Open an internet browser and log in to the AWS Console as the basis or IAM consumer. This instance reveals signing in because the IAM consumer amazon-ebs-user.
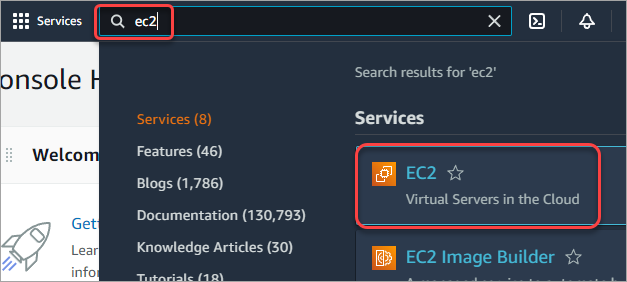
2. Subsequent, kind ec2 within the search field on the high, and click on EC2 from the outcomes.
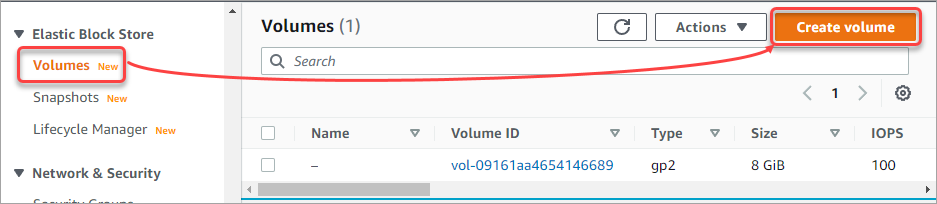
3. On the left panel, scroll to the Elastic Block Retailer and click on Volumes → Create quantity.
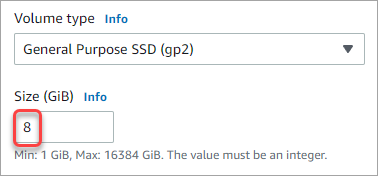
4. Select your quantity kind based on your use case. EBS volumes are available in a number of sorts which have totally different traits. However on this instance, select the Common Objective SSD (gp2), an economical possibility appropriate for basic use.
Go to the Amazon EBS quantity sorts web page to be taught extra concerning the totally different quantity sorts.

5. Subsequent, specify the quantity dimension. Legitimate sizes for a gp2 quantity are from 1 GiB to 16 TiB (16,384 GiB). On this instance, set the quantity dimension to eight GiB.
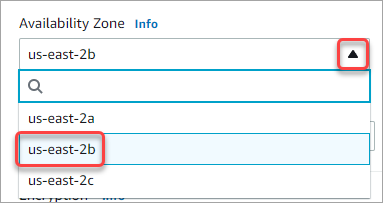
6. Choose the Availability Zone the place you need to create the quantity. Choose the identical area of the EC2 occasion the place you’ll connect this quantity. This instance selects us-east-2b.
NOTE: You possibly can solely connect a quantity to an EC2 occasion throughout the similar availability zone.
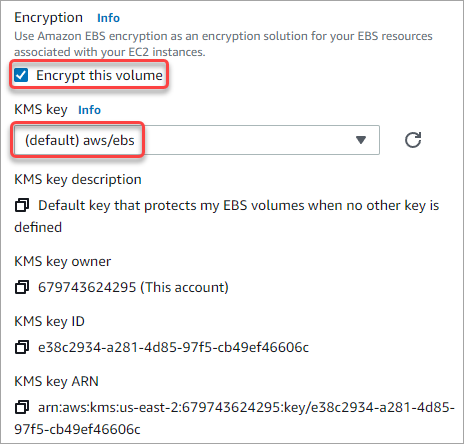
7. Tick on the Encrypt this quantity to allow encryption in your quantity. Underneath the KMS key, choose (default) aws/ebs.
8. Underneath Tags, click on Add tab and sort a string that will provide help to rapidly establish the quantity. On this instance, kind Title as the important thing and Getting_started_ebs as the worth. Lastly, click on Create quantity.

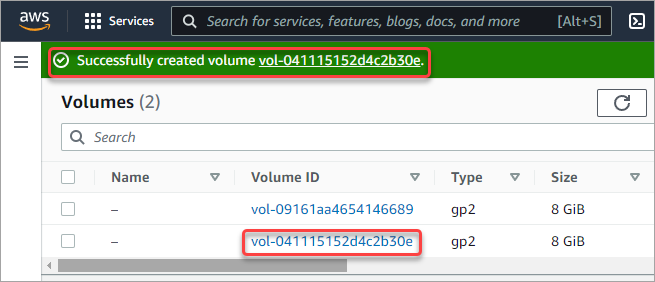
The screenshot beneath reveals that you simply’ve efficiently created a brand new Amazon EBS quantity.
Attaching the Amazon EBS Quantity to an EC2 Occasion
You might have completed creating a brand new Amazon EBS quantity, which now you can connect to your EC2 occasion earlier than you should utilize it to retailer information.
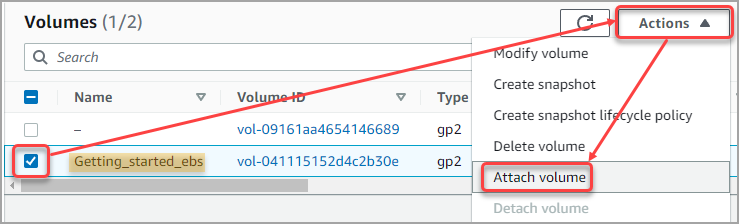
1. Whereas nonetheless on the Volumes web page, tick the field subsequent to the Getting_started_ebs quantity you created.
2. Click on the Actions menu and click on Connect quantity.
3. Click on the dropdown field underneath Occasion and the EC2 occasion the place you need to join the Amazon EBS quantity.
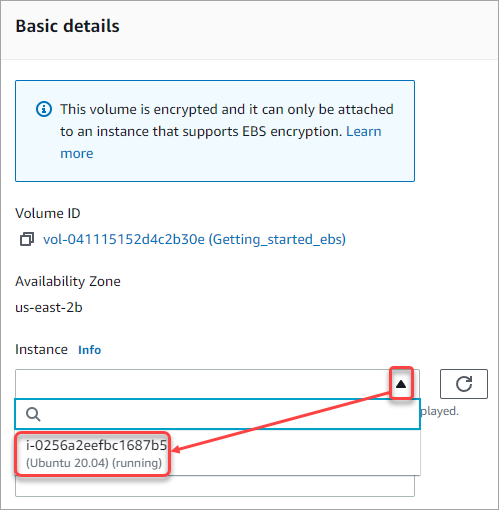
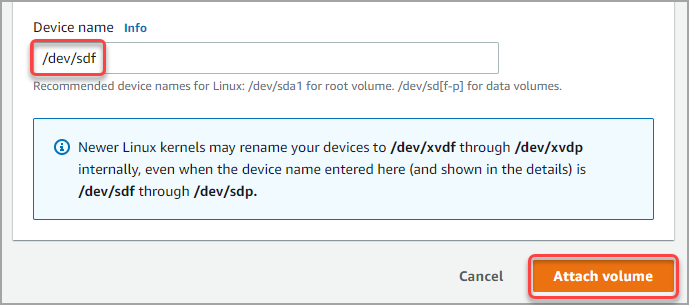
4. Go away the robotically generated machine identify worth on this instance. This machine identify is what you’ll see inside your EC2 occasion because the machine identify of the quantity—Click on Connect quantity to complete.
Word that callout within the beneath screenshot concerning the Linux kernel renaming your machine. This conduct won’t have an effect on the quantity’s performance, solely that the identify will seem in a different way within the OS than the identify you specified right here.
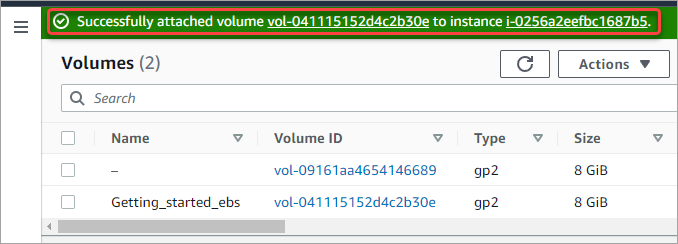
You’ll see a banner just like the one beneath, indicating that you simply’ve efficiently connected the Amazon EBS quantity.
Mounting the Amazon EBS Quantity
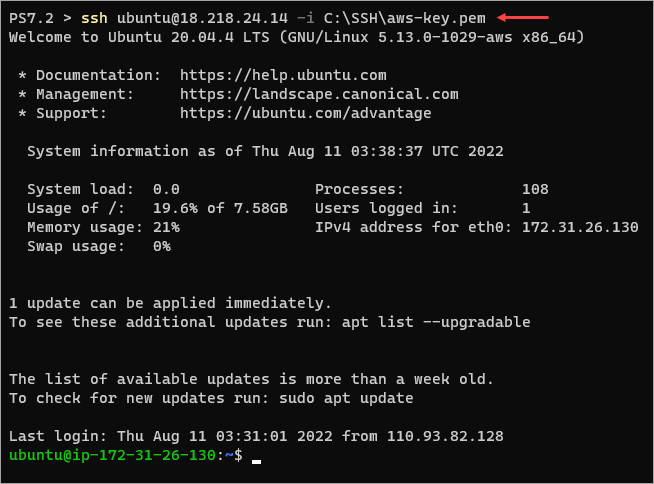
After attaching the Amazon EBS quantity to your EC2 occasion, you could verify whether or not the brand new quantity shouldn’t be seen inside your EC2 occasion. The process will range relying in your working system, and this instance will present you learn how to carry out this activity in Ubuntu.
1. Open your SSH shopper and log in to your EC2 occasion.
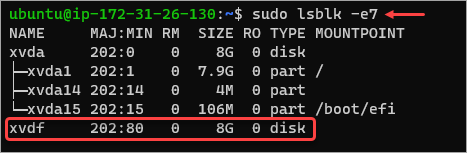
2. Subsequent, checklist all non-loopback block units accessible on the system by operating the beneath command.
Search for the Amazon EBS quantity’s machine identify within the checklist. As you’ll be able to see beneath, the machine identify for EBS, on this case, is xvdf.
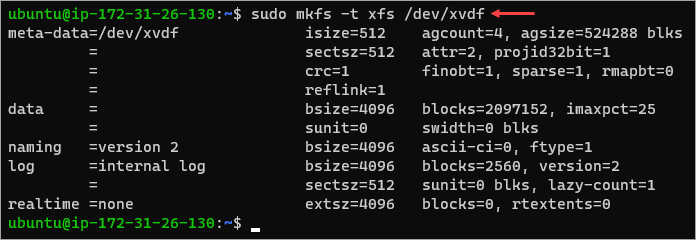
3. Now, run the beneath command to create a file system on the machine.
sudo mkfs -t xfs /dev/xvdfIt’s best to see an output just like the screenshot beneath.
4. Verify if the machine now has a file system.
The outcome ought to present that the machine /dev/vxdf has the XFS filesystem.

5. Create a folder you’ll use because the mount level for this Amazon EBS quantity. For instance, this tutorial will create the /ebs listing because the mount level.
6. After creating the folder, mount the /dev/vxdf machine to /ebs.
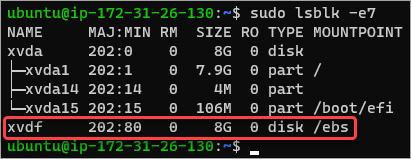
sudo mount /dev/xvdf /ebs7. Record the block units once more and make sure that Amazon EBS mount standing.
As you’ll be able to see within the outcome beneath, the Amazon EBS block machine is mounted to the /ebs mount level.
8. Subsequent, check the quantity by creating a brand new file in it. Run the command beneath to create a readme.txt file in /ebs.
echo 'Amazon EBS' | sudo tee /ebs/readme.txt9. Verify that the brand new file exists and show its contents.
ls /ebs/readme.txt
sudo cat /ebs/readme.txt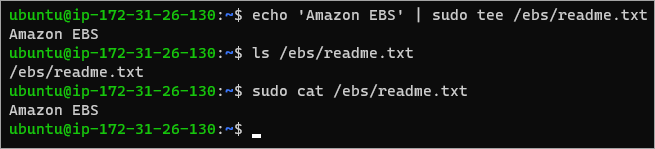
You’ve efficiently made the Amazon EBS quantity accessible inside your EC2 occasion.
Creating an EBS Quantity Snapshot
In a earlier part, you created the Getting_started_ebs quantity. This time, you’ll create a snapshot out of this quantity. EBS snapshots are point-in-time references to information, which you should utilize for backups, catastrophe restoration, and migrating information throughout areas and accounts.
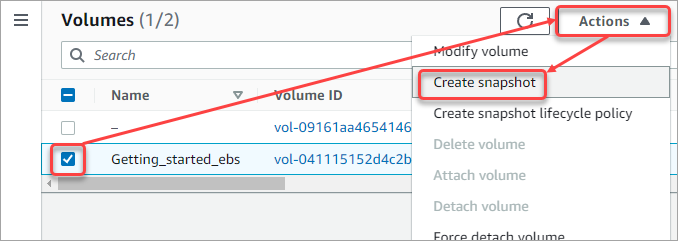
1. Choose the Getting_started_ebs quantity, click on Actions → Create snapshot.
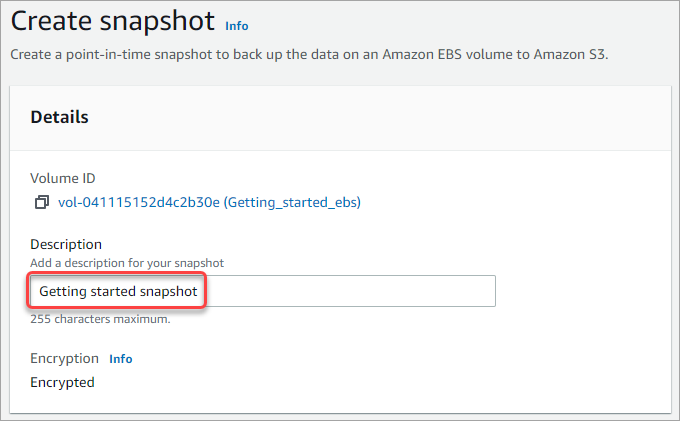
2. Kind the outline of the snapshot you’re creating. This snapshot’s description is Getting began snapshot.
3. Underneath the Tags part, click on Add tags, kind Title as the important thing, and Getting began snapshot as the worth. Click on Create snapshot when you’ve completed including the tag.
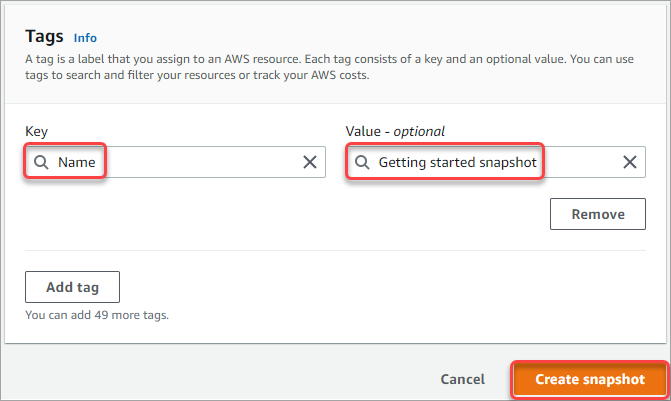
You’ll see the banner saying your efficiently created the snapshot.

Utilizing Amazon EBS Volumes Throughout Availability Zones
As you’ve learn within the earlier part, you’ll be able to solely connect an EBS quantity to an EC2 occasion on the identical availability zone. However what in case you want the info on a quantity in one other EC2 occasion on a special availability zone?
For this state of affairs, you’ll be able to as a substitute create a brand new Amazon EBS quantity from current snapshots of the unique quantity. You possibly can then create the quantity in one other availability zone.
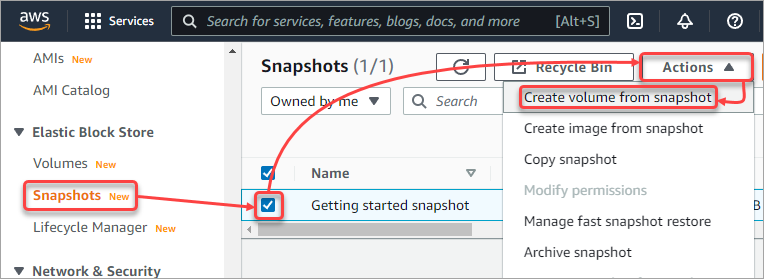
1. On the left pane, click on Snapshots. Tick the field subsequent to the snapshot, click on Actions → Create quantity from snapshot.
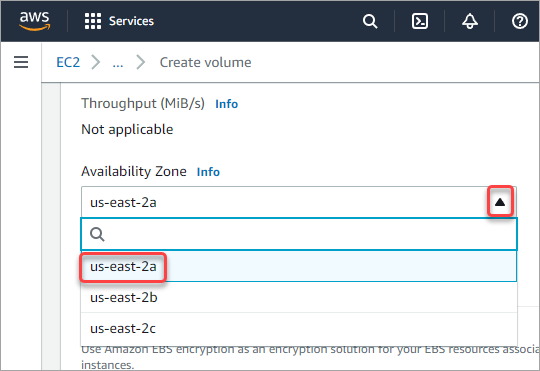
2. On the Create Quantity web page, change the supply zone the place you need to deploy the brand new quantity. On this instance, the brand new quantity shall be in us-east-2a.
At this level, you can too change the quantity kind and dimension. However for this tutorial, go away the unique values, apart from the Availability Zone.
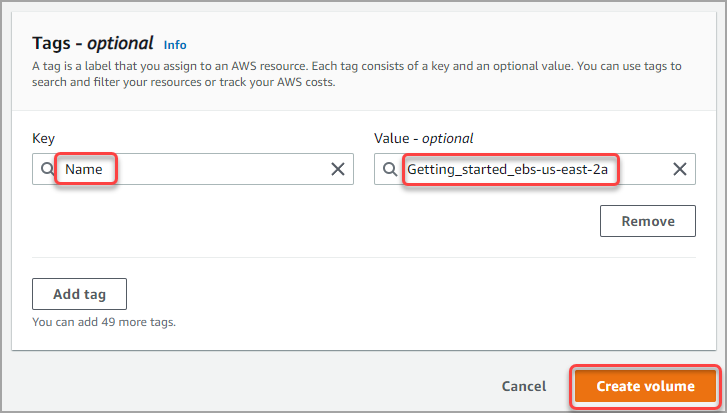
3. Scroll right down to the Tags sections. Click on Add tags and add a Title tag and enter the worth. On this instance, the worth is Getting_started_ebs-us-east-2a, which signifies that this quantity is a duplicate of the Getting_started_ebs quantity in us-east-2a. Make your tag as descriptive as you want.
4. Click on on Volumes, and you need to now see the brand new quantity. As you’ll be able to see, this new quantity is in your specified availability zone.

Creating an AMI from the Snapshot
Out of an Amazon EBS Snapshot, you’ll be able to create a brand new Amazon Machine Photographs (AMI). There are some eventualities the place you’d need to create a customized AMI and share it with others, otherwise you’ll need to launch an EC2 occasion with the customized picture.
To create an AMI from the snapshot, comply with the beneath steps.
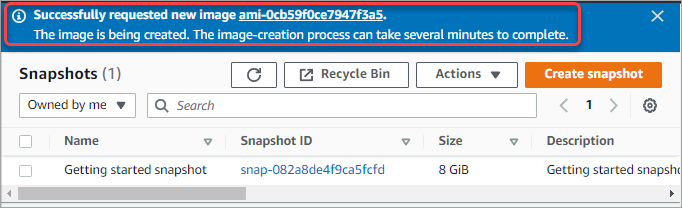
1. Click on Snapshots. Tick the field subsequent to the snapshot, click on Actions → Create picture from snapshot.

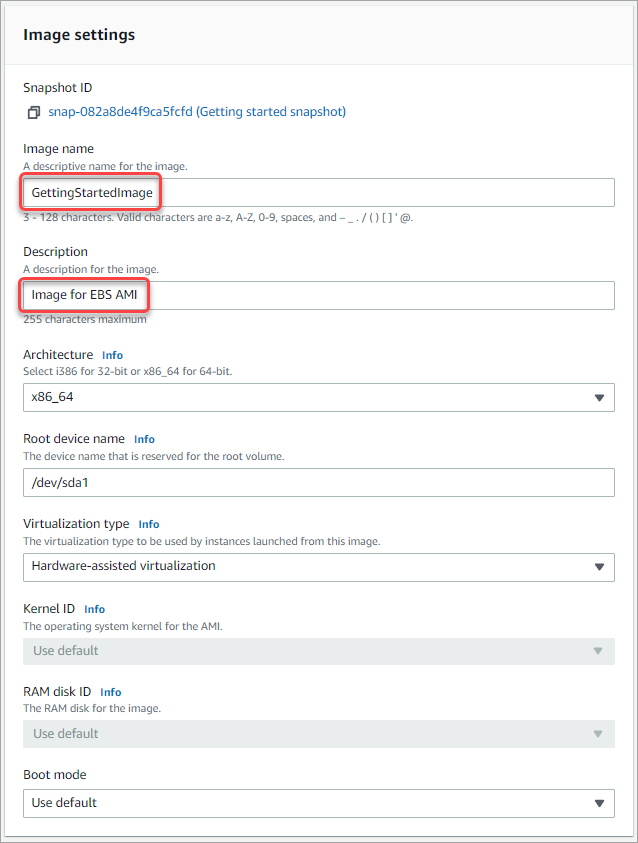
2. On the Picture settings web page, kind the Picture identify and Description. Make them as uniquely indefinable as potential. Go away the opposite settings intact.
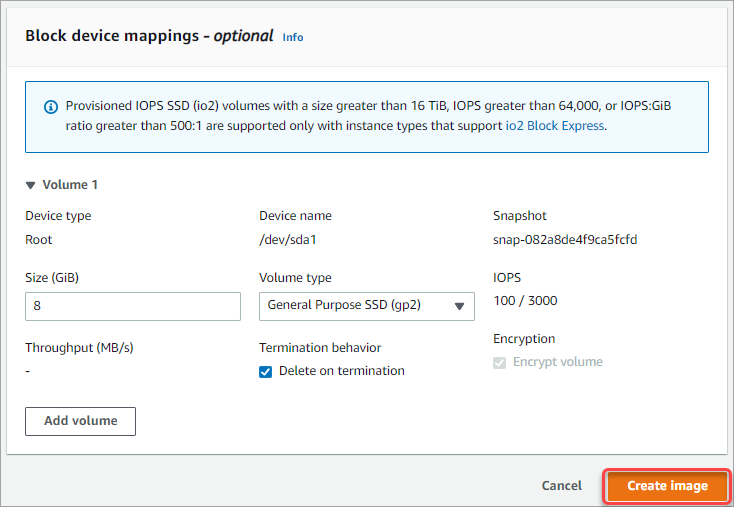
3. Scroll right down to the Block machine mappings part. Specify the quantity dimension and sort. On this tutorial, go away the whole lot in its default values and click on Create picture.
The AWS EC2 service now creates the picture within the background. It’s best to see a banner saying that the picture creation can take a number of minutes to finish.
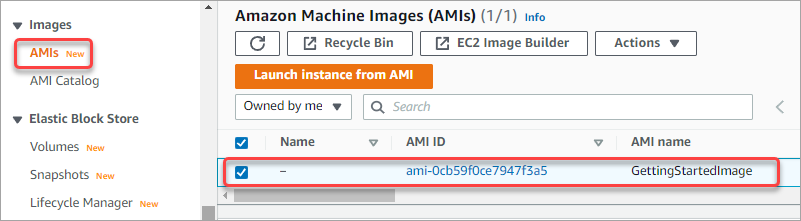
4. Now, click on AMIs underneath the Photographs group, and you need to see the brand new AMI you created. From right here, you may have the choice to launch a brand new EC2 occasion primarily based on this AMI.
Conclusion
On this article, you’ve discovered to leverage the ability of the Amazon Elastic Block Retailer. You’ve discovered to create an Amazon EBS quantity, connect it to an EC2 occasion, create snapshots, and a customized AMI.
With this information, why not attempt to accomplish the identical duties utilizing the AWS CLI?