

The area controller is an important server inside your community. It ensures that customers can log in, and handles permissions, insurance policies, and so on. However what in case your area controller goes offline? Having a second area controller in your community will increase the reliability of your entire community. So how will we add a site controller to an current area?
Including a site controller doesn’t solely enhance the reliability of your area, nevertheless it additionally helps with the load balancing of the companies. And you probably have a number of workplaces then having a second area controller on the opposite websites, ensures that customers can nonetheless login within the occasion of an web/VPN outage.
On this article, we’re going to add a site controller to an current area step-by-step. The steps under work for Home windows Server 2012 and upwards to Home windows Server 2022.
Necessities
Earlier than we begin with including the area controller to the present area, there are a number of necessities that we have to verify. I assume you’ve gotten accomplished the Home windows Server set up.
- Static IP Handle – Give the brand new server a static IP Handle
- DNS to current DC – Set the Most popular DNS server to the present DNS Server (DC01)
- Pc title – Just remember to have modified to laptop title (DC02) of the brand new server earlier than selling it to a site controller.
- Date and Time – Make it possible for the date and time and time zone match between the servers
- Be part of the server to the area – The server must be a member of the area
Add Area Controller to Present Area
With our server prepared we will begin by selling it to a site controller and including it to the present area.
Step 1 – Putting in Energetic Listing Area Providers
Step one is to put in the AD DS (Energetic Listing Area Providers) on the brand new server.
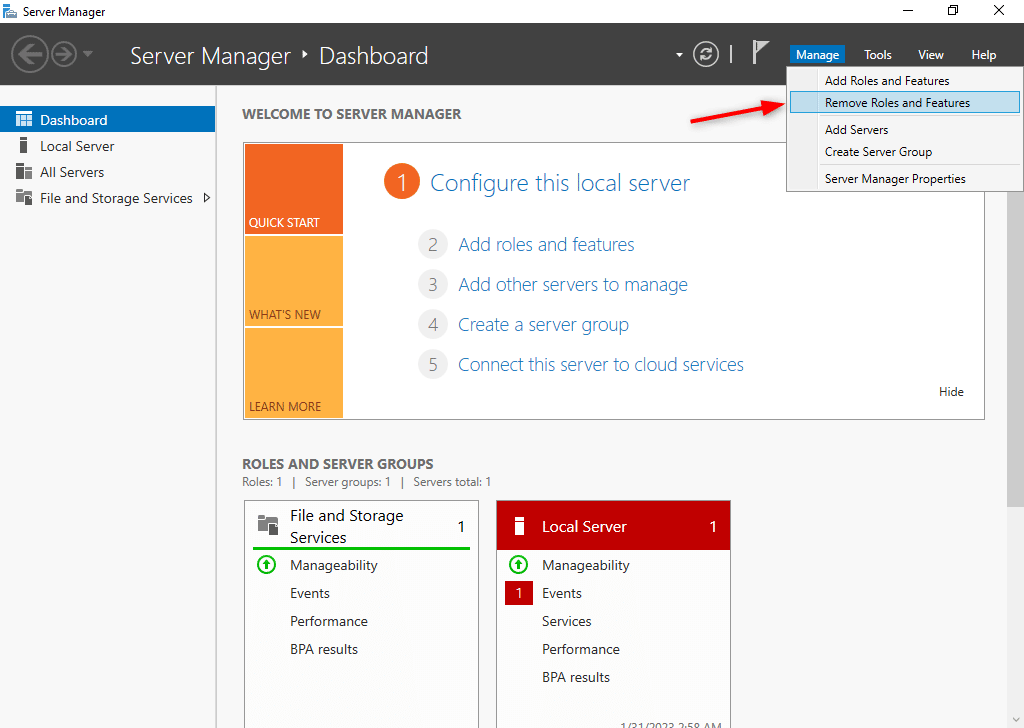
- Click on on Begin and open the Server Supervisor
- Click on on Handle > Add Roles and Options
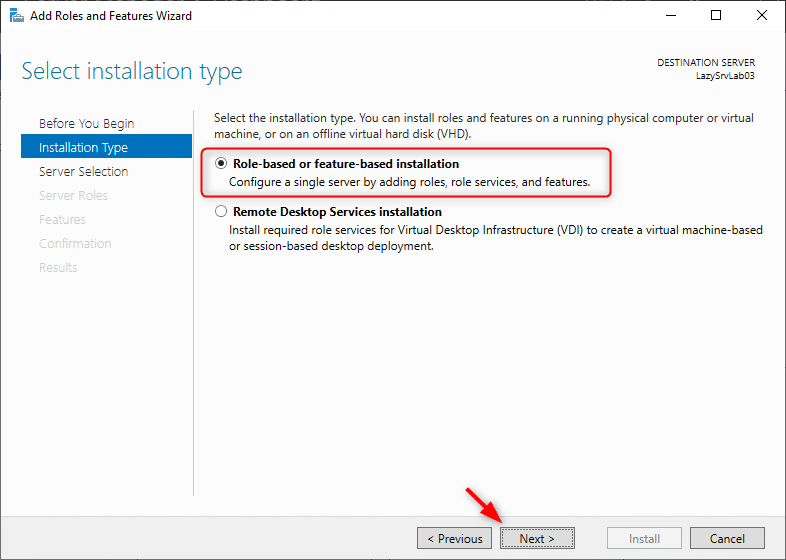
- Click on Subsequent, ensure Position-based or feature-based set up is chosen, and click on Subsequent
- Within the Choose vacation spot server ensure that your new server is chosen (it’s by default), and click on Subsequent
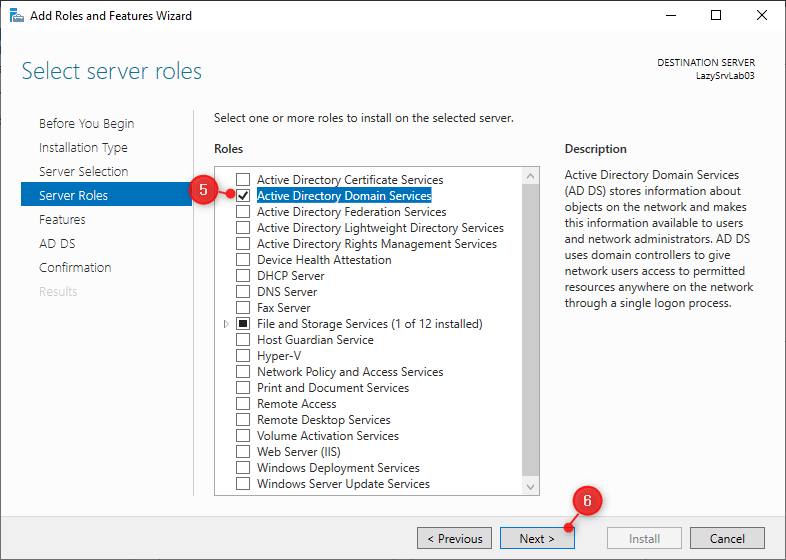
- Choose Energetic Listing Area Providers. A brand new dialog display will seem, click on Add Options so as to add the instruments which can be required.
- Click on Subsequent to proceed
- We don’t want so as to add further options, so simply click on Subsequent on the Choose options web page.
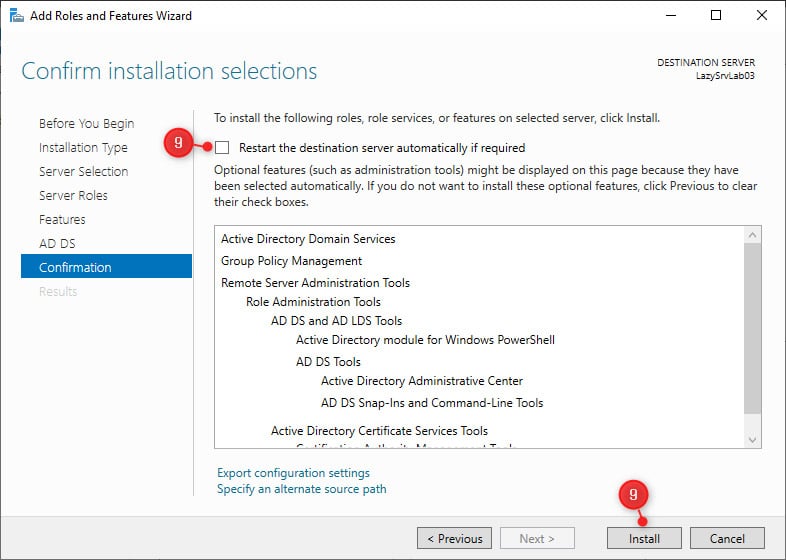
- You’ll get a abstract of the Energetic Listing Area Providers, click on Subsequent to proceed
- A reboot is just not required, so we will depart Restart vacation spot server… off and click on on Set up.
Step 2 – Promote Server to Area Controller
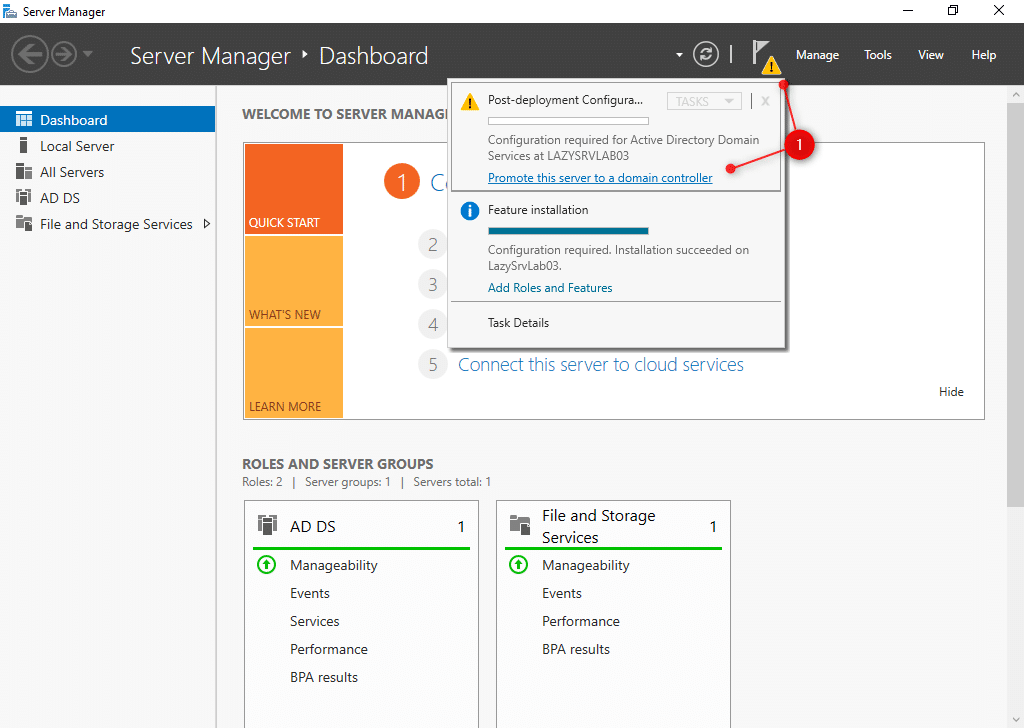
After the set up of AD DS is accomplished, you’ll be able to click on on Shut. We are able to now promote the server to a site controller. Throughout these steps, we’ll add the brand new area controller to the present area.
- Within the Server Supervisor, click on on the flag/warning icon and click on Promote this server to a site controller.
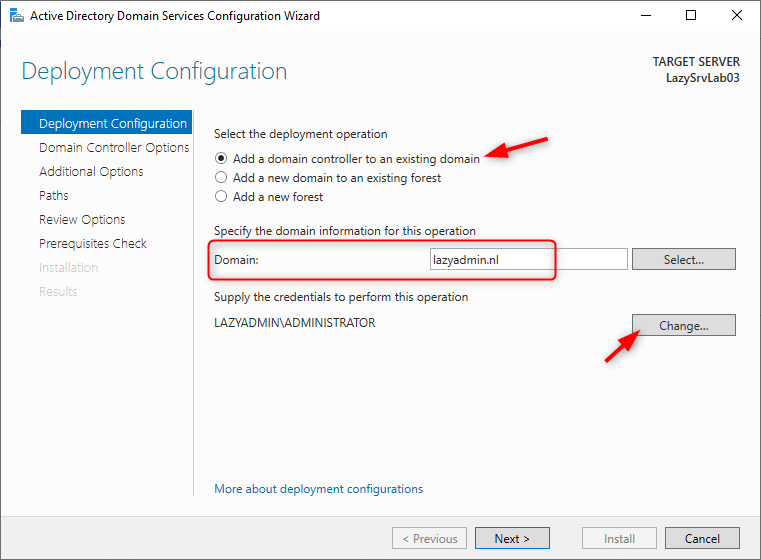
- Make it possible for Add a site controller to an current area is chosen. Enter the area and provide the area admin credentials. Click on on Subsequent when completed.
- Within the area controller choices web page, depart the default objects chosen. You solely have to enter the DSRM password twice

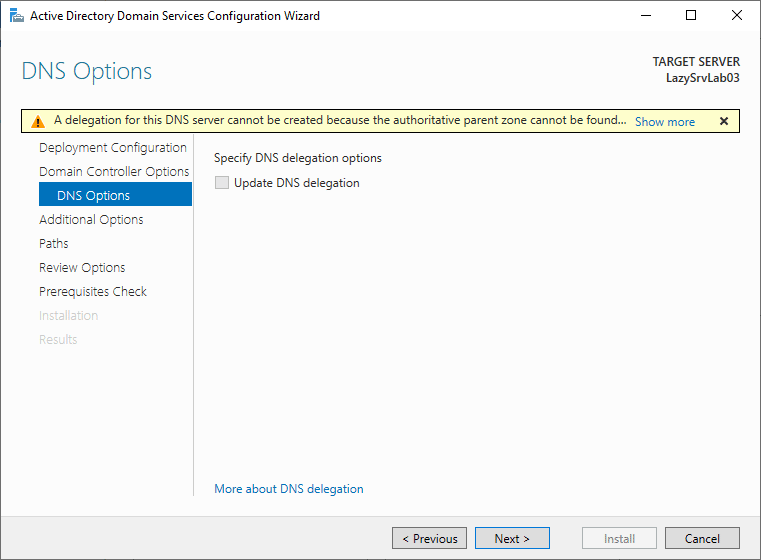
- Ignore the warning on the DNS choice web page. That is regular and may be skipped.
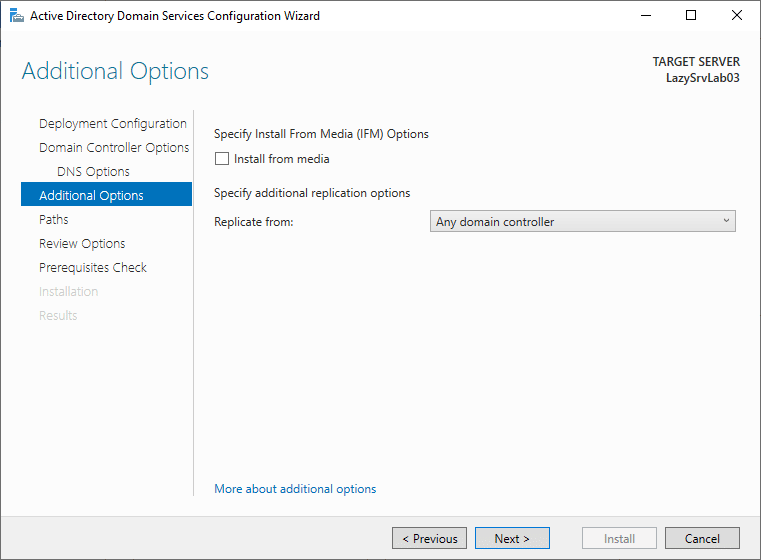
- Within the further choices web page, we will choose the area controller from which we wish to replicate. Usually you need to have the ability to replicate from any area controller.
However you probably have two area controllers in your information heart, and putting in further controllers on department workplaces, then you definitely in all probability wish to replicate from the information heart.
- We are able to skip the subsequent two screens. It’s greatest apply to go away the paths within the default location and you’ll click on subsequent on the evaluate display.
- Click on on Set up after the Stipulations Verify is accomplished. It’s regular that you just see two warnings (identical to within the screenshot under)
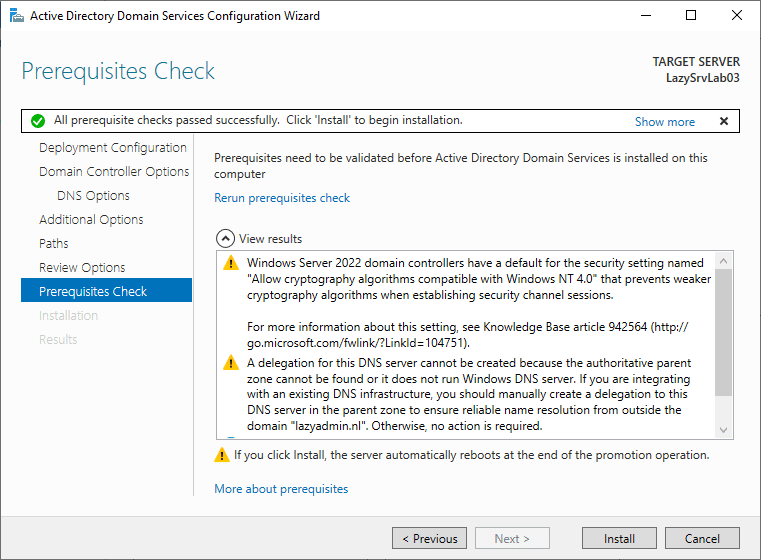
Watch for the set up to complete. The server will routinely reboot as soon as accomplished.
Step 3 – Verifying AD replication
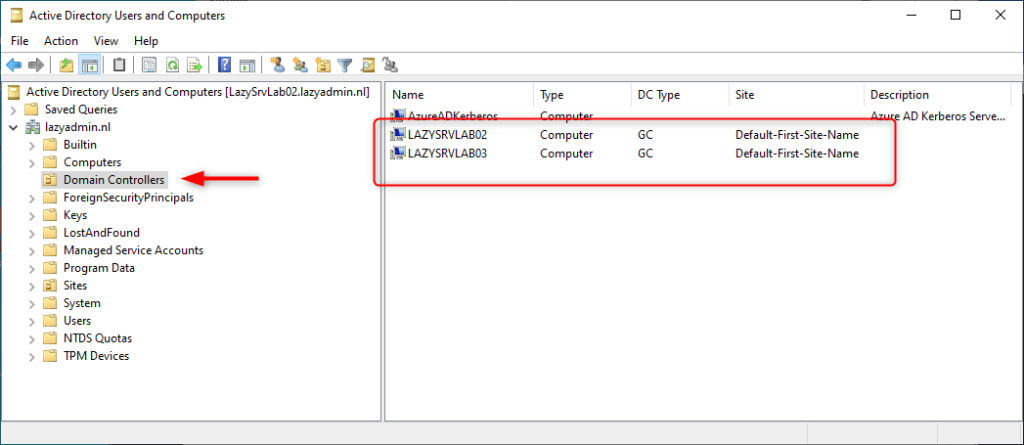
After the server is rebooted, we have to confirm the area replication. We begin within the Energetic Listing Customers and Computer systems. Increase the area controllers and confirm that each area controllers are listed:
Subsequent, we wish to verify if that there aren’t any errors occurred through the replication. For this, we’re going to use the built-in repadmin utility.
- Open PowerShell or a Command Immediate on the brand new area controller.
- Kind
repadmin /replsummary dc02the place dc02 is the title of your new area controller
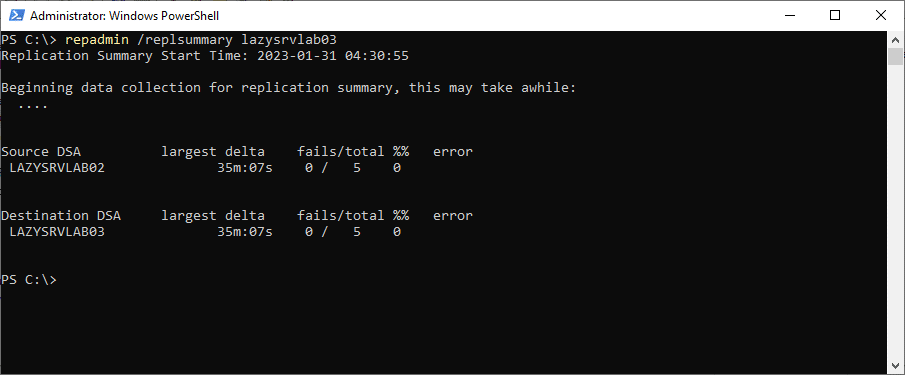
As you’ll be able to see within the screenshot above, there have been no errors through the replications.
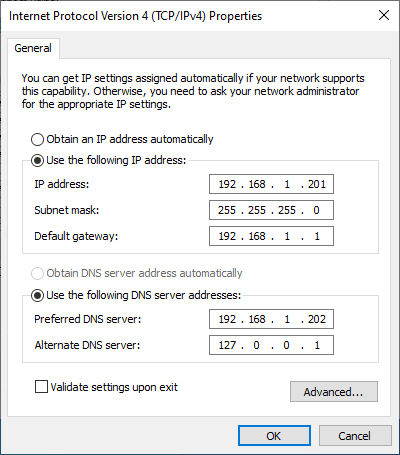
The final step is that we have to configure the DNS servers accurately on the 2 area controller. The popular DNS server ought to at all times level to the opposite area controller. The Alternate DNS server should level to its personal IP tackle (or the loopback tackle 127.0.0.1)
So within the screenshots under:
- 192.168.1.201 is DC01
- 192.168.1.202 is DC02

Wrapping up
Including a site controller to an current area is fairly easy as you’ve gotten seen. Just remember to configure the DNS servers accurately, in any other case, the replication will in all probability fail.
I hope you discovered this text helpful, you probably have any questions, simply drop a remark under.