


Sooner or later, you undoubtedly felt like your Linux expertise might use a bit of additional aptitude. Maybe you’ve encountered repetitive duties or wished for a smoother command-line interface. Properly, guess what? Your system holds the important thing: the .bashrc file, quietly nestled in your house listing!
Delve into the basic facets of the ~/.bashrc file on this tutorial to rework the way you work together along with your Linux system. You’re heading in the right direction, from customizing your command immediate to automating duties and establishing personalised shortcuts.
Say goodbye to mundane duties and hiya to a extra environment friendly and pleasant Linux expertise!
Conditions
Earlier than you mess around with the ~/.bashrc file, guarantee you have got the next in place to observe alongside:
- A Linux distribution is put in in your machine – This tutorial makes use of Ubuntu 20.04 LTS, however some other distribution works.
- A non-root person with sudo privileges.
What’s the Bash Run Instructions (.bashrc) File in Linux?
Think about the ~/.bashrc file in Linux like a secret toy field in your room. This toy field provides you and units up your favourite toys simply the way in which you want them as you open the field.
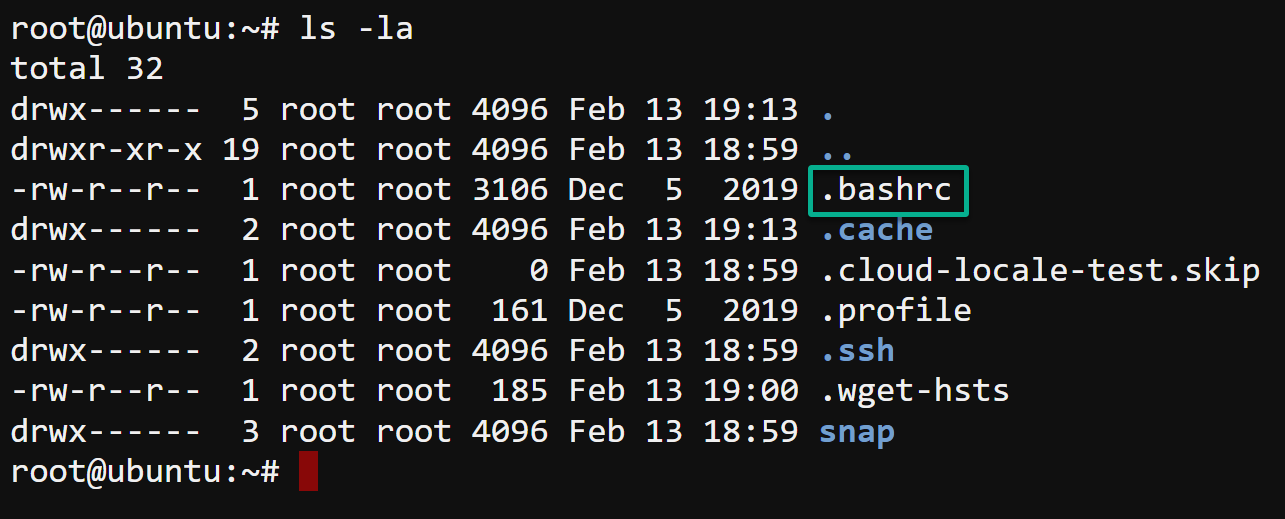
However as a result of ~/.bashrc is a secret file, it doesn’t present if you run the ls command. Properly, not until you specify to indicate hidden ones, too, with the -la parameter, as proven beneath.
Under, you’ll be able to see the .bashrc file is listed together with different ones which can be additionally hidden.
Defining Customized Aliases for Fast Command Executions
A brief definition wouldn’t reduce into realizing the ~/.bashrc file’s position in customizing your Linux expertise. So, how does this file work precisely? Whenever you crack open that ~/.bashrc file, one of many highly effective tips it enables you to obtain is defining customized aliases on your favourite instructions.
For instance, as a substitute of typing sudo apt-get replace to replace your system’s native package deal index, outline an alias within the .bashrc file that works the identical approach.
💡 Observe: This tutorial makes use of the basis account to run instructions (not advisable) for instance administrative duties, equivalent to system configuration. However, for safety causes, make sure you’re utilizing a non-root person with
sudoprivileges when performing related actions in your system.
To outline aliases for instructions, observe these steps:
1. Open the .bashrc file in your house listing (~/) by way of your most well-liked editor, like nano or vim.
💡 For those who’re utilizing a non-root account, prepend
sudoif you run instructions that require elevated privileges.
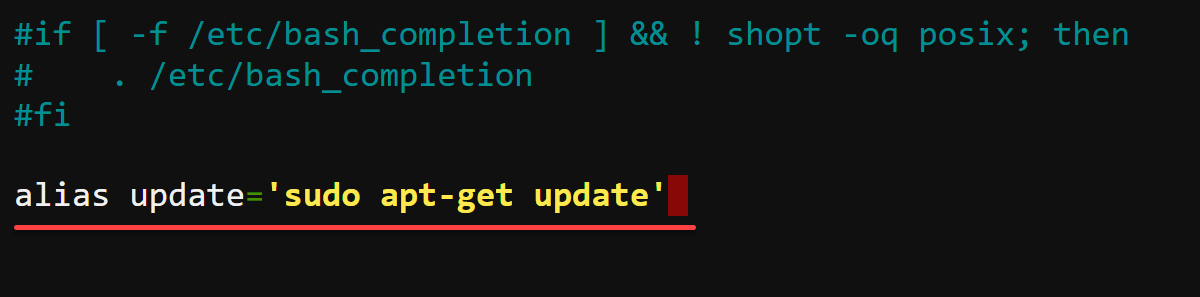
2. Subsequent, scroll to the underside of the file and outline an alias (i.e., replace) on your goal command (i.e., sudo apt-get replace), as demonstrated beneath.
alias replace="sudo apt-get replace"Save the modifications to the file, and shut the editor.
3. As soon as saved, execute the next command in your terminal to supply the ~/.bashrc file. This command produces no output to the terminal however applies your modifications.
4. Now, run the replace alias you outlined and ensure the corresponding command (sudo apt-get replace) takes place.
The output beneath confirms your replace alias works like operating the sudo apt-get replace command however with fewer keystrokes.

Crafting Features for Enhanced Productiveness
Defining an alias falls brief when you have got intricate operations to execute repeatedly. However don’t fear; capabilities are right here to step as much as the plate for an answer the place aliases may stumble.
In contrast to aliases that merely function a shorthand for a single command, capabilities embody a fancy collection of instructions designed to carry out intricate operations.
To appreciate how a perform works, perform the next:
1. Within the ~/.bashrc file, append the perform beneath referred to as manage_package (arbitrary).
When executed, this perform checks if a given package deal is put in, and primarily based on that info, it both updates or installs the package deal.
Keep in mind, this perform takes a single argument solely, which is the package deal title you’re excited about.
manage_package() {
  # Checks if the package deal is put in by querying the package deal standing with dpkg.
  # $1 is the placeholder for the primary argument handed to the perform (the package deal title).
  # The output is redirected to /dev/null to suppress it within the terminal.
  # The if assertion checks the exit standing of the dpkg -s command.
  # If the standing is 0 (package deal is put in),
  # proceeds to the primary block, updating the package deal.
  if dpkg -s "$1" &> /dev/null; then
    echo "Package deal '$1' is already put in. Updating..."
    sudo apt-get replace && sudo apt-get set up --only-upgrade "$1"
  # If the package deal isn't put in, print a message
  # and run sudo apt-get set up "$1" to put in the package deal.
  else
    echo "Package deal '$1' isn't put in. Putting in..."
    sudo apt-get replace && sudo apt-get set up "$1"
  fi
}2. With the perform added, save the modifications, shut the editor, then supply the ~/.bashrc file to use the modifications.
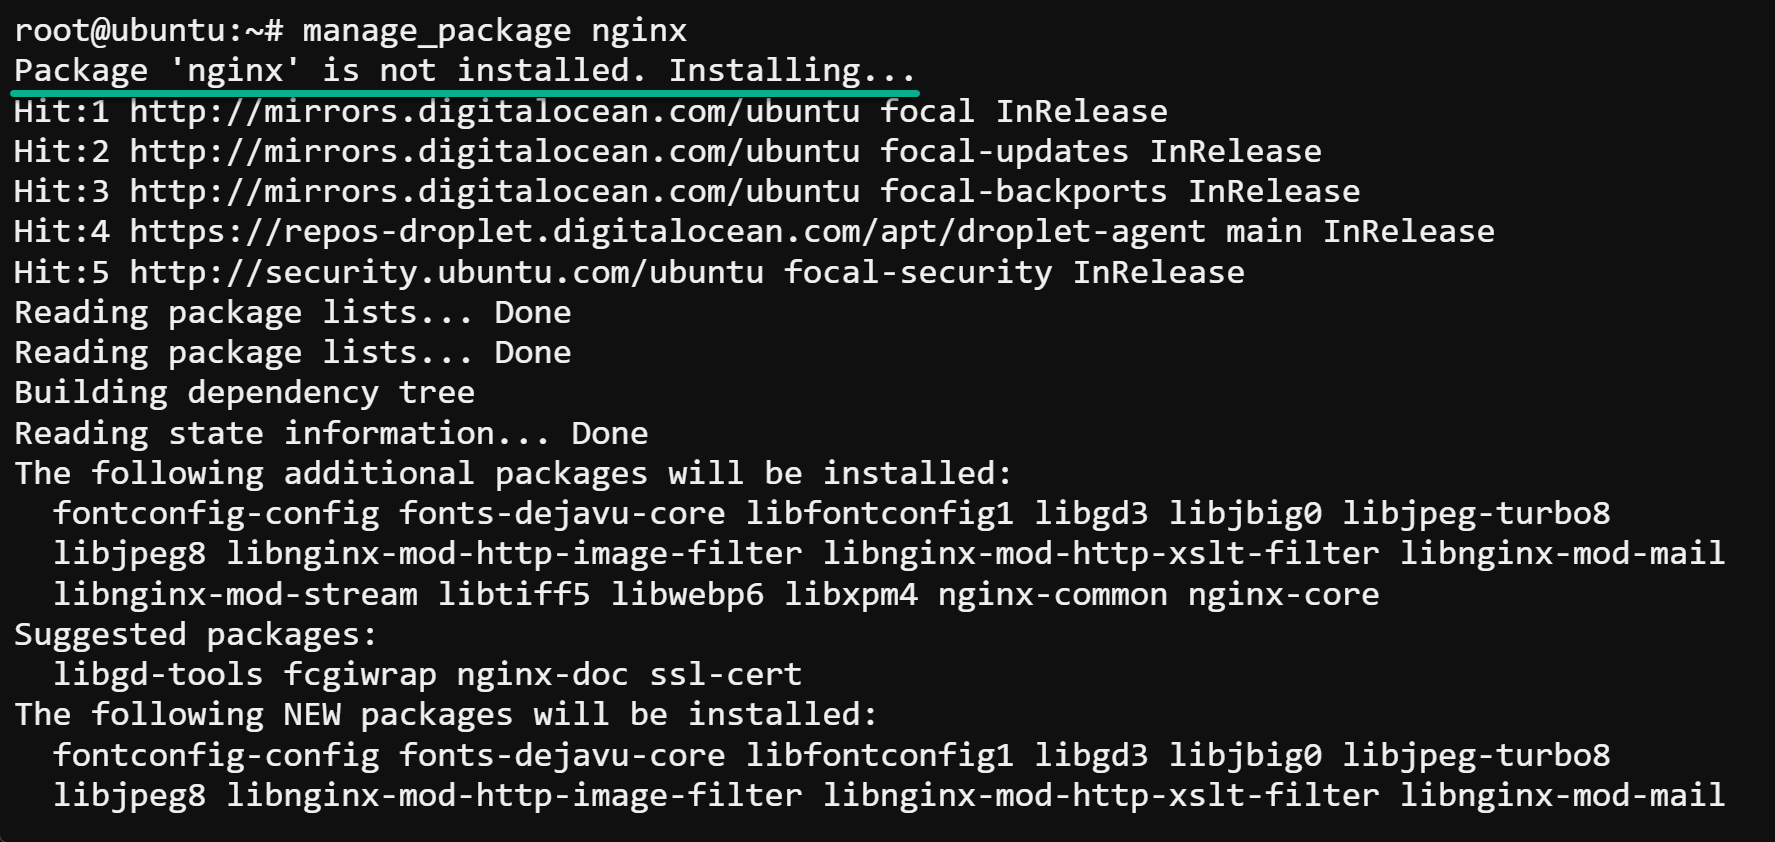
3. As soon as sourced, name the perform (manage_package), adopted by the package-name you want to verify, replace, or set up in your terminal, as proven beneath.
This tutorial’s alternative of package deal is NGINX, however make sure you substitute package-name along with your most well-liked package deal title.
manage_package package-nameAs you’ll be able to see within the output, capabilities like this make package deal administration a breeze by doing the heavy lifting for you. They robotically decide whether or not the package deal you need is there, so that you don’t should.
Personalizing Your Linux Terminal and Shell Immediate (PS1)
Consider your Linux terminal as a private workspace. Customizing your terminal transforms it right into a extra visually interesting and informative surroundings.
When spicing up your Linux terminal, the sky’s the restrict. You possibly can spruce your terminal up with a cool welcome message or tweak your shell immediate for that additional aptitude.
To personalize your Linux terminal, proceed with the next:
1. Add the next line on the backside of your ~/. bashrc file. This line prints a (greeting) message every time you begin a terminal session.
echo "Welcome to your terminal, $USER!”2. Subsequent, modify the Immediate String 1 (PS1) surroundings variable if it exists, or add the road beneath to your ~/.bashrc file. The PS1 variable exactly controls the first immediate string, which is the primary immediate displayed (i.e., person@linux:~#) when the shell is able to settle for instructions.
Modifying the PS1 variable enables you to change your shell immediate’s look, together with its colour, format, and show info. The next expression:
- Makes the username (
u) and hostname (h) seem in vivid inexperienced (32m). - Causes the present working listing (
w) to seem in vivid blue (34m). - Resets the colour attributes to the default colour (normally white) (
[�33[00m]) for the textual content that follows the immediate. This reset ensures the remainder of your terminal textual content stays unaffected.
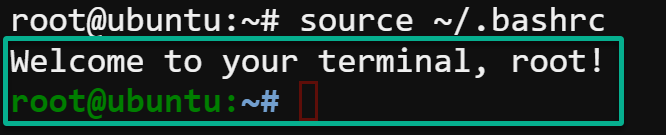
PS1='[�33[01;32m]u@h:[�33[01;34m]w$ [�33[00m]'3. Afterward, save and shut the file, then supply your ~/.bashrc file to use the modifications.
Discover beneath that the welcome message seems instantly after sourcing, and your shell immediate modifications its look as you outlined.
Launching Your Scripts: No Path? No Downside!
Enhancing your system to acknowledge further directories for executable instructions can streamline your workflow. Take operating scripts, for instance—no extra wrestling with lengthy paths, simply pure comfort.
To launch your scripts with out memorizing every path, full the steps beneath:
1. Execute the next command to make a listing (mkdir) referred to as ~/scripts (arbitrary)) devoted to storing your scripts.
2. Subsequent, open the ~/.bashrc file and add the next line to the top, which modifies the system’s command search path. This line prepends the ~/scripts listing to your present PATH variable.
This habits ensures the shell prioritizes your scripts over different executables with an identical names elsewhere within the system’s PATH.
export PATH="$HOME/scripts:$PATH"3. Save and shut the file, then supply it to use the modifications with out restarting the terminal.
4. Subsequently, run every command beneath to create a script referred to as testscript (arbitrary) in your ~/scripts listing.
These instructions don’t have any output, however this script is made executable (chmod), which prints a message (echo) to the terminal.
# Create a brand new Bash script referred to as 'testscript' within the ~/scripts listing
echo '#!/bin/bash' > ~/scripts/testscript

# Append a line to the 'testscript' that prints "Script is operating!" when executed
echo 'echo "Script is operating!"' >> ~/scripts/testscript

# Make the 'testscript' executable by altering its permissions
chmod +x ~/scripts/testscript
5. Lastly, execute your script (testscript) by calling its title within the terminal.
The system executes your script out of your devoted ~/scripts listing no matter your working listing within the terminal.
The output beneath confirms your script, and the system’s modified command search path works as anticipated.

Conclusion
Within the ~/.bashrc file world, you’ve journeyed by means of the basics of its position and the way the command aliases and capabilities customization works. Even personalizing the texture of your Linux terminal is now inside attain.
In addition to the seems, you’ve unlocked the comfort of executing scripts with out specifying their full paths every time by extending the PATH surroundings variable. These modifications save time and improve the person interface, making your interplay with Linux extra environment friendly and extra pleasant on the identical time.
As you shut this chapter on the ~/.bashrc file, do not forget that the true essence of Linux is its flexibility and the management it provides you. The journey continues, so why not thirst for a tailor-made expertise by exploring ZSH’s enhancements?
Dive into the ocean of themes and plugins that ZSH and frameworks like Oh My Zsh present. Watch your terminal remodel right into a extra productive and visually partaking workspace!