

Managing your virtualized infrastructure through a centralized administration device might sound too good to be true. Nicely, say howdy to the System Heart Digital Machine Supervisor (SCVMM).
With SCVMM, you’ll be strolling in what looks as if a fantasy land the place you may successfully handle and deploy digital machines (VMs). And on this tutorial, you’ll discover ways to carry out numerous administration duties in a virtualized surroundings through SCVMM.
Uncover SCVMM and begin virtualizing your dream infrastructure!
Stipulations
Earlier than you dive deep into the SCVMM, guarantee you’ve the next in place:
Downloading and Extracting the SCVMM Setup Information
SCVMM is a Microsoft administration device that lets you handle and deploy VMs throughout virtualization platforms, reminiscent of Hyper-V and VMware. However to benefit from SCVMM, you have to first obtain and extract the SCVMM information in your Home windows Server, as follows:
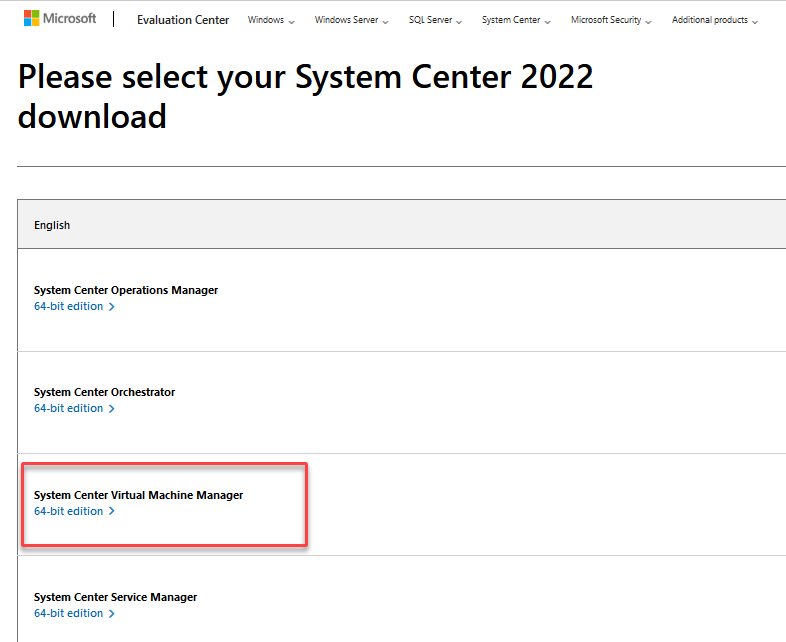
1. Open your most popular internet browser, navigate to Microsoft’s official analysis heart web page, and obtain the SCVMM set up file.
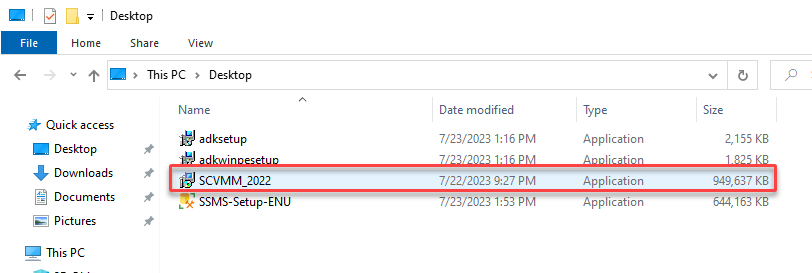
2. Subsequent, open the SCVMM bundle (i.e., SCVMM_2022).
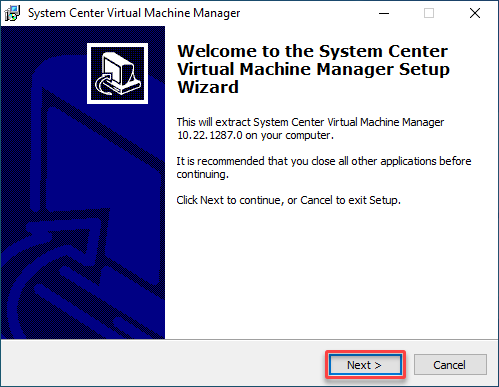
3. On the welcome display, click on Subsequent to extract the SCVMM setup information.
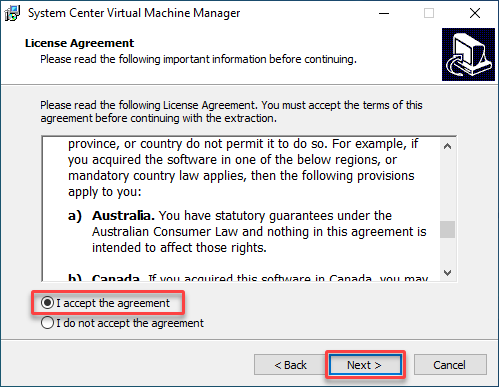
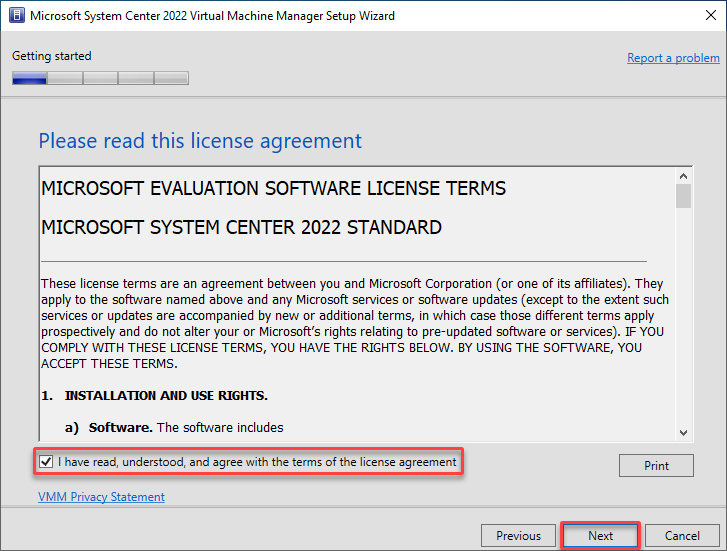
4. Now, settle for the license settlement, and click on Subsequent.
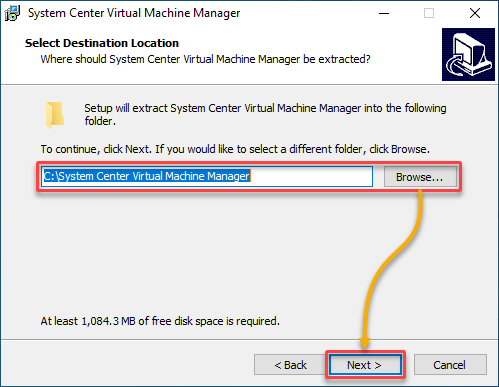
5. Select an applicable folder location to extract information, and click on Subsequent.
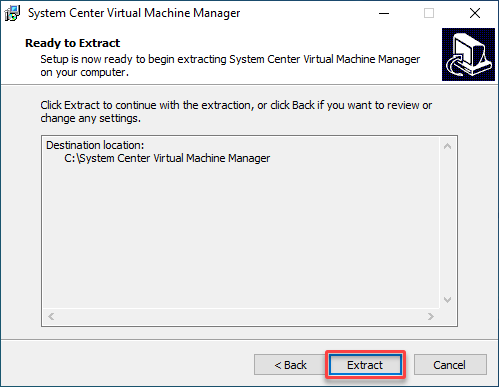
6. Verify the settings and vacation spot folder, and click on Extract to extract the setup information.
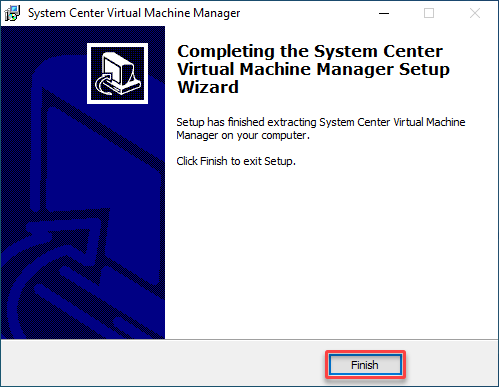
7. Lastly, click on End to shut the wizard.
Putting in and Configuring SCVMM on a Home windows Server
Extracting the setup information doesn’t robotically set up SCVMM. Like every other instruments/software program, you have to set up and configure SCVMM in your Home windows Server.
To put in SCVMM, observe these steps:
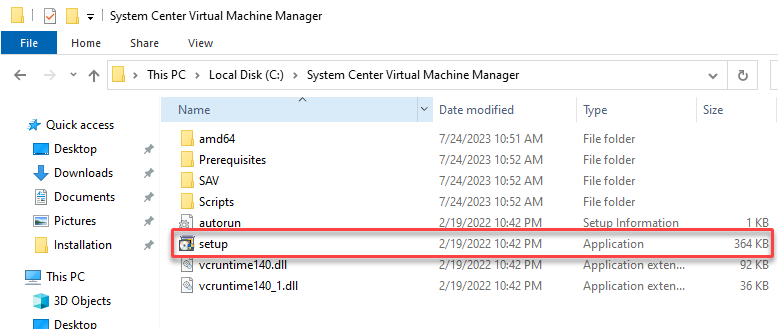
1. Open your file supervisor, navigate to the place you extracted the SCVMM setup information, and launch the setup.exe file within the System Heart Digital Machine Supervisor folder.
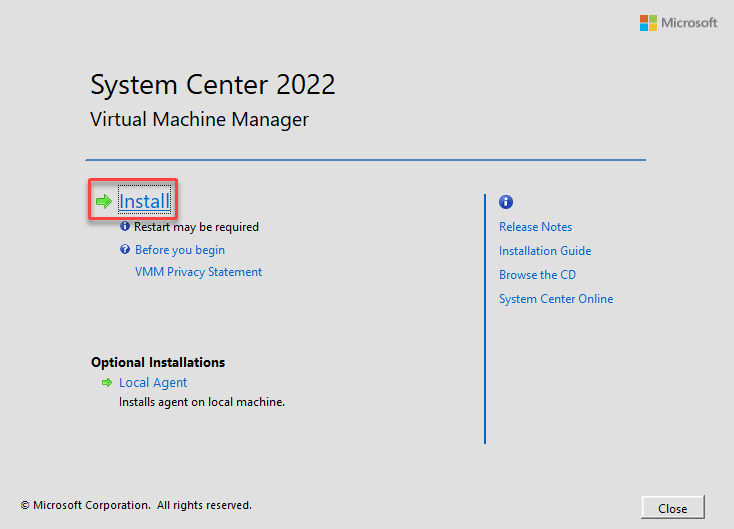
2. Subsequent, within the SCVMM immediate, click on Set up to start putting in SCVMM.
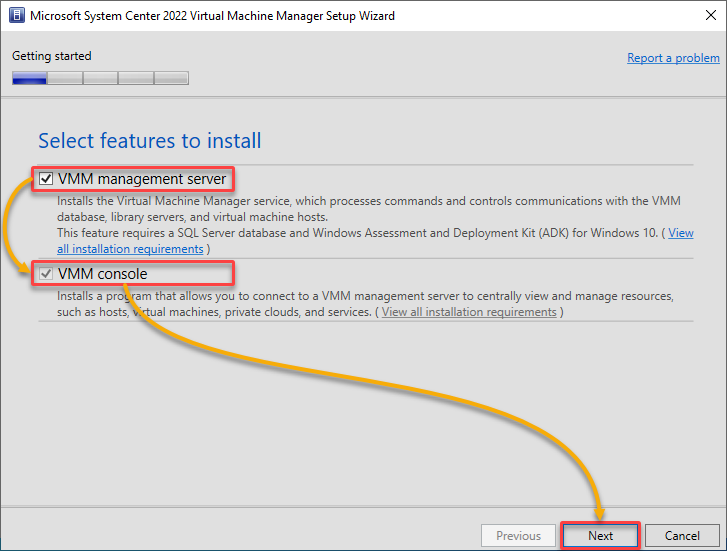
3. Tick the VMM administration server field and the VMM console field that seems, and click on Subsequent.
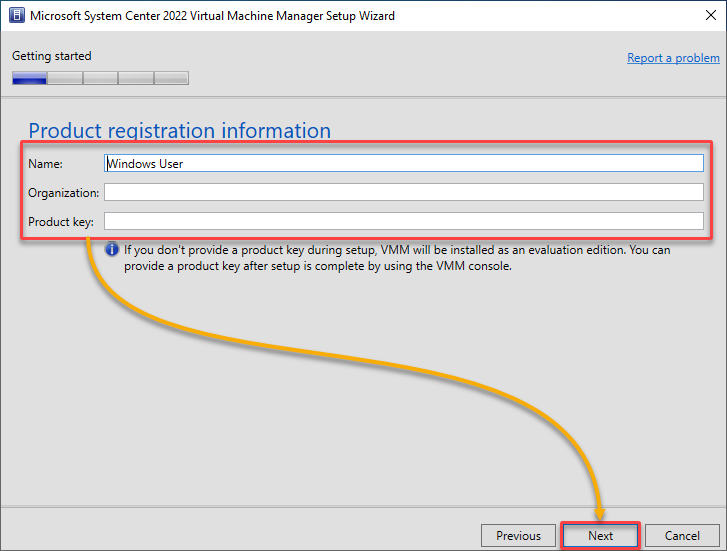
4. Fill within the Product registration data on the subsequent web page, and click on Subsequent.
5. Settle for the license settlement, and click on Subsequent.
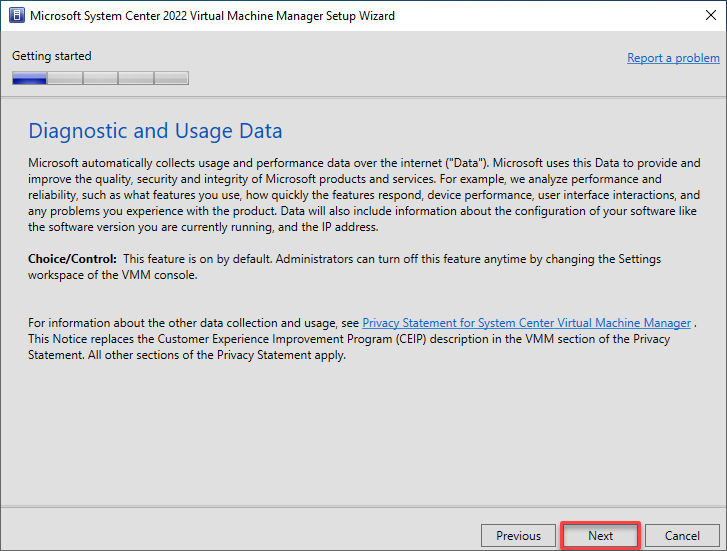
6. Learn in regards to the Diagnostic and Utilization Information, and click on Subsequent.
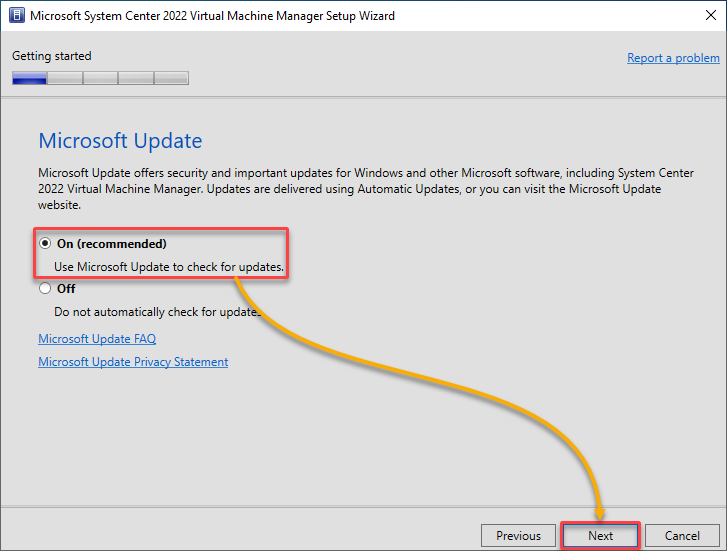
7. Flip On the Microsoft Replace for updating SCVMM, and click on Subsequent.
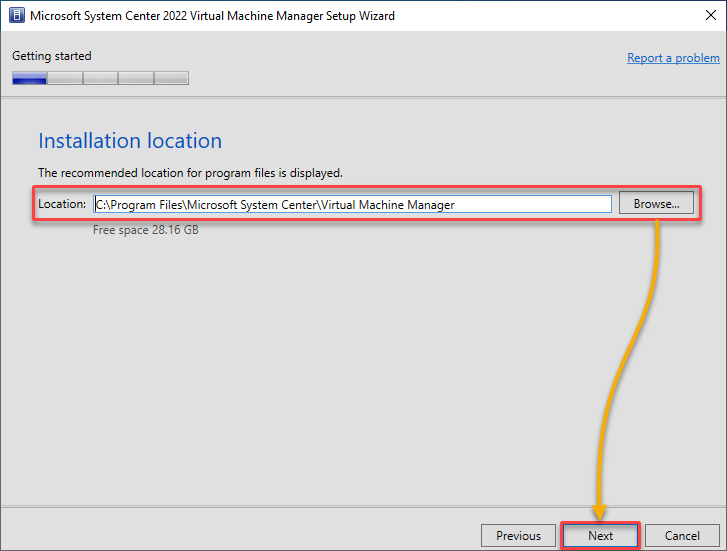
8. Select a location to put in SCVMM, and click on Subsequent.
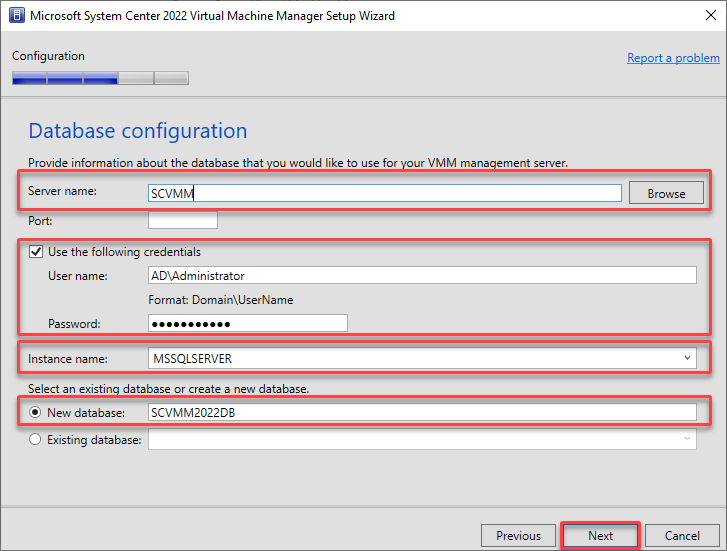
9. Configure your database, as proven under:
- Server title – Browse or enter the title of your laptop operating your SQL Server.
- Use the next credentials – Tick this field, fill within the Person title and Password of your laptop operating the SQL Server.
- Occasion title – Select your Microsoft SQL Server’s occasion title.
- New database – Select this selection to create a brand new database referred to as SCVMM2022DB (arbitrary).
As soon as configured, click on Subsequent to proceed.
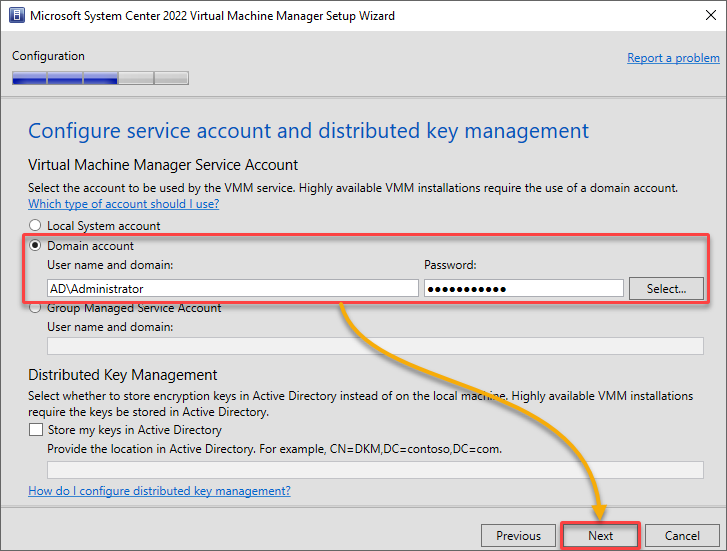
10. Subsequent, present your area’s Person title and Password, and click on Subsequent.
💡 Optionally, you may configure the distributed key administration. Distributed key administration permits the management of encryption keys for securing knowledge throughout a number of areas. In SCVMM, the encryption keys are saved within the Lively Listing.
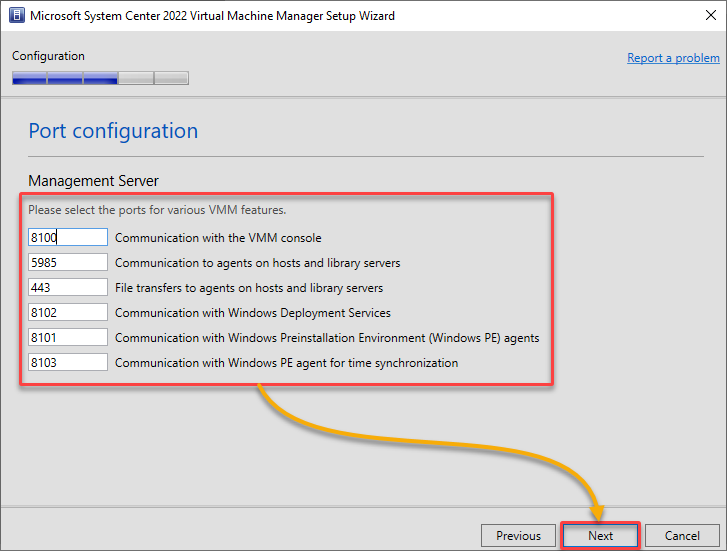
11. Now, configure or go away the default port settings, and click on Subsequent to proceed.
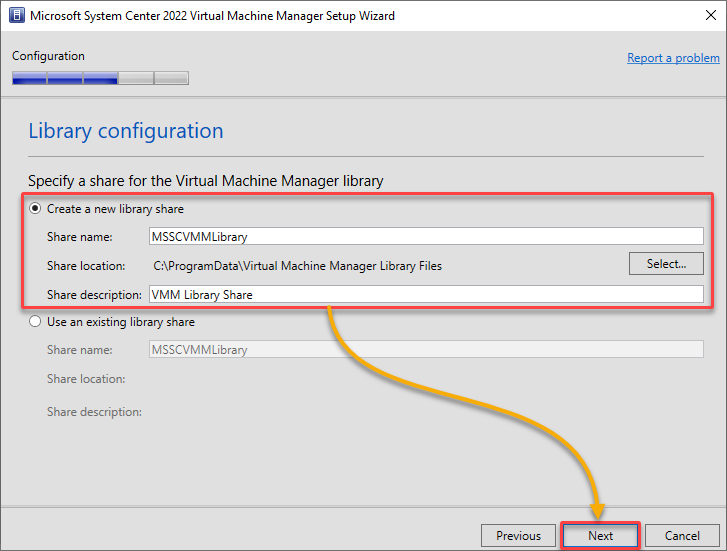
12. Select the Create a brand new library share possibility, specify the VMM library Share title, location, and description, and click on Subsequent.
The VMM Share Library lets you create and handle a centralized library of sources, reminiscent of VM templates, ISO photos, scripts, and different information. Totally different SCVMM situations inside your virtualized infrastructure can share and entry this library.
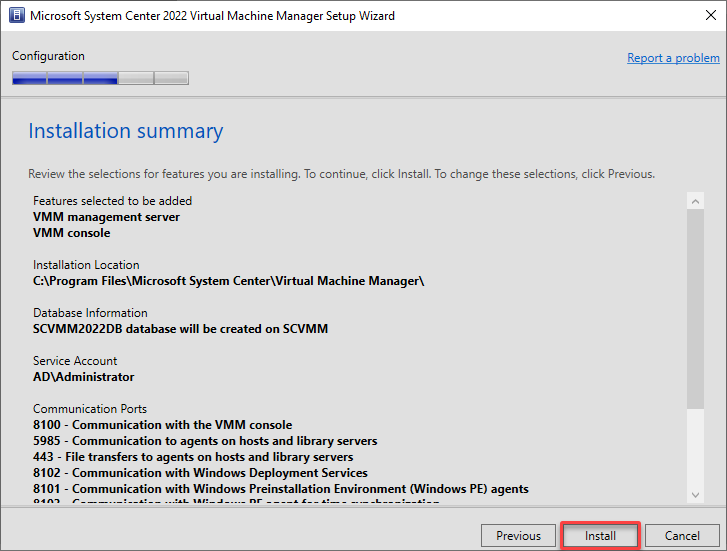
13. Confirm the set up abstract, and click on Set up.
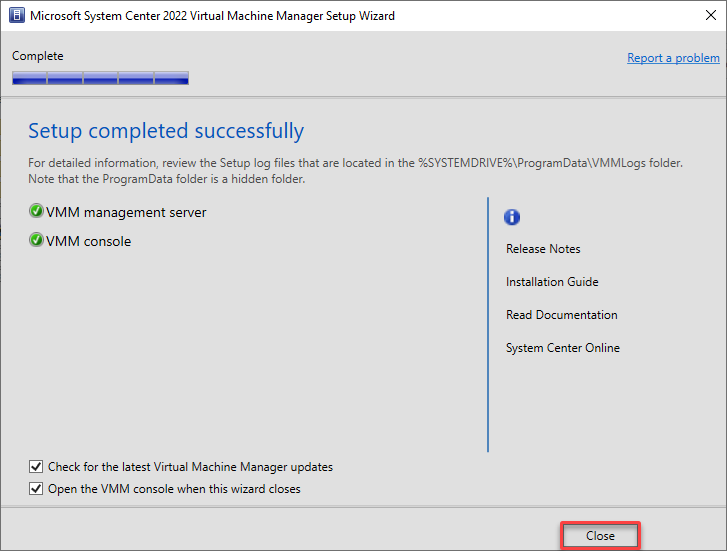
14. As soon as put in, click on Shut to exit the wizard.
Including Virtualization Hosts
After finishing the set up and preliminary configuration, you might be nearly prepared to make use of SCVMM to handle your virtualization surroundings. However first, you want a virtualization host, a bodily server, that runs a hypervisor and hosts VMs.
SCVMM lets you centrally handle and administer these virtualization hosts, whatever the underlying hypervisor expertise, reminiscent of Hyper-V or VMware vSphere.
So as to add a virtualization host within the SCVMM, do the next:
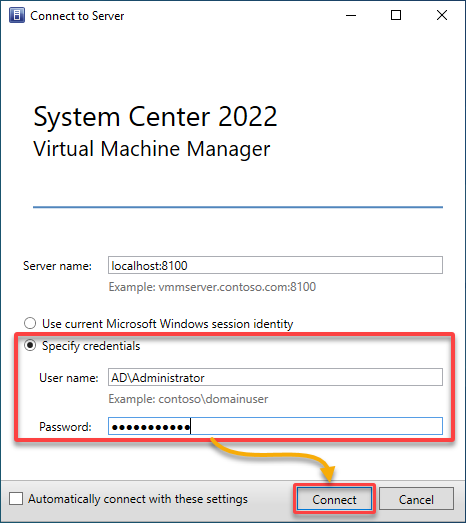
1. Launch SCVMM you put in in your Home windows Server.
2. Subsequent, present your area credentials to hook up with your SCVMM server.
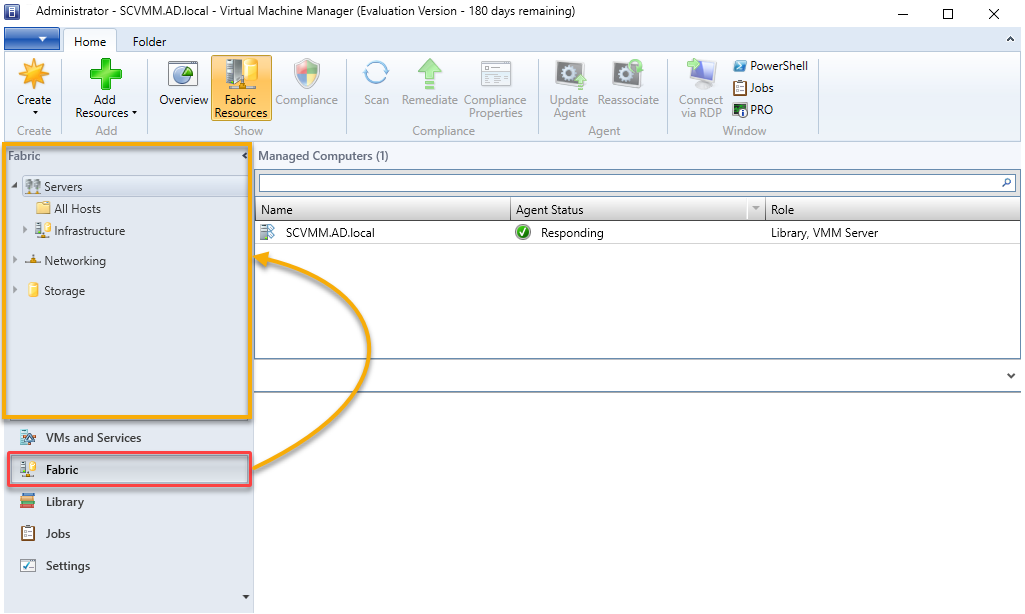
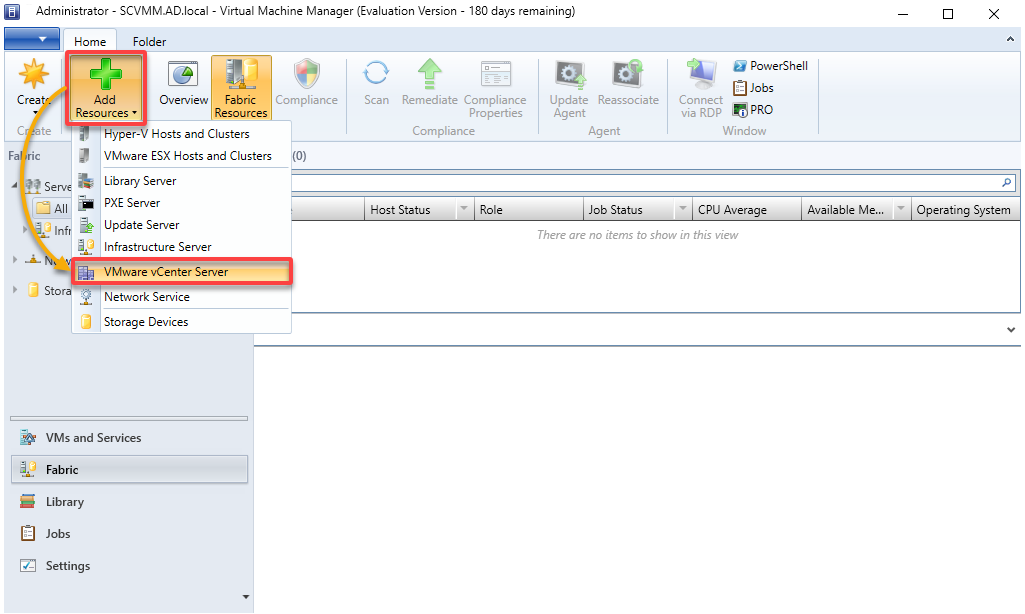
3. Within the SCVMM console, navigate to Material (bottom-left), which opens the Material workspace. This workspace is the place you may handle infrastructure components, together with virtualization hosts.
4. Now, click on the Add Sources drop-down, and select VMware vCenter Server to provoke including a vCenter Server.
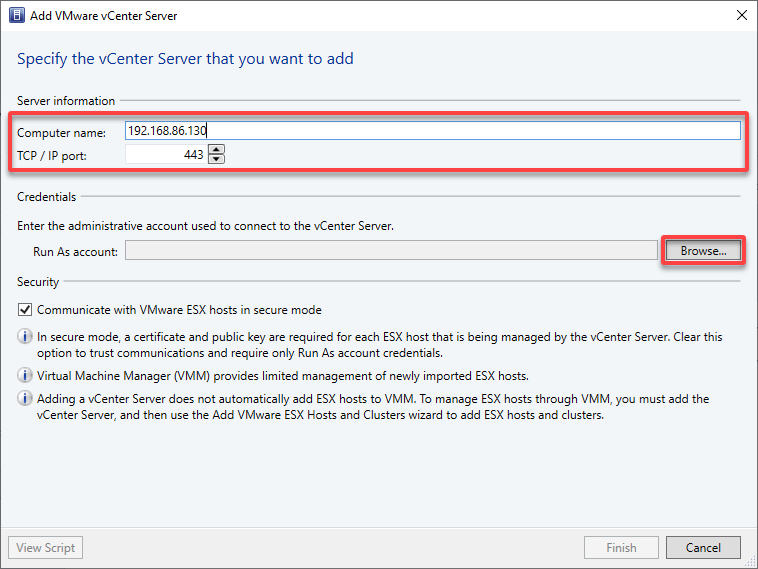
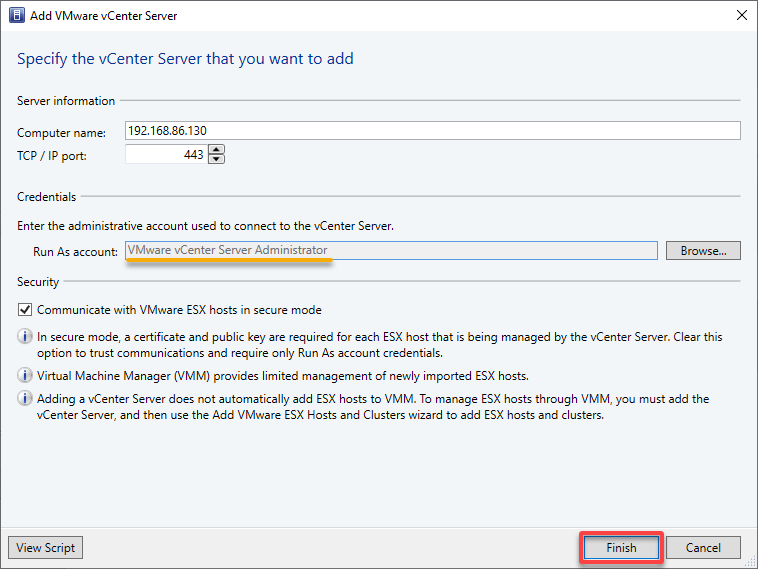
5. Specify the vCenter Server you want to add as follows:
- Laptop title – Specify the title (IP handle) of your vCenter Server.
- TCP / IP port – Add the port wanted to hook up with the vCenter server (443 by default).
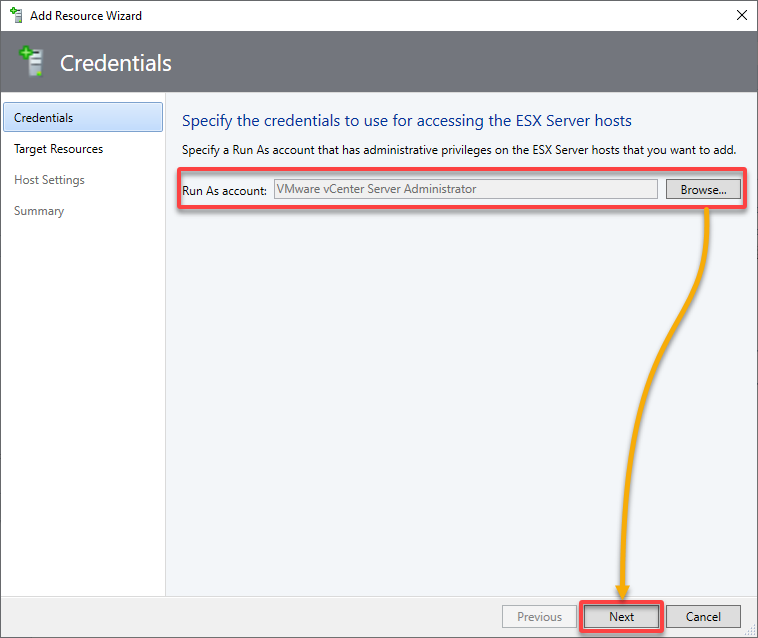
- Run As account – Click on Browse to decide on the executive account you used to hook up with the vCenter Server.
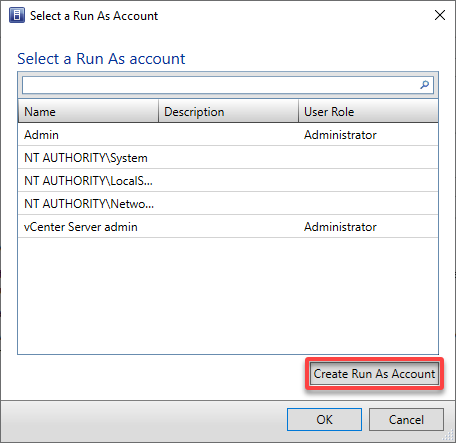
6. Choose an current consumer from the listing on the Choose a Run As Account window or click on Create Run As Account to create a brand new one.
However on this instance, click on Create Run As Account to create a brand new consumer account.
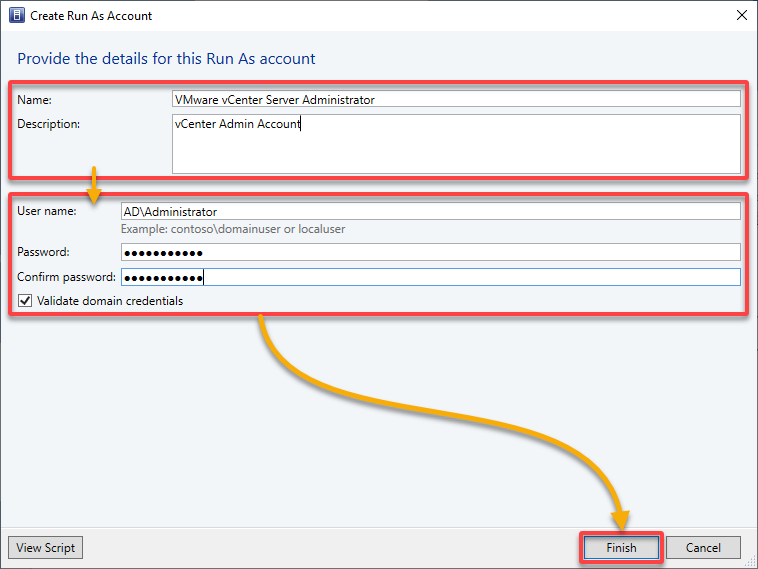
7. Present a Title and Description for the Run As account, authenticate together with your vSphere credentials, and click on End to save lots of the entry.
8. With the Run As account created, click on End so as to add a vCenter Server.
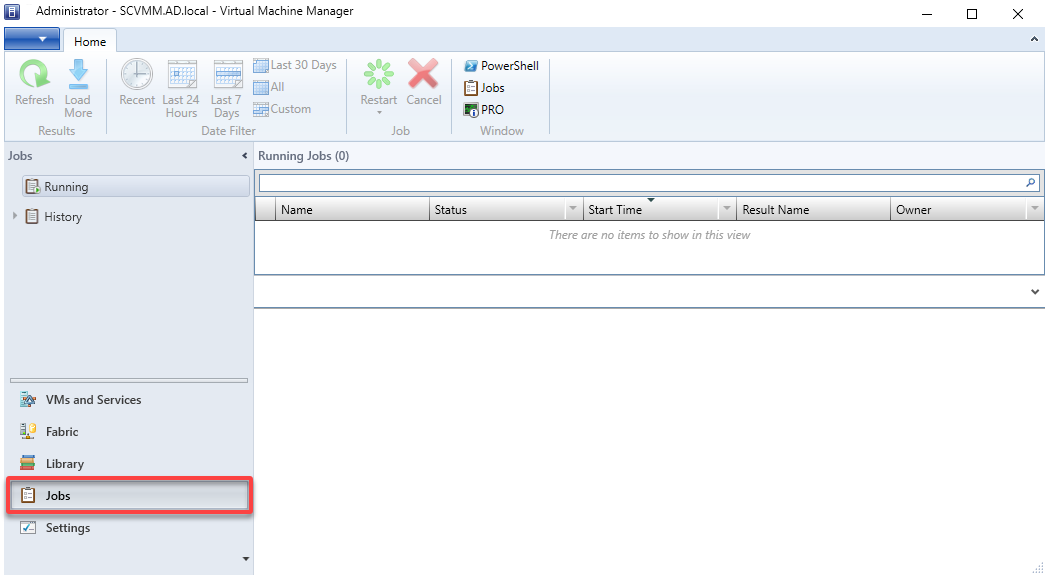
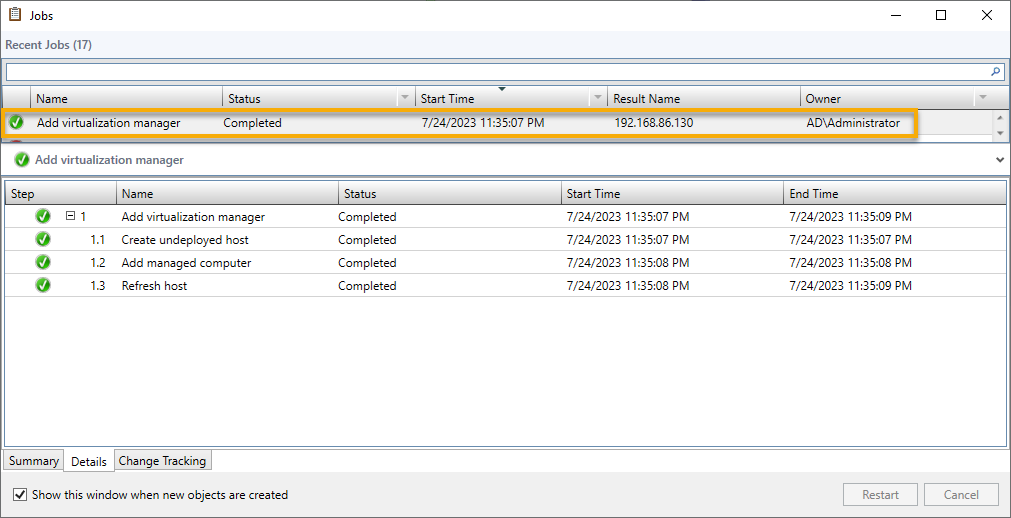
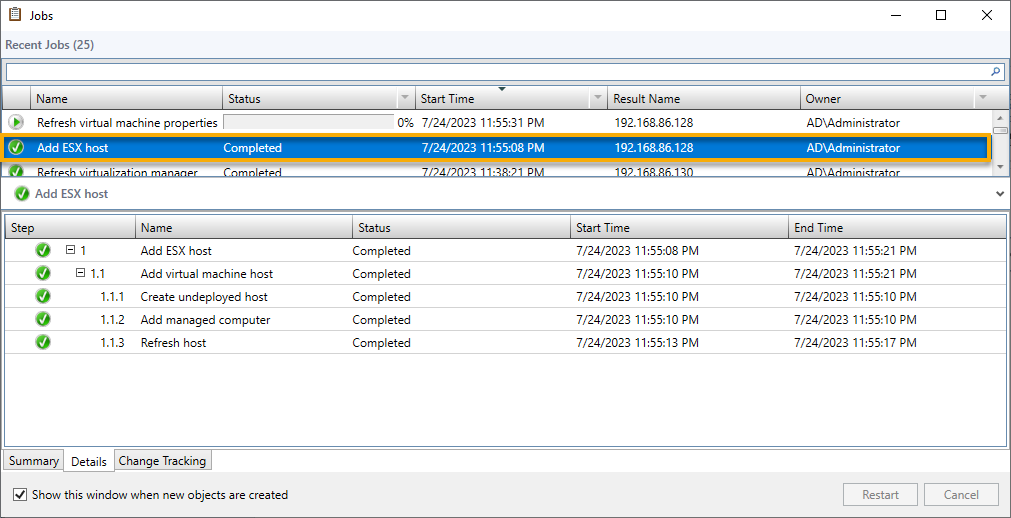
9. Navigate to the Jobs tab, as proven under, to view all jobs.
Under, you may see the Add virtualization supervisor job has been accomplished, which signifies you’ve efficiently added a vCenter Server.
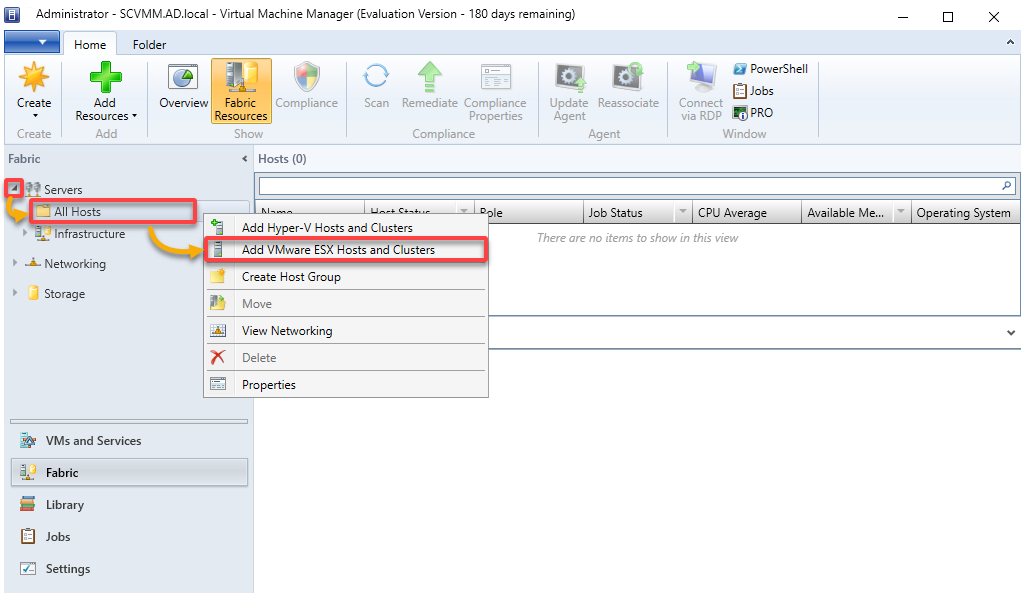
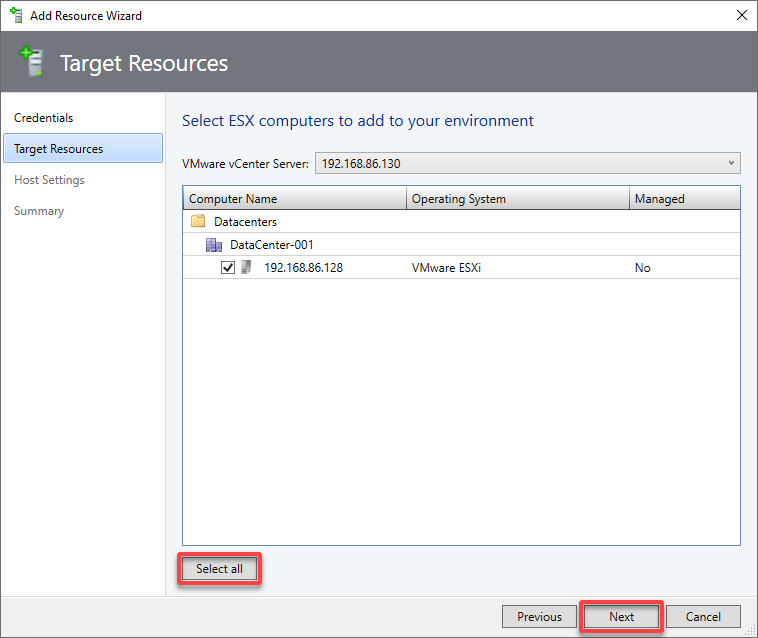
10. Beneath Material, develop Servers, right-click All Hosts, and choose Add VMware ESX Hosts and Clusters. A wizard opens the place you may add new ESXi host sources (step 11).
11. Choose the credentials to your vCenter Server on the Add Useful resource Wizard, and click on Subsequent.
12. Within the Goal Sources web page, click on the Choose all button to tug in all of the hosts within the cluster, and click on Subsequent.
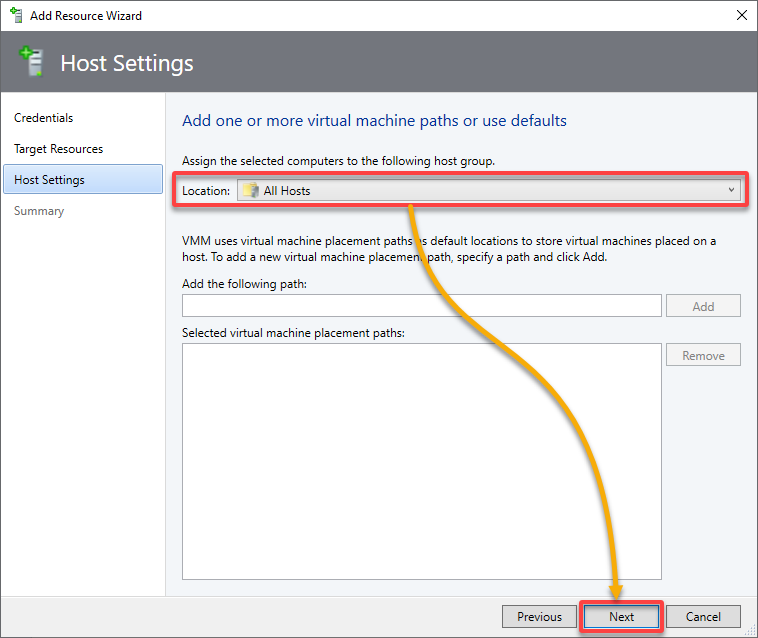
13. Choose the placement to import the VMware ESXi hosts, and click on Subsequent.
14. Overview your chosen settings, and click on End so as to add ESXi host sources to SCVMM.
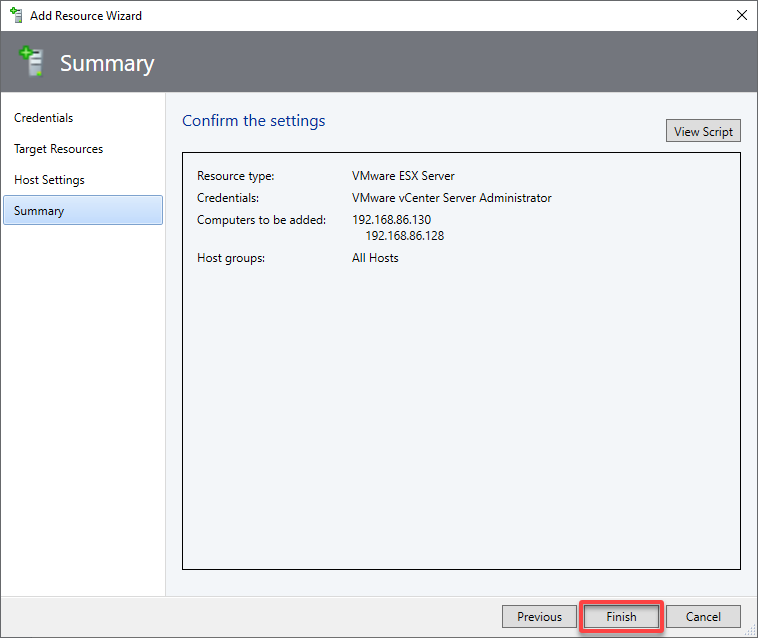
The Jobs window reveals the job so as to add the ESXi hosts to SCVMM accomplished.
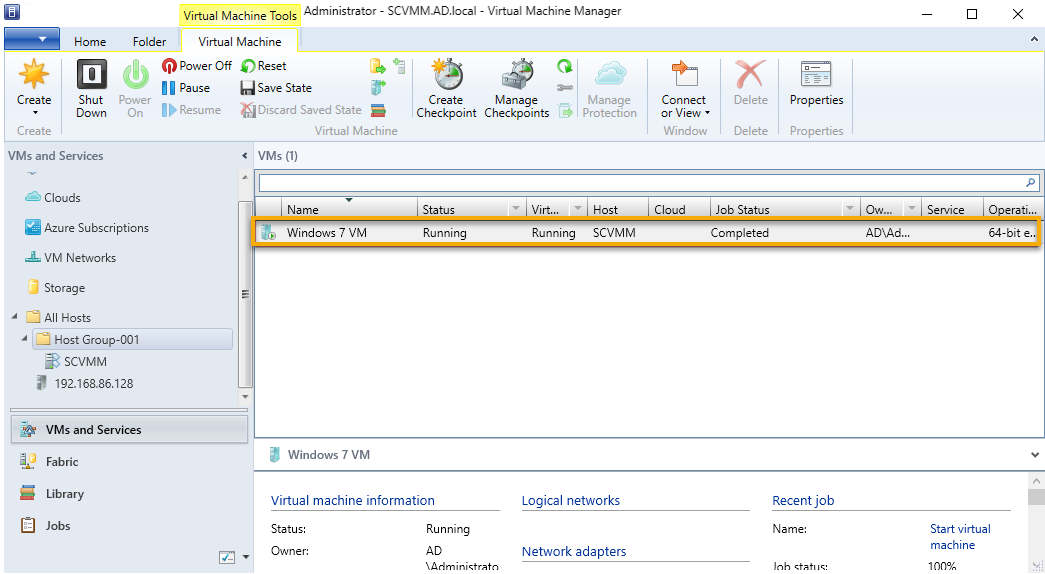
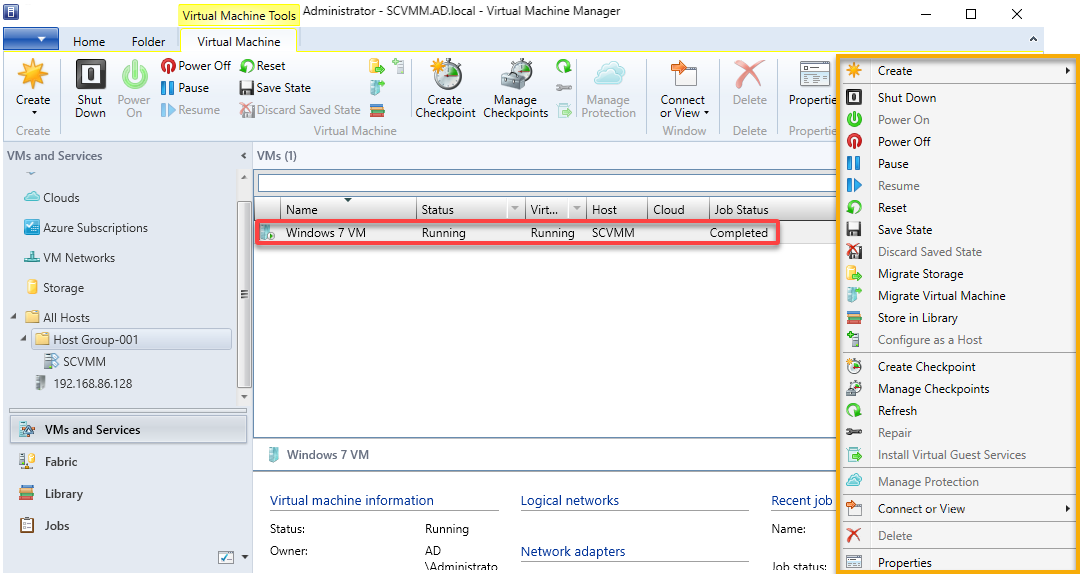
15. Finally, navigate to VMs and Providers, and right-click on one of many VMs listed to view the out there choices.

Creating and Configuring Host Teams
As your virtualization hosts at the moment are managed by SCVMM 2022, you can begin creating and managing VMs by way of the SCVMM console. However first, you want a solution to arrange and handle virtualization hosts.
To create a bunch group, a neighborhood container, inside SCVMM, observe these steps:
1. Navigate to Material workspace, right-click the All Hosts folder, and select Create Host Group to create a brand new host group.
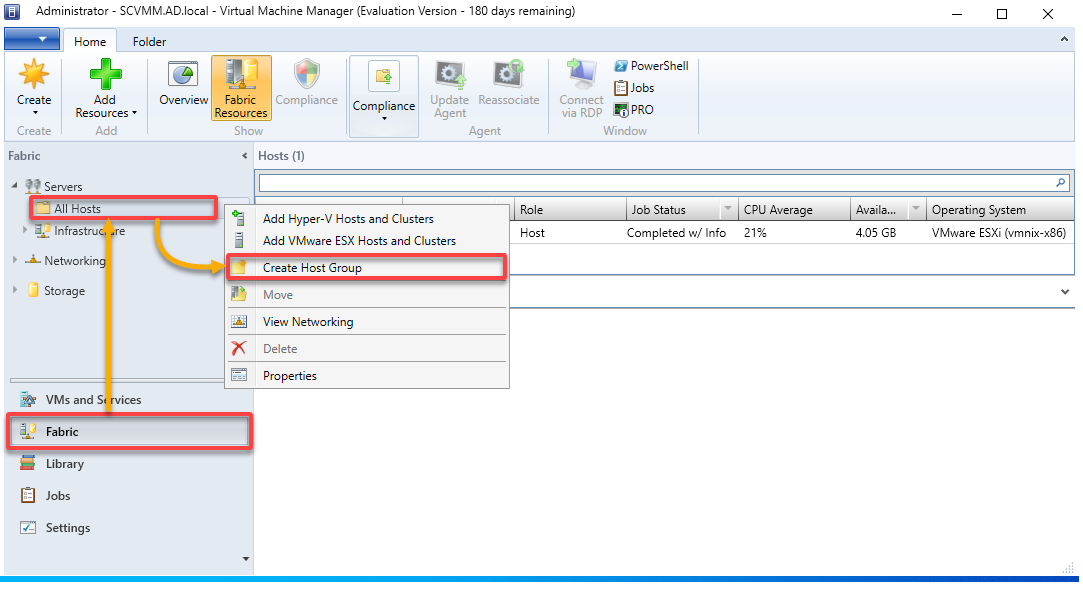
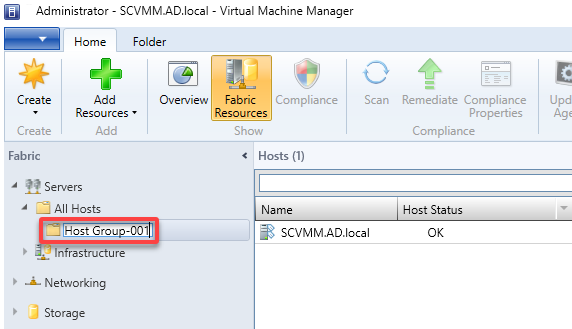
2. Subsequent, present a descriptive host group title (i.e., Host Group-001).
3. Proper click on in your newly-created host group, and choose Properties to entry its properties in a brand new window.
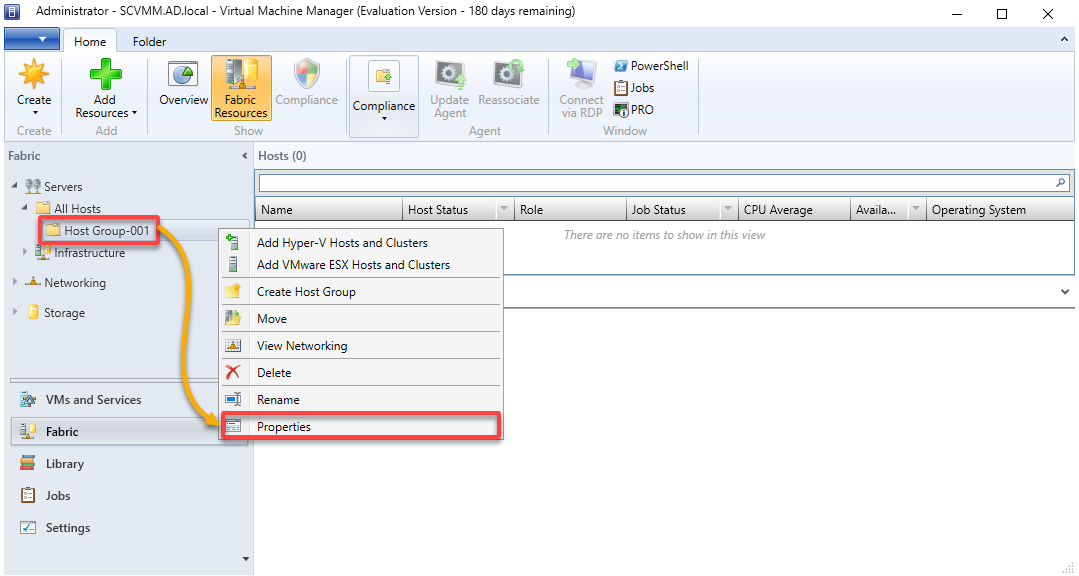
4. Now, change the Title, Location, and Description of your host group as you want, and click on OK.
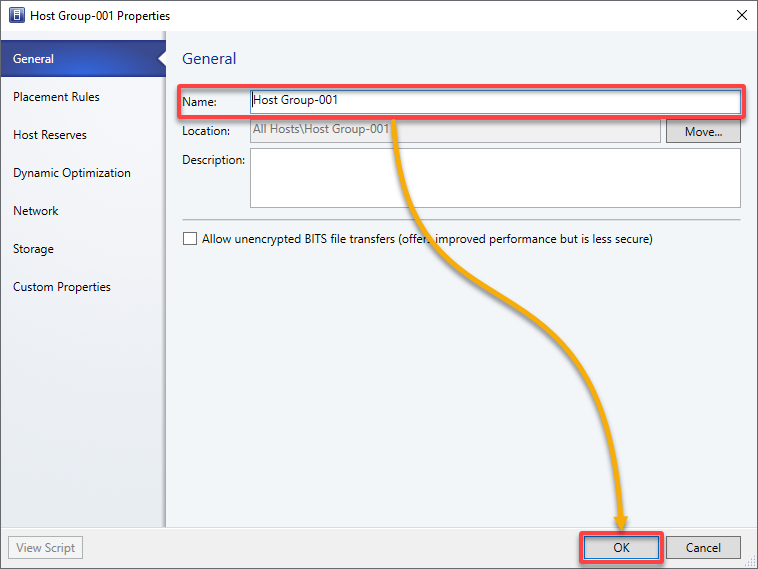
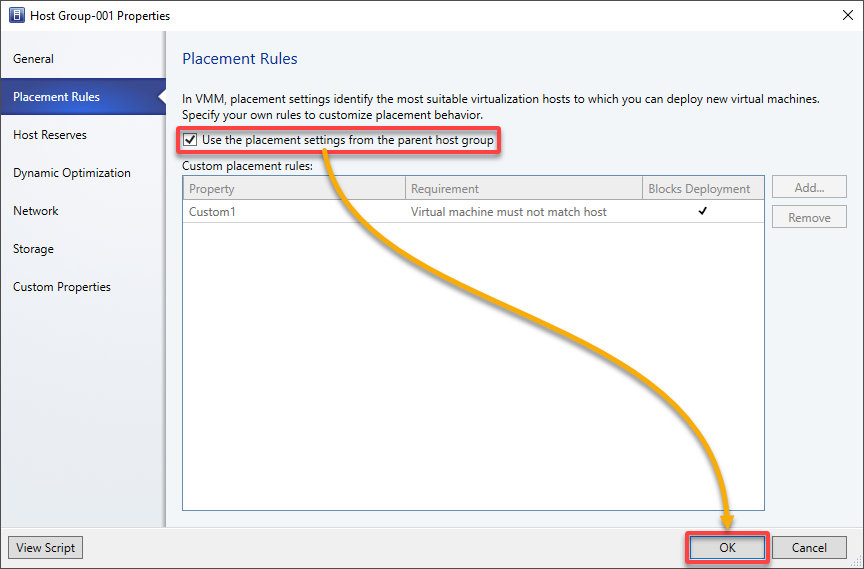
5. Go away the position guidelines settings as default, the place a bunch group makes use of the position settings from the dad or mum host group, and click on OK.
💡 Optionally, configure the position settings for the Host Group, which outline the popular host scores, load-balancing settings, and availability choices.
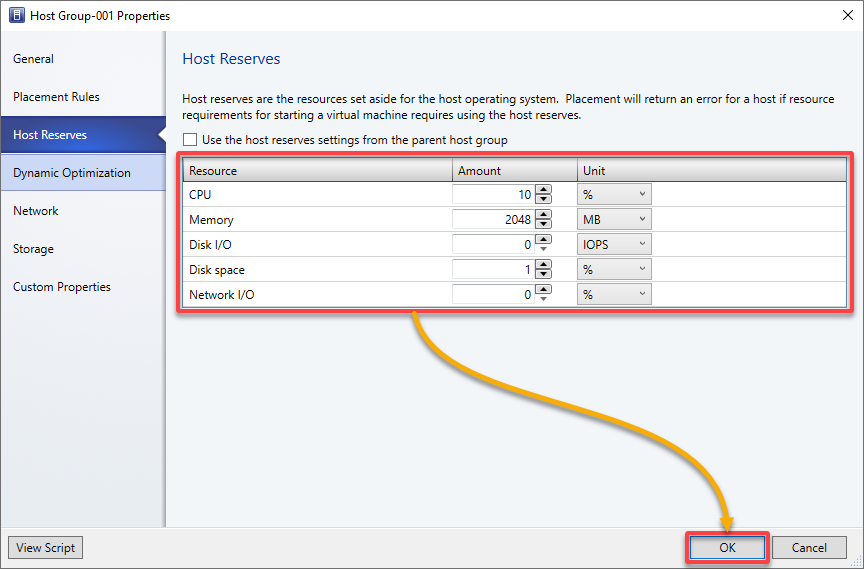
6. Beneath Host Reserves, configure the host reserve values for the CPU, Reminiscence, Disk I/O, Disk house, and Community I/O, and click on OK.
Host reserve settings allow you to specify the sources VMM units apart for the host O/S to make use of.
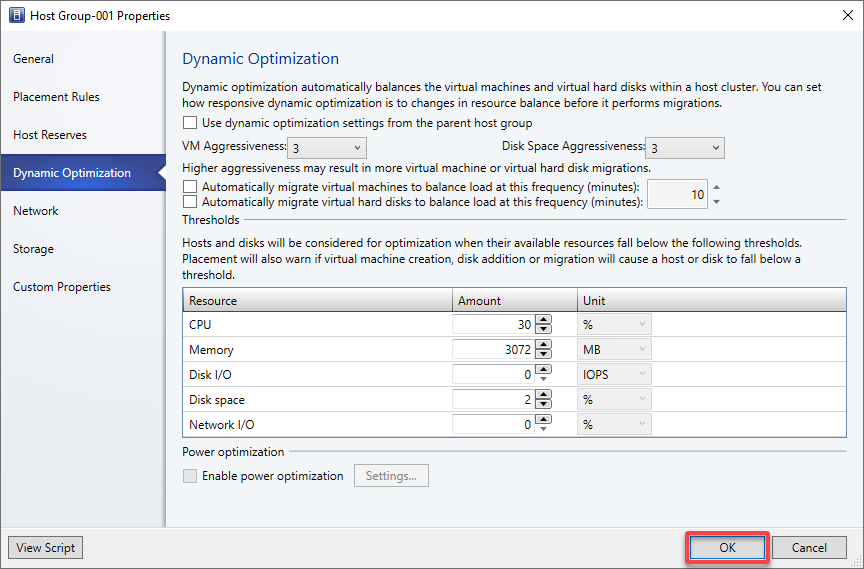
7. Configure dynamic optimization and energy optimization settings, and click on OK.
Dynamic optimization balances the VM’s load inside a bunch cluster, whereas Energy optimization allows VMM to evacuate hosts of a balanced cluster and switch them off to save lots of energy.
8. Configure the community settings as follows:
- Tick the field to Inherit community native sources from dad or mum host teams.
- Useful resource kind – Choose a useful resource kind from the drop-down to view the community sources related together with your chosen host group.
As soon as configured, click on OK to proceed.
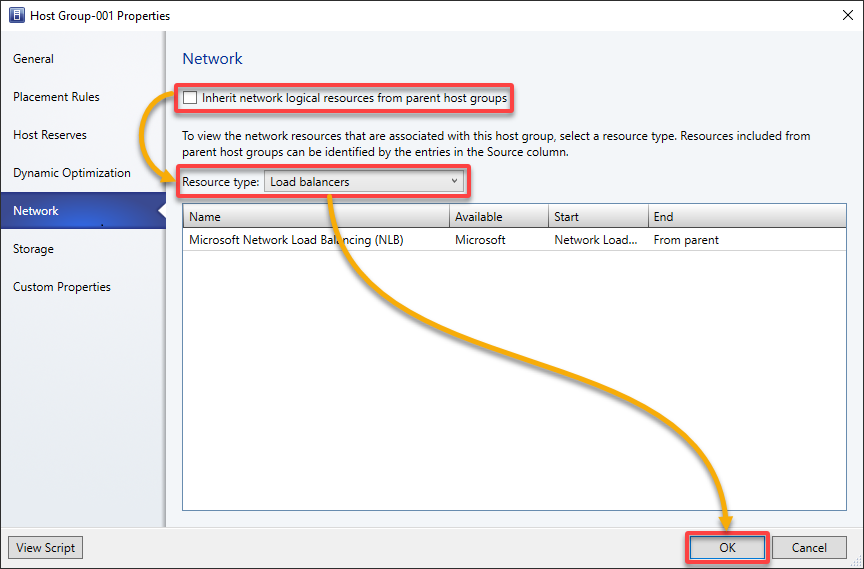
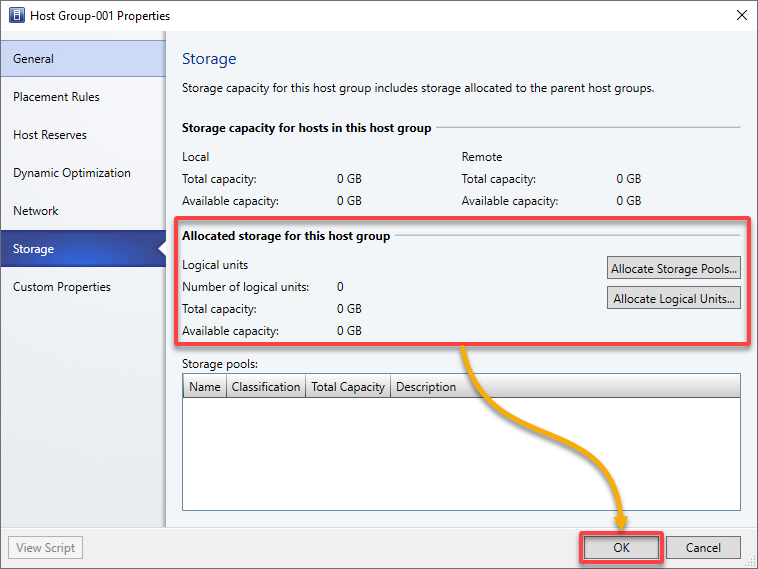
9. View and allocate storage to your host group, and click on OK.
10. Handle customized properties for Digital Machine, Digital Machine Template, Host, Host Cluster, Host Group, Service Template, Service Occasion, Laptop Tier, and Cloud, and click on OK.
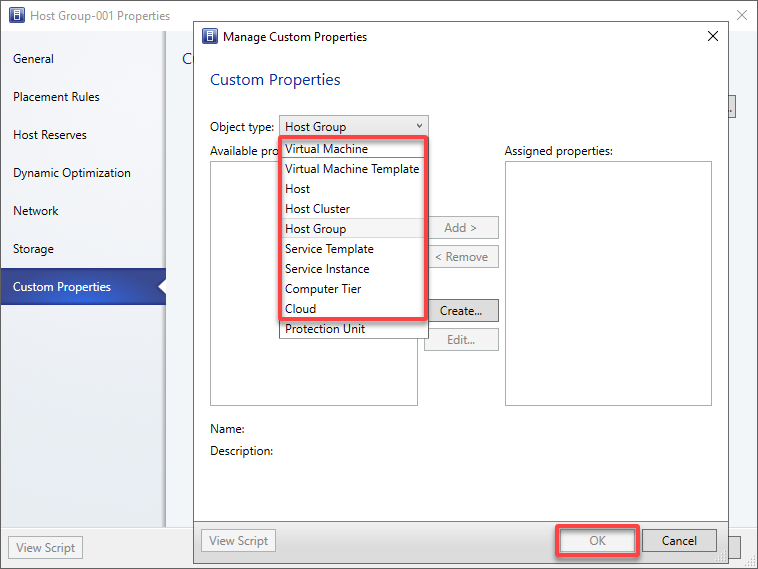
11. Lastly, click on OK to save lots of the adjustments.

Assigning a Host to an Present Host Group
With a bunch group created in SCVMM, you have to assign a bunch to the host group, so you may shortly handle and apply frequent settings to a number of hosts concurrently.
This setup helps streamline your virtualized infrastructure administration and simplifies configuring networking, storage, and different host-specific settings throughout a bunch of hosts.
To assign a bunch to your host group:
Proper click on on the host to assign to your host group and choose Transfer to Host Group to provoke assigning the host.
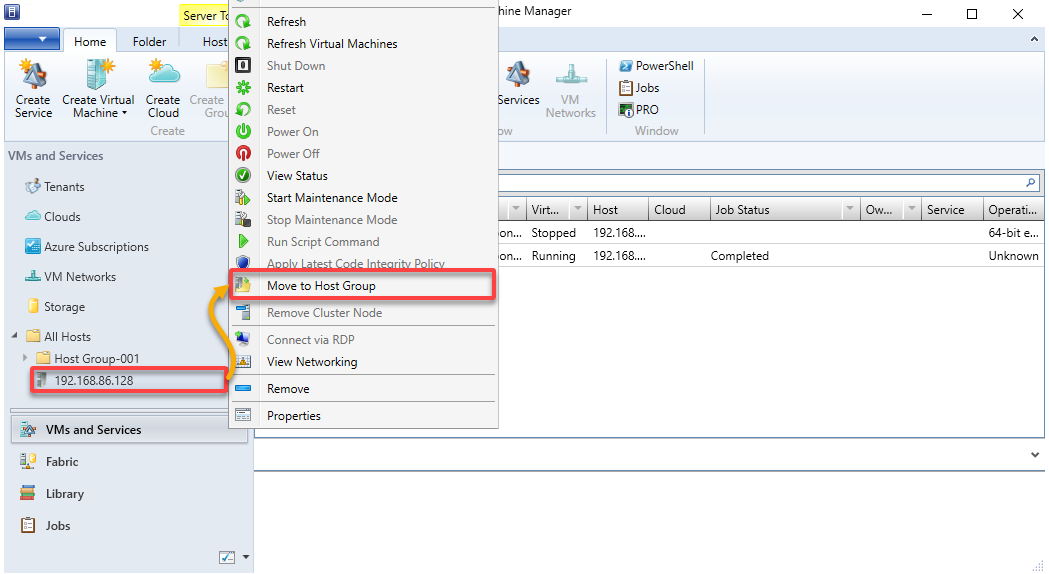
Now, select the goal host group from the Mother or father host group drop-down listing, and click on OK to substantiate.
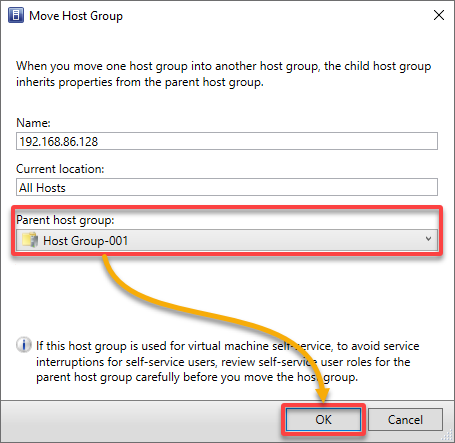
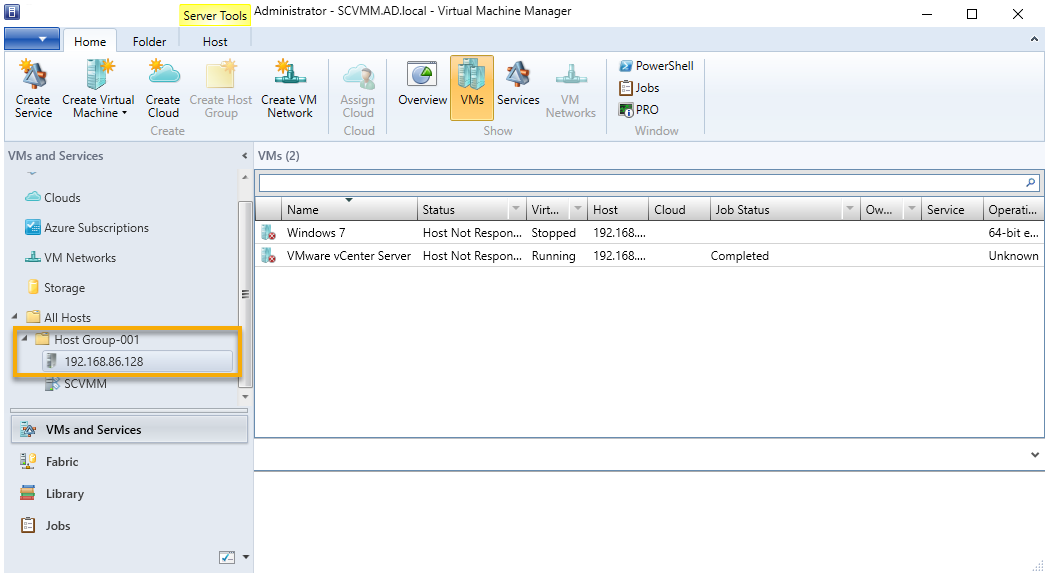
After confirming the transfer, the host is assigned to the brand new host group. The host is listed beneath the corresponding host group, as proven under.
Creating and Deploying VMs in SCVMM
In SCVMM, VMs type the elemental models of virtualized infrastructure you may create, handle, and function. With SCVMM’s cross-platform administration capabilities, you may create VMs for physical-to-virtual (P2V) and virtual-to-virtual (V2V) migrations.
To create a VM in SCVMM, observe these steps:
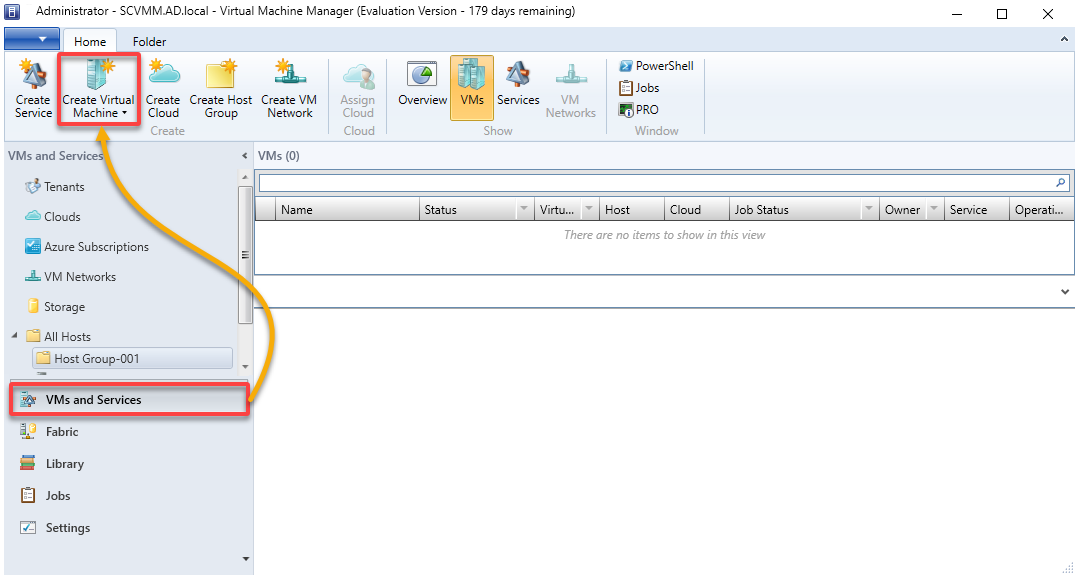
1. Navigate to VMs and Providers (left pane), and click on Create Digital Machine within the toolbar to provoke creating a brand new VM.
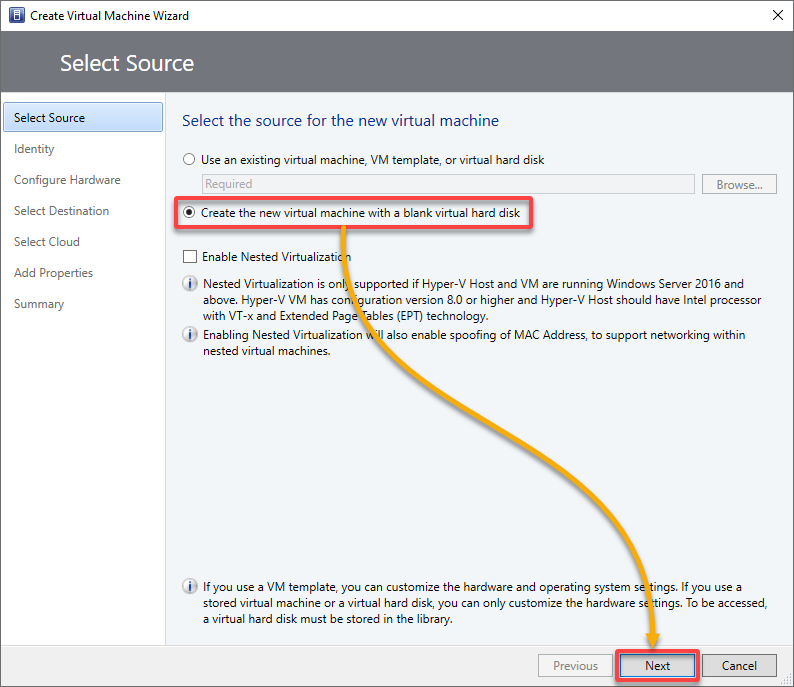
2. Within the wizard under, select the Create the brand new digital machine with a clean digital arduous disk possibility since you might be creating your first VM, and click on Subsequent.
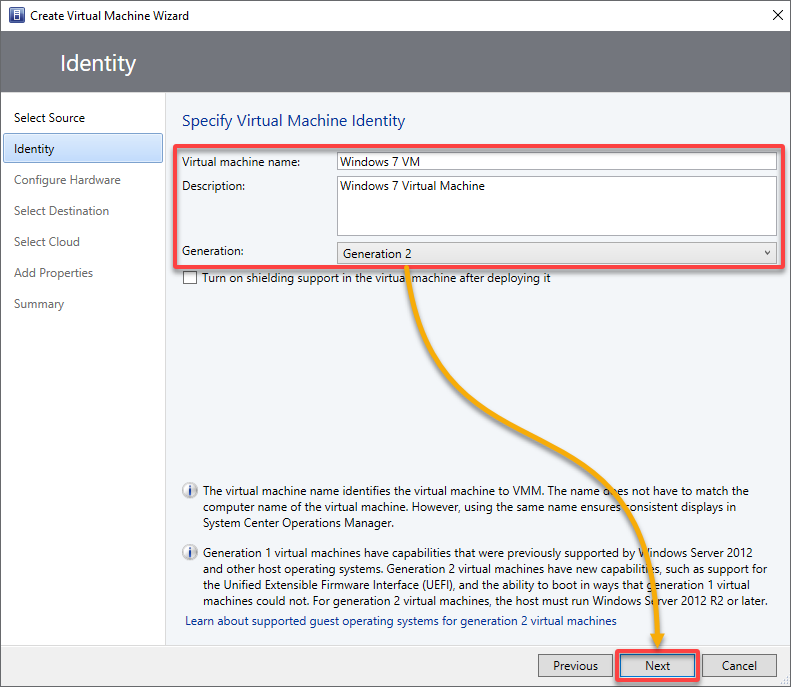
3. Subsequent, configure the VM identification as follows:
- Digital machine title – Specify a novel title to your VM.
- Description (optionally available) – Distinguishes your VMs from each other.
- Technology – Select one under relying in your virtualization surroundings’s particular wants and the visitor OS’s compatibility necessities.
| Technology 1 | VMs are higher fitted to legacy or much less demanding workloads. |
|---|---|
| Technology 2 | VMs supply extra fashionable options and are higher outfitted to deal with newer OSes and safety necessities. |
As soon as configured, click on Subsequent to proceed.
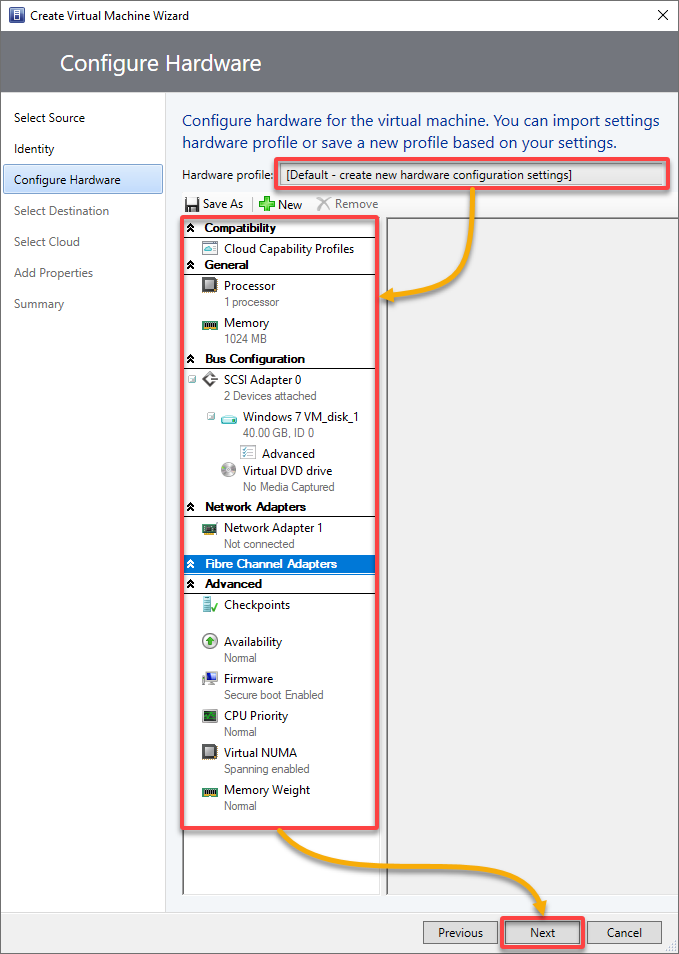
4. Now, choose the profile from the {Hardware} profile listing or configure the {hardware} settings manually, and click on Subsequent.
The {hardware} settings differ relying in your chosen Technology machine (Technology 1 or Technology 2).
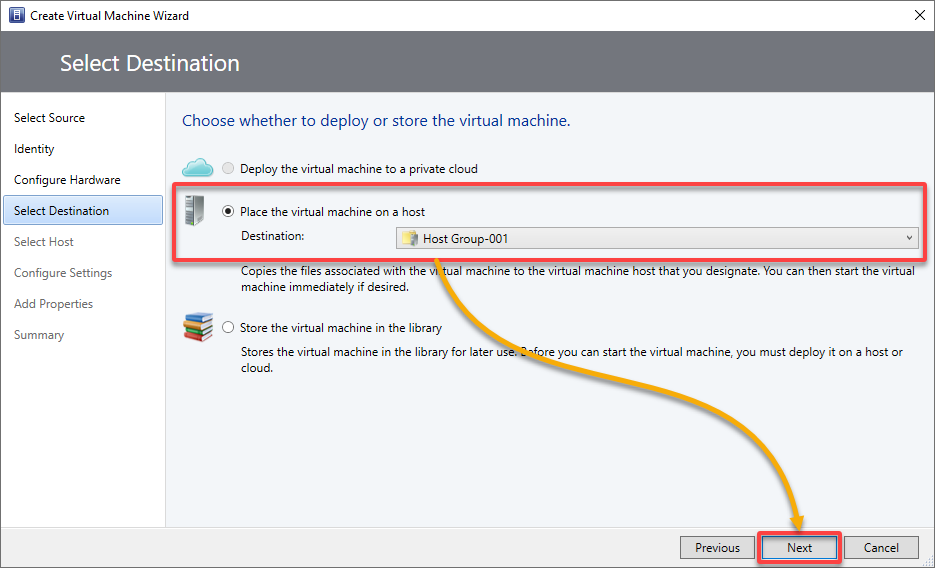
5. Within the Choose Vacation spot web page, specify how the VM ought to be deployed, and click on Subsequent.
This tutorial’s selection is to deploy the VM on a specified vacation spot host.
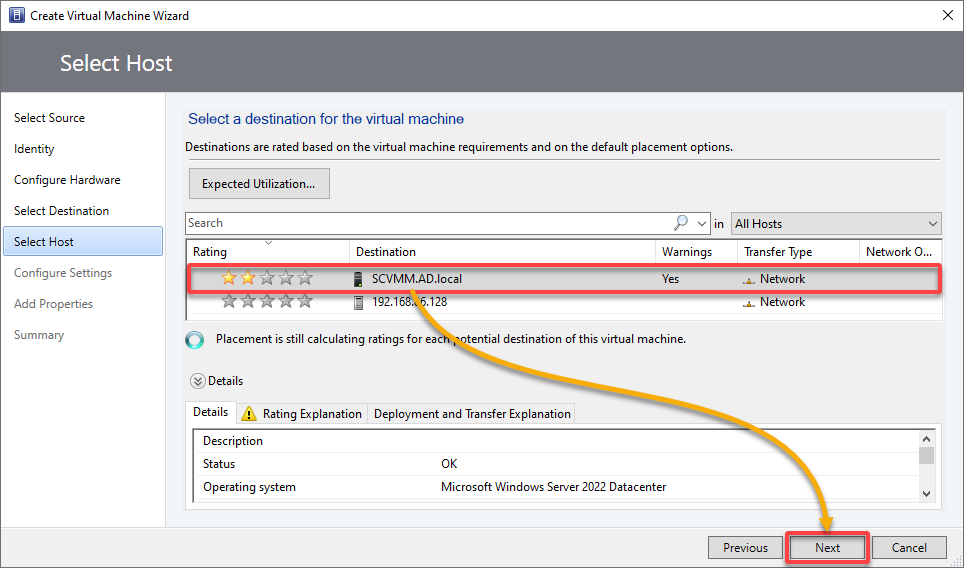
6. View the scores, select the host to deploy the VM, and click on Subsequent.
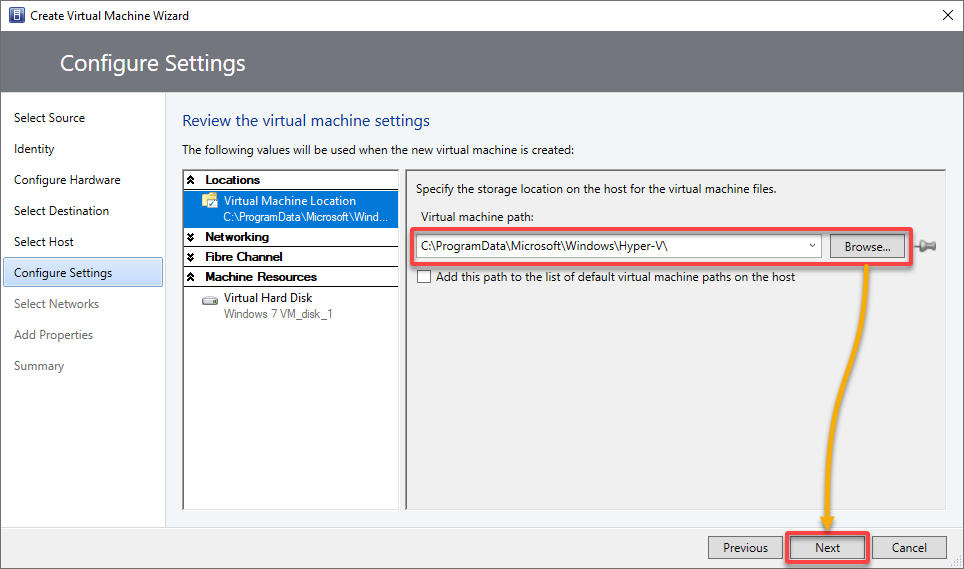
7. Subsequent, evaluation the VM settings, settle for the default VM path on the host or specify a unique location, and click on Subsequent.
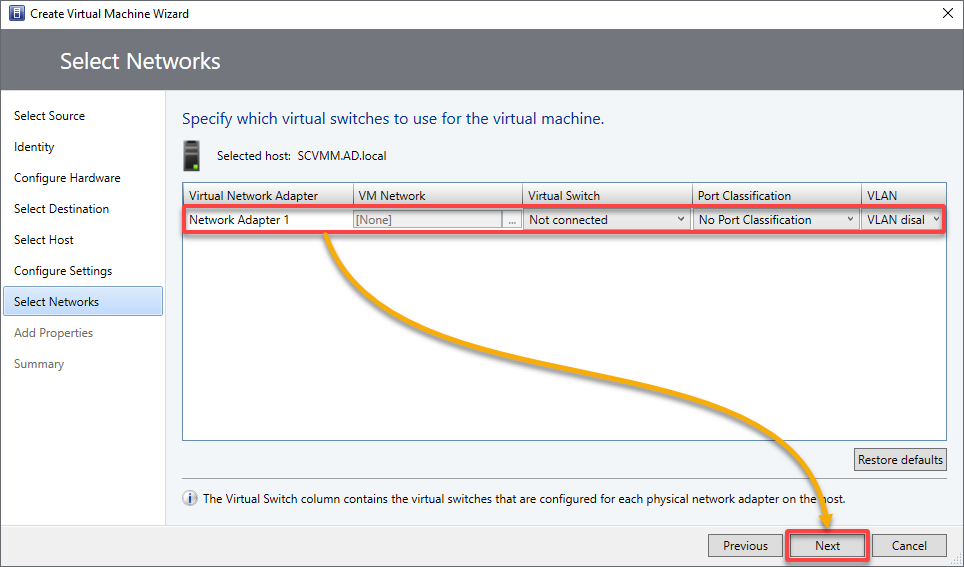
8. In Choose Networks, choose the community adapter that seems, and click on Subsequent.
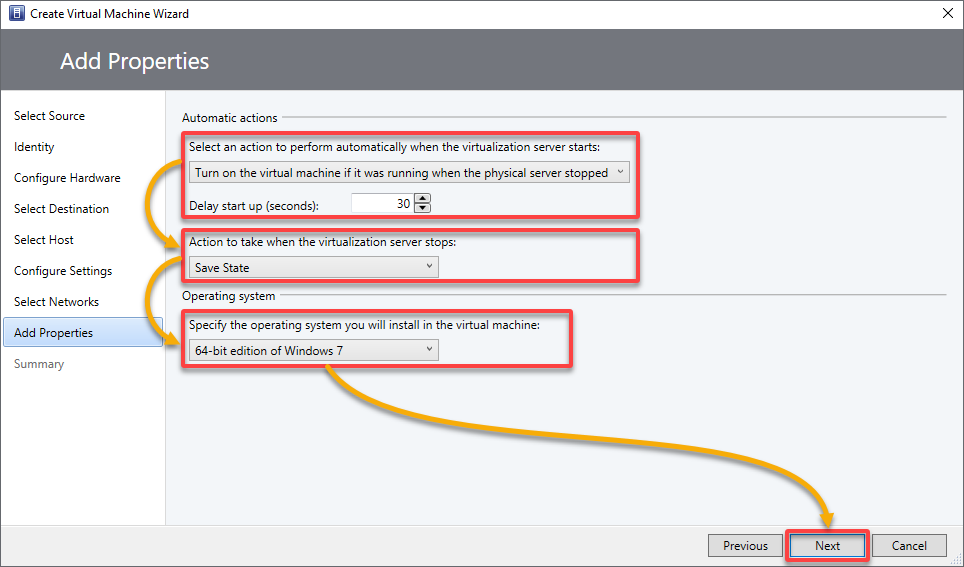
9. Configure the Automated actions to take when the host begins or stops and the OS to put in in your VM, and click on Subsequent.
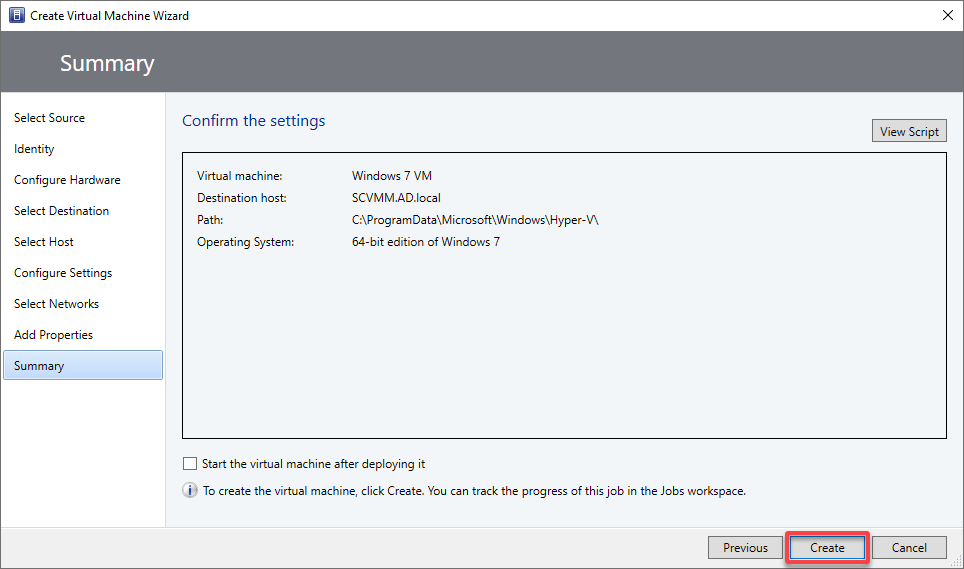
10. Lastly, evaluation your chosen settings and click on Create to finalize creating your VM.
Under, you may see your newly-created VM within the listing inside a bunch group.
Optionally, you may right-click your VM, as proven under, and modify its configuration and properties as crucial.
💡 Be aware that some adjustments require you to restart your VM for the adjustments to take impact. Moreover, at all times guarantee that you’ve applicable permissions and sources and perceive the affect of your adjustments to VM properties.
Making a Logical Community
Your VM is operating however should be related to your bodily community infrastructure. Fear not, although! SCVMM gives instruments to create, handle, and configure digital networks effectively.
You’ll join your VM to your bodily community infrastructure by making a logical community, a bodily community in your datacenter. Logical networks present an abstraction layer permitting you to outline and handle VM networking for VMs independently of the underlying bodily infrastructure.
To create a logical community, observe the under steps:
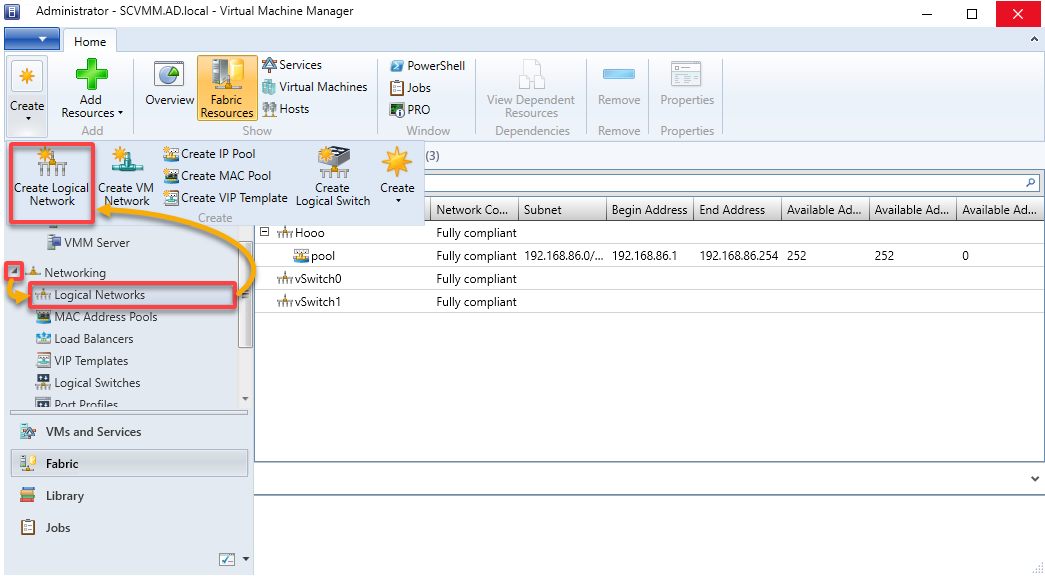
1. Within the Material workspace, develop Networking, choose Logical Networks, and click on Create Logical Community to configure your new logical community.
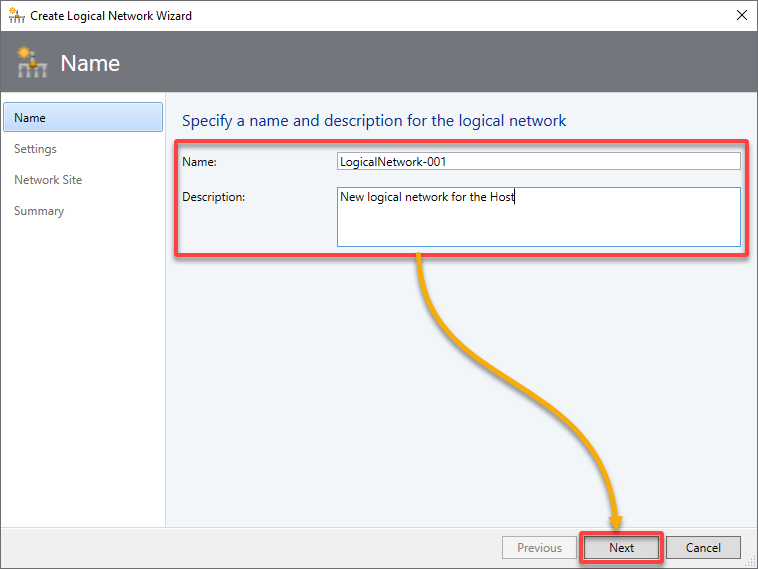
2. Subsequent, present a descriptive Title and Description to your logical community, and click on Subsequent.
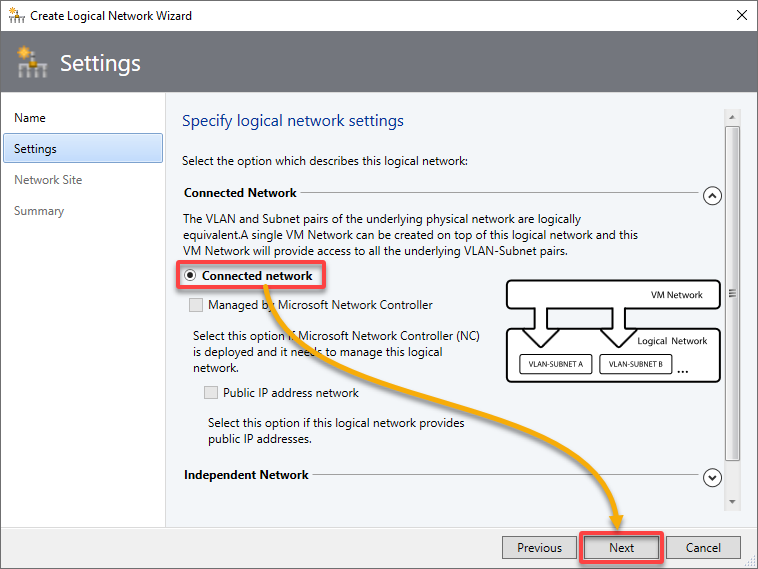
3. Choose the Related community choice to hyperlink your logical community to your bodily community infrastructure, and click on Subsequent.
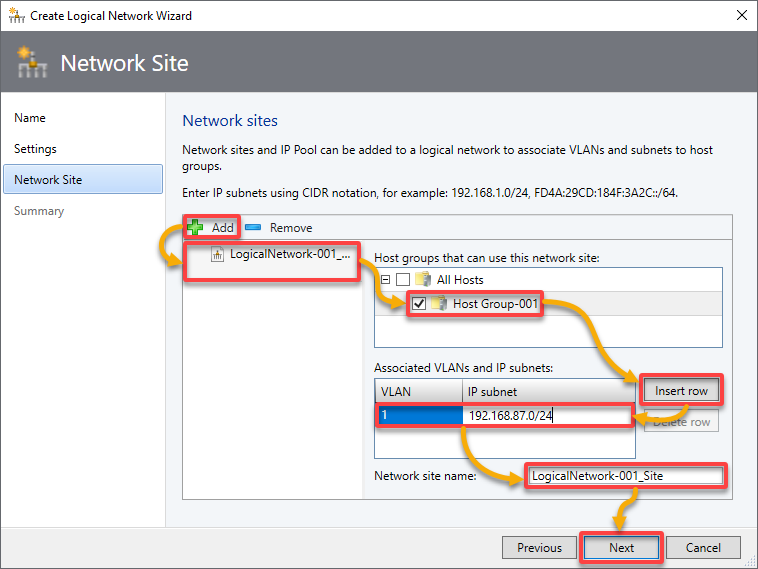
4. On the Community Web site web page, add a community website to your logical community as follows:
- Click on Add, choose your logical community (LogicalNetwork-001), and choose your host group (Host Group-001) from the listing.
- Click on Insert row, and enter the VLANs and IP subnets to assign to the logical community definition.
- Title your logical community, and click on Subsequent to proceed.
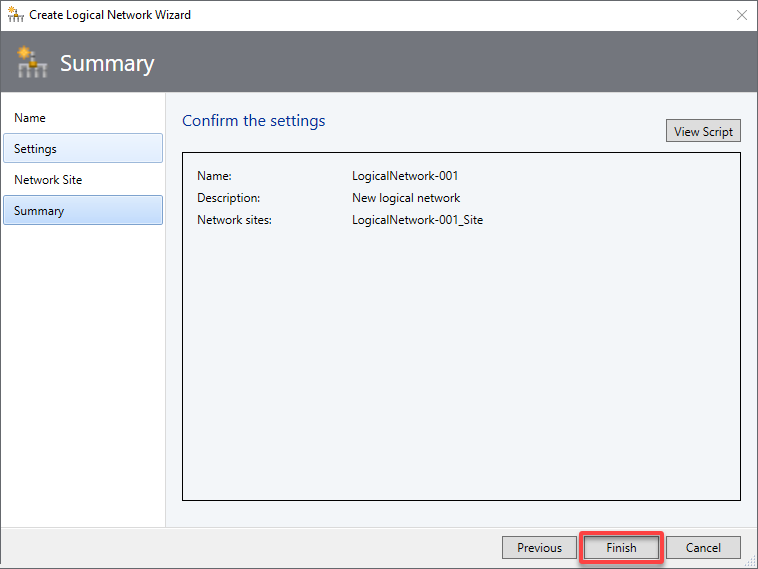
5. Overview your chosen settings, and click on Subsequent to create your logical community.
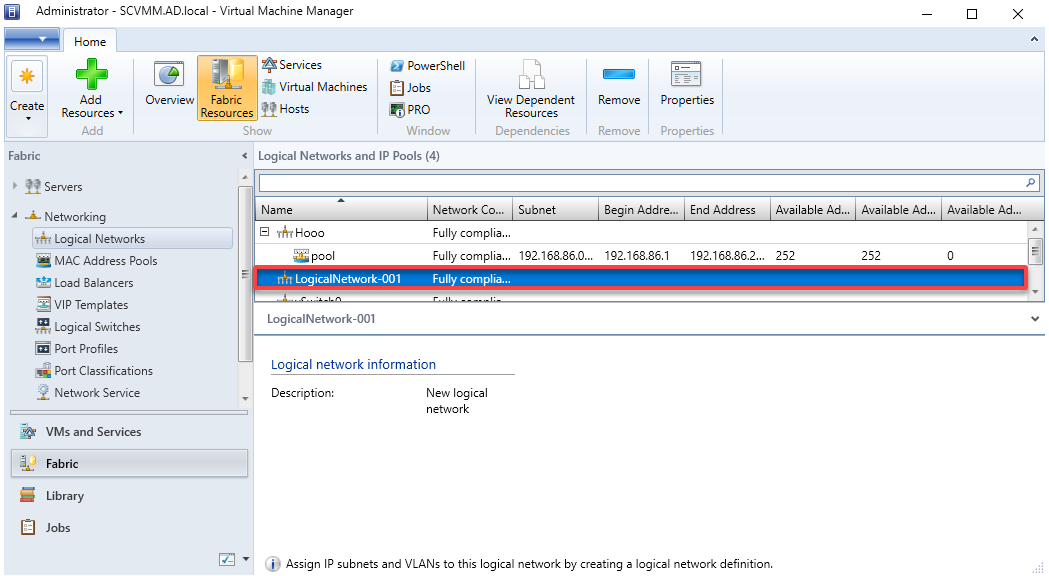
6. Lastly, choose your newly-created logical community to view its community data and confirm the right settings.
Creating IP Handle Swimming pools
Sadly, IP handle battle is a factor, so you have to guarantee IP handle assignments to your VMs are in place. How? You need to create IP handle swimming pools to robotically assign IP addresses to your VMs for faster community administration.
SCVMM lets you outline IP handle swimming pools for various logical networks to make sure environment friendly IP handle utilization.
To create IP handle swimming pools in SCVMM:
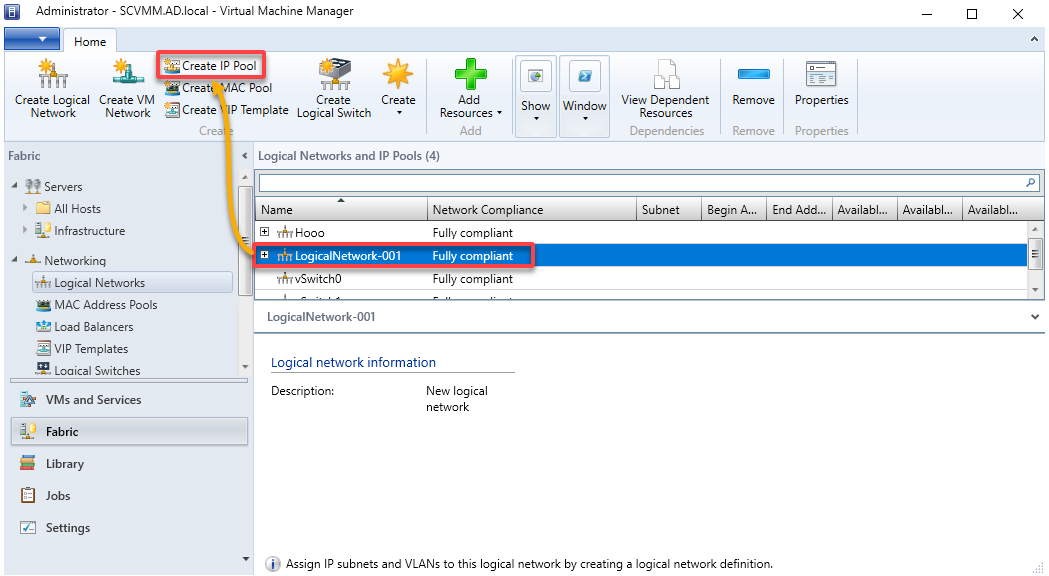
1. Within the Logical Networks desk, choose your logical community (LogicalNetwork-001) the place you want to create the IP pool and click on Create IP Pool.
A wizard seems the place you’ll configure your new IP pool (step three).
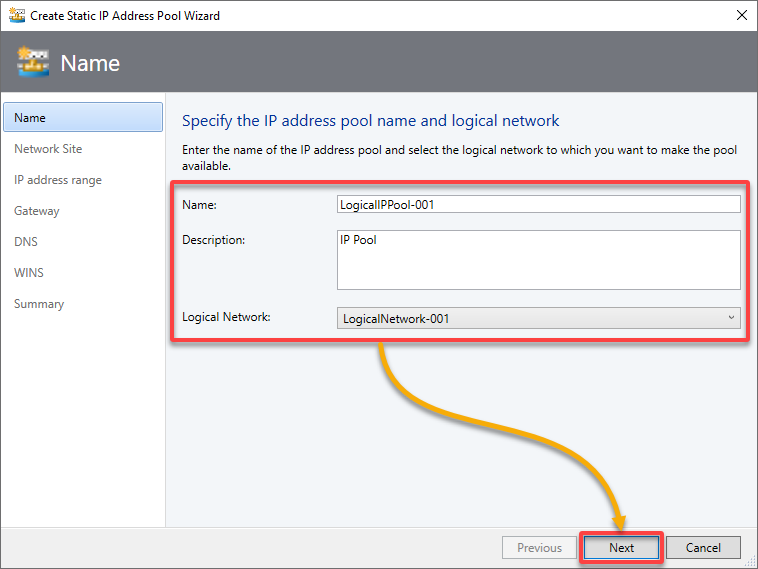
2. Within the wizard under, specify a Title and Description (optionally available) for the brand new IP handle pool, choose your Logical Community, and click on Subsequent.
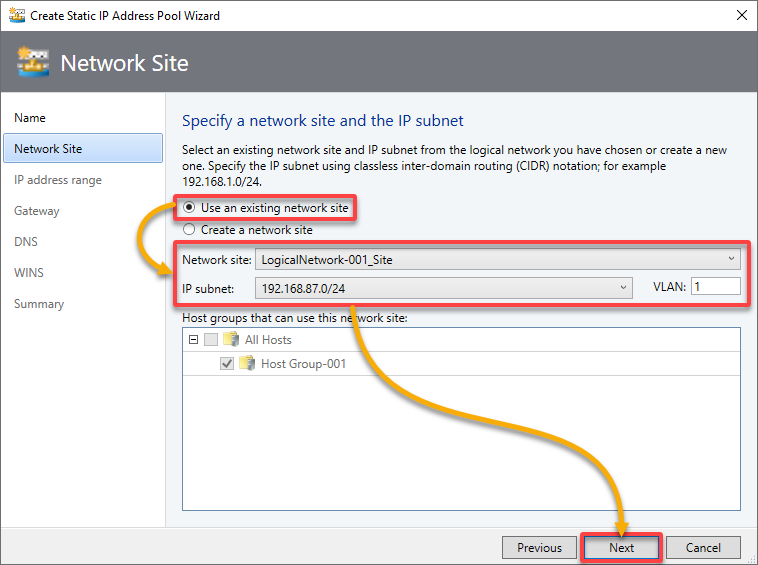
3. Now, in Community Web site, select to Use an current community website, choose the IP subnet (or create a brand new website) from which to create the pool, and click on Subsequent.
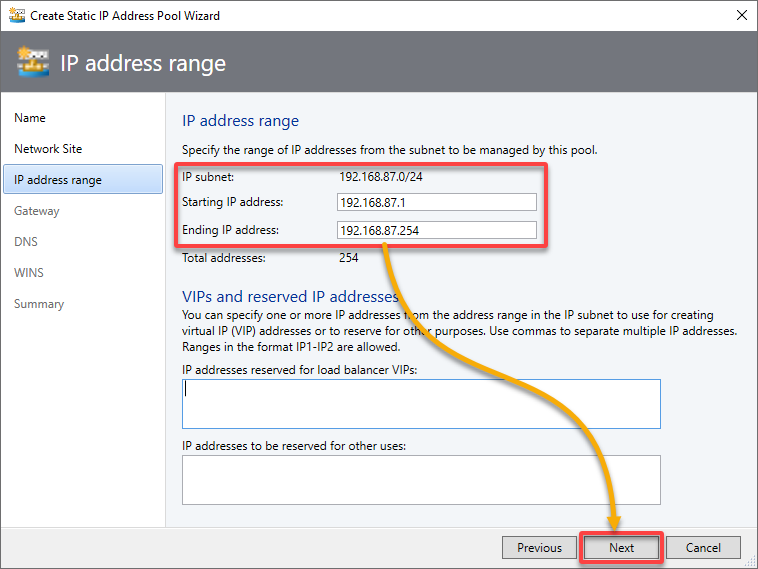
4. For the IP handle vary, present the Beginning and Ending IP handle for the IP pool (which should be contained inside the subnet), and click on Subsequent.
💡 Optionally, specify the IP handle vary you wish to reserve for VIPs beneath the VIPs and reserved IP addresses part.
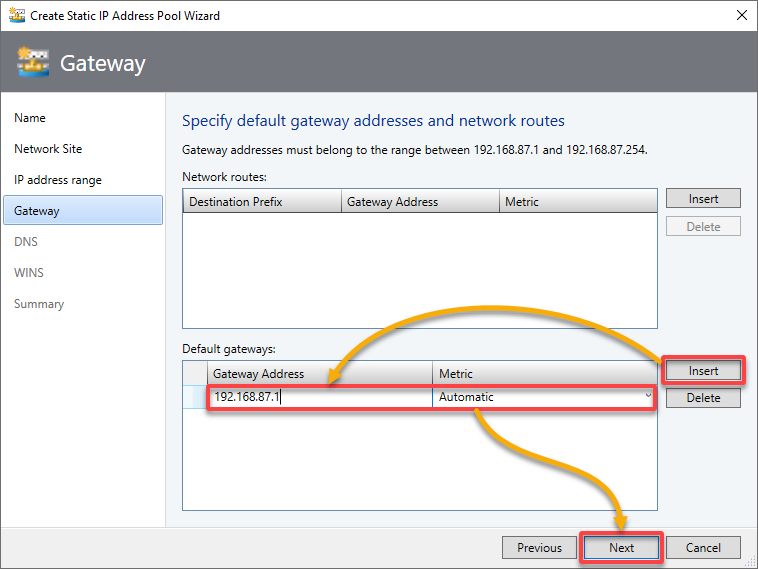
5. On the Gateway web page, click on Insert, specify a number of default gateways and the metric, and click on Subsequent.
The default gateway handle should be in the identical subnet vary because the IP handle pool however does should be a part of the pool.
6. For the DNS settings, Insert particular DNS-related data, and click on Subsequent.
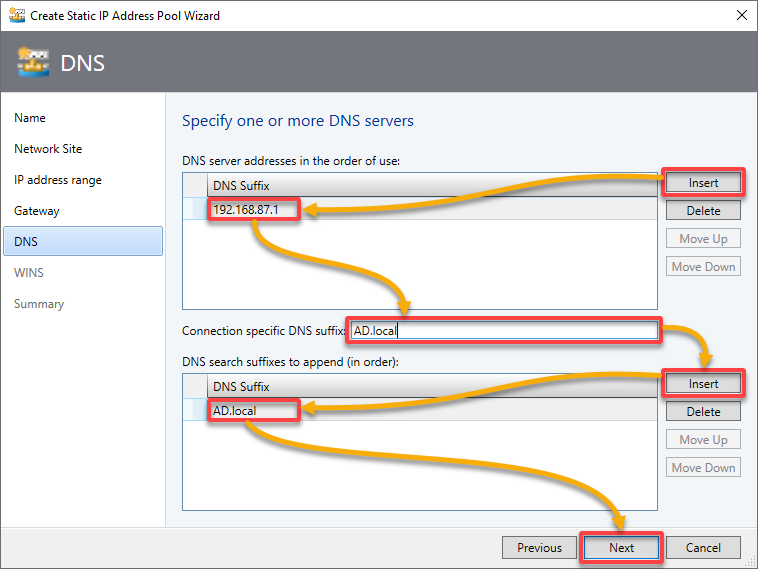
7. Skip specifying a Home windows Web Title Service (WINS) server, and click on Subsequent to proceed since you’ll not want one on this tutorial.

8. Overview your chosen settings, and click on End

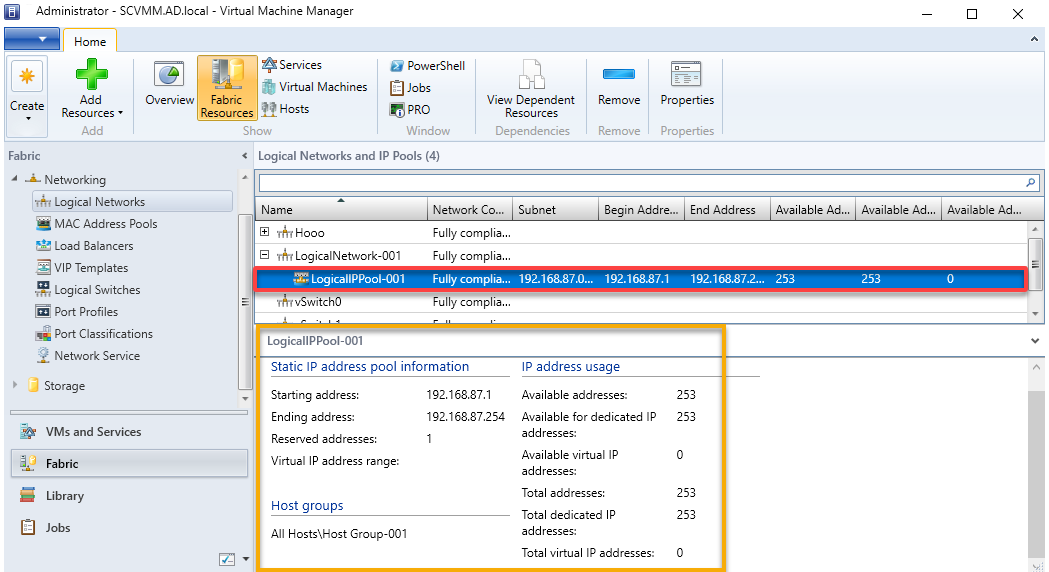
9. Now, develop the subnet the place you created your IP handle pool, and choose the IP Handle pool. Doing so enables you to view the static IP handle pool data within the SCVMM console.
💡 By configuring IP handle swimming pools in SCVMM, you cut back the handbook effort concerned in assigning IP addresses. Furthermore, you guarantee environment friendly IP handle utilization inside your virtualized surroundings.
Configuring SCVMM for an Exterior Digital Community
With an IP handle pool created, you have to allow communication and web entry to your VMs to work together with the skin world. How? By connecting your logical community to an exterior digital community.
To make logical networks out there to VMs on an exterior digital community:
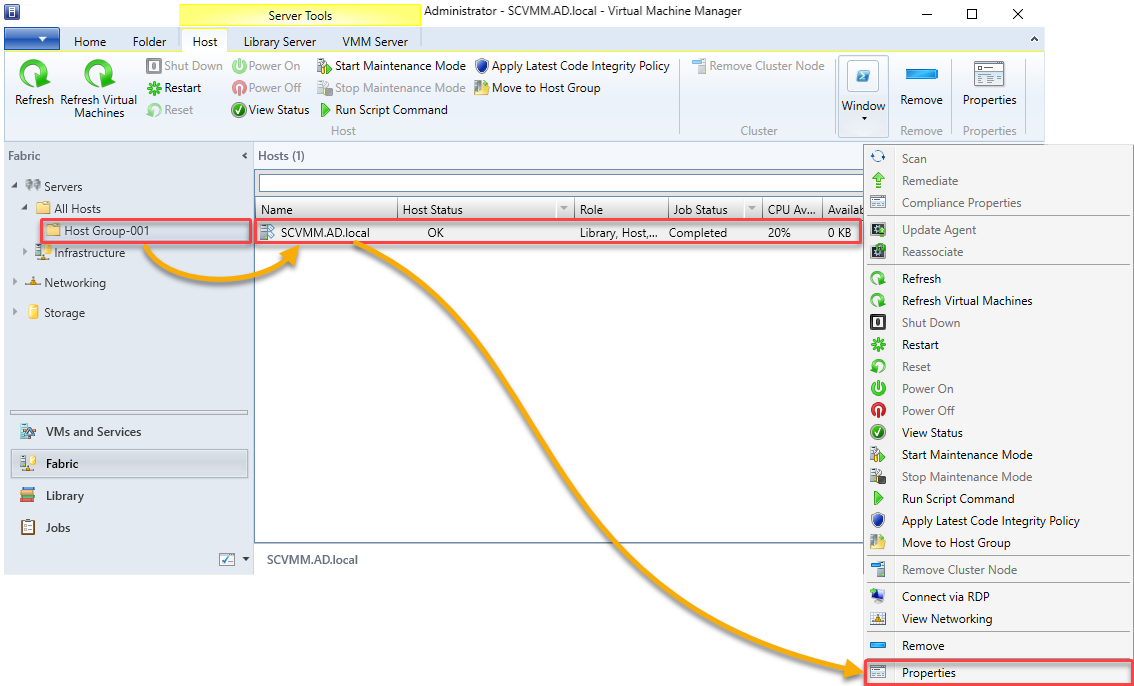
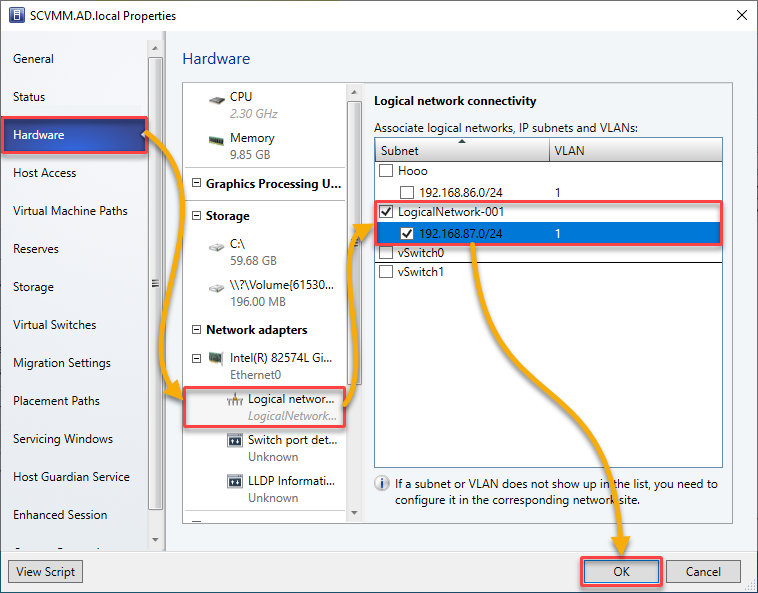
1. Navigate to your host group (Host-Group-001), right-click in your host, and select Properties.
2. Subsequent, navigate to the {Hardware} tab (left pane), and configure the next:
- Choose the bodily community adapter to make use of for the logical community.
- Tick the field beside the logical community title to affiliate together with your chosen adapter.
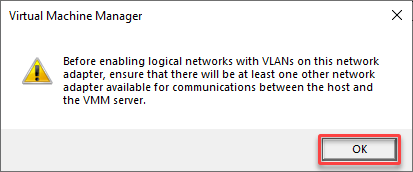
As soon as configured, click on OK to proceed.
3. Click on OK when prompted to allow the logical community.
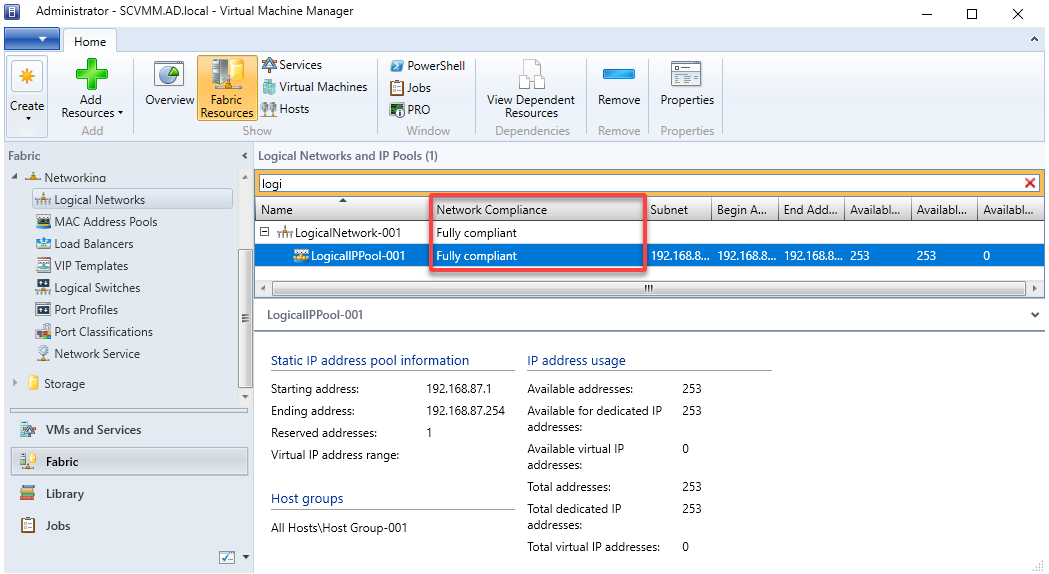
4. Lastly, confirm that the Community Compliance standing of your logical community is Absolutely compliant, as proven under.
Conclusion
All through this tutorial, you’ve realized to leverage numerous options the SCVMM gives to manage and handle your digital infrastructure successfully centrally.
With a stable understanding of SCVMM’s capabilities, why not take into account integrating your SCVMM with Azure and Hybrid Cloud? Discover deploying and managing VMs in each on-premises and Azure Cloud environments!