


In this article, we’ll dive into Cypress testing. Cypress is a modern, open-source test automation tool for web applications. We’ll take a look at how to set up and use Cypress for testing web applications, and we’ll also look at some of the features that make Cypress an attractive option.
Cypress is built on top of Electron, which is used by the Atom text editor and many other applications. It’s easy to install and has a simple, clear API.
Cypress Testing Outline
What Is Software Testing?

Software Testing by Nick Youngson CC BY-SA 3.0 Pix4free.or
Software testing is the process of verifying the functionality of an application. This can be done manually, by running the app and trying out its various features, or automatically, by writing code to test the app’s functionality.
Why software testing is important
Testing is important because it helps to ensure that software works as expected. It can find bugs and issues that would otherwise go unnoticed, and it can help to improve the quality of software. Testing is especially important because it can run tests quickly and efficiently, without needing human intervention.
The benefits of automated software tests
There are many benefits to automated software testing:
- Increased efficiency: they can be run quickly and easily, without needing human intervention. This saves time and resources.
- Improved accuracy: they’re often more accurate than manual tests, because they can be written to cover all possible scenarios.
- Increased coverage: they can cover a larger portion of code than manual tests, providing comprehensive coverage of an application.
- Reduced costs: they can save money in the long run by reducing the need for manual testers.
Would you like to learn more about frontend testing? Check out our latest guide, A Frontend Web Developer’s Guide to Testing. It will introduce you to a range of leading, powerful frameworks, such as Selenium, Cypress, Puppeteer, and Playwright, and serve as a guide to leveraging their test coverage capability.
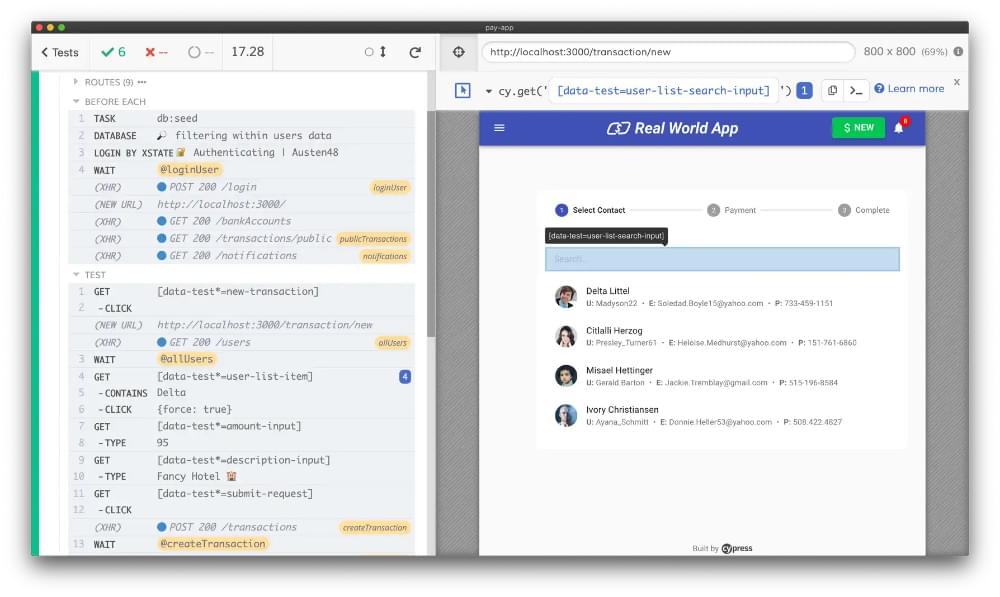
What is Cypress?
![]()
Cypress is a modern, open-source test suite for web applications. It’s built on top of Electron, which is used by the Atom text editor and many other applications. Cypress is easy to install and has a simple, clear API.
Cypress can be used to automate all kinds of tests, including unit tests, functional tests, and end-to-end tests. Cypress can also be used to run tests in parallel on multiple browsers and devices.
Features of Cypress
Some of the features that make Cypress an attractive option for automated tests are:
- Simple installation: Cypress can be installed using npm or Yarn. There’s no need to install any other dependencies.
- Clear API: the API provided by Cypress is simple and easy to understand. All the commands are chainable, making the code easy to read and write tests.
- Automatic waiting: Cypress automatically waits for elements to appear before performing any actions on them. This makes the code more reliable and easier to write.
- Parallel execution: tests can be run in parallel on multiple browsers and devices using Cypress Test Runner. This makes the execution of tests faster.
Getting Started with Cypress Testing
![]()
Cypress works on Node.js 12 or 14 and above, so you’ll need to have Node.js installed on your computer before you can install and use Cypress.
Cypress Installation
You can install Cypress via npm:
npm install cypress --save-dev
Or you can install it using Yarn:
yarn add cypress --dev
Once Cypress has been installed, you can run it using the following command:
$(npm bin)/cypress open
This will open the Cypress test runner. You can then run your tests from here.
Cypress Configuration
Cypress can be configured using a cypress.json file. This file should be located in the root of your project. The following is a basic example:
{
  "baseUrl": "http://localhost:8080",
  "viewportWidth": 1200,
  "viewportHeight": 800,
  "fixturesFolder": "tests/e2e/fixtures",
  "integrationFolder": "tests/e2e/specs",
  "pluginsFile": "cypress/plugins.js",
  "supportFile": false,
  "screenshotsFolder": ".cypress/screenshots"
}
For more information on configuring Cypress, see the documentation.
Writing Cypress Tests
A Cypress test is written using JavaScript and run in the browser. This makes tests easy to write and understand.
Every Cypress test is organized into “specs”. A spec is a collection of tests for a specific feature or functionality. Specs are located in the integrationFolder (by default tests/e2e/specs). A spec or test file can contain one or more tests.
Here is a basic example of a spec file:
describe('My App', function() {

  it('does something', function() {

  });

  it('does something else', function() {

  });

});
Cypress Testing Example 1: Testing a Login Form
In this example, we’ll write a Cypress test a login form. We will assume that the form has two fields, username and password, and a submit button.
First, we need to open the page that contains the login form. We can do this with the cy.visit() command:
describe('My App', function() {

  it('does something', function() {
    cy.visit('http://localhost:8080/login');
  });


});
Next, we need to fill in the username and password fields and click the submit button. We can do this with the cy.get(), cy.type(), and cy.click() commands:
describe('My App', function() {

  it('does something', function() {
    cy.visit('http://localhost:8080/login');
    cy.get('#username').type('testuser');
    cy.get('#password').type('secret');
    cy.get('.btn-submit').click();

  });


});
Cypress Testing Example 2: Testing a Shopping Cart
In this example, we’ll write a spec to test a shopping cart feature. We’ll assume that the shopping cart has two fields, quantity and item, and an “add to cart” button.
First, we need to open the page that contains the shopping cart form. We can do this with the cy.visit() command:
describe('My App', function() {

  it('does something', function() {
    cy.visit('http://localhost:8080/cart');
  });


});
Next, we need to fill in the quantity and item fields and click the “add to cart” button. We can do this with the cy.get(), cy.type(), and cy.click() commands:
describe('My App', function() {

  it('does something', function() {
    cy.visit('http://localhost:8080/cart');
    cy.get('#quantity').type(5);
    cy.get('#item').type('pants');
    cy.get('.btn-add-to-cart').click();

  });


});
Cypress Testing Example 3: Testing a Single Page Application
In this example, we’ll test a single page application (SPA) that uses the React frontend framework. The application is a simple task manager that allows users to add, edit, and delete tasks.
First, we need to install some dependencies. We’ll need the following:
We can install these dependencies with npm:
npm install --save react react-dom create-react-app cypress
Now we can create a new React app using Create React App:
create-react-app my-app
Next, we need to install some additional Cypress dependencies:
cd my-app
npm install --save-dev cypress
Now that our dependencies are installed, we can write our tests. Create a new file called tasks.spec.js in the cypress/integration folder with the following contents:
describe('Tasks', function() {

  beforeEach(function() {
    cy.visit('http://localhost:3000');
  });

  it('should add a task', function() {


    cy.get('input[name="taskName"]').type('My Task');
    cy.get('textarea[name="taskDescription"]').type('My Description');
    cy.get('form').submit();


    expect(cy.get('.tasks li').its('length')).to.equal(1);
   });
});
The beforeEach function runs before each test in the spec. In this case, we’re visiting the base URL of our application (http://localhost:3000).
The it function contains our actual test code. The first argument is a description of the test case, and the second argument is a callback function containing our test code. In this example, we’re testing that our task manager application correctly adds tasks to the list when they’re submitted using the form. We do this by first entering some data into the form fields and then submitting it. Finally, we assert that there’s now one task in the list using expect.
You can run your tests from within Visual Studio Code by opening up Integration Tests from under Test Explorer (View -> Test Explorer).
Alternatively, you can run them from a terminal window using npm:
npm run e2e
npm run e2e:open
The Cypress Test Runner
There are two ways to run every Cypress test: locally, and in the cloud.
Testing Cypress locally
You can open the Cypress Test Runner by running the following command:
node_modules/.bin/cypress open
The Test Runner will open in a new window. From here, you can run all tests or individual tests by clicking on the Run all specs or Run test file buttons.
Cypress testing in the cloud
Cypress also offers a cloud-based testing service that allows you to run your Cypress tests on a remote server. This is especially useful if you want to test on different browsers or devices that aren’t available locally.
To use the cloud-based Cypress testing service, you first need to sign up for a free account at https://www.cypress.io/. Once you have an account, you can connect your GitHub repository and select which branch you want to test. Cypress will then automatically run your tests on every commit to that branch.
You can also manually trigger a test run from the Cypress Dashboard by clicking on the “Run” button next to your project name.
Continuous Integration
Continuous integration (CI) is the practice of automatically building and testing code changes as they’re made. This allows developers to detect errors early and avoid potential problems later in the development process.
There are many different CI tools available, but we’ll focus on three of the most popular: Travis CI, CircleCI, and Jenkins.
Travis CI
![]()
Travis CI is a popular hosted CI service that’s free for open-source projects. It integrates with GitHub, making it easy to set up and use.
To use Travis CI with Cypress, you’ll need to create a travis.yml file in your project’s root directory. This file tells Travis how to build and test your project. Here’s a simple example:
language: node_js


node_js: 10


script:

  - npm run test


env: CYPRESS_BASE_URL=https://example.com
This file tells Travis to use Node v10 for testing and to run the npm run test command (or yarn test, if you’re using Yarn instead of npm). It also sets the CYPRESS_BASE_URL environment variable, which will be used by Cypress when running tests.
You can learn more about configuring Travis CI for use with Cypress in the Cypress documentation.
CircleCI
![]()
CircleCI is another popular hosted CI service that offers a free plan for open-source projects. Like Travis, it integrates with GitHub, making it easy to set up and use.
To use CircleCI with Cypress, you’ll need to create a circleci/config.yml file in your project’s root directory. This file tells CircleCI how to build and test your project.
Here’s a simple example:
version: 2.0
jobs:
  build:
    docker:

      - image: circleci/node:10

    steps:

      - run: npm run test


      - run: echo "CYPRESS_BASE_URL=https://example.com" >> $BASH_ENV

  deploy:
This file tells CircleCI to use Node v10 for testing and to run the npm run test command. It also sets the CYPRESS_BASE_URL environment variable, which will be used by Cypress when running tests.
You can learn more about configuring CircleCI for use with Cypress in the Cypress documentation.
Jenkins
![]()
Jenkins is a popular, self-hosted CI server that can be used for both open-source and private projects. It offers a wide range of features and plugins to extend its functionality.
To use Jenkins with Cypress, you’ll need to install the Cypress plugin from the Jenkins plugin repository. This plugin adds a new “Cypress” build step that can be used to run Cypress tests.
In your project’s Jenkins configuration, you’ll need to add a “Cypress” build step and specify the path to your project’s cypress.json file. You’ll also need to set the baseUrl property in this file to the URL of your application (such as https://example.com). Here’s an example cypress.json file:
{
  "baseUrl": "https://example.com"
}
You can learn more about configuring Jenkins for use with Cypress testing in the Cypress documentation.
Debugging Tests
Debugging Cypress tests is simple and straightforward. There are two ways to debug tests: using the command line, or using the browser DevTools.
Cypress testing with the command line
The Cypress command-line interface (CLI) has a built-in debugger that can be used to debug tests. To use the CLI debugger, simply run the cypress command with the --debug flag. This will open the Cypress GUI with the debugger enabled.
Once the GUI is open, you can set breakpoints in your test code by clicking on the line number in the left panel. The test will pause at each breakpoint and you’ll be able to inspect variables and see the call stack. You can also resume execution of the test and step through each line of code.
Cypress testing with the browser developer tools
If you aren’t using the CLI, you can still debug your Cypress tests using the browser DevTools. To do this, simply open the DevTools console and enter cypress into the console. This will give you access to all of the same debugging features as the CLI debugger, including setting breakpoints and inspecting variables.
Upgrading the Cypress Test Suite
When upgrading from one version of Cypress to another, it’s important to be aware of any breaking changes that have been introduced. These changes can potentially break your Cypress tests, and may require you to update your code in order to continue using the new version of Cypress.
Make sure to check the official Migration Guide.
<br>
Useful Resources
If you want to learn more about Cypress, here are some useful resources:
Migrating from Selenium
![]()
If you’re currently using Selenium for testing web applications, you may be considering migrating to Cypress. There are several reasons why you might want to do this:
- Cypress has a simpler, more intuitive API than Selenium.
- Cypress tests run in the same environment as the application being tested, which makes debugging easier.
- Cypress can automatically wait for elements to appear in the DOM before interacting with them, which makes tests more robust.
There are two main options for migrating from Selenium to Cypress: WebDriverIO and Protractor.
WebDriverIO
WebDriverIO is a Node.js library that wraps around the Selenium WebDriver API. It has a similar API to Cypress, making it easy to migrate existing Selenium tests to WebDriverIO. The WebdriverIO website has a guide on how to do this.
Protractor
Protractor is an end-to-end test framework for Angular applications that uses the Selenium WebDriver API under the hood. It has a similar architecture to Cypress, making it easy to migrate existing Selenium tests to Protractor. The Protractor website has a guide on how to do this.
Conclusion
Automated testing tools like Cypress can make our lives as developers much easier. By running tests automatically, we can quickly catch errors and avoid potential regressions.
Although it can be tempting to rely solely on automated tests, manual testing is still important. Automated tests can catch some bugs, but they can’t catch everything. A human eye is still needed to catch things like typos, layout issues, and user experience problems.
If you’re not already using an automated tool, I recommend giving Cypress a try. It’s easy to set up and use, and Cypress testing can save you a lot of time and headaches in the long run.
Would you like to learn more about frontend testing? Check out our latest guide, A Frontend Web Developer’s Guide to Testing. It will introduce you to a range of leading, powerful frameworks, such as Selenium, Cypress, Puppeteer, and Playwright, and serve as a guide to leveraging their test coverage capability.
If you enjoyed this article, you might also find the following useful: