

Find out how to make a generalized SwiftUI container that exhibits subviews in a hexagonal grid.

The element we’re about to make is offered as a Swift Bundle.
SwiftUI is basically good at constructing a hierarchy of rectangular frames. With the current addition of Grid it turned even higher. Nonetheless, right now we need to construct a loopy hexagonal format. After all, there isn’t any devoted format kind for this. So we construct our personal with the Structure protocol!
Let’s first outline a form for our grid cell. For this, we have to implement func path(in rect: CGRect) -> Path to fulfill Form protocol requirement. We mainly want to seek out the biggest measurement of a hexagon that matches contained in the rect, compute its vertices and draw strains between them. Right here is the entire code to do a flat-top hexagon.
struct Hexagon: Form {
static let aspectRatio: CGFloat = 2 / sqrt(3)func path(in rect: CGRect) -> Path {
var path = Path()
let heart = CGPoint(x: rect.midX, y: rect.midY)
let width = min(rect.width, rect.peak * Self.aspectRatio)
let measurement = width / 2
let corners = (0..<6)
.map {
let angle = -CGFloat.pi / 3 * CGFloat($0)
let dx = measurement * cos(angle)
let dy = measurement * sin(angle)
return CGPoint(x: heart.x + dx, y: heart.y + dy)
}
path.transfer(to: corners[0])
corners[1..<6].forEach { level in
path.addLine(to: level)
}
path.closeSubpath()
return path
}
}

We’ll want to position our hexagons someplace. And for that, we want a coordinate system. The simplest to know is the offset coordinate system, however different coordinates could possibly be used with the identical success (e.g. axial coordinates). We’ll take an odd-q variation of the offset coordinates. It mainly simply defines cells as pairs of rows and columns. And every odd column is shifted by 1/2 down. We might want to present these coordinates to the format system and it’s completed by making a key conforming to LayoutValueKey.
struct OffsetCoordinate: Hashable {
var row: Int
var col: Int
}protocol OffsetCoordinateProviding {
var offsetCoordinate: OffsetCoordinate { get }
}
struct OffsetCoordinateLayoutValueKey: LayoutValueKey {
static let defaultValue: OffsetCoordinate? = nil
}
The protocol has 2 necessities:
sizeThatFitscontrols how a lot area the view wantsplaceSubviewscontrols the position of subviews throughout the out there area
And optionally:
makeCacheto keep away from further computations
Let’s outline our cached information for the format protocol. First, we’ll have to know the highest left coordinates of the grid to appropriately calculate offsets from the bounds’ high left nook. Then we’ll have to know the way huge is the grid by way of full rows and columns of cells.
struct CacheData {
let offsetX: Int
let offsetY: Int
let width: CGFloat
let peak: CGFloat
}func makeCache(subviews: Subviews) -> CacheData? {
let coordinates = subviews.compactMap { $0[OffsetCoordinateLayoutValueKey.self] }
if coordinates.isEmpty { return nil }
let offsetX = coordinates.map { $0.col }.min()!
let offsetY = coordinates.map { $0.row }.min()!
let coordinatesX = coordinates.map { CGFloat($0.col) }
let minX: CGFloat = coordinatesX.min()!
let maxX: CGFloat = coordinatesX.max()!
let width = maxX - minX + 4 / 3
let coordinatesY = coordinates.map { CGFloat($0.row) + 1 / 2 * CGFloat($0.col & 1) }
let minY: CGFloat = coordinatesY.min()!
let maxY: CGFloat = coordinatesY.max()!
let peak = maxY - minY + 1
return CacheData(offsetX: offsetX, offsetY: offsetY, width: width, peak: peak)
}
This one is fairly simple. We simply have to take the width of the hex cell such that it suits contained in the proposal. After which multiply it by the corresponding width and peak of the grid by way of cell width.
func sizeThatFits(proposal: ProposedViewSize, subviews: Subviews, cache: inout CacheData?) -> CGSize {
guard let cache else { return .zero }let measurement = proposal.replacingUnspecifiedDimensions()
let step = min(measurement.width / cache.width, measurement.peak / cache.peak / Hexagon.aspectRatio)
return CGSize(width: step * cache.width, peak: step * cache.peak * Hexagon.aspectRatio)
}
Right here we compute the step between subsequent hexagons. After which putting every hexagon at its corresponding place with the right measurement.
func placeSubviews(in bounds: CGRect, proposal: ProposedViewSize, subviews: Subviews, cache: inout CacheData?) {
guard let cache else { return }let measurement = proposal.replacingUnspecifiedDimensions()
let step = min(measurement.width / cache.width, measurement.peak / cache.peak / Hexagon.aspectRatio)
let width = step * 4 / 3
let proposal = ProposedViewSize(width: width, peak: width / Hexagon.aspectRatio)
let x = width / 2 + bounds.minX
let y = width / Hexagon.aspectRatio / 2 + bounds.minY
for subview in subviews {
guard let coord = subview[OffsetCoordinateLayoutValueKey.self] else { proceed }
let dx: CGFloat = step * CGFloat(coord.col - cache.offsetX)
let dy: CGFloat = step * Hexagon.aspectRatio * (CGFloat(coord.row - cache.offsetY) + 1 / 2 * CGFloat(coord.col & 1))
let level = CGPoint(x: x + dx, y: y + dy)
subview.place(at: level, anchor: .heart, proposal: proposal)
}
}
At this level, the HexLayout is already usable. Nonetheless, the rule that every one subviews ought to have a coordinate is just not enforced. So it is higher to do a skinny wrapper that may present this compile-time assure to element shoppers. Whereas at it, we’ll clip the subviews with the form of the hexagon to make the decision web site even cleaner.
struct HexGrid<Information, ID, Content material>: View the place Information: RandomAccessCollection, Information.Component: OffsetCoordinateProviding, ID: Hashable, Content material: View {
let information: Information
let id: KeyPath<Information.Component, ID>
let content material: (Information.Component) -> Content materialinit(_ information: Information,
id: KeyPath<Information.Component, ID>,
@ViewBuilder content material: @escaping (Information.Component) -> Content material) {
self.information = information
self.id = id
self.content material = content material
}
var physique: some View {
HexLayout {
ForEach(information, id: id) { component in
content material(component)
.clipShape(Hexagon())
.layoutValue(key: OffsetCoordinateLayoutValueKey.self,
worth: component.offsetCoordinate)
}
}
}
}
extension HexGrid the place ID == Information.Component.ID, Information.Component: Identifiable {
init(_ information: Information,
@ViewBuilder content material: @escaping (Information.Component) -> Content material) {
self.init(information, id: .id, content material: content material)
}
}
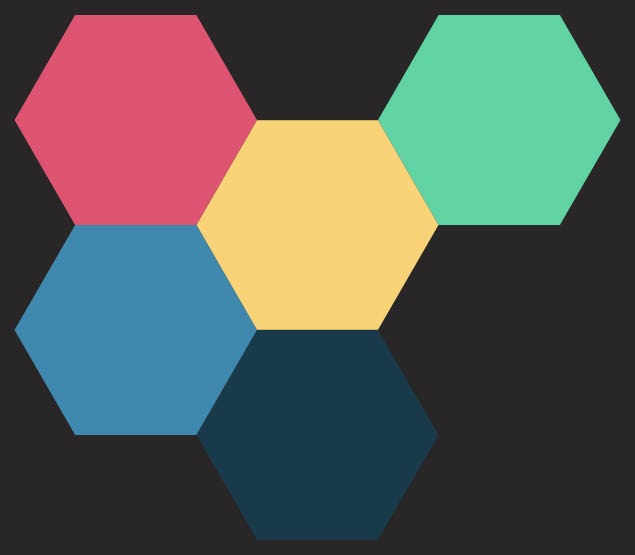
Now we are able to lastly outline our information mannequin and use the prepared element to get the picture from the start of the article:
struct HexCell: Identifiable, OffsetCoordinateProviding {
var id: Int { offsetCoordinate.hashValue }
var offsetCoordinate: OffsetCoordinate
var colorName: String
}let cells: [HexCell] = [
.init(offsetCoordinate: .init(row: 0, col: 0), colorName: "color1"),
.init(offsetCoordinate: .init(row: 0, col: 1), colorName: "color2"),
.init(offsetCoordinate: .init(row: 0, col: 2), colorName: "color3"),
.init(offsetCoordinate: .init(row: 1, col: 0), colorName: "color4"),
.init(offsetCoordinate: .init(row: 1, col: 1), colorName: "color5")
]
HexGrid(cells) { cell in
Shade(cell.colorName)
}
However you may put photos or actually any view into subviews! Simply remember that the format assumes subviews fill the contents of the hexagon cell.
HexGrid(cells) { cell in
AsyncImage(url: cell.url) { picture in
picture.resizable().aspectRatio(contentMode: .fill)
} placeholder: {
ProgressView().body(maxWidth: .infinity, maxHeight: .infinity)
}
}

We’ve realized easy methods to present values to LayoutSubview proxy and construct a enjoyable non-trivial format.
For extra info on hexagonal grids see this implausible information
See the total code at https://github.com/ksemianov/HexGrid