


If in case you have a Microsft Azure account and are nonetheless managing assets solely via the Azure Portal, you’re lacking out. The most effective methods to cut back clicking and enhance productiveness is through the use of the Azure CLI.
The Azure CLI is a cross-platform toolset written in Python that means that you can handle almost all your Azure assets from the command line. It doesn’t matter what working system you’re on, the Azure CLI gives a constant expertise throughout all platforms.
On this tutorial, you’re going to learn to get began with the Azure CLI. You’ll learn to carry out an preliminary configuration and create and take away some widespread assets utilizing numerous Azure CLI instructions.
Stipulations
This text will probably be a tutorial. In case you plan on following alongside step-by-step, you have to not less than one of many following:
- Azure CLI – This tutorial will probably be utilizing v2.20.0 on a Docker Container, however the instructions will work all the identical on different platforms.
- Permissions to create assets inside Azure by way of a Microsoft account maybe utilizing a service principal.
Getting Assist with az assist
Earlier than you run any command within the Azure CLI, learn to use the az assist command. The Azure CLI has wealthy and plentiful assist in the Azure CLI. This tutorial can’t probably cowl all instructions so studying how you can use az assist is essential.
To get began, let’s navigate across the assist system and take a look at how you can discover additional data on numerous instructions.
Navigating a Typical Assist Instance
Examples make one of the best studying materials. Let’s cowl how you can use the Azure CLI assist system by strolling via an instance of discovering the wanted command to create a useful resource group in Azure.
Together with your terminal open:
1. Run the az assist command. This command returns two kinds of output; teams and subgroups.
Instructions are organized as teams. You’ll usually see tutorials (and even documentation) seek advice from teams as “instructions”. Teams are damaged out in a hierarchical style with every group representing an Azure service.
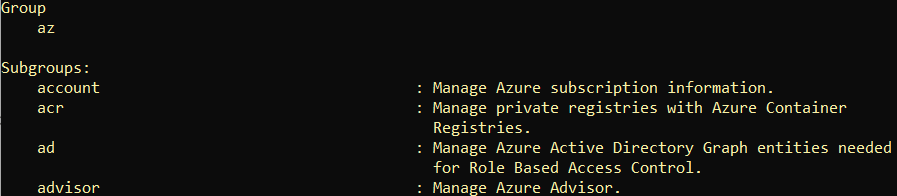
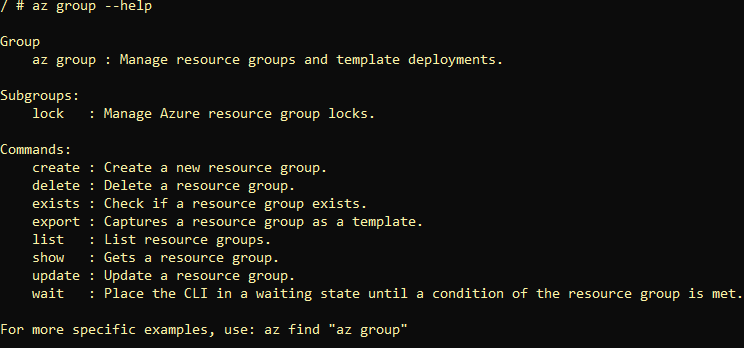
2. Scroll down till you discover the subgroup referred to as group. You possibly can see from the outline under, this subgroup is liable for managing useful resource teams. Teams are ordered alphabetically.

3. When you’ve discovered the command you’re in search of, run it utilizing the --help parameter. Utilizing the --help parameter doesn’t make any adjustments; it returns all assist documentation for a bunch or command.
You possibly can see under the group group and a single subgroup (lock) with numerous instructions inside.
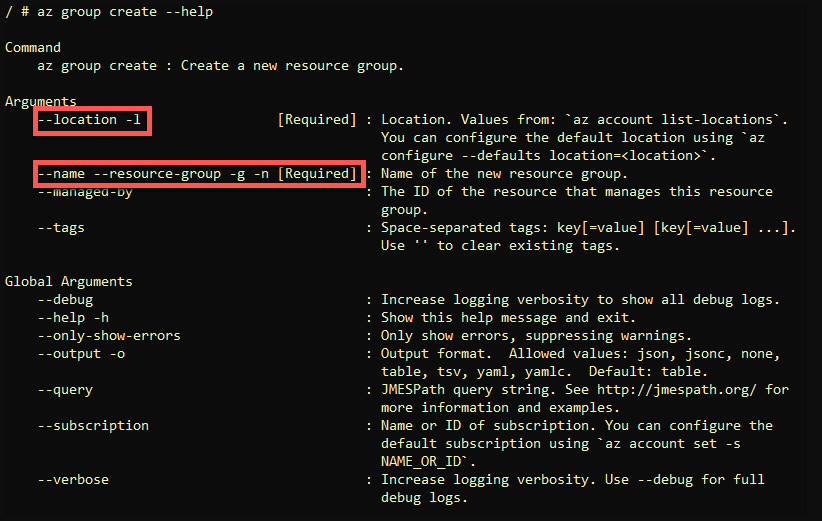
4. Because you wish to create a useful resource group, the create command appears to be like like the fitting command. Now proceed getting extra particular by appending a extra granular command to the unique az group reference and discovering assist.
Reference the
--helpparameter on any command to see it’s assist documentation.
The --help parameter now shows details about the create command. Instructions have arguments as proven under. On this instance, you now have the arguments required to specify a useful resource group and required location.
Discovering Syntax Examples with az discover
In case you can’t simply discover the group or command you’re in search of with the --help parameter, check out the az discover command. This command searches for syntax examples utilizing group/command references as proven under.
For instance, as an alternative of navigating the assistance system with --help as proven above, carry out the identical process with a single line with az discover.
az discover "az group create"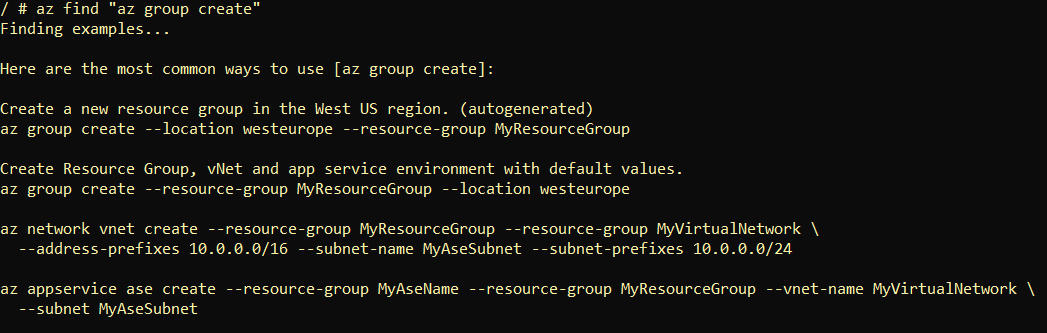
Assigning a Default Configuration with az configure
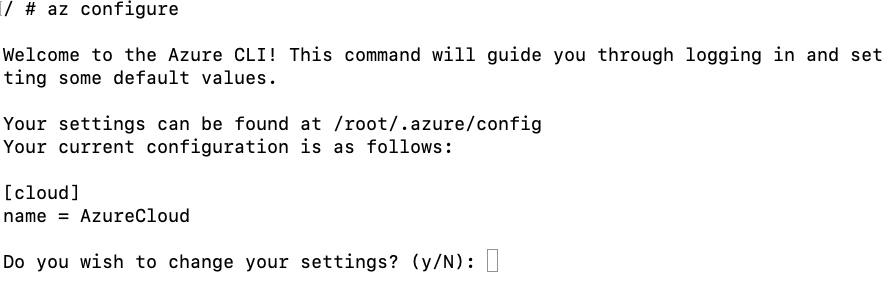
The Azure CLI has many instructions and options. Every of those options has numerous configurations they reference like logging and information assortment preferences. One of many first duties you must full when organising the Azure CLI for the primary time is working the az configure command.
In a single command, the az configure command walks you thru three completely different settings:
- Output Format – Seven completely different completely different ways in which the Azure CLI returns output
- Logging – The power to log all Azure CLI exercise to a file
- Telemetry – To allow or disable sending data to Microsoft about how you employ Azure CLI
To get began, assuming you have already got the Azure CLI put in:
1. Open a terminal (Bash or PowerShell).
2. Kind within the command az configure. You’ll be prompted with a easy menu letting you already know that each one settings will probably be saved within the .azure/config file. Press Y to proceed.
3. The command will first immediate you on your desired default output format. Right here, decide your required output. The default output format units how your output will seem on the display screen after executing a command or receiving an error message.
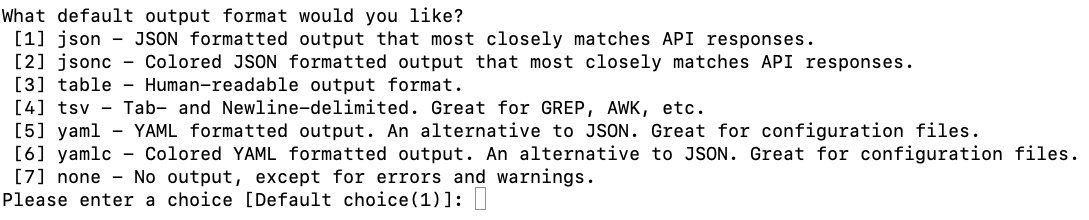
The under examples use the
outputparameter. No matter what format you decide because the default, you possibly can all the time override the default output with theoutputparameter.
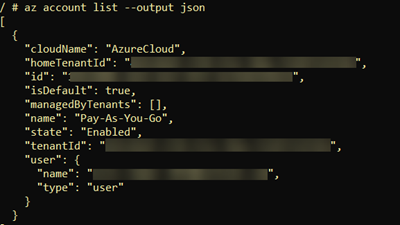
JSON (Java Object Notation)
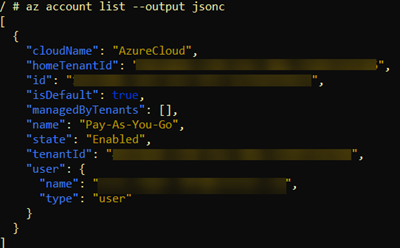
JSONC (Java Object Notation with commentscolorization)
Desk

TSV (Tab-Separated Values)

YAML (YAML Ain’t Markup Language)
YAMLC (YAML with commentscolorization)
None – The Azure CLI will solely return errors or warning.
4. When you’ve set the output format, the Azure CLI will immediate you to allow logging. Right here, choose Y to allow logging all instructions and output to a file.

Choosing Y right here will create a log containing all of the instructions and output collected whereas utilizing the CLI. This log is positioned within the $HOME/.azure/logs listing in Linux and macOS and %USERPROFILE%.azurelogs in Home windows.
Under you possibly can see an instance of what the log would seem like.

az login5. The Azure CLI will then ask you to ship telemetry information to Microsoft. Choosing Y right here will ship nameless data to Microsoft on how you employ the Azure CLI.

For extra data on the data that Microsoft collects, seek advice from Microsoft’s privateness data on gathering nameless information from Azure CLI.
Lastly, az configure will ask to set the CLI object cache time-to-live worth. You must go away this set on the default of 10.

Solely change the CLI object TTL if suggested by Microsoft when troubleshooting a difficulty with the Azure CLI.
Setting Default Parameter Values
The Azure CLI has numerous instructions with the identical parameters comparable to location and group. Fairly than key within the values for these parameters each time for each command, you possibly can set default parameter values.
To set parameter defaults, use the --defaults parameter on az configure. This parameter means that you can outline a parameter and it’s default worth. For instance, maybe you’re bored with typing in a location and group for numerous instructions. No downside. Set a few default values.
The next instance units the default area (location) to westus2 and the useful resource group (group) to MyResourceGroup. Now everytime you run any Azure CLI command that has a location or group parameter, Azure CLI will routinely move values to these parameters.
az configure --defaults location=westus2 group=MyResourceGroupIf you’re utilizing containers, you can set particular person containers to handle particular areas, subscriptions or useful resource teams by setting the defaults in every container occasion. You would create 4 containers in every container utilizing az configure to set a default area and a default useful resource group utilizing the command above.
Authenticating with a Browser
You’ve now realized the fundamentals of utilizing the Azure CLI, however you haven’t really accomplished something but. Let’s now take that step into creating some assets! However first, you will need to log in to Azure, utilizing the command, az login.
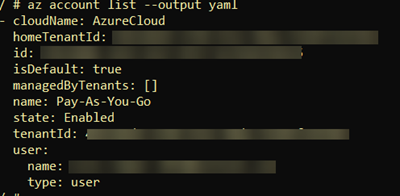
If in case you have a number of Azure subscriptions, run the
az account recordcommand to seek out all subscriptions. Whenever you discover the subscription, runaz account set --subscription <subscription identify>to set the subscription to make use of for the session. You may as well use the worldwidesubscriptionparameter to explicitly specify a subscription.
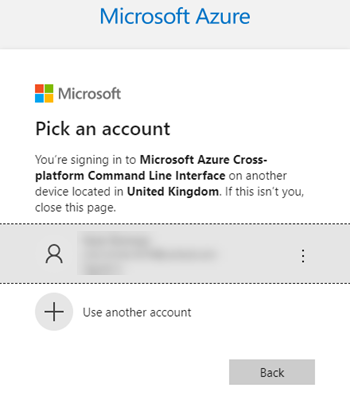
1. Open a terminal and run az login. This command opens a browser window that takes you to a web page to offer your username and password.

2. Present your Azure account credentials or click on on an current person account as proven under.
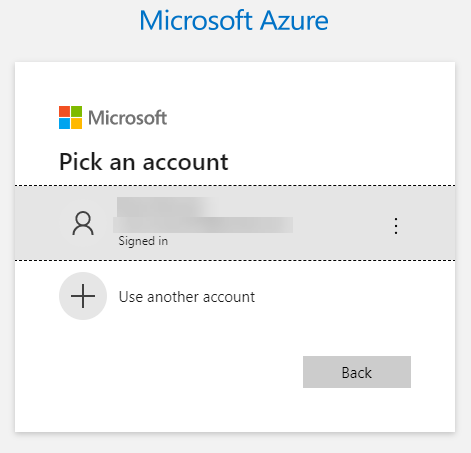
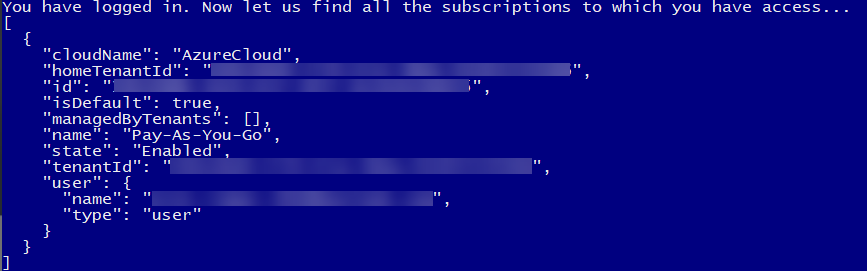
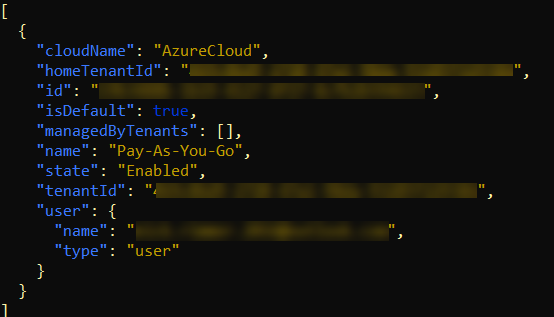
3. As soon as Azure authenticates your account, shut your internet browser and return to your Azure CLI session. The az login command returns details about your subscription to substantiate you now have an authentication token.
Authenticating Utilizing a Gadget Code
In case you’re on a system and not using a browser or wish to obtain an authentication token on one other laptop, use the --use-device-code parameter. This parameter permits a person to make use of a code provided from one other system to authenticate the person.
To authenticate utilizing a tool code, open a terminal and:
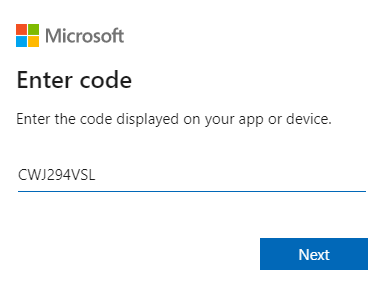
Run az login utilizing the --use-device-code parameter. The az login command, this time, won’t open a browser. As a substitute, it is going to present a code to offer to the system login web page on one other laptop.
az login --use-device-code
2. On a completely different laptop, navigate to https://microsoft.com/devicelogin, paste within the code provided, and click on Subsequent.
3. Now enter your credentials to authenticate to Azure and shut your browser, if not wanted.
Again within the Azure CLI session, az login will return your subscription data.
Azure CLI Output Choices
As talked about, the Azure CLI can return output in numerous methods. You possibly can outline the default output and alter it on the fly with the output parameter. However the output parameter isn’t the one parameter that adjustments output conduct.
To vary up the verbosity, filter output or modify error output conduct, use the next parameters.
question– Makes use of the JMESPath question language to filter output for all instructions. Reference this text to be taught extra.verbose– Returns details about assets created in Azure and prolonged details about these assets.debug– Returns a low-level quantity of details about CLI operations used for debugging.only-show-errors– Present errors and suppress warnings.
Making a Useful resource Group
Now that you simply’re authenticated to Azure, you’re free to handle all the assets you might have permission to. Let’s first run via a standard instance of making a useful resource group.
Assuming you’re on a pc with the Azure CLI put in and also you’ve already authenticated to Azure with the CLI:
Create a useful resource group utilizing the az group create command as proven under. This command is making a resource-group referred to as TESTGrp within the North Europe location and returning all verbose output.
az group create --location northeurope --resource-group TESTGrp --verbose
2. Now affirm Azure created the useful resource. az group record
Discover that you simply’ve created the TESTGrp useful resource group.
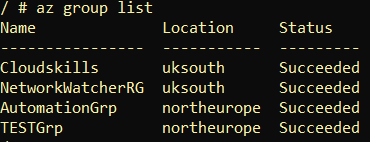
3. Maybe you might have a number of useful resource teams to sift via. As a substitute of scrolling, use the question parameter to slim down the record. The under command solely returns useful resource teams within the North Europe location utilizing JMESPath.
az group record --query "[?location=='northeurope']"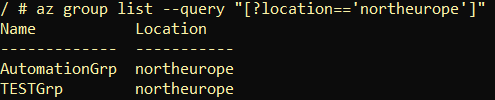
Creating A Linux Digital Machine
For this final instance, learn to create an Azure VM with the Azure CLI. Creating digital machines and the configuration round them is an efficient talent to be taught. Creating Azure VMs is a standard process it’s possible you’ll carry out repeatedly throughout your cloud journey.
On this train, you’ll create an Azure Linux VM with default settings and deploy it into the useful resource group created within the earlier part.
An Azure VM consists of many Azure assets all working collectively like a disk picture, digital community adapter, digital machine, and so forth.
To create an Azure VM with the Azure CLI:
1. Run the az vm picture record command to seek out all obtainable VM pictures for the VM. This command returns all the cached/offline pictures. az vm picture record
For this demo, select the UbuntuLTS picture as highlighted under.
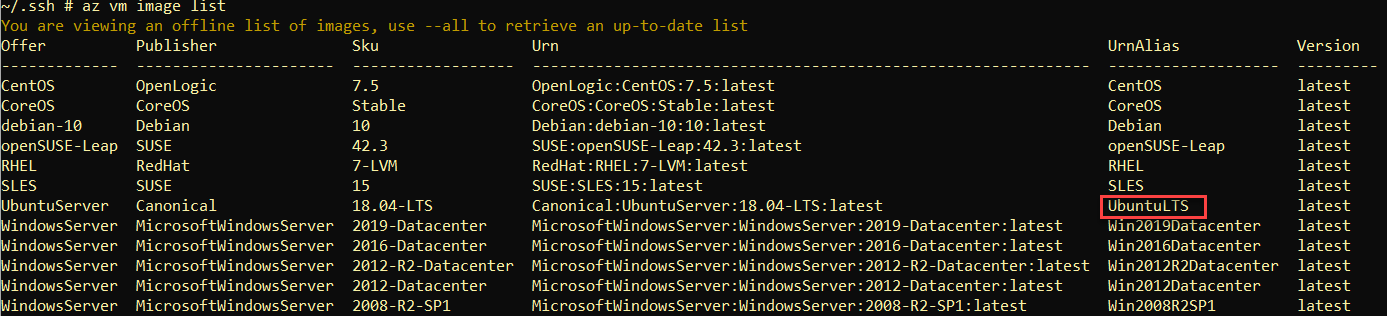
The Azure CLI maintains a cached record of all VM pictures. If the UbuntuLTS picture doesn’t present up, use the
allparameter to get an up to date record.
2. As soon as you already know the disk picture to make use of for the VM, create the VM with az vm create. The code snippet under creates a VM identify of ATAVM1 utilizing the UbuntuLTS picture within the resource-group TESTGrp. When Azure creates the VM, it is going to generate the SSH keys (generate-ssh-keys) to connect with it later and return output in JSON (output).
az vm create --resource-group TESTGrp
   --name ATAVM1  ## hostname for the digital machine
   --image UbuntuLTS  ## Picture identify gathered with az vm picture record
   --generate-ssh-keys  ## Auto generates SSH keys to be used with VM
   --output json  ## override for format output to return JSON
   --verbose ## additional output
Cut up a single longer Azure CLI instructions on separates traces utilizing a trailing backslash.
The
az vm createcommand has many extra methods to configure constructing a VM. Keep in mind the assistance system is your good friend!az vm create --help
If the command was initiated efficiently, you must see one thing much like the screenshot under.
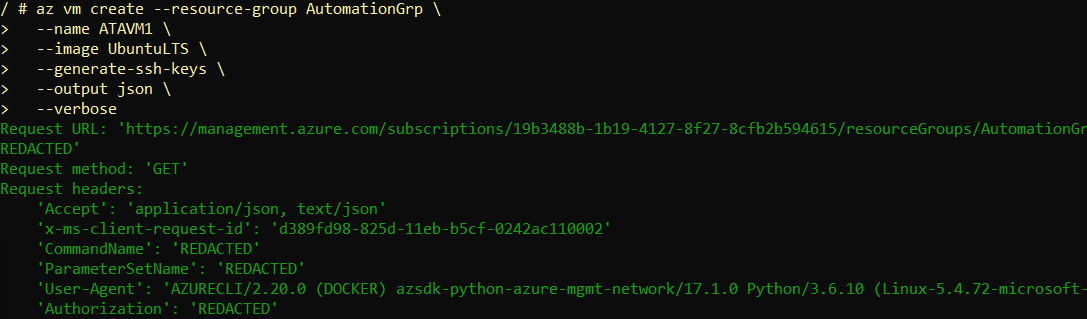
Through the use of the
verboseparameter, you will notice the precise REST API technique and parameters utilized in inexperienced.
3. When the deployment completes, the final part of the output will show details about your VM. Most notably for this demo, copy the general public IP tackle. You’ll want this to connect with the VM over the Web.
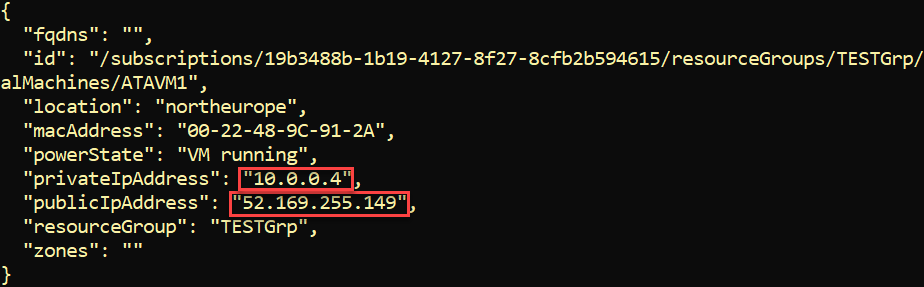
At this level, now hook up with the Ubuntu VM by way of SSH utilizing the VM’s public IP tackle discovered above. To take action, open your favourite SSH consumer and hook up with the VM because the person azureuser as proven under. By default, the az vm create command creates an area person referred to as azureuser.
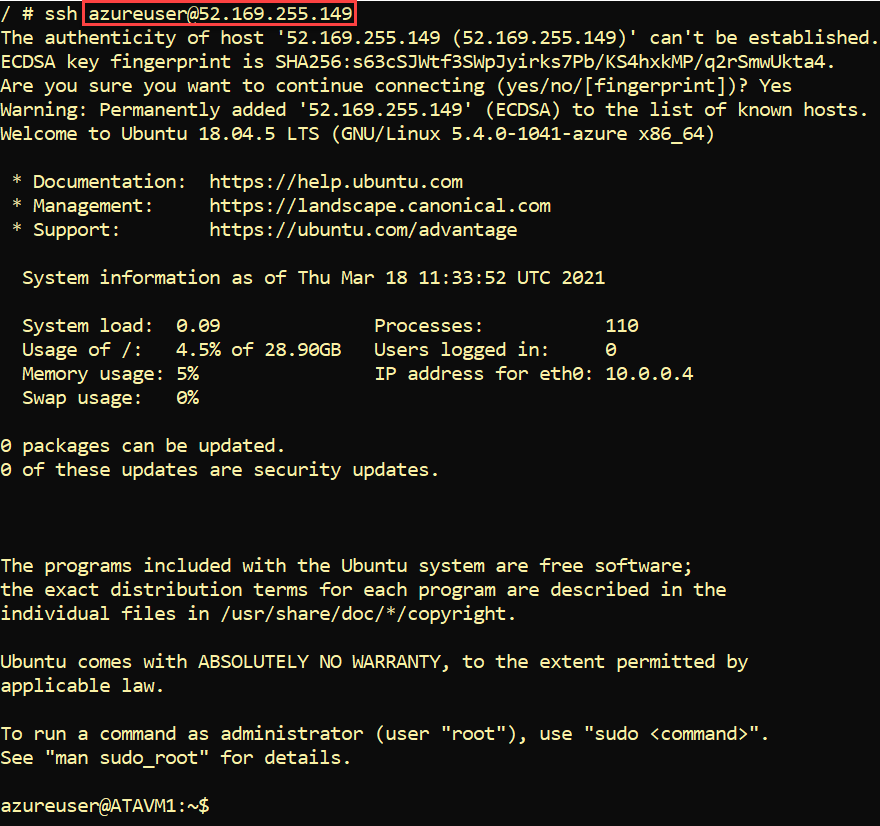
You have been in a position to SSH to the VM and not using a password since you used the
generate-ssh-keysparameter when creating the VM. This downloads the non-public key to your ~/.ssh listing and uploads the general public key to the VM permitting you to authenticate.
5. Now clear up the VM and the useful resource group.
az group delete --name TestGRPSubsequent Steps
You must now have the Azure CLI able to go. You’re now able to handle some assets! So what subsequent?