


Changing your uncooked knowledge into organized and actionable info could sound complicated. Effectively, not when you may have a quick and environment friendly answer. Fear not! This beginner-friendly AWS Glue tutorial has acquired your again.
On this tutorial, you’ll be taught the essential steps of configuring and executing knowledge transformations with AWS Glue.
Discover and streamline knowledge preparation for cloud-based analytics!
Conditions
Earlier than working with AWS Glue, guarantee you may have an energetic Amazon Internet Companies (AWS) account with billing enabled. A free tier account will suffice for this tutorial.
Creating an IAM Function for AWS Glue
Earlier than executing a metamorphosis job, you have to create an Identification and Entry Administration (IAM) function that grants permission to the AWS Glue service. This function defines what kind of sources AWS Glue is allowed to entry in your AWS account.
To create the IAM function, comply with the steps beneath:
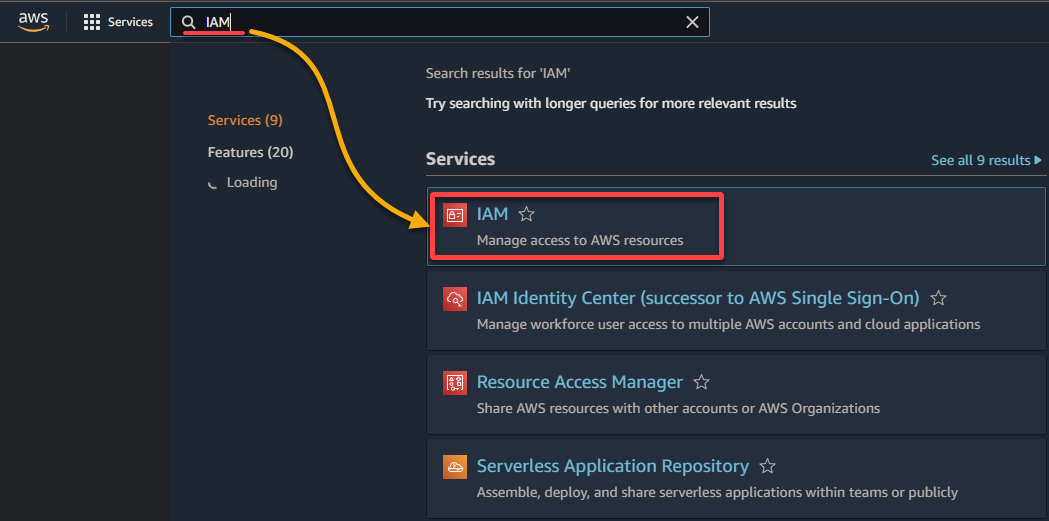
1. Open your most well-liked net browser, and log in to the AWS Administration Console.
2. Seek for and choose IAM within the end result record to entry the IAM console.
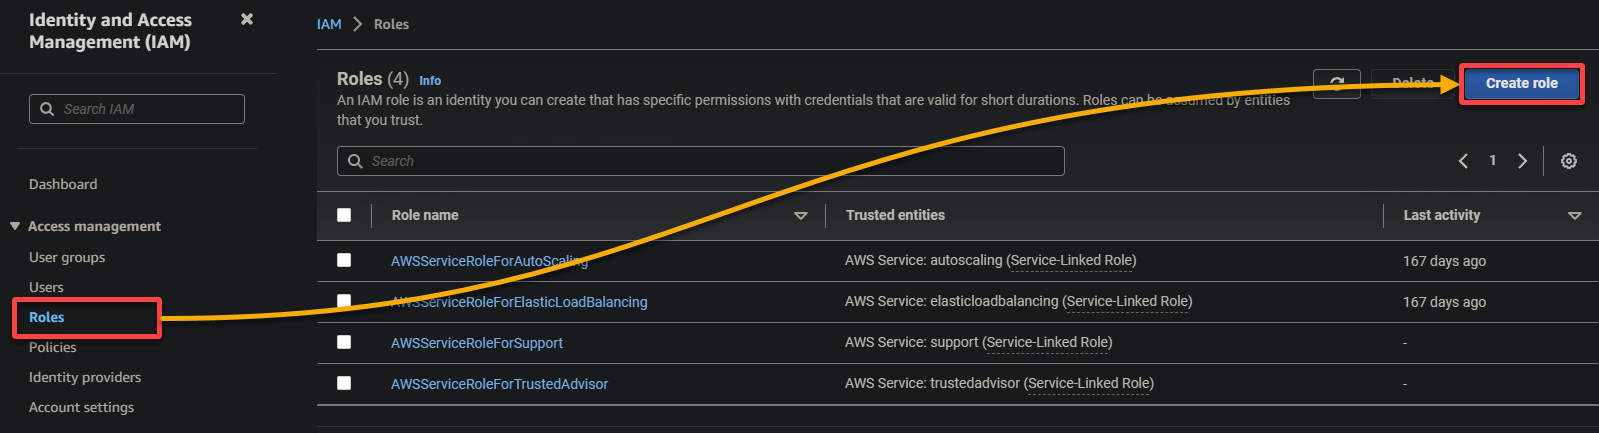
3. Within the IAM console, navigate to Roles (left pane) and click on Create function (top-right), redirecting your browser to a brand new web page devoted to configuring the function.
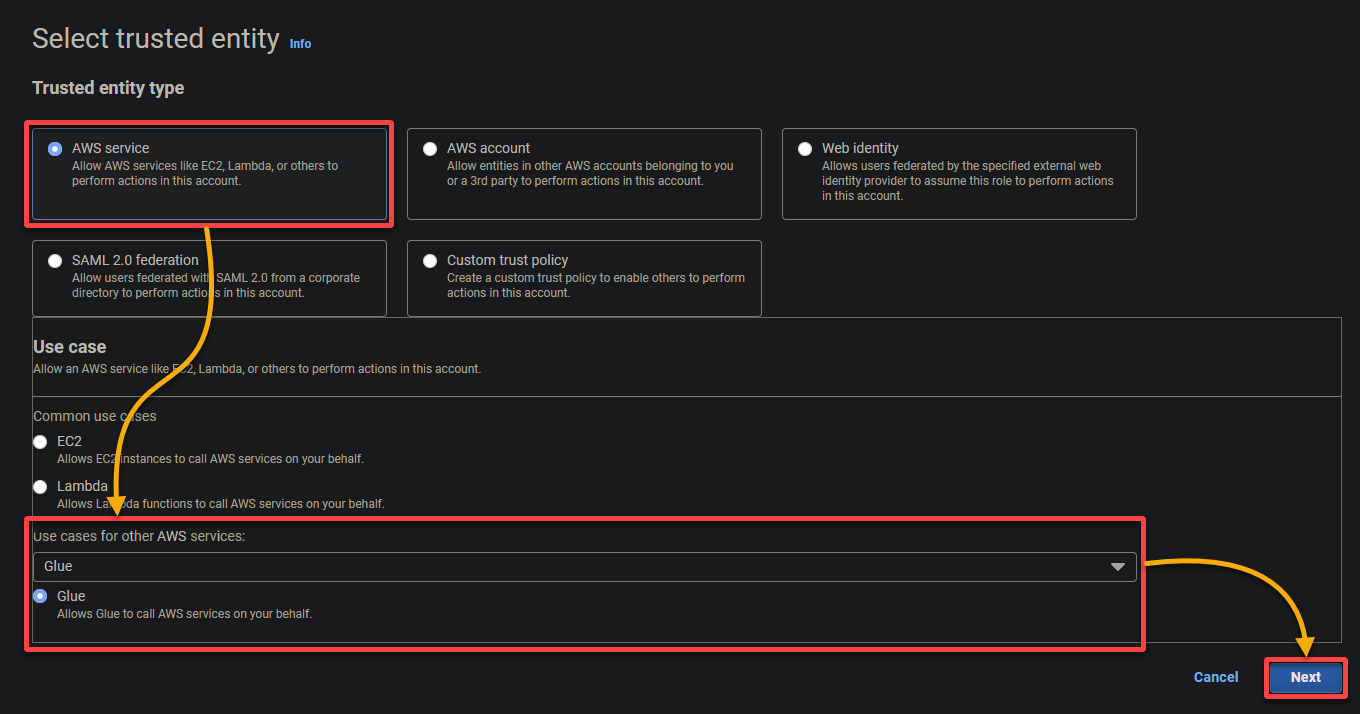
4. Now, configure the next settings for the function:
- Trusted entity kind – Choose AWS service so an AWS service will belief the function. Doing so permits that service to imagine the function and act in your behalf.
- Use case – Select Glue below the Use circumstances for different AWS providers part since you’ll create the IAM function particularly for AWS Glue, and click on Subsequent.
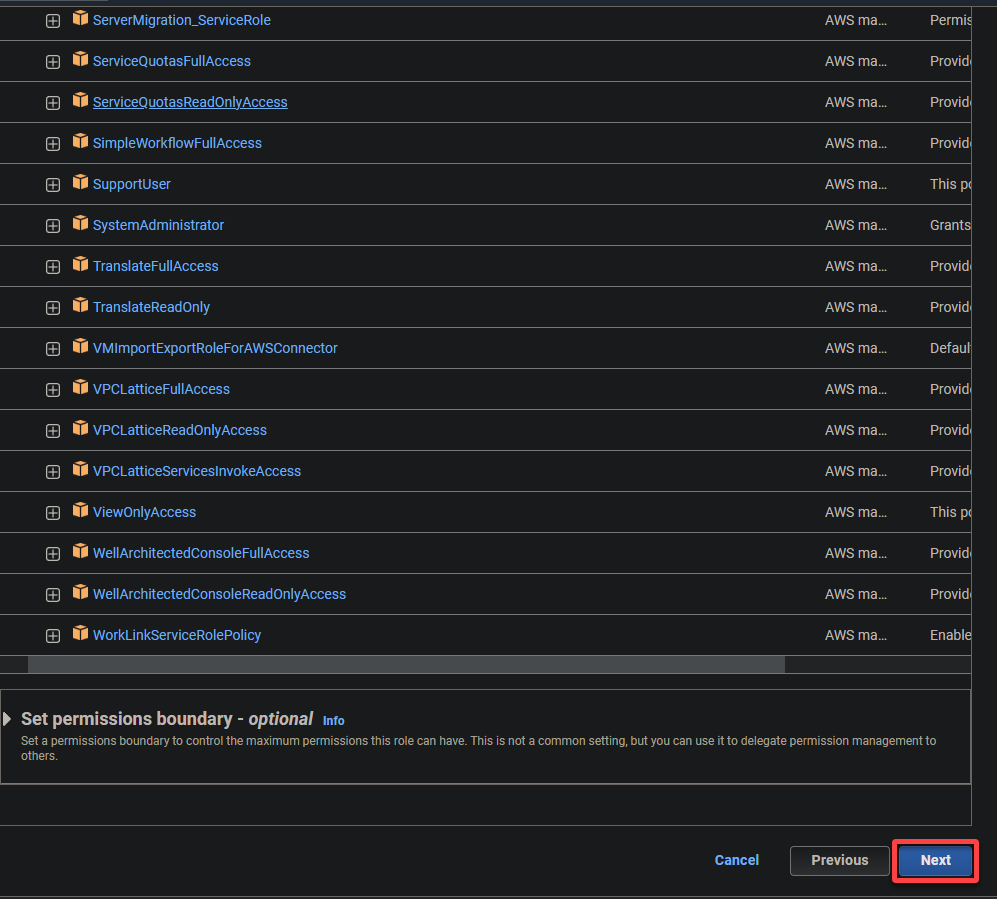
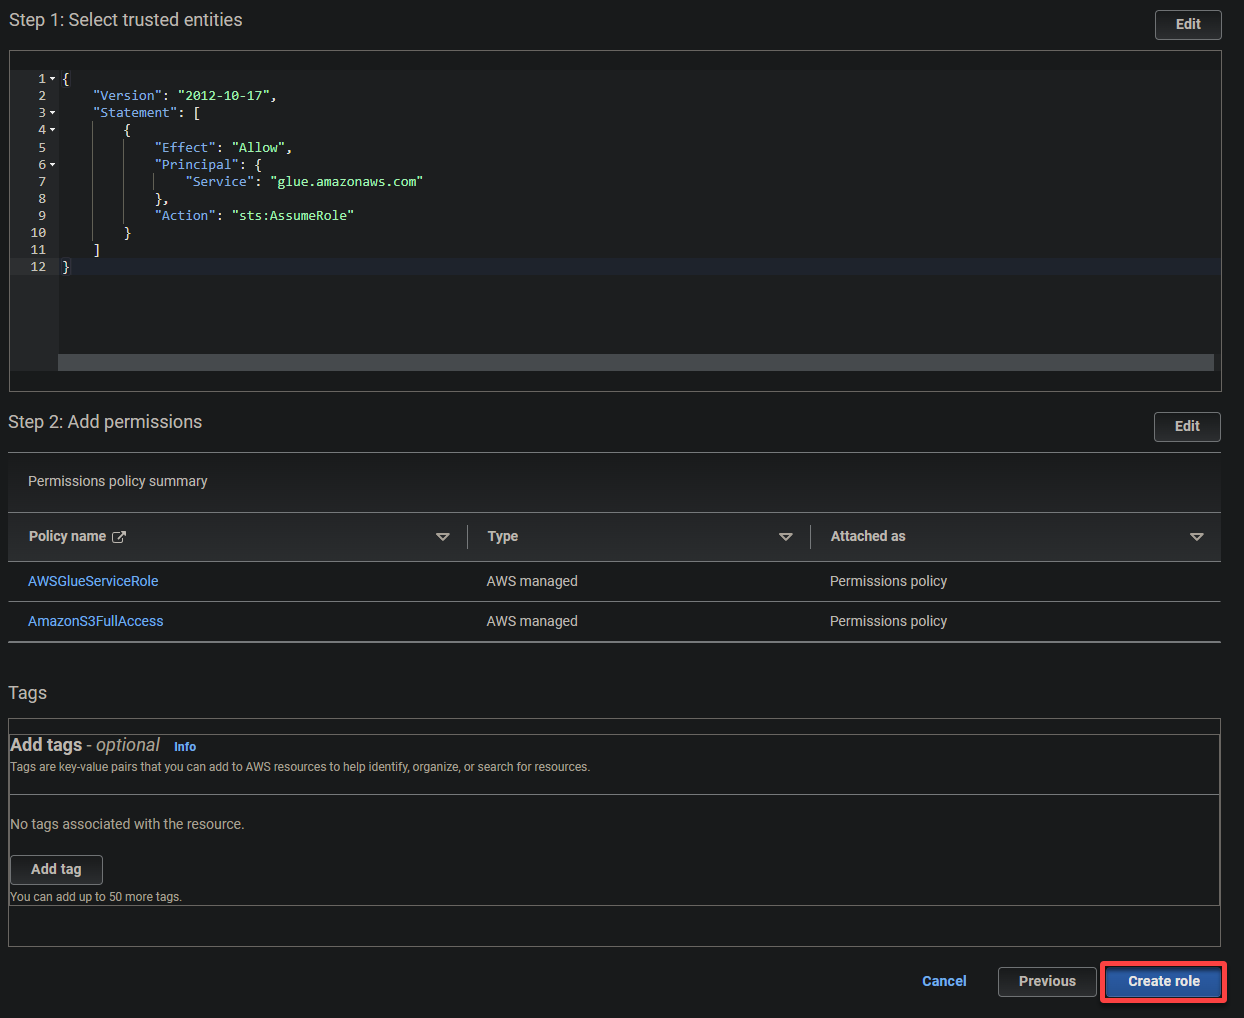
5. Search and choose the next insurance policies, and click on Subsequent.
- AWSGlueServiceRole – Grants the AWS Glue service the required permissions to carry out its operations.
- S3FullAccess – Grants full entry to the S3 sources, permitting AWS Glue to learn from and write to S3 buckets.
AWS Glue wants in depth permissions to learn from and write to S3 buckets to carry out its knowledge extraction, transformation, and loading (ETL) duties successfully.
💡 Keep away from granting pointless extreme permissions, as they will pose safety dangers.
6. Present a descriptive title for the function (i.e., glue_role) and an outline.
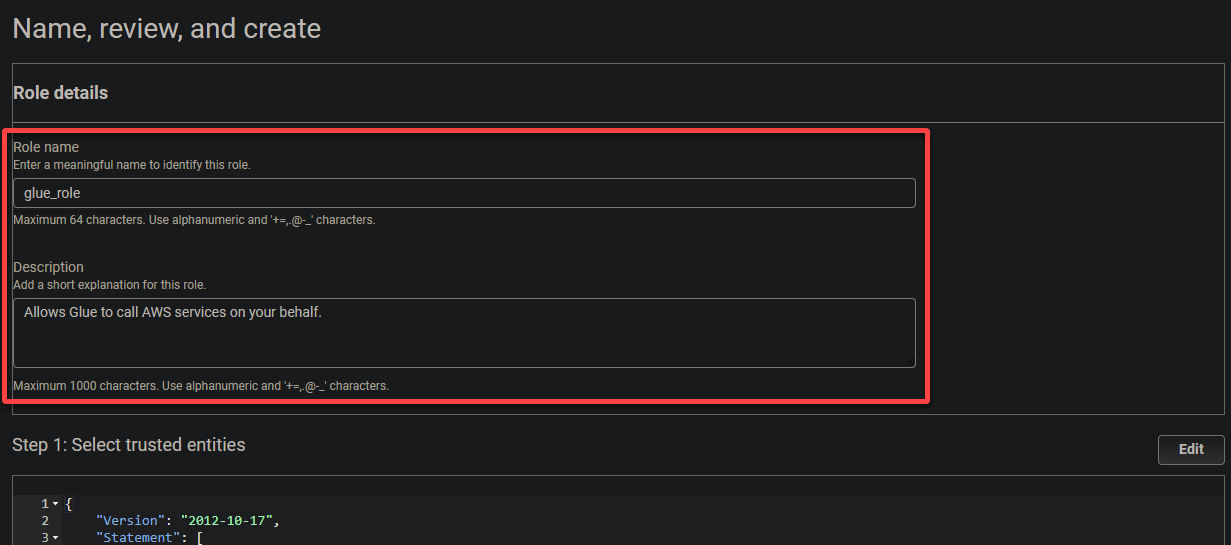
7. Lastly, scroll down, evaluation your settings, and click on Create function (bottom-right) to finalize creating the function.
Creating an S3 Bucket and Importing a Pattern File
Now that you’ve got an IAM function for AWS Glue, you want a spot to retailer your knowledge, particularly, an S3 bucket. An S3 bucket gives a centralized location for storing the info that AWS Glue will course of.
On this instance, AWS Glue will use AWS S3 as an information retailer for numerous operations, corresponding to knowledge extraction, transformation, and loading (ETL) duties.
To create an S3 bucket and add a pattern file, comply with these steps:
1. Obtain a pattern knowledge file (instance Each Politician knowledge set) to your native machine. This file incorporates an unstructured assortment of data to function the enter for the AWS Glue transformation job.
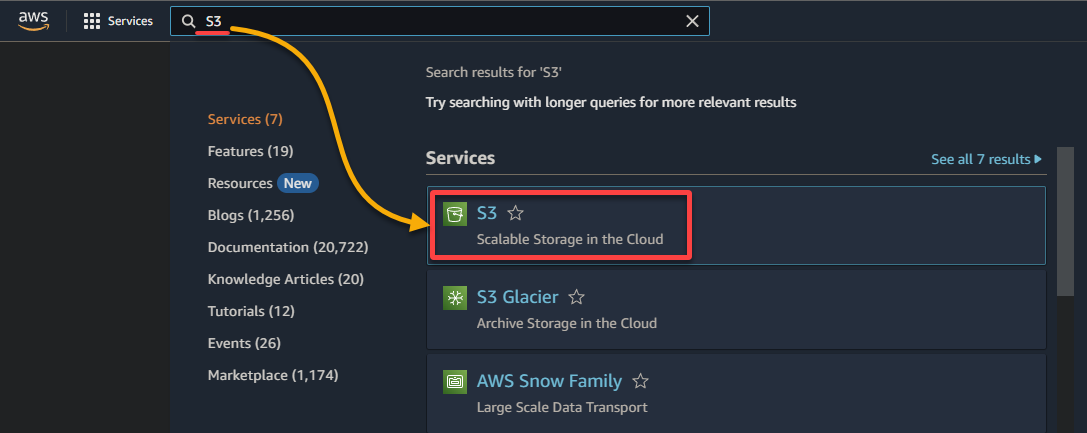
2. Seek for and choose the S3 service to entry the S3 console.
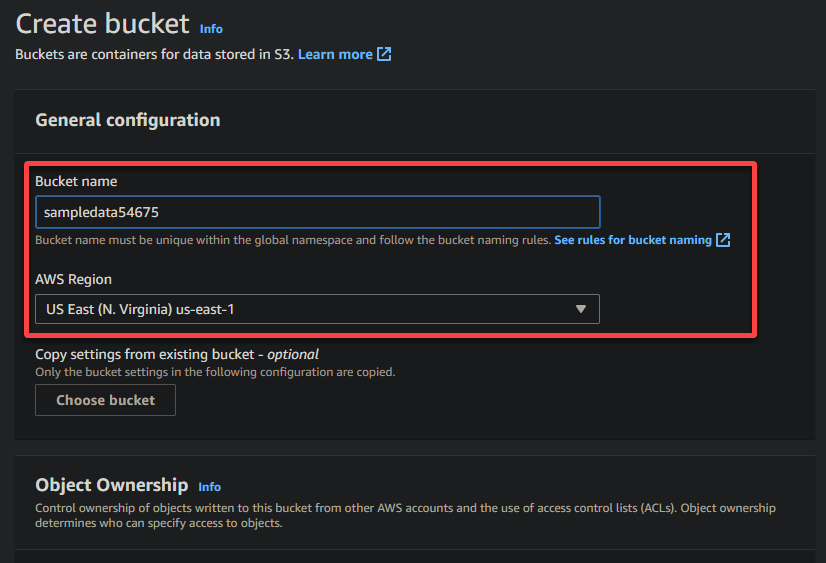
3. Click on Create a bucket to provoke creating a brand new S3 bucket.

4. Now, present a singular title on your bucket (i.e., sampledata54675) and choose the area the place the bucket must be positioned.
A novel title allows you to keep away from conflicts with current bucket names is essential, whereas the area choice determines the bodily location of your bucket’s knowledge.
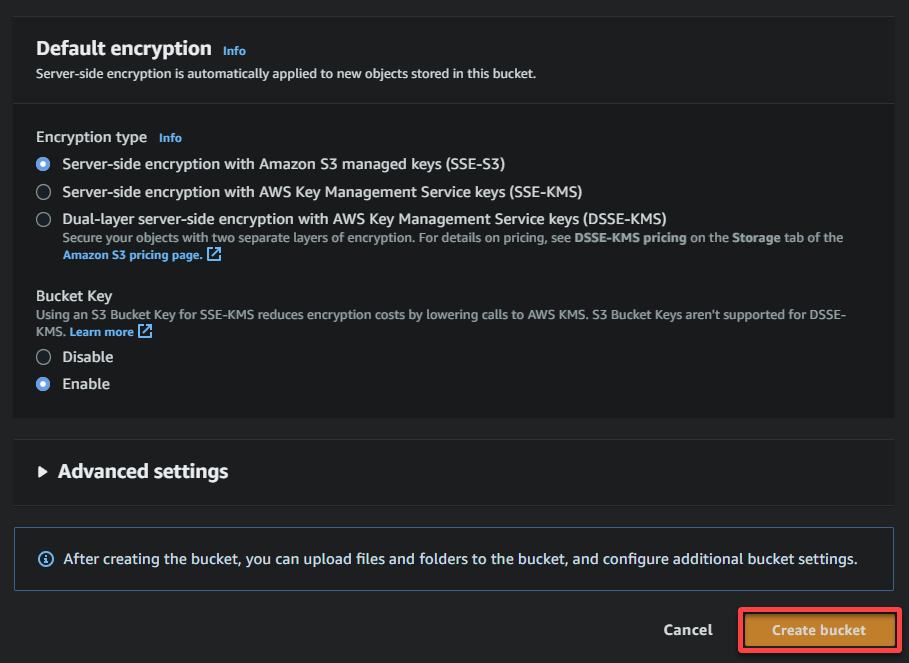
5. Scroll down, preserve different choices as is, and click on Create bucket to create the bucket.
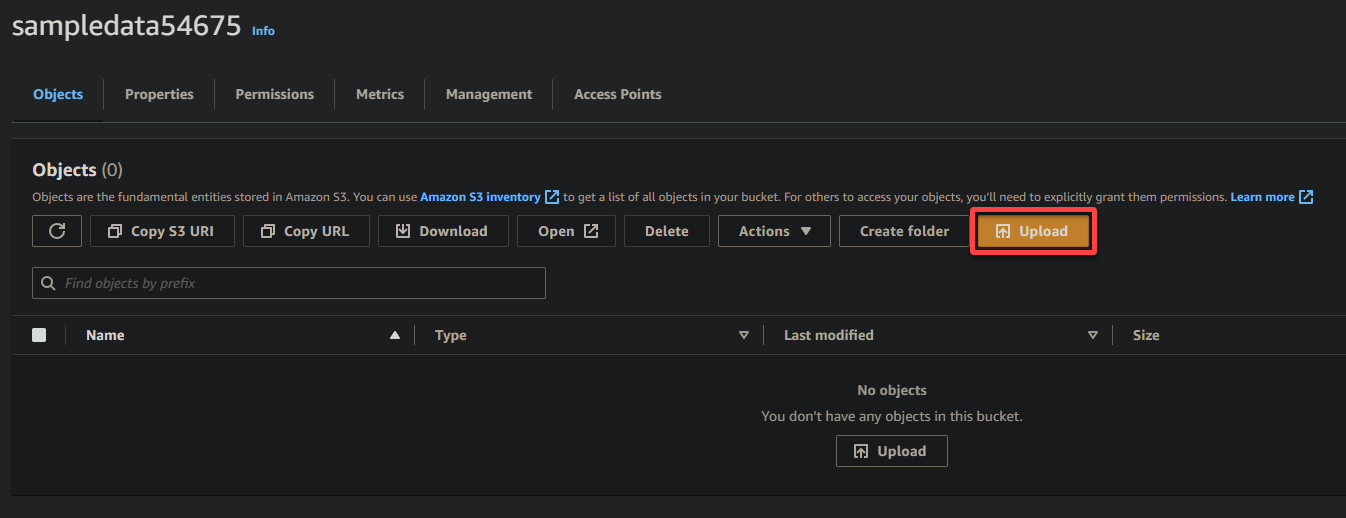
6. As soon as created, click on the hyperlink for the newly created S3 bucket to navigate to the bucket.

7. Click on Add and find the pattern file you want to add.
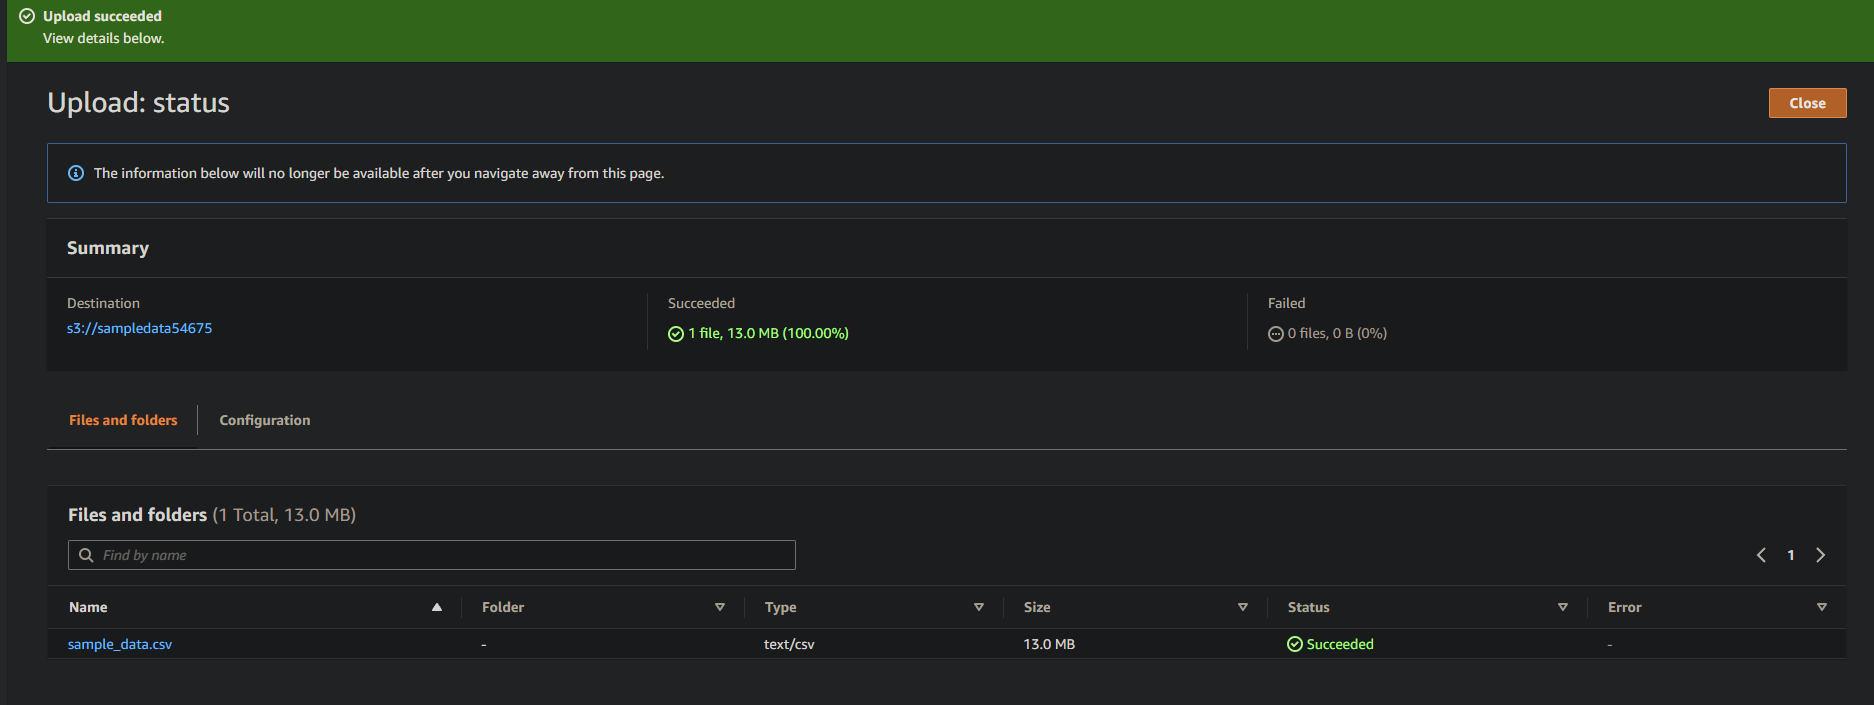
8. Lastly, preserve different settings as is, and click on Add to add the pattern file to the newly created bucket.

If profitable, you will note your newly-uploaded file in your bucket, as proven beneath.
Making a Glue Crawler to Scan and Catalog Information
You may have simply uploaded pattern knowledge to your S3 bucket, however since it’s at present unstructured, you want a approach to learn the info and construct a metadata catalog. How? By making a glue crawler that robotically scans and catalogs the info.
To create a glue crawler, comply with the steps beneath:
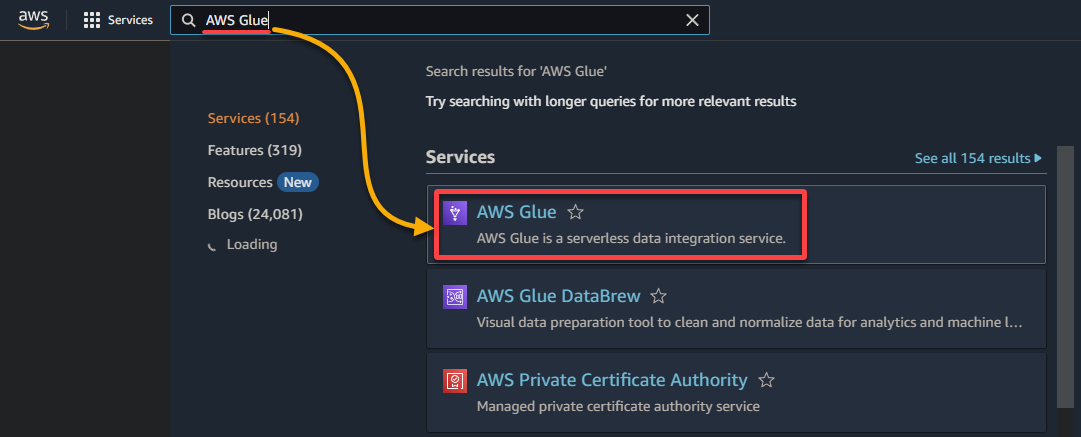
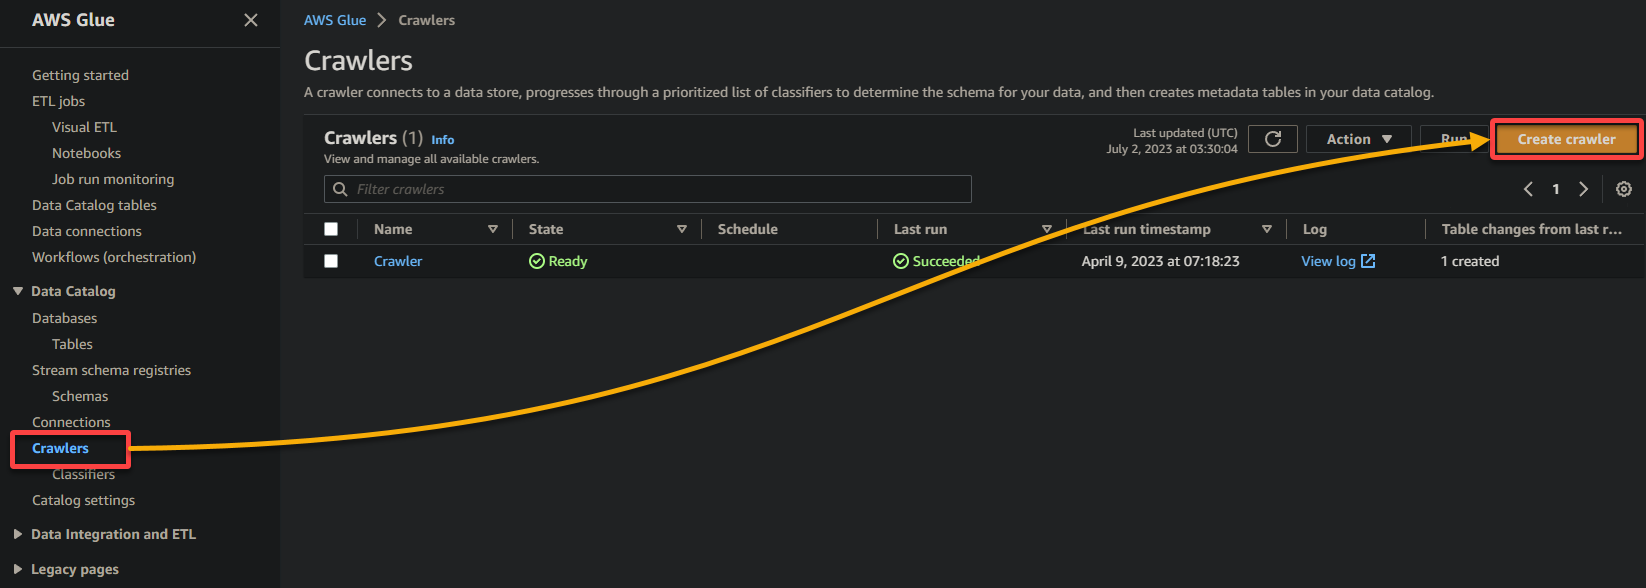
1. Navigate to the AWS Glue console through the AWS Administration Console, as proven beneath.
2. Subsequent, navigate to Crawler (left pane) and click on Add crawler (upper-right) to provoke creating a brand new glue crawler.
3. Present a descriptive title (i.e., glue_crawler) and an outline for the crawler, preserve different settings as is, and click on Subsequent.

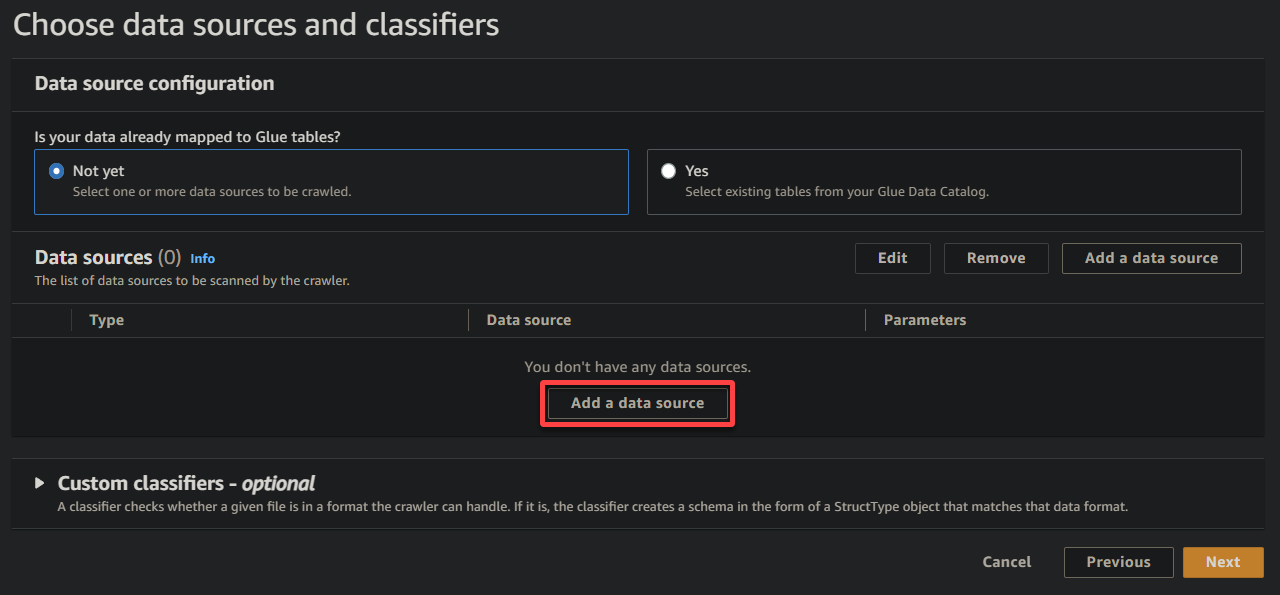
4. Now, click on Add an information supply below Information sources to provoke including a brand new knowledge supply to the crawler.
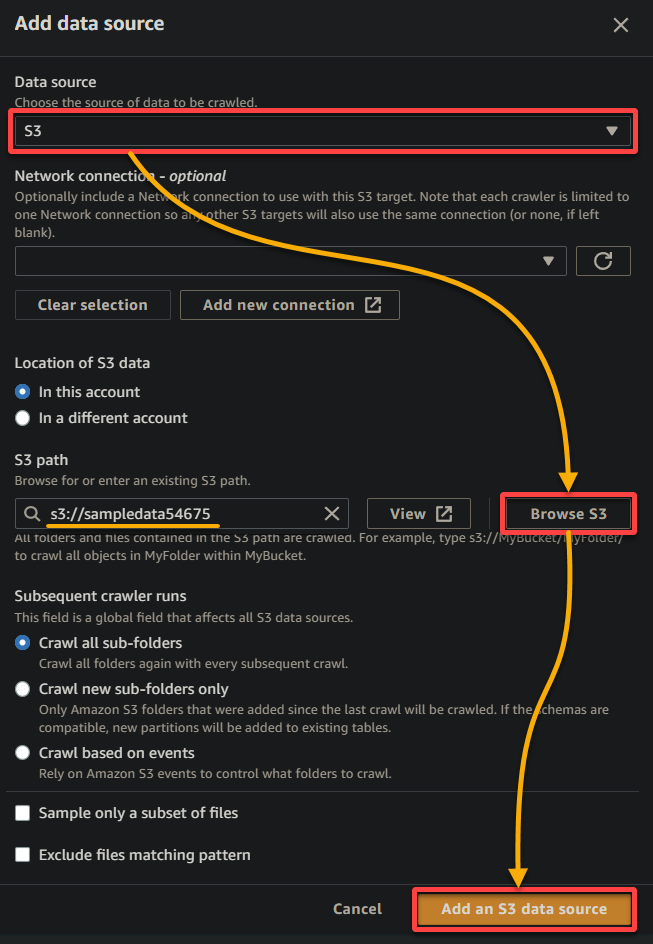
5. On the popup window, configure the info supply as follows:
- Information supply – Choose S3 since your knowledge is in your S3 bucket.
- S3 path – Click on Browse S3, and select the bucket that incorporates your uploaded pattern knowledge (sampledata54675).
- Hold different settings as is, and click on Add an S3 knowledge supply so as to add the pattern knowledge to the crawler.
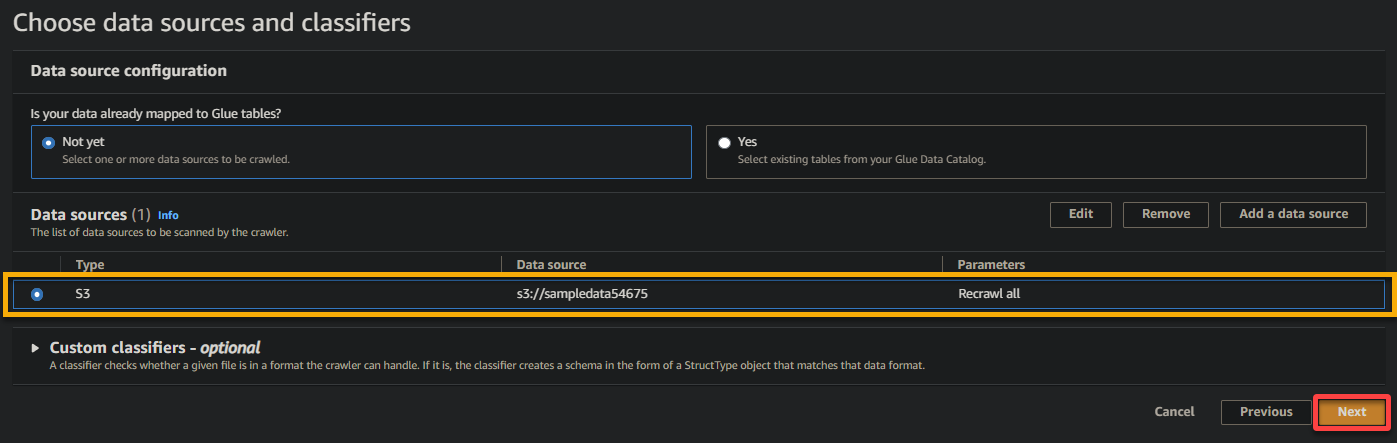
6. As soon as configured, confirm the info supply, as proven beneath, and click on Subsequent to proceed.
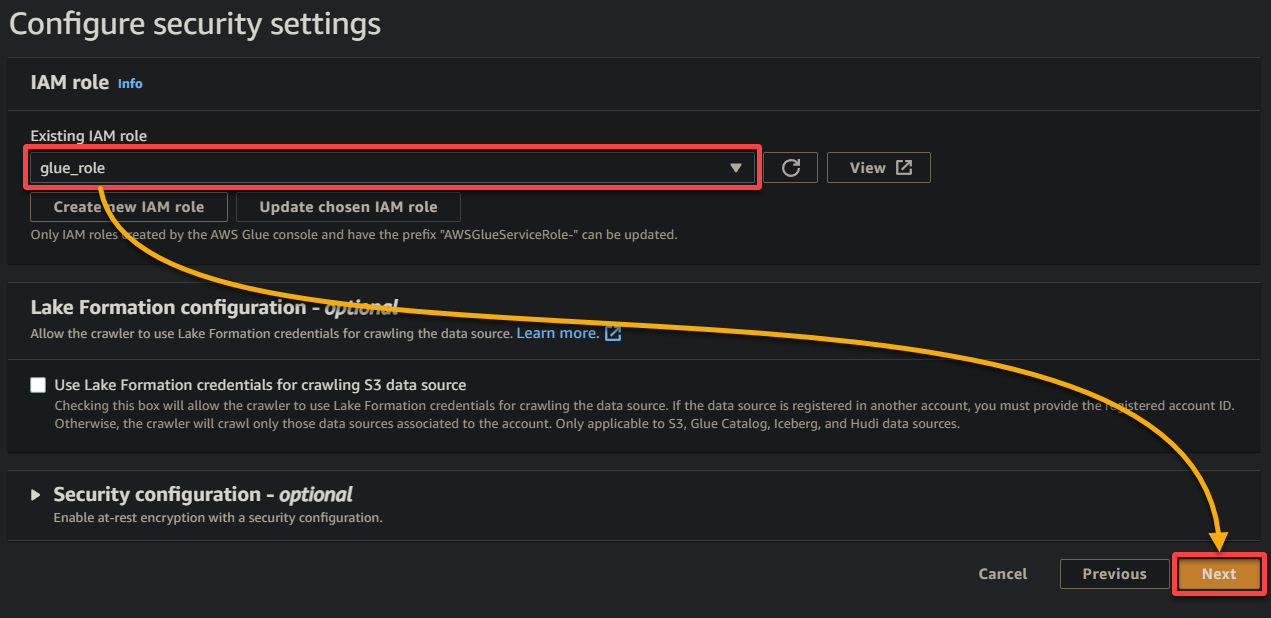
7. On the subsequent display screen, choose the IAM function you created earlier (glue_role), preserve different settings as is, and click on Subsequent.
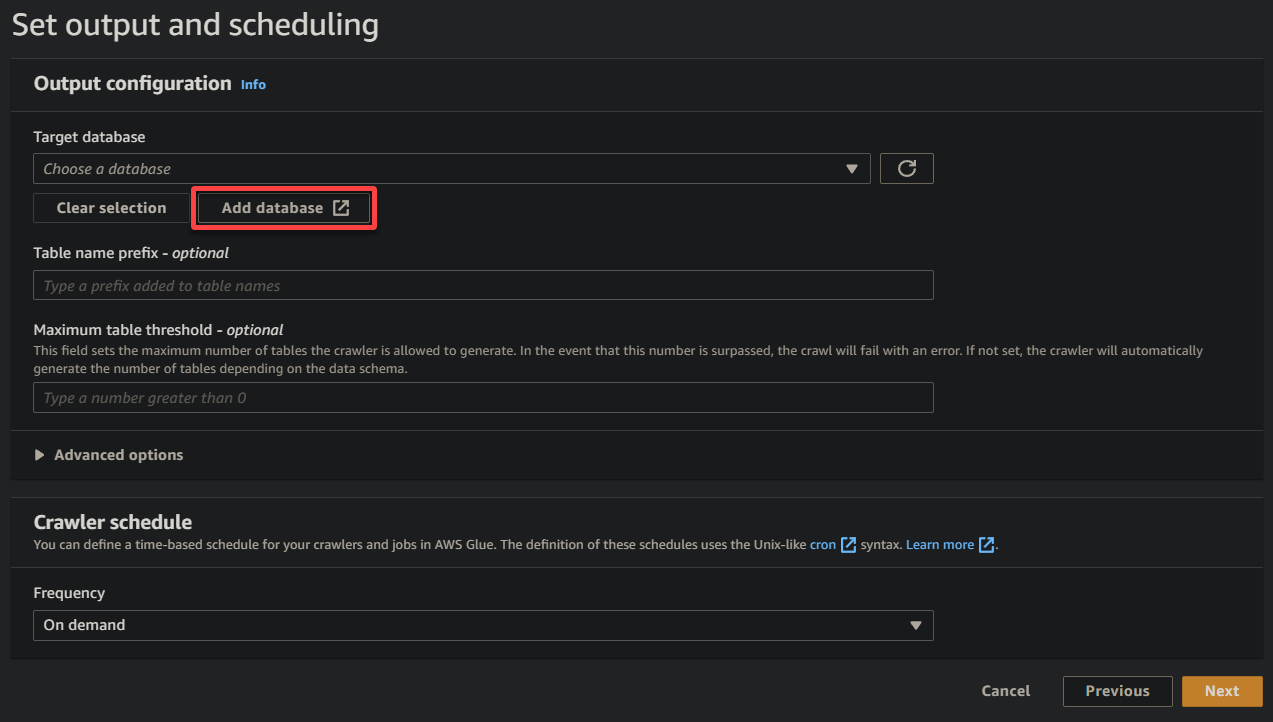
8. Underneath output and scheduling, click on Add database to provoke including a brand new database to retailer the processed knowledge and metadata generated by your glue crawler. This motion opens a brand new browser tab, the place you’ll configure your database particulars (step eight).
This database gives a structured illustration of the info for querying and evaluation.
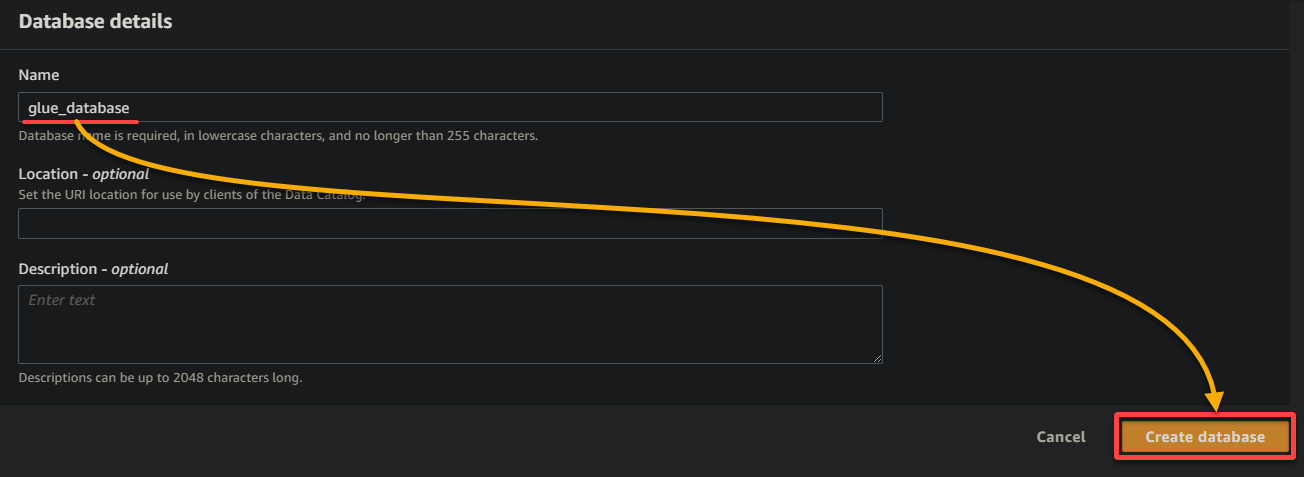
9. On the brand new browser tab, present a descriptive database title (i.e., glue_database), and click on Create database to create the database.
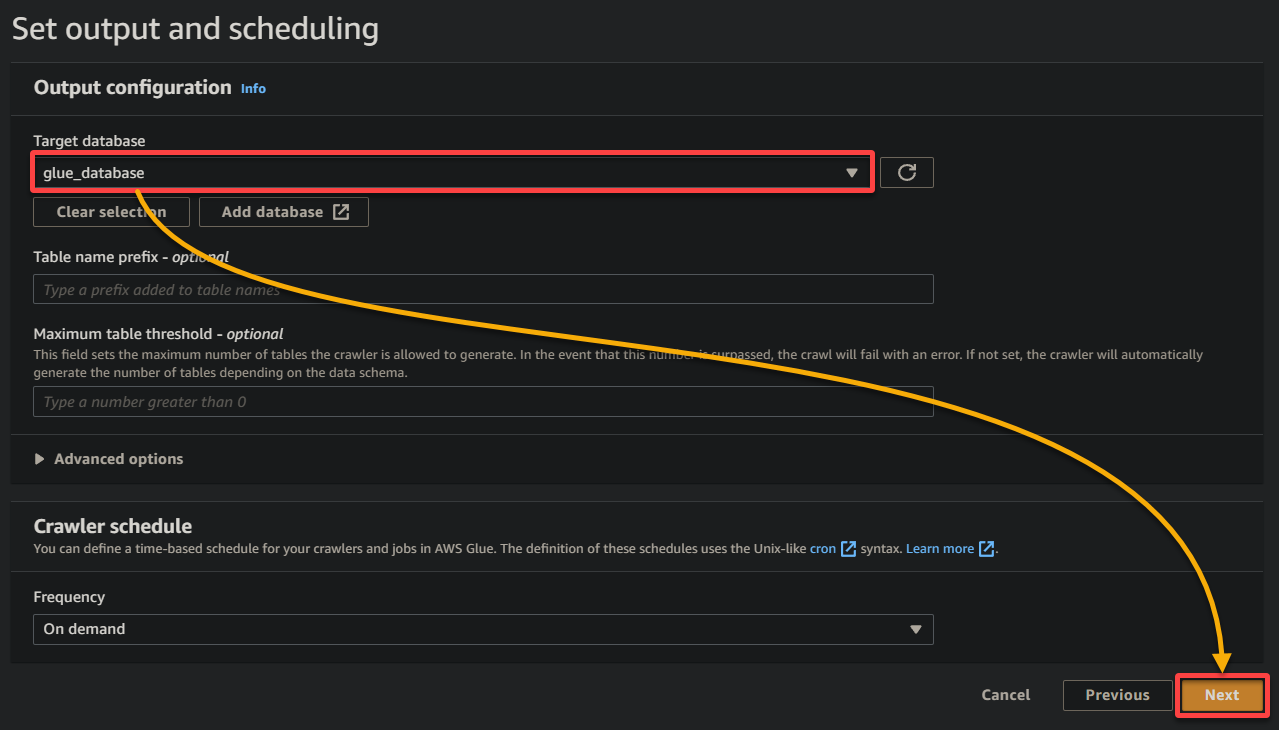
10. Swap to the earlier browser tab, choose the newly-created database (glue_database) from the drop-down, preserve different settings as is, and click on Subsequent.
11. In the end, evaluation your settings on the ultimate display screen to make sure they’re correct, and click on Create crawler (bottom-right) to create the brand new crawler.
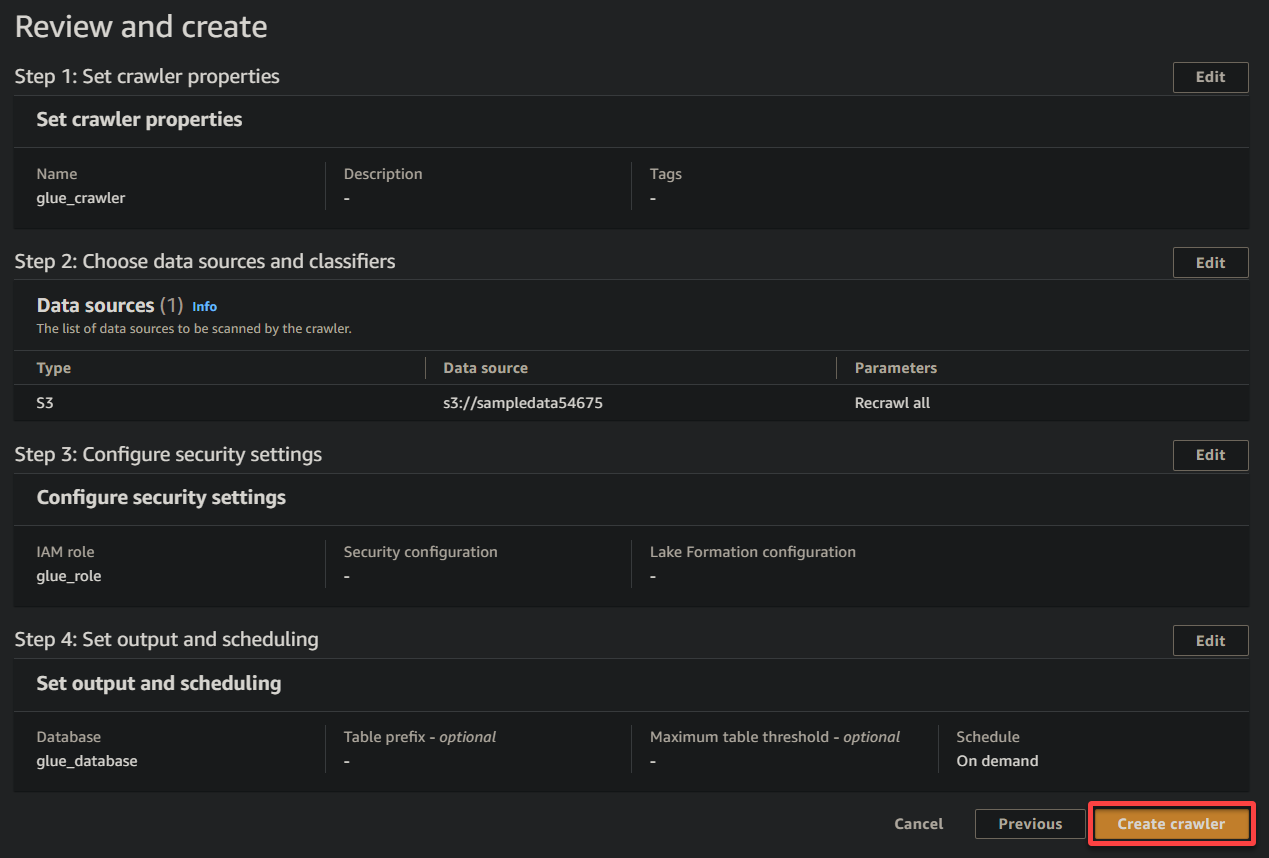
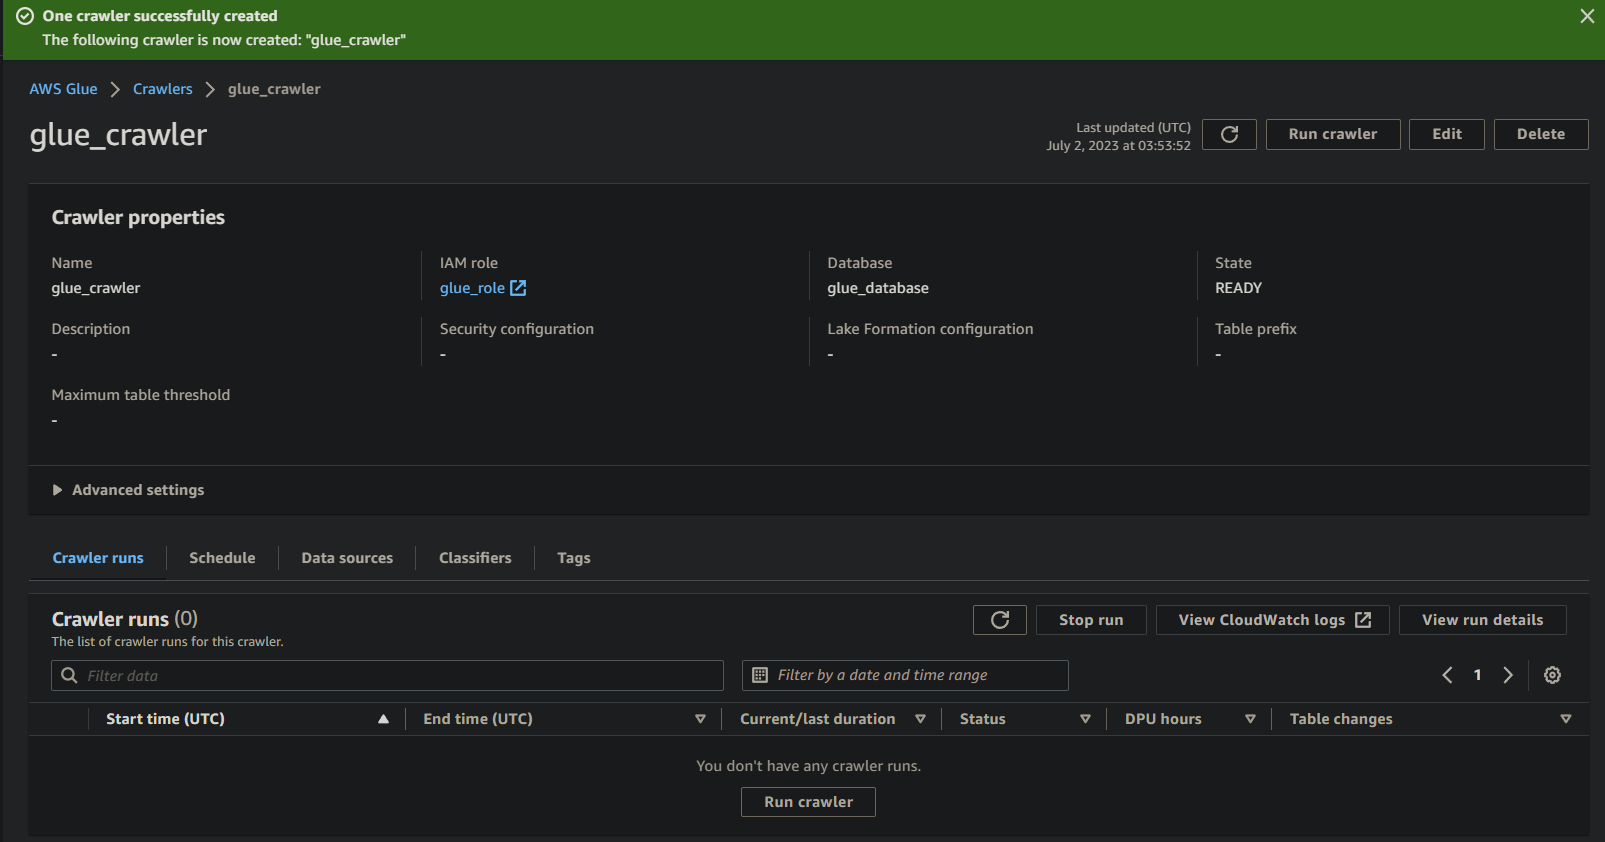
If all the things goes effectively, you will note a display screen confirming the profitable creation of the crawler. Don’t shut this display screen but; you’ll run this crawler within the following part.
Working the Glue Crawler to Construct a Metadata Catalog
With a brand new crawler at your disposal, operating the crawler is important to start out the scanning and cataloging course of. Your glue crawler will construct a metadata catalog that gives a structured illustration of your knowledge for querying and evaluation functions.
To run your newly-created glue crawler:
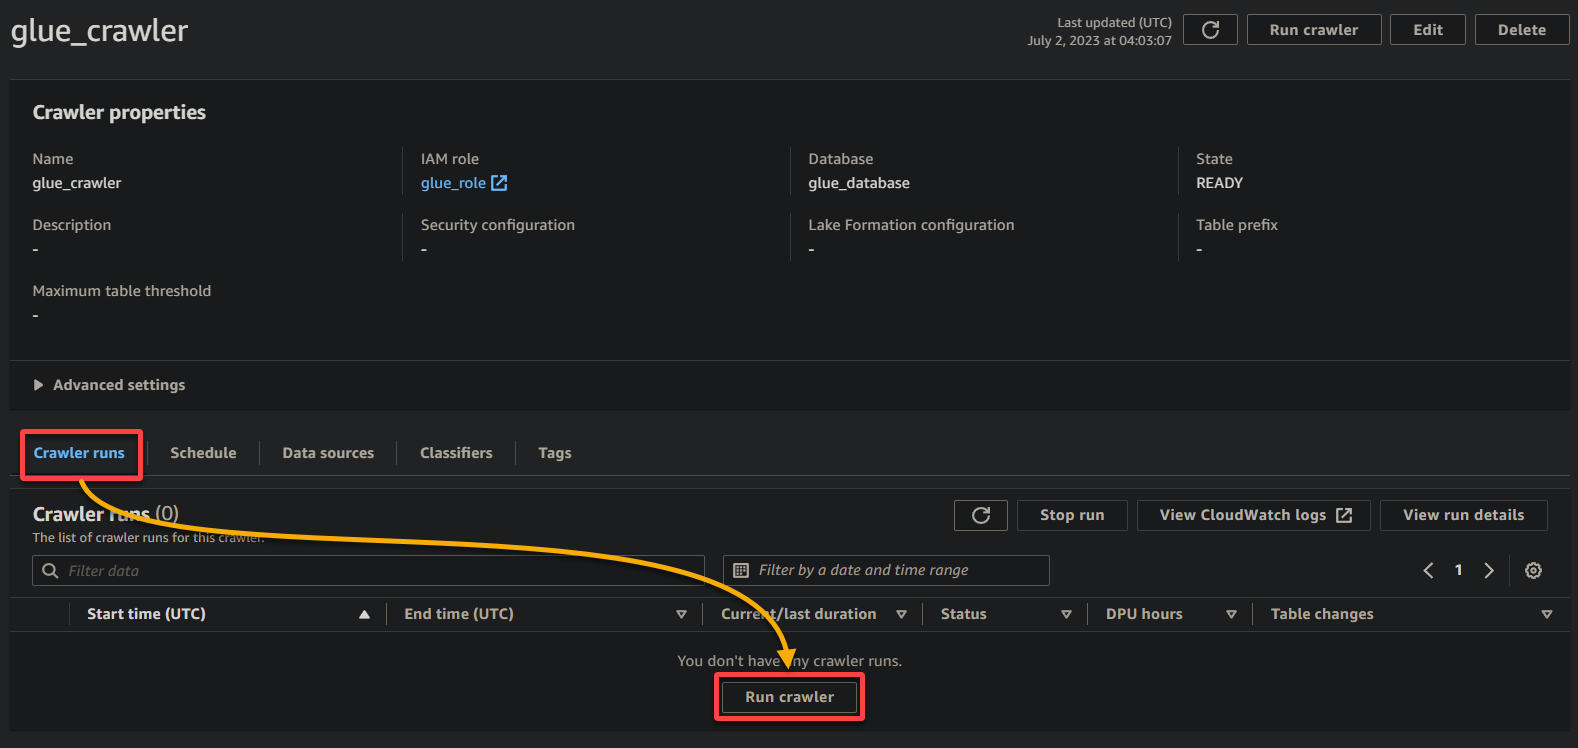
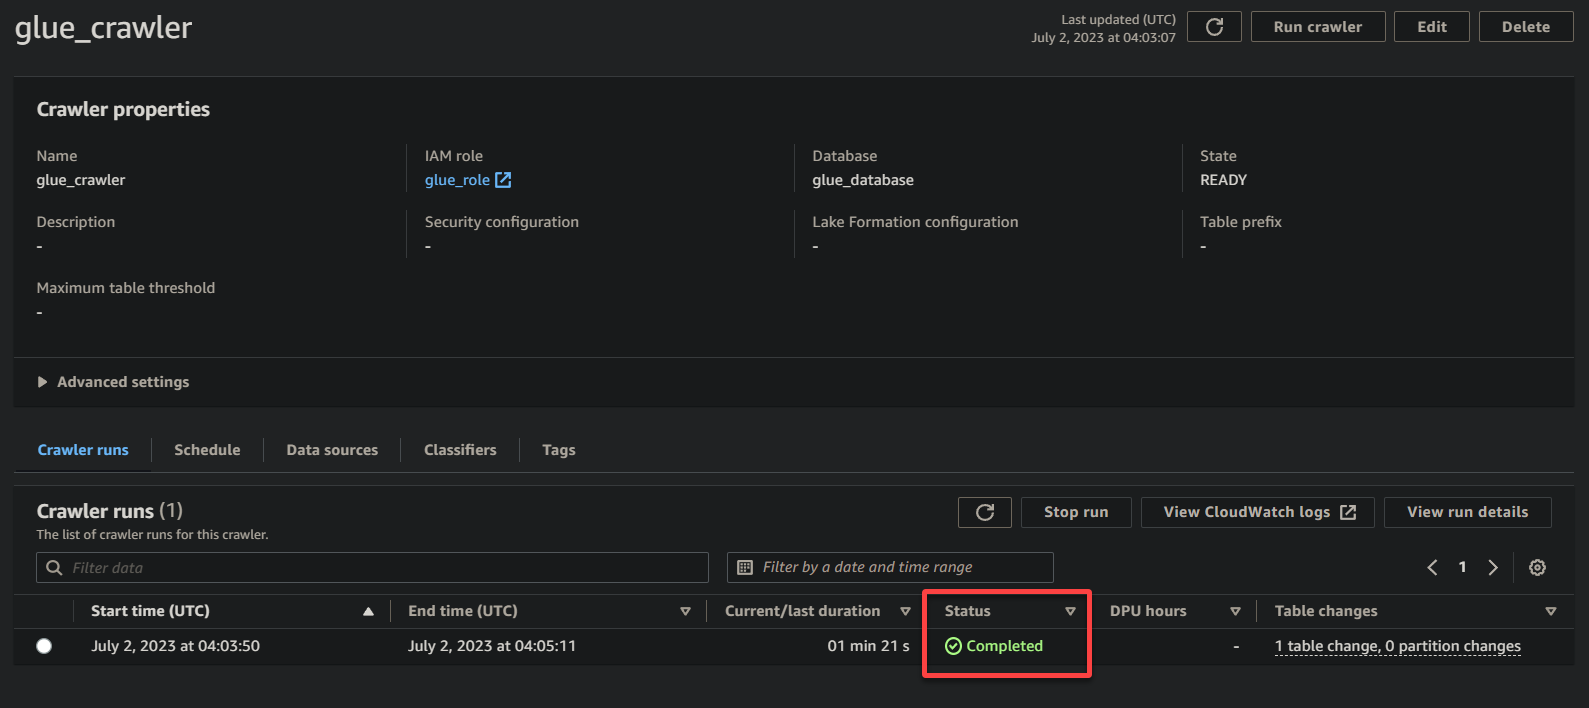
1. On the crawler particulars web page, click on Run crawler below the Crawler runs tab to provoke the execution of the crawler.
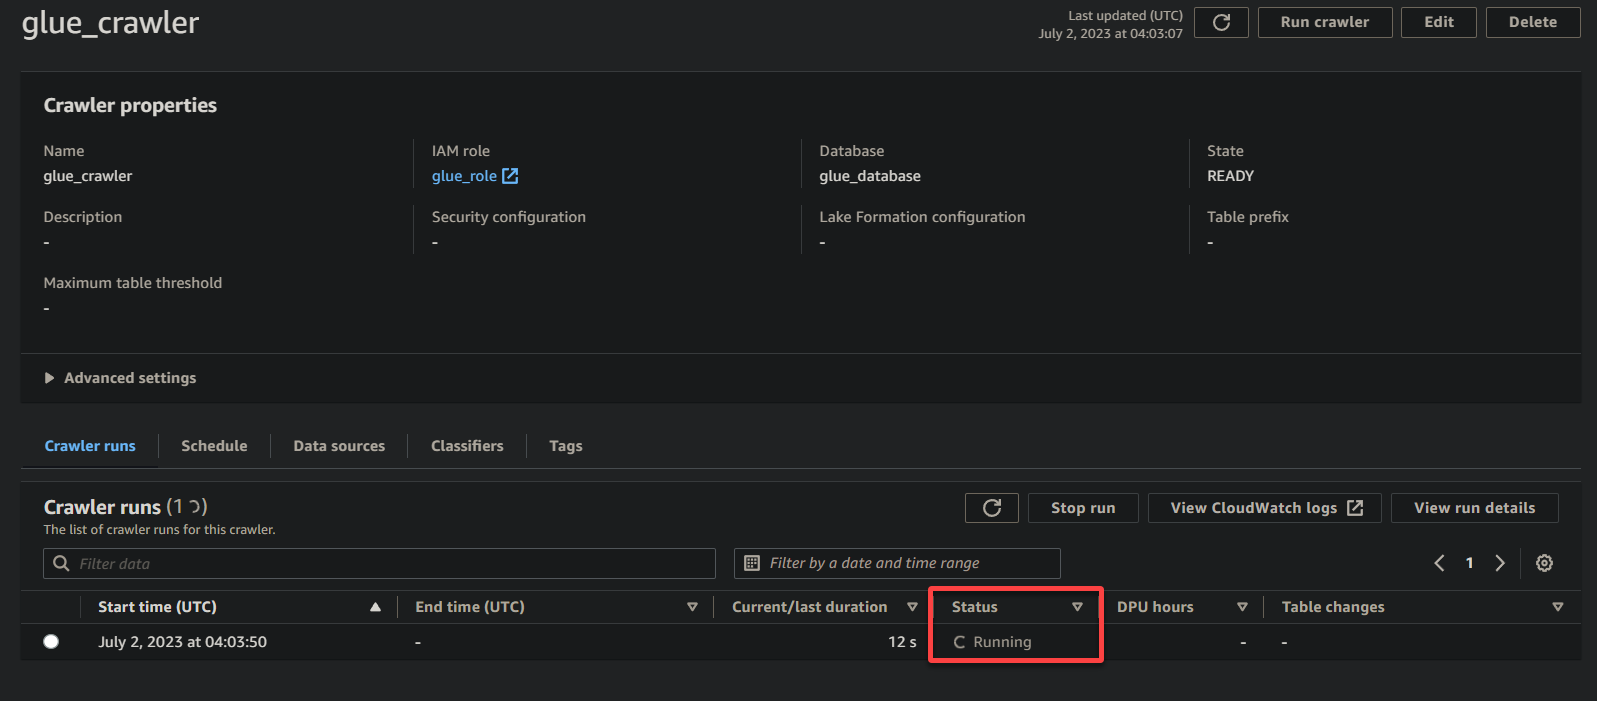
As soon as the crawler begins operating, you will note its standing and progress on the crawler particulars web page.
Relying on the scale and complexity of your knowledge, the crawler could take a while to finish its execution. You’ll be able to periodically refresh the web page to see the up to date standing of the crawler.
As soon as the crawler has accomplished its execution, the standing modifications to Accomplished, as proven beneath. At this level, you possibly can proceed with querying your knowledge.
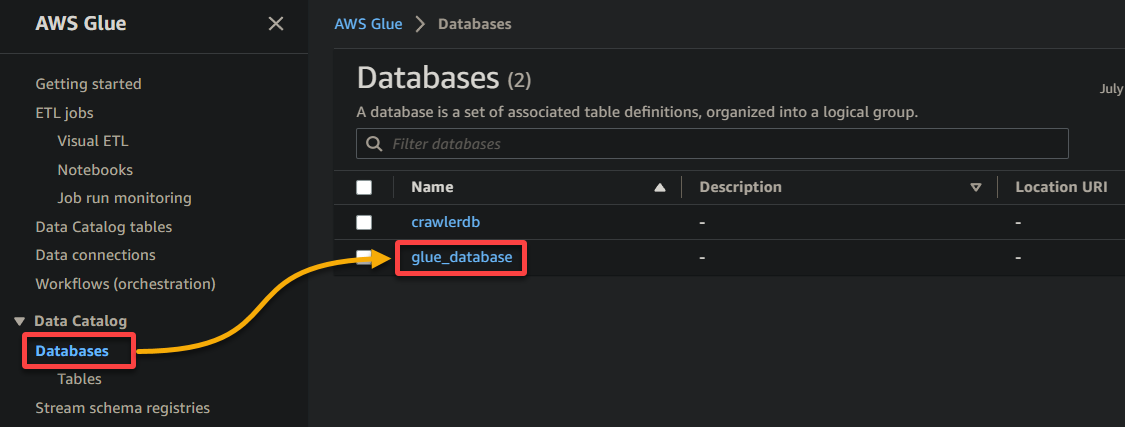
2. Subsequent, navigate to Database (left pane), and click on your database to entry its properties and tables.
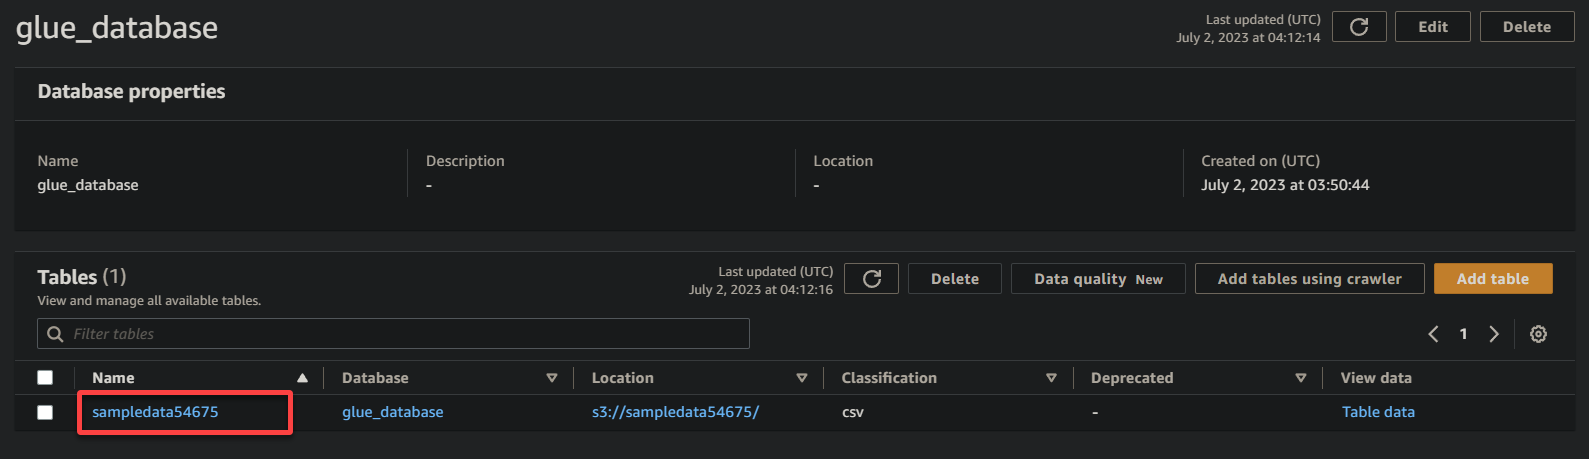
3. Lastly, click on in your bucket’s title (sampledata54675), now a desk, to view its saved knowledge.
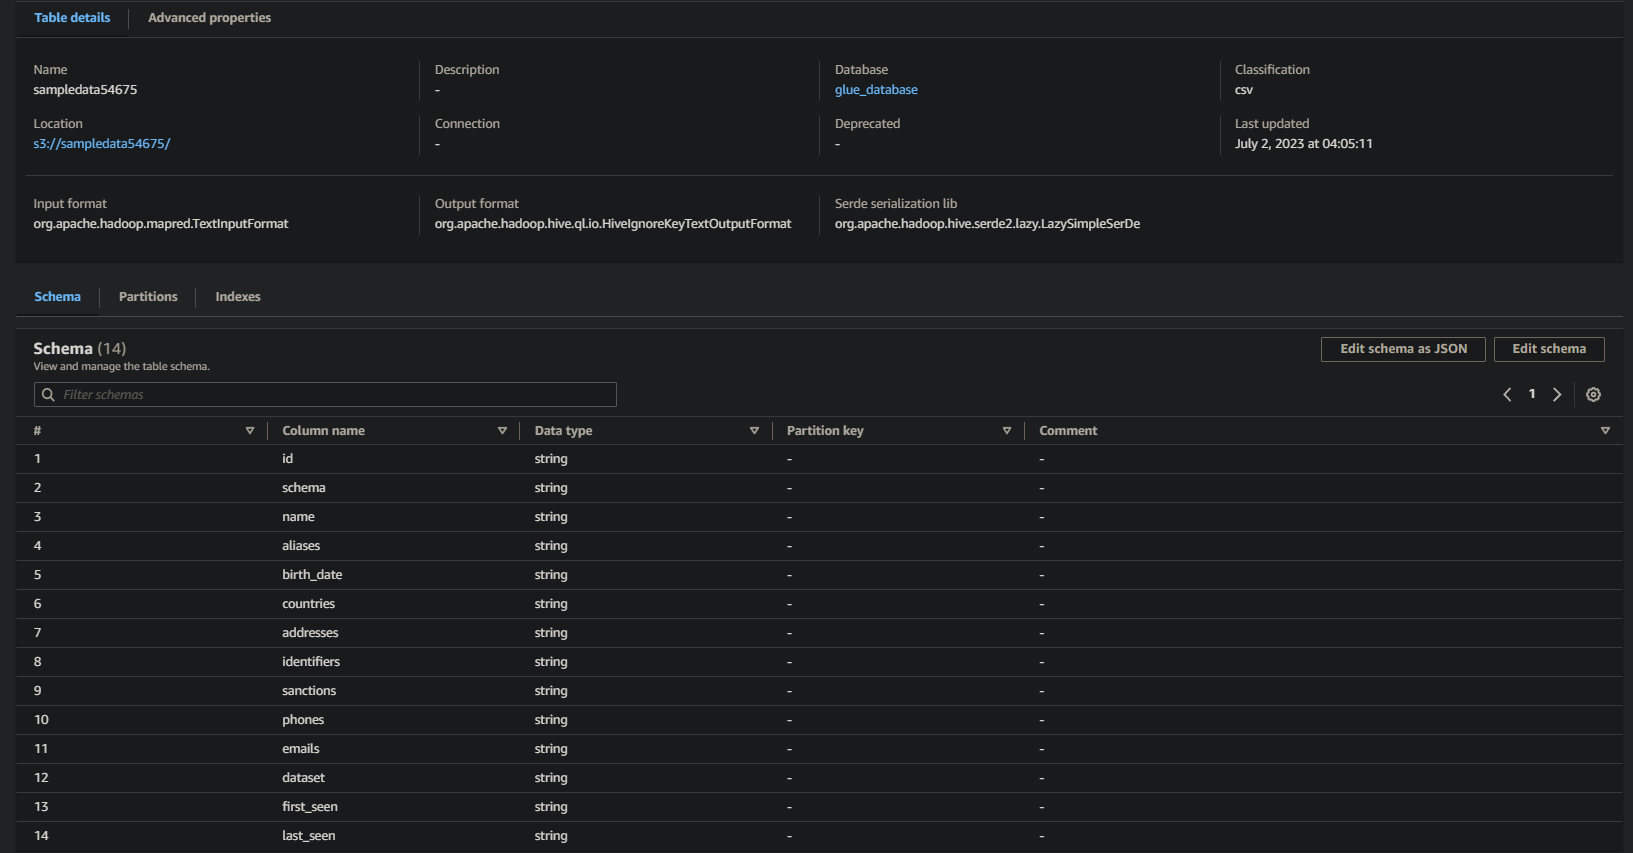
If profitable, you will note info related beneath. This info confirms that the info was efficiently remodeled into the database desk, offering invaluable particulars.
Querying Cataloged Information through AWS Athena
Now that your knowledge is accessible in AWS Glue Information Catalog, you should utilize numerous instruments to question and analyze your knowledge. One such instrument is AWS Athena, an interactive question service that lets you analyze knowledge within the cloud utilizing commonplace SQL.
To question the info utilizing AWS Athena, comply with the steps beneath:
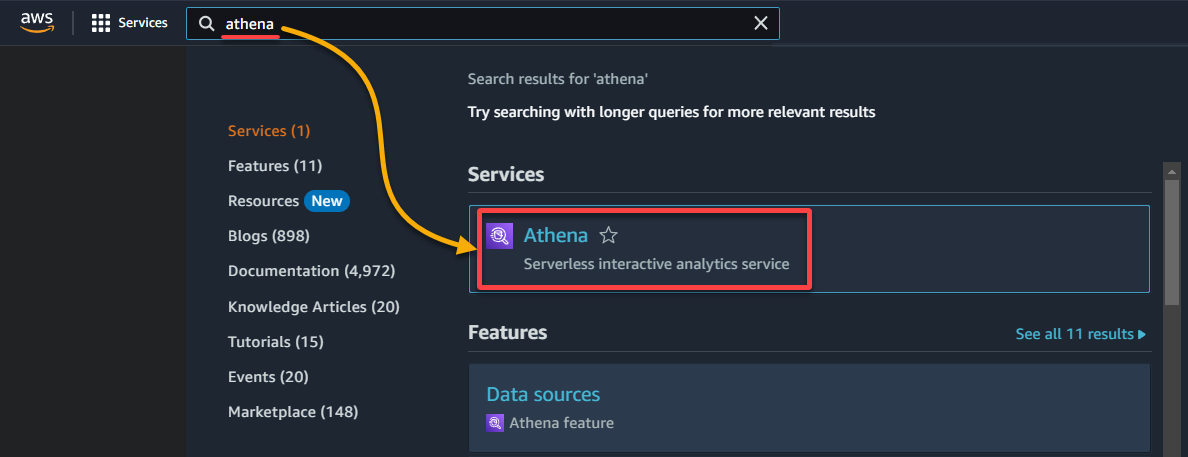
1. Seek for and entry the Athena console.
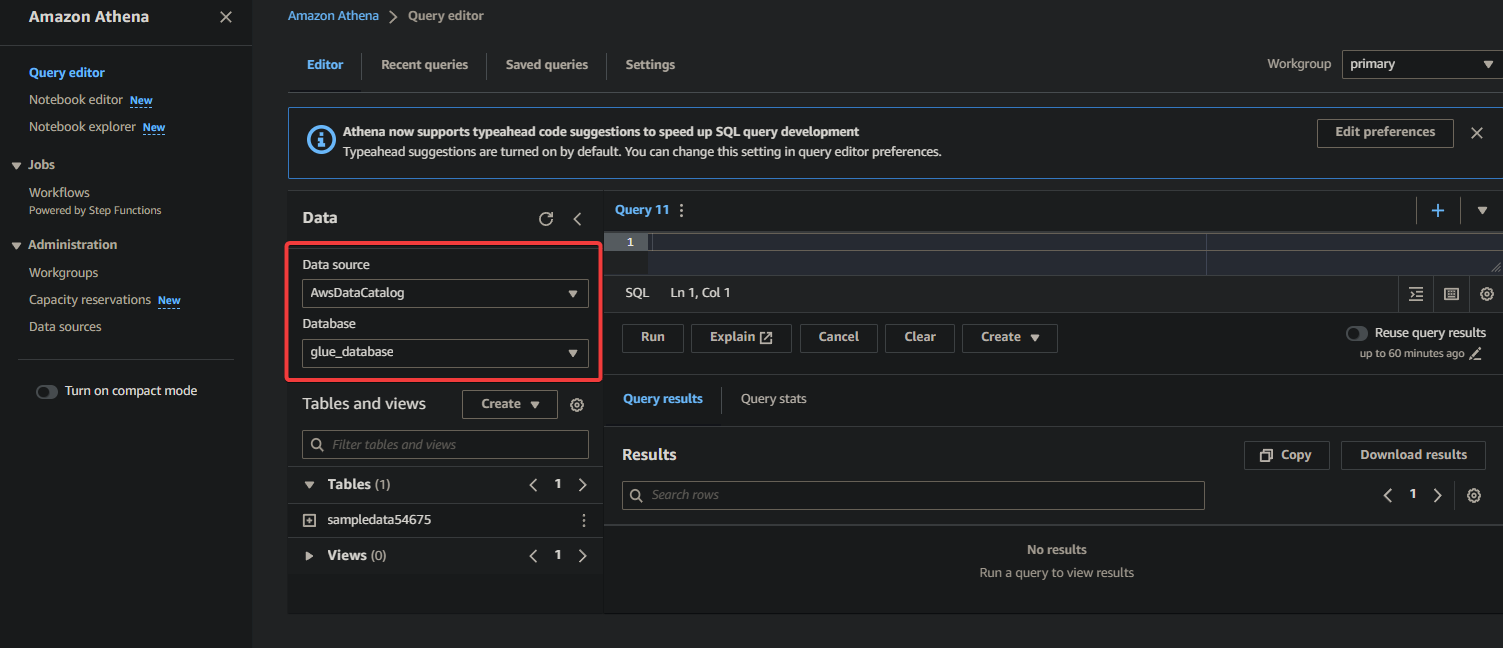
2. Choose the database the place your knowledge is cataloged below the Information part as follows:
- Information supply – Choose AwsDataCatalog to point that you simply need to question the info cataloged in AWS Glue.
- Database – Choose the suitable database from the drop-down discipline (i.e., glue_database).
💡 If you don’t see your required database within the drop-down, make sure the crawler has accomplished its execution and cataloged the info.
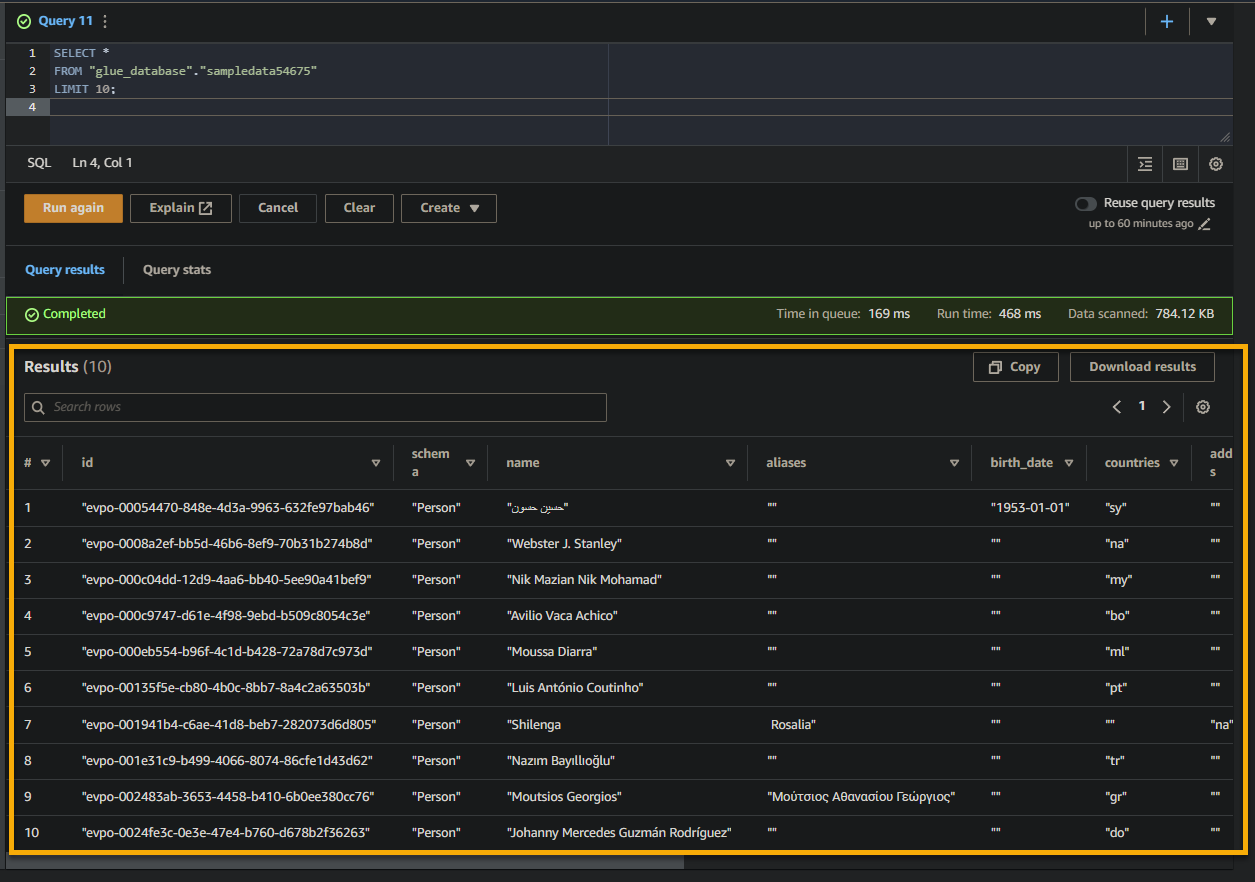
3. Lastly, populate and run the next question within the question editor on the best.
This question returns the primary 10 rows from the sampledata54675 desk within the glue_database database. Be at liberty to change the question to fit your particular necessities.
SELECT *
FROM "glue_database"."sampledata54675"
LIMIT 10;
If the question is profitable, you will note the ends in the Consequence pane, as proven beneath. The outcomes comprise details about the data saved within the desk based mostly in your SQL question.
Pay attention to the column names, knowledge sorts, and values returned within the end result set. This info helps you perceive the construction and content material of the queried knowledge.
Conclusion
On this tutorial, you may have realized the fundamentals of utilizing AWS Glue to create a Glue Crawler, catalog your knowledge, and question knowledge utilizing AWS Athena. Information preparation and evaluation are important for any data-driven utility. And instruments like AWS Glue present a fast approach to extract, remodel, and cargo (ETL) knowledge from numerous sources right into a database desk.
With AWS Glue, now you can rapidly handle and manage knowledge, permitting you to focus extra on analyzing and deriving insights out of your knowledge. However what you may have seen is simply the tip of the iceberg. Discover the wide selection of capabilities and functionalities AWS Glue can provide!
Why not leverage AWS Glue connections to seamlessly combine with different AWS providers, corresponding to Amazon RDS or Amazon Redshift? This integration lets you construct complicated ETL pipelines and obtain even higher knowledge evaluation capabilities.