


Like all Cloud Suppliers, Google gives a full-fledged Id Administration resolution, which can be daunting for newcomers. On this part, I’ll solely element the required steps required to configure it for OIDC.
On the Cloud Console, create a devoted venture (or use an current one).
Within the venture context, navigate to .
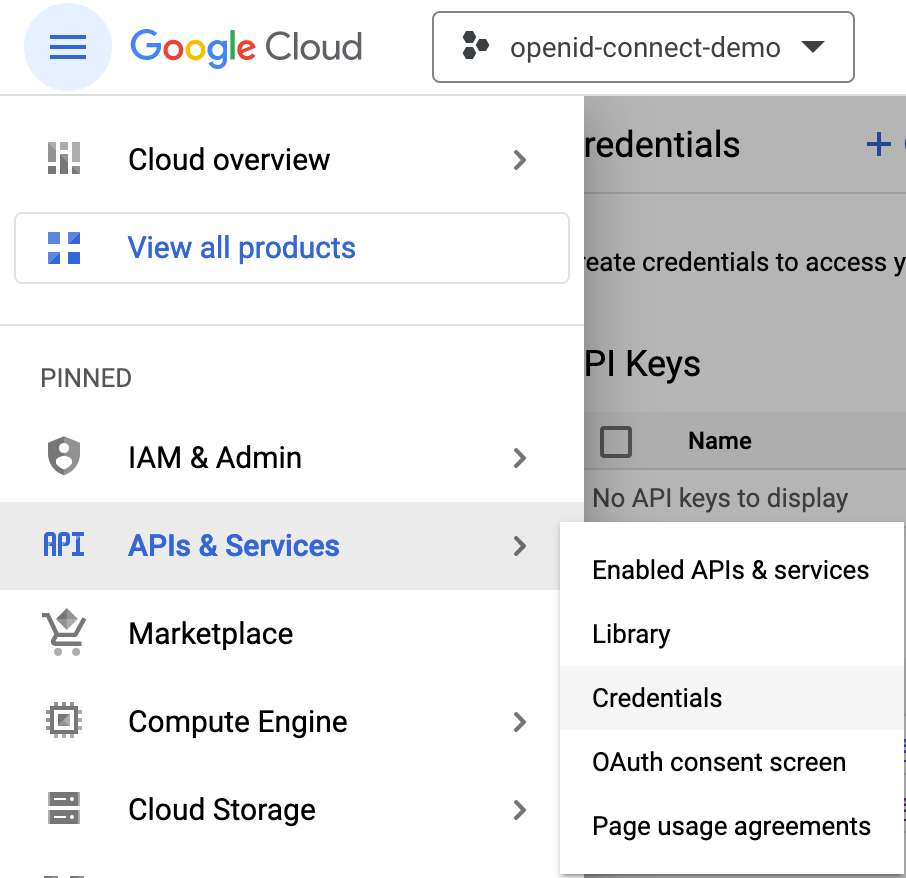
Then, press the + CREATE CREDENTIALS button within the higher menu bar.

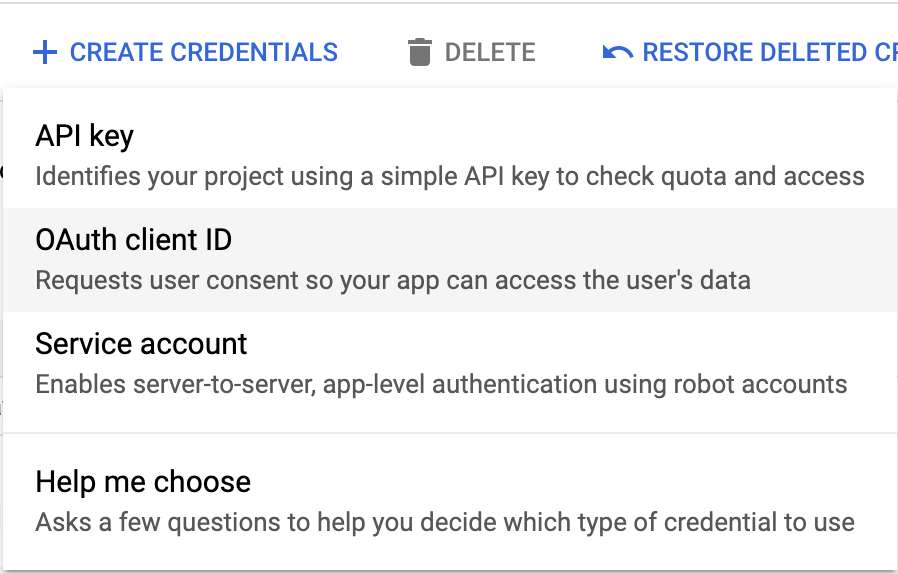
Choose within the scrolling menu.
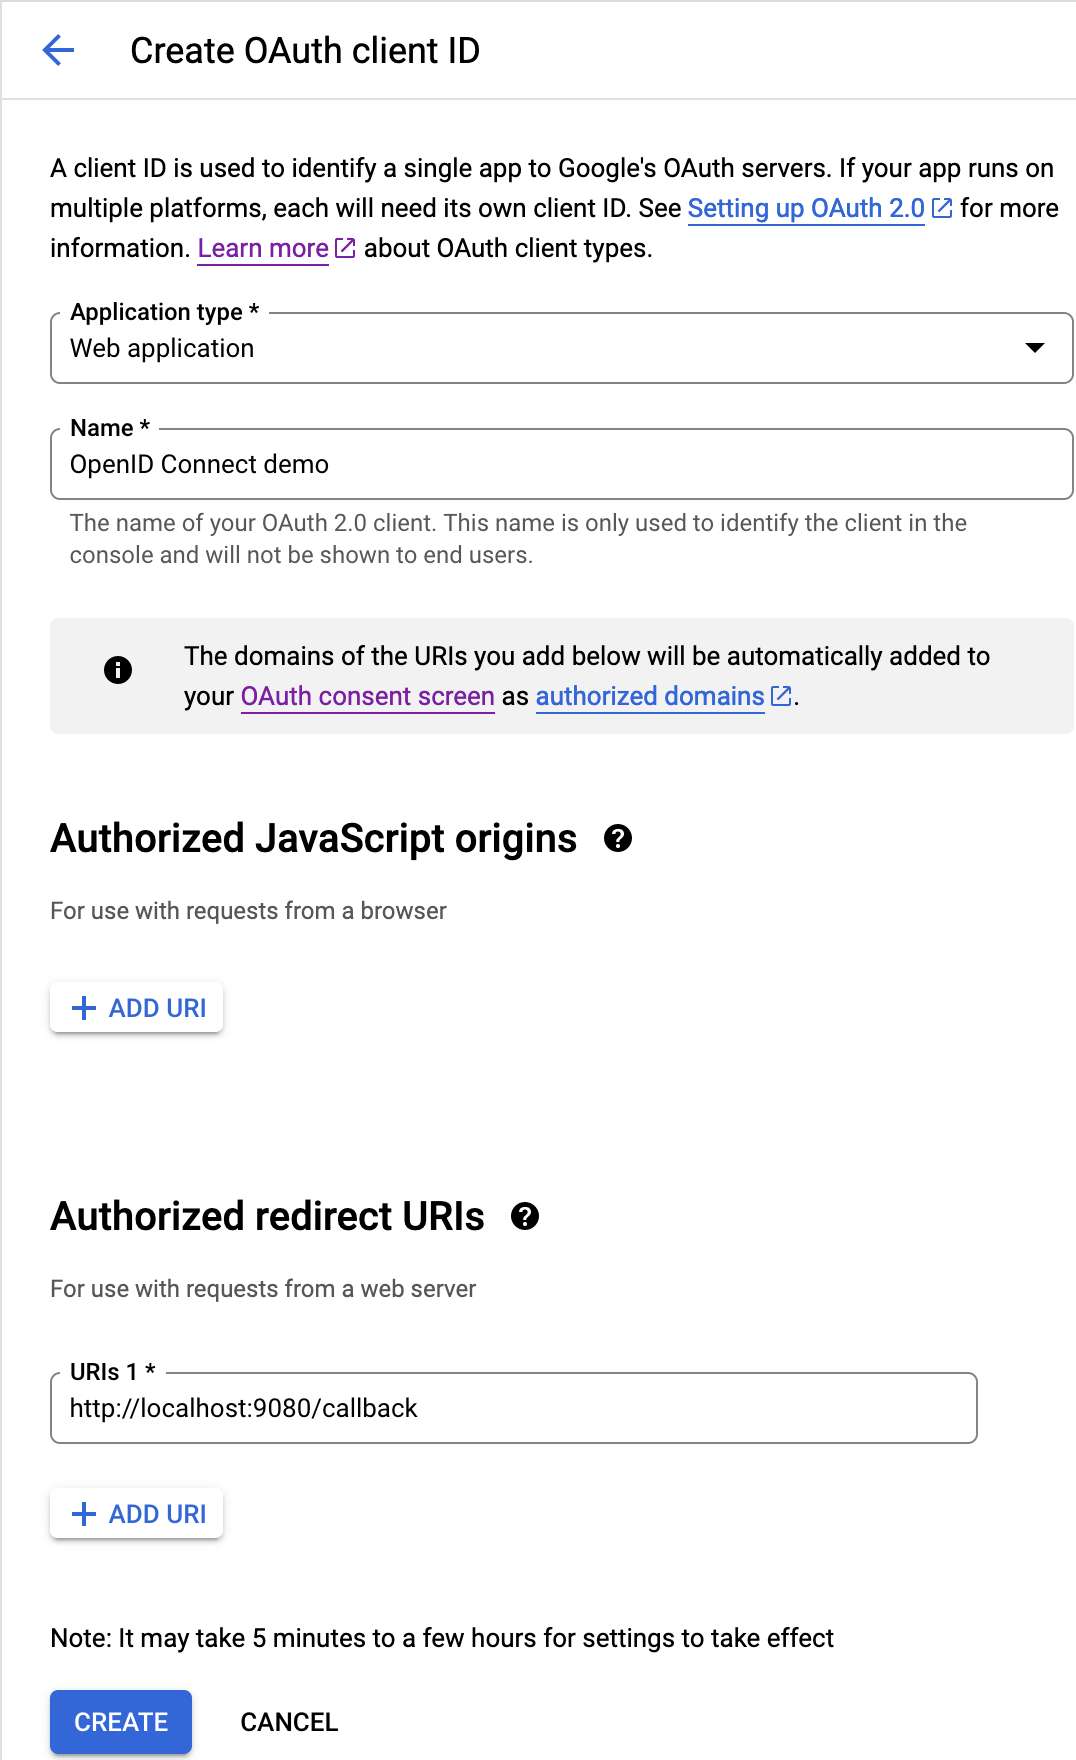
URL needs to be the URL of the online utility. Likewise, /callback ought to match the openid-connect plugin configuration above. Observe that Google doesn’t permit relative URLs, so if that you must reuse the applying in numerous environments, that you must add the URL of every setting. Click on the Create button.
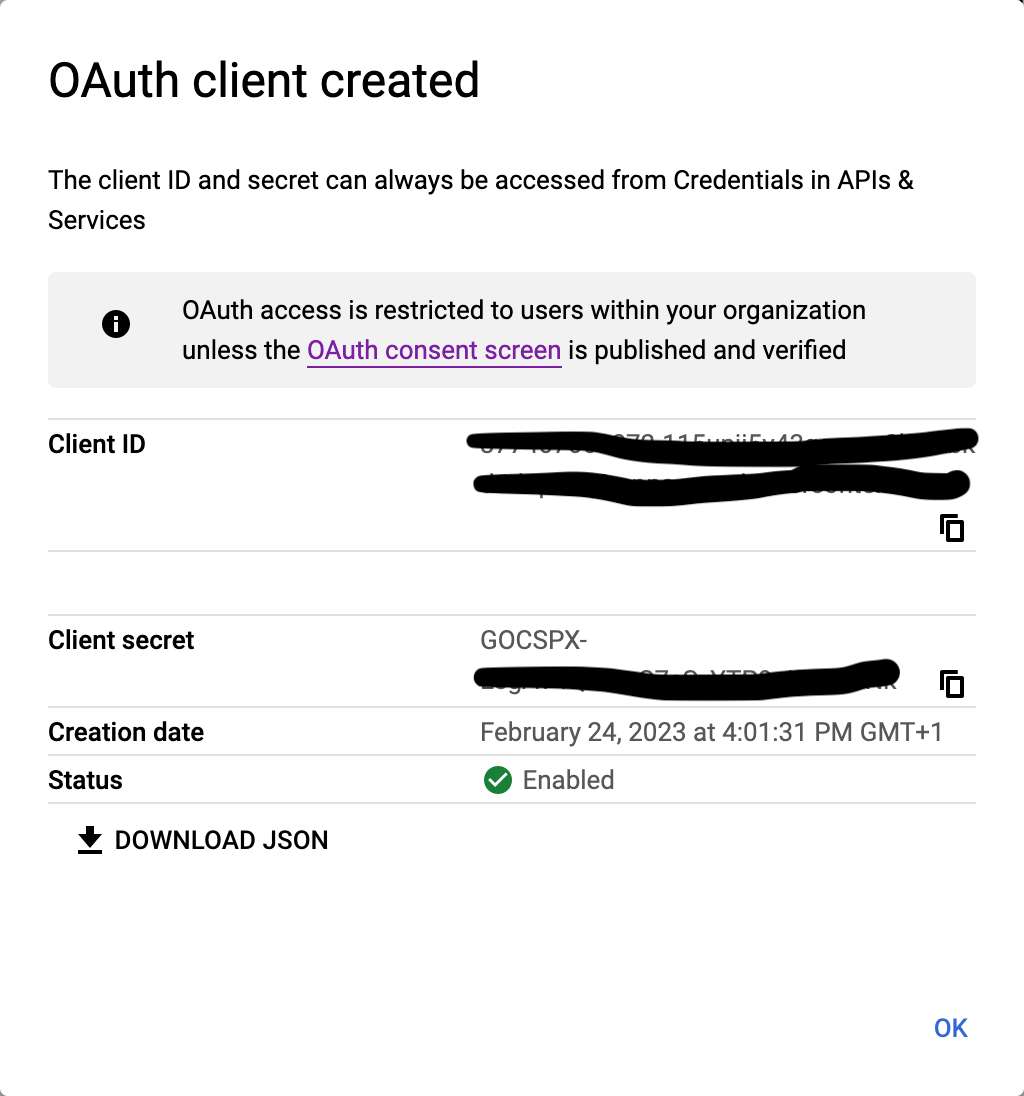
Within the Docker Compose configuration above, use the Consumer ID and Consumer Secret as OIDC_CLIENTID and OIDC_SECRET. I wrote them down as setting variables in a .env file.
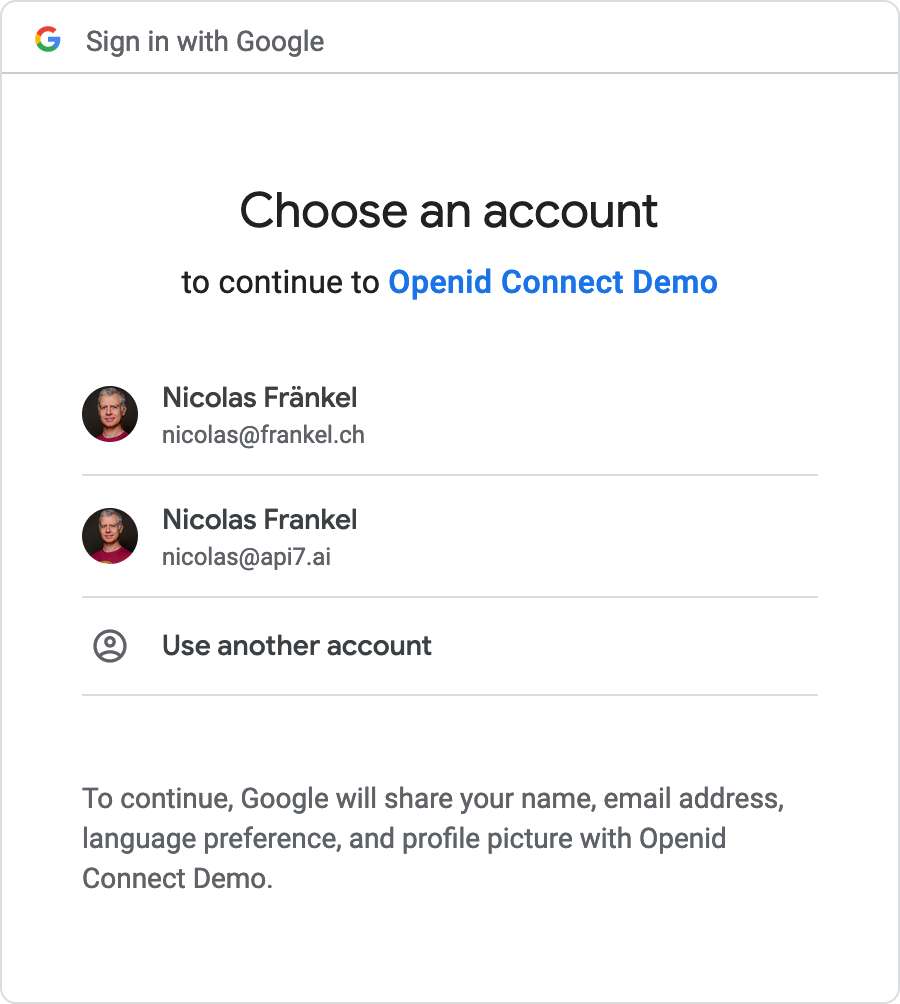
At this level, we will begin our setup with docker compose up. After we navigate to http://localhost:9080/, the browser redirects us to the Google authentication web page. Since I’m already authenticated, I can select my ID – and I want one sure to the group of the venture I created above.
Then, I can freely entry the useful resource.