


On this tutorial, we’ll be how we will implement routing in a Vue app utilizing Vue Router. So we will have a hands-on apply, we’ll be constructing a easy Pokedex app utilizing Vue and Vue Router.
Particularly, we’ll be overlaying the next:
- establishing a router
- route parameters
- declarative and programmatic navigation
- nested routes
- 404 pages
Each JavaScript UI framework that permits the creation of single web page purposes wants a strategy to navigate customers from one web page to a different. All of this must be managed on the client-side by syncing the view that’s at present displayed on the web page with the URL within the deal with bar. Within the Vue world, the [official library] for managing one of these job is Vue Router.
As ever, the code for this tutorial will be discovered on GitHub.
Conditions
The next are required so you may make the most effective use of this tutorial:
- Primary data of HTML, CSS, JavaScript, and Vue. If you understand how to render one thing on the web page utilizing Vue, it’s best to have the ability to observe alongside. A bit of data on APIs would additionally assist.
- Node.js and Vue CLI put in in your machine. We’ll be utilizing Vue 3 on this tutorial so make certain Vue CLI is up to date.
App Overview
We’re going to construct a Pokedex app. It is going to have three pages:
-
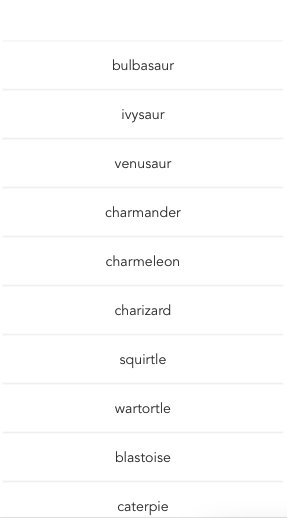
Pokemon listing web page. That is the default web page which lists all the unique 151 Pokemon.
-
Pokemon web page. That is the place we show the fundamental particulars equivalent to kind and the outline.

-
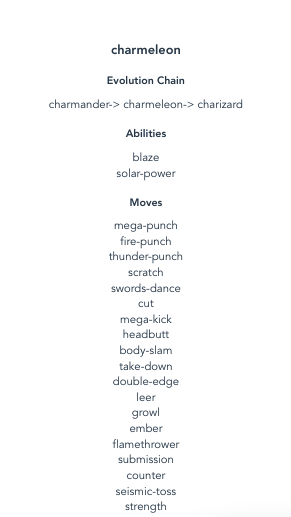
Pokemon particulars web page. That is the place we show the evolution chain, skills and strikes.
Setting Up the App
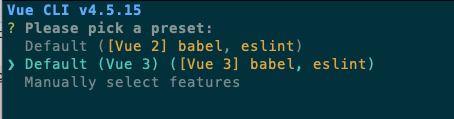
Spin up a brand new Vue app utilizing the Vue CLI:
vue create poke-vue-router
Select Vue 3 from the choices listed:
As soon as it’s executed, navigate contained in the venture folder and set up the libraries we want:
cd poke-vue-router
npm set up vue-router@4 axios
Notice that we’re utilizing Vue Router 4 as a substitute of three, which is the default consequence that exhibits up whenever you Google it. It’s at subsequent.router.vuejs.org versus router.vuejs.org. We’re utilizing Axios to make a request to PokeAPI v2.
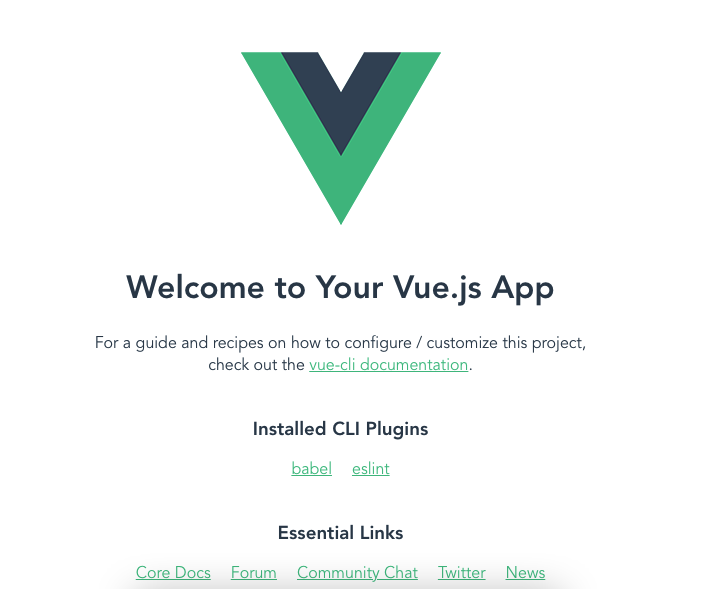
At this level, it’s a good suggestion to run the venture to verify the default Vue app is working:
npm run serve
Go to http://localhost:8080/ in your browser and verify to see if the default Vue app is operating. It ought to present one thing like this:
Subsequent, it’s essential to add sass-loader as a dev dependency. For the aim of this tutorial, it’s finest to simply set up the identical model I used. It’s because, on the time of writing, the newest model isn’t suitable with Vue 3:
npm set up sass-loader@10.1.1 --save-dev
You additionally want to put in node-sass, for a similar purpose as above. It’s finest to stay with the identical model as mine:
npm set up node-sass@4.14.1 --save
Notice: if putting in Sass this fashion doesn’t give you the results you want, you can too select Manually choose options when creating the Vue app with the CLI. Then, choose CSS Preprocessors and choose Sass/SCSS (with dart-sass).
Creating the App
Now we’re prepared to begin constructing the app. As you observe alongside, keep in mind that the basis listing is the src folder.
Begin by updating the foremost.js file. That is the place we import the basis element App.vue and the router/index.js file the place we declare all issues associated to routing:
import { createApp } from "vue";
import App from "./App.vue";
import router from "./router";

const app = createApp(App);
app.use(router);
app.mount("#app");
Establishing a router
Within the App.vue file, use the router-view element supplied by Vue Router. That is the top-most element utilized by Vue Router that renders the corresponding element for the present path visited by the person:
<template>
  <div id="app">
    <router-view />
  </div>
</template>

<script>
export default {
  identify: "App",
};
</script>
Subsequent, create a brand new router/index.js file and add the next. To create a router, we have to extract createRouter and createWebHistory from Vue Router. createRouter permits us to create a brand new router occasion, whereas createWebHistory creates an HTML5 historical past that’s mainly a wrapper for the Historical past API. It permits Vue Router to govern the deal with within the deal with bar after we’re navigating between pages:
import { createRouter, createWebHistory } from "vue-router";
Under that, import all of the pages we’ll be utilizing:
import PokemonList from "../views/PokemonList.vue";
Vue Router requires an array of objects containing the path, identify, and element as its properties:
path: that is the sample you’d wish to match. Within the code under, we’re matching for the basis path. So if the person tries to entryhttp://localhost:8000, this sample is matched.identify: the identify of the web page. That is the distinctive identifier for the web page and is what’s getting used whenever you wish to navigate to this web page from different pages.element: the element you wish to render when thepathmatches the URL the person accessed.
const routes = [
  {
    path: "https://www.sitepoint.com/",
    name: "PokemonList",
    component: PokemonList,
  },
];
Lastly, create the router occasion by supplying an object containing the historical past and the routes to createRouter:
const router = createRouter({
  historical past: createWebHistory(),
  routes,
});

export default router;
That’s all we want for now. You could be questioning the place the opposite pages are. We’ll add them later as we go alongside. For now, let’s work on the default web page first.
Making a web page
Making a web page doesn’t really want any particular code. So if you understand how to create a customized element in Vue, it’s best to have the ability to create a web page for Vue Router to make use of.
Create a views/PokemonList.vue file and add the code under. On this file, we’re utilizing a customized Checklist element to render the Pokemon listing. The one factor we actually must do is to provide the information for the Checklist element to make use of. We make a request to PokeAPI as soon as the element is mounted. We don’t need the listing to get too huge, so we’re limiting the outcomes to the unique 151 Pokemon. As soon as we get the outcomes again, we merely assign it to the element’s gadgets information. This may in flip replace the Checklist element:
<template>
  <Checklist :gadgets="gadgets" />
</template>

<script>
import axios from "axios";
import Checklist from "../parts/Checklist.vue";

export default {
  identify: "PokemonList",
  information() {
    return {
      gadgets: null,
    };
  },
  mounted() {
    axios.get(`https://pokeapi.co/api/v2/pokemon?restrict=151`).then((res) => {
      if (res.information && res.information.outcomes) {
        this.gadgets = res.information.outcomes;
      }
    });
  },
  parts: {
    Checklist,
  },
};
</script>
Right here’s the code for the Checklist element. Parts are saved within the parts listing, so create a parts/Checklist.vue file and add the next:
<template>
  <div v-if="gadgets">
    <router-link
      :to="{ identify: 'Pokemon', params: { identify: row.identify } }"
      class="hyperlink"
      v-for="row in gadgets"
      :key="row.identify"
    >
      <div class="list-item">
        {{ row.identify }}
      </div>
    </router-link>
  </div>
</template>

<script>
export default {
  identify: "Checklist",
  props: {
    gadgets: {
      kind: Array,
    },
  },
};
</script>

<model lang="scss" scoped>
@import "../kinds/listing.scss";
</model>
You possibly can take a look at the code for the kinds/listing.scss file within the GitHub repo.
At this level, now you can view the modifications within the browser. Besides you get the next error as a substitute:
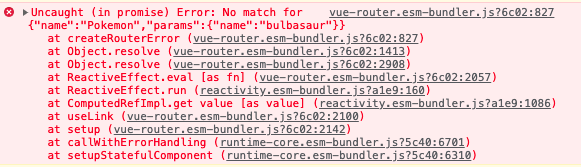
It’s because Vue is making an attempt to generate the hyperlink to the Pokemon web page however there isn’t one but. The Vue CLI is sensible sufficient to warn you of that. You possibly can briefly remedy this problem by utilizing a <div> as a substitute for the template of parts/Checklist.vue file:
<template>
  <div v-if="gadgets">
    <div v-for="row in gadgets" :key="row.identify">{{ row.identify }}</div>
  </div>
</template>
With that, it’s best to have the ability to see the listing of Pokemon. Bear in mind to alter this again later as soon as we add the Pokemon web page.
Declarative Navigation
With Vue Router, you possibly can navigate in two methods: declaratively, and programmatically. Declarative navigation is just about the identical as what we do with the anchor tag in HTML. You simply declare the place you need the hyperlink to navigate to. Then again, programmatic navigation is completed by explicitly calling Vue Router to navigate to a selected web page when a person motion is carried out (equivalent to a button button being clicked).
Let’s rapidly break down how this works. To navigate, it’s essential to use the router-link element. The one property this requires is :to. That is an object containing the identify of the web page you wish to navigate to, and an elective params object for specifying the parameters you wish to go to the web page. On this case, we’re passing within the identify of the Pokemon:
<router-link
  :to="{ identify: 'Pokemon', params: { identify: row.identify } }"
  class="hyperlink"
  v-for="row in gadgets"
  :key="row.identify"
>
  <div class="list-item">
    {{ row.identify }}
  </div>
</router-link>
To visualise how this works, it’s essential to know the sample utilized by the Pokemon display. Right here’s what it seems like: /pokemon/:identify. :identify represents the param identify that you just handed in. For instance, if the person needed to view Pikachu, the URL would seem like http://localhost:8000/pokemon/pikachu. We’ll get again to this in additional element shortly.
Route parameters
We’ve already seen how we will match particular patterns for our routes, however we haven’t gone by means of how we will go in customized parameters but. We’ve seen it briefly by means of the router-link instance earlier.
We’ll use the following web page (Pokemon) as an instance how route parameters work in Vue Router. To try this, all it’s essential to do is prefix the identify of the parameter with colon (:). Within the instance under, we wish to go within the identify of the Pokemon, so we added :identify. Which means if we wish to navigate to this particular route, we have to go in a price for this parameter. As we’ve seen within the router-link instance earlier, that is the place we go the identify of the Pokemon:
import PokemonList from "../views/PokemonList.vue";

import Pokemon from "../views/Pokemon";

const routes = [
  {
    path: "https://www.sitepoint.com/",
    name: "PokemonList",
    component: PokemonList,
  },

  {
    path: "/pokemon/:name",
    name: "Pokemon",
    component: Pokemon,
  }
]
Right here’s the code for the Pokemon web page (views/Pokemon.vue). Identical to the PokemonList web page earlier, we’re delegating the duty of rendering the UI to a separate element BasicDetails. When the element is mounted, we make a request to the API’s /pokemon endpoint. To get the Pokemon identify handed in as a route parameter, we use this.$route.params.identify. The property we’re accessing ought to be the identical because the identify you gave to the parameter within the router/index.js file. On this case, it’s identify. Should you used /pokemon/:pokemon_name for the path as a substitute, you entry it with this.$route.params.pokemon_name:
<template>
  <BasicDetails :pokemon="pokemon" />
</template>
<script>
import axios from "axios";
import BasicDetails from "../parts/BasicDetails.vue";

export default {
  identify: "Pokemon",
  information() {
    return {
      pokemon: null,
    };
  },
  mounted() {
    const pokemon_name = this.$route.params.identify;

    axios
      .get(`https://pokeapi.co/api/v2/pokemon/${pokemon_name}`)
      .then((res) => {
        const information = res.information;

        axios
          .get(`https://pokeapi.co/api/v2/pokemon-species/${pokemon_name}`)
          .then((res) => {
            Object.assign(information, {
              description: res.information.flavor_text_entries[0].flavor_text,
              specie_id: res.information.evolution_chain.url.break up("https://www.sitepoint.com/")[6],
            });

            this.pokemon = information;
          });
      });
  },
  parts: {
    BasicDetails,
  },
};
</script>
Right here’s the code for the BasicDetails element (parts/BasicDetails.vue):
<template>
  <div v-if="pokemon">
    <img :src="pokemon.sprites.front_default" :alt="pokemon.identify" />
    <h1>{{ pokemon.identify }}</h1>
    <div class="varieties">
      <div
        class="type-box"
        v-for="row in pokemon.varieties"
        :key="row.slot"
        v-bind:class="row.kind.identify.toLowerCase()"
      >
        {{ row.kind.identify }}
      </div>
    </div>

    <div class="description">
    {{ pokemon.description }}
    </div>

    <a @click on="moreDetails" class="hyperlink">Extra Particulars</a>
  </div>
</template>

<script>
export default {
  identify: "BasicDetails",
  props: {
    pokemon: {
      kind: Object,
    },
  },

  strategies: {
    moreDetails() {
      this.$router.push({
        identify: "PokemonDetails",
        params: {
          identify: this.pokemon.identify,
          specie_id: this.pokemon.specie_id,
        },
      });
    },
  },
};
</script>

<model lang="scss" scoped>
@import "../kinds/varieties.scss";
@import "../kinds/pokemon.scss";
</model>
You possibly can take a look at the code for the kinds/varieties.scss and kinds/pokemon.scss file within the GitHub repo.
At this level, it’s best to have the ability to see the modifications within the browser once more. You can even replace the parts/Checklist.vue file again to its authentic code with the router-link on it as a substitute of the <div>.
Programmatic Navigation
You might need observed that we’ve executed one thing completely different within the BasicDetails element. We didn’t actually navigate to the PokemonDetails web page utilizing router-link. As a substitute, we used an anchor component and intercepted its click on occasion. That is how programmatic navigation is applied. We are able to get entry to the router by way of this.$router. Then we name the push() technique to push a brand new web page on prime of the historical past stack. No matter web page is on prime might be displayed by the router. This technique permits for navigating again to the earlier web page when the person clicks on the browser’s again button, since clicking it merely “pops” the present web page on prime of the historical past stack. This technique accepts an object containing the identify and params properties, so it’s just about the identical factor you go to the to property within the router-link:
strategies: {
  moreDetails() {
    this.$router.push({
      identify: "PokemonDetails",
      params: {
        identify: this.pokemon.identify,
        specie_id: this.pokemon.specie_id,
      },
    });
  },
},
Nested routes
Subsequent, replace the router file to incorporate the trail for the Pokemon particulars web page. Right here, we’re utilizing nested routes to go in multiple customized parameter. On this case, we’re passing within the identify and specie_id:
import Pokemon from "../views/Pokemon";

import PokemonDetails from "../views/PokemonDetails";

const routes = [

  {
    path: "/pokemon/:name",

  },


  {
    path: "/pokemon/:name/:specie_id/details",
    name: "PokemonDetails",
    component: PokemonDetails,
  },
];
Right here’s the code for the PokemonDetails web page (views/PokemonDetails.vue):
<template>
  <MoreDetails :pokemon="pokemon" />
</template>
<script>
import axios from "axios";
import MoreDetails from "../parts/MoreDetails.vue";

export default {
  identify: "PokemonDetails",
  information() {
    return {
      pokemon: null,
    };
  },
  mounted() {
    const pokemon_name = this.$route.params.identify;

    axios
      .get(`https://pokeapi.co/api/v2/pokemon/${pokemon_name}`)
      .then((res) => {
        const information = res.information;

        axios.get(`https://pokeapi.co/api/v2/evolution-chain/${this.$route.params.specie_id}`)
        .then((res) => {
          let evolution_chain = [res.data.chain.species.name];

          if (res.information.chain.evolves_to.size > 0) {
            evolution_chain.push(
              res.information.chain.evolves_to[0].species.identify
            );

            if (res.information.chain.evolves_to.size > 1) {
              const evolutions = res.information.chain.evolves_to.map((merchandise) => {
                return merchandise.species.identify;
              }
            );

            evolution_chain[1] = evolutions.be a part of(" | ");
          }

          if (
            res.information.chain.evolves_to[0].evolves_to.size >
            0
          ) {
            evolution_chain.push(res.information.chain.evolves_to[0].evolves_to[0].species.identify);
          }

            Object.assign(information, {
              evolution_chain,
            });
          }

          this.pokemon = information;
        });
    });
  },
  parts: {
    MoreDetails,
  },
};
</script>
Right here’s the code for the MoreDetails parts (parts/MoreDetails.vue):
<template>
  <div v-if="pokemon">
    <h1>{{ pokemon.identify }}</h1>

    <div v-if="pokemon.evolution_chain" class="part">
      <h2>Evolution Chain</h2>
      <span v-for="(identify, index) in pokemon.evolution_chain" :key="identify">
        <span v-if="index">-></span>
        {{ identify }}
      </span>
    </div>

    <div v-if="pokemon.skills" class="part">
      <h2>Talents</h2>

      <div v-for="row in pokemon.skills" :key="row.capacity.identify">
        {{ row.capacity.identify }}
      </div>
    </div>

    <div v-if="pokemon.strikes" class="part">
      <h2>Strikes</h2>
      <div v-for="row in pokemon.strikes" :key="row.transfer.identify">
        {{ row.transfer.identify }}
      </div>
    </div>
  </div>
</template>

<script>
export default {
  identify: "MoreDetails",
  props: {
    pokemon: {
      kind: Object,
    },
  },
};
</script>

<model lang="scss" scoped>
@import "../kinds/more-details.scss";
</model>
You possibly can view the contents of the kinds/more-details.scss file on the GitHub repo.
At this level you possibly can click on on any of the Pokemon names and look at the main points of a person Pokemon. You may must restart the server to see the modifications.
404 web page
We’ve added the code for the entire pages. However what occurs if the person enters an invalid URL to the browser’s deal with bar? In these circumstances, it is going to merely error out or not show something in any respect. We have to add a strategy to intercept these requests so we will show a “404 not discovered” web page.
To try this, open the router file and import the NotFound web page:
import NotFound from "../views/NotFound";
Routes are prioritized primarily based on the order they’re added within the routes array. Which means those added first are the primary ones being matched with the URL entered by the person on the deal with bar. So the sample for the 404 web page must be added final.
Within the routes array, add the next:
const routes = [

  {
    path: "/pokemon/:name/:specie_id/details",

  },


  {
    path: "/:pathMatch(.*)*",
    name: "NotFound",
    component: NotFound,
  },
];
Does the path look acquainted? We’re utilizing a customized param named pathMatch to match for no matter URL is entered. So if the person entered http://localhost:8000/hey or http://localhost:8000/hey/jude, it might render the NotFound web page.
That is all effectively and good. However what occurs if the patterns above the catch-all sample are literally matched? For instance:
http://localhost:8000/pokemon/someinvalidpokemonhttp://localhost:8000/pokemon/someinvalidpokemon/99999/particulars
In these circumstances, the catch-all sample wouldn’t match, so we want a strategy to intercept such requests.
The principle problem with these sorts of requests is that the person is assuming {that a} sure Pokemon or species ID exists, but it surely doesn’t. The one strategy to verify is to have a listing of legitimate Pokemon. In your routes file, import the listing of legitimate Pokemon:
import NotFound from "../views/NotFound";

import valid_pokemon from "../information/valid-pokemon.json";
You will discover this file on the GitHub repo.
To intercept these sorts of requests, Vue Router offers navigation guards. Consider them as “hooks” to the navigation course of that mean you can execute sure actions earlier than or after Vue Router has navigated to a sure web page. We’ll solely be going by means of the one executed earlier than the navigation is completed, as this permits us to redirect to a distinct web page if our situation for navigating to that web page isn’t matched.
To hook into the present request earlier than the navigation is completed, we name the beforeEach() technique on the router occasion:
const router = createRouter({

});

router.beforeEach(async (to) => {

});
Vue Router passes two arguments to it:
to: the goal route locationfrom: the present route location
Every one accommodates these properties. What we’re fascinated about is the params, as this accommodates no matter params the person has handed within the URL.
Right here’s what our situation seems like. We first verify whether or not the params we wish to verify exists. If it does, we proceed to verify if it’s legitimate. The primary situation matches for the Pokemon web page. We use the valid_pokemon array from earlier. We evaluate it with to.params.identify, which accommodates the identify of the Pokemon handed by the person. Then again, the second situation matches for the PokemonDetails web page. Right here we’re checking for the species ID. As we solely wish to match the unique 101 Pokemon, any ID that’s larger than that’s thought-about invalid. If it matches any of those situations, we merely return the trail to the 404 web page. If the situations didn’t match, it is going to navigate to the place its initially meant to navigate to:
if (
  to.params &&
  to.params.identify &&
  valid_pokemon.indexOf(to.params.identify) === -1
) {
  return "/404";
}

if (
  (to.params &&
    to.params.identify &&
    to.params.specie_id &&
    valid_pokemon.indexOf(to.params.identify) === -1 &&
    to.params.specie_id < 0) ||
  to.params.specie_id > 101
) {
  return "/404";
}
Right here’s the code for the 404 web page (views/NotFound.vue):
<template>
  <h1>404 Not Discovered</h1>
</template>
<script>
export default {
  identify: "Not Discovered",
};
</script>
<model lang="scss" scoped>
@import "../kinds/notfound.scss";
</model>
You possibly can view the code for the kinds/notfound.scss file on the GitHub repo.
At this level, the app is full! You possibly can strive visiting invalid pages and it’ll return a 404 web page.
Conclusion
That’s it! On this tutorial, you discovered the fundamentals of utilizing Vue Router. Issues like establishing a router, passing customized parameters, navigating between pages, and implementing a 404 web page will deliver you a good distance. If you would like some route on the place to go from right here, I like to recommend exploring the next subjects:
- Passing props to route parts: permits you to decouple your view parts from the route params. This offers a strategy to swap the route params with props that may be accessed from the element. That approach you need to use your parts anyplace which doesn’t have
$route.params. - Transitions: for animating the transition between pages.
- Lazy loading: that is extra of a efficiency enchancment so the bundler doesn’t compile the codes for all of the pages in a single file. As a substitute, it is going to lazy load it in order that the browser solely downloads the code for a selected web page as soon as it’s wanted.