


Have you ever ever discovered your self misplaced within the labyrinth of command traces, questioning who you might be inside your laptop system? Guess what? You aren’t alone on this quest for self-discovery throughout the digital realm. Fear not, although! The whoami command can assist unveil your digital identification.
On this tutorial, you’ll perceive your system’s perspective on you and acquire insights that can elevate your tech-savviness to an entire new degree.
Buckle up as you might be about to find a aspect of your self that has been hiding in plain sight!
Stipulations
Earlier than you dive headfirst into the intricate world of OS person identification, guarantee you’ve entry to a Home windows, macOS, or Linux machine. This tutorial makes use of Home windows 11 and macOS 12.5 (Monterey) for demonstrations.
Retrieving the Logged-in Username by way of the whoami Command
Each person has a definite identification that governs their entry and actions. Exploring your identification isn’t just about typing instructions; it’s about unveiling the layers of your digital identification.
Open a terminal or PowerShell, and run the beneath whoami command to accumulate details about the at present logged-in person.
Beneath, the output shows the username (i.e., admin) related to the present session.

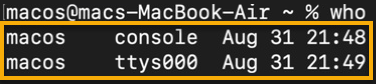
Now, run the next who command, on macOS, to record all logged-in customers in your macOS system.
💡 This command doesn’t exist on Home windows.
The output beneath signifies the person macos logged in twice, one via the console and one other via the ttys000 terminal. Each logins began on August 31 at totally different instances (21:48 and 21:49).
Customers who open a number of terminal home windows or log in quite a few instances is perhaps assigned totally different terminal system names like ttys001, ttys002, and so forth. These system names assist establish and handle the opposite terminal periods occurring concurrently on the system.
Verifying a Person’s Group Membership
Other than the essential utilization, the whoami command presents extra choices to offer extra detailed details about the present person. Take a step additional into understanding the intricate internet of group memberships.
The whoami command allows you to unveil an enchanting layer of your digital identification – the teams you might be part of. This invaluable perception equips you to navigate system permissions, entry rights, and collaborative environments extra successfully.
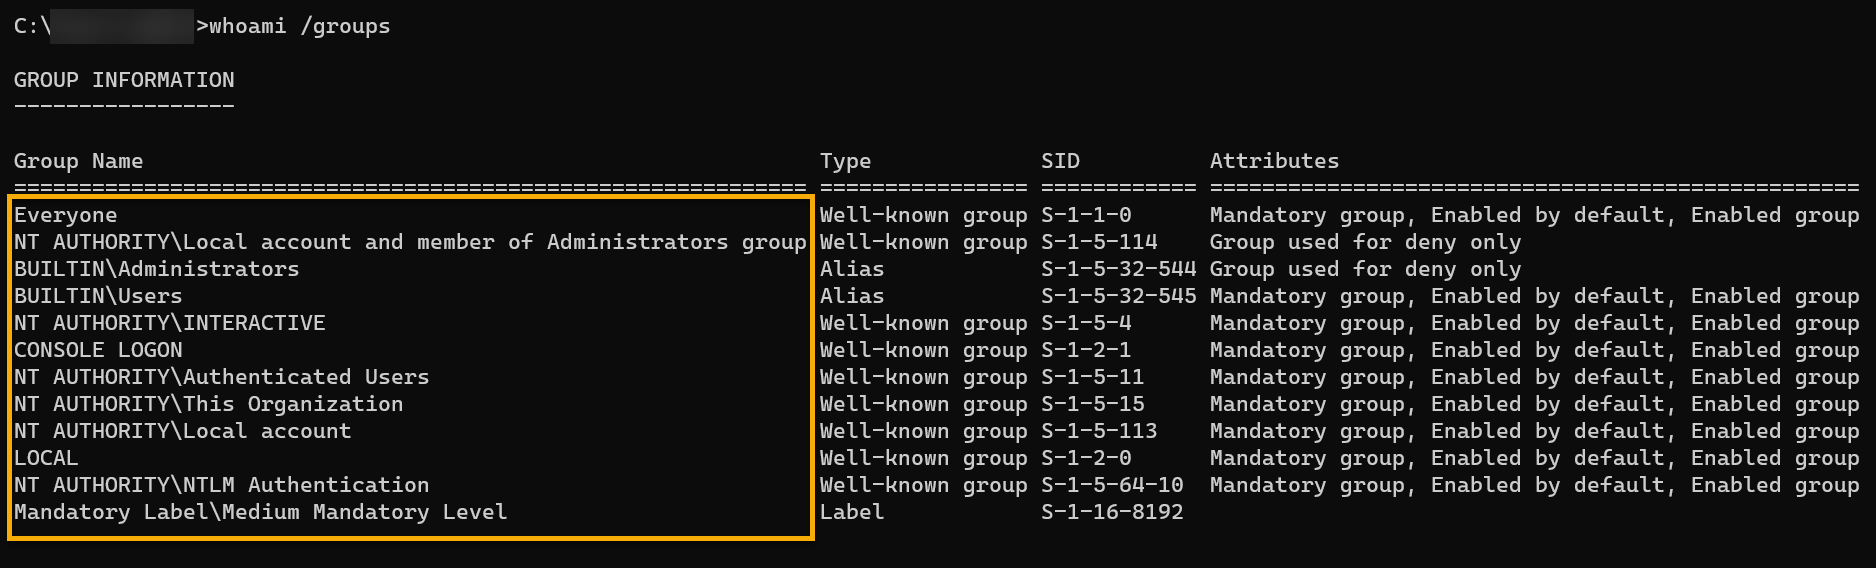
Run the whoami command beneath to see your person account’s group membership (/teams).
# PowerShell command
whoami /teams
# macOS/Linux command
teams
The output beneath shows a listing of teams your present person belongs to, offering helpful insights into entry rights and privileges.
Person teams simplify the method of assigning permissions and entry rights. As an alternative of setting particular person permissions for every person, you’ll be able to assign permissions to teams and customers who’re members of these teams to inherit the group’s permissions.

Acquiring the Person Safety Identifier (SID)
Your person SID is your digital ID card inside your Home windows area. Similar to your bodily ID helps you entry sure locations, the SID helps your system handle who can entry what.
SID acts like a bouncer, making certain solely licensed customers can entry particular sources, information, and folders by organising granular permissions.
Execute the next command to retrieve the present person’s (/person) SID.
# PowerShell command
whoami /person
# macOS/Linux command
id
Beneath, together with the username, is the person’s corresponding SID (for Home windows), which features a collection of numeric elements that establish the next:
- Revision – Signifies the model of the SID construction.
- Identifier Authority – A novel worth assigned to every authority that generates SIDs.
- Area Identifier – Represents the area or safety authority.
- Relative Identifier (RID) – A novel quantity assigned to every safety principal throughout the area.

In a macOS/Linux system, the id command shows person and group info, together with the username, UID (person ID), GID (group ID), and supplementary group IDs as beneath.

Displaying the Safety Privileges of the Logged-in Person
The whoami command isn’t just about understanding your username but additionally a key to understanding the extent of your digital authority. Leap right into a realm that instantly impacts the way you work together along with your digital environment — safety privileges.
Privileges seek advice from particular rights and permissions that management your person account’s actions on the system. By understanding which privileges are enabled or disabled, you’ll be able to establish potential vulnerabilities and take applicable measures to mitigate them.
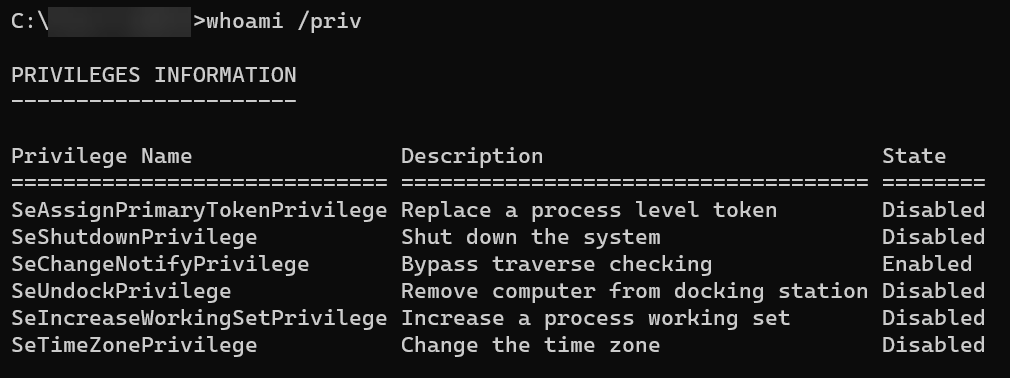
Run the beneath command to show the present person’s safety privileges (/priv).
💡 Unix-based techniques haven’t any direct equal of the Home windows
whoami /privcommand. As an alternative, theidorteamscommand will be another. Safety privileges are managed via file permissions, person accounts, and entry management mechanisms.
You will note an identical output as illustrated beneath the place:
- Privilege Identify – Reveals the names of various privileges accessible for the person.
- Description – A short description of what every privilege permits the person to do.
- State – Signifies the present state of every privilege for the person, and there are two attainable states as follows:
| State | Particulars |
|---|---|
| Enabled | Signifies the person has been granted that particular privilege and might train the related actions on the system. |
| Disabled | Signifies the person doesn’t have the corresponding privilege and isn’t allowed to carry out actions related to that privilege. |
Formatting the whoami Command’s Output
Formatting the output of the whoami command would possibly look like a small element, however it’s a nifty trick that may make your life within the terminal a lot smoother. The whoami command has choices for selecting the output format that most closely fits your wants: a listing or a CSV format.
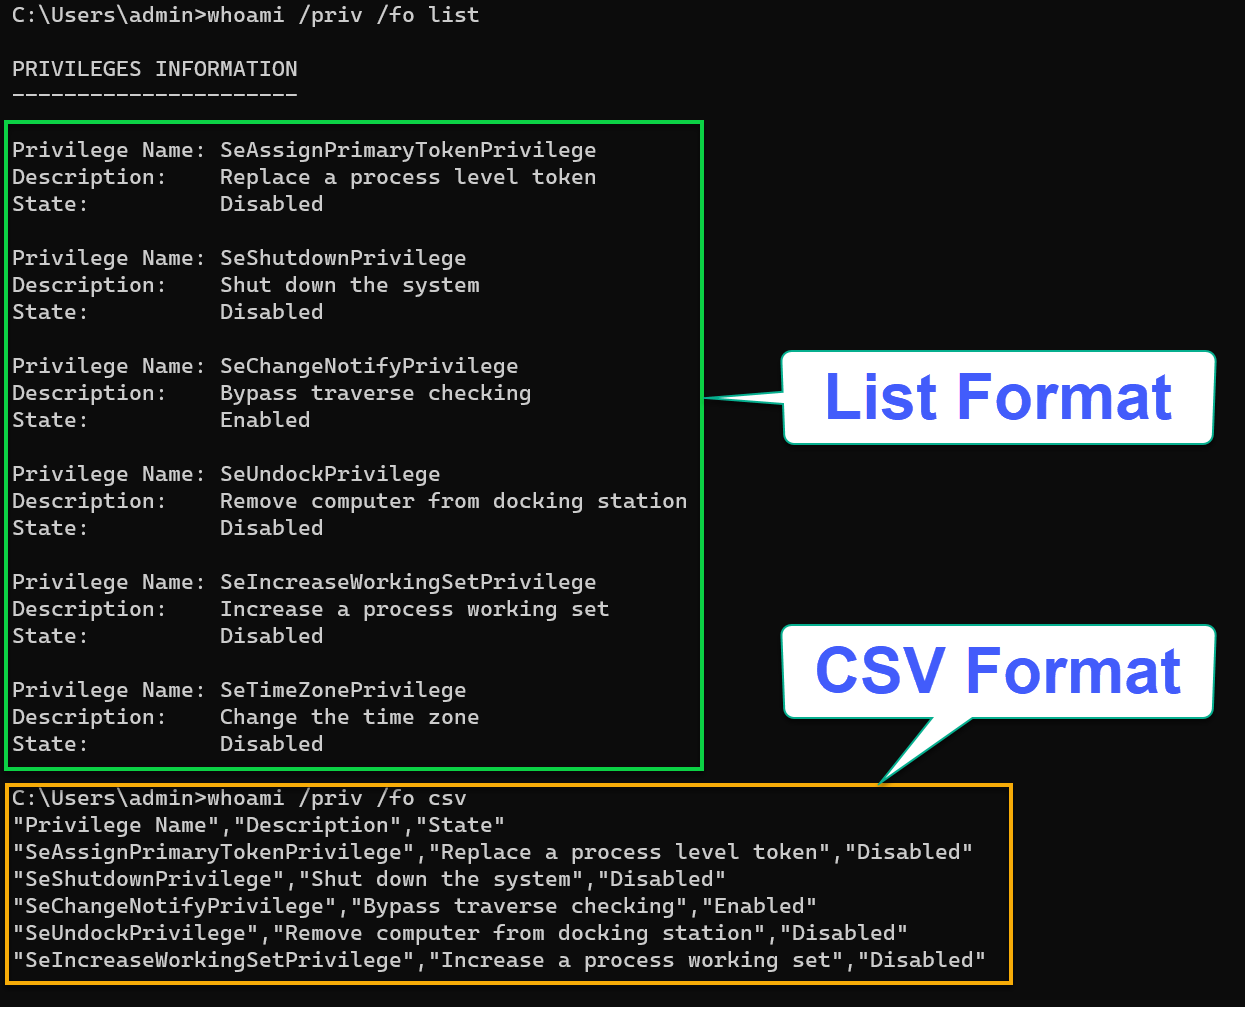
Execute every whoami command beneath to indicate the present person’s safety privileges (/priv) in two totally different codecs.
The record format (/fo record) will be useful if you would like a extra compact show. However in case you want info for additional processing or evaluation in a spreadsheet utility, the CSV format (/fo csv) is extra applicable.
# Díplays the lead to record format
whoami /priv /fo record
# Díplays the lead to csv format
whoami /priv /fo csv
As illustrated beneath, as an alternative of squinting at a jumble of characters, you get a neat, organized output.
Whether or not you’re a informal person or a terminal ninja, formatting the output of the whoami command isn’t just about aesthetics however about efficient communication.
whoami command’s outputAlternatively, run the id or teams command, piped (|) to stream editor (sed) command to format the output, as proven beneath. Unix-based techniques should not have equal instructions for whoami /priv /fo record or whoami /priv /fo csv.
The beneath instructions use Regex to carry out the next:
- Exchange area and comma (
[ ,]) delimiters with newline (/n/) for every string. - Exchange areas with comma (
tr ' ' ','), seize non-space texts (([^ ]*)), and enclose them with double quotes ("1").
# Dispalying the id command's output in a listing format
id | sed 's/[ ,]/n/g'
# Dispalying the teams command's output in a csv format
teams | sed 's/([^ ]*)/"1"/g' | tr ' ' ','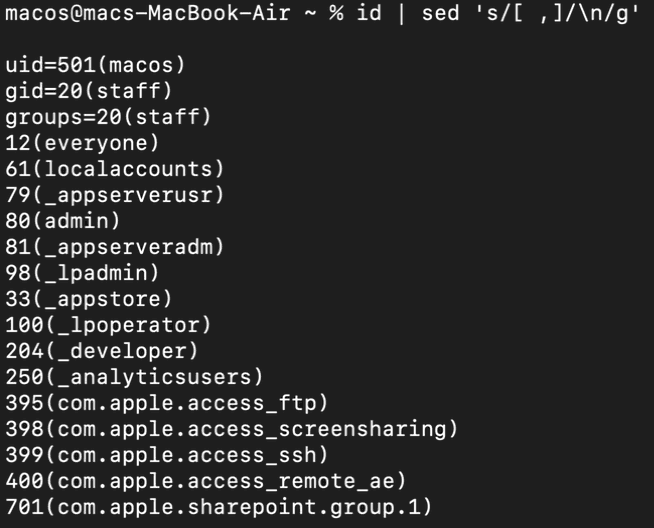
id command’s output in record format
teams command’s output in csv formatConclusion
All through this tutorial, you’ve delved into the intricate artwork of discovering and understanding person identities by way of the whoami command. You may have realized to accumulate the username, group membership, and even the person’s safety identifier (SID).
Along with your understanding of person identification for numerous administrative duties, troubleshooting permissions, and making certain safe system entry is inside your attain.
Now, why not immerse your self on this planet of authentication and authorization mechanisms? How about multi-factor authentication (MFA), role-based entry management (RBAC), and attribute-based entry management (ABAC)? Understanding how these mechanisms work can considerably improve your grasp of person administration and system safety.