


Within the final two components of this sequence, we’ve dockerized our NestJS software. The subsequent step is to discover ways to deploy it. On this article, we push our Docker picture to AWS and deploy it utilizing the Elastic Container Service (ECS).
Pushing our Docker picture to AWS
Thus far, we’ve constructed our Docker picture domestically. To have the ability to deploy it, we have to push it to the Elastic Container Registry (ECR). A container registry is a spot the place we will retailer our Docker photos. ECR works in the same technique to Docker Hub. As quickly as we push our picture to the Elastic Container Registry, we will use it with different AWS providers.
We have to begin by opening the ECR service.

The very first thing to do is to create a repository for our Docker picture.

We should construct our NestJS Docker picture and push it into our ECR repository. Then, after we open our newly created repository, we will see the “View push instructions” button.

Clicking on it opens a popup that serves as a useful record of all of the instructions we have to run to push our picture to the repository.

First, we have to have the AWS CLI put in. For directions on how to try this go to the official documentation.
Authenticating with AWS CLI
Step one within the above popup requires us to authenticate. To do this, we have to perceive the AWS Id and Entry Administration (IAM) service.
IAM is a service that permits us to handle the entry to our AWS assets. Once we create a brand new AWS account, we start with the root consumer that has the entry to all AWS providers and assets within the account. Utilizing it for on a regular basis duties is strongly discouraged. As a substitute, we will create an IAM consumer with restricted permissions.
Our consumer must have the
AmazonElasticContainerRegistryPublicFullAccess permission. It would permit us to push our picture into ECR.
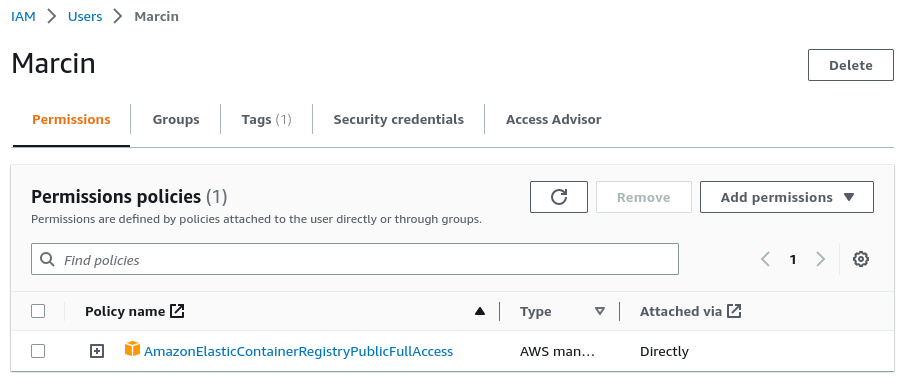
We have to open the “Safety credentials” tab and generate an entry key. We might want to use it with AWS CLI.

The final step is to run the
aws configure command within the terminal and supply the entry key and the key entry key we’ve simply created.
Pushing the docker picture
We will now observe the push instructions in our ECR repository. First, we have to authenticate.
|
aws ecr–public get–login–password —area us–east–1 | docker login —username AWS —password–stdin public.ecr.aws/e2b3j8w6 |
We should always obtain the response saying “Login Suceeded”
Now, we want to ensure our Docker picture is constructed.
|
docker construct –t nestjs–api . |
If you wish to know extra about how we created our
Dockerfile, try the next articles:
Docker makes use of tags to label and categorize photos. For instance, the Docker picture we created above has the
nestjs–api:newest tag. Amazon ECR means that we make a brand new tag for our picture.
|
docker tag nestjs–api:newest public.ecr.aws/e2b3j8w6/nestjs–api:newest |
The final step is to push the docker picture to our ECR repository.
|
docker push public.ecr.aws/e2b3j8w6/nestjs–api:newest |
As quickly as we do the above, our picture is seen in ECR.

We are going to quickly want the the Picture URI that we will copy within the above interface.
Making a PostgreSQL database
Our NestJS software makes use of a PostgreSQL database. One technique to create it when working with the AWS infrastructure is to make use of the Relational Database Service (RDS). Let’s open it within the AWS consumer interface.

The method of making a database is comparatively easy. First, we should present the database sort, identify, dimension, and credentials.
Ensure to maintain the password and username we sort right here, we are going to want them later.

As quickly because the database is created, we will open it within the consumer interface and have a look at the “Endpoint & port” part. There’s the URL of the database that we are going to want quickly.

Utilizing the ECS cluster
Some of the elementary providers offered by AWS is the Elastic Compute Cloud (EC2). With it, we will launch digital servers that may run something. Nonetheless, to make use of Docker with plain EC2, we must undergo the effort of putting in and managing Docker manually on our server.
As a substitute, we will use the Elastic Container Service (ECS). We will use it to run a cluster of a number of EC2 situations that run Docker. We don’t want to fret about putting in Docker manually after we use ECS.
Its necessary to know that ECS shouldn’t be merely an alternative choice to EC2. These are two providers that may work with one another.
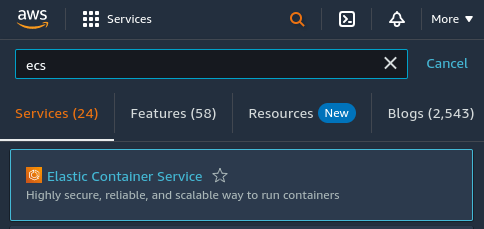
First, we have to open the ECS interface.
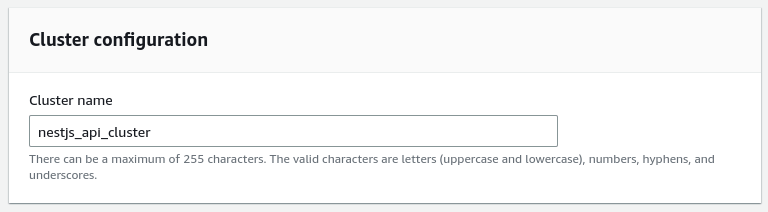
Now, we now have to create a cluster and provides it a reputation.
We will go away a lot of the configuration with the default values. Nonetheless, we have to configure our cluster to make use of EC2 situations.

The
t2.small EC2 occasion ships with 2 GiB of ram. If you wish to see the entire record of potential EC2 situations, try the official documentation.
Making a job definition
The Amazon ECS service can run duties within the cluster. An excellent instance of a job is operating a Docker picture. To do this, we have to create a job definition.

When configuring the duty definition, we use the outcomes of the earlier steps on this article. First, we have to put within the URI of the Docker picture we’ve pushed to our ECR repository.

Our NestJS software runs at port 3000. We have to expose it to have the ability to work together with it.

We additionally want to offer all the setting variables our Docker picture wants.
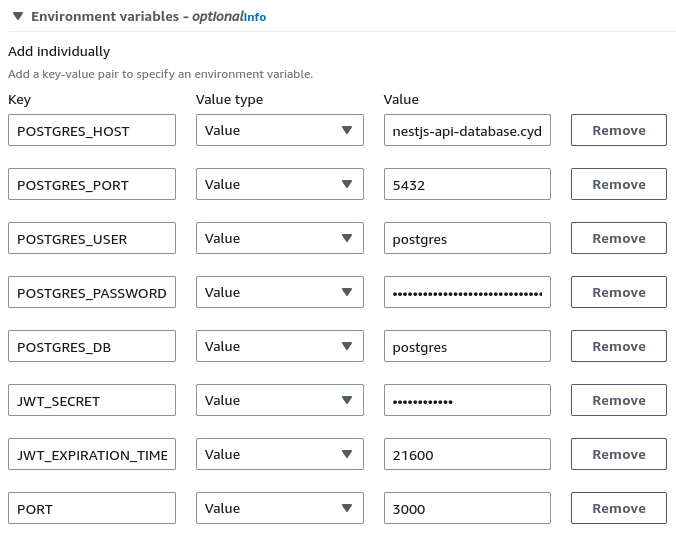
You could find the Postgres host worth within the “Endpoint & port” part of our database within the RDS service
The final step we should undergo when configuring our job definition is specifying the infrastructure necessities.

Configuring static host port mapping
By default, after we put 3000 within the port mappings within the above interface, AWS expects us to arrange the dynamic port mapping. Nonetheless, let’s take one other method for the sake of simplicity.
We are going to talk about dynamic port mapping in a separate article.
To vary the configuration, we have to modify the duty definition we’ve created above by opening our job definition and clicking the “Create new revision” button.
We then must put 3000 because the host port within the port mappings part.

As soon as we click on the “Create” button, AWS creates a new revision of our job definition.
Operating the duty on the cluster
As soon as the duty definition is prepared, we will open our cluster and run a brand new job.

First, we have to arrange the setting accurately.

We additionally want to decide on the duty definition we’ve created within the earlier step.

Please discover that we’re utilizing the second revision of our job definition that makes use of the static host mapping.
As soon as we click on on the “Create” button, AWS runs the duty we’ve outlined.
Accessing the API
We will now go to the EC2 service to see the main points of the EC2 occasion created by our ECS cluster.

As soon as we’re within the EC2 consumer interface, we have to open the record of our situations.

As soon as we open the above occasion, we will see the Public IPv4 DNS part. It comprises the deal with of our API.

Sadly, we aren’t capable of entry it but. To do this, we have to configure our API to simply accept incoming requests on port 3000.
Organising the safety group
The safety group controls site visitors allowed to achieve and go away the related useful resource. Our EC2 occasion already has a default safety group assigned. To see it, we have to open the “Safety” tab.

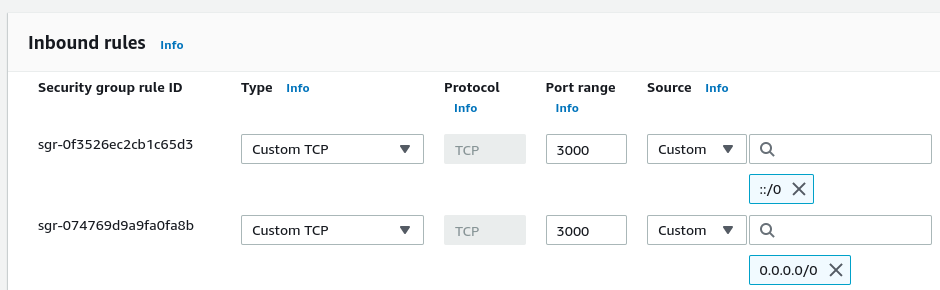
Clicking on the safety group above opens up its configuration web page. We have to modify its inbound guidelines to open port 3000. To do this, we have to create two guidelines. Within the first one, we set “Anyplace-IPv4” because the supply. In the second, we select “Anyplace-IPv6” and specify port 3000.
As soon as we do the above, we will begin making HTTP requests to our API.

Abstract
On this article, we’ve realized the fundamentals of deploying a NestJS software to AWS utilizing the Elastic Container Service (ECS) and Elastic Compute Cloud (EC2). To do this, we needed to study many various ideas concerning the AWS ecosystem. It included establishing a brand new Id and Entry Administration (IAM) consumer, pushing our Docker picture to the Elastic Container Registry (ECR), and operating a job within the Elastic Container Service (ECS) cluster.
There’s nonetheless much more to study relating to deploying NestJS on AWS, so keep tuned!