What’s label widget in tkinter
The tkinter is a Python library for creating GUI-based purposes.
- The label is among the obtainable widgets in tkinter like buttons, entry, and so forth.
- Label widget is a field the place you could place textual content or picture.
- Typically, that is used as an data field explaining the aim of one other widget.
- For instance, we’ve an entry widget (single-line textbox) within the type to enter title.
- To tell the customers goal of that entry widget, you could use a label beside the textbox.
The part beneath reveals utilizing the label widget with numerous obtainable choices.
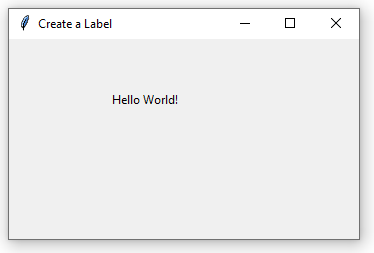
A easy label instance
On this instance, we created a window and positioned a label in it. No different widget is created. Take a look:
Code:
|
1 2 3 4 5 6 7 8 9 10 11 12 13 14 15 16 17 18 19 20 21 22
|
#import tkinter library
from tkinter import *
#Create an occasion of tkinter body or window
win = Tk()
win.geometry(“350×200”)
win.title(“Create a Label”)
lbl1 = Label(win, textual content=“Hiya World!”)
lbl1.place(x=100,y=50)
win.mainloop() |
Output:
Creating labels with background and foreground colours
By utilizing bg choice, you could create a label with a background colour. Equally, the textual content colour of the label will be set by the foreground colour choice i.e. fg.
See a program with a inexperienced background and white foreground colour label beneath:
|
1 2 3 4 5 6 7 8 9 10 11 12 13 14 15 16 17 18 19 20 21 22
|
#import tkinter library
from tkinter import *
#Create an occasion of tkinter window
win = Tk()
win.geometry(“350×200”)
win.title(“Create a Label”)
#Label with background and foreground colour
lbl1 = Label(win, textual content=“Hiya World!”, bg=“inexperienced”, fg=“white”)
lbl1.place(x=100,y=50)
win.mainloop() |
Output:

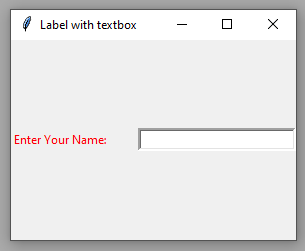
A label with a textbox/entry instance
Within the instance beneath, we create a label together with a textbox/entry widget to indicate the aim of the textbox.
Code:
|
1 2 3 4 5 6 7 8 9 10 11 12 13 14 15 16 17 18 19 20 21 22 23
|
from tkinter import *
win = Tk()
win.geometry(“250×200”)
win.title(“Label with textbox”)
#Label for textbox
Lbl = Label(win, textual content=“Enter Your Title:”, fg=“pink”)
Lbl.pack( facet = LEFT)
#Making a textbox/entry
Ent = Entry(win, bd=“3”, width=25)
Ent.pack(facet = RIGHT)
win.mainloop() |
Output:
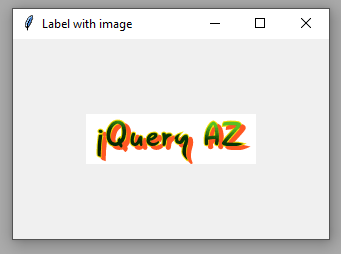
Utilizing a picture in label instance
Relatively than textual content, you may additionally use picture within the label. For that, use the picture choice. First, take a look at an instance beneath after which we are going to clarify the way it labored.
Code:
|
1 2 3 4 5 6 7 8 9 10 11 12 13 14 15 16 17 18 19 20 21 22 23 24 25
|
import tkinter as tk
from PIL import Picture, ImageTk
win = tk.Tk()
win.geometry(“250×200”)
win.title(“Label with picture”)
#Specify picture path
img = ImageTk.PhotoImage(Picture.open(“E:/emblem.png”))
#Create label and specify picture there
lbl_img = tk.Label(win, picture = img)
lbl_img.pack(facet = “backside”, fill = “each”, develop = “sure”)
win.mainloop() |
Output:
How did it work?
Step 1:
Contemplate this line:
from PIL import Picture, ImageTk
We used Pillow Picture Library to learn and convert photographs to Python objects, so we are able to show them.
With a purpose to set up PIL, execute this command within the CMD (when you don’t have already got):
pip set up pillow
Step 2:
Then we specified the picture on this line:
img = ImageTk.PhotoImage(Picture.open(“E:/emblem.png”))
Set the trail in response to your system.
Step 3:
Utilizing picture choice within the label:
lbl_img = tk.Label(win, picture = img)
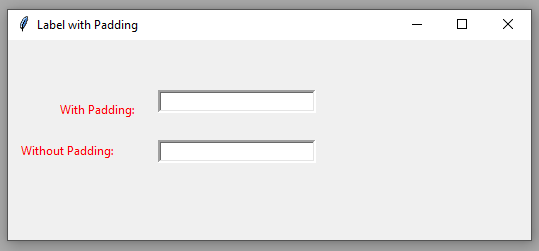
An instance of padding choices
Chances are you’ll add further area to the left, proper, high, and backside of the textual content through the use of the padding choices of the label widget.
For including padding to the left and proper of the textual content, use padx choice.
So as to add area within the high and backside, use the pady choice.
Code:
|
1 2 3 4 5 6 7 8 9 10 11 12 13 14 15 16 17 18 19 20 21 22 23 24 25 26 27 28 29 30 31 32 33
|
from tkinter import *
win = Tk()
win.geometry(“250×200”)
win.title(“Label with Padding”)
#Label for textbox with padding
Lb_pd = Label(win, textual content=“With Padding:”, fg=“pink”, padx = 40, pady=10).place(x = 10,y = 50)
#Making a textbox/entry
Ent1 = Entry(win, bd=“3”, width=25).place(x = 150, y = 50)
#Label for textbox with out padding
Lb_no_pd = Label(win, textual content=“With out Padding:”, fg=“pink”).place(x = 10,y = 100)
#Making a textbox/entry
Ent2 = Entry(win, bd=“3”, width=25).place(x = 150, y = 100)
win.mainloop() |
Output:
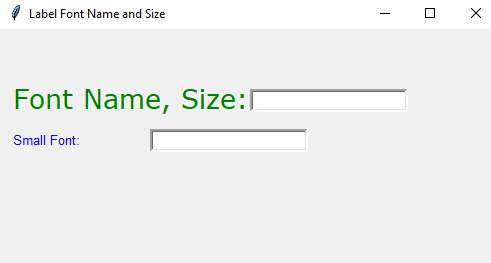
Altering the font dimension and title of the label instance
Within the instance beneath, we created various-sized labels through the use of the font choice of the label widget. Apart from, font names are additionally given for 2 labels Verdana and Arial.
Code:
|
1 2 3 4 5 6 7 8 9 10 11 12 13 14 15 16 17 18 19 20 21 22 23 24 25 26 27 28 29 30 31 32
|
from tkinter import *
win = Tk()
win.geometry(“350×300”)
win.title(“Label Font Title and Dimension”)
#Label with greater font
Lb_pd = Label(win, textual content=“Font Title, Dimension:”, fg=“inexperienced”, font=(‘Verdana’, 20)).place(x = 10,y = 50)
#Making a textbox/entry
Ent1 = Entry(win, bd=“3”, width=25).place(x = 250, y = 60)
#Label with greater font
Lb_no_pd = Label(win, textual content=“Small Font:”, fg=“blue”,font=(‘arial’, 10)).place(x = 10,y = 100)
#Making a textbox/entry
Ent2 = Entry(win, bd=“3”, width=25).place(x = 150, y = 100)
win.mainloop() |
Output: