


Just a few days in the past, I revealed a brand new design for my web site. Ever since I first created it, it didn’t have sufficient consideration from my finish. I stored writing articles and thought it was working.
On this article, I’ll talk about why I redesigned it, the method, and some highlights from the design basically.
The why
Good design is about fixing issues. I’ve completely different the reason why I redesigned my weblog, listed here are a couple of of them:
Doesn’t characterize who I’m
I found these days that my web site doesn’t characterize me in any respect. If a reader opens an article on my web site and tries to browse the house web page, for instance, they may assume that I’m a “content material creator”. I don’t prefer to be represented as that.
I’m a designer and developer, writing articles on the facet. For a brand new reader for one among my articles, I might be positioned as a content material creator.
No private contact
The web site doesn’t embody a transparent private contact. The design was boring and never that participating. Including a private contact will make it really feel like a web site created by an individual.
Lack of selling myself
My work relies on how I promote myself. I haven’t shared any workpieces on my weblog for a very long time. This isn’t good. Including chosen work will assist to make clear what I can do professionally.
Previous and new comparability
Earlier than diving into the main points of the brand new design, let’s see a comparability for the highest a part of the house web page.
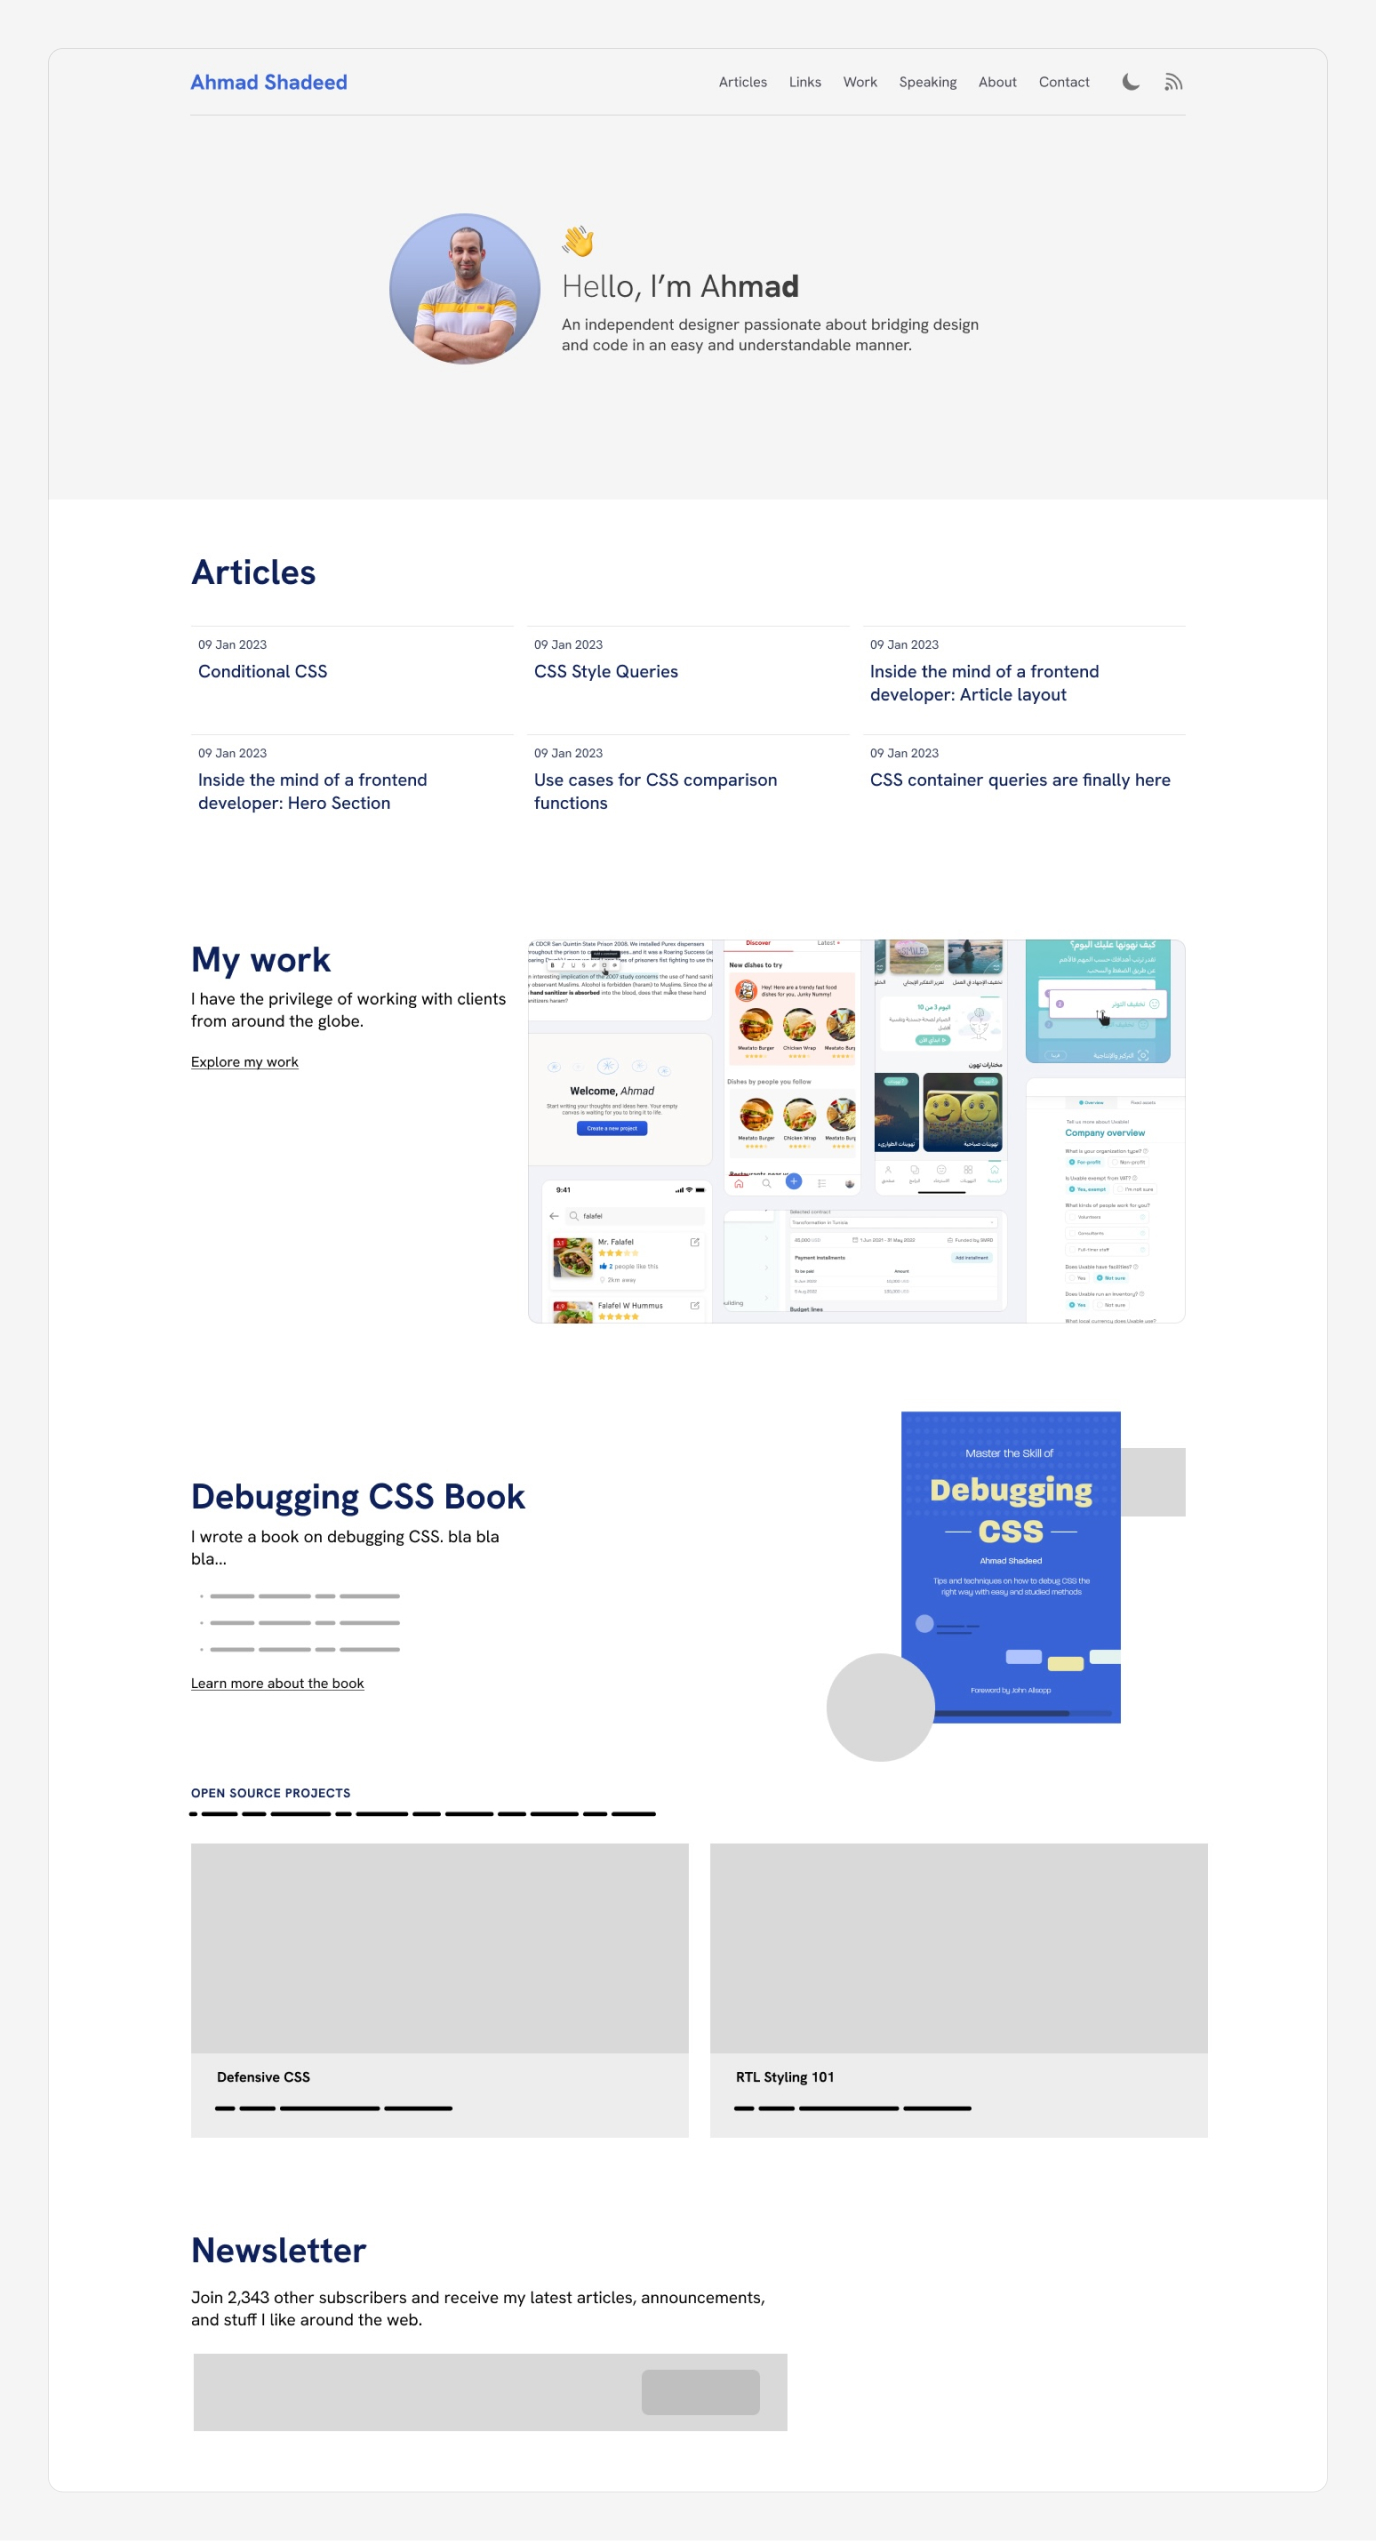
The outdated design:
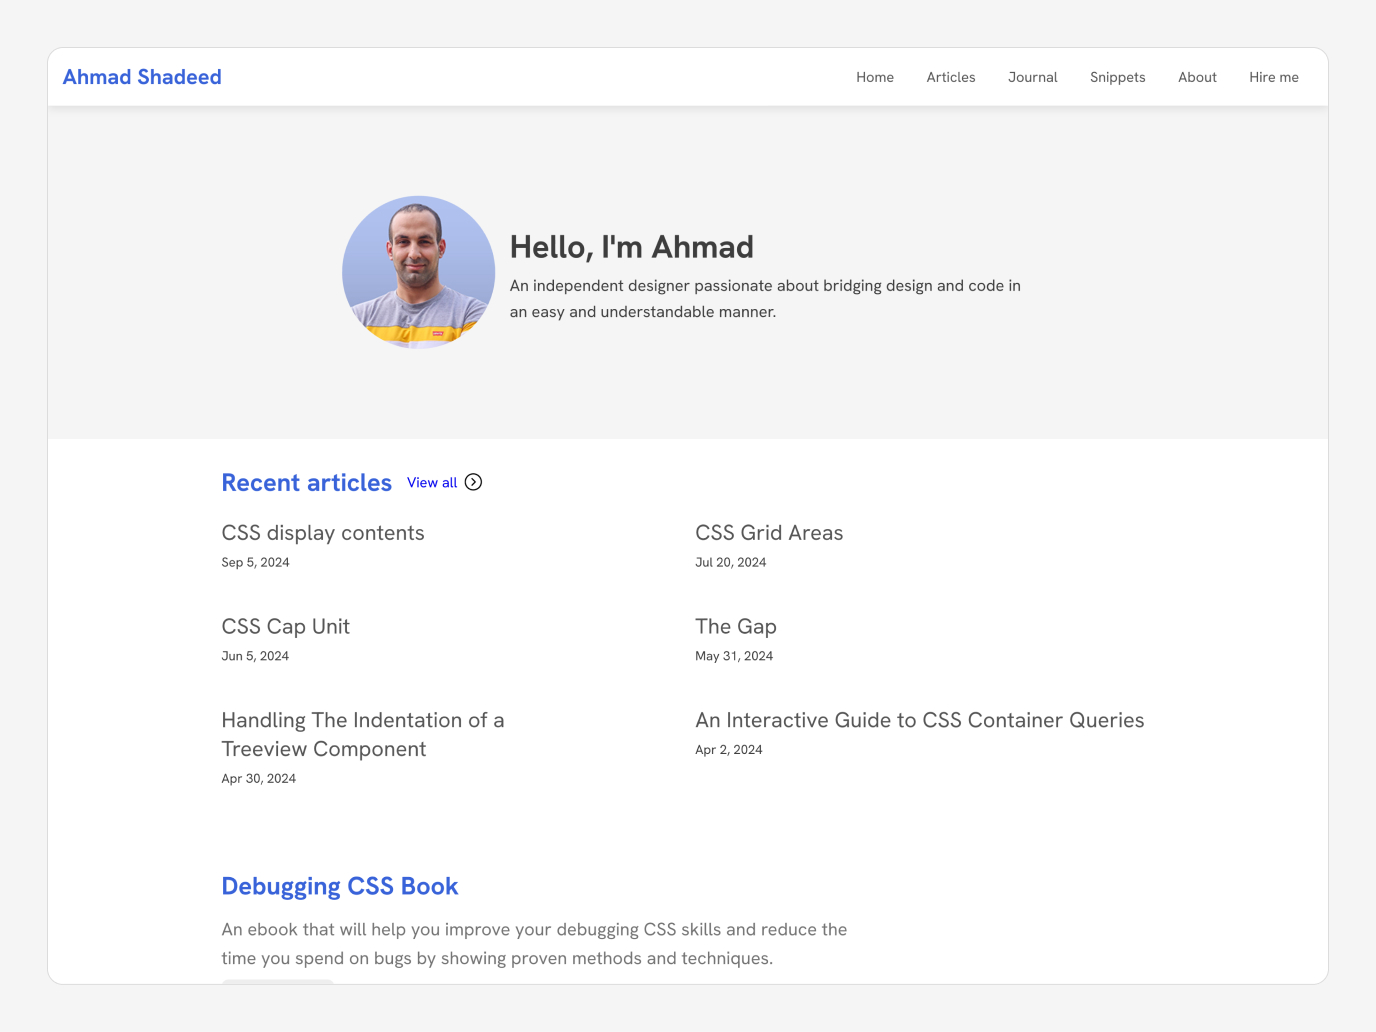
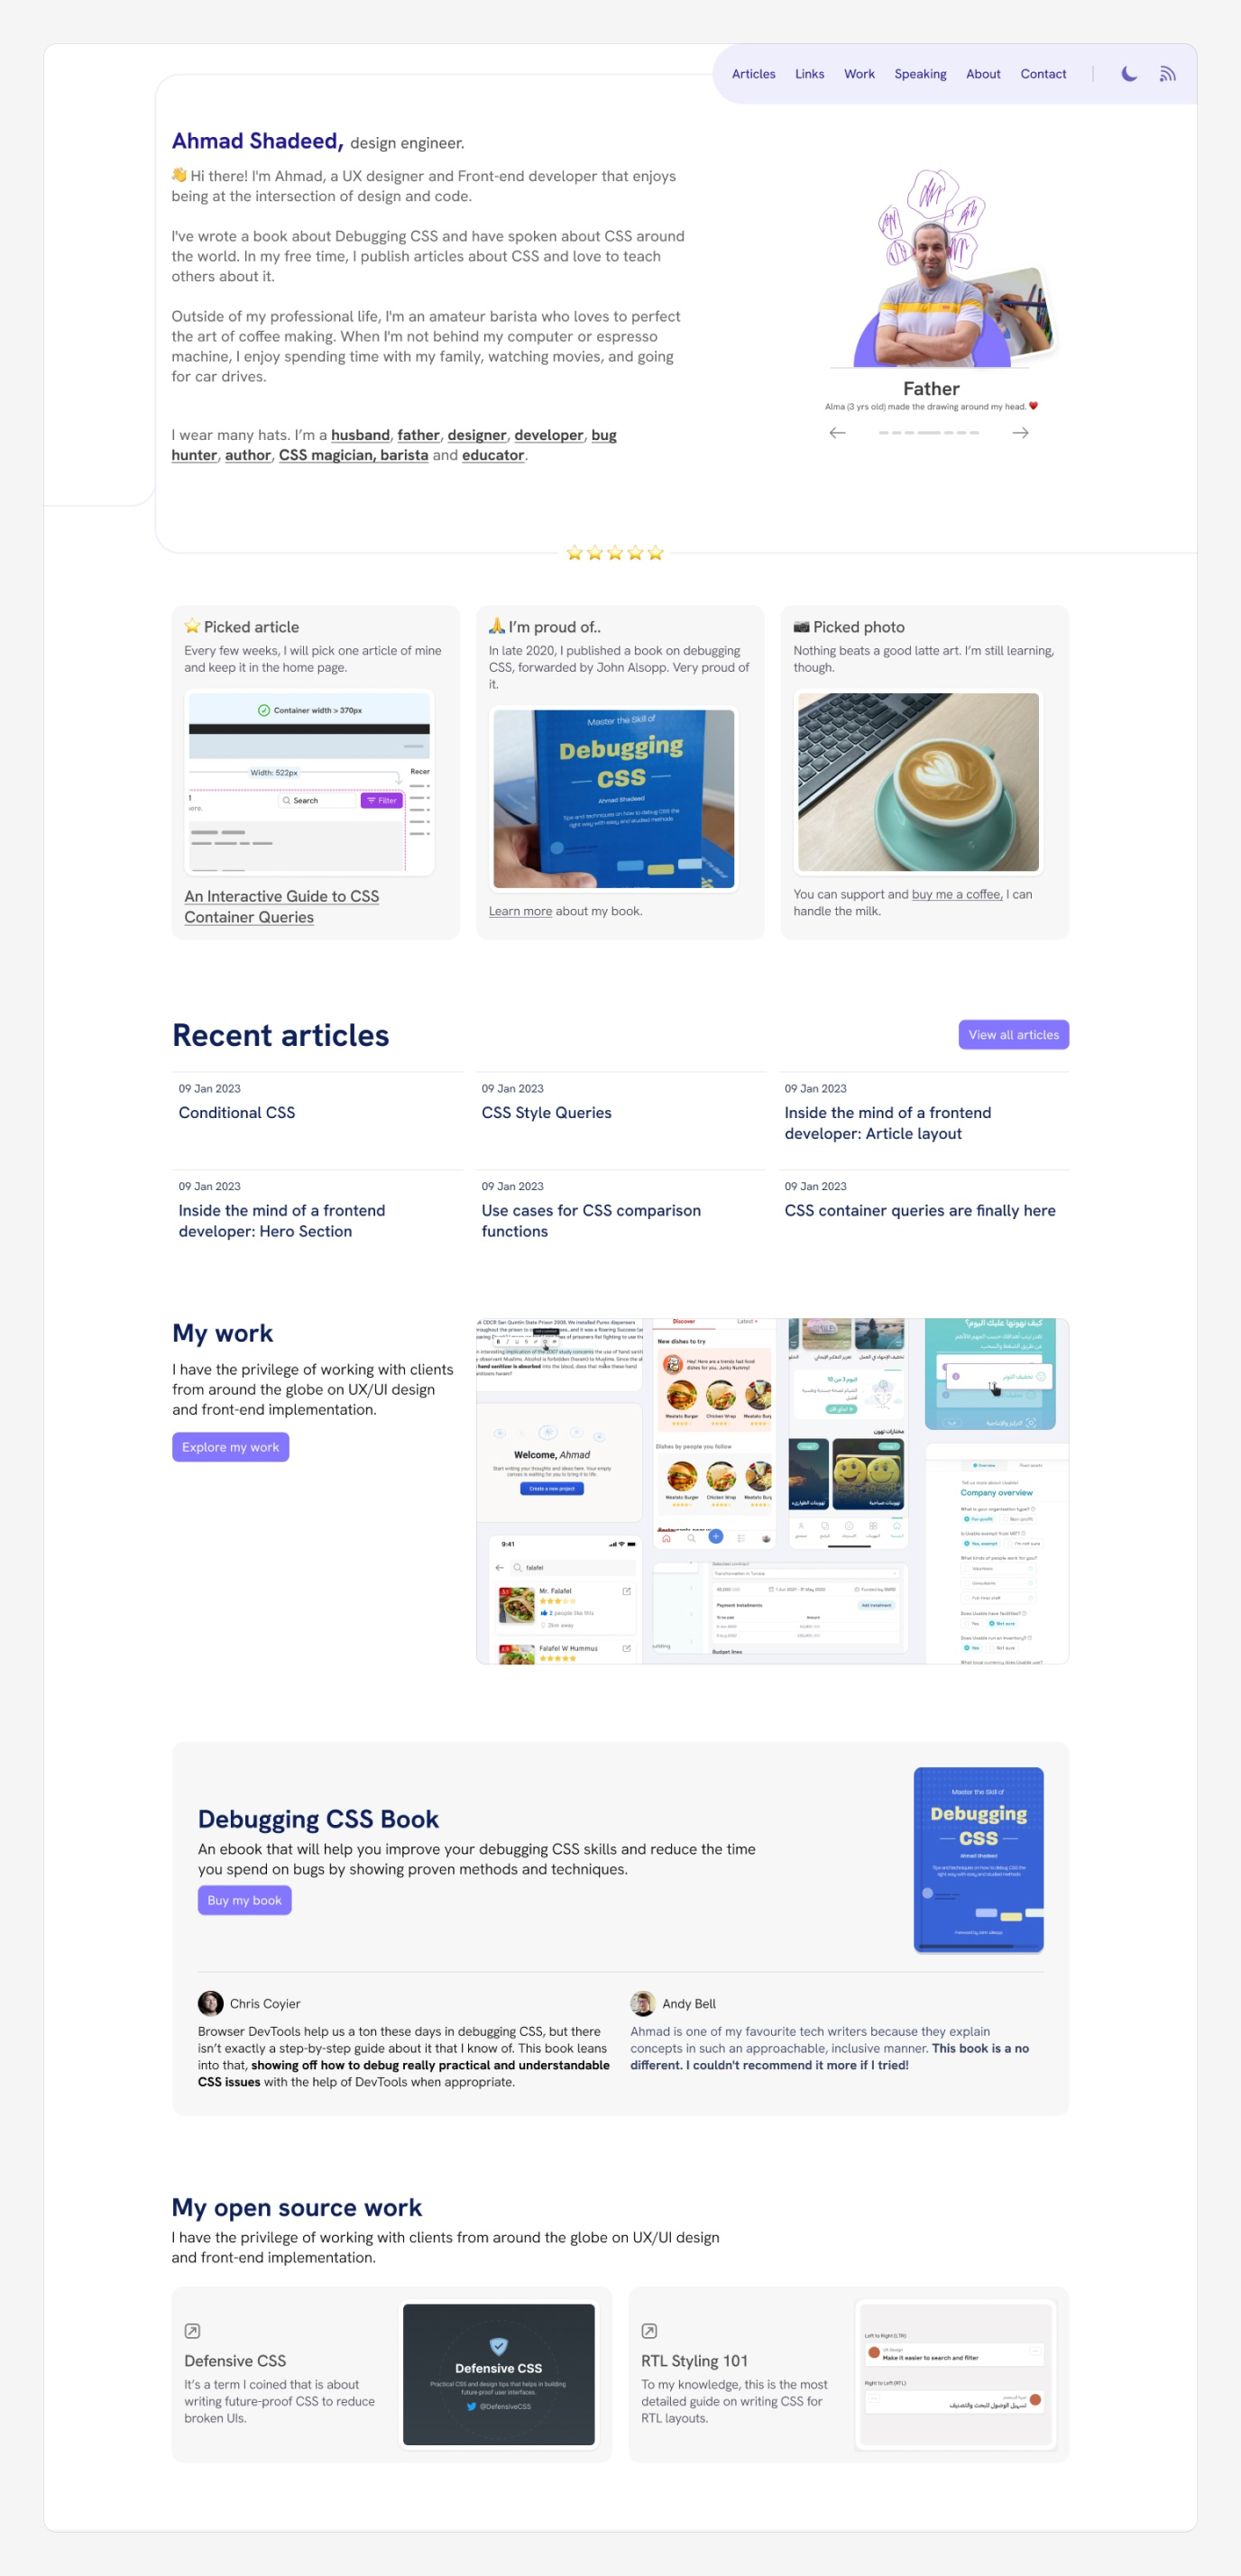
The brand new design:
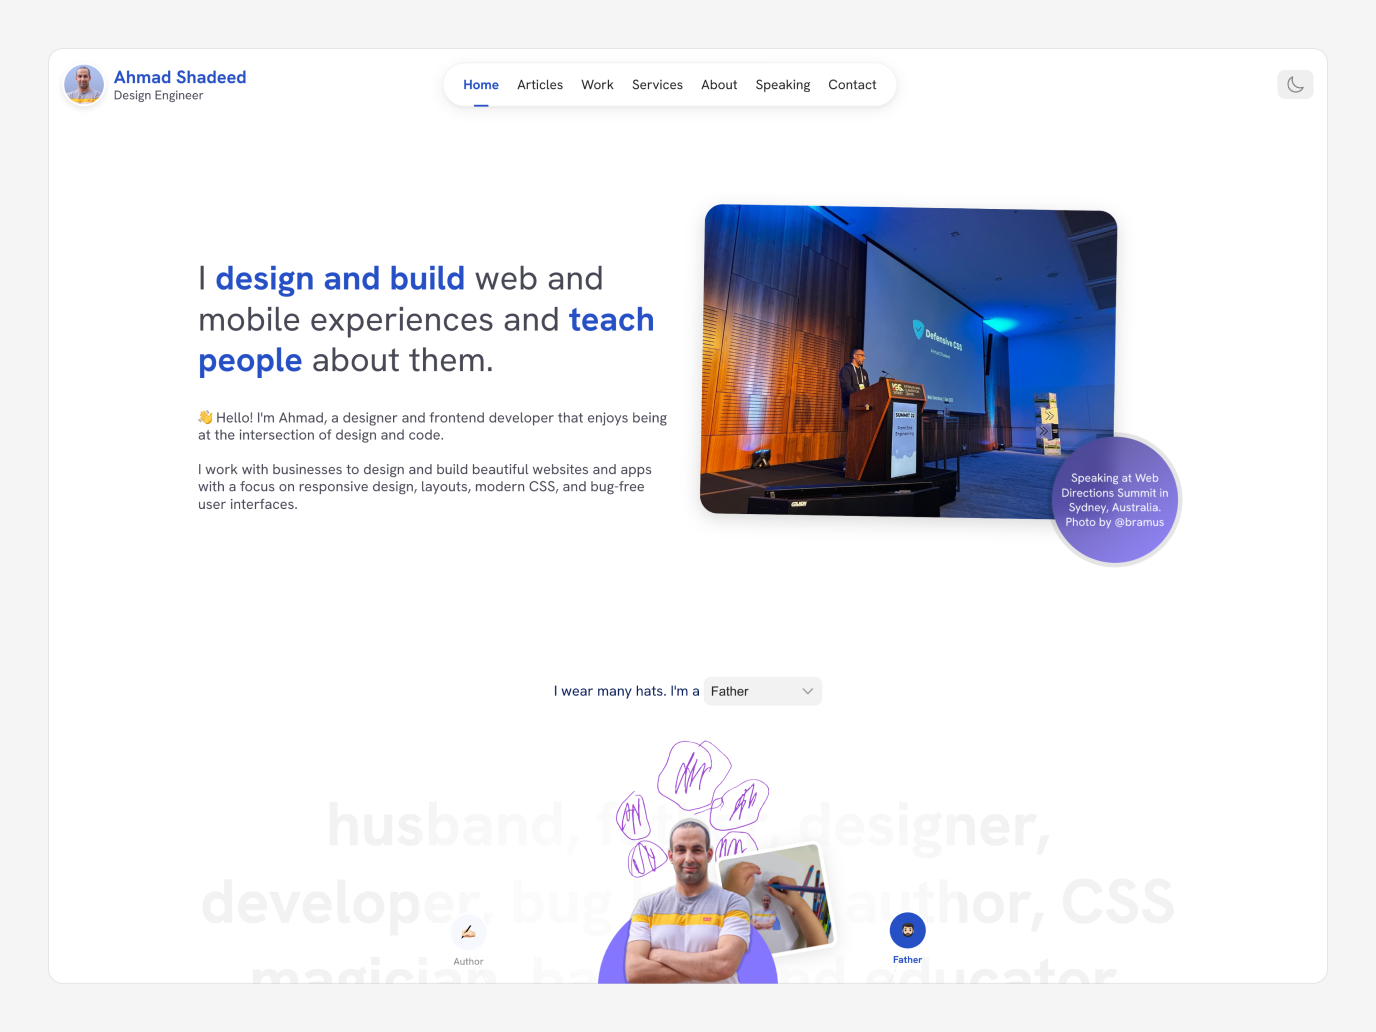
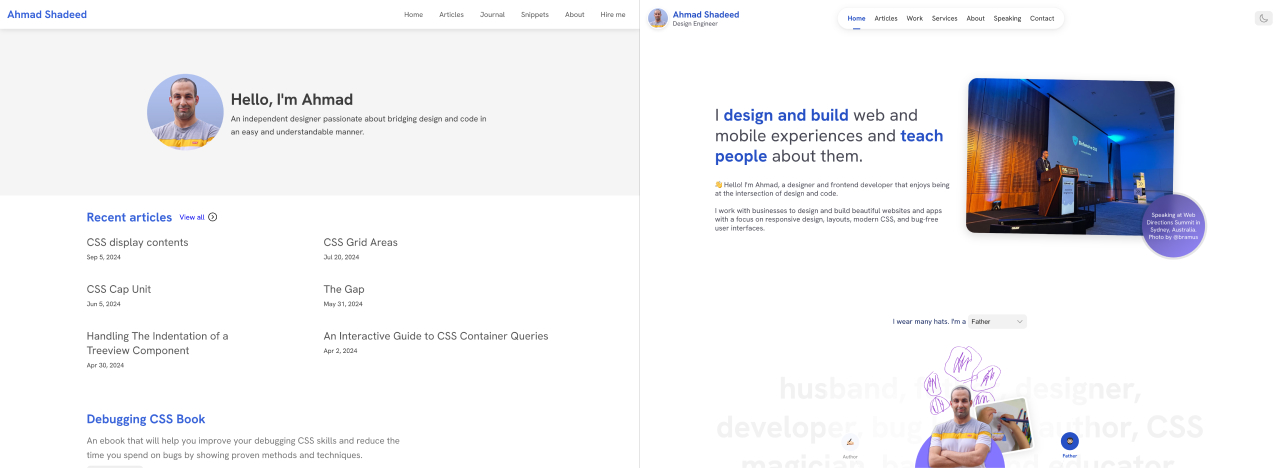
Aspect-by-side comparability:
Dwelling web page design
Provided that it is a private web site, I didn’t have a branding or a transparent brand that I used within the design. Nonetheless, over time, I used the blue shade as my model shade. Based mostly on that, I began exploring design concepts.
Listed here are some explorations for the header and hero part.
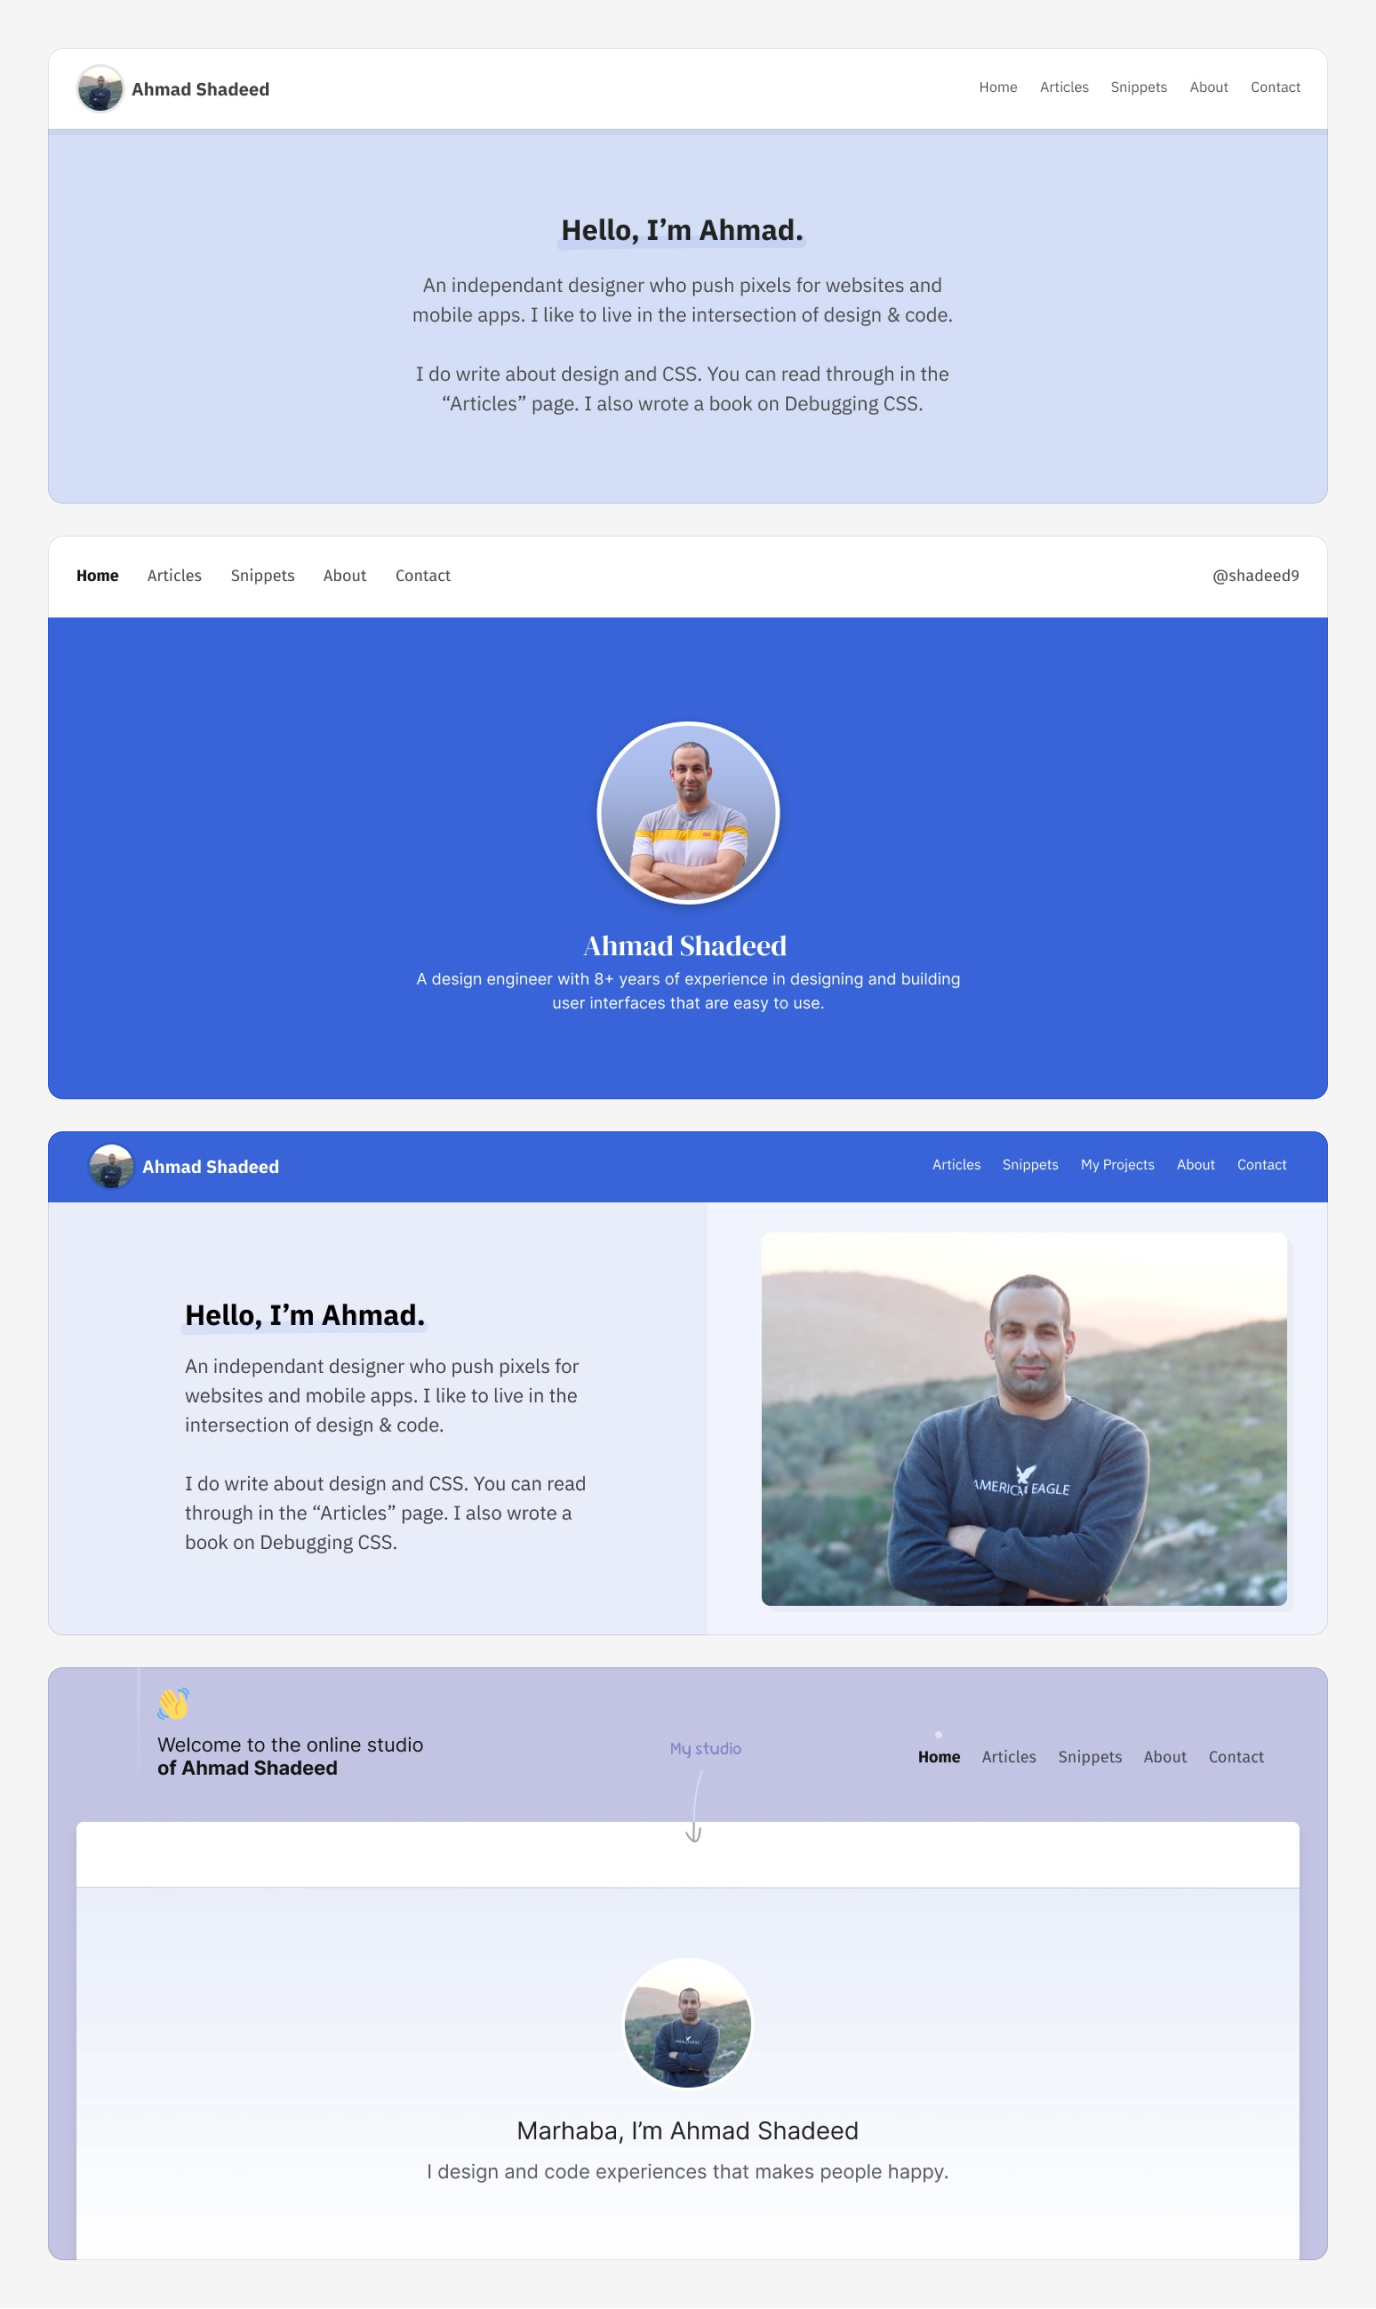
I didn’t like every of them. I didn’t really feel that the above design ideas would clear up my downside. I stored exploring. After a while, I landed on a design that I typically really feel good with.
I thought it was sufficient to try this. I used this design to replace my web site header early this yr.
I received an concept for the hero part
Right now, I felt that my thoughts was like the sunshine bulb emoji (💡). I lastly received an concept for one thing that could be distinctive and particular.
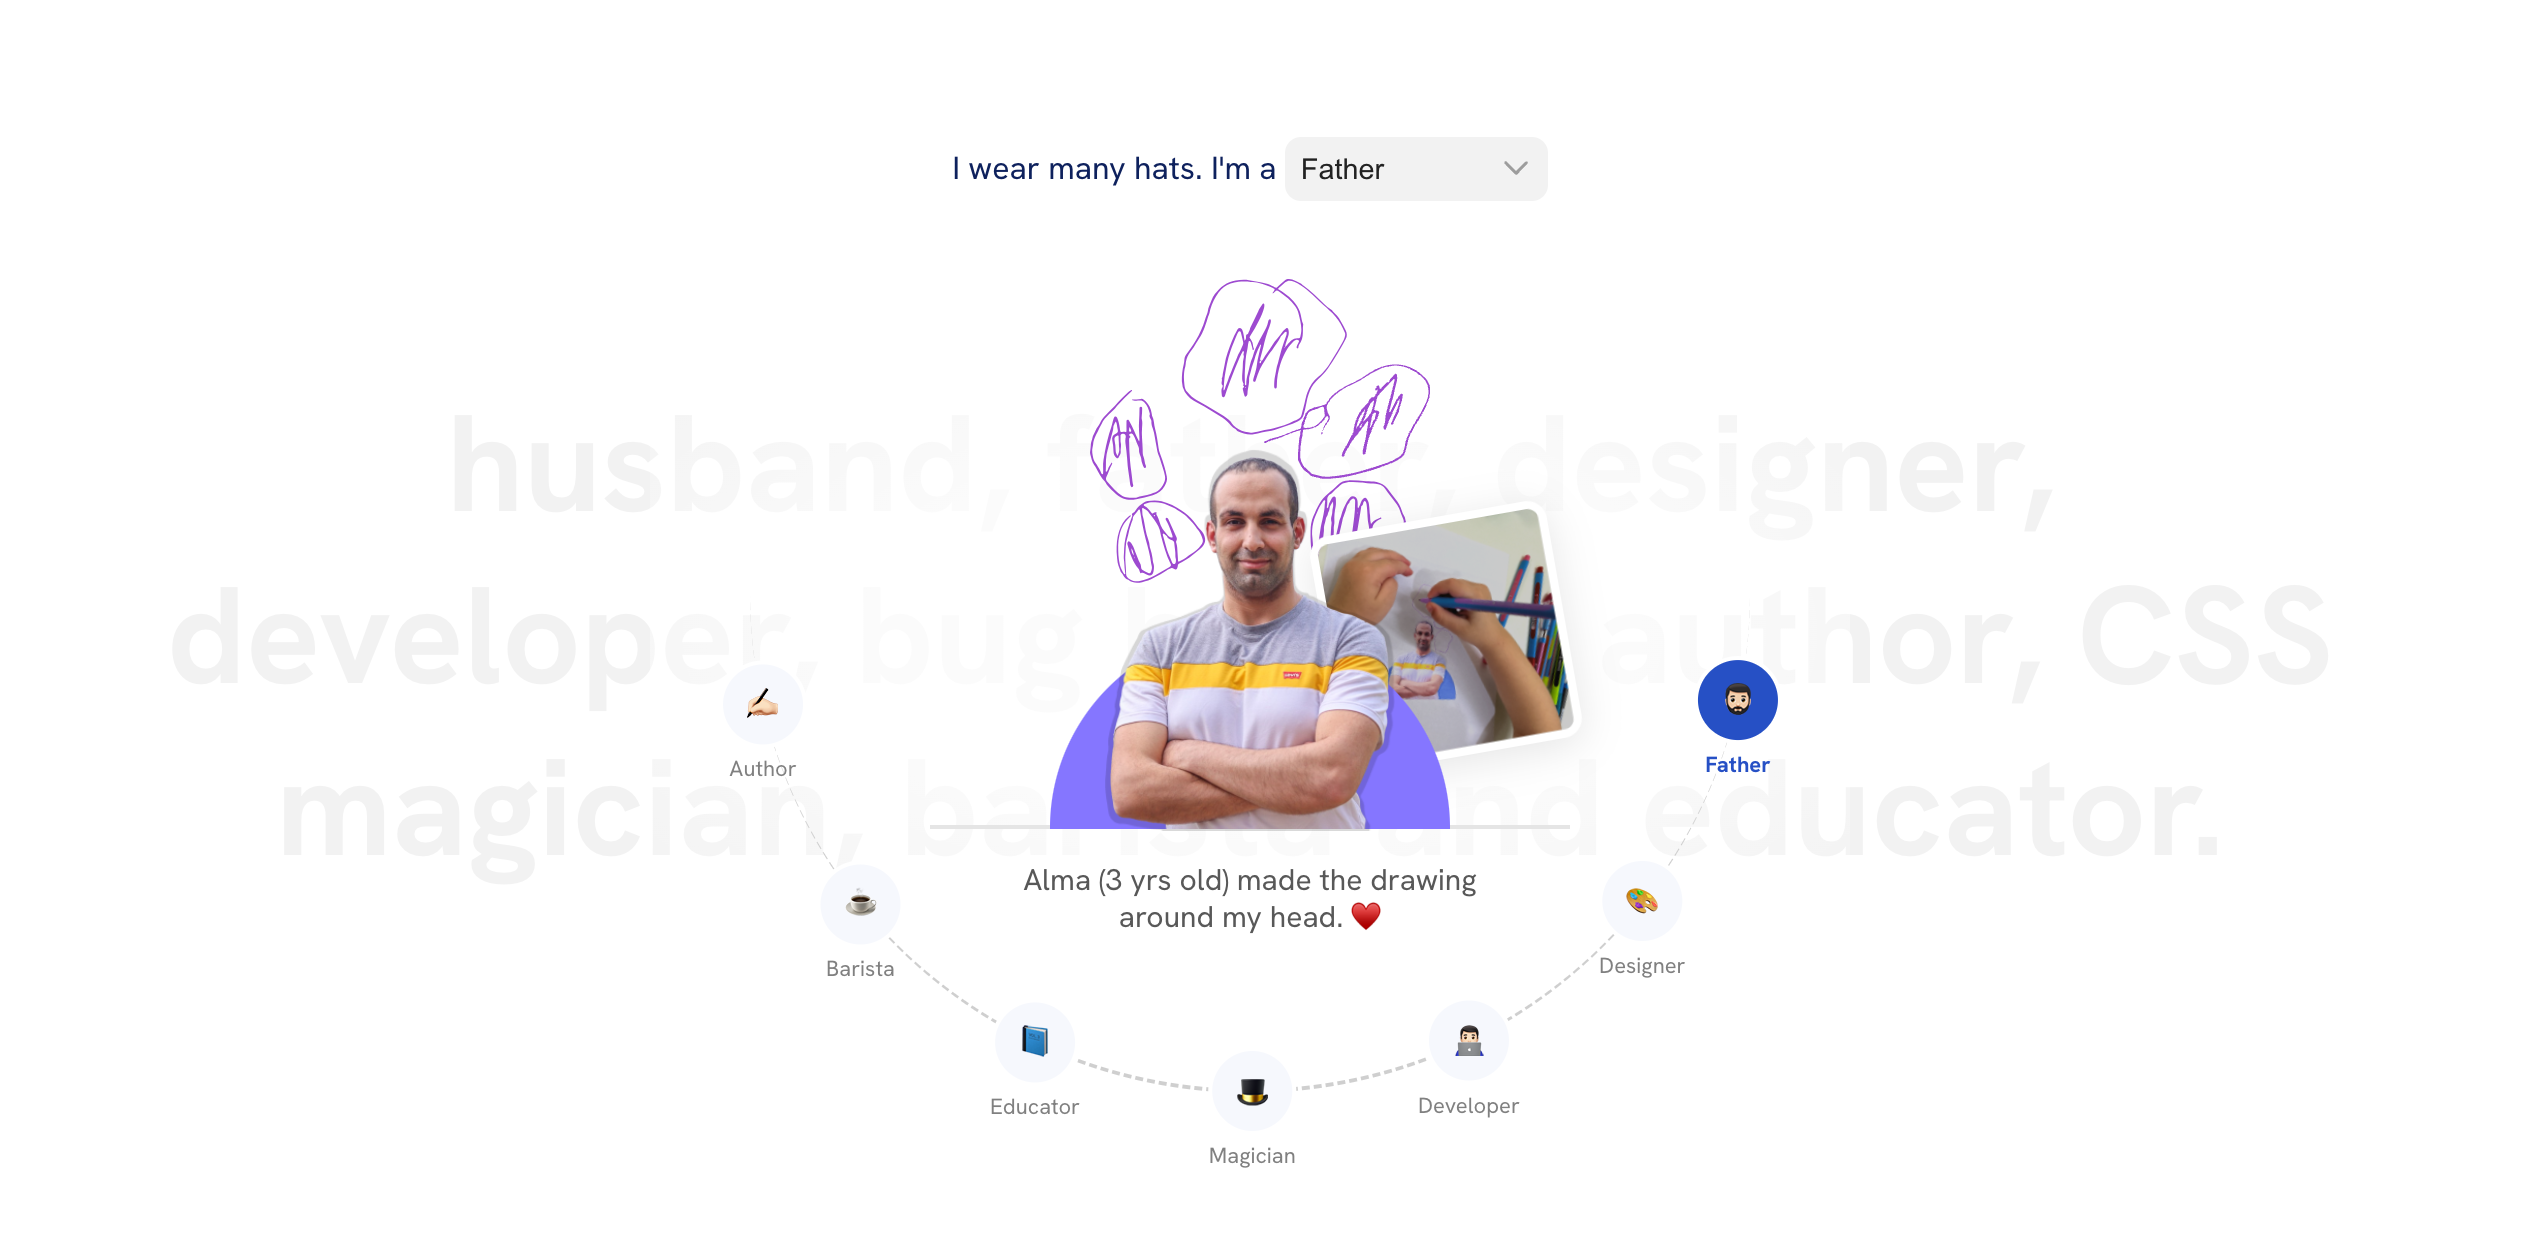
I thought of utilizing my photograph in a piece the place it represents how I put on many hats. Right here is the preliminary design:
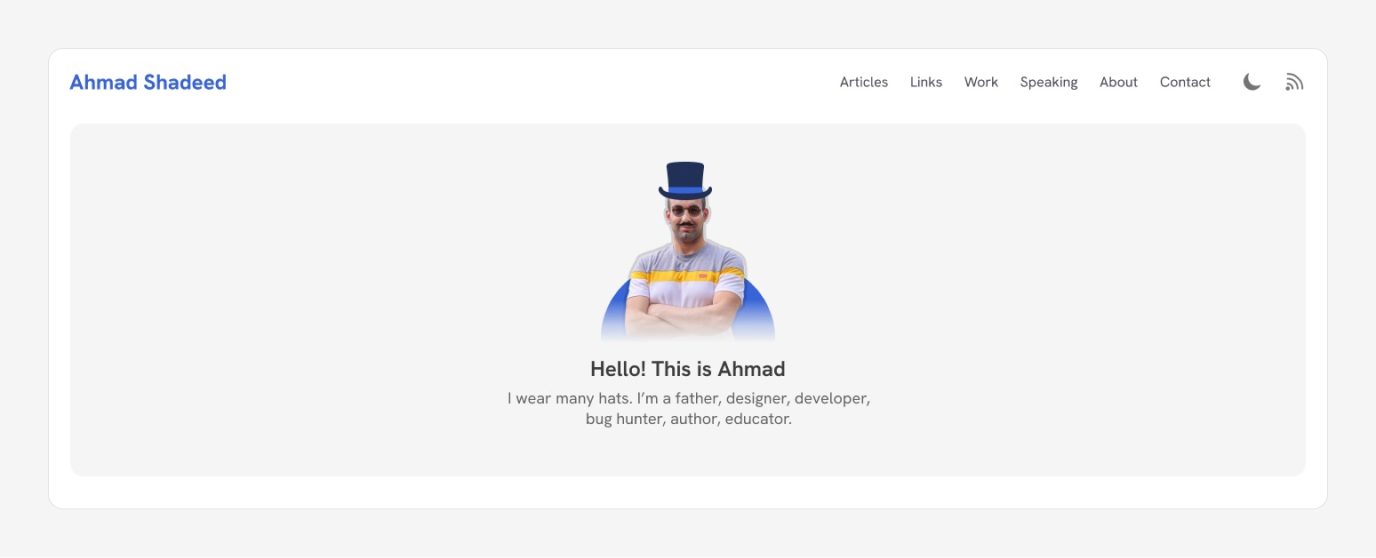
I thought of together with it within the hero part like this. Whereas taking a look at it, I assumed that I ought to embody the next hats:
- Father
- Designer
- Developer
- Writer
- CSS Magician
- Educator
I took my photograph printed it and requested my daughter (Alma) to attract one thing on my photograph.
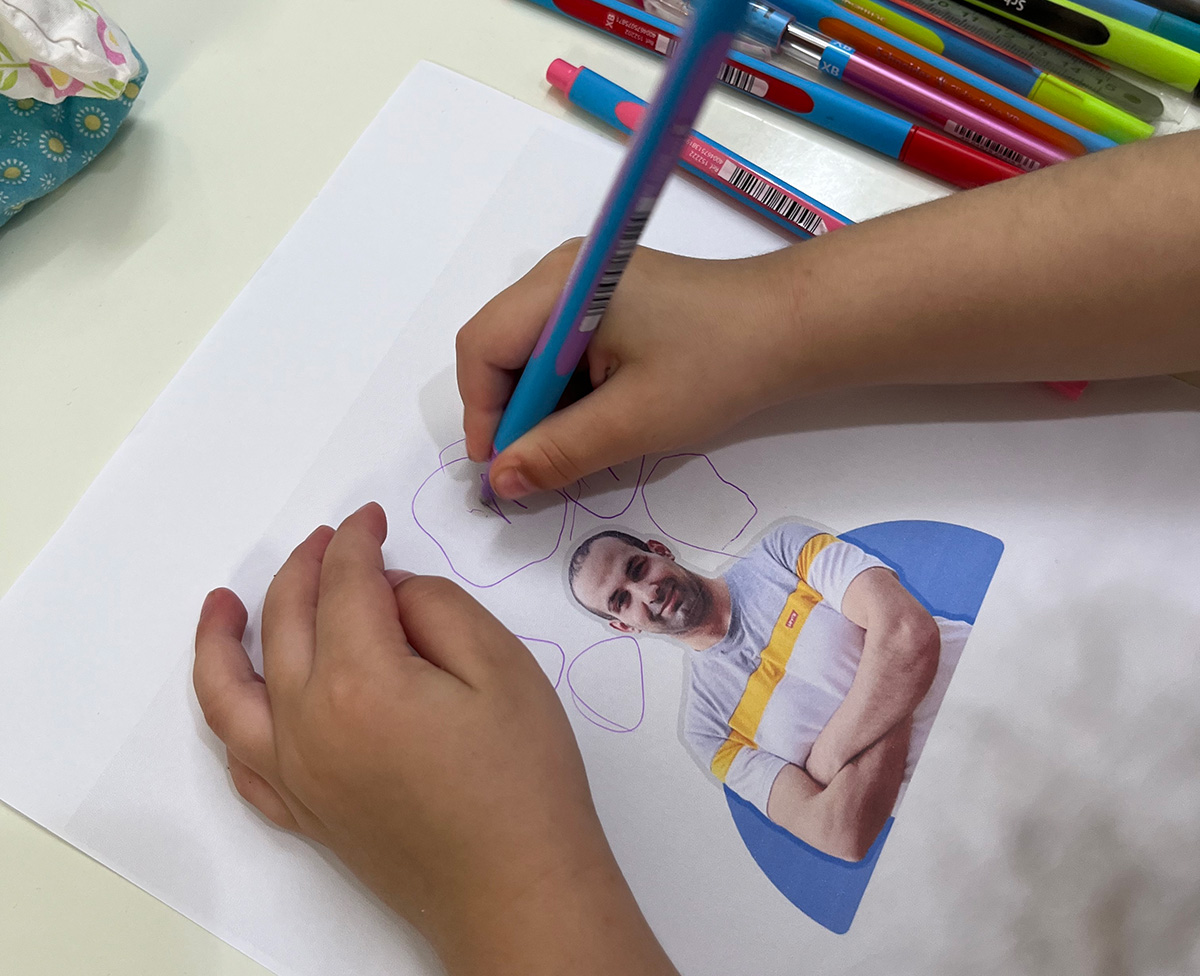
Right here is how I extracted the above drawings from Alma:
- Scanned the paper
- Used Adobe Illustrator’s “Picture Hint” characteristic
- Exported the end result as SVG
Then, I labored on all of the hat variations, right here they’re:

I appreciated them quite a bit and thought they wanted to be extra constant (design-wise).
Transferring to the remainder of the house part
At this level, here’s what the house web page design seems to be like:
It’s not unhealthy, there are a few issues I don’t like right here:
- I felt that putting the part that comprises the picked article, my e book, and the espresso is misplaced.
- I wasn’t certain about having left and proper arrows for the hats part. Additionally, its placement is a bit odd to me.
- The e book part design is boring.
First, I up to date the hero part with two most important targets:
- Add a photograph of me talking at a convention.
- Transfer the hats into their part.
That was a very good base that opened the way in which for the subsequent design concepts.
I stored iterating the web page and ended up with the next end result:
Transferring to the browser
At this level, I began implementing the design within the browser because the design path began shaping up.
I constructed the house web page and modified the design there.
Foremost header
I designed the header within the browser because it’s simpler for me there, particularly for cell.
At first, I thought of making a toggle button for cell, however I didn’t like that. The full variety of header gadgets is 6, so why have a toggle button?
I ended up displaying the navigation straight on cell.
The brand is a container question. If there’s sufficient house, the avatar is proven.
.header__start {
  container-name: header-start;
  container-type: inline-size;
  grid-area: brand;
}

.brand {
  @container header-start (min-width: 210px) {
    img {
      show: block;
    }
  }
}
The header structure is constructed with a CSS grid. I used grid-template-areas to make it simpler.
.header {
  --dynamic-col: clamp(12.5rem, 3.125rem + 15.63vw, 18.75rem);
  show: grid;
  grid-template-areas:
    "brand theme"
    "nav nav";

  @media (min-width: 960px) {
    grid-template-areas: "brand nav theme";
    grid-template-columns: var(--dynamic-col) 1fr var(--dynamic-col);
  }
}
See the next determine.
The hats part
I have already got Framer Movement on my weblog as I exploit it for my interactive articles. The hats part is a React element that makes use of Framer Movement.
First, I created a React state to deal with the present chosen hat.
const Hats = (props) => {
  const [hat, setHat] = useState(hats[0]);
};
For instance, if the chosen hat is “Father”, it would load sure components for that state.
<AnimatePresence>
  {hat === "father" && (
    <>
      <Alma />
      <movement.img
        preliminary={{ x: 50, y: 0, rotate: "10deg", opacity: 0 }}
        animate={{ x: 30, y: -10, rotate: "-10deg", opacity: 1 }}
        exit={{ x: 100, y: 0, rotate: "10deg", opacity: 0 }}
        transition={{ period: 0.4 }}
        className={types.fatherImage}
        src="/property/common/hats/alma-in-progress.png"
        alt=""
      />
    </>
  )}
</AnimatePresence>
And the identical for the remainder of the states. What I like about utilizing React and Framer Movement is:
- The browser will solely load what it wants within the first load.
- I can simply management the relation between the JS and the animation itself.
- Utilizing CSS modules. I need the types of this part to be remoted from the remainder of the web page to keep away from styling battle.
- It’s enjoyable. I realized one thing that I haven’t achieved earlier than.
Cool, proper?
The hats may be modified in three other ways:
- The choose menu
- Clicking on a hat button
- Utilizing the left/proper keyboard keys
The hats navigation
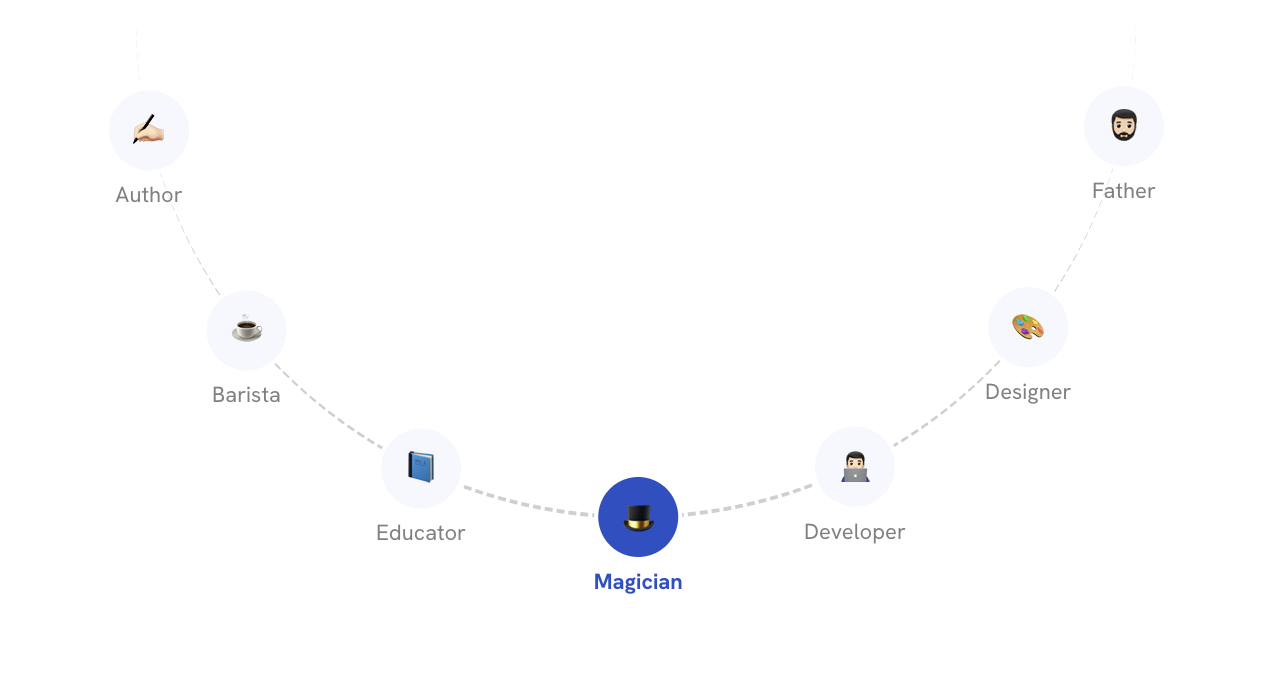
I want to position a button for every hat circularly. How to try this? First, we have to use place: absolute to get the circle out of the stream.
.wrapper {
  place: relative;
}

.circle {
  place: absolute;
  inset: 0;
  margin: auto;
}
Now the circle is positioned on the middle of the circle. Have a look:
make this circle rotate across the middle of the dashed one? To do this, we have to change the x place of the circle.
.circleItem {
  remodel: translateX(var(--radius));
}
We have to shift the circle by the worth of the radius. Play with the slider within the following demo:
remodel: translateX(0px)
After altering the translateX, we are able to rotate the circle by any diploma we wish. Discover how when the translateX is elevated, the road will increase in measurement. This can be a illustration of the place the circle will rotate across the huge circle orign.
remodel: translateX(50px) rotate(50deg)
Let’s say that we elevated the variety of circles. Now every one among them will want a distinct angle.
To perform that, we have to:
- Outline the index of every circle
- Know the variety of gadgets
- Outline a fraction worth for every circle merchandise by dividing the index by the entire circles
- Multiply the fraction with the complete angle
See the next CSS:
.circle {
  --numOfItems: 5;
  --radius: 100px;
}

.circleItem {
  --fraction: calc(var(--i) / var(--numOfItems));
  --rotationAngle: calc(360deg * var(--fraction));
  remodel: rotate(var(--rotationAngle)) translateX(var(--radius));

  &:nth-child(1) {
    --i: 0;
  }

  &:nth-child(2) {
    --i: 1;
  }


}
Right here is an interactive demo that exhibits it in motion. Play with the translate worth. Every circle is 100px away from the middle and has an incremental angle.
In my case, I wanted to distribute the circles within the backside half solely. All I have to do is to alter the complete circle 360deg to a half one.
.circleItem {
  --fraction: calc(var(--i) / var(--numOfItems));
  --rotationAngle: calc(180deg * var(--fraction));
  remodel: rotate(var(--rotationAngle)) translateX(var(--radius));
}
After altering the entire angle from 360deg to 180deg, now the gadgets are positioned in half a circle.
In case you discover, they don’t seem to be centered completely. We have to add an offset to repair that.
.circleItem {

  --offset: 16deg;
  --fraction: calc(var(--i) / var(--numOfItems));
  --rotationAngle: calc(180deg * var(--fraction) + var(--offset));
  remodel: rotate(var(--rotationAngle)) translateX(var(--radius));
}
Attempt to toggle it within the following demo:
Once we add content material to the gadgets, it’s rotated together with the merchandise itself. This isn’t good in my case.
To repair that, I’ll revert the --rotationAngle on the finish of the remodel.
.circleItem {

  --offset: 16deg;
  --fraction: calc(var(--i) / var(--numOfItems));
  --rotationAngle: calc(180deg * var(--fraction) + var(--offset));
  remodel: rotate(var(--rotationAngle)) translateX(var(--translate)) rotate(calc(-1 *
          var(--rotationAngle)));
}
Play with it within the demo beneath:
We are able to take this and construct upon it to create a round navigation, identical to what’s on my residence web page now.
Right here is the ultimate end result:
I want to credit score this Codepen demo, it helped me to construct a proof of idea for the hats navigation.
The e book part
I used CSS scroll-driven animation so as to add an eye catching scroll impact. Whenever you scroll down, the rows will animate in several instructions.
I selected to incorporate pages from the e book as it would make the reader curious to discover my e book. I can verify that it labored! My e book gross sales in the previous few days equal the gross sales of the final two months, mixed.
About web page
That is the place the 50% effort went. I spent lots of time engaged on this web page. I needed it to replicate who I’m as an individual.
I brain-dumped all of the content material I have to put on this web page.
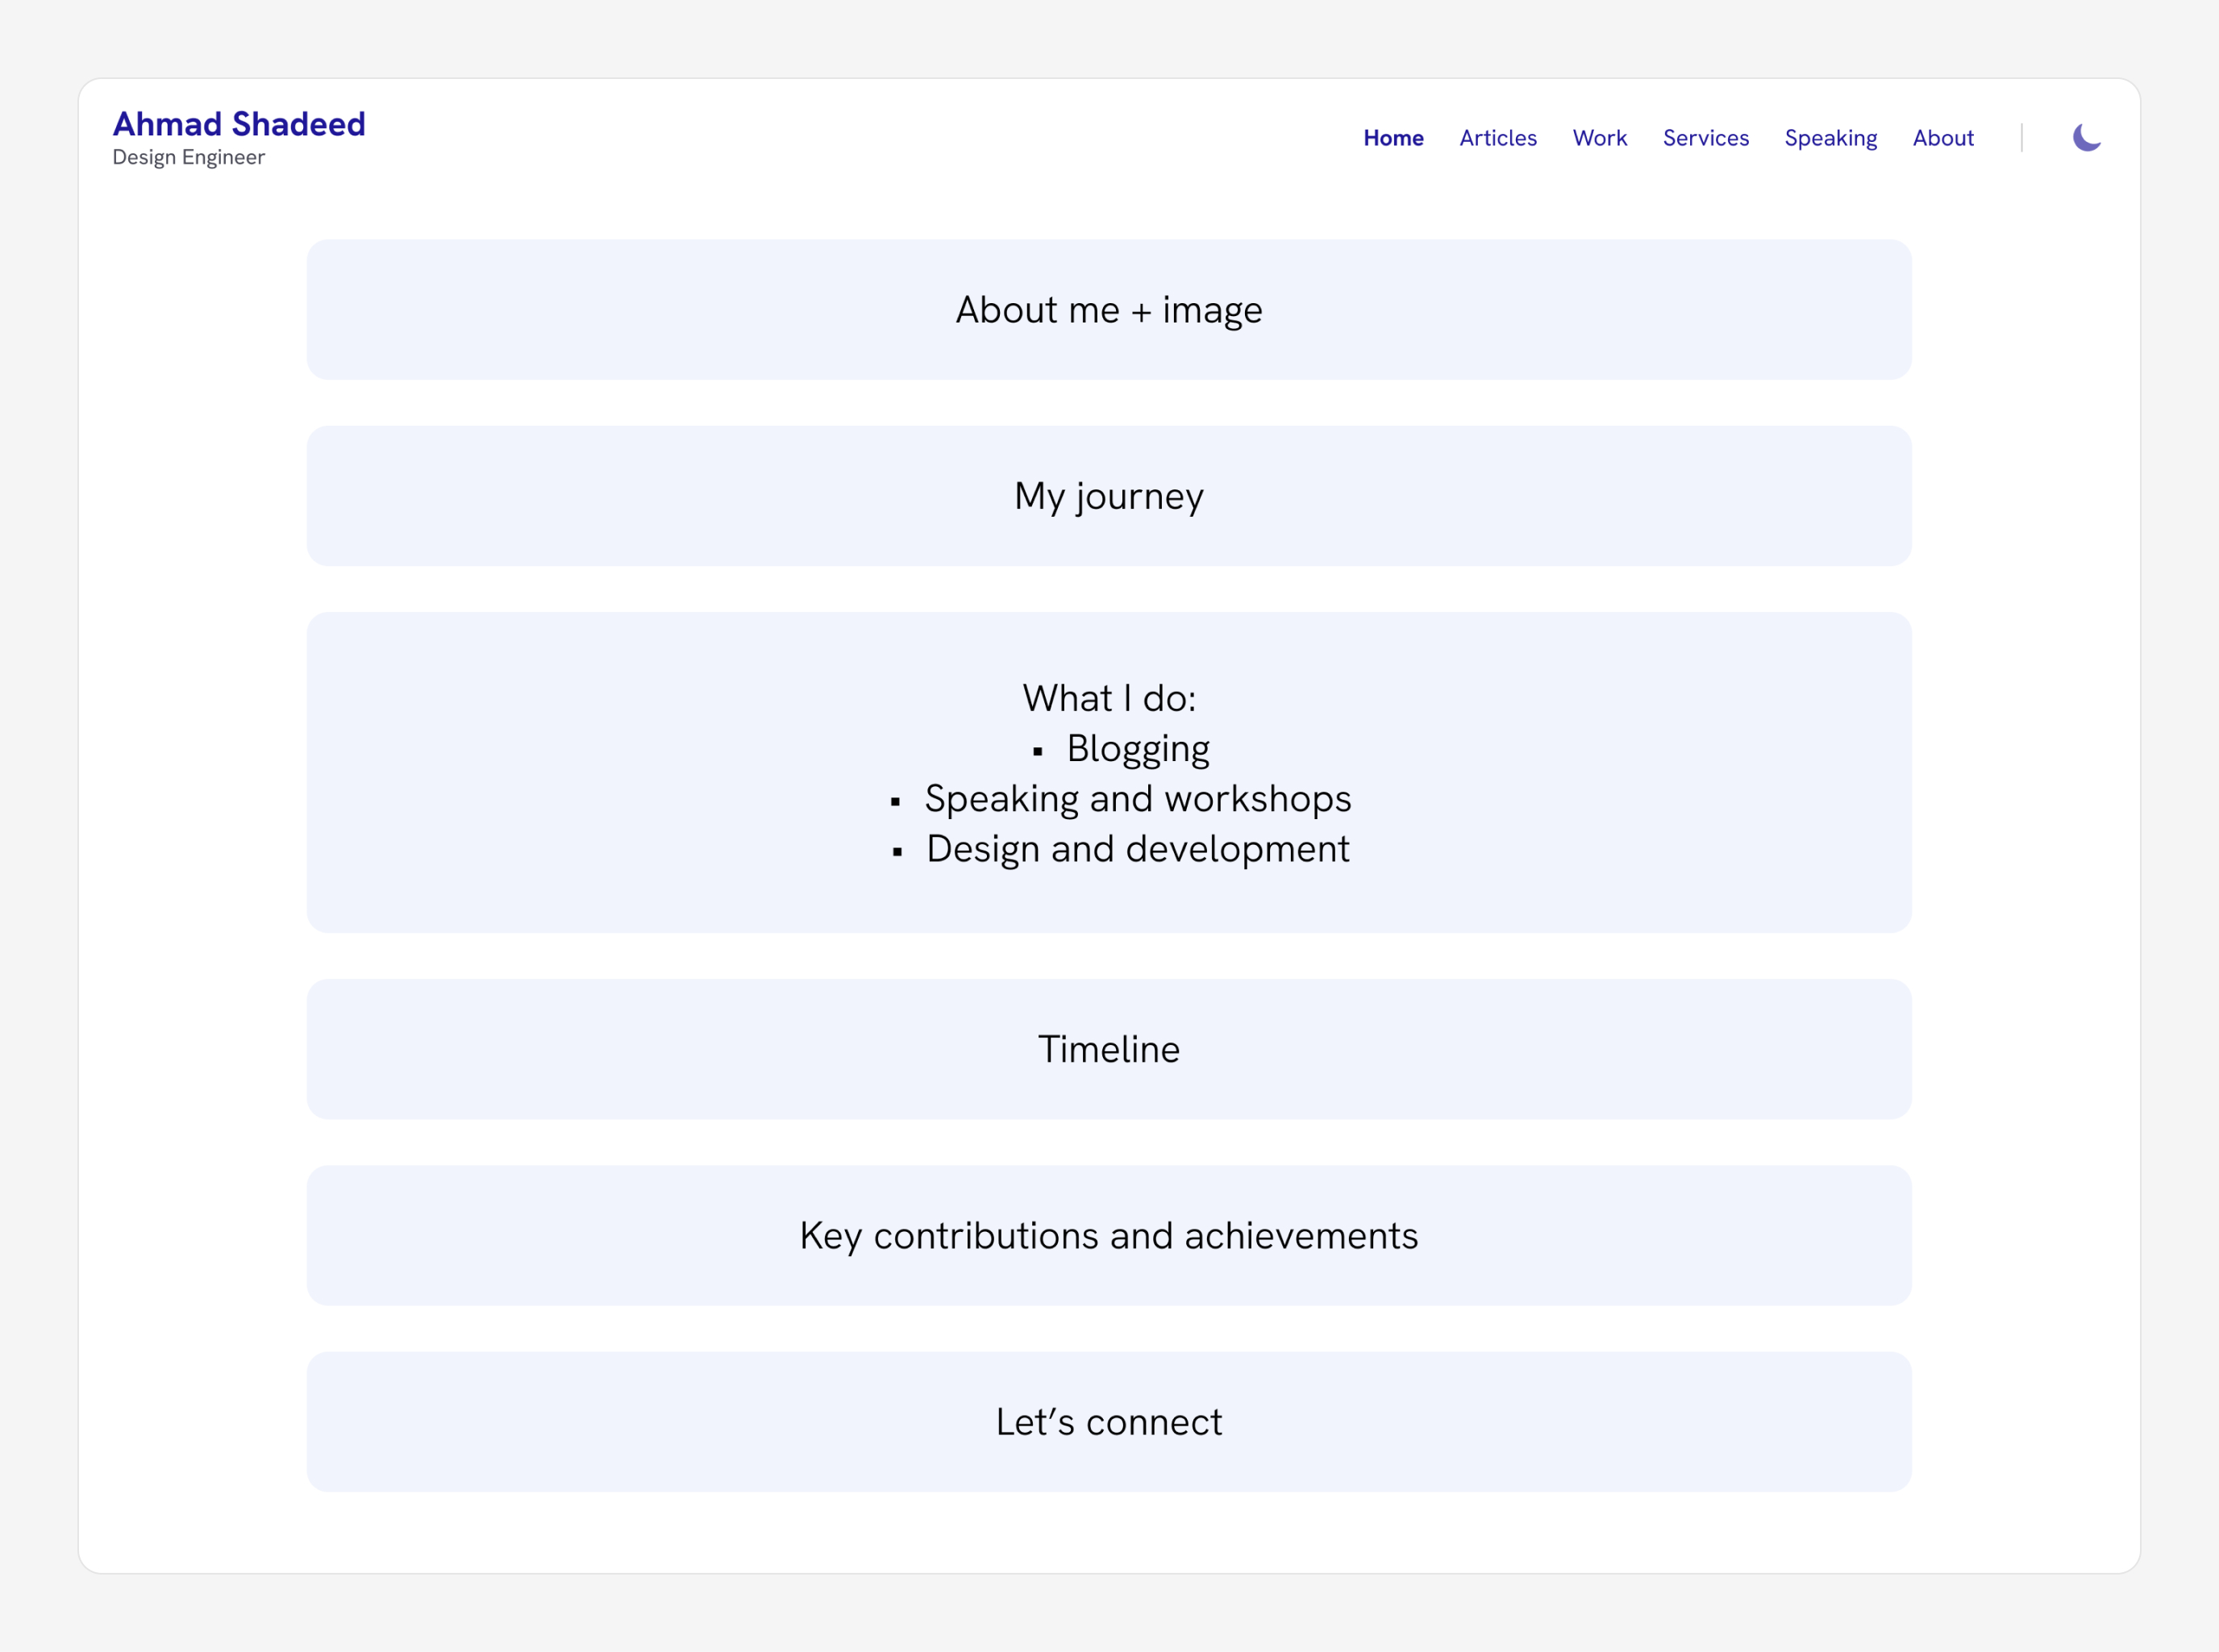
After that, I began with a design and ended up with the next:
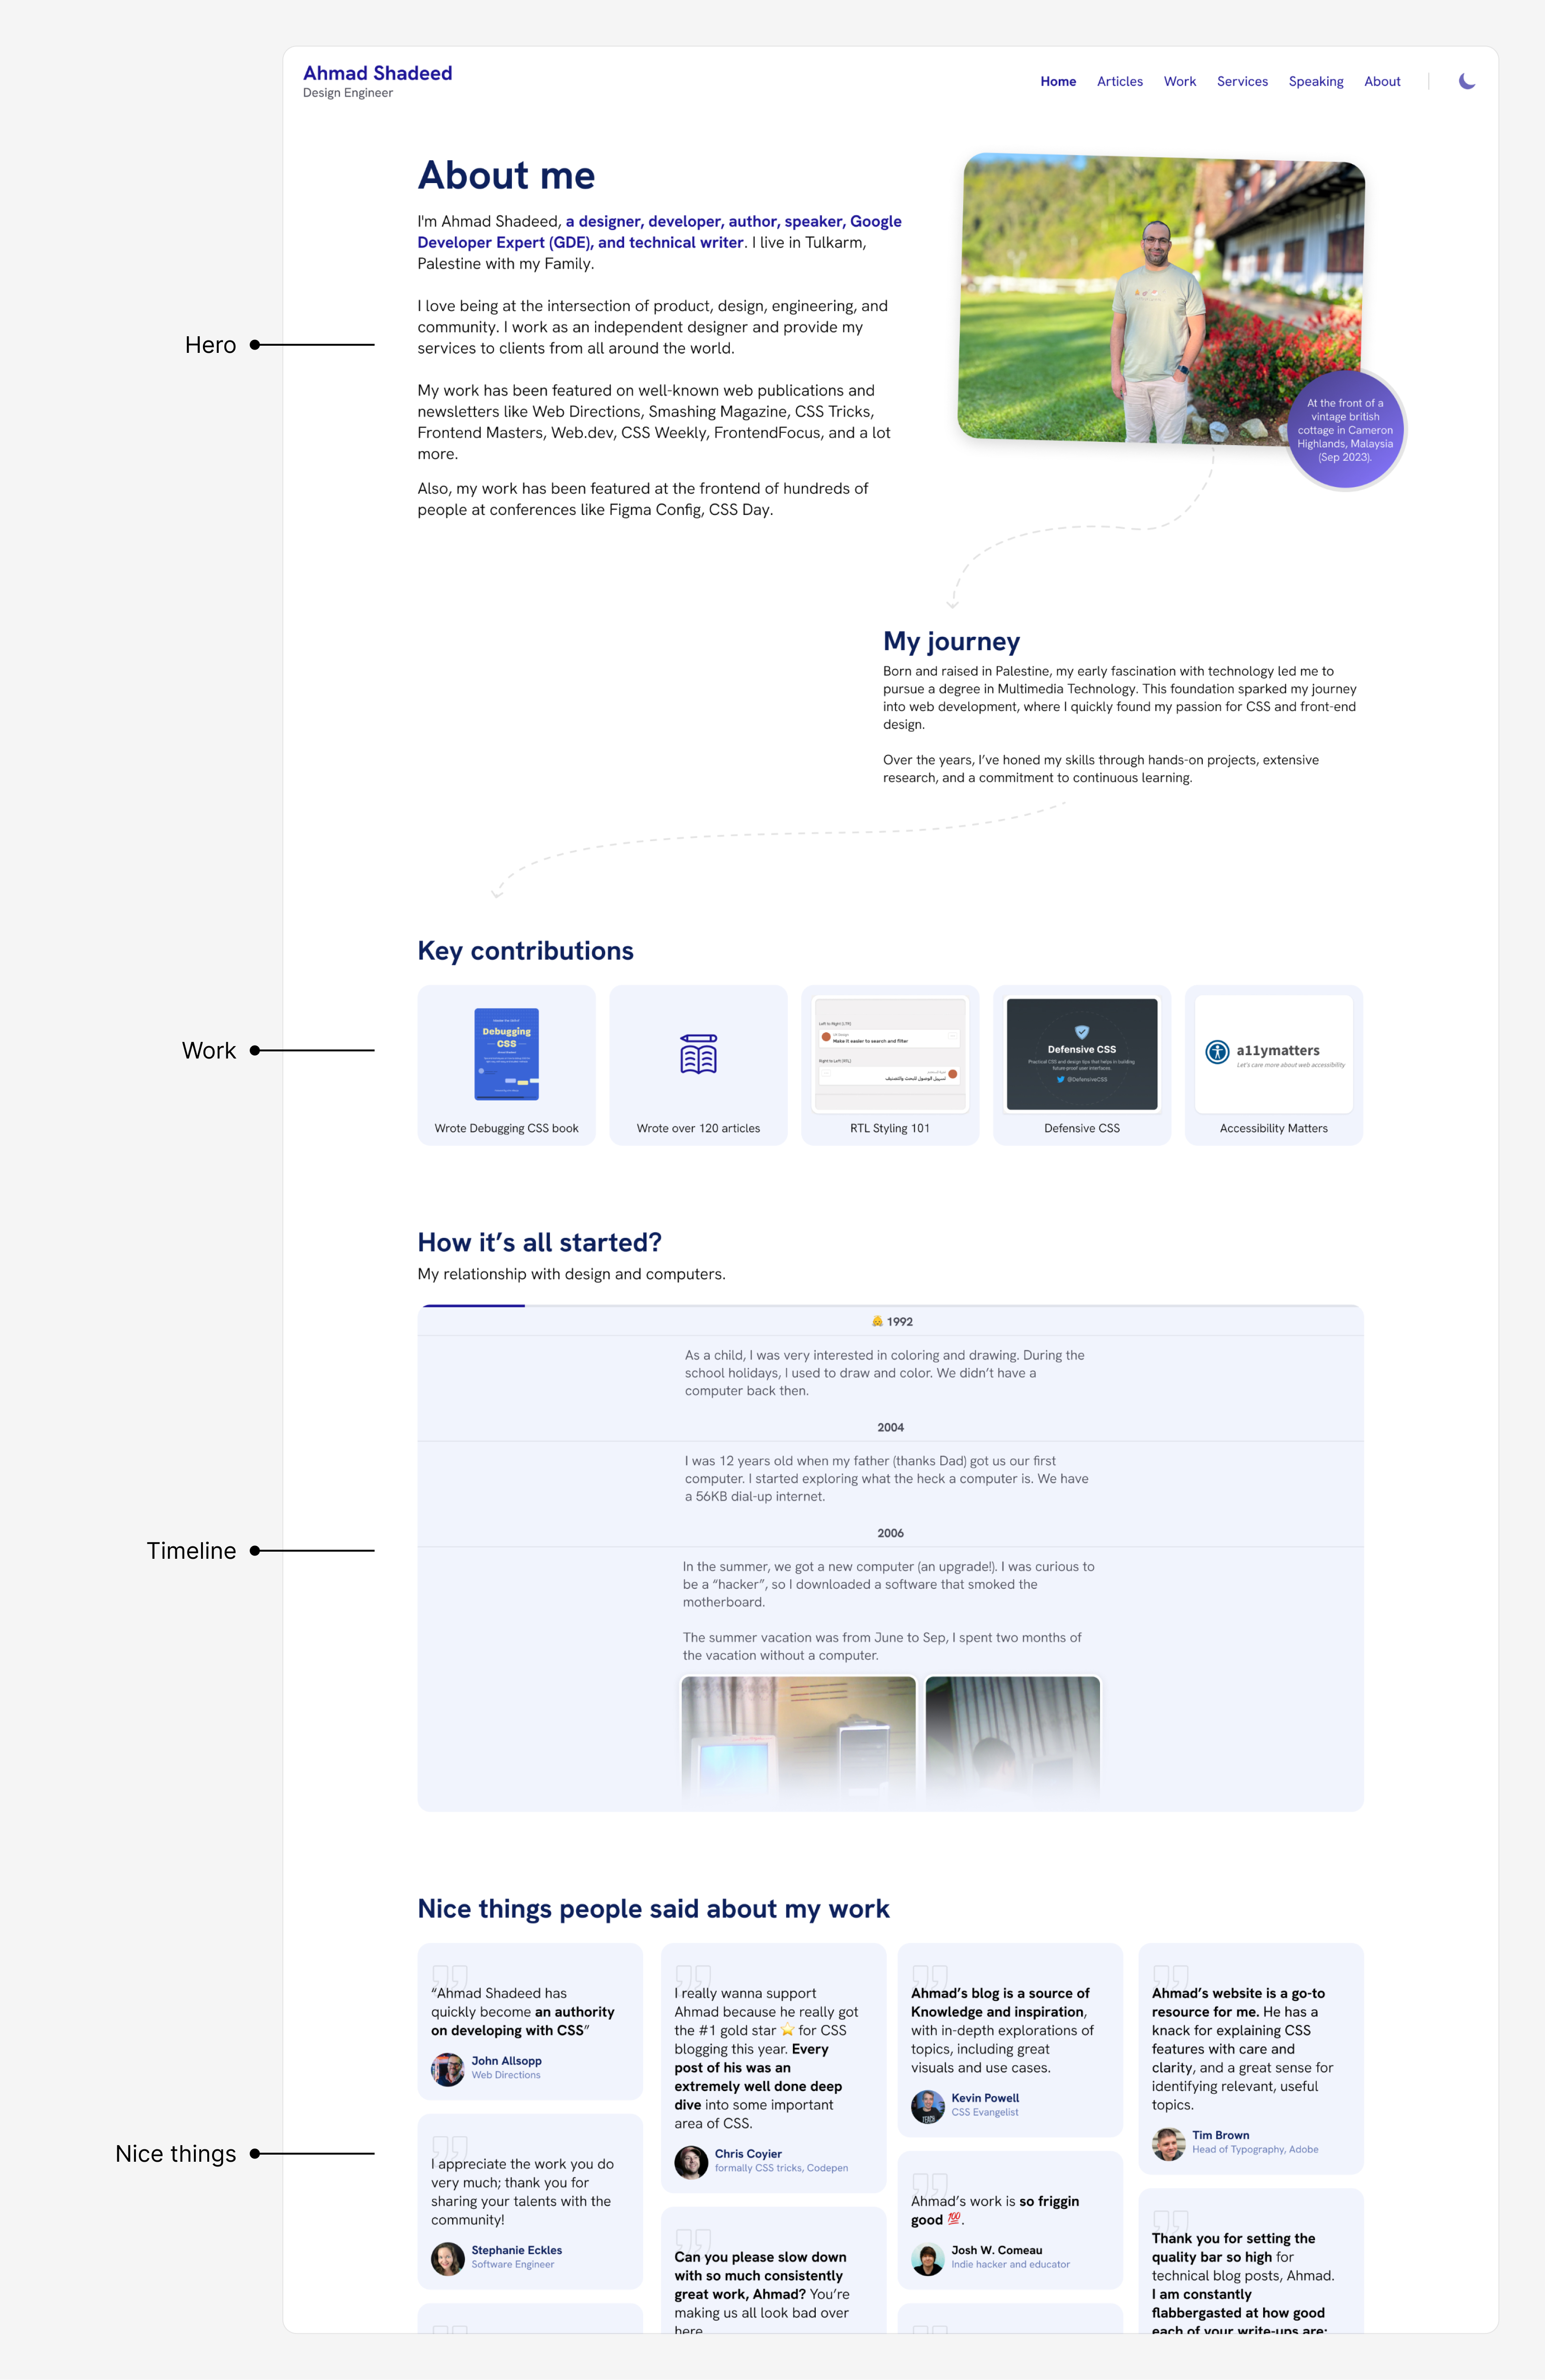
The design contains the hero, contributions, timeline, and the good issues sections.
Initially, it was okay however every time I take a look at it later, I discover that I’m not proud of it. It wants a private contact!
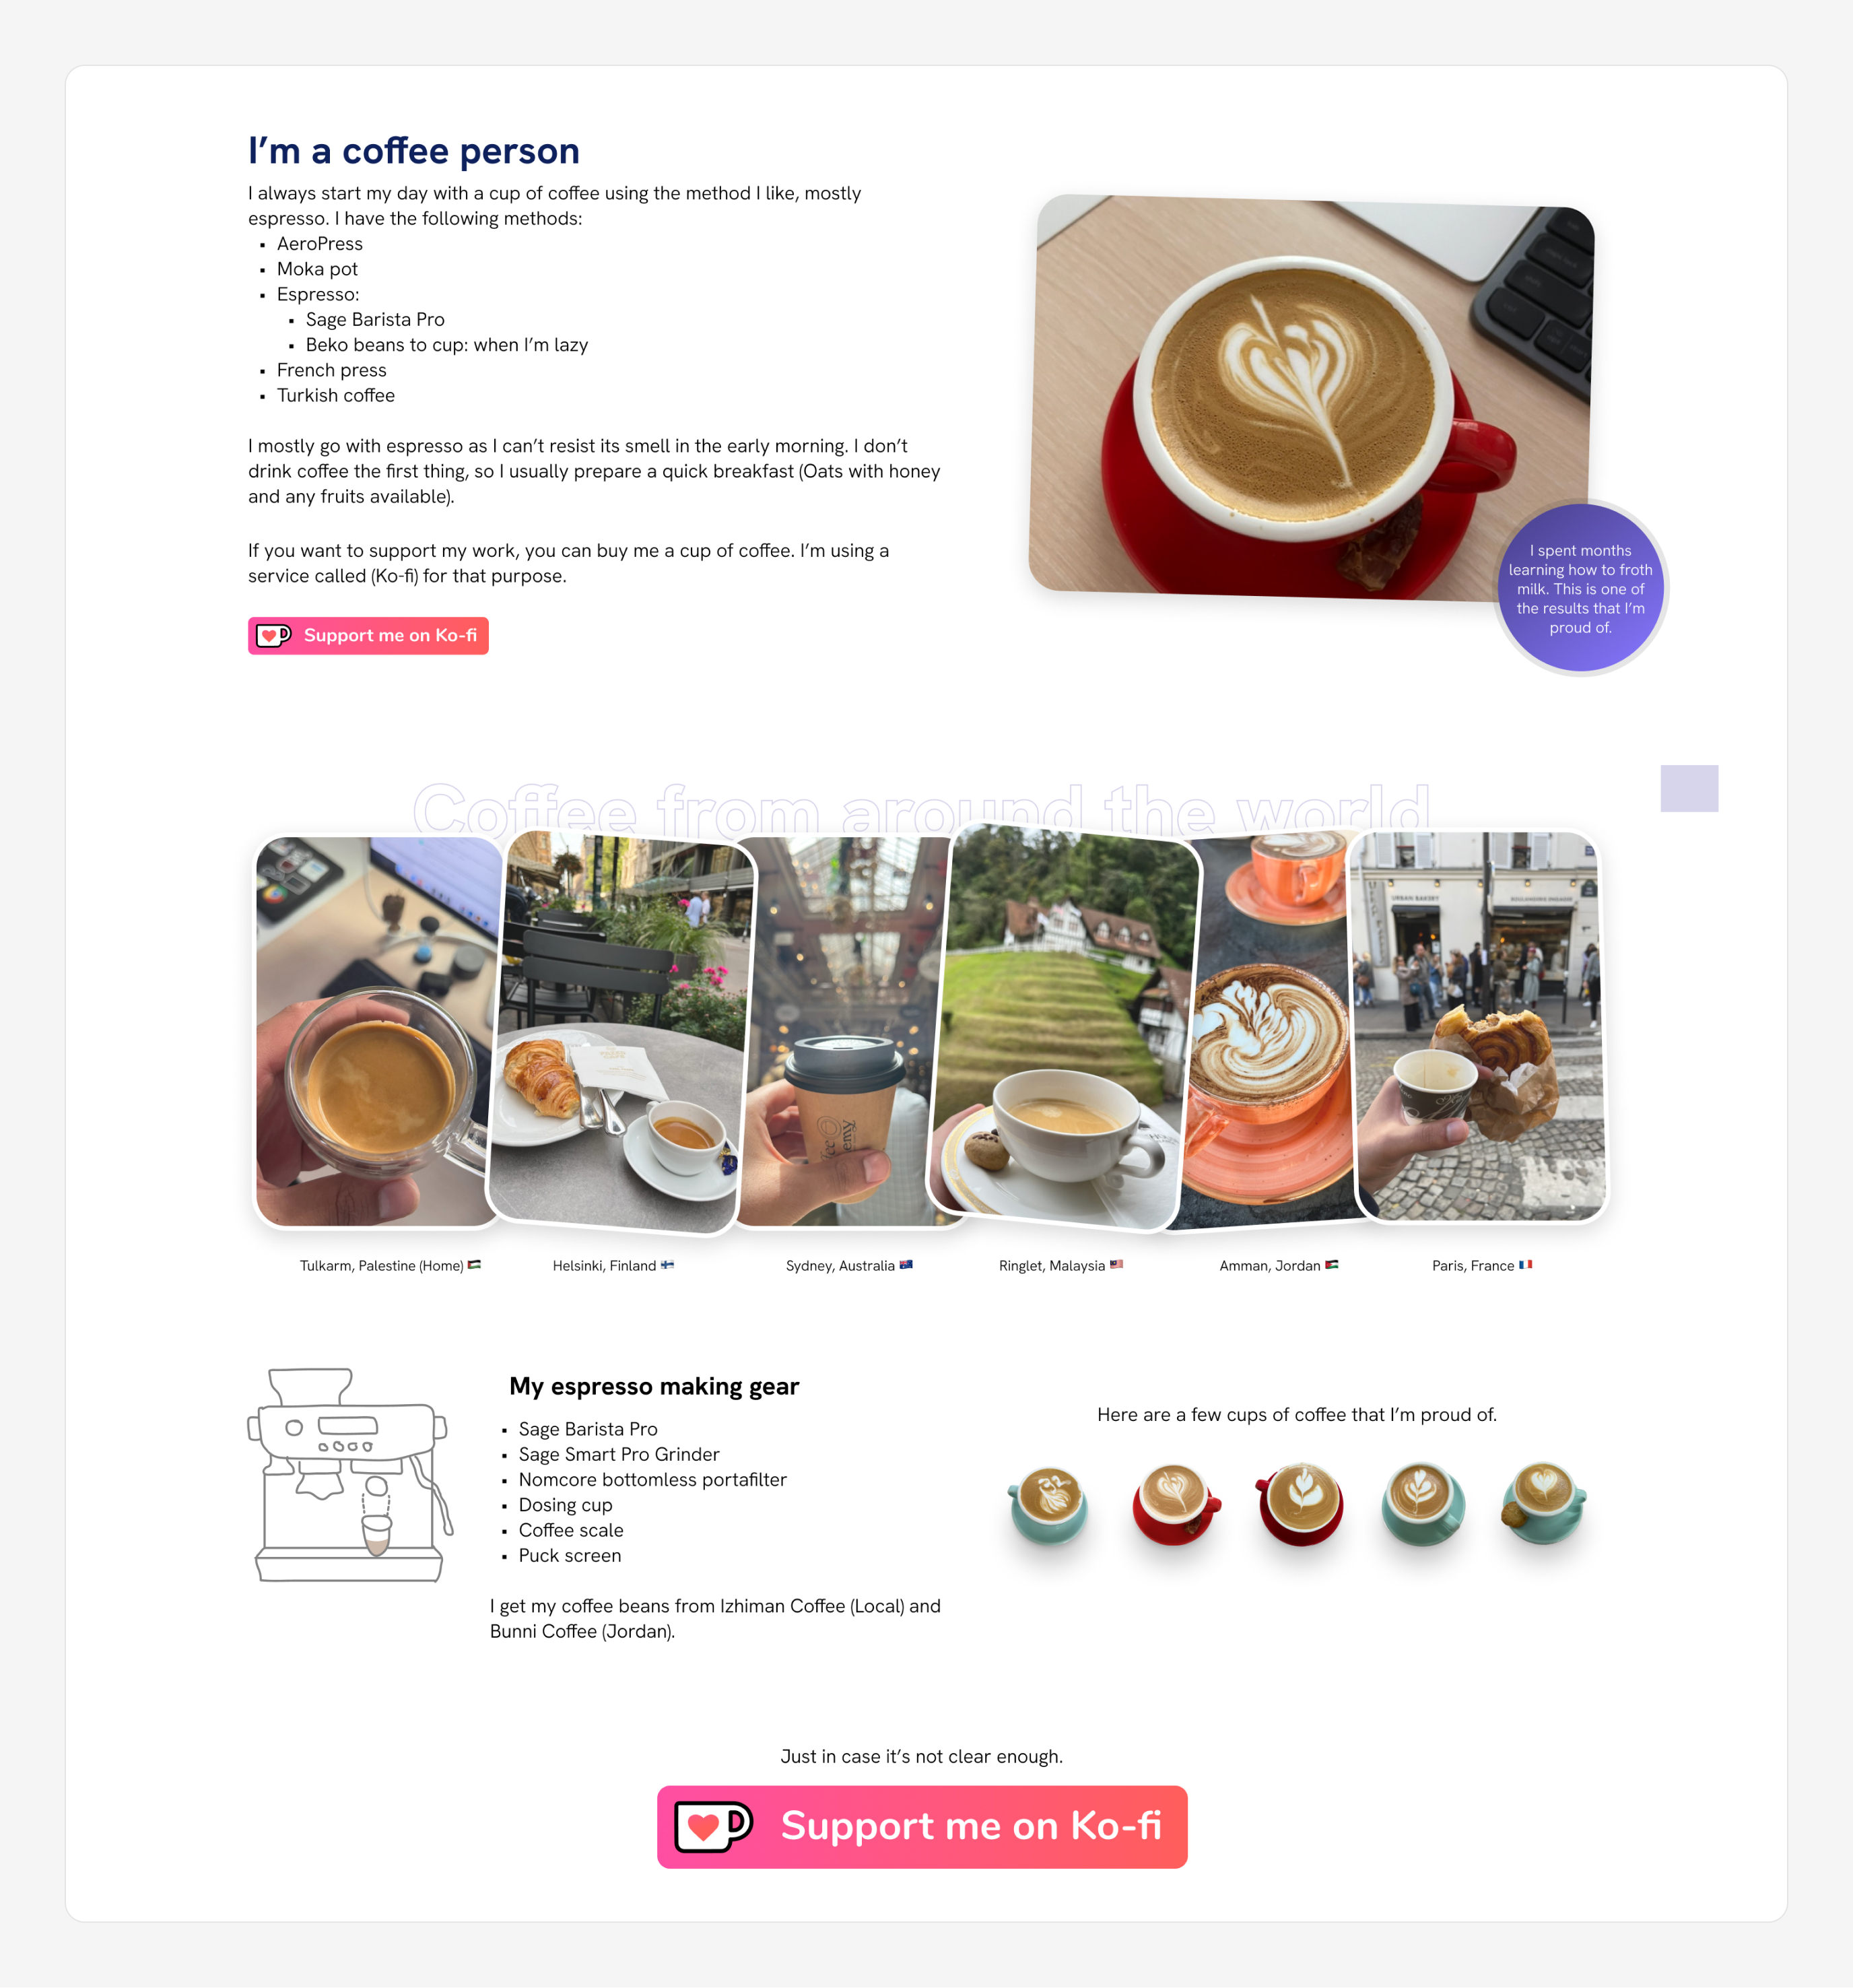
The espresso nook
I like espresso, quite a bit. I thought of why not have a espresso nook on my About web page. I did that. Right here is the preliminary design:
Now the about is a little more private, I believe. Any further, all of the modifications to this part occur within the browser.
After that, I attempted a enjoyable experiment which was to incorporate an AeroPress animation on scroll. I did it! Here’s a video:
I left it for weeks then got here again and eliminated all of it collectively. It simply met the extent of enjoyable and element I normally do.
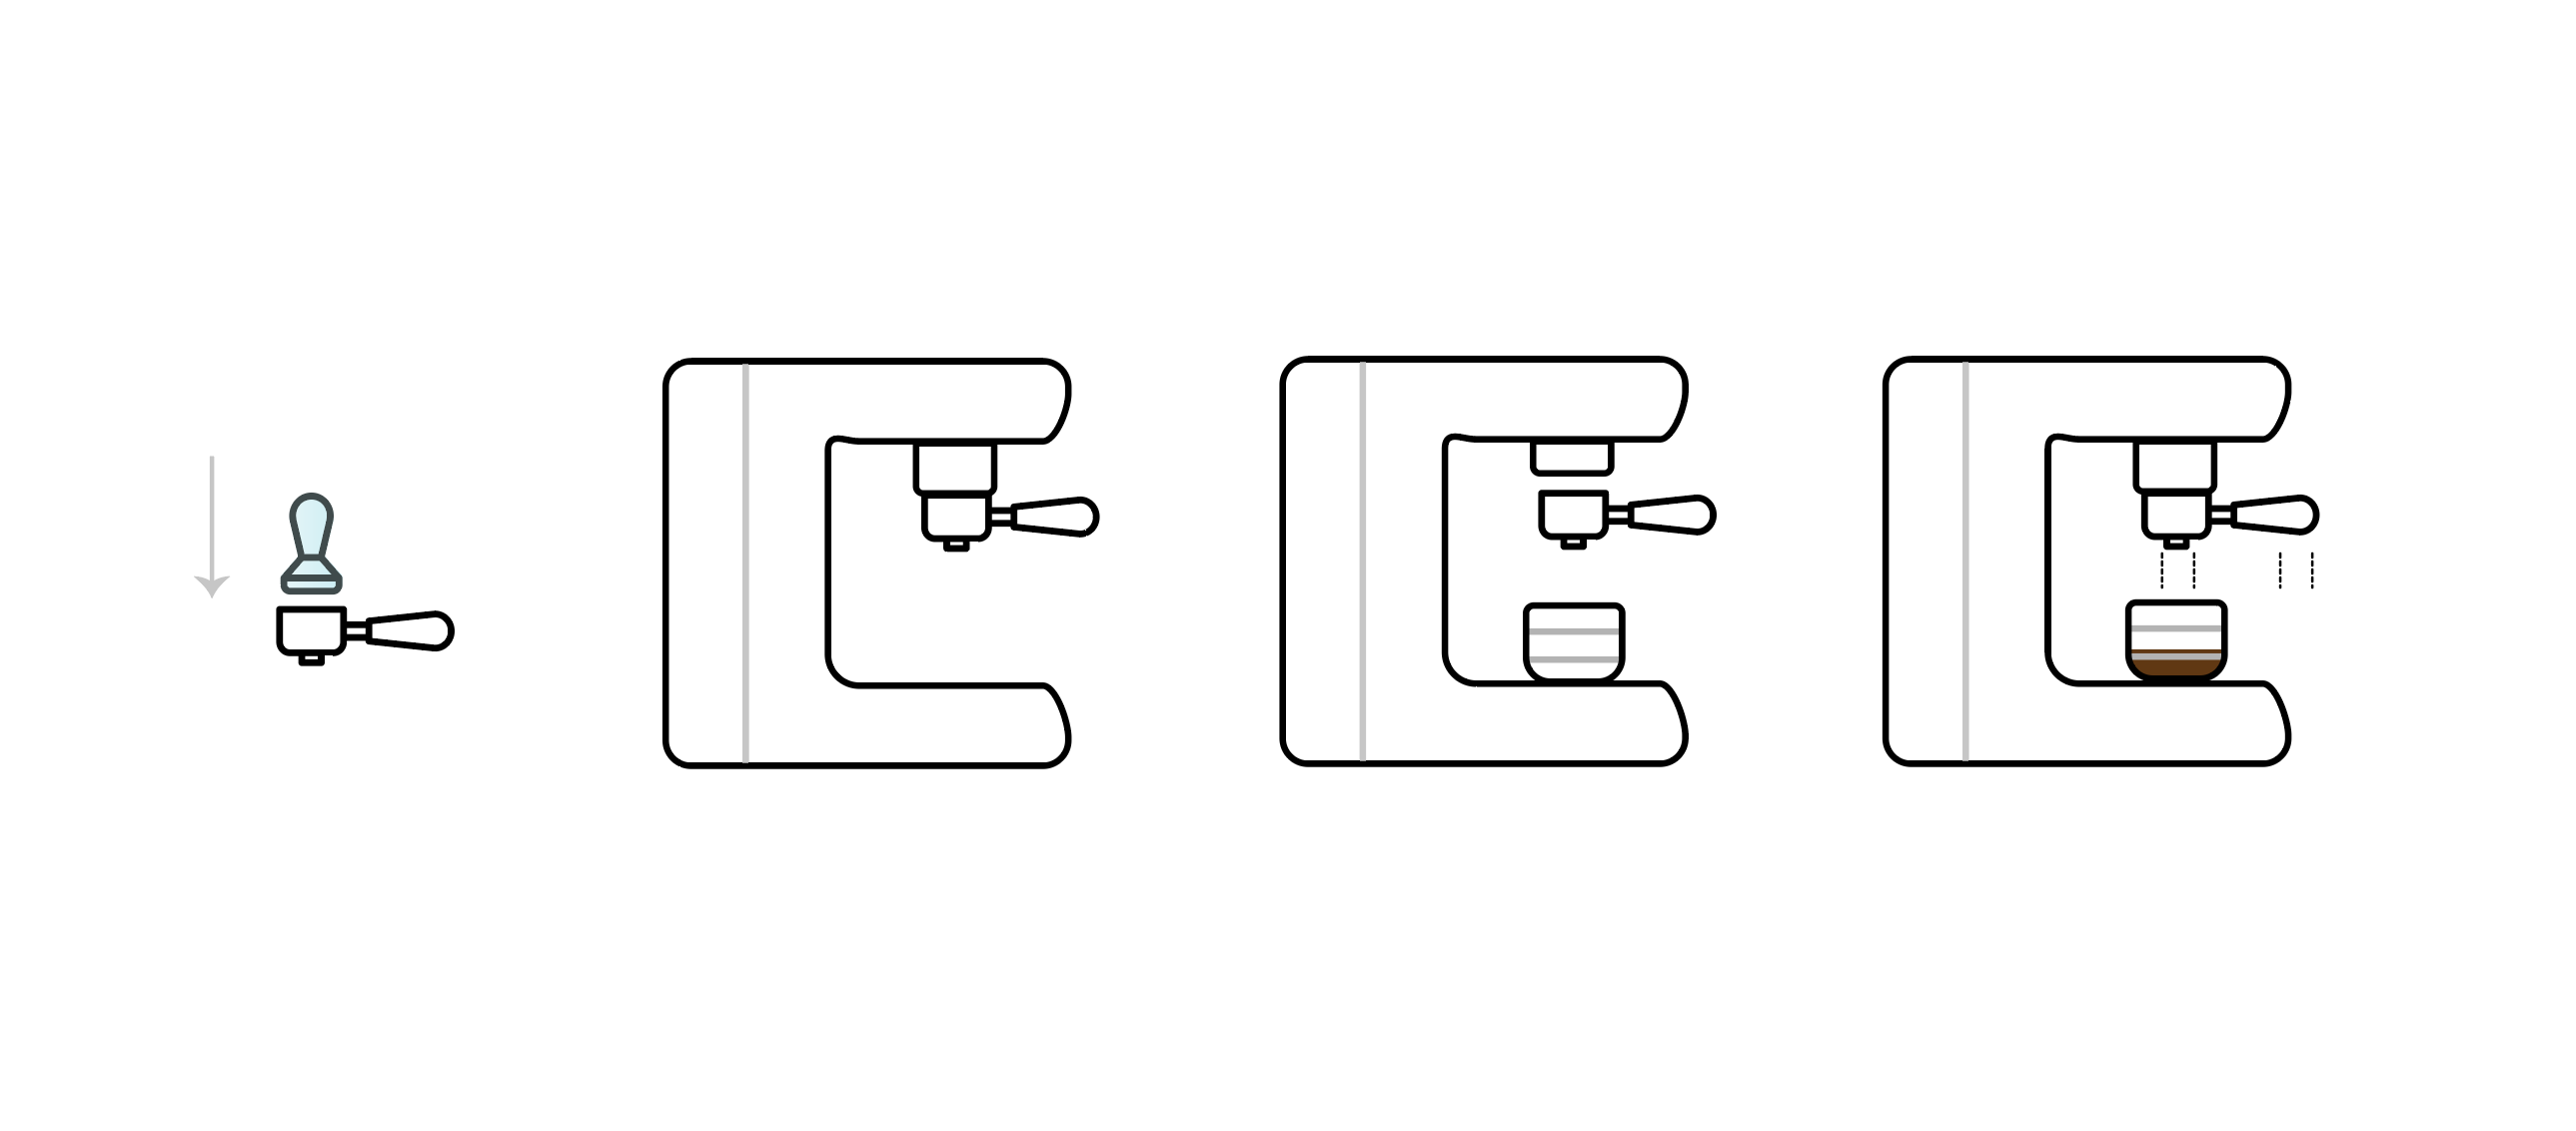
I made a decision to present it one other attempt however with a brand new design. I drew an espresso machine with the steps to creating a cup. I thought of animating it.
Right here is the illustration I made:
Curious to know what occurred subsequent? I’ll clarify extra within the CSS highlights part.
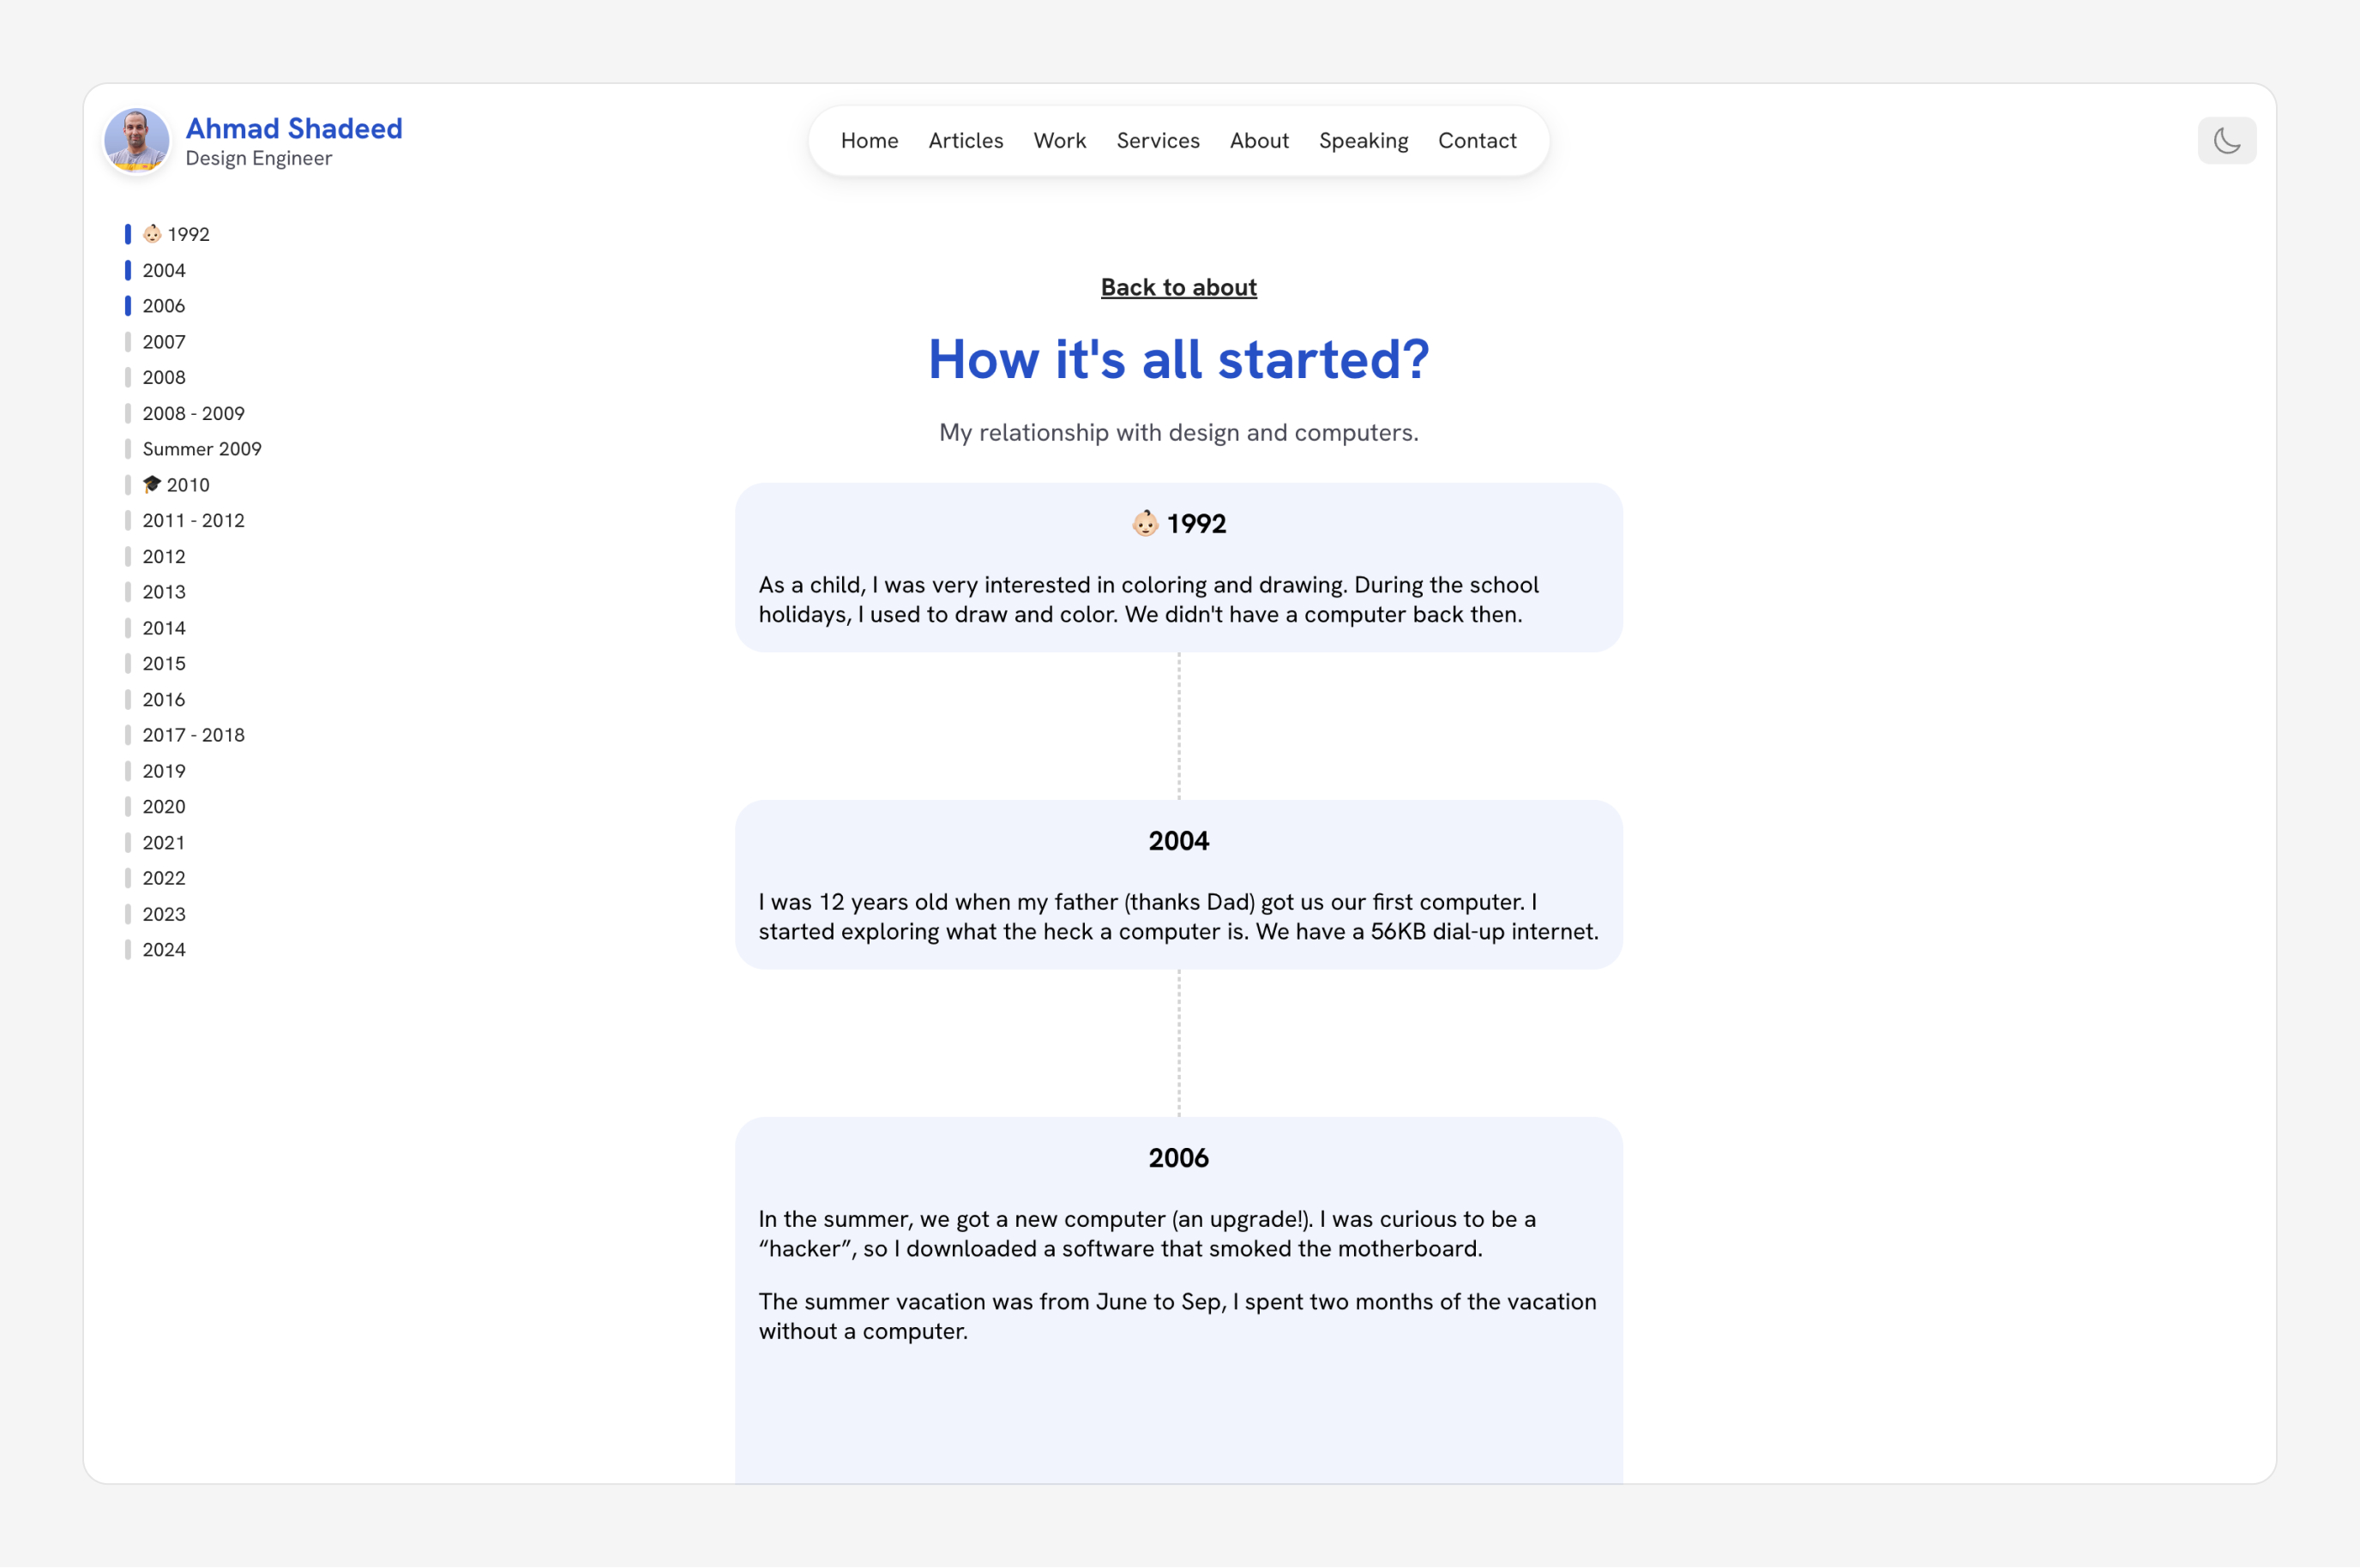
The timeline
As a part of the About web page, I included a piece I referred to as “timeline”. It’s an organized record of occasions of my curiosity in design since 2004 until in the present day.
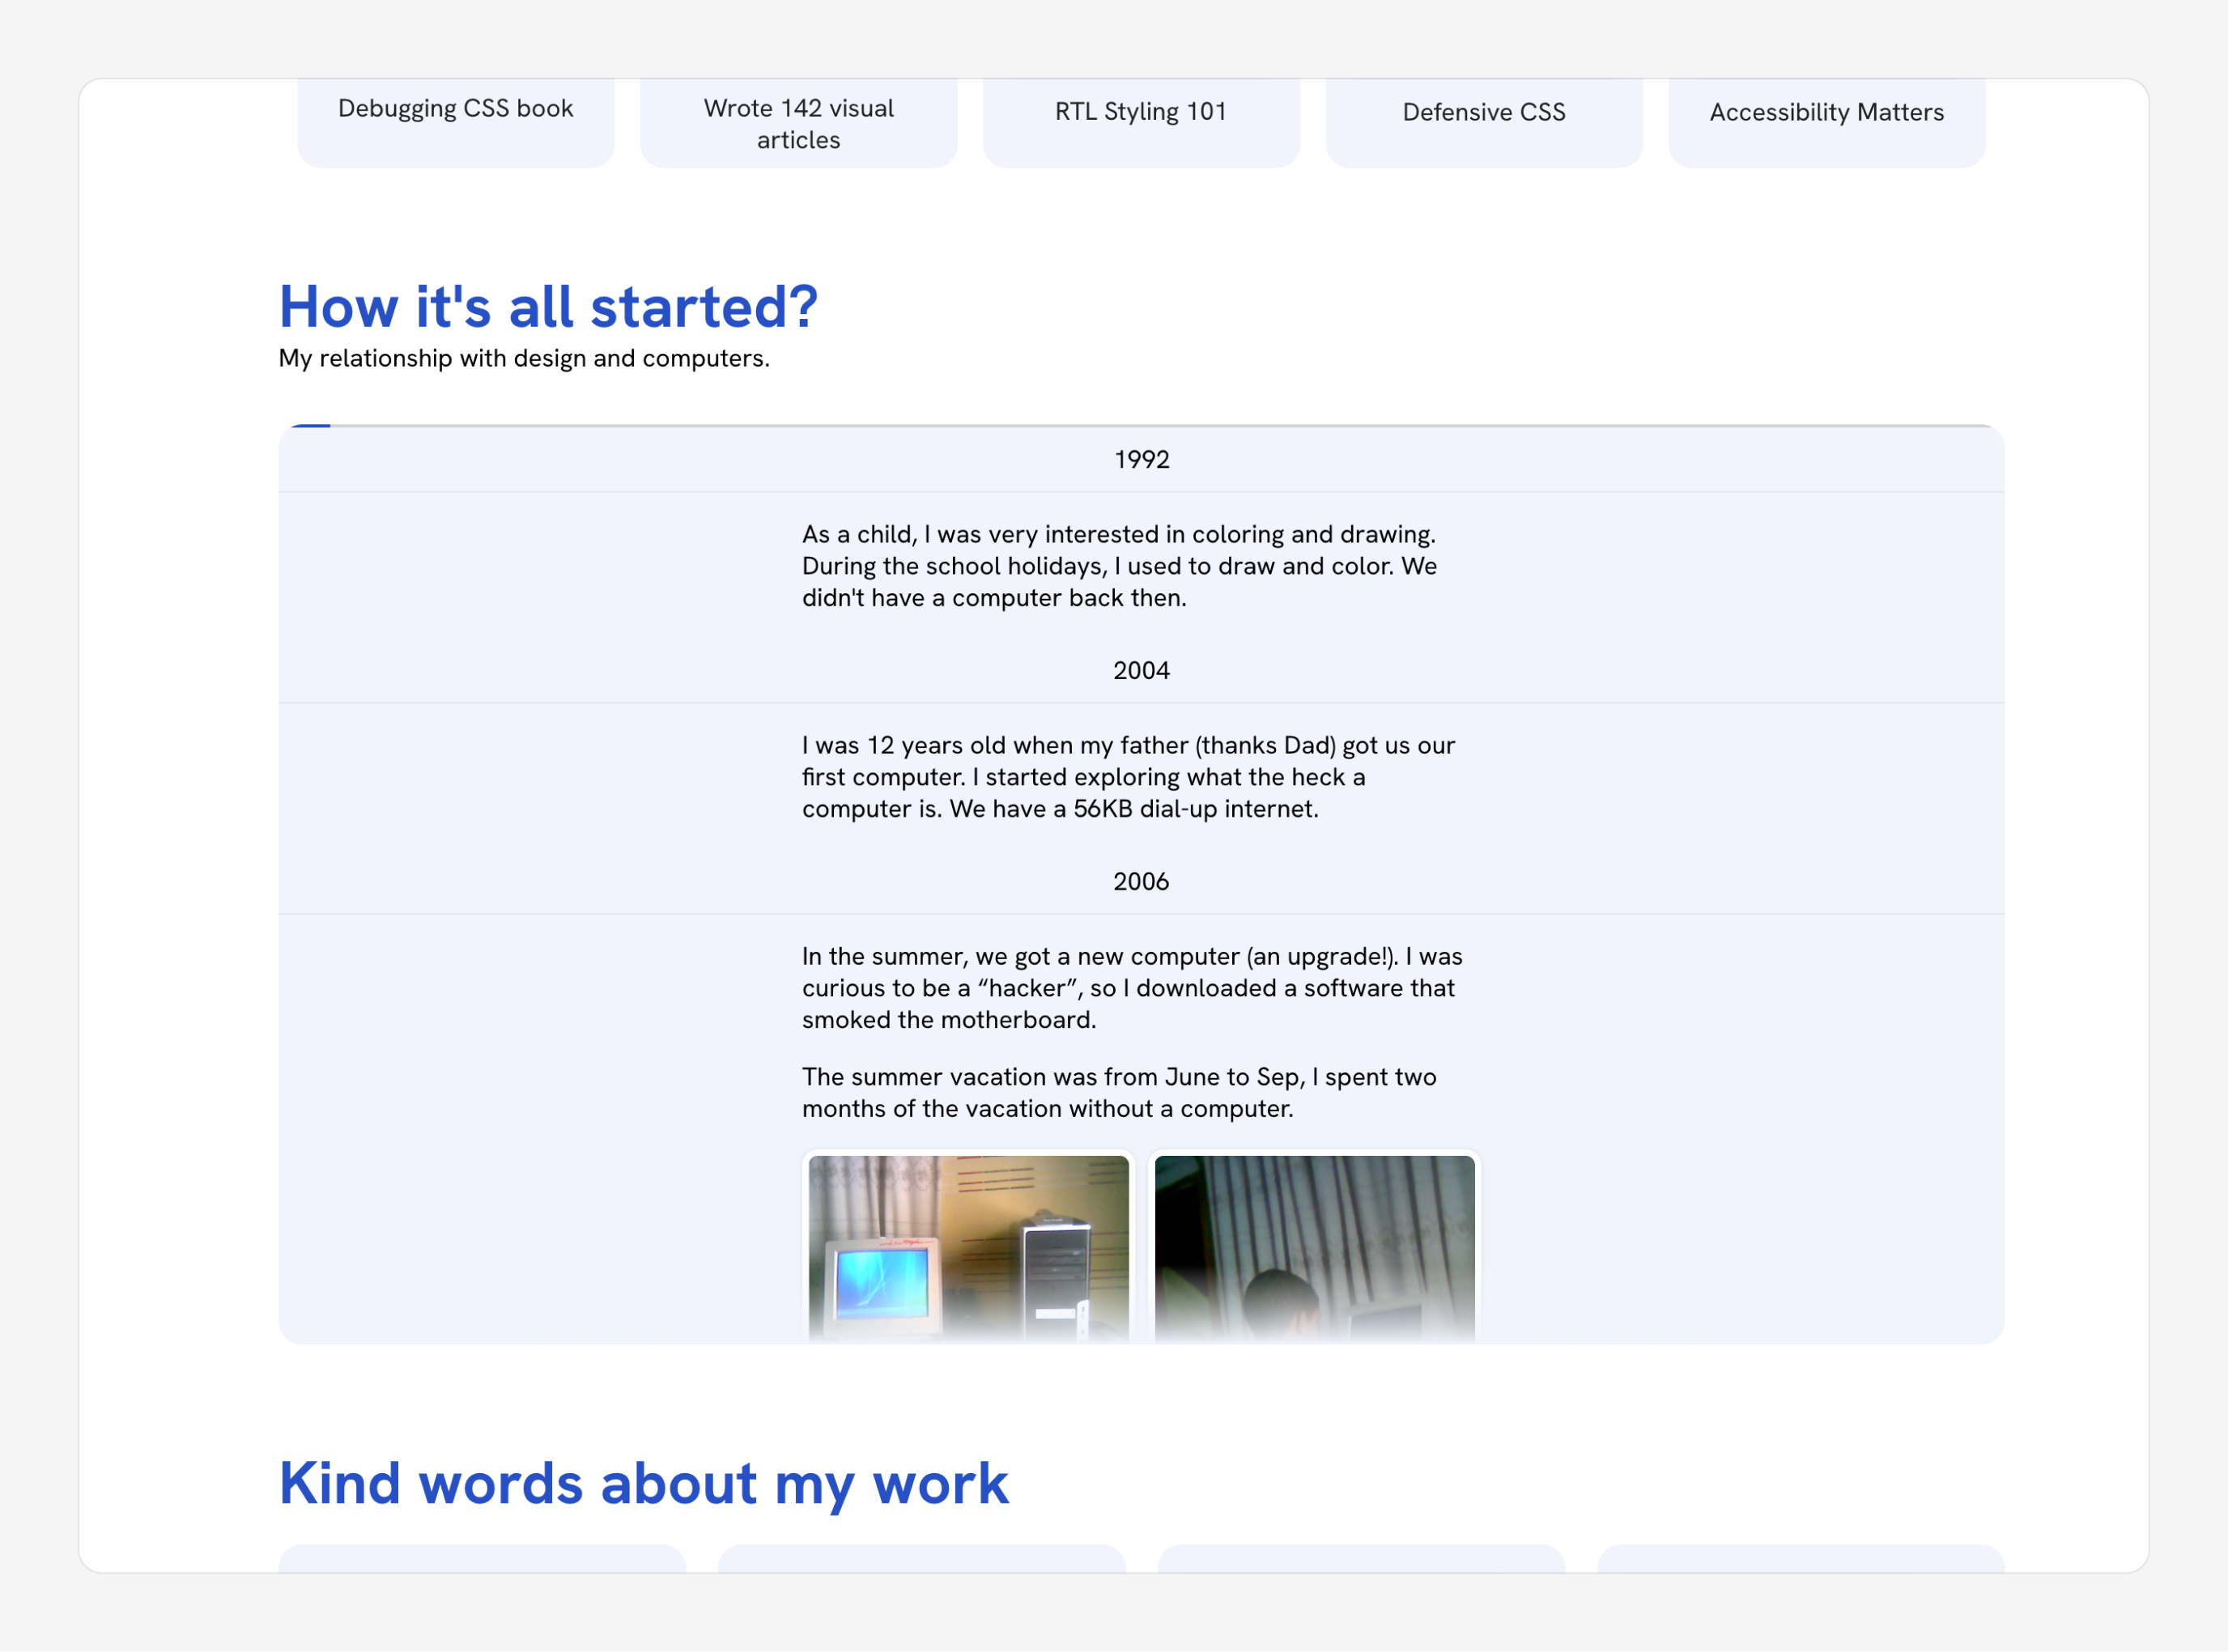
Initially, I thought of together with it within the About web page and letting the person scroll inside the part. See the next video:
This launched a couple of issues:
- It may be exhausting to maintain observe of the place you reached within the timeline.
- The browser will obtain all of the textual content content material, even when the reader didn’t scroll down.
- I don’t need to pressure such a piece for all readers. Just a few might be to learn that.
Consequently, I moved the part to its web page and changed it with a title, description, and name to motion.
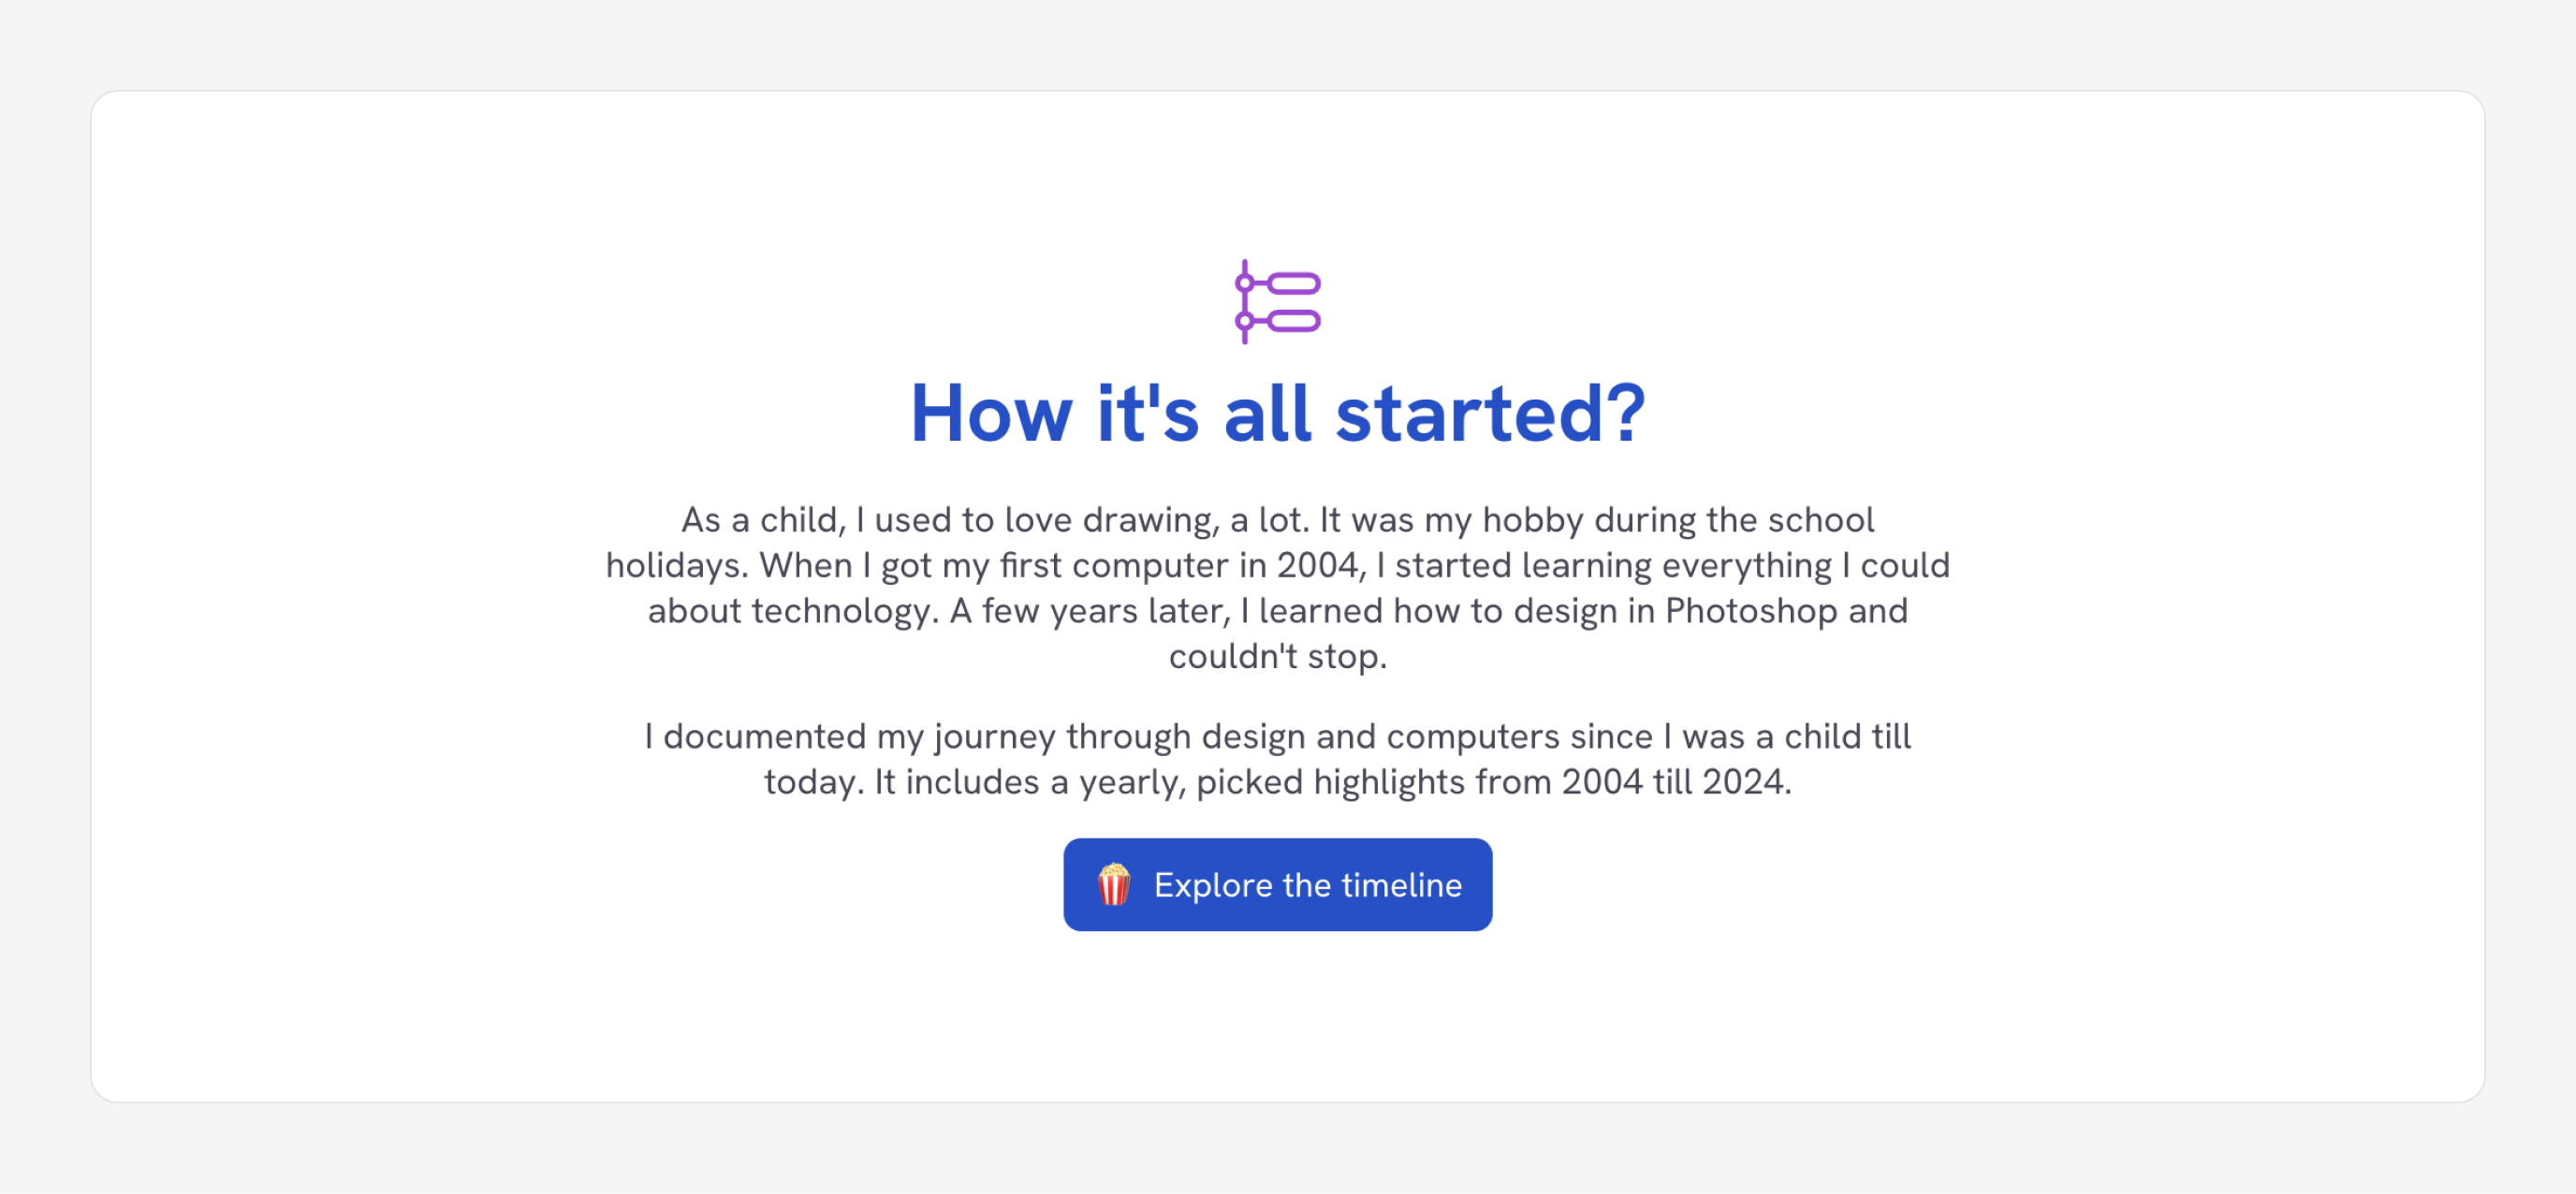
When the reader clicks on “Discover the timeline”, they may see the next web page.
Hero
Every time I take a look at the hero part, I really feel that it comprises an excessive amount of textual content and simply seems to be boring. Just a few days earlier than the design launch, I received suggestions from pals confirming that.
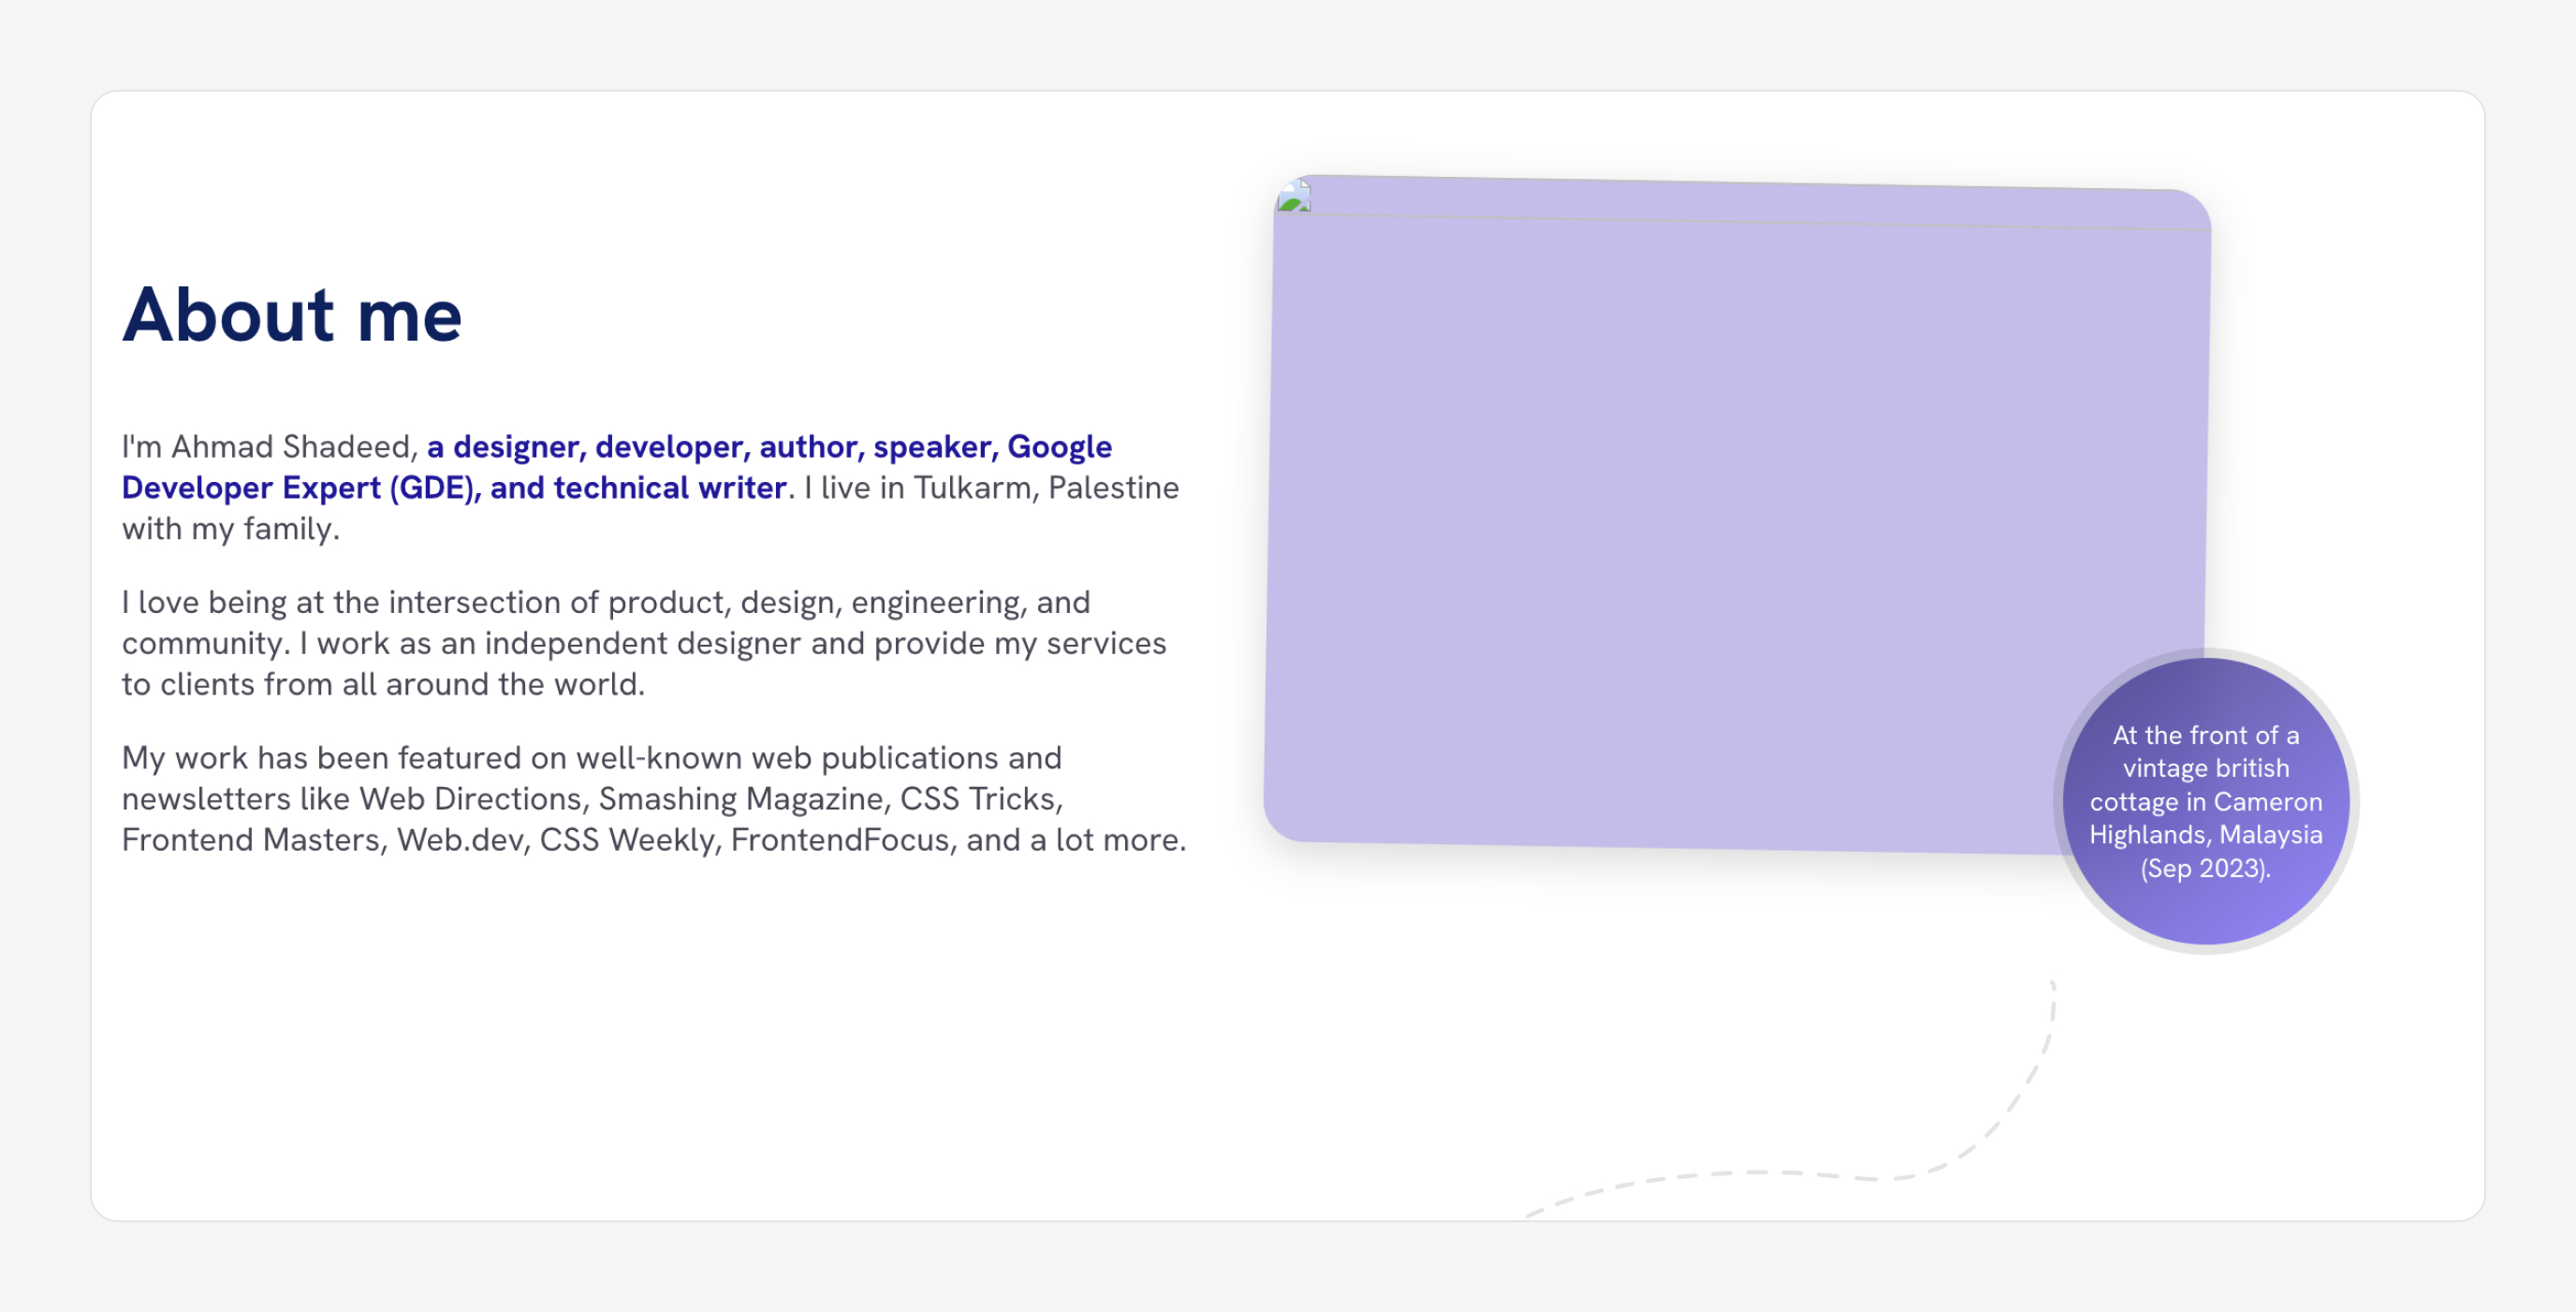
To resolve that, I thought of changing the paragraphs to one thing extra visible.
- For the primary two paragraphs, I made it right into a bullet record with emojis.
- For the final one, I moved into a brand new part and included logos of the talked about web sites.
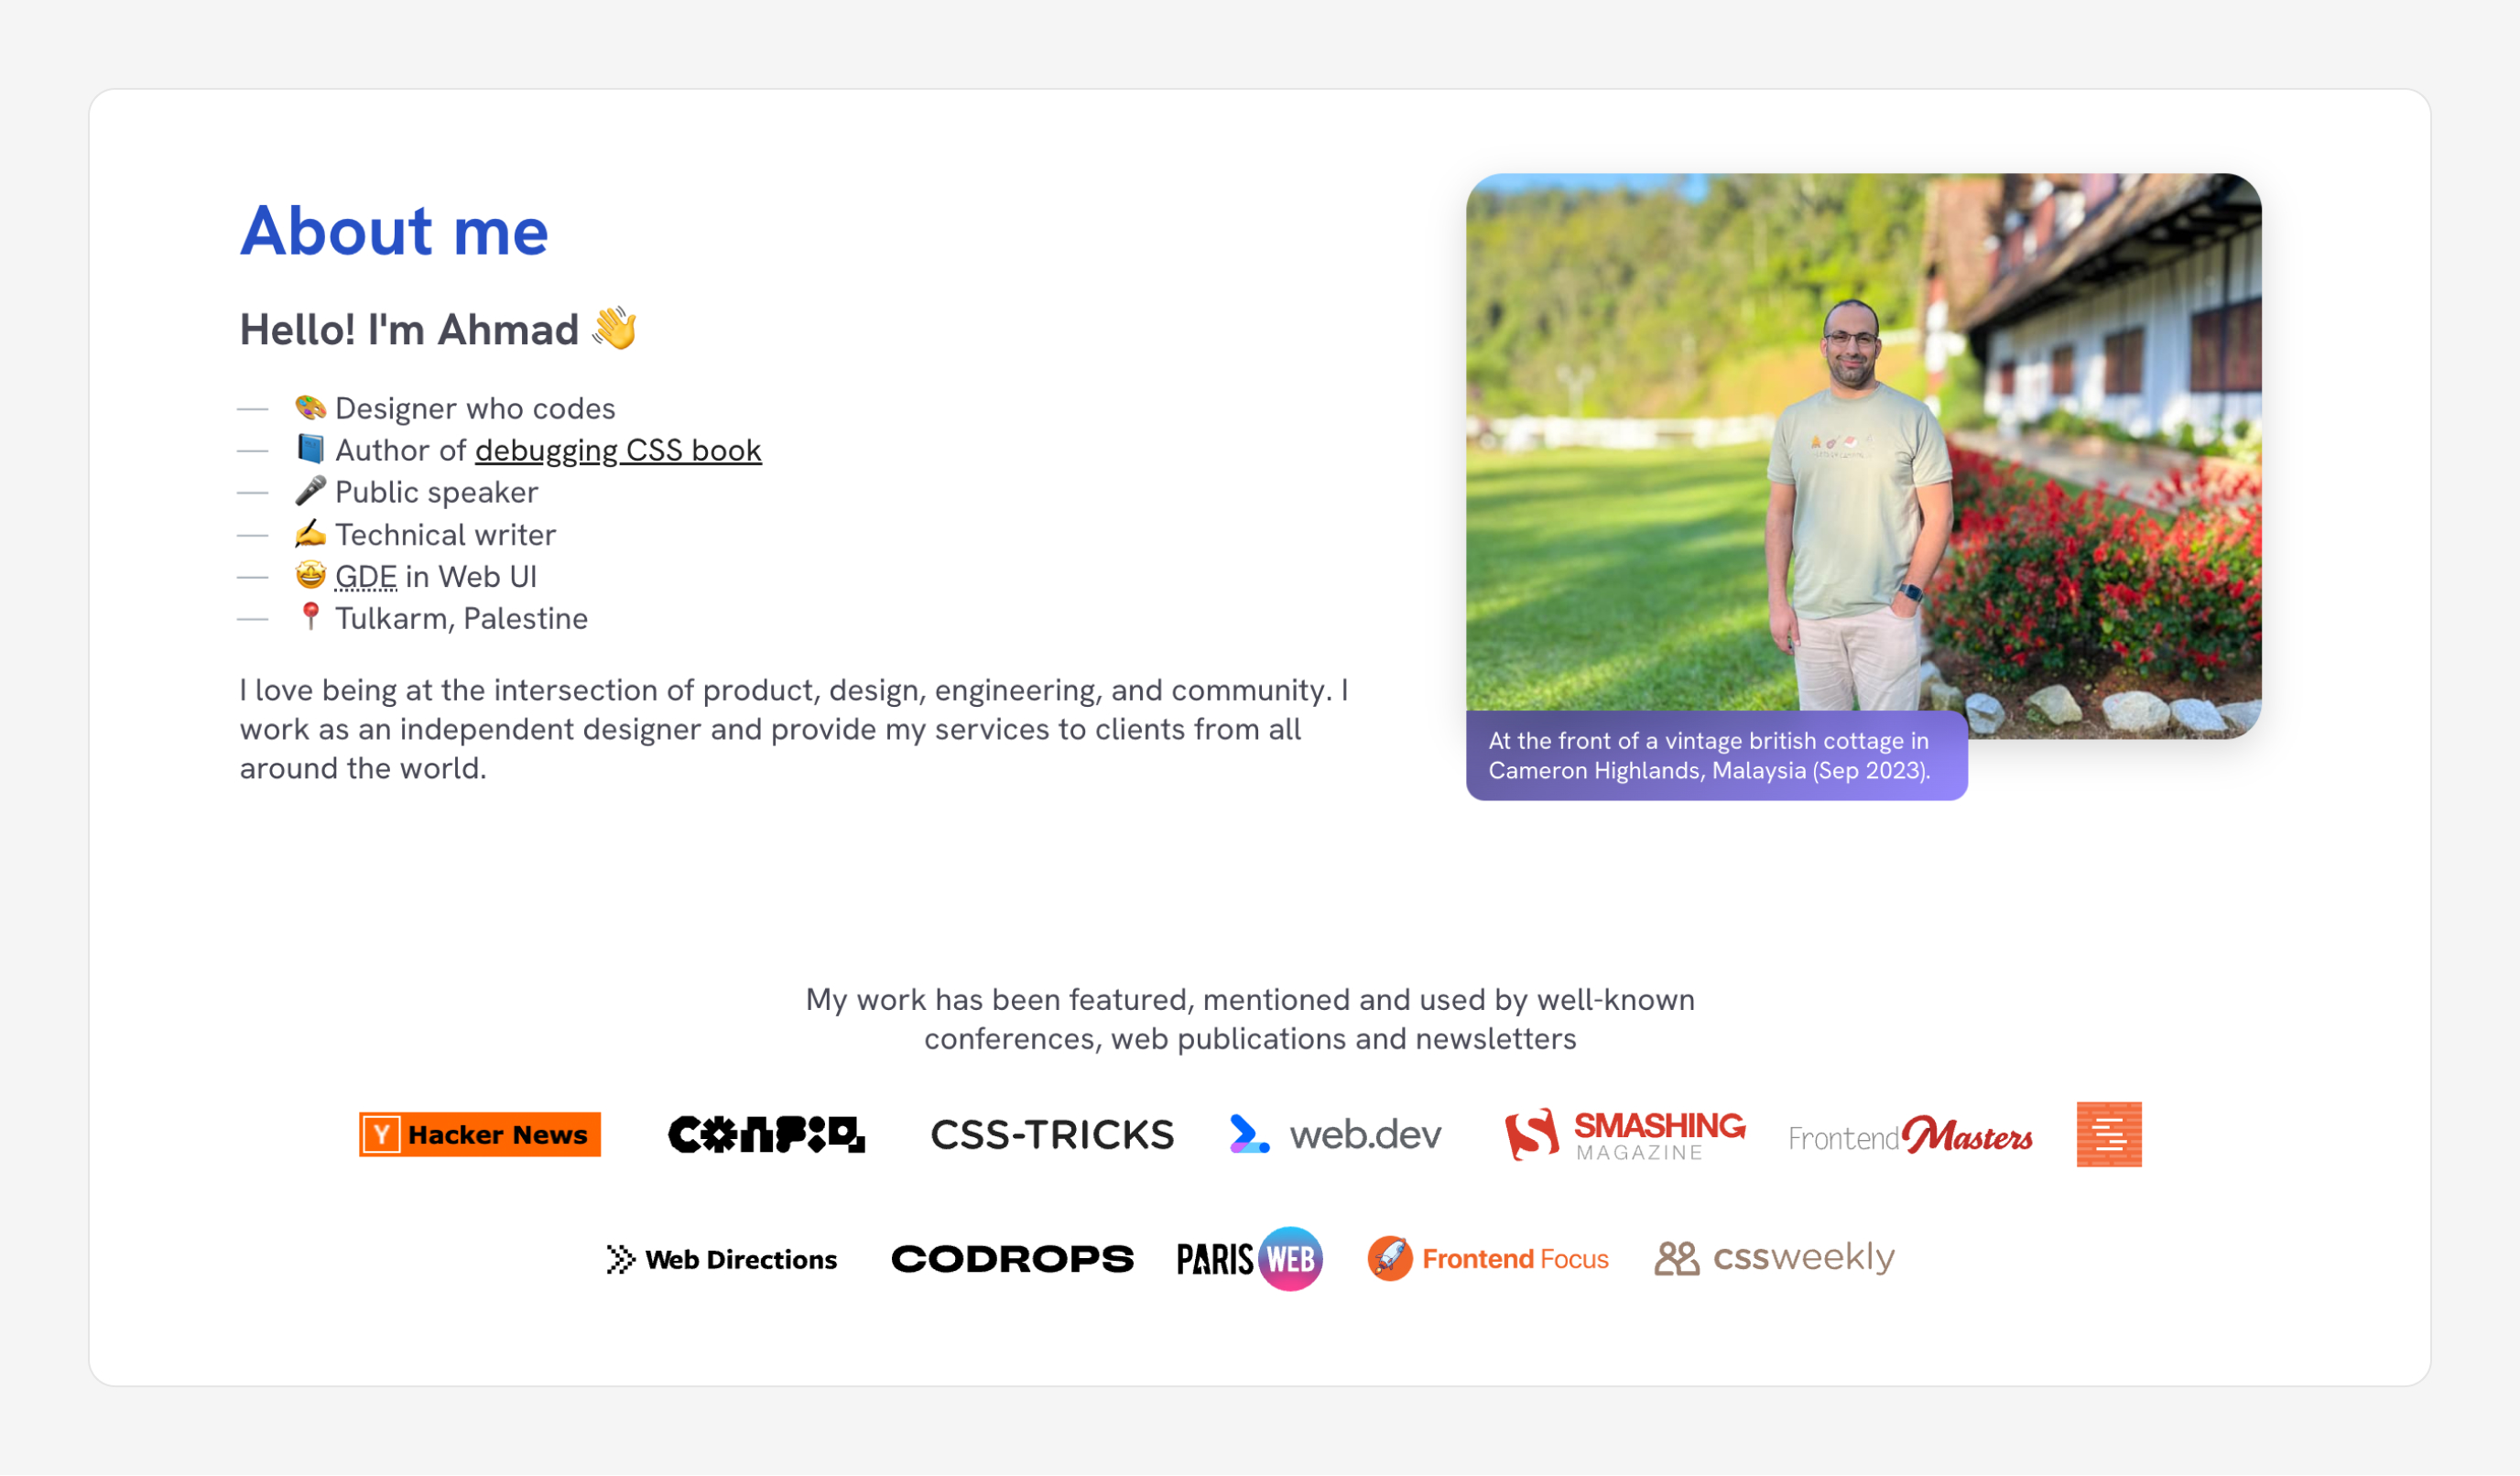
That is a lot better, no less than for me.
CSS highlights
Scroll-driven animations
I nonetheless didn’t totally grasp scroll-driven animations, however thought of utilizing it for my new web site when appropriate. That being mentioned, the next are use instances of the place I used them.
At present, all of the demos work in Chromium browsers solely (Chrome and Edge). I used `@helps: animation-timeline` however that was true in Firefox Nightly though their implementation is not accomplished but.
I received assist from Bramus in updating the @helps question to solely goal Chromium browsers for now.
The web site’s header will fade on a scroll and seem once more when scrolling to the highest. I didn’t need to use JavaScript as I’m solely inquisitive about it fading on the preliminary scroll.
.c-header {
  @helps ((animation-timeline: scroll()) and (animation-range: 0% 100%)) {
    place: sticky;
    high: 0;
    animation: moveHeader linear each;
    animation-timeline: scroll();
    animation-range: 0 300px;
  }
}

@keyframes moveHeader {
  to {
    remodel: translateY(-100%);
    opacity: 0.2;
  }
}
See it in motion within the following video:
Espresso machine
On the About web page, I added a espresso nook part. I wanted to create an attention-grabbing scroll animation firstly of the part.
See the next video:
How do I construct this? All of the shifting components are separate SVGs. On scroll, every will animate as I want. Let’s discover how I added the scroll animation for some gadgets.
First, I wanted the animation to run when the espresso machine crossed the viewport. To do this, I want to make use of animation-timeline: view(). Then, to regulate when every animation ought to work, I performed with the beginning and finish for the animation-range values.
For the espresso tamper, I wanted two animations: one for tamping the espresso puck, and the opposite to take away it.
.tamper {
  animation:
    tamp linear each,
    removeTamp linear each;
  animation-timeline: view();
  animation-range:
    5vh 15vh,
    15vh 25vh;
}

@keyframes tamp {
  to {
    remodel: translateY(43px);
  }
}

@keyframes removeTamp {
  to {
    opacity: 0;
  }
}
Discover how I used two animations for the CSS animation property. Additionally, the animation-range comprises a set for every animation.
In case you discover, the machine brews espresso within the cup. I did that by animating stroke-dasharray for the SVG.
line {
  stroke: #8f5f35;
  stroke-dasharray: 151;
  stroke-dashoffset: 151;
  animation: brew linear each;
  animation-timeline: view();
  animation-range: 30vh 40vh;
}

@keyframes brew {
  to {
    stroke-dasharray: 165;
  }
}


.cup:after {
  animation: fillCup linear each;
  animation-timeline: view();
  animation-range: 30vh 40vh;
}

@keyframes fillCup {
  to {
    remodel: scaleY(0.65);
  }
}
On the finish, there’s a huge arrow that attracts itself and factors to the next part. I exported it as an SVG path and animated each the road and the arrow deal with.
path {

  &:first-child {
    stroke-dashoffset: 522;
    stroke-dasharray: 522;
    animation: showArrow linear each;
    animation-timeline: view();
    animation-range: 50vh 60vh;
  }


  &:nth-child(2) {
    stroke-dashoffset: 19.5;
    stroke-dasharray: 19.5;
    animation: showArrow linear each;
    animation-timeline: view();
    animation-range: 60vh 61vh;
  }
}

@keyframes showArrow {
  to {
    stroke-dashoffset: 0;
  }
}
I needed the arrowhead to look a bit after the road was completed, so I modified the animation vary from 50vh 60vh to 60vh 61vh.
It’s enjoyable, isn’t it? In case you are curious to see all of the CSS, I like to recommend to examine the part and see the way it works.
Publication
I designed this part within the browser as I couldn’t experiment freely in Figma. Whenever you scroll down, a paper will slide up and present the publication card.
To make that work, I used a view() scroll timeline. See the next CSS:
.newsletter-card {
  remodel: translateY(100%) rotate(5deg);
  animation: showNewsletter linear each;
  animation-timeline: view();
  animation-range: 0vh 70vh;
}

@keyframes showNewsletter {
  to {
    remodel: translateY(10%) rotate(-2deg);
  }
}
To make sure that the cardboard might be hidden, we have to use CSS overflow. Watch out to make use of overflow: clip and never overflow: hidden.
In case you use hidden, the scroll animation won’t work as a result of the browser will create a scroll container that breaks the scroll animation. Study extra in this text by Bramus.
Books
Right here is the way it works in CSS:
.pages-row.begin {
  view-timeline: --row-a block;

  @helps (animation-timeline: view()) {
    animation: pages-default linear each;
    animation-timeline: --row-a;
    animation-range-start: 10%;
  }
}
Additionally, whenever you hover over a web page, the remainder of the pages will fade. I used CSS :has() for that.
.rows-wrapper {
  &:has(img:hover) {
    img:not(:hover) {
      opacity: 0.3;
    }

    img:hover {
      opacity: 1;
      remodel: rotate(0deg) scale(1.05);
    }
  }
}
Here’s a video of it in motion:
Pictures
Provided that I like images, I wanted to point out that in a easy manner. On my final birthday, Alma (3 years outdated) gifted me a rope that contained photographs of us on our latest journey to Malaysia.
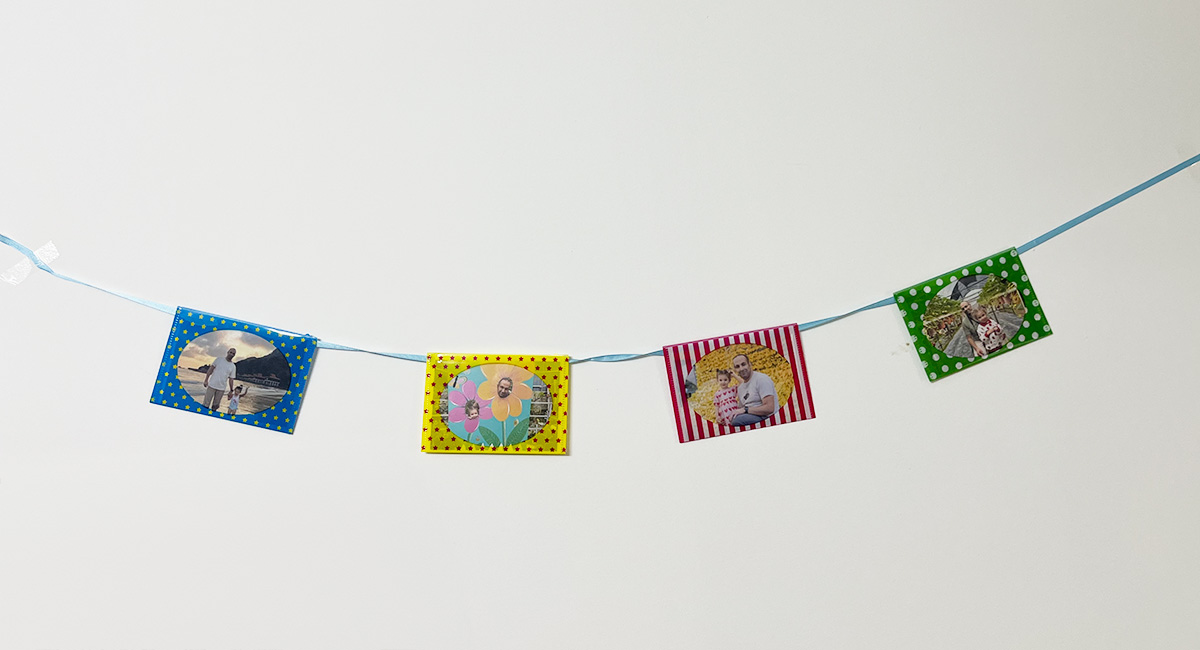
I received an concept to transform that right into a UI design. I began exploring design concepts in Figma simply to get a way of it.
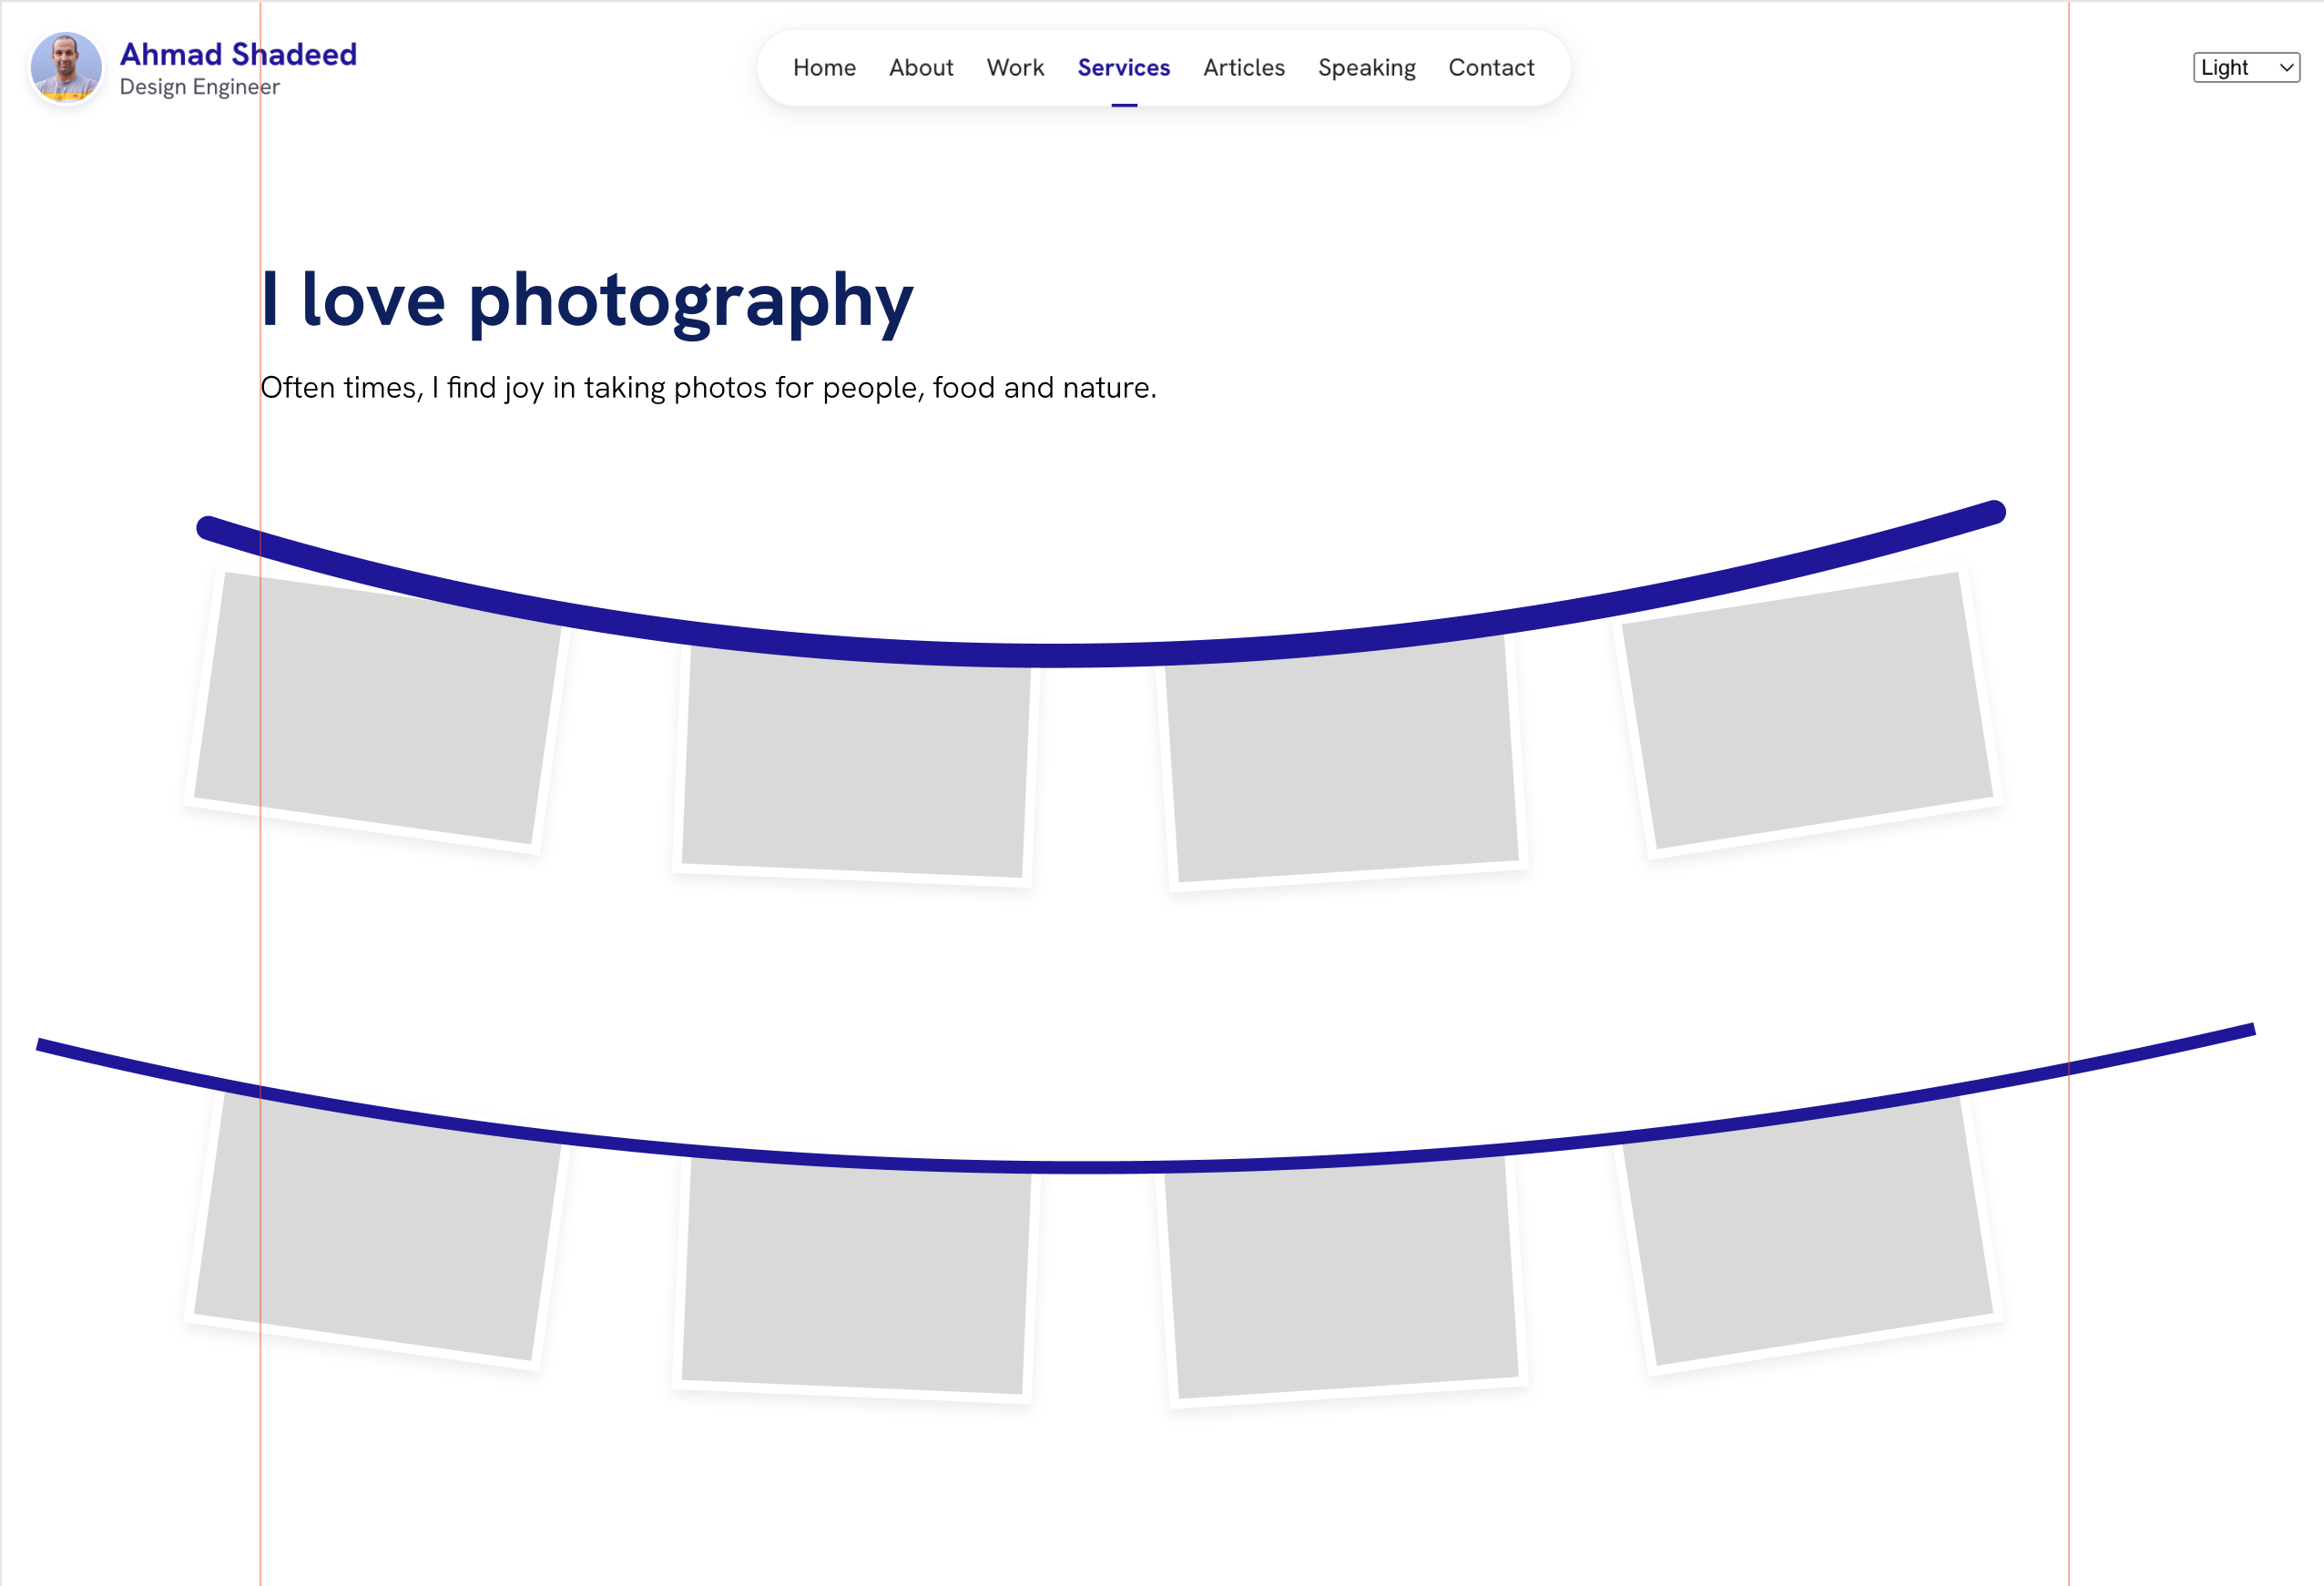
How can I construct that in CSS? At first, I exported the trail as an SVG and positioned the gadgets manually like this:
.photos__item:nth-of-type(2) {
  remodel: rotate(3deg) translateY(85px);
}

.photos__item:nth-of-type(3) {
  remodel: rotate(-4deg) translateY(81px);
}
This wasn’t an answer that I’m completely happy about. Fortunately, I remembered that there’s something in CSS referred to as offset-path. The concept is that we are able to place components on a path and management their place with the offset-distance property.
.photos__item {
  offset-path: path("M8 17.8164C271.314 100.481 648.167 148.013 1114 8");
}

.photos__item:nth-of-type(2) {
  offset-distance: 16%;
}
Within the following interactive demo. I positioned a rectangle on a path:
- We are able to management its place through
offset-distance. - We are able to additionally change it’s anchor level.
Play with it your self.
Constructing on the above, I used scroll animations to alter the offset-distance on the scroll.
.photographs {
  view-timeline: --photography;
}

.photos__item:nth-child(1) {
  offset-distance: 100%;
  animation: moveImage1 linear forwards;
  animation-timeline: --photography;
  animation-range: 0 45vh;
}

@keyframes moveImage1 {
  from {
    offset-distance: 100%;
  }

  to {
    offset-distance: 81%;
    opacity: 1;
  }
}
Right here is the ultimate end result:
Timeline desk of contents
On the timeline web page, I’ve a desk of contents with place: fastened. On scroll, I have to push it again to the highest because the header isn’t sticky.
.toc-wrapper {
  @media (min-width: 960px) {
    animation: moveUp linear each;
    animation-timeline: scroll(root);
    animation-range: 0 300px;
  }
}
Here’s a video:
I used the Scroll-Pushed Animations Debugger to point out you the way it works behind the scenes.
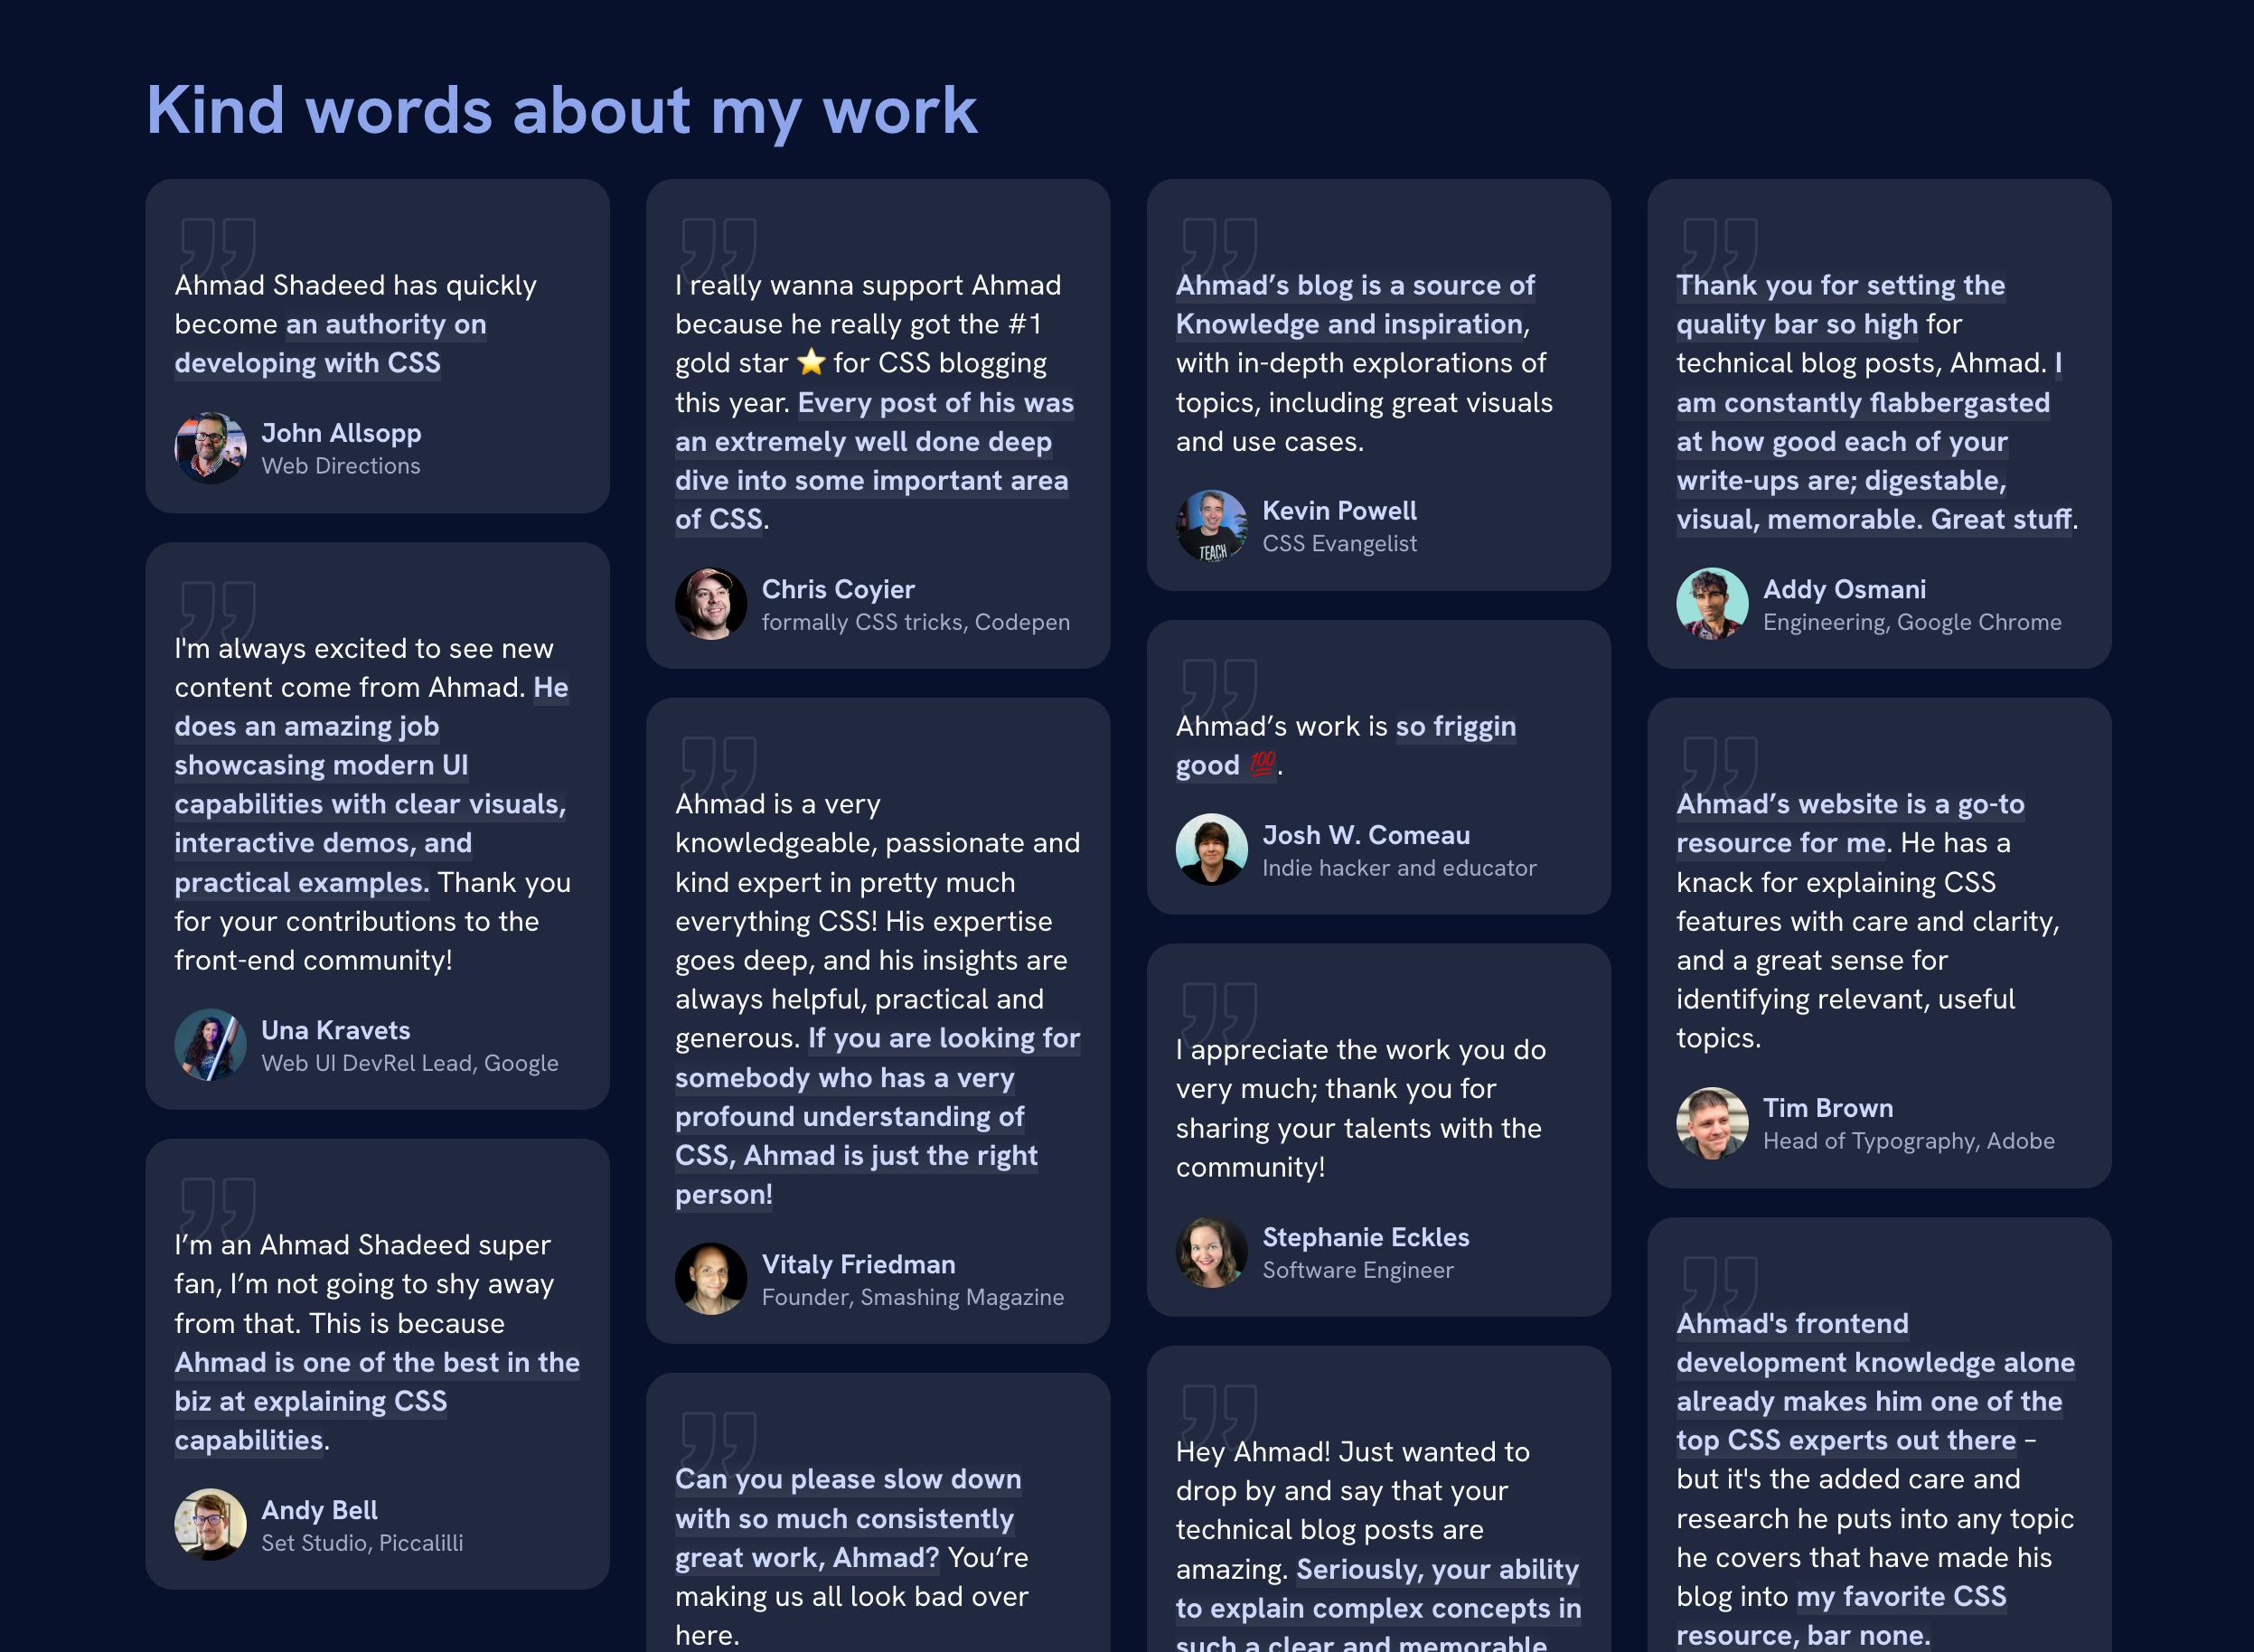
Faux masonry structure with CSS grid and show contents
I want a masonry structure to point out the good issues mentioned about my work. At first, I attempted CSS columns however I didn’t just like the end result.
As a substitute, I divided the quotes into 4 wrappers.
<div class="quotes">
  <div class="quotes__wrapper">

  </div>
  <div class="quotes__wrapper">

  </div>
  <div class="quotes__wrapper">

  </div>
  <div class="quotes__wrapper">

  </div>
</div>
Right here is the way it works:
- By default, every quote merchandise ought to be no less than 200px on small screens.
- The
.quotes__wrappercomponent is flattened withshow: contents. Which means the quotes inside it would be a part of the.quotescomponent’s grid. - On bigger screens, the grid columns are modified and the
.quotes__wrapperis transformed right into a flex container.
.quotes {
  show: grid;
  grid-template-columns: repeat(auto-fit, minmax(200px, 1fr));
  hole: 1.25rem;

  @media (min-width: 950px) {
    grid-template-columns: repeat(4, 1fr);
  }
}

.quotes__wrapper {
  show: contents;

  @media (min-width: 950px) {
    show: flex;
    flex-direction: column;
    hole: 1rem;
  }
}
I like this resolution to my downside. I wrote about show contents lately.
Container queries
I used container queries for a few elements within the design. Listed here are a couple of of them.
Determine
The determine caption model modifications primarily based on the container width.
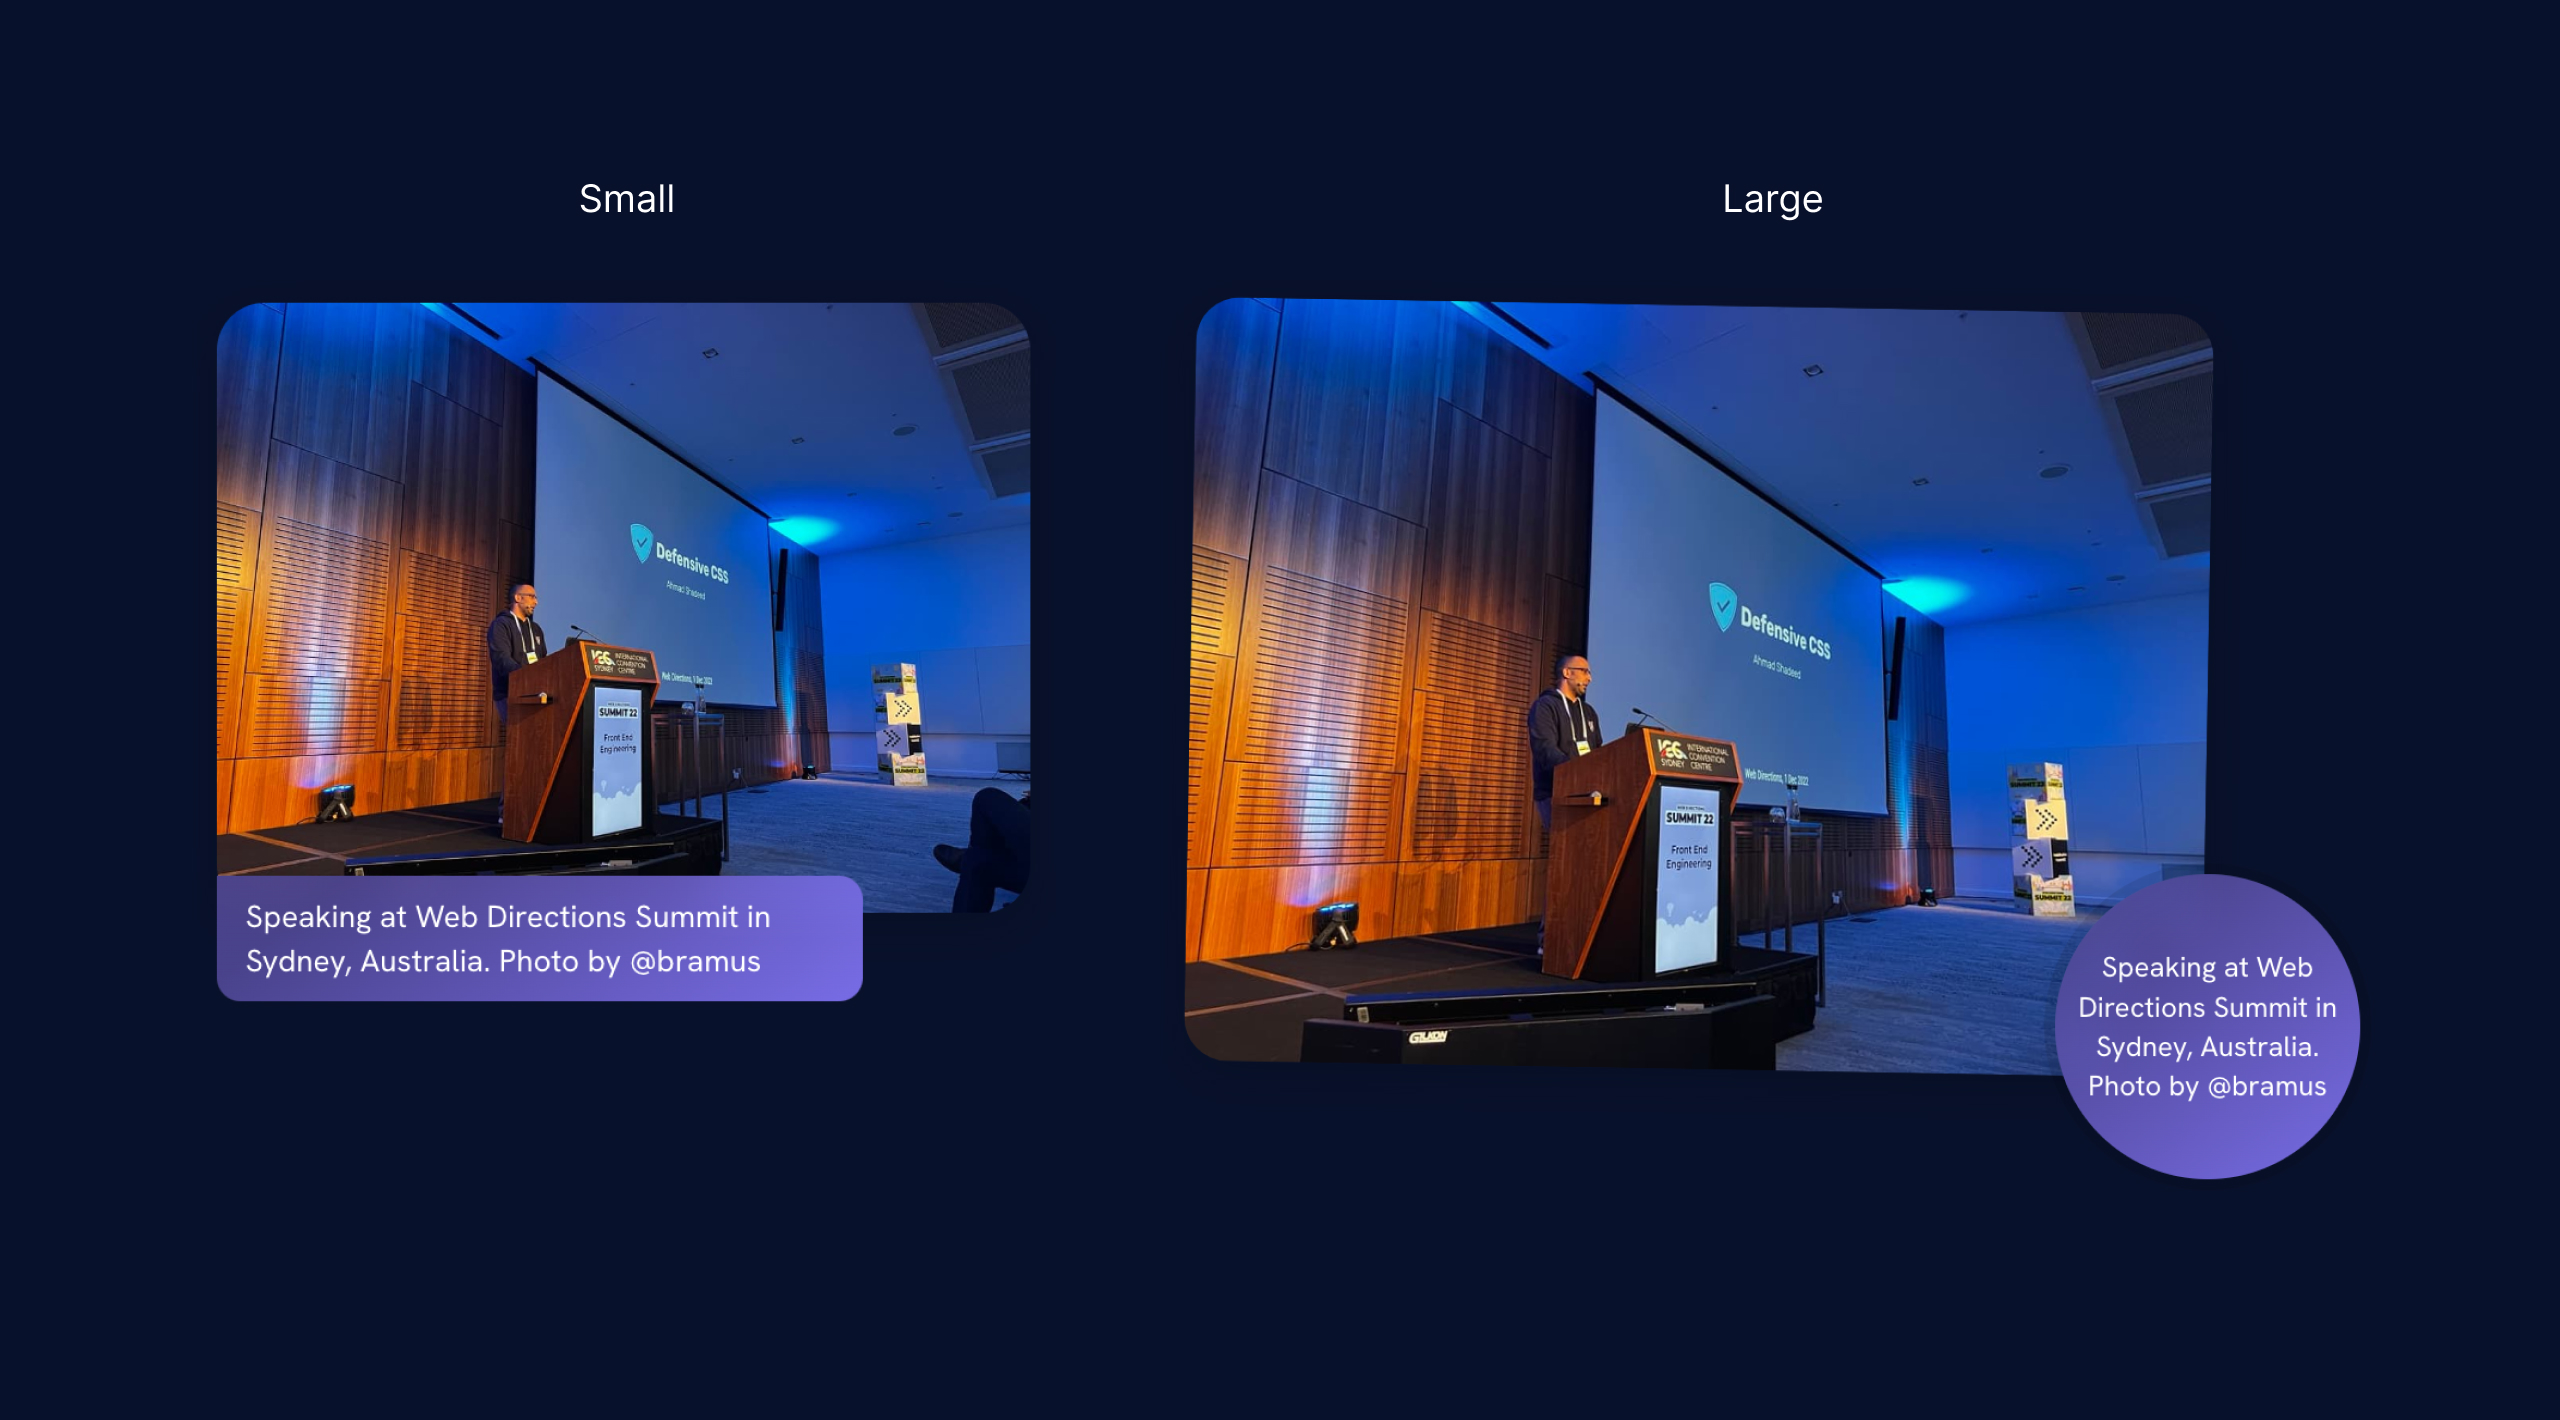
Check out the CSS:
@container determine (min-width: 440px) {
  img {
    remodel: rotate(1deg);
  }

  figcaption {
    place: absolute;
    proper: 0;
    backside: 0;
    width: var(--figcaption-size);
    top: var(--figcaption-size);
    border-radius: 50%;
  }
}
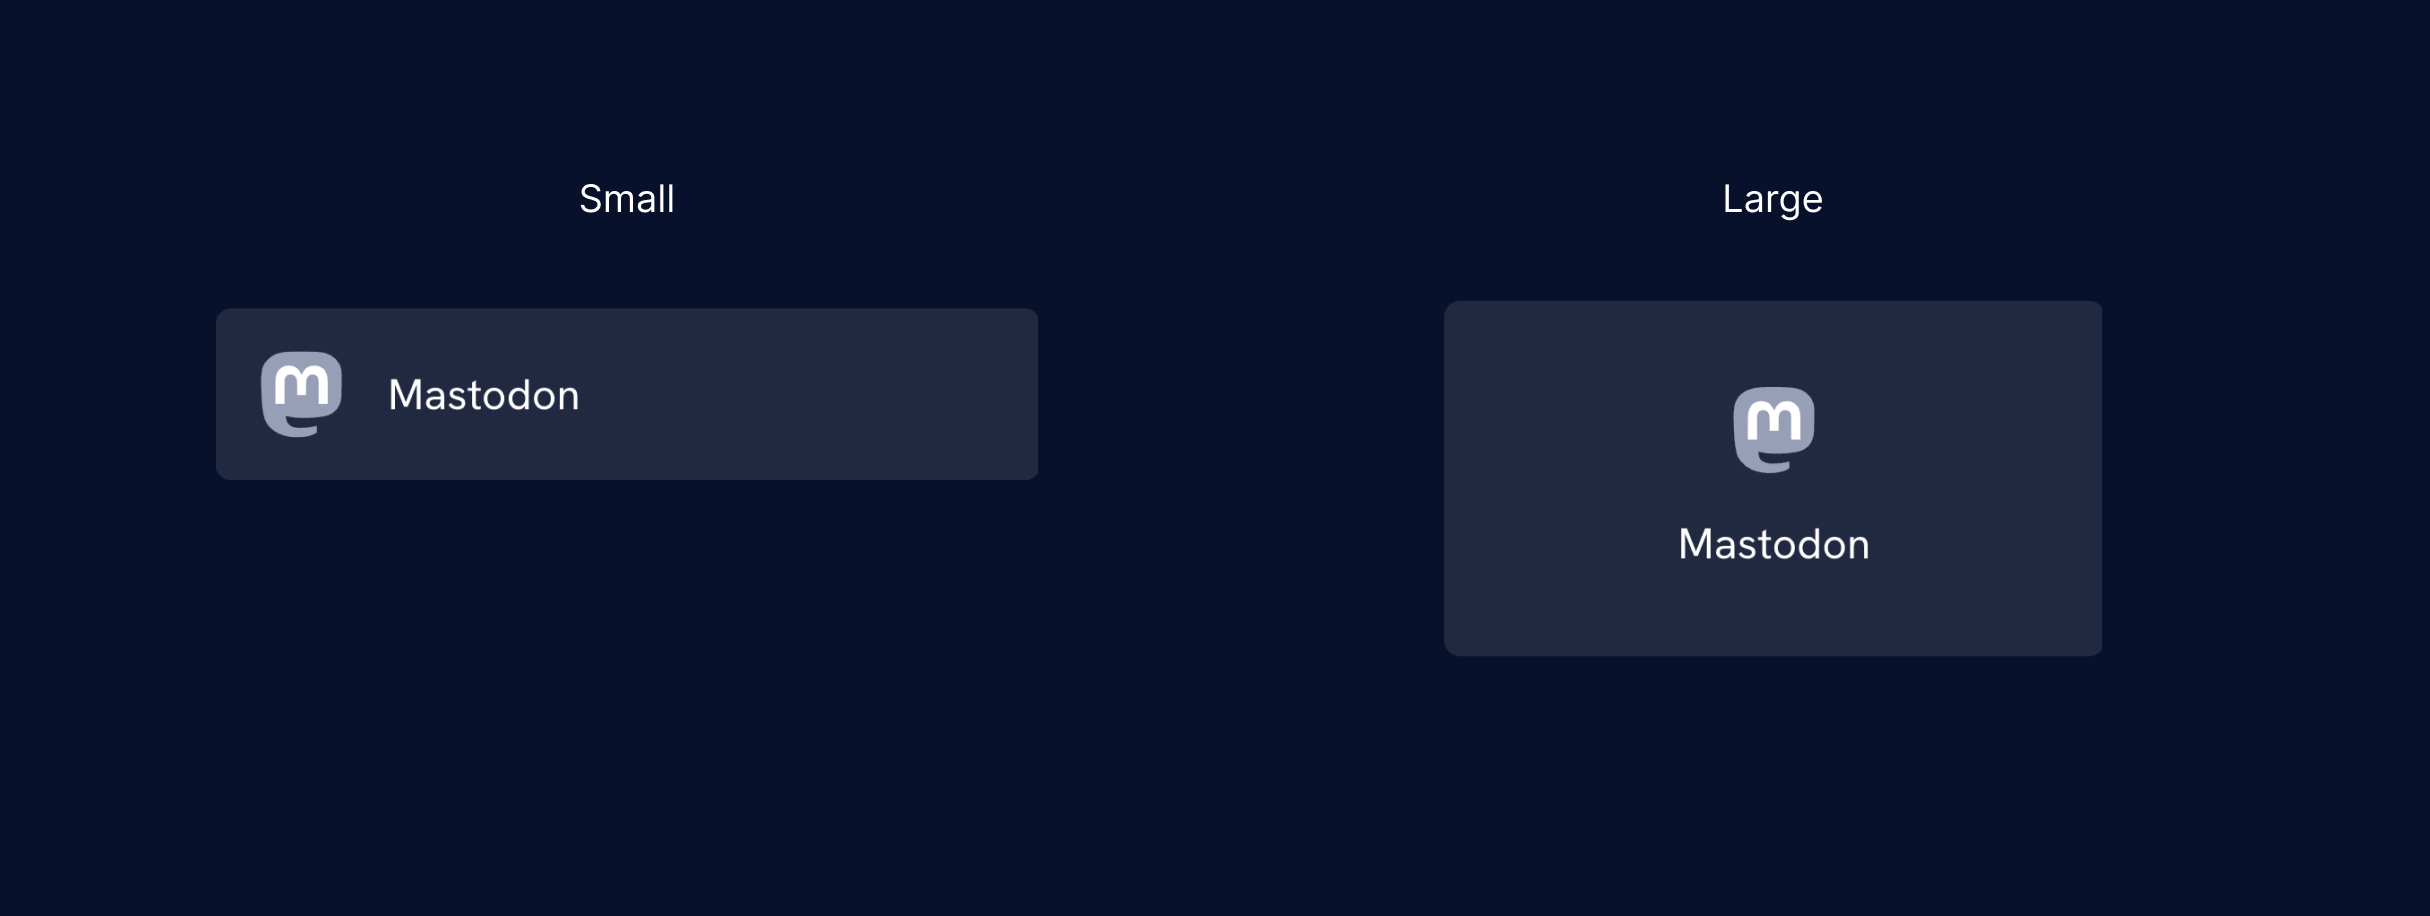
Social buttons
The social buttons on the About web page depend on container queries to alter between the 2 types.
.social-link {
  @container hyperlink (min-width: 280px) {
    flex-direction: row;
    padding: 1rem;
  }
}
See the next video:
Brand
Within the header, if there’s not sufficient house for my avatar, it will likely be hidden.
![]()
@container header-start (min-width: 210px) {
  img {
    show: block;
  }
}
See the next video:
If you wish to be taught extra about container queries, I wrote a full interactive information on them.
CSS :has
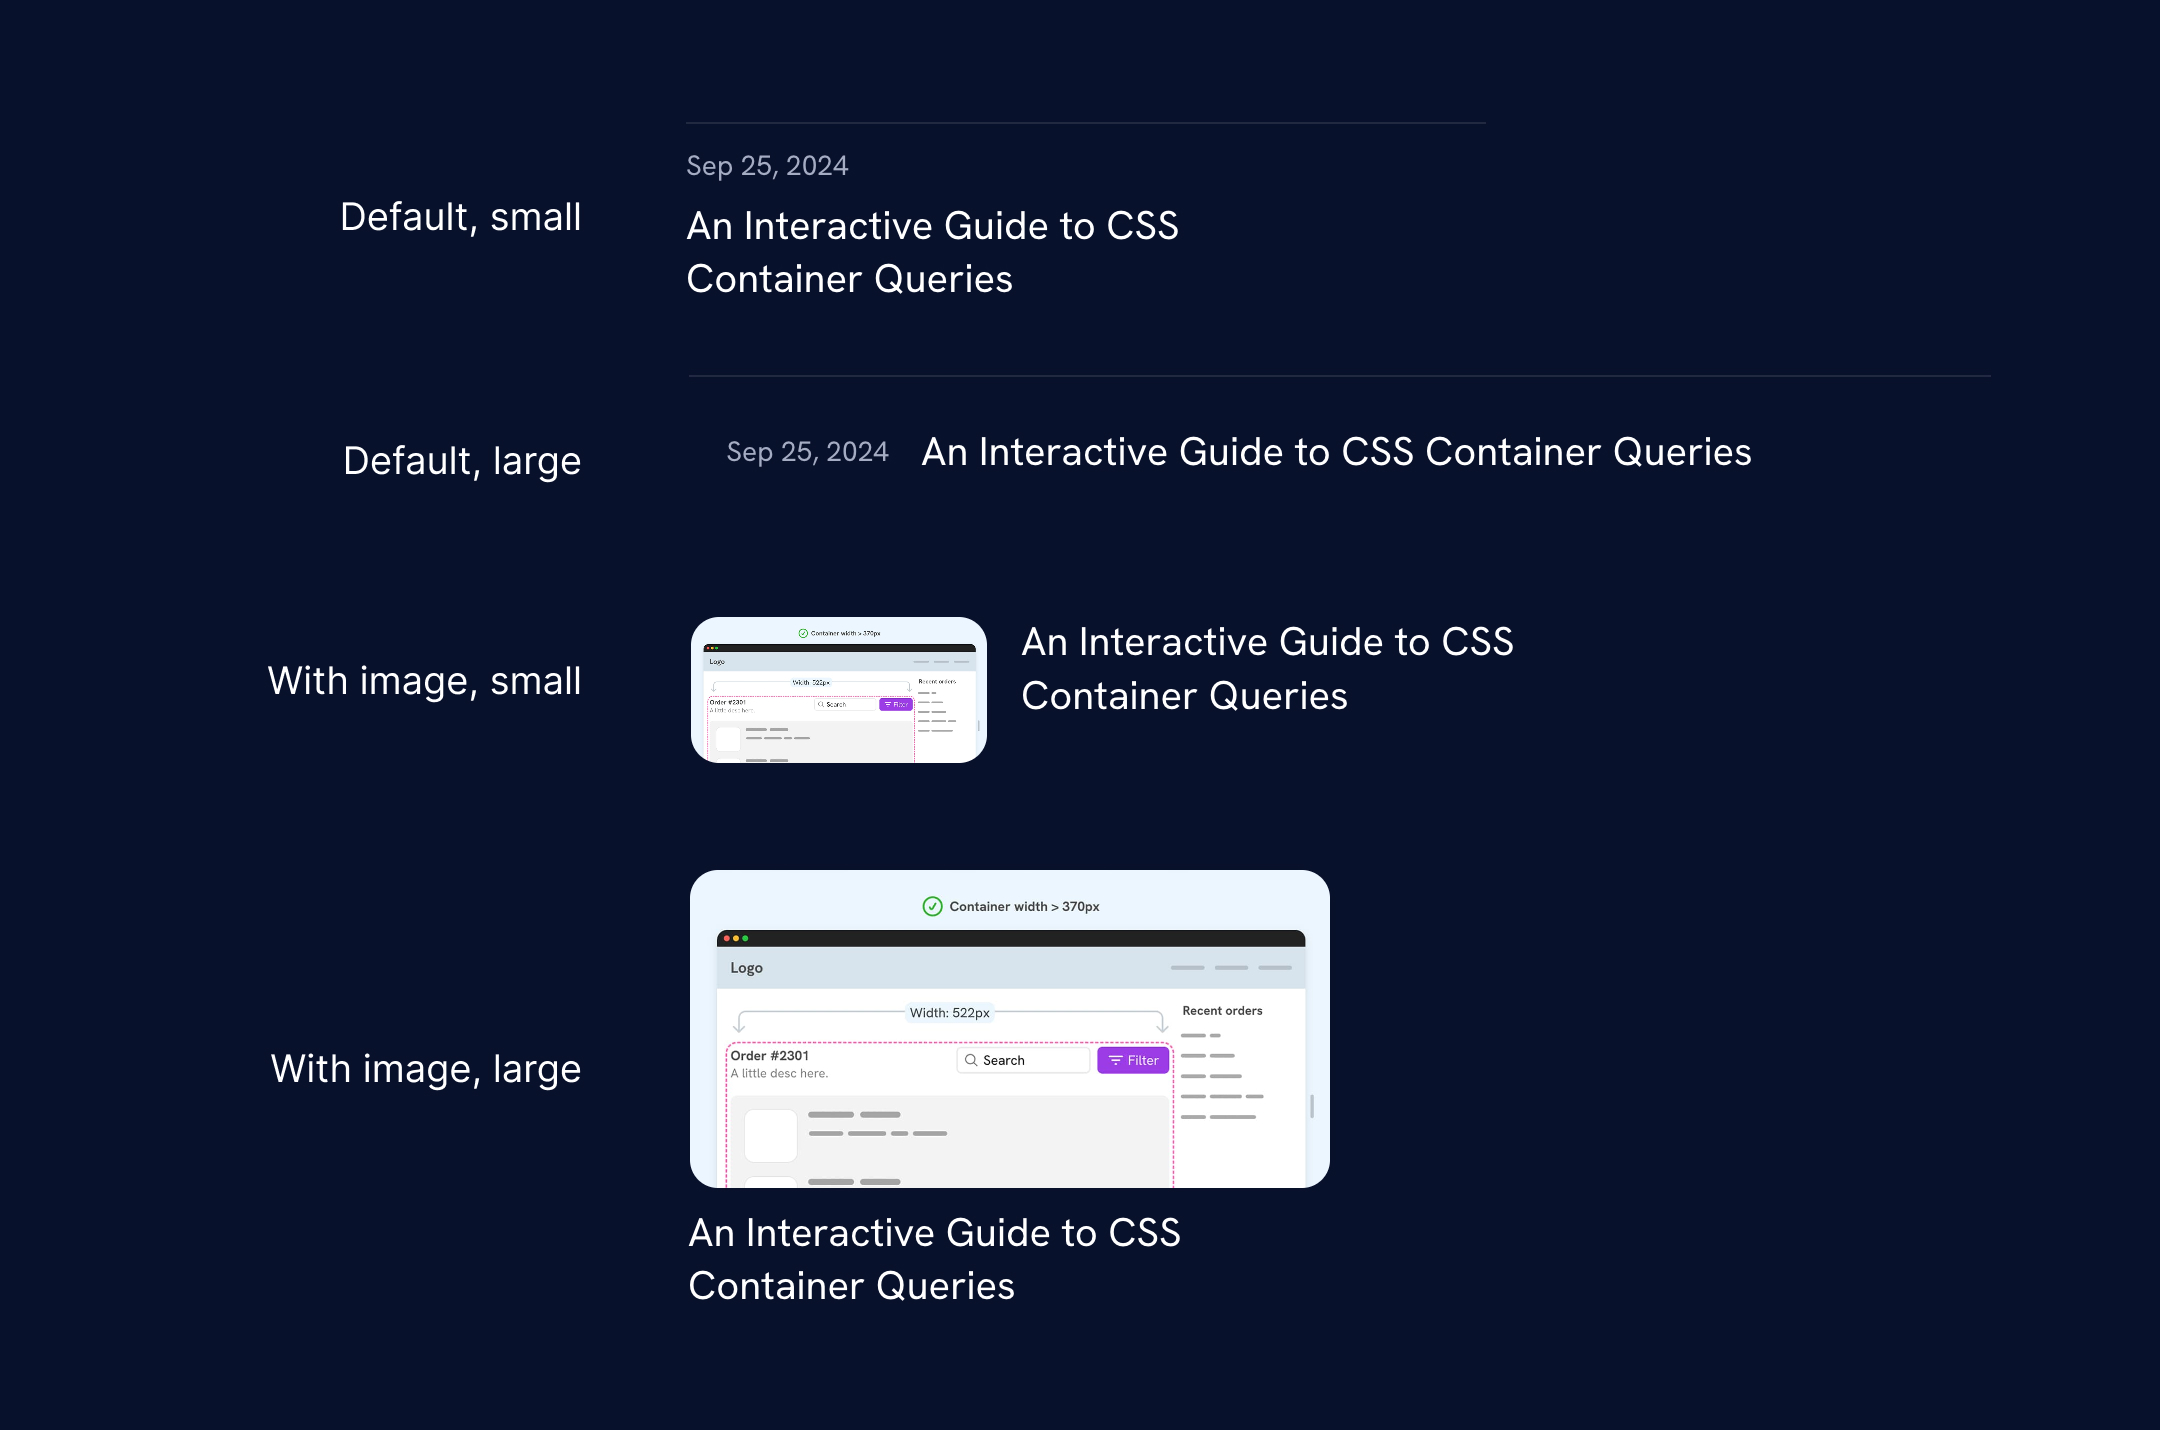
Article card
I used CSS :has to conditionally model the article card element. If there’s a picture, I need a model stacked. If not, the article’s date and title will seem subsequent to one another so long as there’s sufficient house.
Here’s a pattern from the CSS:
.c-article {
  &:has(img) {
    flex-direction: row;
    border-top: 0;
    padding-block: 0;

    a {
      show: flex;
      hole: 1rem;
    }

    img {
      show: block;
      width: 150px;
    }

    h3 {
      flex: 1;
    }

    time {
      show: none;
    }

    .interactive-tag {
      show: none;
    }

    @container articles (max-width: 400px) {
      a {
        flex-direction: column;
        hole: 0;
      }

      img {
        width: 100%;
        min-width: 0;
      }
    }
  }
}
Study extra about CSS :has() on this CSS :has interactive information.
Enjoyable bits to discover
- See how I used the
[src*=""]factor within the about web page, contribution gadgets, and logos part. - Discover how I used CSS
clamp()for the books and the hat buttons. - How the hover impact works for the work web page playing cards. Ensure to hover on each English and Arabic designs, do you discover one thing?
- Contact web page, uhm.
Suggestions
I’m grateful sufficient that the brand new design obtained nice suggestions from the group. One suggestions I need to spotlight is the article Ahmad Shadeed has a pleasant new web site by Andy Bell. Thanks, Andy!