


How-To’s
Python
Tutorials
Learn this put up in different languages:
简体中文
In case you are wanting into constructing a easy net software with Python, the Flask microframework might be top-of-the-line decisions. With Flask you may construct an actual net software with only a single Python file and prolong it if it is advisable.
It’s even simpler to construct a Flask software in PyCharm. PyCharm takes care of making the particular (correct) listing construction and settings, and makes certain that Flask, Jinja, and the Werkzeug WSGI toolkit are efficiently put in.

On this very quick Flask tutorial, Nafiul Islam units up a easy Flask software in only a minute and showcases the PyCharm toolkit you may profit from.
This tutorial will present you the right way to:
- Create a Flask mission in PyCharm.
- Arrange a digital surroundings to work together with your mission.
- Arrange a run configuration on your Flask software.
- Work effectively with templates in PyCharm.
Find out how to create a brand new Flask mission in PyCharm
There are two methods to create a brand new Flask mission in PyCharm:
You’ll be able to navigate to the principle menu and choose File | New Venture.

You can even click on “New Venture” on the Welcome display screen.

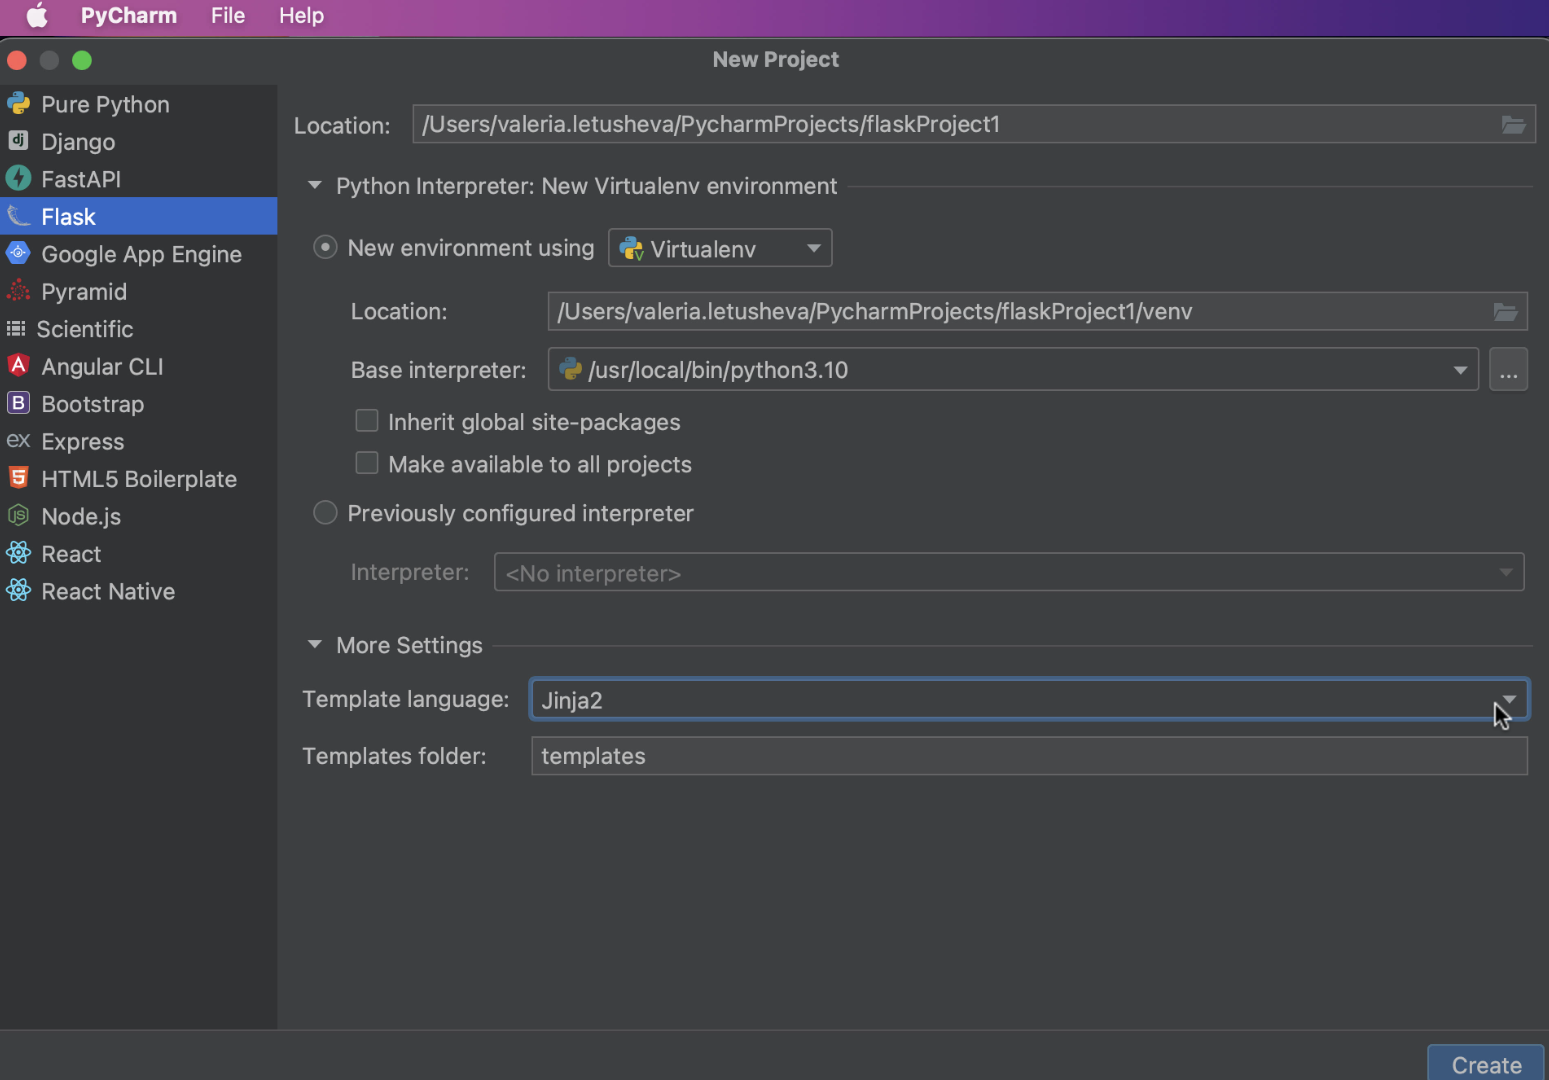
In each circumstances, PyCharm will carry you to the New Venture dialog, the place you may choose Flask from the record of Venture sorts on the left panel.

Within the New Venture dialog, it is advisable specify the mission location path within the Location.
Find out how to arrange an surroundings on your mission
The subsequent step is to decide on the interpreter you need to use for this specific mission. You should use an current interpreter that you just’ve already arrange for one more mission or create a brand new one. When organising a brand new interpreter, you may choose an surroundings of your selection, whether or not a Digital surroundings, Pipenv, Poetry, or Conda.

You additionally have to specify the specified location and base interpreter of a brand new digital surroundings.
For those who’d like so as to add all packages which can be already put in within the world Python in your machine to your digital surroundings, test the Inherit world site-packages checkbox.
If you’ll use this surroundings for different tasks, tick the Make out there to all tasks checkbox and it is possible for you to to pick out this surroundings the following time you arrange a Python interpreter on your new mission.
Find out how to setup a template language
After you’re performed with the surroundings setup, chances are you’ll need to specify the Template language and the identify on your Templates folder. This may be performed from the New Venture dialog. By default, PyCharm units Jinja because the template language and names the template folder “templates”.
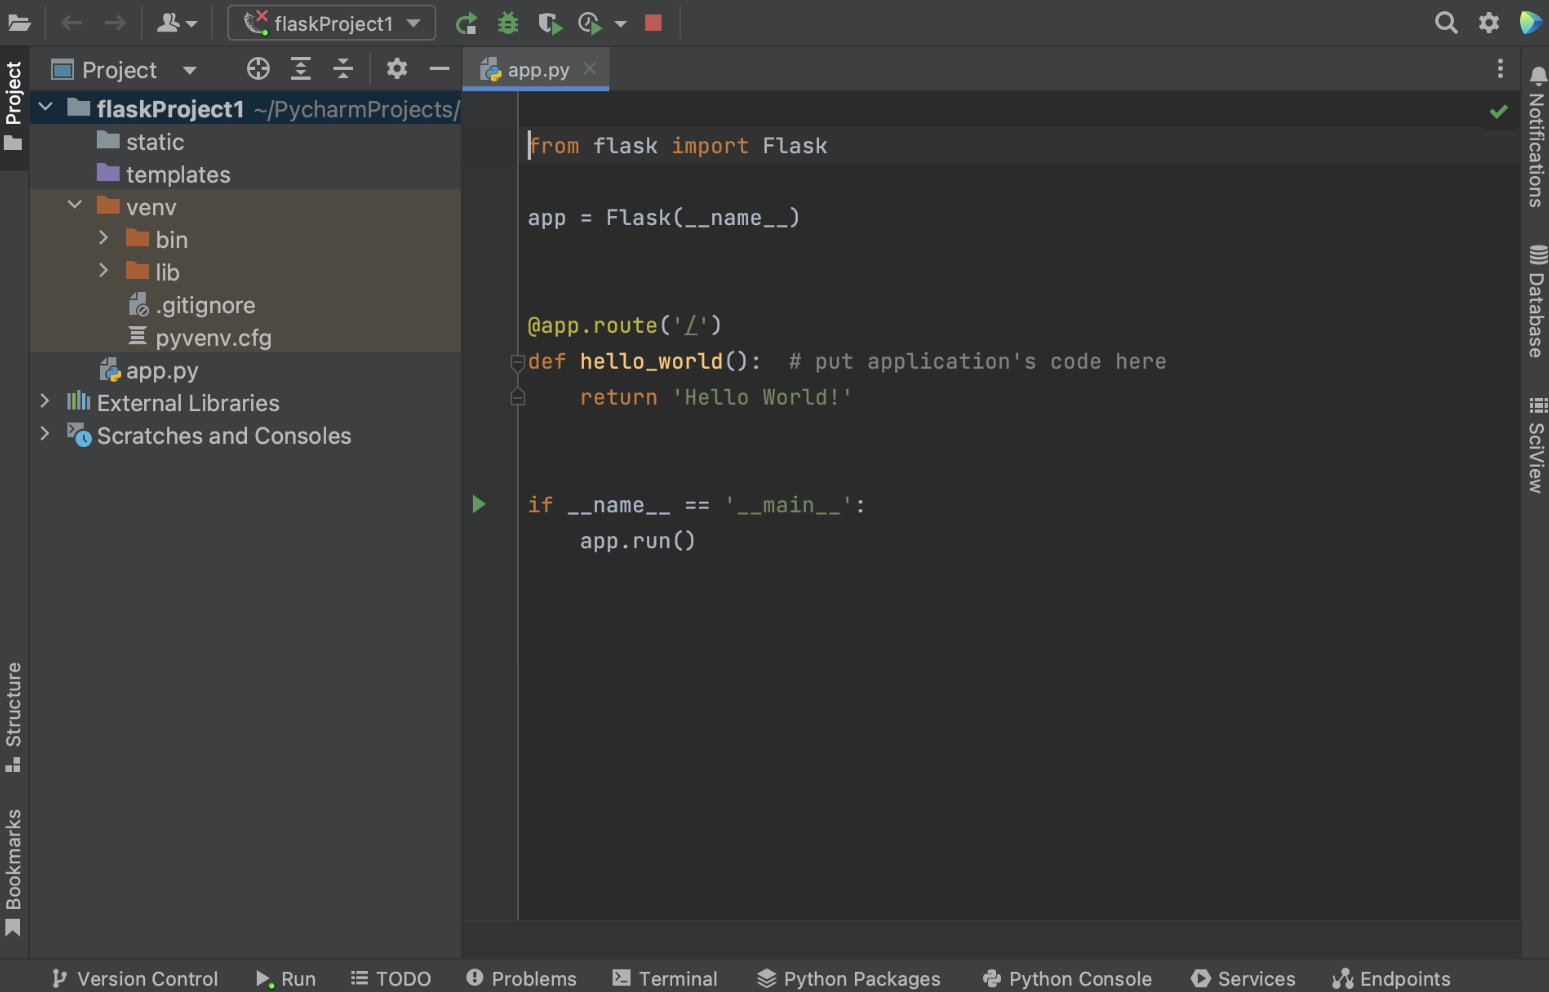
Now you’re all set to get began together with your new Flask mission! Don’t overlook to click on the “Create” button on the proper backside nook of the dialog. PyCharm will create a Flask software for you with a particular listing construction and devoted templates folder, and set up Flask in your machine if it’s not already.
Find out how to arrange a run configuration on your Flask software
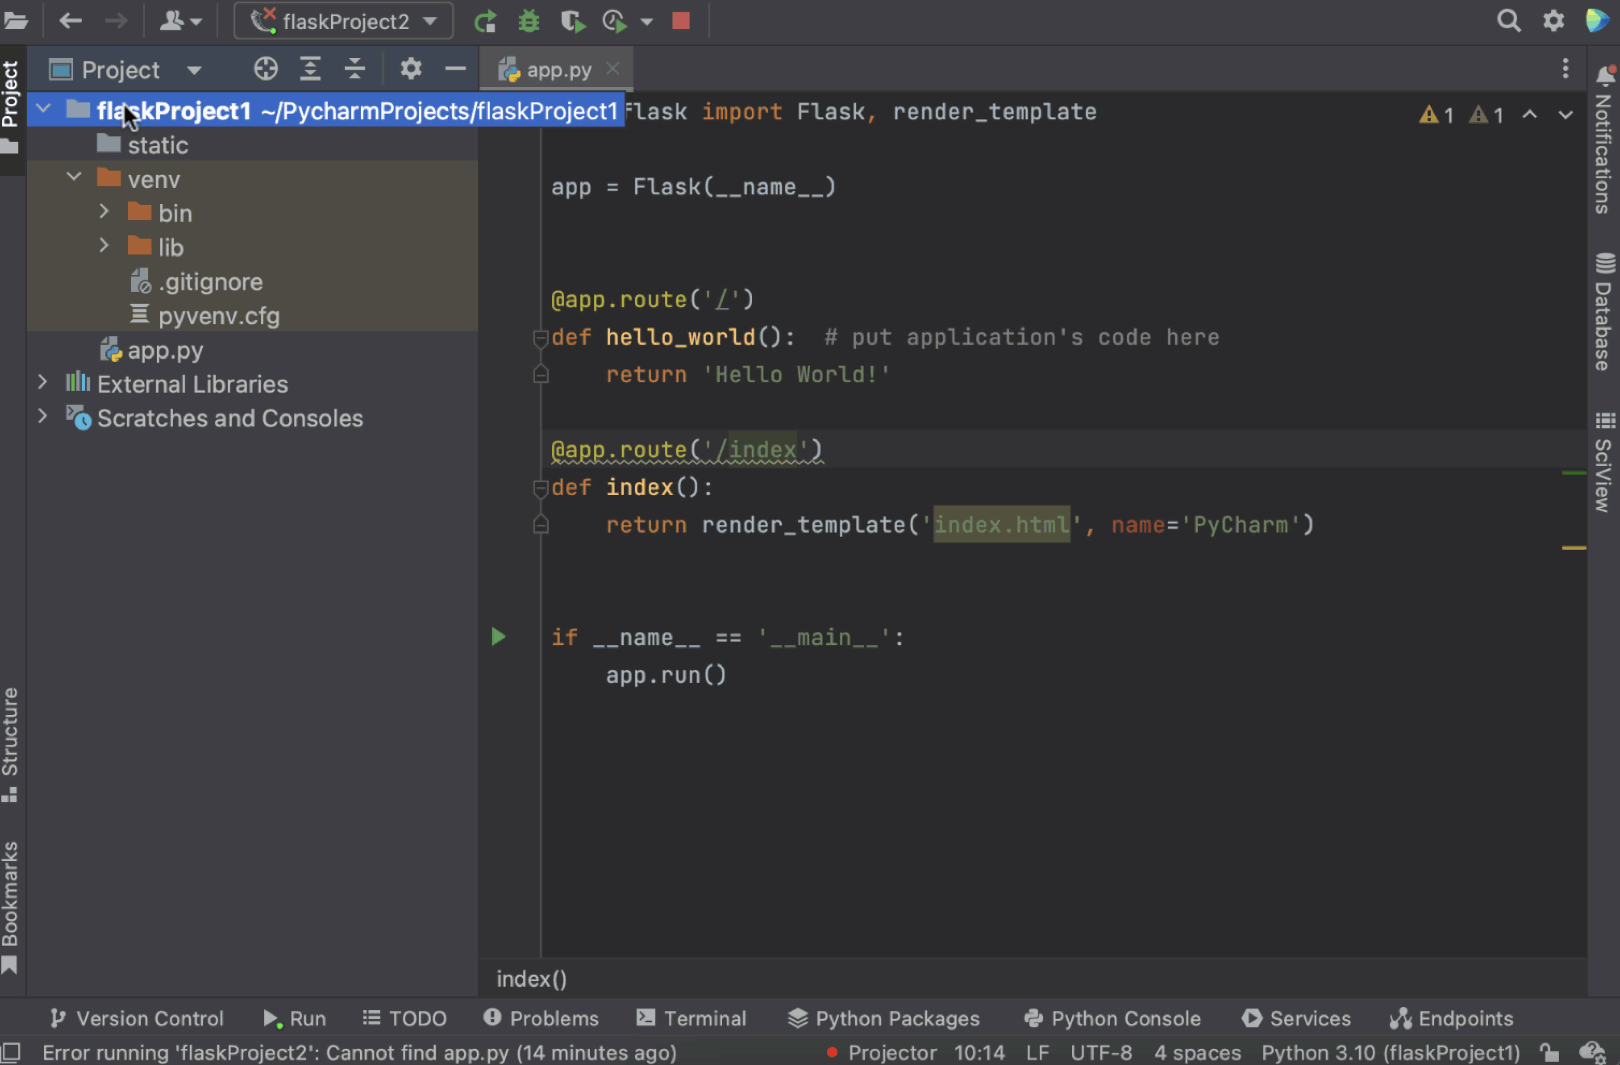
As soon as your new Flask software is preconfigured for you by PyCharm, you will notice an open app.py file, which is a stub Python script that can be utilized to check whether or not your software is working and your settings are right.

Observe that in case you are utilizing macOS Monterey, you’ll possible want to vary the default port to run app.py, in any other case you’ll get an error. Learn on to see how one can change the port.
To configure a Run configuration manually, you may choose Edit run configuration within the dropdown menu subsequent to the run button within the gutter.

Within the Run / Debug Configurations dialog, it is advisable click on Add new run configuration (or simply press plus within the left higher nook of the dialog window) and choose Flask server from the record of Configurations.
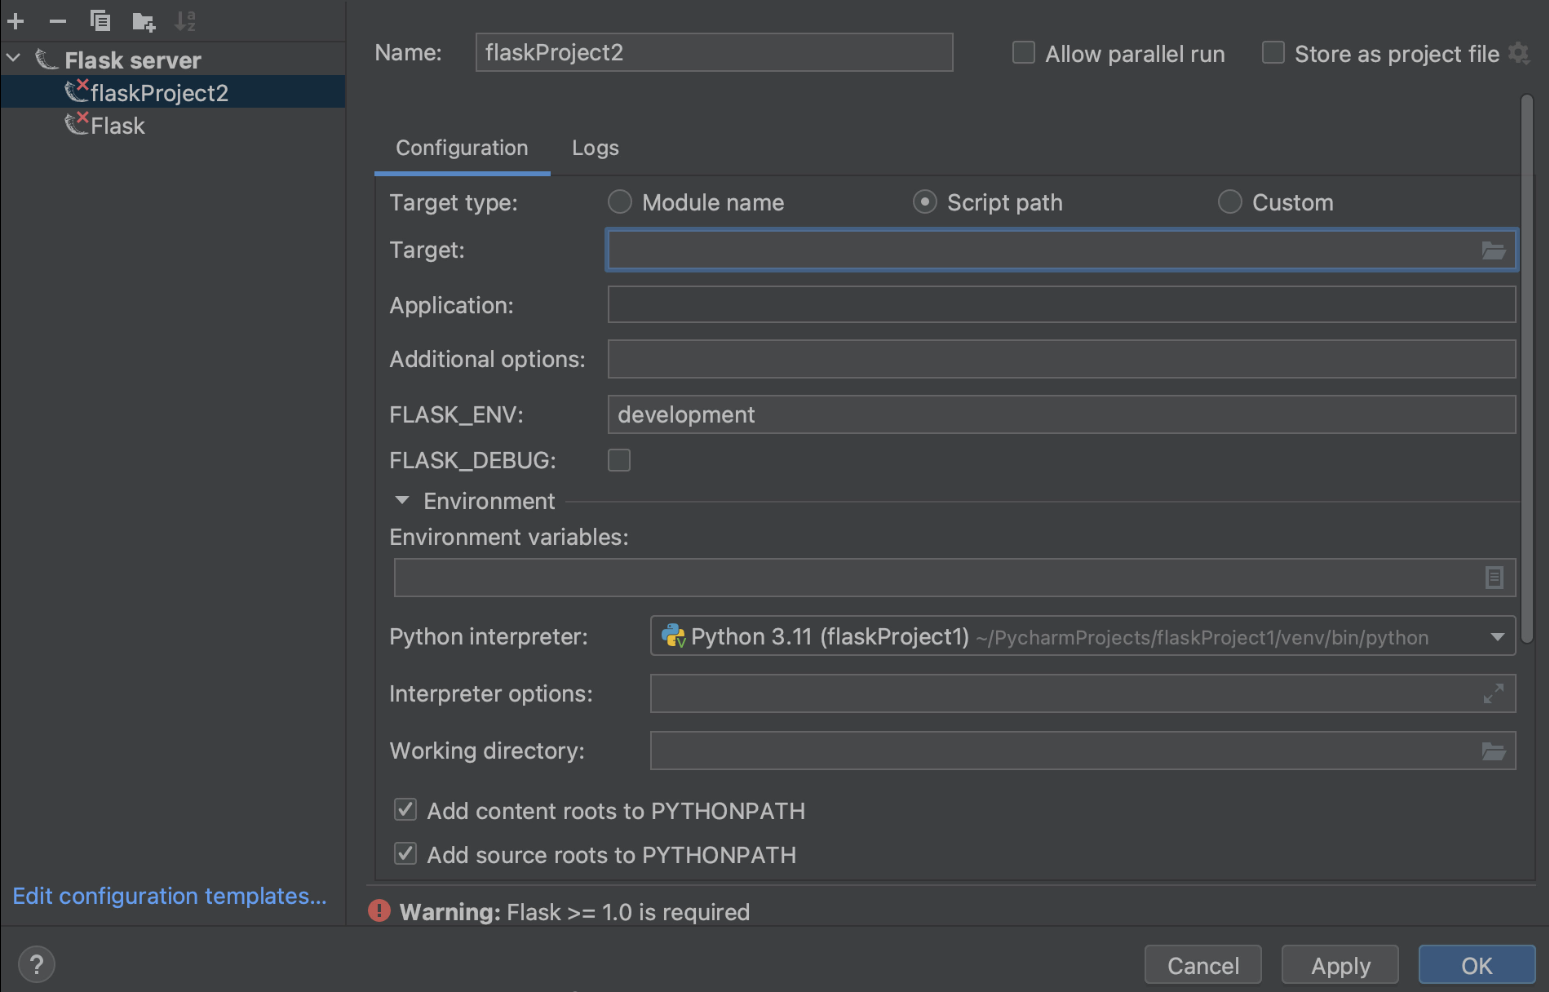
That you must specify the values for Goal and Utility fields.
You’ll be able to specify totally different Goal sorts within the Goal subject, relying on what you want to run: a path to the Python file, a module in your Flask mission, or perhaps a customized mixture of modules, scripts, and Flask cases. For our instance, we want to run a file known as autoapp.py.
Within the Utility subject we might want to outline the identify of the applying we’re going to execute. In our case it can simply be “app”.

If you wish to be taught extra about these and different Run Configuration settings, please go to the devoted Assist web page.
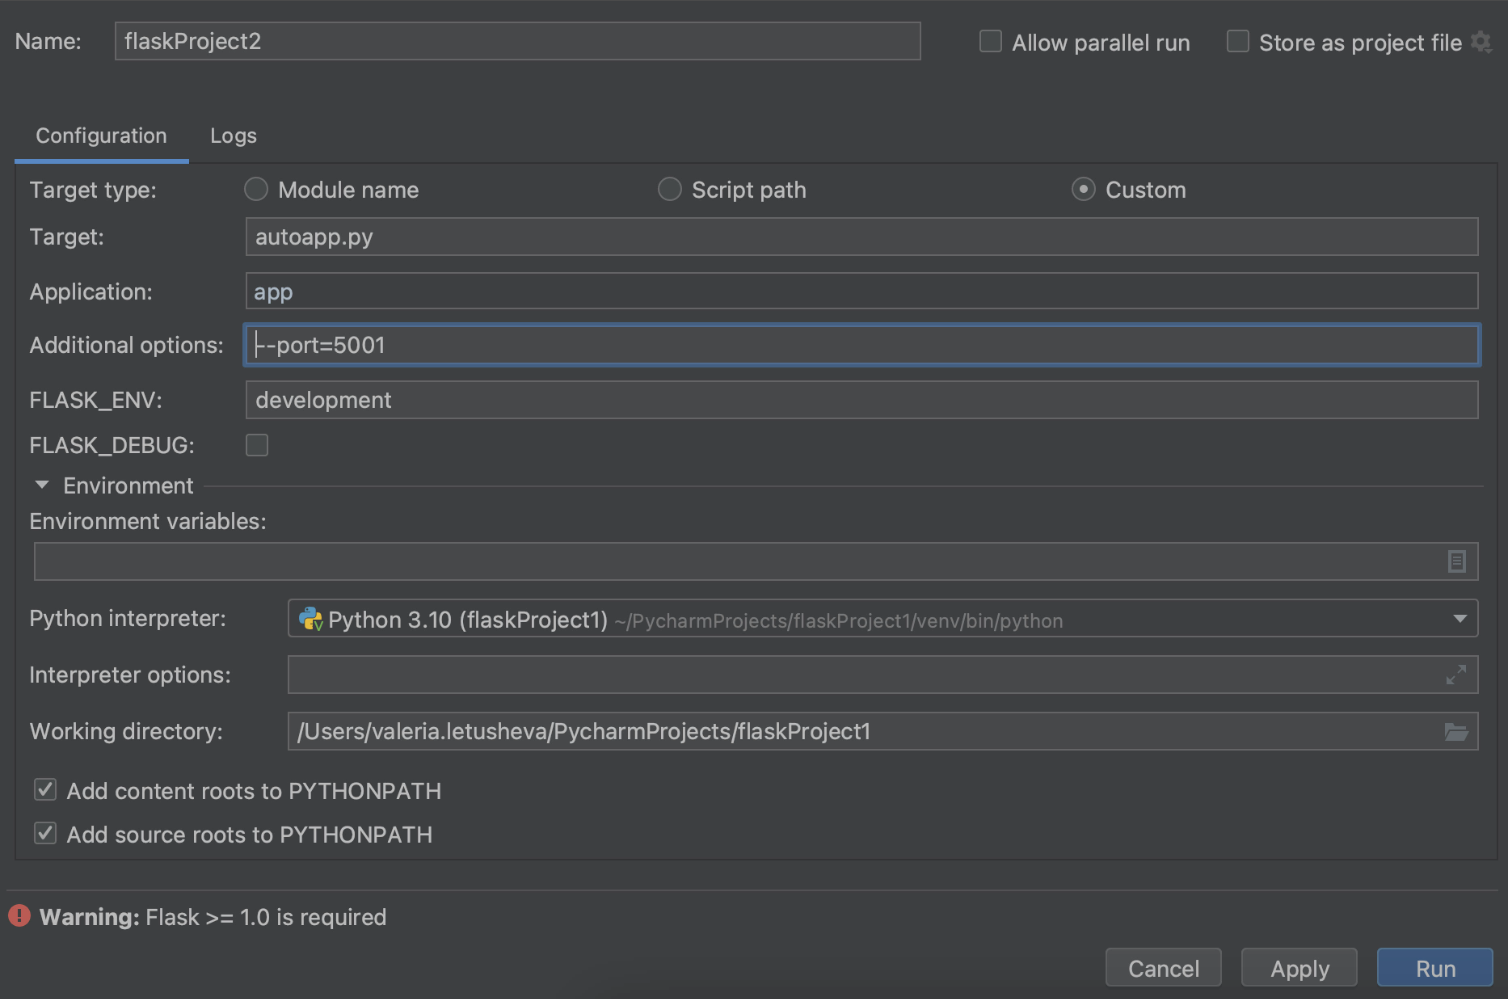
How one can change the default port
If it is advisable change the default port, you can too do it within the Run / Debug Configurations dialog. Print --port=[number of port] within the Extra choices subject.
Working with templates
Find out how to create a template file from utilization
As part of Flask assist, PyCharm gives the power to routinely create a template file if you are engaged on the code. So should you occur to say a non-existing template in your route, PyCharm will spotlight the identify of the template file. Use the quick-fix Create template <identify> by inserting a caret on the highlighted template identify, press ⌥ ⏎, and select Create template <identify> from the record of obtainable intention actions.
Alternatively, you may click on the yellow mild bulb and select Create template <identify> from there.

Within the Create Template dialog, choose the template listing, the place the brand new template can be created. Observe that this quick-fix will create an empty template.

Quite the opposite, should you create a brand new template by right-clicking on the templates folder within the mission view and selecting New / HTML file, you’re going to get a file prefilled with generic HTML code.
You’ll be able to be taught extra about how PyCharm can assist with templates on our Assist web page.
Find out how to use a stay template
To optimize your work, you may create stay templates as a substitute of writing the identical items of code a number of instances. To develop a code snippet, kind the corresponding template abbreviation and press ⇥. Maintain urgent ⇥ to leap from one variable within the template to the following one. Press ⇧ ⇥ to maneuver to the earlier variable.
In our case, we’ll use a pre-built stay template with html: 5 typing and press ⇥. We are going to get primary HTML code that we will modify additional.

There are lots of predefined stay templates out there for you in PyCharm. To view and customise the one you want to use, go to Settings | Preferences / Editor / Reside Templates. The stay template that we used right here is beneath Zen HTML. You’ll be able to click on on it and see detailed details about the template, together with abbreviations and template textual content. You’ll be able to modify the template in line with your wants.

Coming again to our template file, we’ll add Whats up {{ identify }} to the <physique> and run our app to test if the template is working.

We get a url on our localhost that we will paste into the browser. Add /index to the url and we see “Whats up PyCharm” textual content – the whole lot is working!

Find out how to add a templates folder to your mission
In case you are keen to have a templates folder beneath a unique identify (not “templates”), you may delete the present templates folder from the mission view after which right-click on the mission identify, choose New / Listing, and outline the folder’s identify within the dialog window.
Don’t overlook to mark the folder as a Template folder by right-clicking on it and selecting Mark Listing as / Template Folder. Now you could have a template folder with a reputation of your selection!
Find out how to affiliate an SQL database together with your Flask mission (and why you would possibly achieve this)
In case your mission has an SQL database, you may affiliate it with the mission in PyCharm by merely dragging it from the mission construction to the Database device window on the precise panel.

Associating a database together with your mission will offer you correct code perception each for SQL statements and throughout the entire mission. PyCharm will be capable of introspect the entire mission, together with the related database, and can acknowledge it once you want the desk identify from the database in your code.

Now you’re all set for productive work in your new Flask software. If in case you have any additional questions, please go away a remark or ping us on Twitter.
For those who’re within the temper to be taught greater than this Flask tutorial, listed below are some sources you would possibly discover helpful:
To learn:
To observe: