

Default Habits
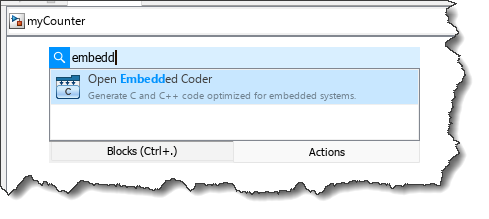
Let’s take this straightforward instance mannequin and generate code for it utilizing Embedded Coder
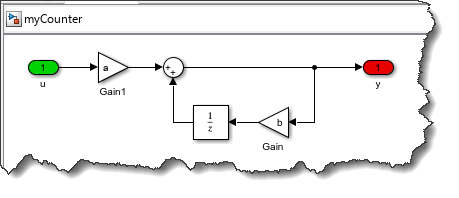
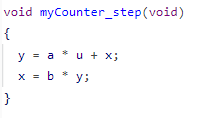
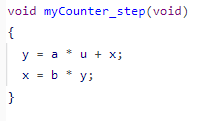
By default, the “step” perform for this mannequin seems to be like this:

Whereas this code is legitimate, there are a number of causes for desirous to customise it.
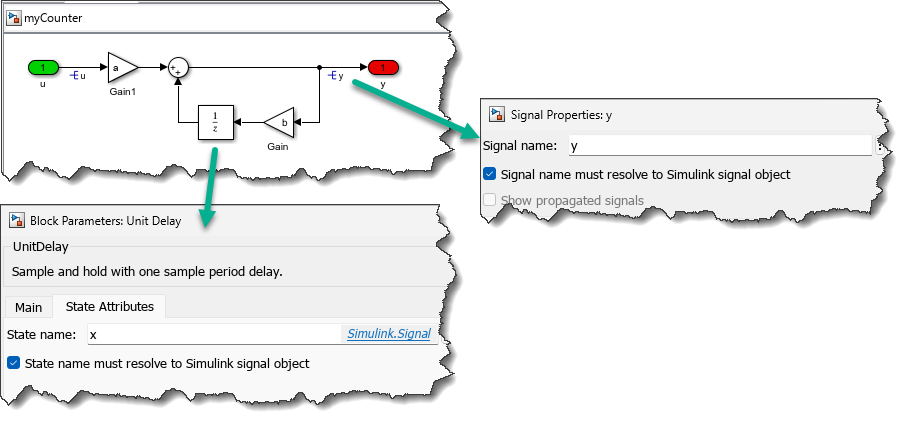
For this instance, I’ll make the generated code look extra like what a human would write, utilizing easy variables like u and y as an alternative of grouping them within the construction modelname_Y.
Customizing Code utilizing Simulink.Parameter and Simulink.Sign Objects
u.CoderInfo.StorageClass = ‘ExportedGlobal’;
y.CoderInfo.StorageClass = ‘ExportedGlobal’;
x.CoderInfo.StorageClass = ‘ExportedGlobal’;
a.CoderInfo.StorageClass = ‘ExportedGlobal’;
b.CoderInfo.StorageClass = ‘ExportedGlobal’;
Within the mannequin, I affiliate these objects with indicators and block properties:
And the generated code now seems to be like this:
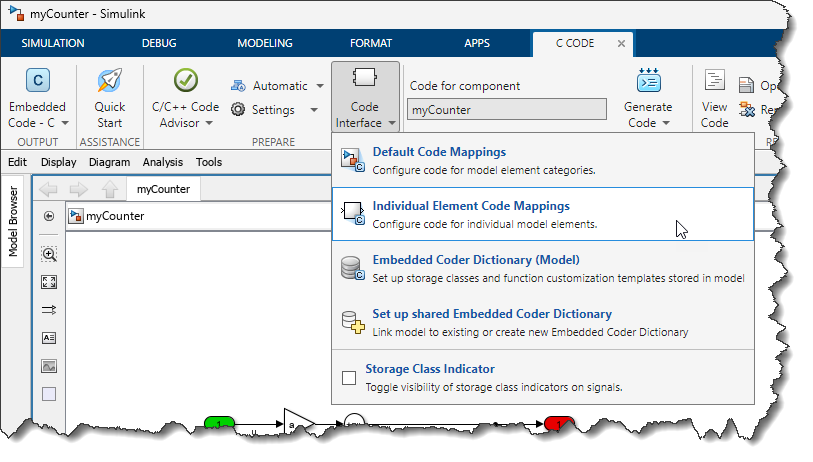
Customizing Code utilizing Code Mapping
Within the C Code tab, the Code Interface dropdown incorporates the Code Mapping associated entries:
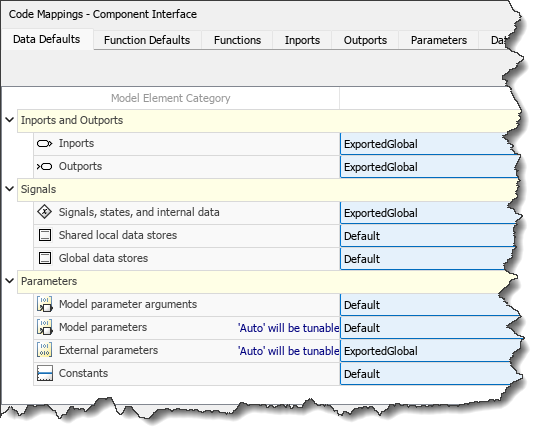
The very first thing I can attempt is altering the default storage class and see if I can get what I need. I set the Inports, Outports, States and Exterior Parameters default storage class to ExportedGlobal:
and now the code I get is:

The information shouldn’t be saved in buildings anymore and the parameters are displaying up as a and b, however I nonetheless must do a further step for the indicators and states.
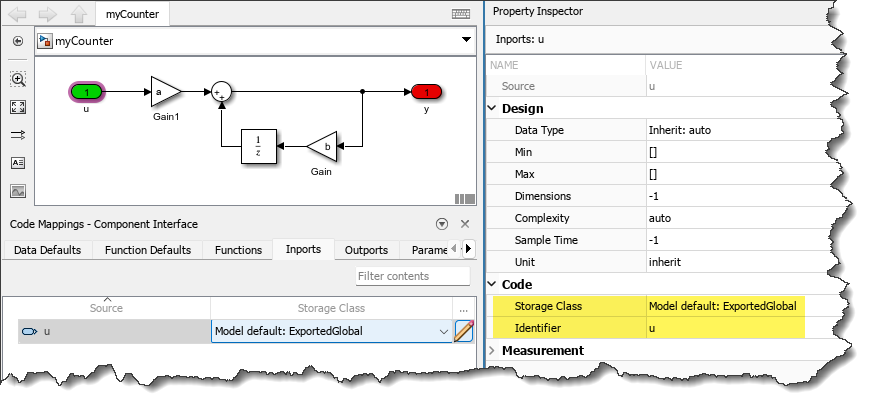
As soon as the identifiers have been specified for ports and states, I can generate code and ensure that it behaves as I count on:
Notice that these two methods (parameter/sign objects and Code Mapping) will not be mutually unique. It’s doable to specify code era properties utilizing sign and parameter objects on prime of Code Mapping. That is helpful if you’d like a finer granularity in your specification and/or if you happen to want to maintain these specs outdoors of the mannequin file.
Now it is your flip
After studying this fundamental introduction, which different code era matters would you wish to see in future posts? Tell us within the feedback beneath.