

A short while in the past, Ana Tudor created a powerful assortment of halftone patterns utilizing solely CSS. As I had a bit of time to spare, I assumed I’d dig into the code and see the way it was accomplished! Ana’s demos are made utilizing Sass — what higher approach to study than to attempt to produce comparable results utilizing vanilla CSS?
Ana’s demo makes use of Houdini to animate the halftone background (solely supported in Chromium browsers). For the aim of this text we’re simply going to be concentrating on the halftone sample itself, reasonably than the animation.
What’s halftone?
Halftone is outlined as a replica of a picture by which darkish and lightweight variations in tone are produced by variously sized dots. It was initially invented as a method for printing pictures in journals and different publications at a time when different printing processes have been prohibitively costly. You may need come throughout the type in older comedian books, the place color replica was restricted.
Halftone in CSS
It’s easy sufficient to provide a dotted background in CSS through the use of radial-gradient(). However for a halftone impact, we want some variation within the dimension of the dots so as to depict a picture or sample.
To get this impact, we want three important substances:
- A repeating background, utilizing
radial-gradient. - A masks, which would be the picture or sample we need to reproduce.
- The key weapon: the distinction filter. We’re going to take our radial gradient background and switch the distinction up excessive. The impact when mixed with the masks is the place the magic occurs.
Easy dotted background
Let’s begin with a easy dotted background, made with radial-gradient(). First let’s outline the gradient. As a substitute of a clean gradient the place one color blends into one other, we’re utilizing arduous stops, so the color goes from black to clear with none mixing. That’s how we get a circle with a clean edge.
.halftone {
  background: radial-gradient(circle at middle, black 0.25rem, clear 0);
}
We’ll have only a single circle at this level. If we alter the background dimension to one thing smaller, we’ll as a substitute get a repeating dotted sample. We are able to use background-repeat: spherical to make sure the dots received’t be clipped, and we’ll place our background within the centre. I choose to make use of separate properties because it’s simpler to learn, however you should use the background shorthand.
.halftone {
background-image: radial-gradient(
circle at middle,
black 0.25rem,
clear 0
);
background-size: 1rem 1rem;
background-repeat: spherical;
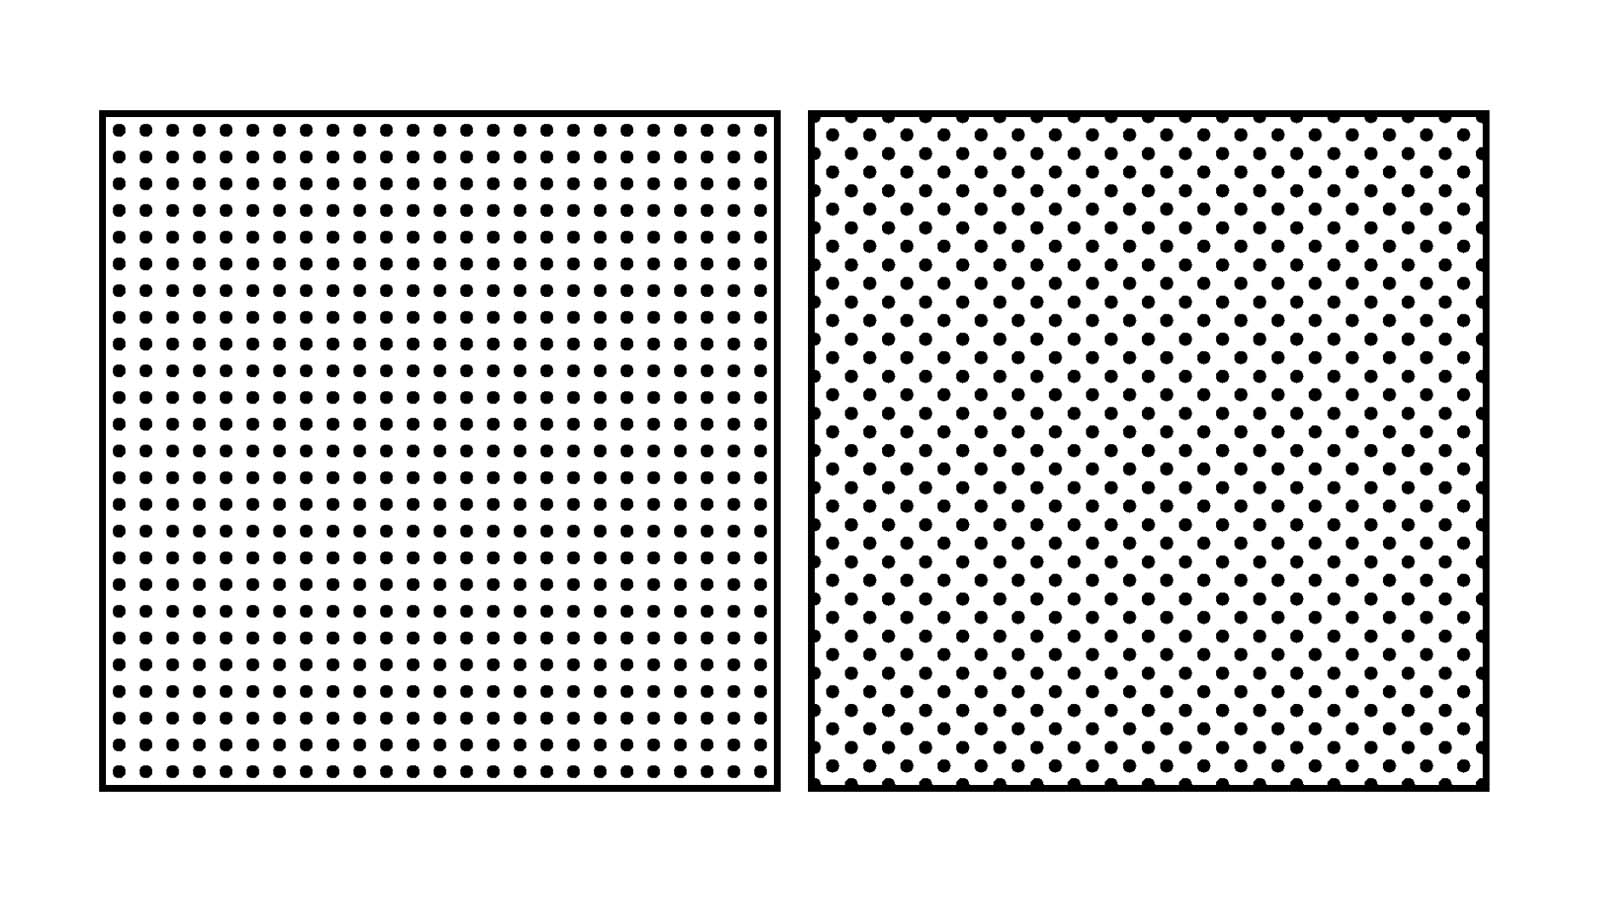
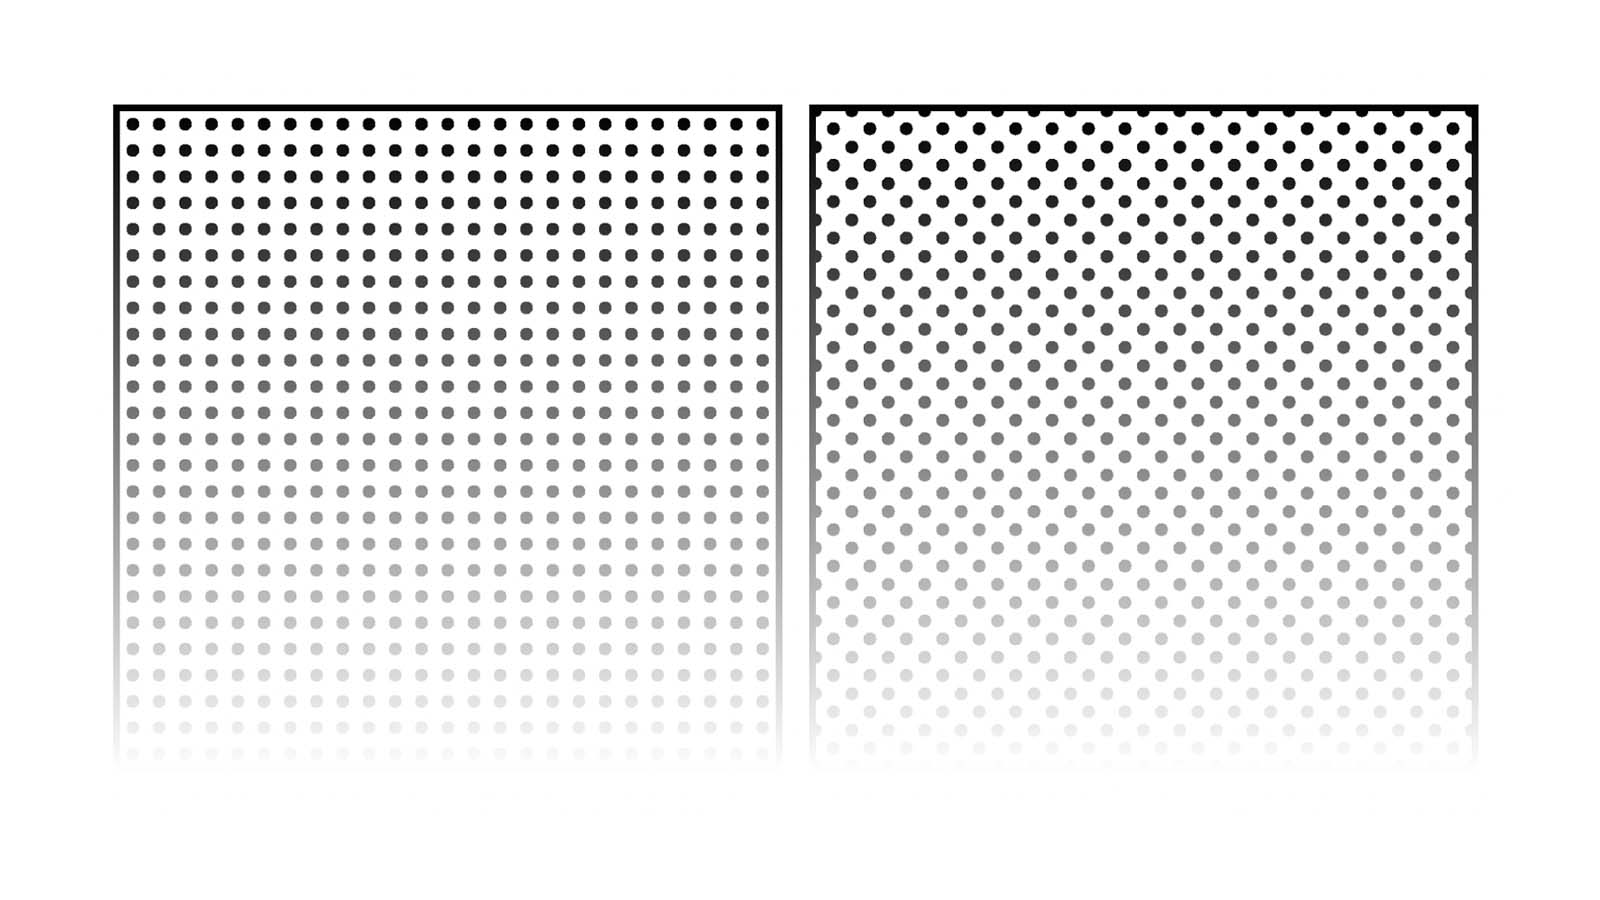
}This provides us a simple dotted grid. If we wish an angled grid as a substitute we might use two gradients overlaid, so long as the second color is clear (in any other case we wouldn’t see the gradient beneath).
.halftone {
  background-image: radial-gradient(
      circle at middle,
      black 0.25rem,
      clear 0
    ), radial-gradient(circle at middle, black 0.25rem, clear 0);
  background-size: 1.3rem 1.3rem;
  background-position: 0 0, 0.65rem 0.65rem;
}
The result’s subtly totally different.
We’re repeating a number of values right here, so we might make our code a bit extra concise (and readable) utilizing customized properties:
.halftone {
  --dotSize: 0.25rem;
  --bgSize: 1.35rem;
  --bgPosition: calc(var(--bgSize) / 2);

  background-image: radial-gradient(
      circle at middle,
      black var(--dotSize),
      clear 0
    ), radial-gradient(circle at middle, black var(--dotSize), clear 0);
  background-size: var(--bgSize) var(--bgSize);
  background-position: 0 0, var(--bgPosition) var(--bgPosition);
}
Utilizing customized properties means it’ll be a lot simpler to regulate particular person values afterward, as we refine our halftone sample: we’ll have only one place to replace them, as a substitute of a bunch of locations.
Masking
To create a halftone sample we’ll want to maneuver our background properties to a pseudo-element. It’s because shortly we’re going to use a distinction filter to the factor itself.
.halftone {
--dotSize: 0.25rem;
--stop1: 3%;
--stop2: 60%;
}
.halftone::after {
/* Cowl our factor */
content material: '';
place: absolute;
inset: 0;
/* Dotted background */
background-image: radial-gradient(
circle at middle,
black var(--dotSize),
clear 0
);
background-size: 1.3rem 1.3rem;
background-position: 0 0, 0.65rem 0.65rem;
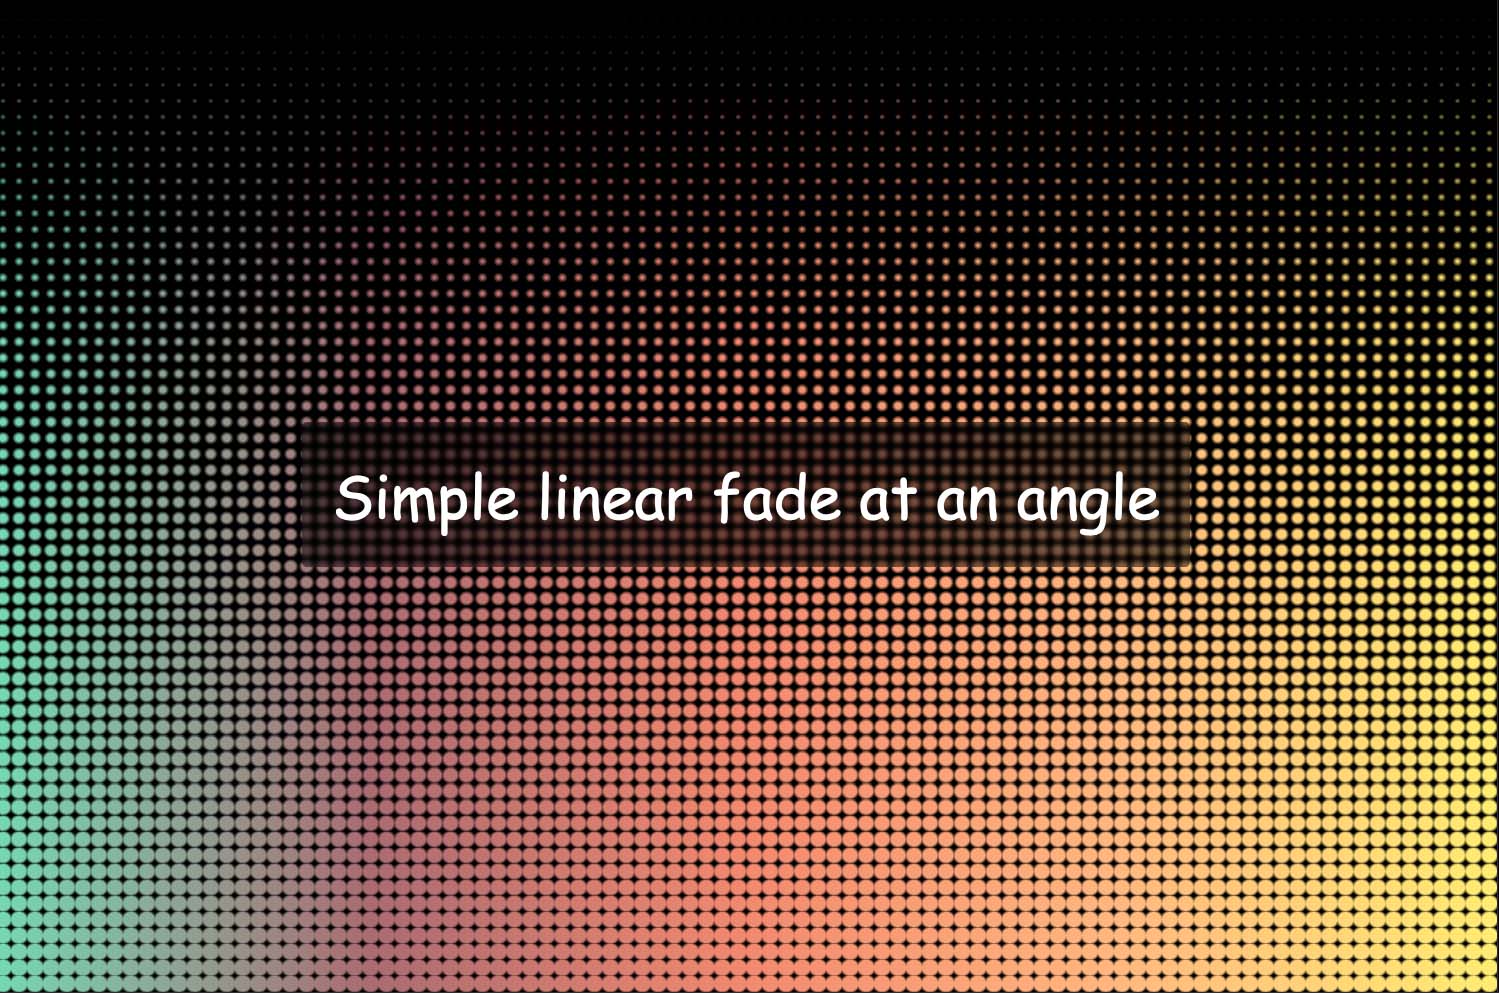
}The following step in creating our halftone sample is so as to add a masks. To start out with, we’ll use a easy linear gradient, fading black to clear from high to backside.
.halftone::after {
  mask-image: linear-gradient(rgb(0 0 0), rgb(0 0 0 / 0));
}
(Older variations of Safari require prefixed masks properties, e.g. -webkit-mask-image. I’m excluding them right here for brevity.)
Making use of the masks doesn’t end in a halftone sample, because the dots are all the identical dimension — they merely seem to grow to be extra clear from high to backside. We’ll have to revisit our background sample to vary that.
Blurring the background
As a substitute of utilizing arduous stops for our radial gradient background, we’re going to present them clean edges by fading them, extra like a typical gradient. We’ll want two stops: the purpose at which the black begins to fade (--stop1) and the purpose at which it needs to be absolutely clear (--stop2). The precise values don’t matter an excessive amount of for now, as we will at all times alter them later — once more, customized properties make it simple to do that.
.halftone {
  --stop1: 0.06rem;
  --stop2: 0.65rem;
}

.halftone::after {
  background-image: radial-gradient(
    circle at middle,
    black var(--stop1),
    clear var(--stop2)
  );
}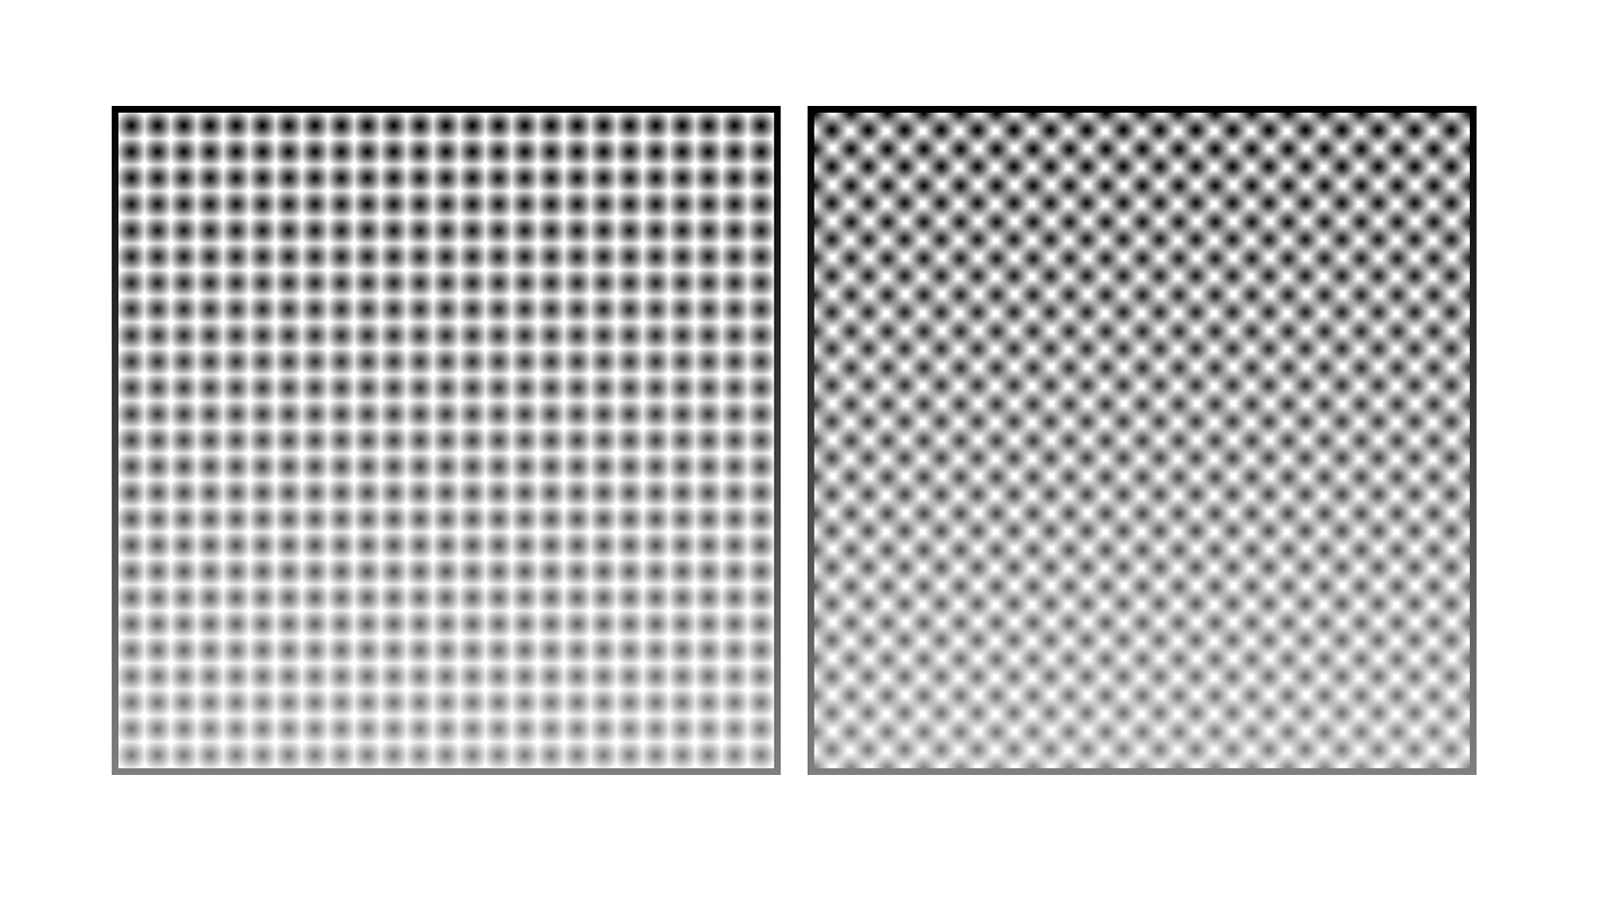
You’ll discover now that our background now seems to be nothing like a halftone. Nevertheless it’ll all come collectively within the closing step.
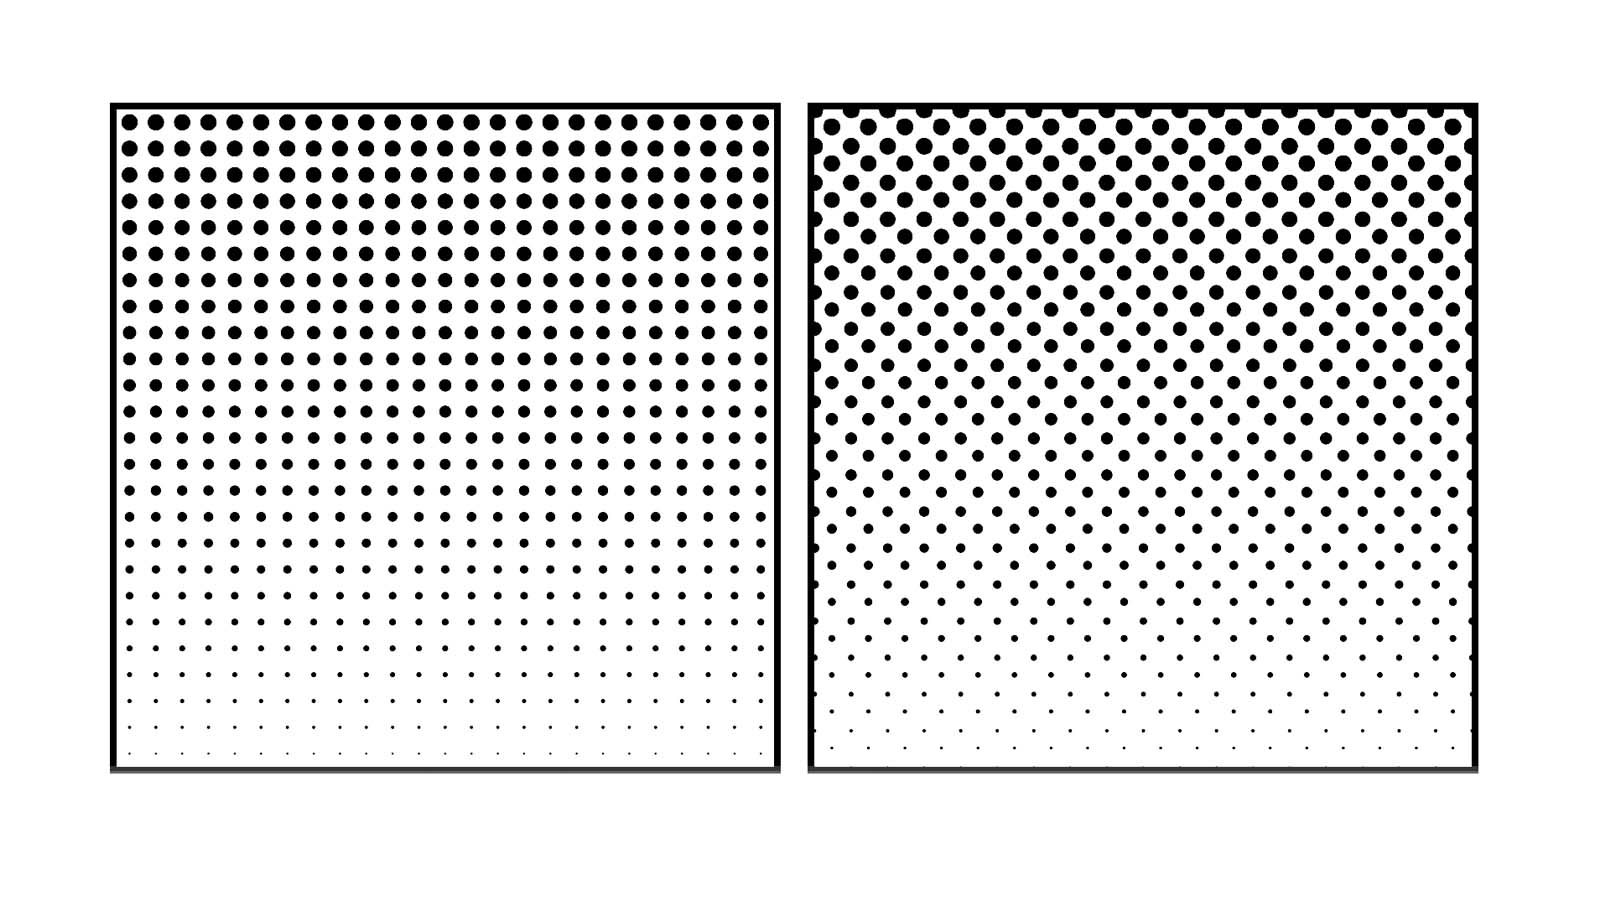
Including distinction
Lastly, we add a distinction filter to our factor (not the pseudo-element). A background color can also be essential, in any other case we received’t see the distinction.
.halftone {
  background: white;
  filter: distinction(50);
}
The aim right here is so as to add sufficient distinction in order that our radial gradient background not seems blurred, however begins to resemble the dotted sample we had initially — besides now you need to discover that the dots differ in dimension, relying on to what diploma they’re masked by the linear gradient. In case you don’t see a lot distinction at this level, attempt adjusting the values of the radial gradient stops (within the earlier step). The bigger the distinction between --stop and --stop3, the larger the variation in dot dimension.
The pale impact is at present a bit of abrupt, so let’s alter the masks to fade to a much less clear worth: about 0.5 on the alpha channel ought to do it, guaranteeing we don’t find yourself with some areas with no dots in any respect.
.halftone::after {
  mask-image: linear-gradient(rgb(0 0 0), rgb(0 0 0 / 0.5));
}
Right here’s the total demo.
See the Pen
Easy halftone backgrounds by Michelle Barker (@michellebarker)
on CodePen.
Colouring the background with mix modes
We now have a black and white halftone sample, however we would need to add some color. There’s one downside: altering the background color of our factor will end in a distorted impact, due to the distinction filter. (Strive altering the background worth of the .halftone class within the above demo to a lightweight color to see the issue.)
We are able to get round this through the use of mix-blend-mode. Let’s add a background to our physique. (We might alternatively wrap every factor, as Ana does in her demo.)
physique {
  background: linear-gradient(45deg, purple, blue);
}
Then we’ll apply the multiply mix mode to the halftone factor. This may end result within the white areas being rendered clear, whereas the dots stay black. The display screen mix mode has the alternative impact: the white background is preserved, and the black dots will as a substitute present the background beneath.
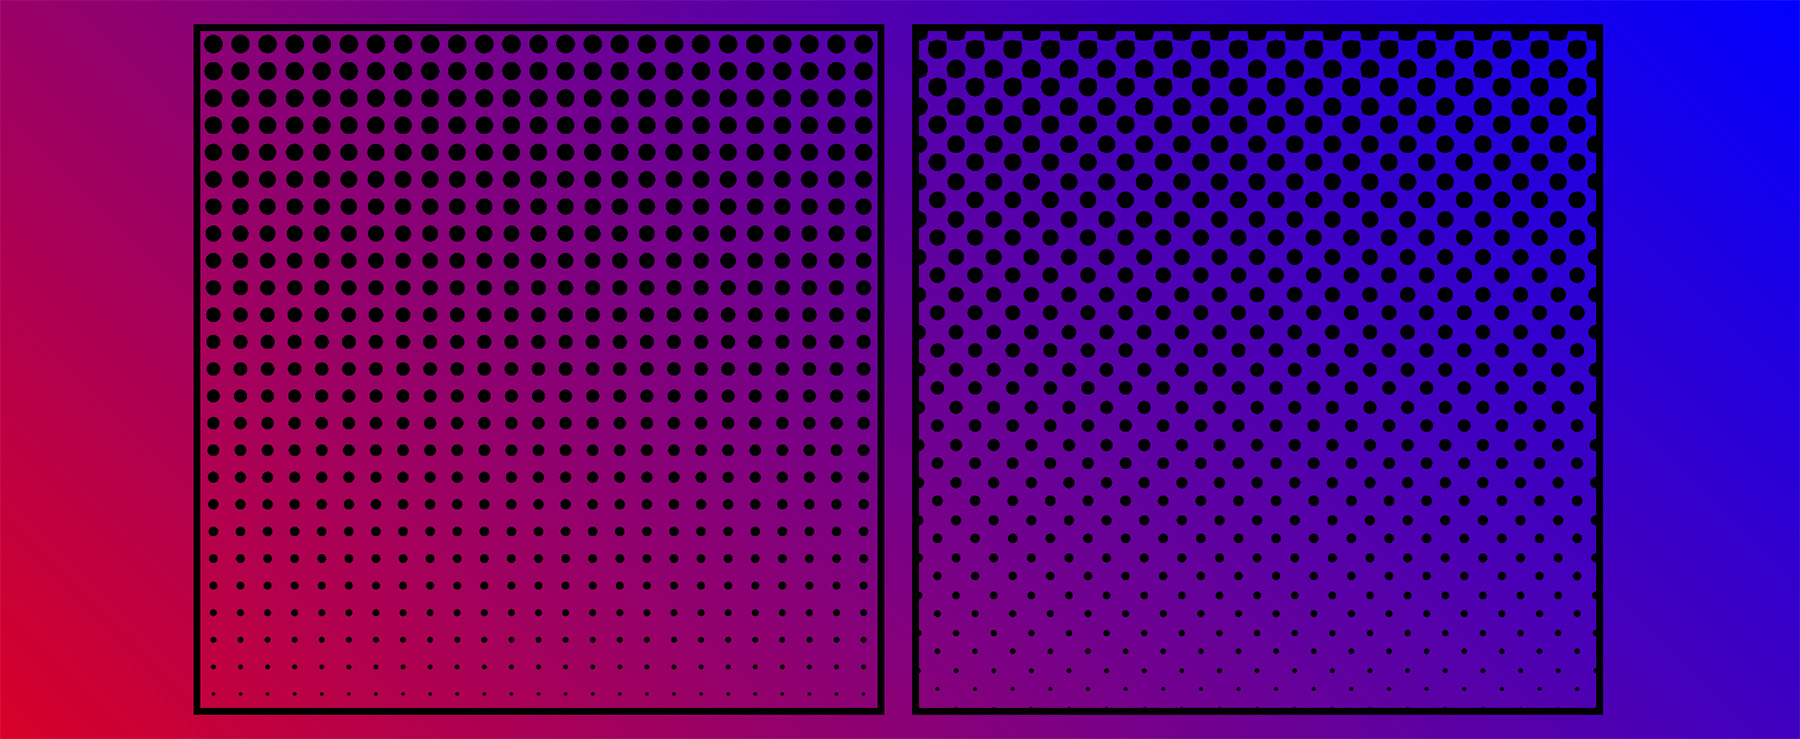
multiply mix mode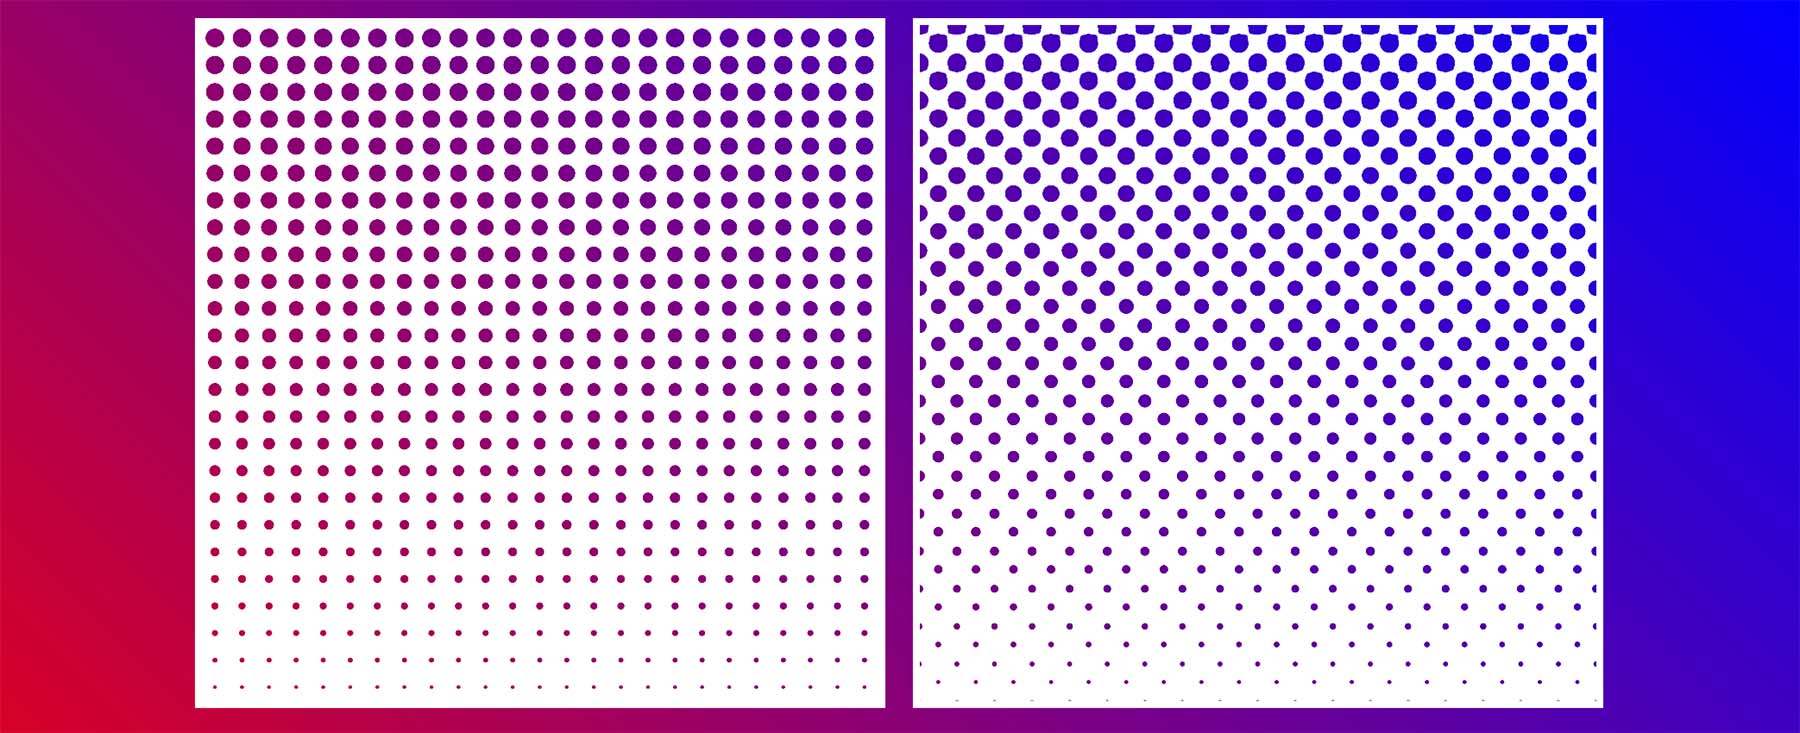
display screen mix modeWe might alternatively render a black background with the dots the color of the background, by inverting the colors of the backgrounds. We are able to both swap these colors from black to white (and vice versa), or we might use the invert filter, as I’m doing right here.
.halftone {
  filter: distinction(50) invert(var(--invert, 0));
}

.halftone--inverted {
  --invert: 1;
}
This demo reveals the totally different results produced by totally different mixtures of mix modes and the invert filter.
See the Pen
Halftone background with mix modes by Michelle Barker (@michellebarker)
on CodePen.
Totally different masks results
We’re utilizing a easy linear gradient as a masks, however there are limitless prospects for fascinating, inventive results. We might use radial gradients, conic gradients, repeating gradients (or a mixture!). We are able to use pictures too: Both SVGs or clear PNGs. This demo reveals a couple of totally different results. You too can alter a couple of customized properties utilizing the controls to discover some totally different choices.
See the Pen
Halftone sample explorer by Michelle Barker (@michellebarker)
on CodePen.
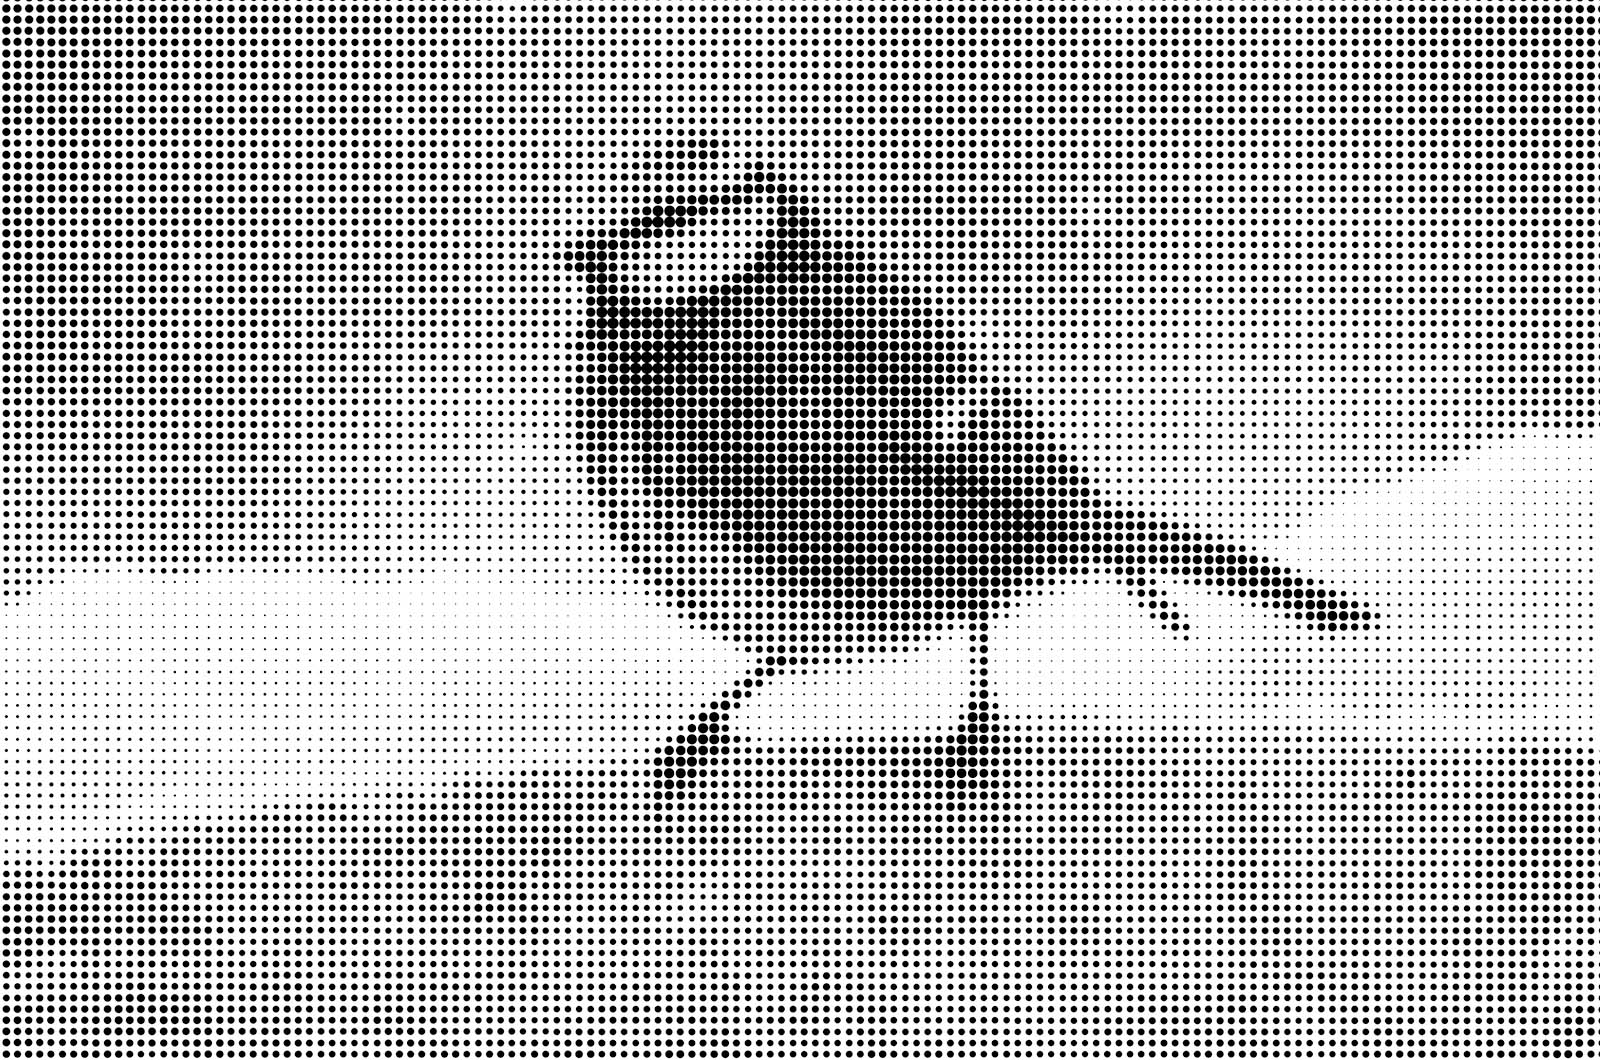
Ana has one other demo that applies a halftone therapy to non-transparent pictures. We’re not going to stroll via it right here, but it surely’s one other intriguing one to review!
Limitations
As a result of we’re utilizing a filter and mix mode, both our dots or the background ideally must be white or black. If we attempt making use of a distinct color we’re not at all times going to get the end result we hope for, as the color will probably be distorted. Maybe there’s one other approach to do it? Nonetheless, it’s fascinating to know we will create these form of results with solely CSS!