


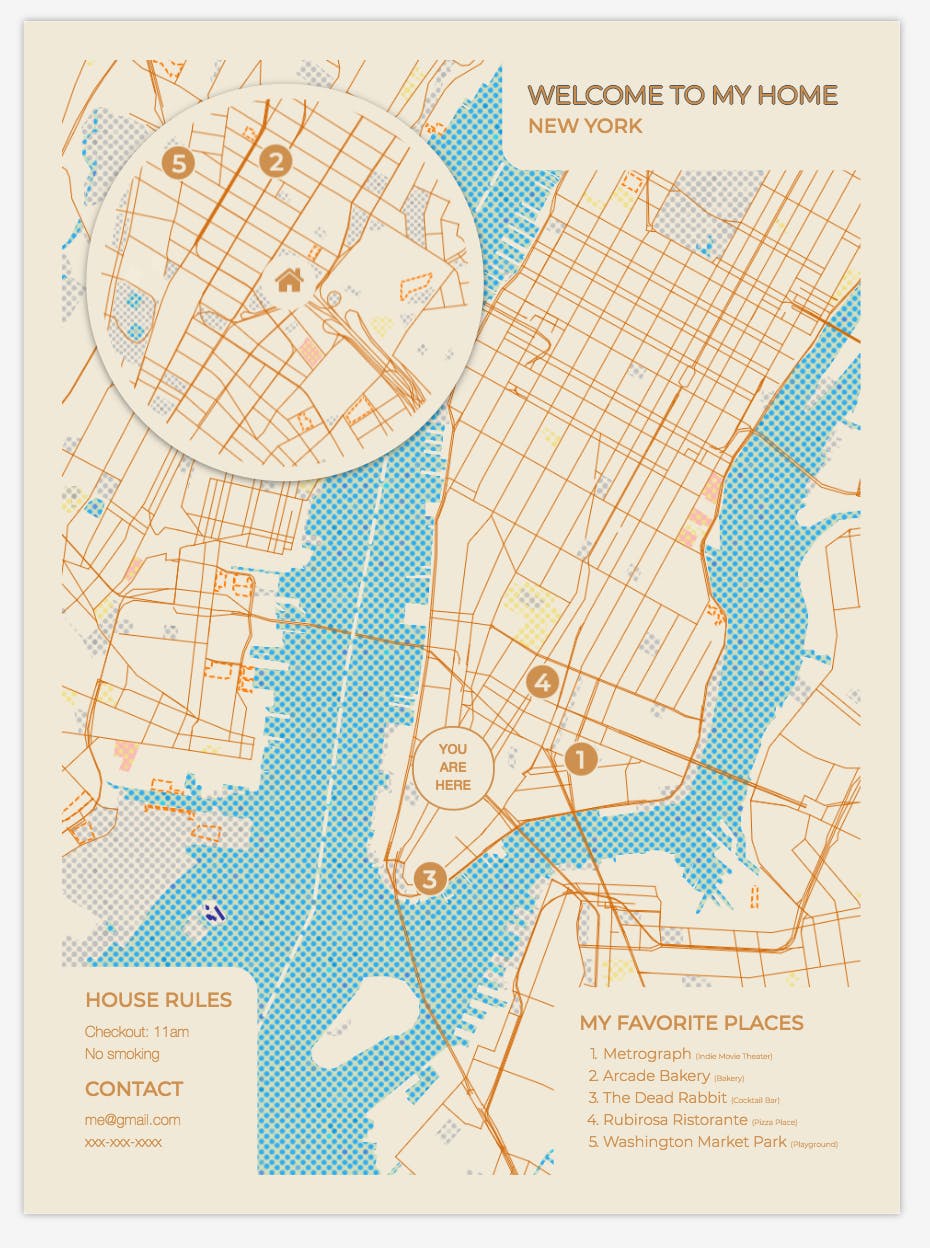
Hello beautiful individuals! 👋 Final yr, I noticed a challenge on Product Hunt which allowed individuals to generate posters from maps. The web site has since closed down and the corporate has been acquired by Airbnb. That is what the output regarded like:
Now, I used to be enthusiastic about determining how they had been in a position to render this map. My expertise with maps was restricted to Google Maps solely so I used to be excited to discover the world of customized map era. I thought of this challenge for some time, tried engaged on it however shortly gave up due to how troublesome it was to know the fundamentals and get a map rendering pipeline working regionally.
It wasn’t till lately that I got here throughout an article the place the writer used Mapbox Studio to create a blueprint type map. That publish rekindled my curiosity in customized map era and I knew that with the provision of Open Avenue Maps there may be positively an Open Supply software program which I can use.
Offline rendering choices:
I may use tileserver-gl or openmaptiles. Each are developed by the identical firm. The distinction is summed up by one in all their gross sales individuals like this:
OpenMapTiles Map Server is best fitted to a manufacturing surroundings. It’s a whole package deal with caching and built-in map companies (WMTS/WMS). It is usually a lot simpler to arrange than TileServerGL. That is particularly helpful when working with vector map knowledge (corresponding to OpenMapTiles) and dynamically creating raster tiles from such knowledge.
When you’ve got raster tiles (already ready upfront) and also you solely must serve them, the TileServerGL is completely ample. There are additionally alternate options like tileserver-gl-light (with out rasterization) or tileserver-php.
I made a decision to go along with tileserver-gl.
Let me let you know proper now that I’m on no account an professional in mapping. I did this challenge out of non-public curiosity and can’t assure the correctness of the data on this web page. I attempted my finest to verify all the pieces I wrote is right however errors can nonetheless creep in. In the event you discover any error simply e mail me and I’ll repair it. Thanks!
Putting in the Docker model
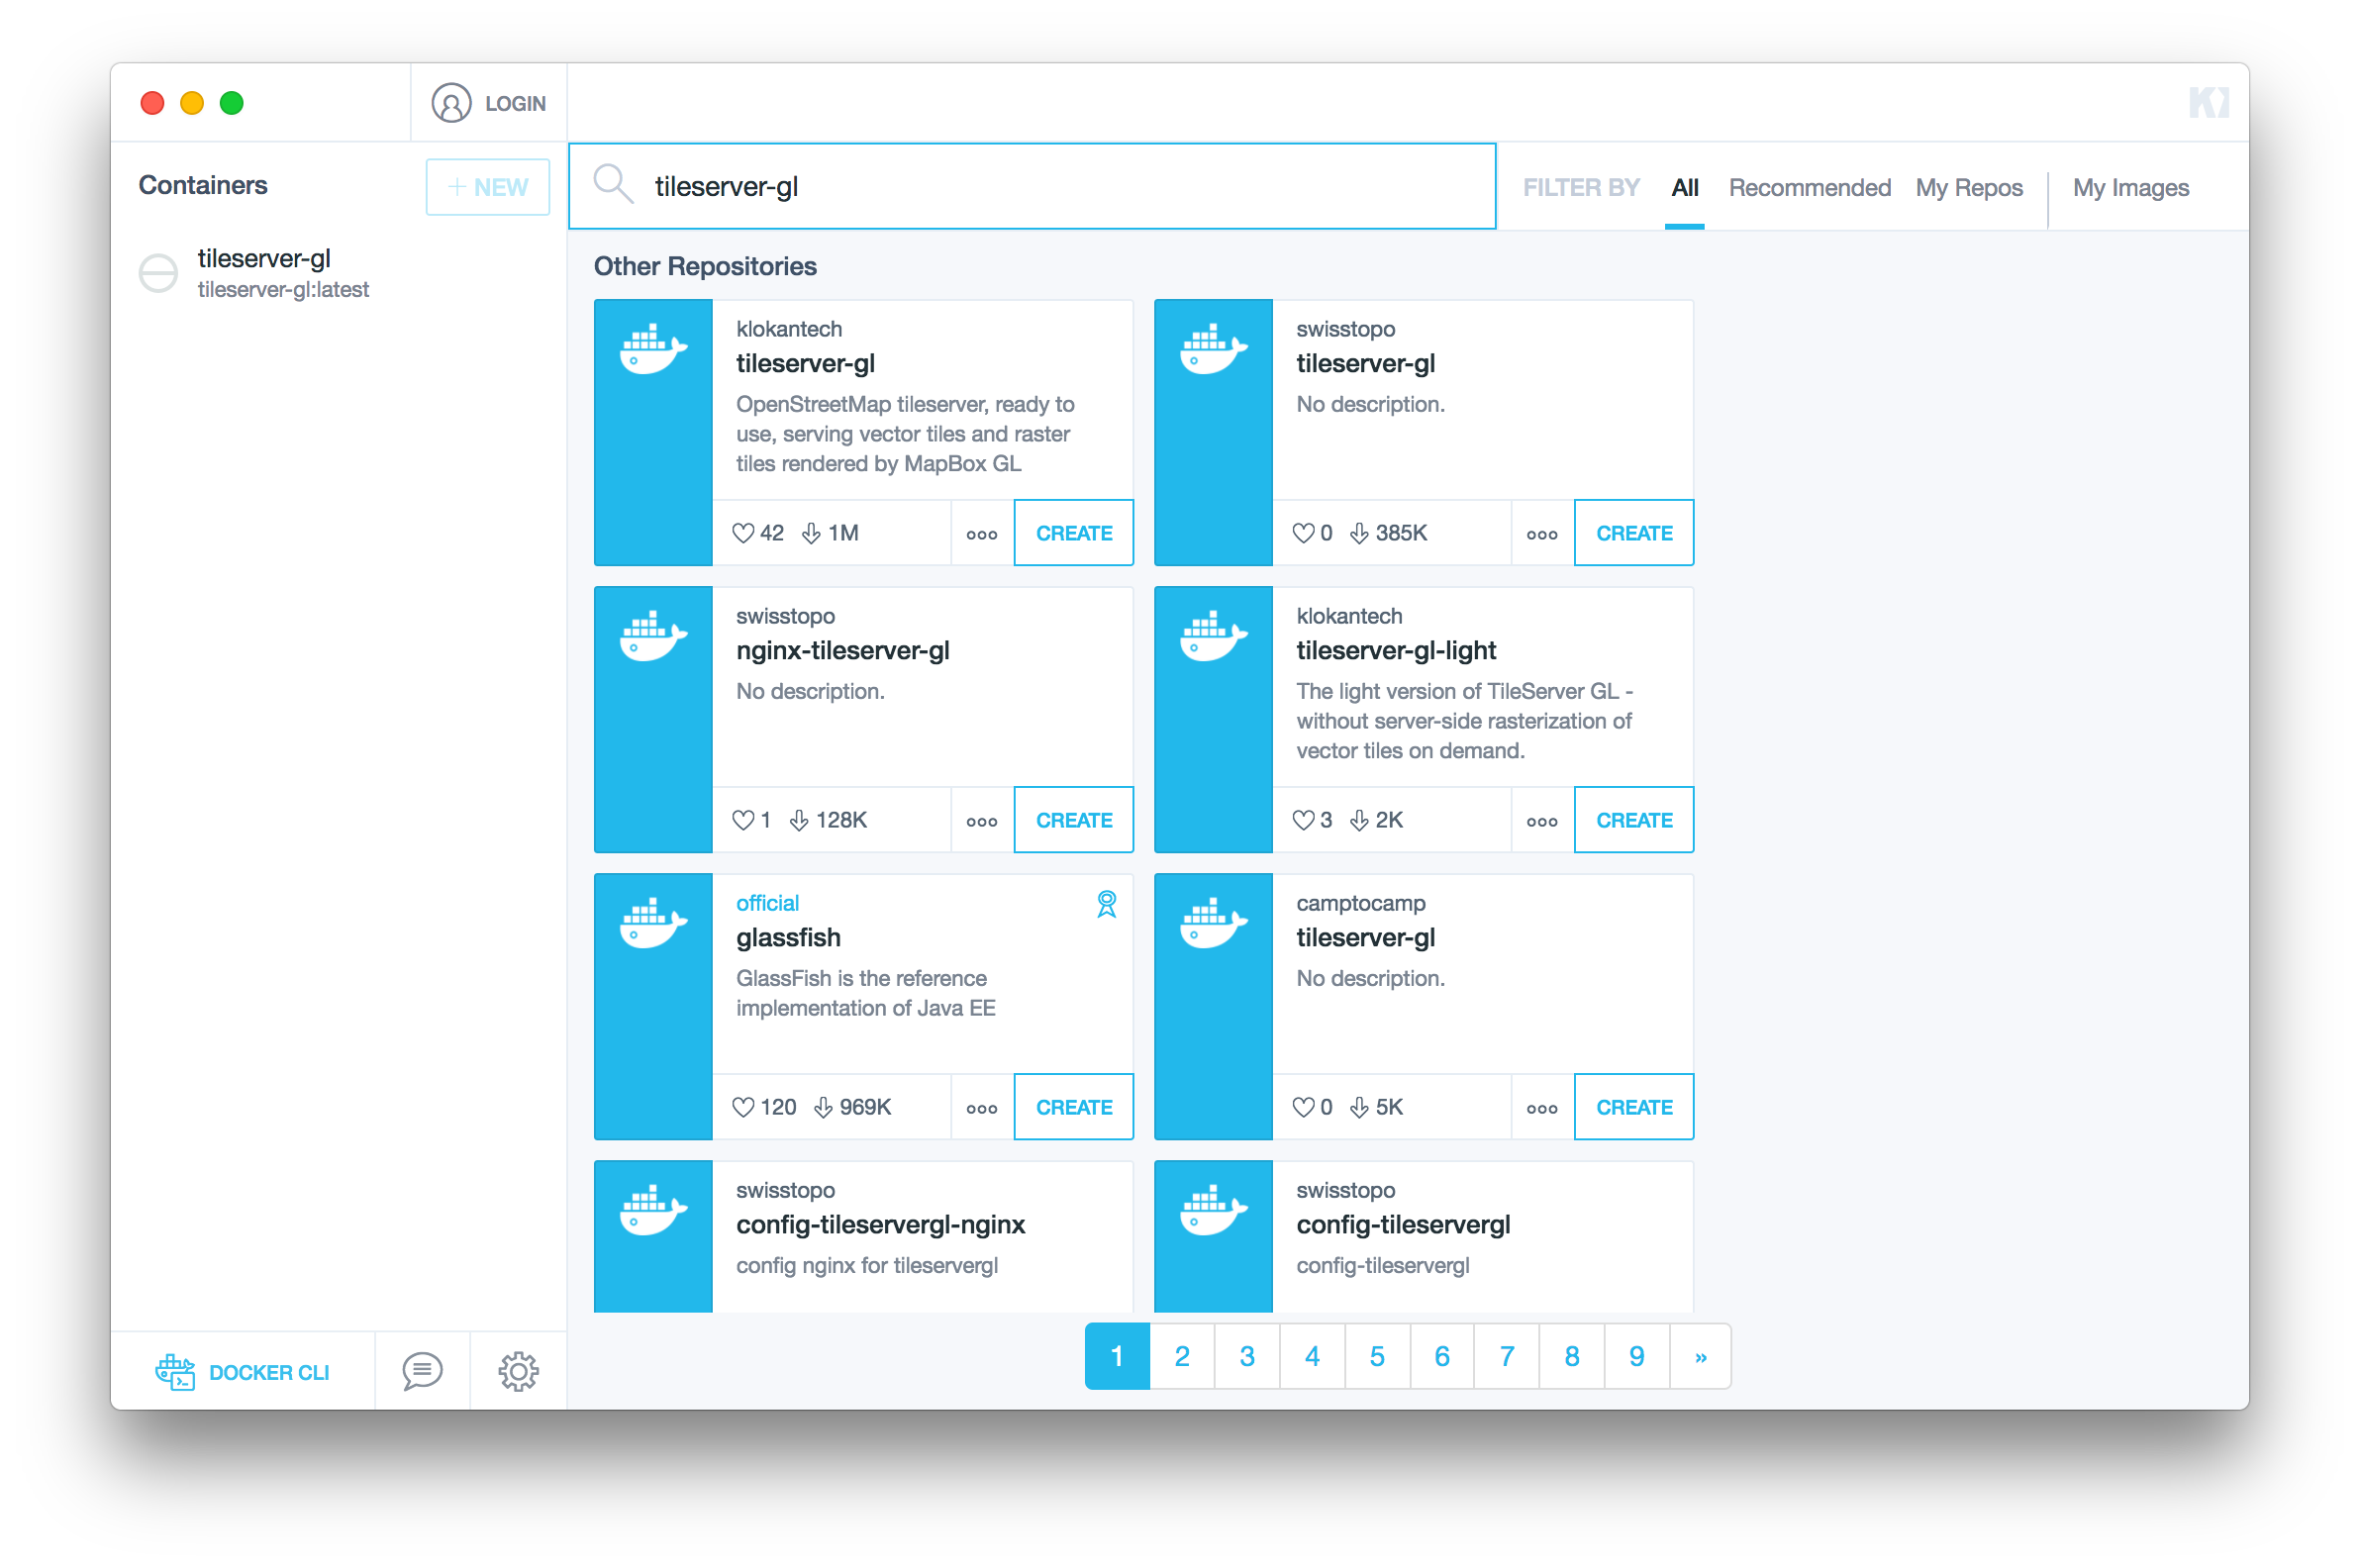
Set up Docker and Kitematic in the event you don’t have it already. Open Kitematic and create a container utilizing the tileserver-gl repo by Klokantech:
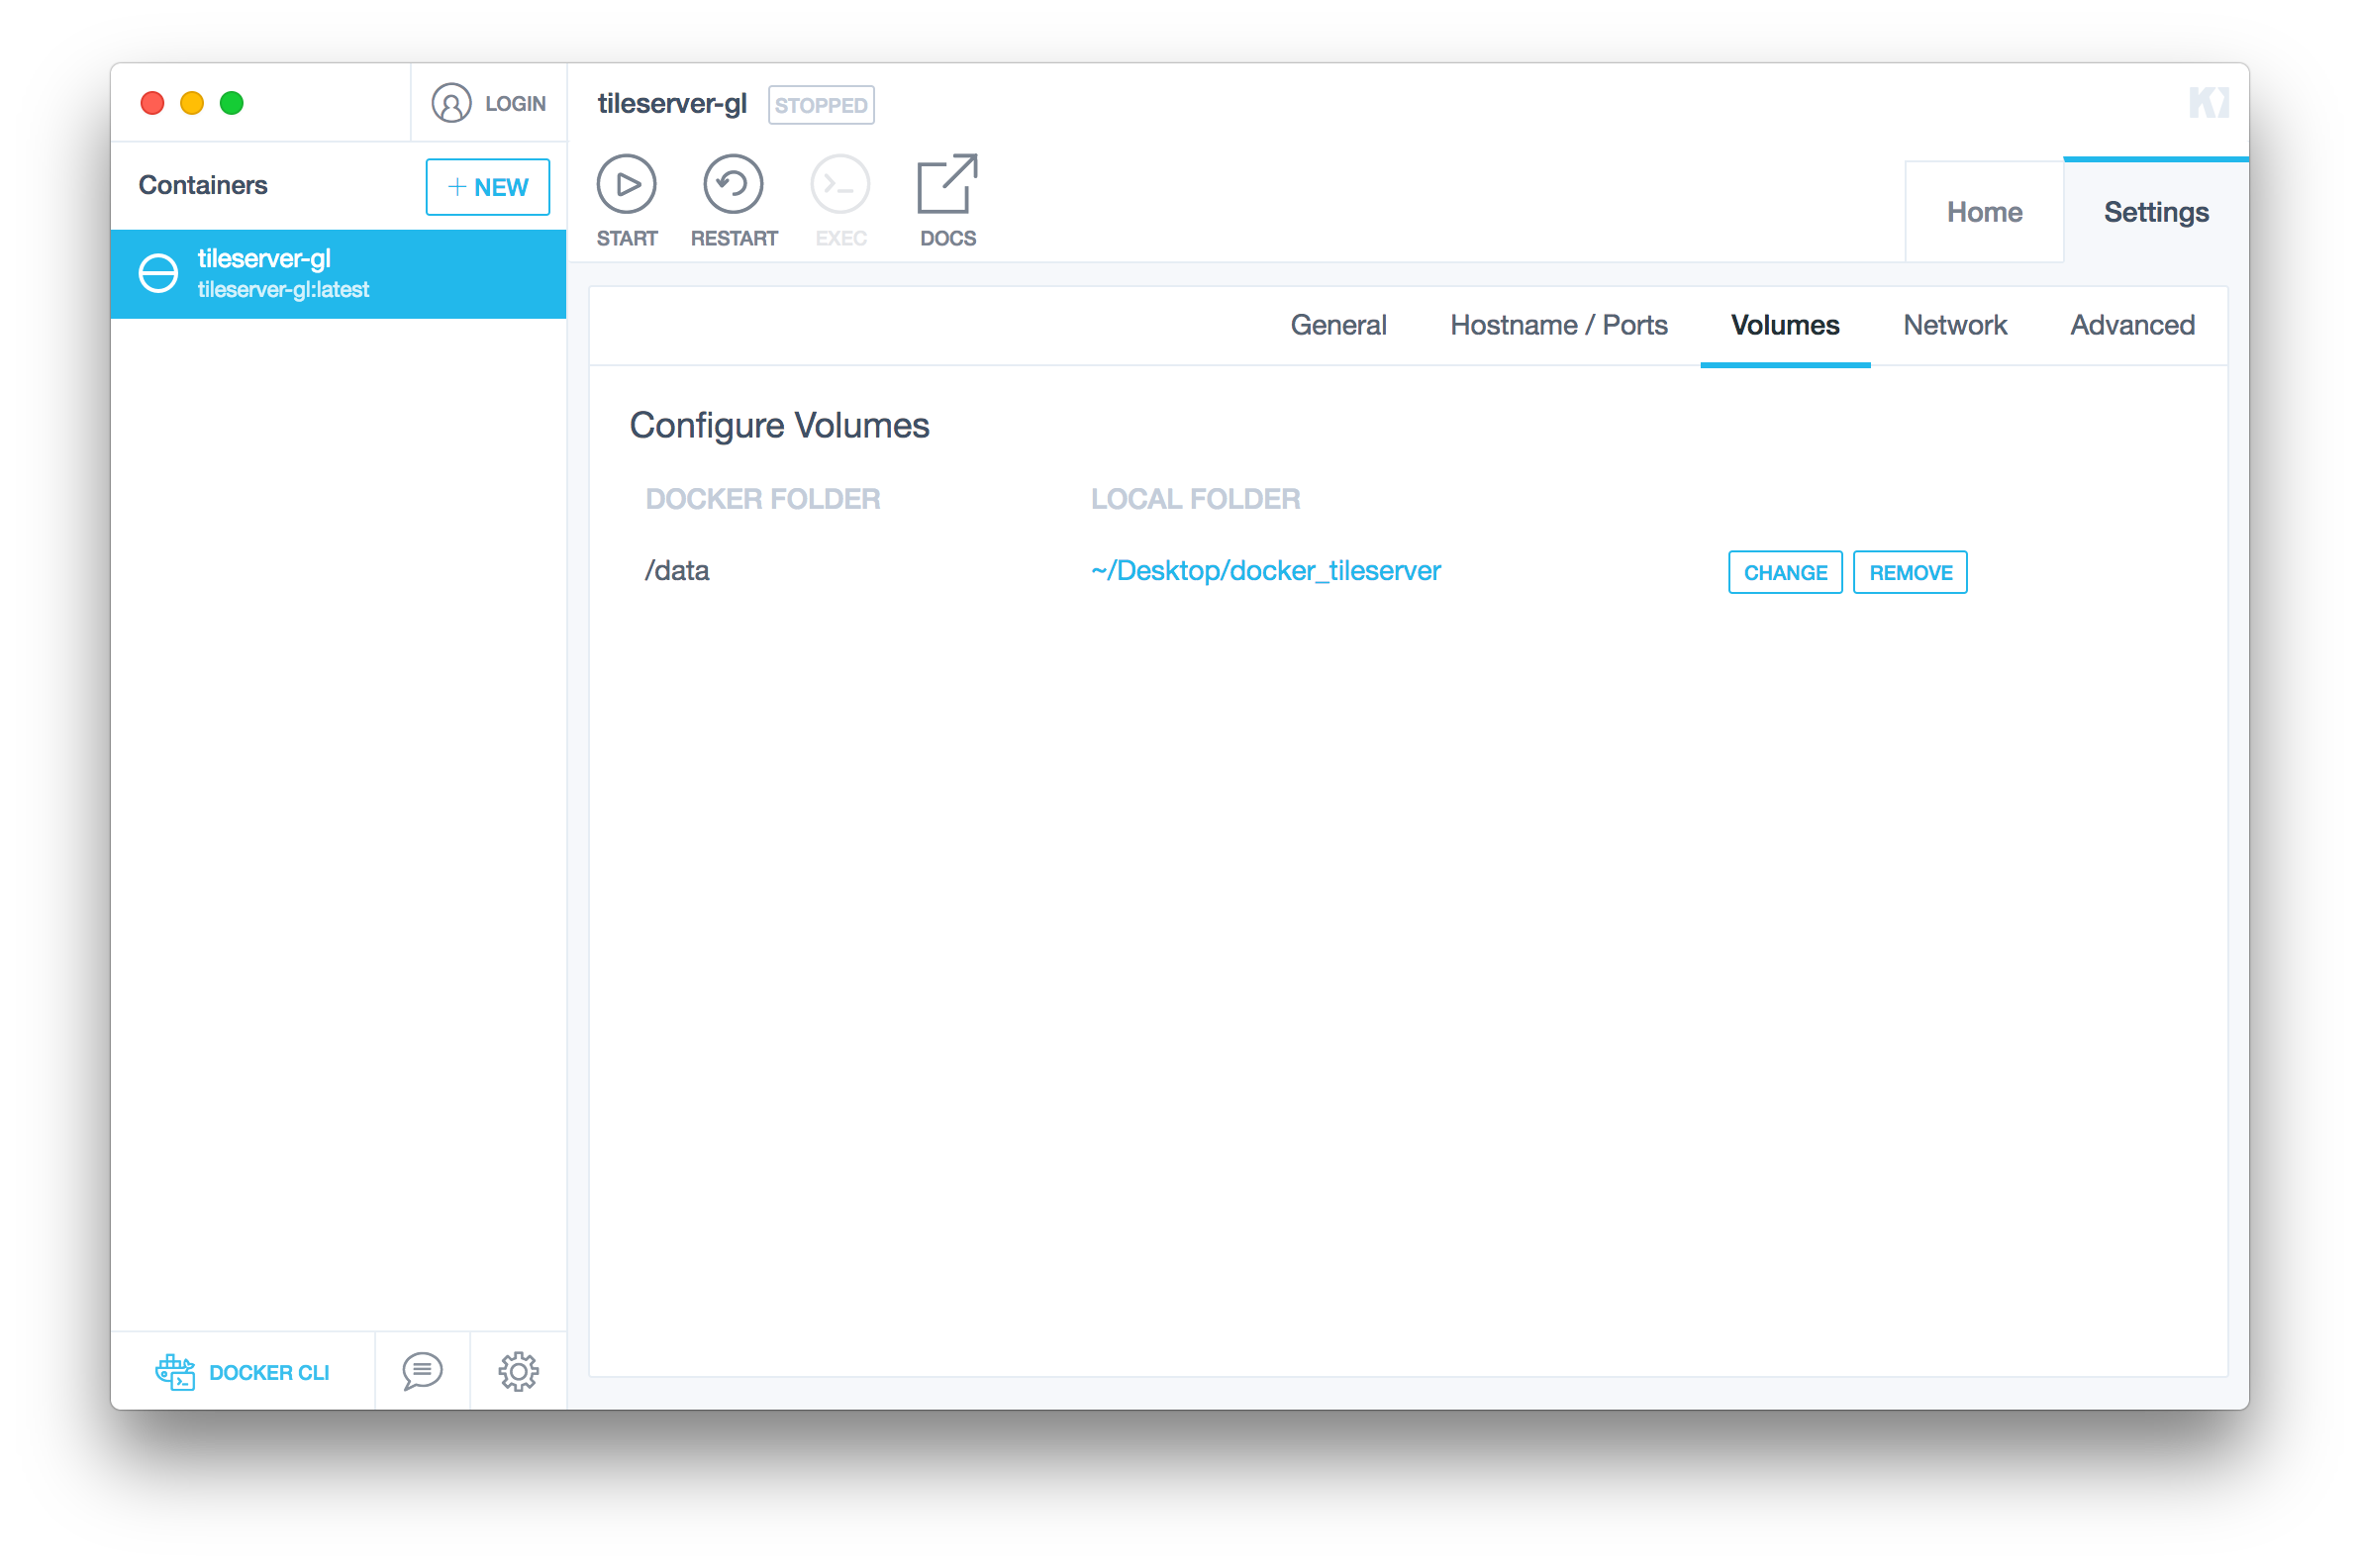
Now we have to map a neighborhood folder to the knowledge folder for the tileserver-gl container. You are able to do that in Kitematic by clicking on the container identify within the left column, clicking on “settings” on the high proper after which selecting the “Volumes” tab.
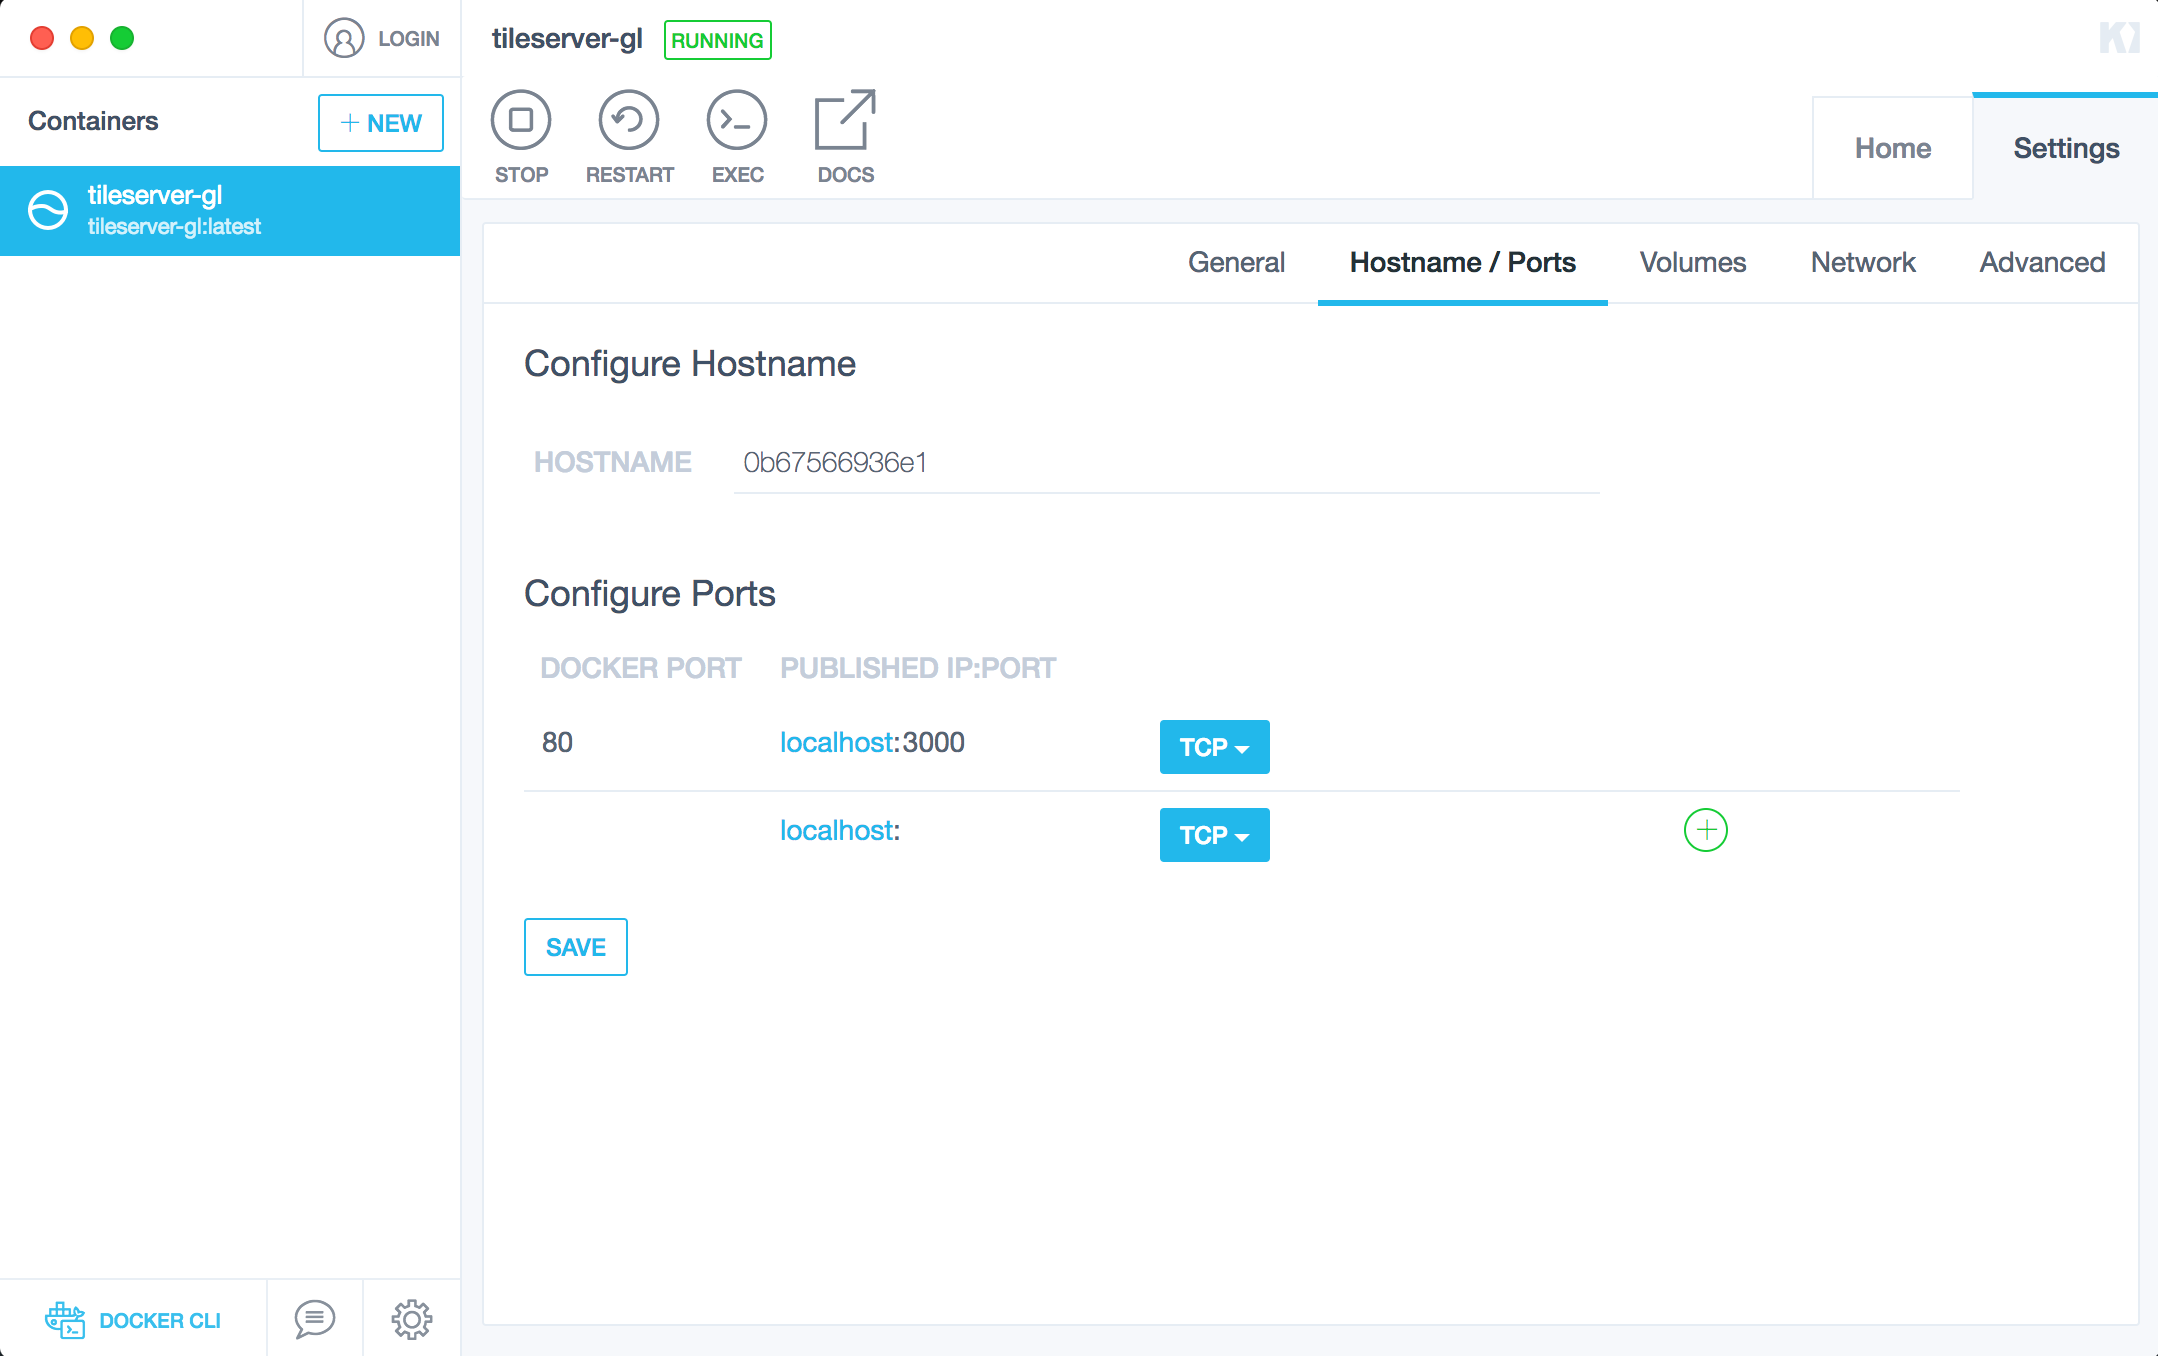
One other factor I like doing is mapping the container port to a identified host port so that each time the container is run I can entry tileserver-gl on the identical port within the browser. You are able to do that by going to the Hostname / Ports tab.
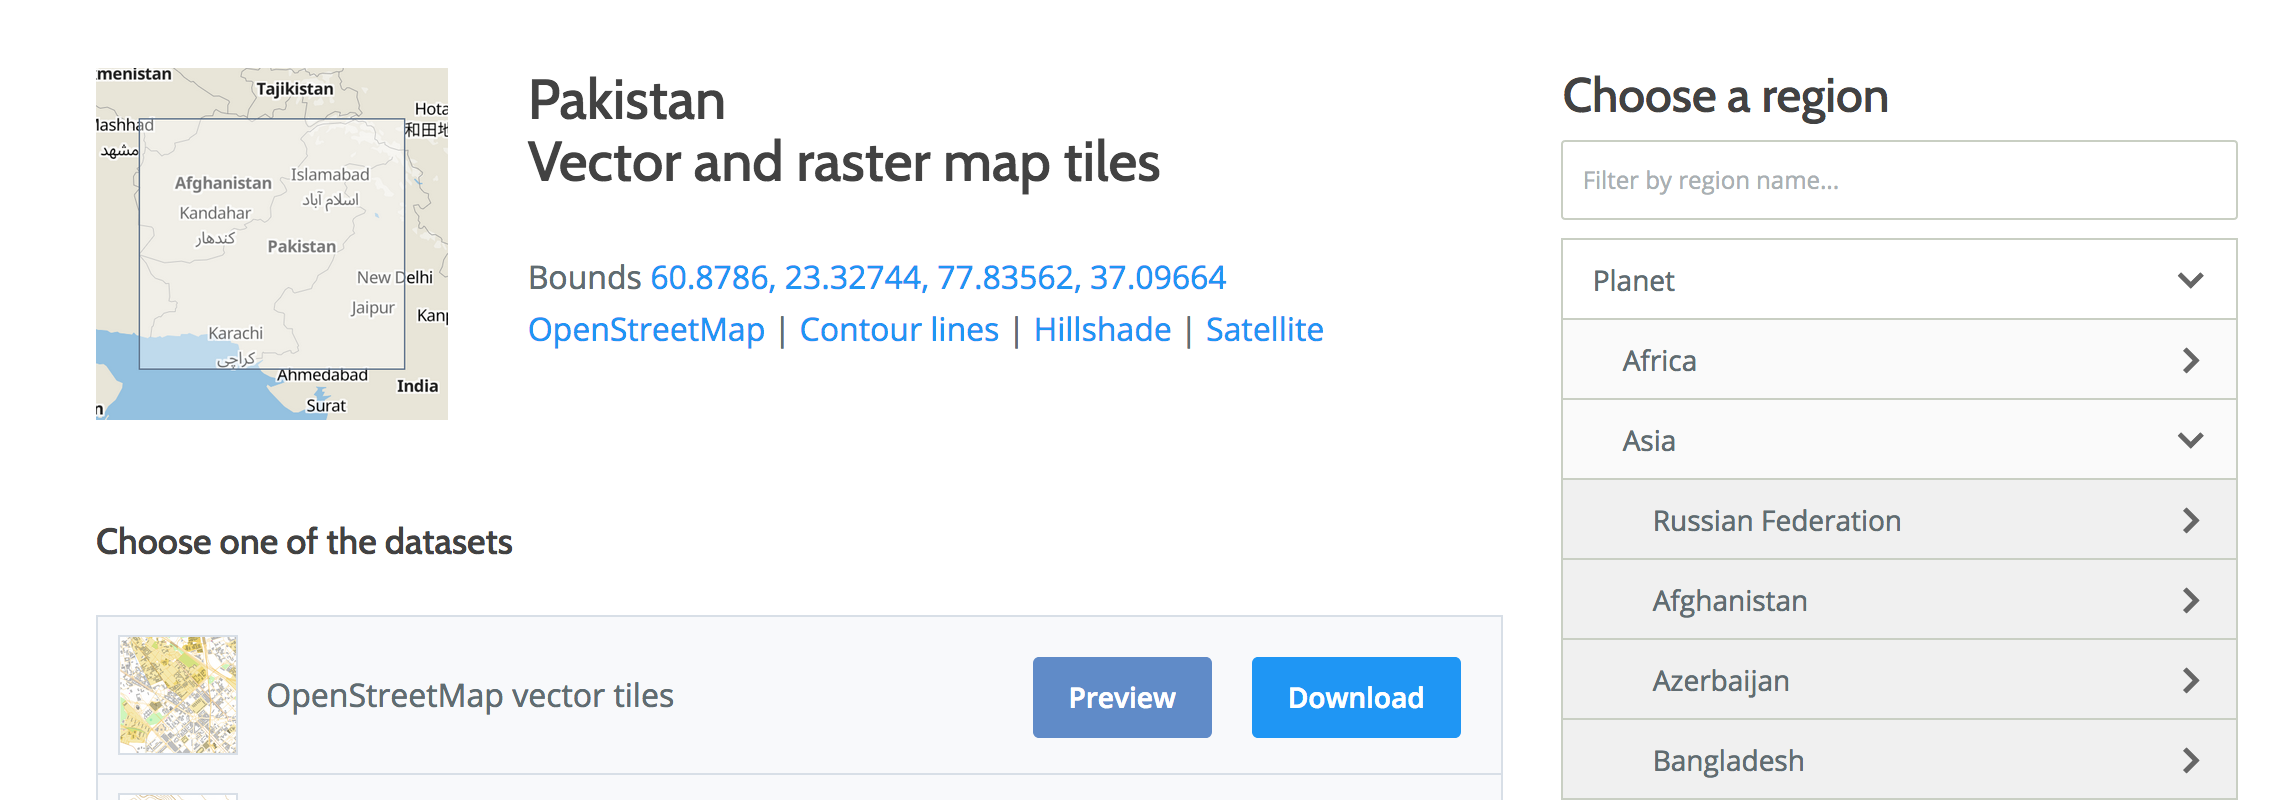
Subsequent step is to obtain some tile knowledge. We shall be downloading a mbtiles file for Pakistan. This mbtiles file is a compressed file which comprises all the data you see in a standard map. We shall be downloading the OpenStreetMap vector tiles.
Now put the downloaded file within the native folder you mapped above to the /knowledge folder for the container. In my case, I mapped a docker_tileserver folder on my Desktop because the /knowledge folder on the container.
Making a configuration file
By default tileserver-gl already has a configuration file however now that we wish to use customized mbtiles we have to create a config file. Begin by making a config.json file within the mapped /knowledge folder. Subsequent, populate it with the next content material:
{
  "choices": {
    "paths": {
      "root": "/usr/src/app/node_modules/tileserver-gl-styles",
      "fonts": "fonts",
      "kinds": "kinds",
      "mbtiles": "/knowledge"
    },
    "serveStaticMaps": true,
    "formatQuality": {
      "jpeg": 90,
      "webp": 90
    },
    "maxSize": 8192,
    "pbfAlias": "pbf"
  },
  "kinds": {
    "klokantech-basic": {
      "type": "klokantech-basic/type.json",
      "tilejson": {
        "bounds": [60.8786, 23.32744, 77.83562, 37.09664]
      }
    },
    "osm-bright": {
      "type": "osm-bright/type.json",
      "tilejson": {
        "bounds": [60.8786, 23.32744, 77.83562, 37.09664]
      }
    }
  },
  "knowledge": {
    "v3": {
      "mbtiles": "/knowledge/2017-07-03_asia_pakistan.mbtiles"
    }
  }
}
We haven’t added something new within the config file. Go to Kitematic and restart the server. You must have the ability to entry localhost:3000 and be greeted with this web page:
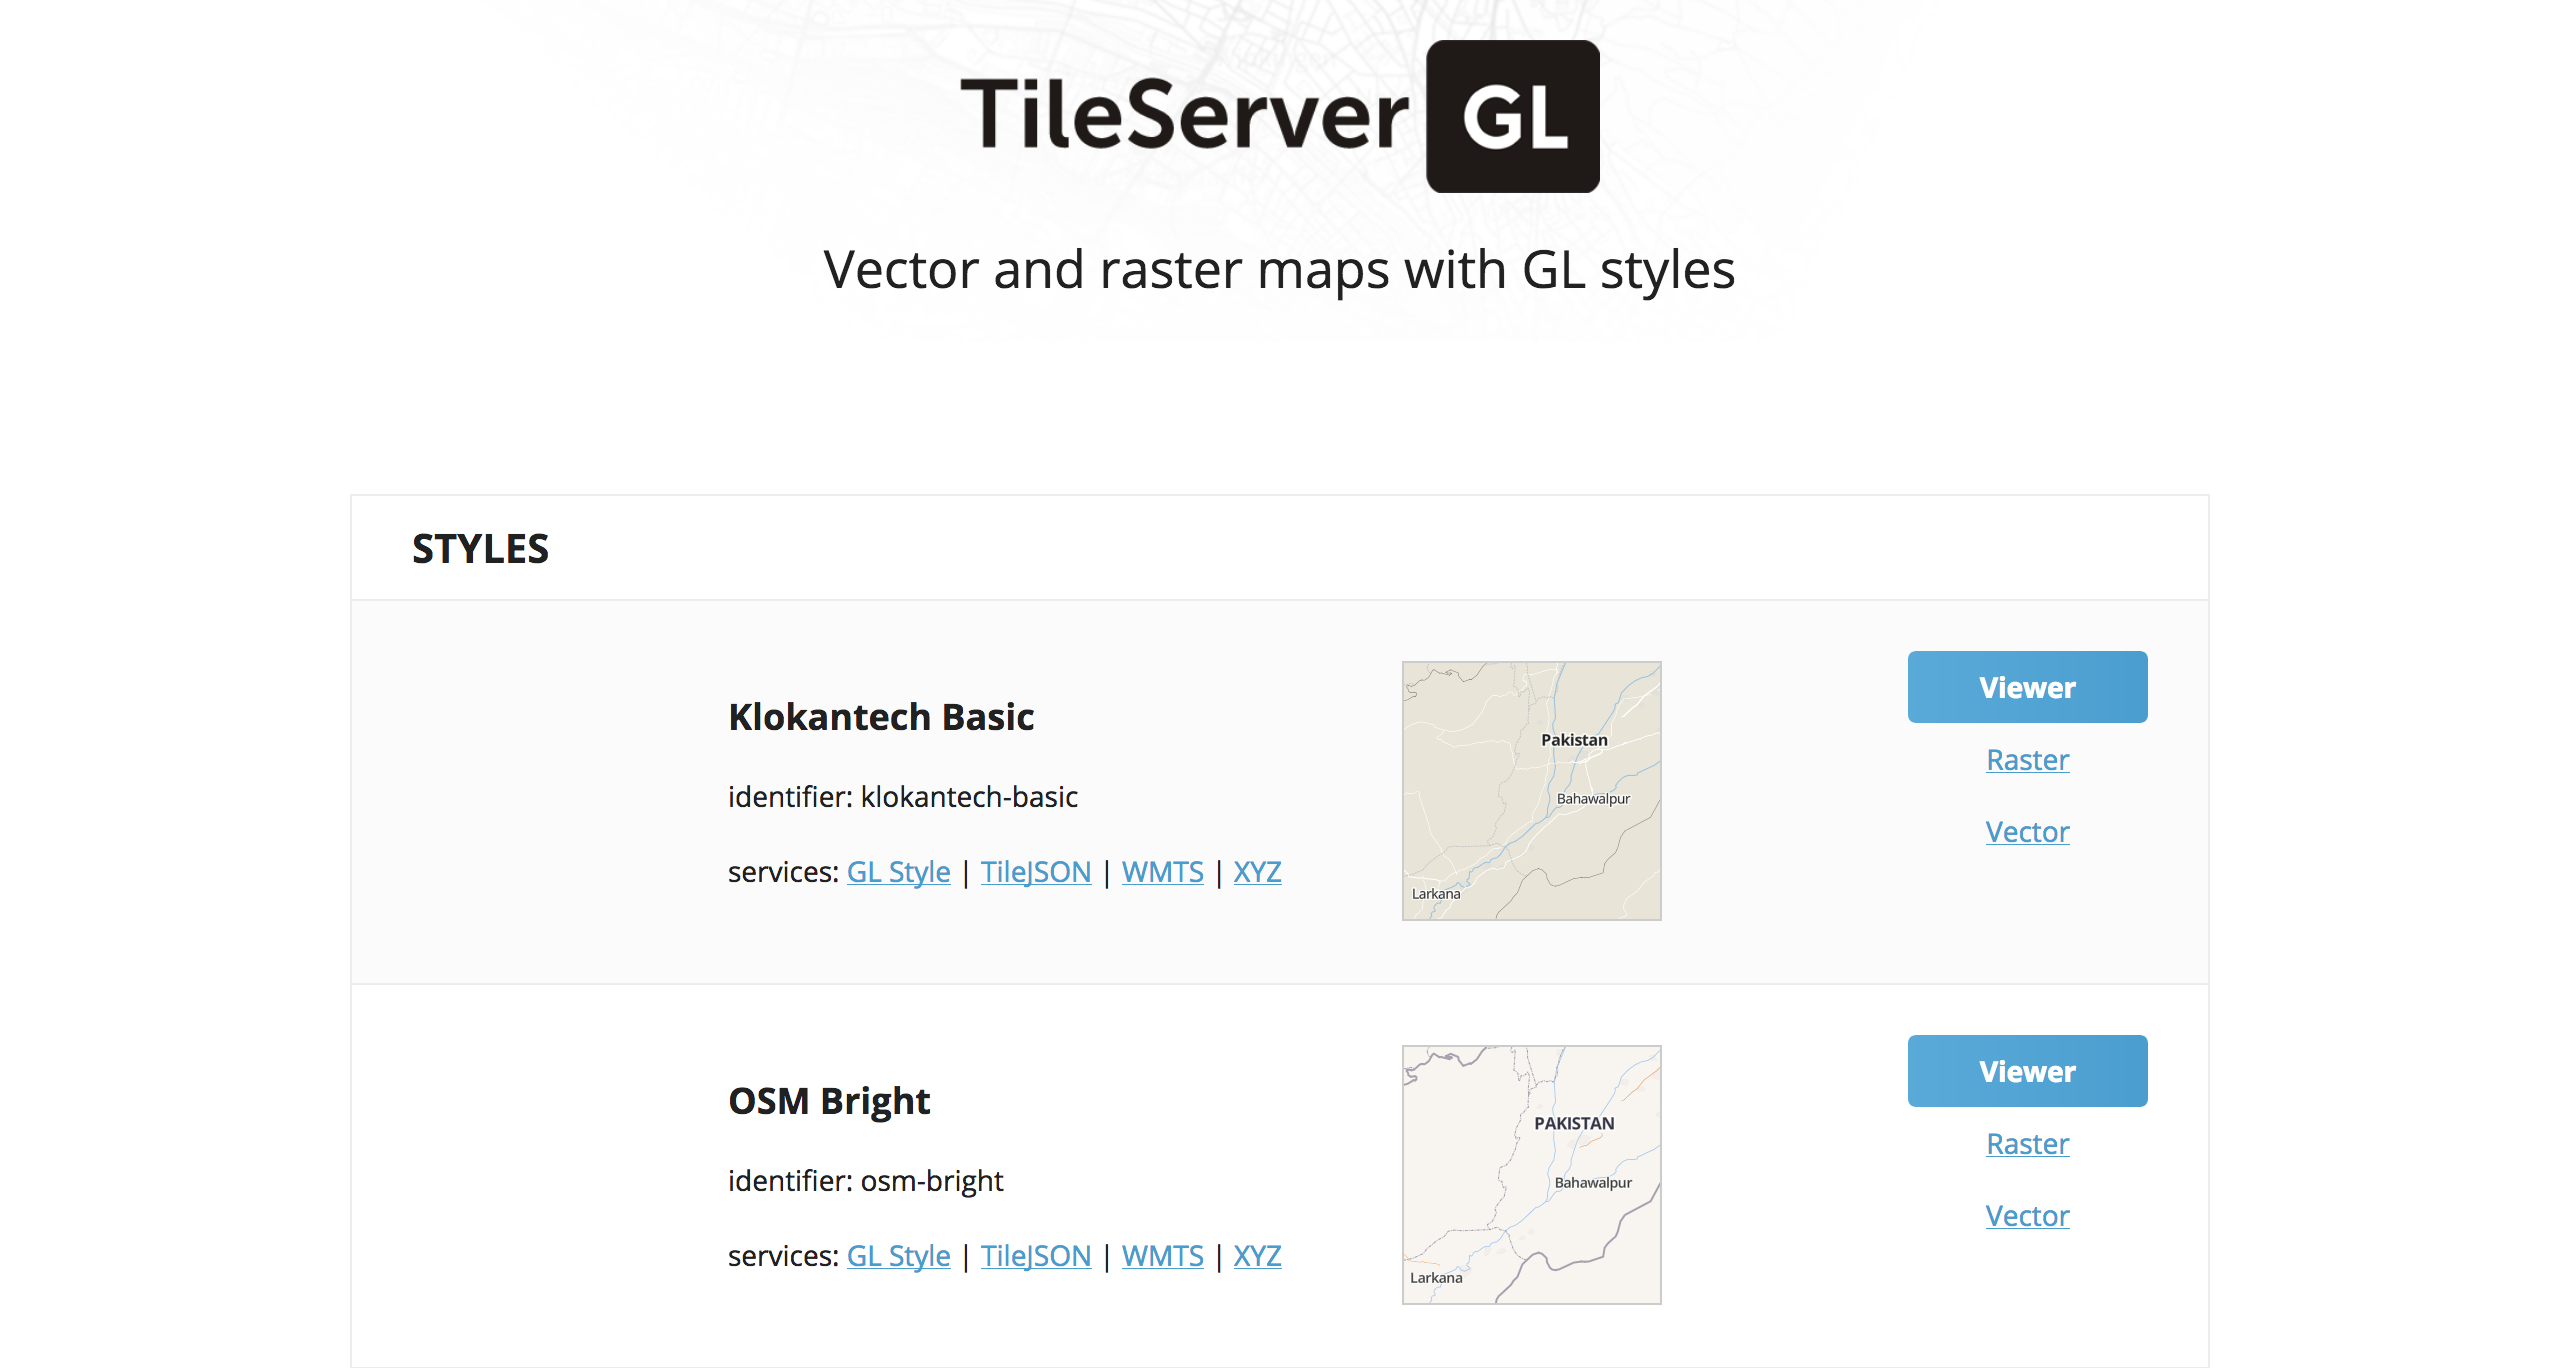
At this level, you’ll be able to click on on the viewer and navigate the maps. If that’s what you wished all alongside, good. You might be lastly at your vacation spot. You may plug in an internet interface utilizing mapbox-gl-js or one thing related and name it a day.
Nonetheless, I wished one thing extra. I wished to create a customized blueprint type and render massive maps utilizing that type. Now we’ll go forward and learn to do precisely that.
Making a customized type
Klokantech has an extended historical past as an Open supply firm. Their assist is top-notch and their instruments are superb. Fortunate for us, they host a web-based map editor referred to as maputnik. We are able to use that to create customized kinds and use them with tileserver-gl. Go forward open up the on-line editor.
Now you’ll be able to all the time start styling from scratch however it’s all the time simpler and quicker to face on the shoulder of the giants. We shall be modifying the Darkish Matter type to go well with our wants.
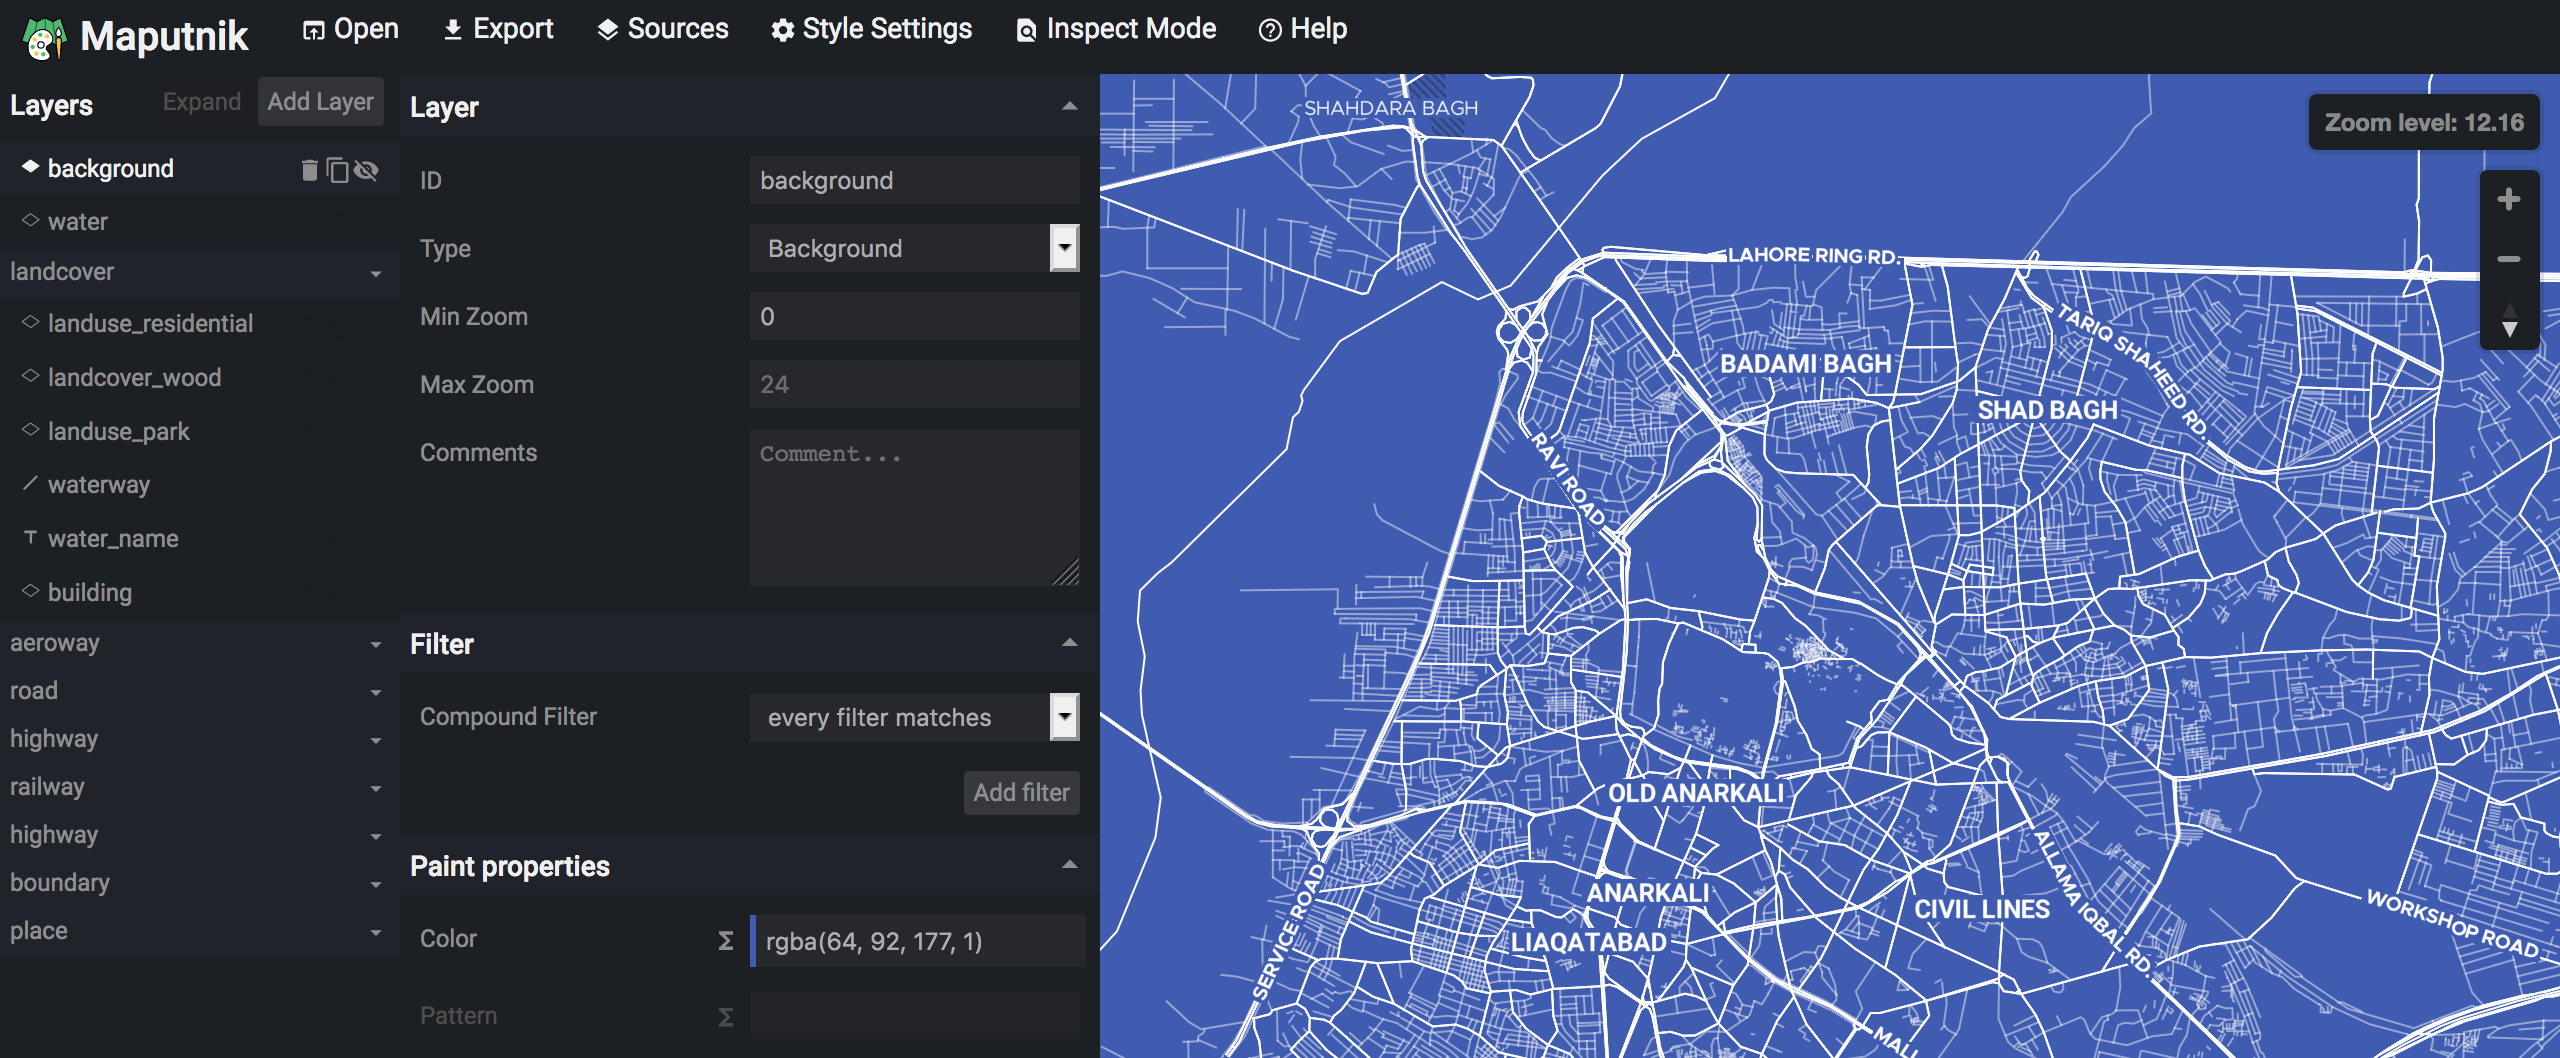
The way in which styling works is {that a} map is made up of a number of layers. These layers vary from water layer to constructing layer to main highway layer to minor freeway layer. You edit the type of every layer and might even cover the layers you don’t wish to present on the ultimate map.
I modified the halo shade, font-size and place names (from {identify:latin}{identify:nonlatin} to {identify:latin}) together with plenty of different mundane stuff. That is probably the most time-consuming activity of the entire course of and takes time to get proper.
After doing all of the type edits that is what I ended up with:
Exporting Customized Model
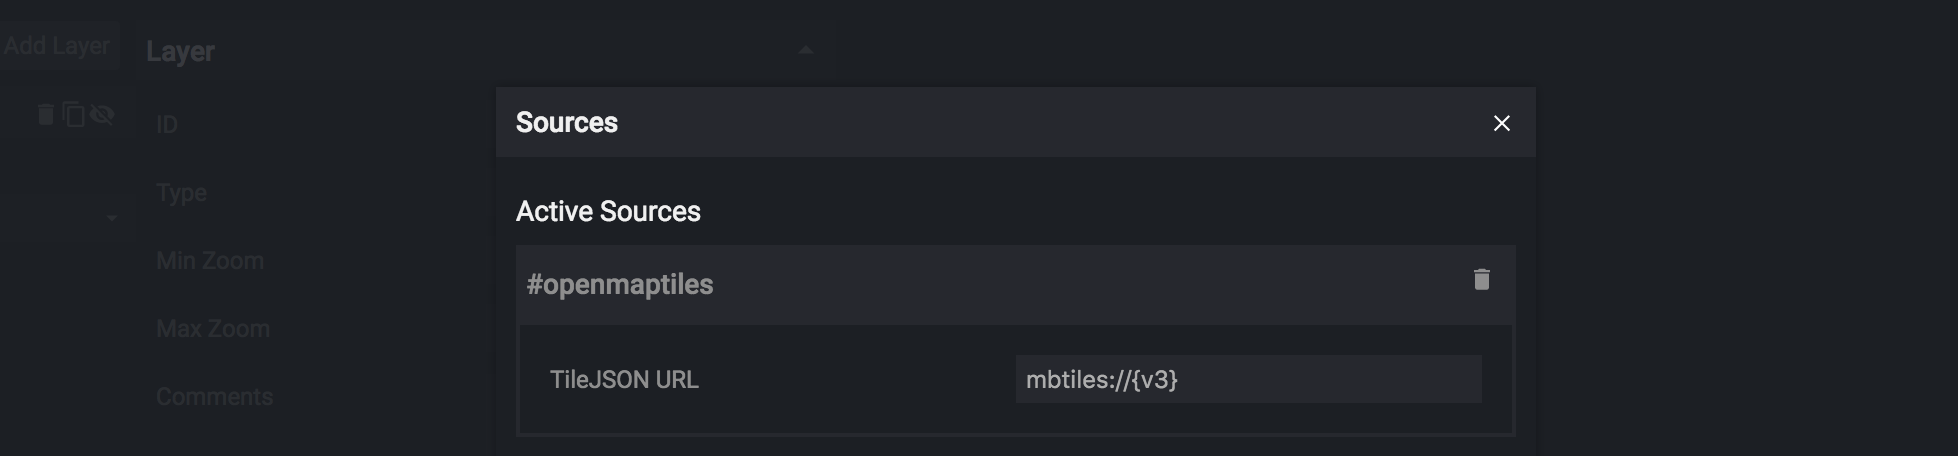
We can’t merely export this map as a result of it makes use of a free service graciously offered by OpenMapTiles to render the tiles within the editor. We’ve to vary some settings in order that the type.json file it produces is usable for us in our offline setup with our personal data-source.
Within the on-line editor click on on Sources and edit the supply like this:
And in addition click on on Model Settings and edit them like this:
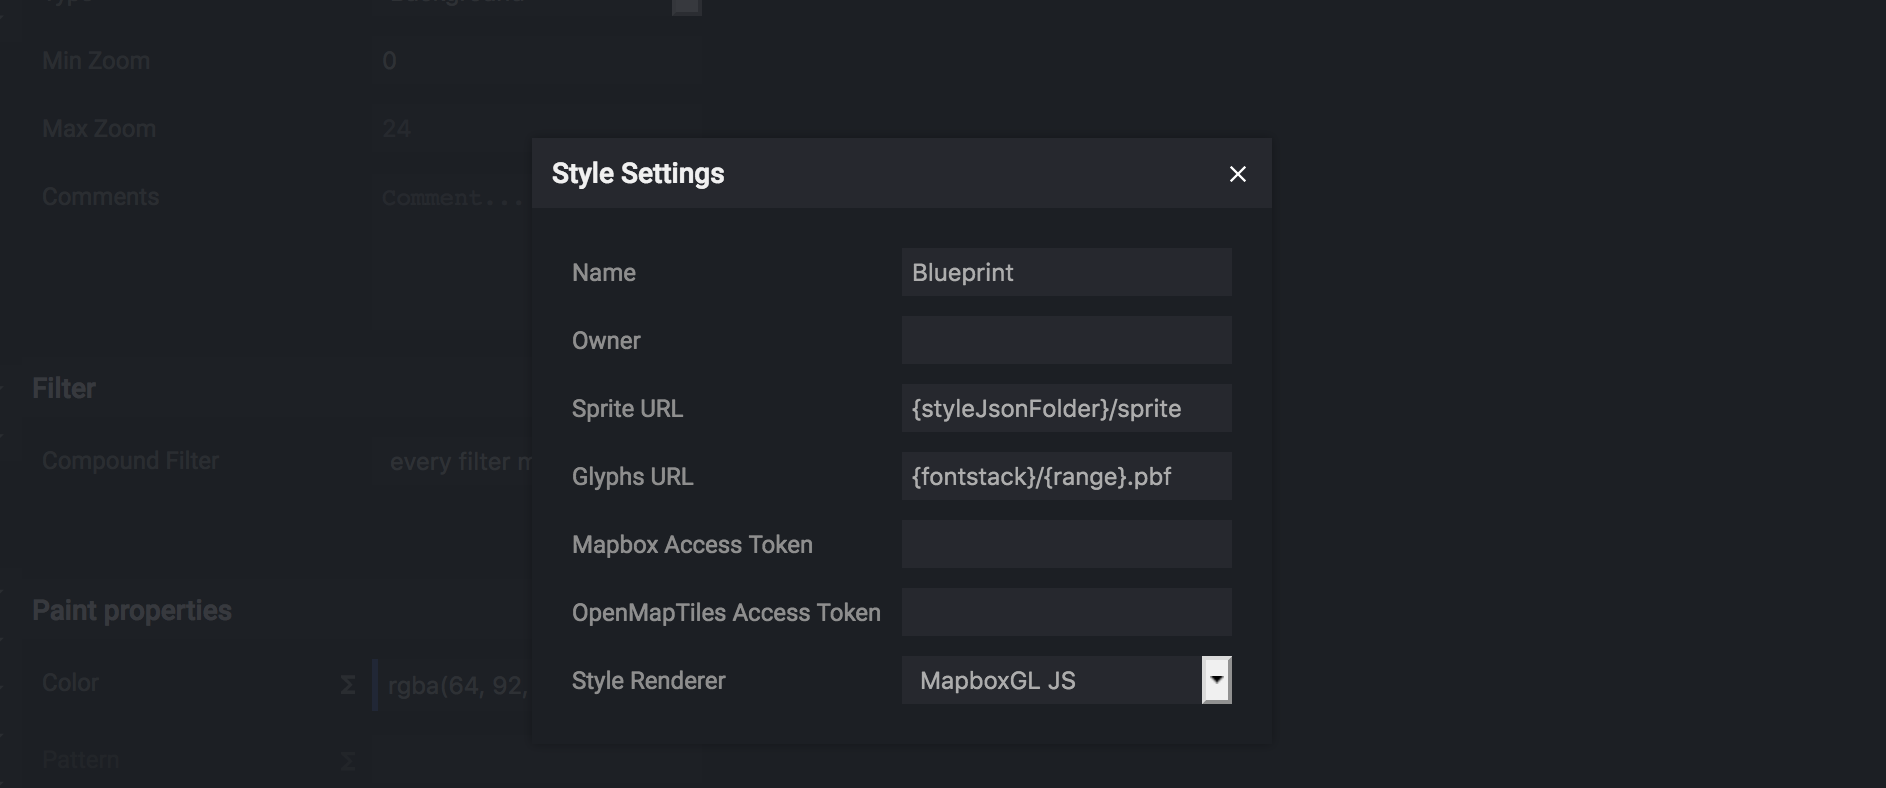
Now click on on Export and obtain the JSON file. It’ll obtain a blueprint.json file. We used Darkish Matter type as our base which makes use of some icons and sprites which we haven’t downloaded.
Obtain the next recordsdata and place them within the mapped /knowledge folder like this:
.
├── config.json
├── kinds
│   ├── blueprint.json
│   ├── icons
│   │   ├── circle-11.svg
│   │   ├── star-11.svg
│   │   └── wood-pattern.svg
│   ├── sprite.json
│   ├── sprite.png
│   ├── sprite@2x.json
│   └── sprite@2x.png
└── 2017-07-03_asia_pakistan.mbtiles
Enabling Customized Model
Now we simply must allow our customized type within the config.json file:
{
  "choices": {
    "paths": {
      "root": "/usr/src/app/node_modules/tileserver-gl-styles",
      "fonts": "fonts",
      "kinds": "kinds",
      "mbtiles": "/knowledge"
    },
    "serveStaticMaps": true,
    "formatQuality": {
      "jpeg": 90,
      "webp": 90
    },
    "maxSize": 8192,
    "pbfAlias": "pbf"
  },
  "kinds": {
    "klokantech-basic": {
      "type": "klokantech-basic/type.json",
      "tilejson": {
        "bounds": [60.8786, 23.32744, 77.83562, 37.09664]
      }
    },
    "osm-bright": {
      "type": "osm-bright/type.json",
      "tilejson": {
        "bounds": [60.8786, 23.32744, 77.83562, 37.09664]
      }
    },
    "blueprint": {
      "type": "/knowledge/kinds/blueprint.json",
      "tilejson": {
        "bounds": [60.8786, 23.32744, 77.83562, 37.09664]
      }
    }
  },
  "knowledge": {
    "v3": {
      "mbtiles": "2017-07-03_asia_pakistan.mbtiles"
    }
  }
}
In the event you use any customized fonts you’ll be able to put them within the kinds folder and hopefully, they need to work. Now restart the tileserver-gl container from kitematic and it’s best to have the ability to see “Blueprint” type on the homepage.
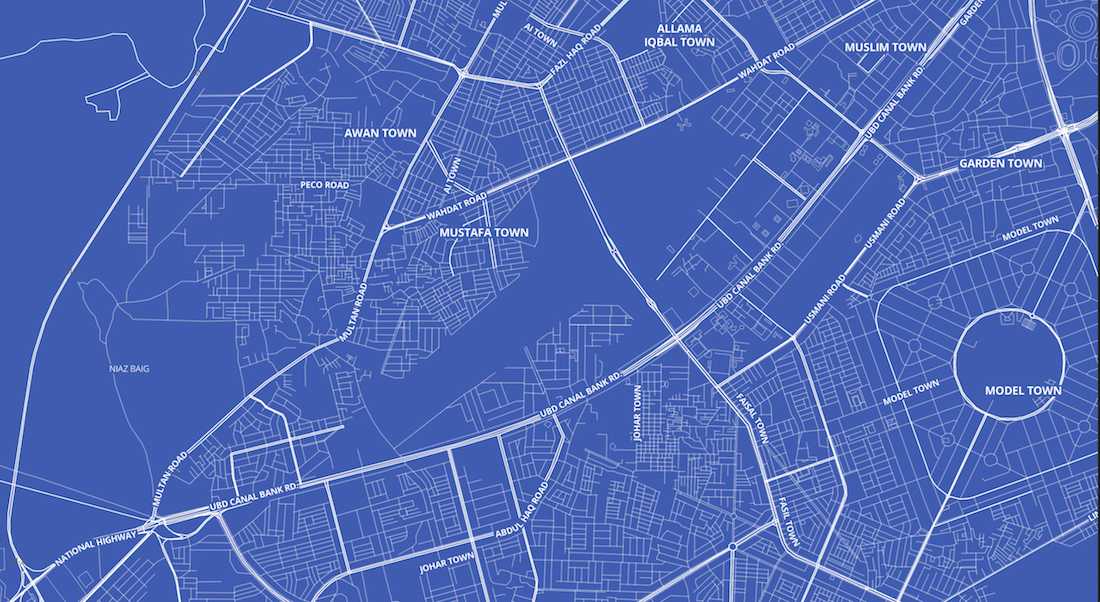
I went forward and created a static map of my metropolis out of this. You may too! Let’s first see how I did it. I used the viewer for the Blueprint type and went to my metropolis (Lahore). I received the next URL:
http://localhost:3000/kinds/blueprint/#13/31.49/74.28045
Subsequent, I transformed that URL to the type of a static picture export URL:
http://localhost:3000/kinds/blueprint/static/74.28045,31.49,14/1270x700@2x.png
You may learn extra about how the static export works within the on-line documentation.
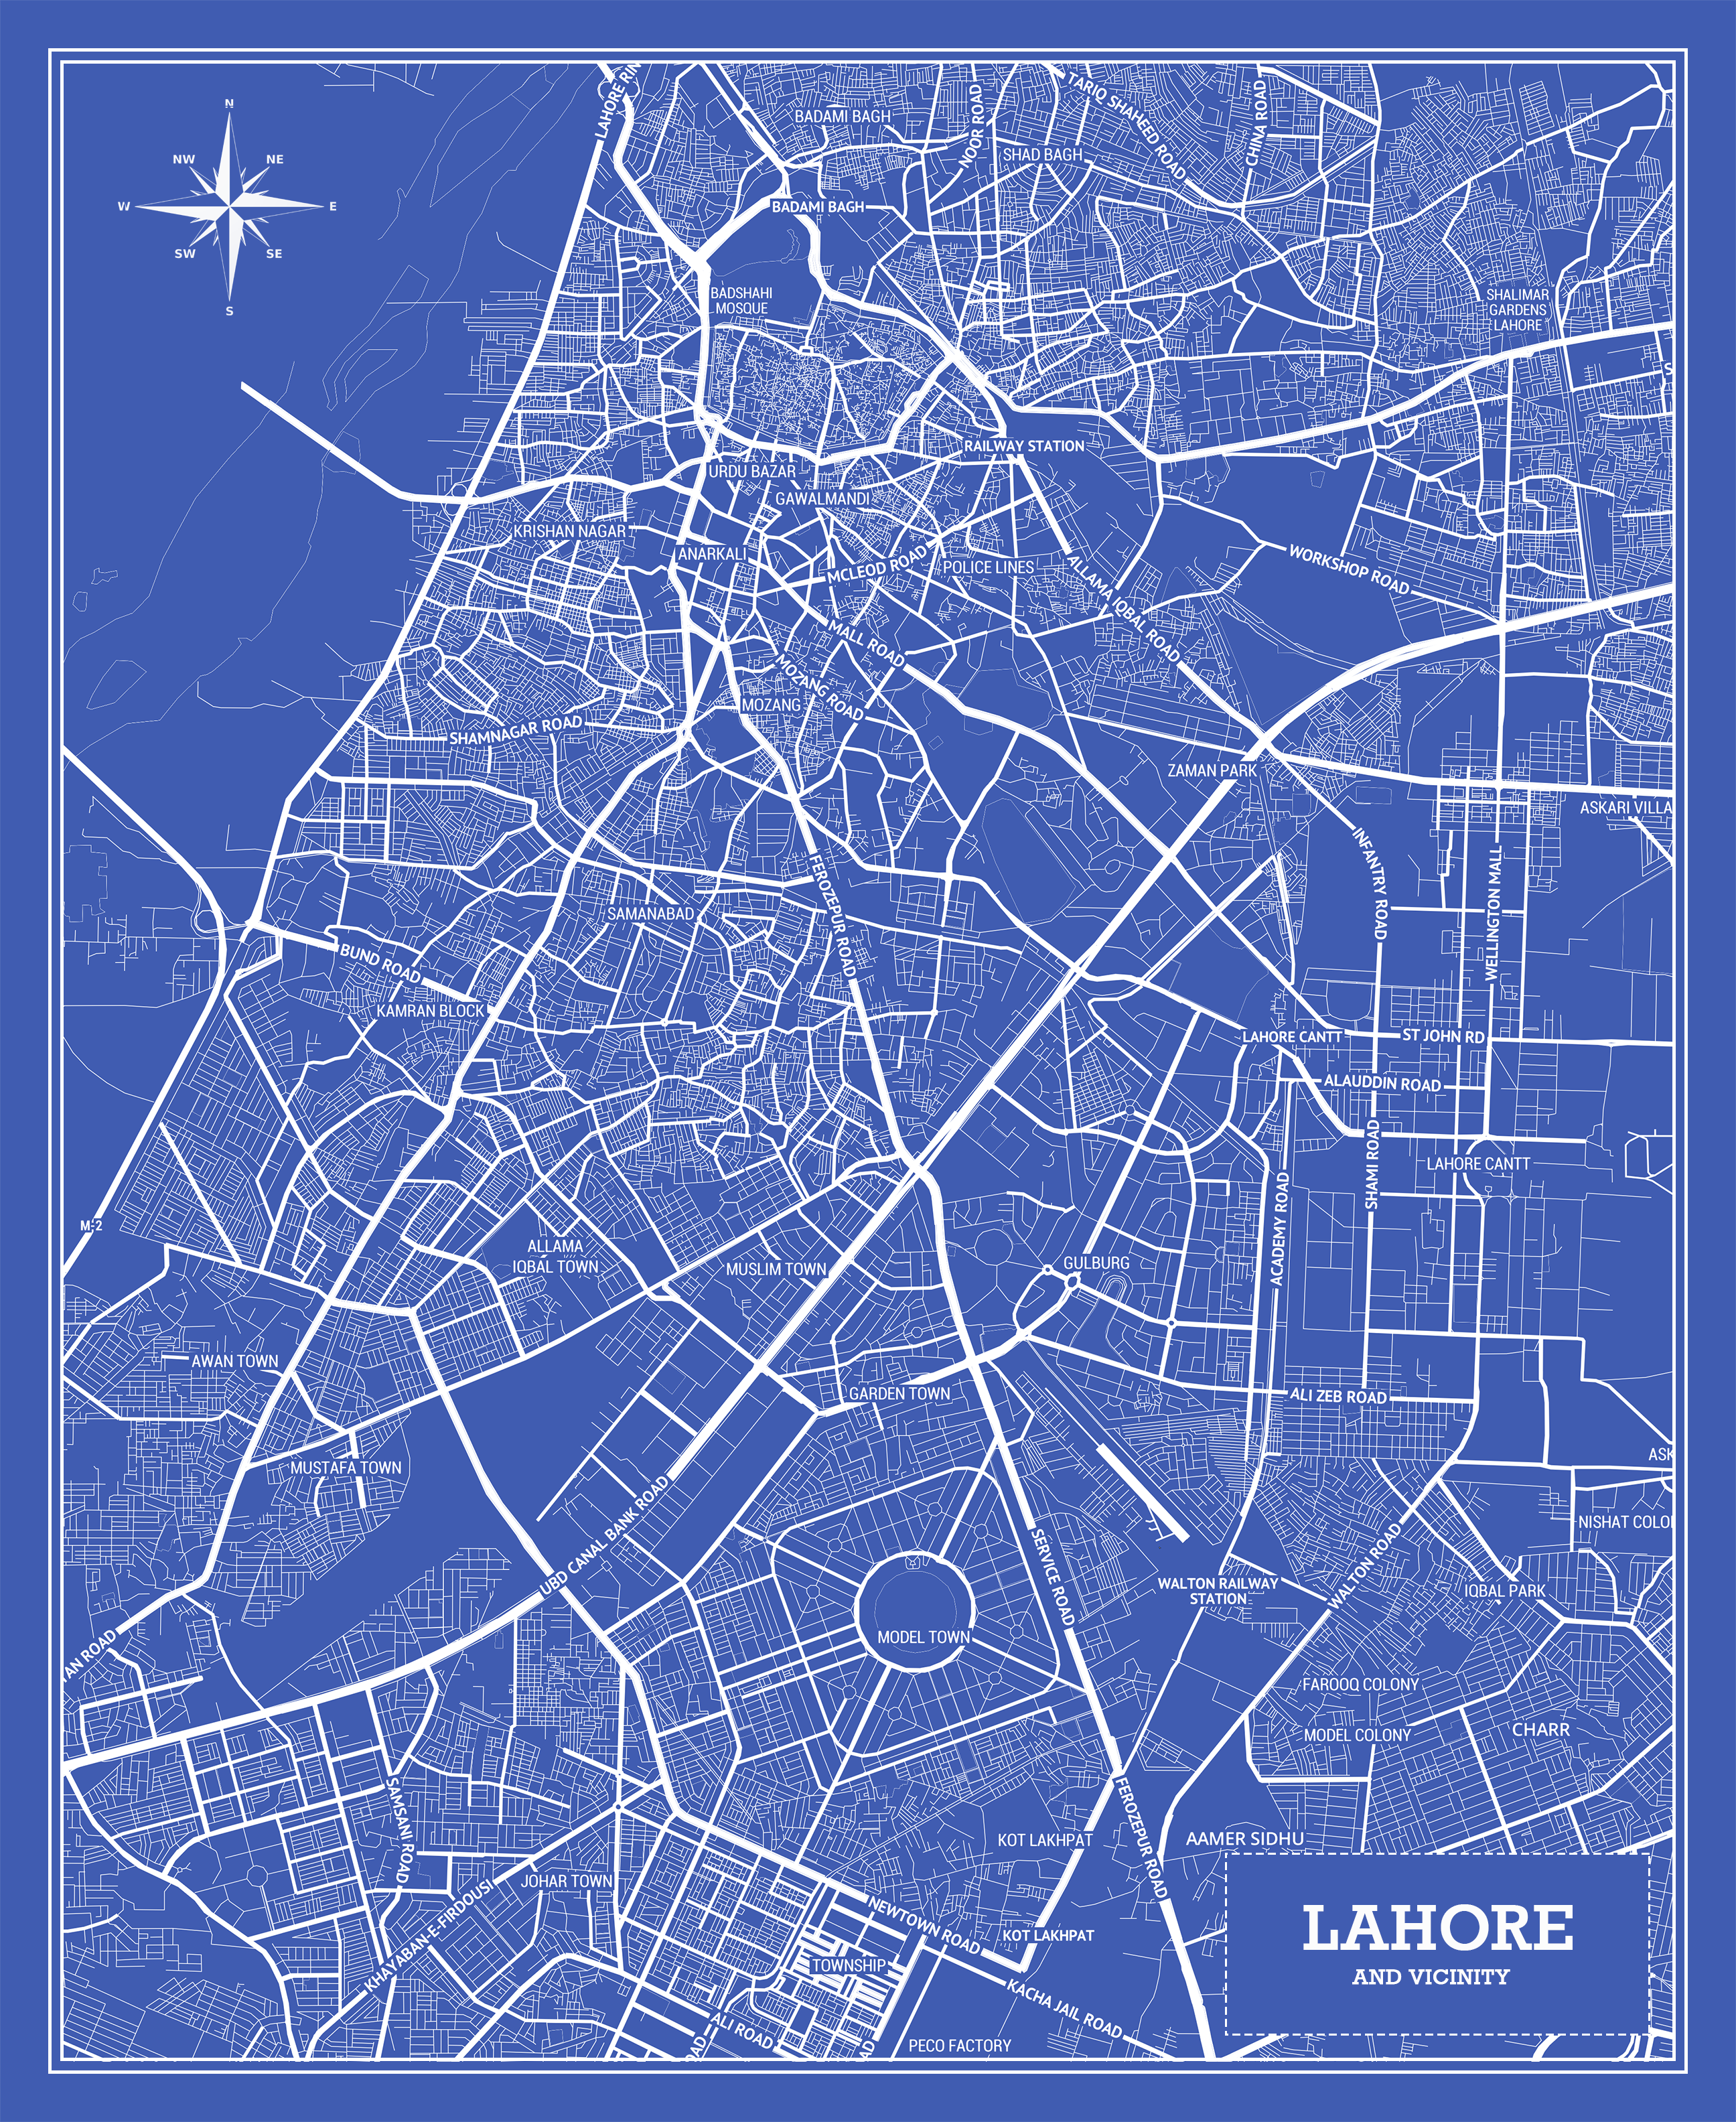
I created a pleasant wanting poster utilizing this as effectively!
Subsequent Steps
Now that you understand how the export works, you’ll be able to go forward and create a pleasant wanting poster on your metropolis or nation. Simply obtain the respective mbtiles file on your location and you need to be good to go!
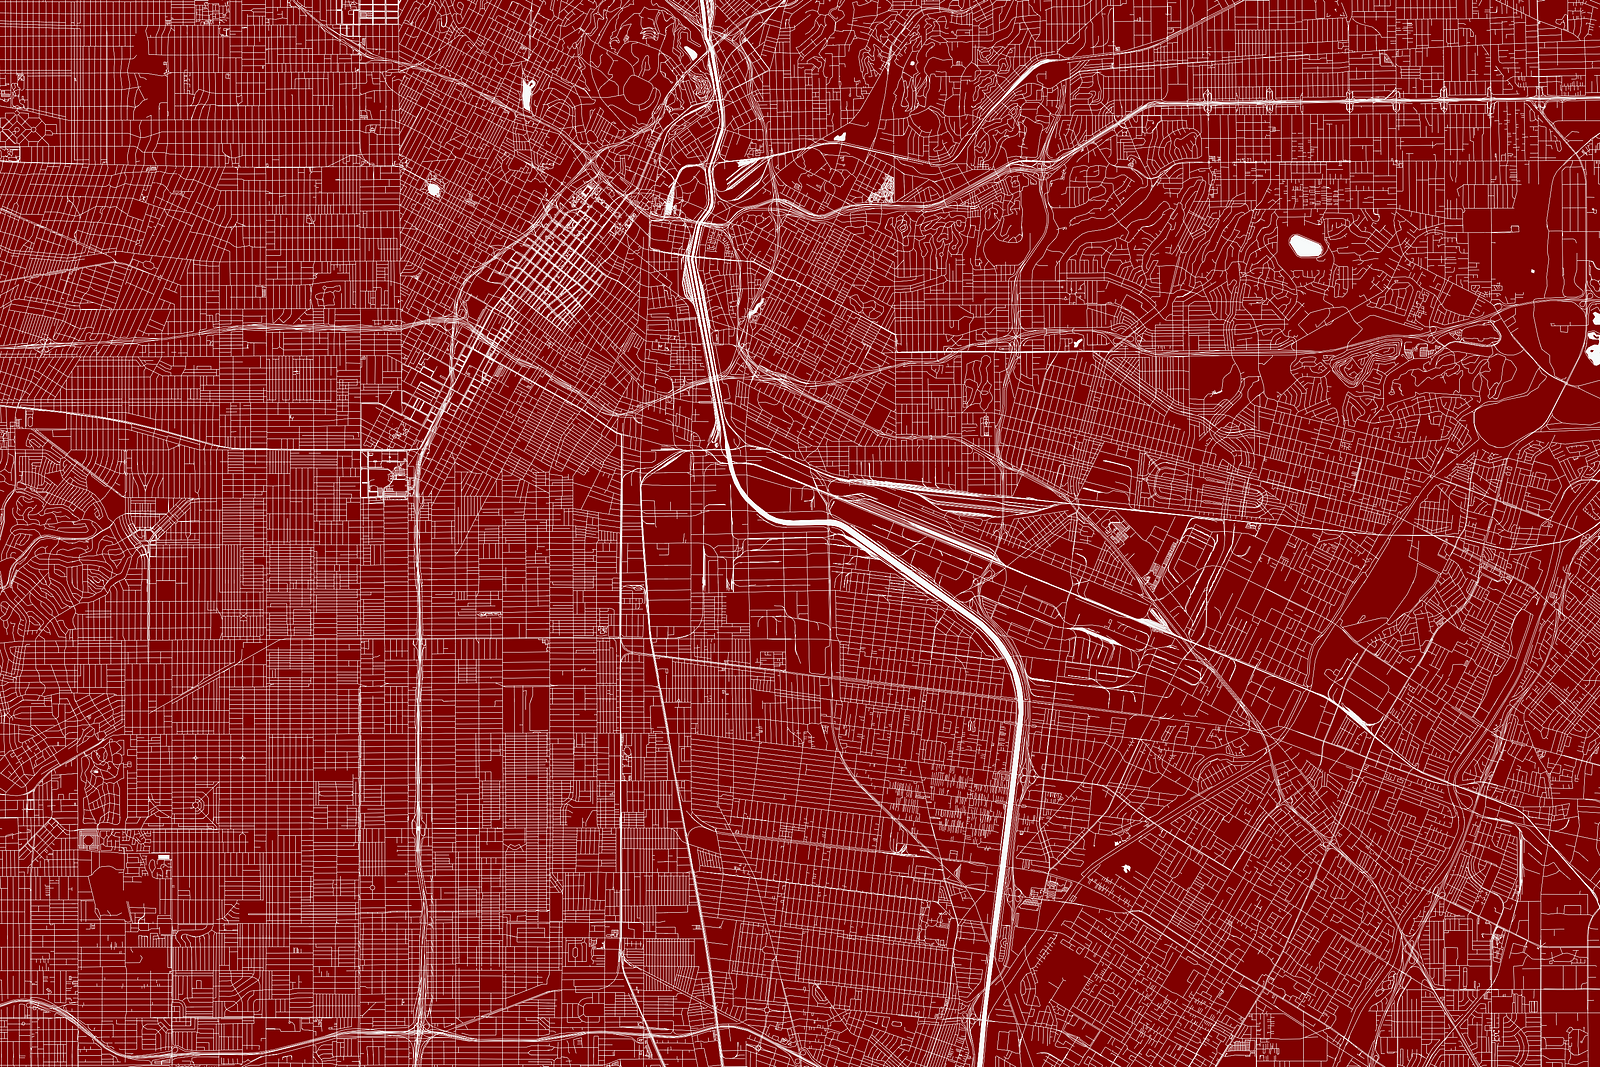
There are nonetheless some edges of tileserver-gl which I haven’t managed to totally discover. I’d go forward and use tippecanoe to create some cool wanting maps like this:
I hope you loved the publish. If there may be something I missed or something which I defined flawed please let me know. See you all within the subsequent publish! ❤️
Helpful Hyperlinks: