


Have you ever ever wished to create an app with an interesting interface that works within the command line? Welcome to Textual, a Python toolkit and framework for creating lovely, practical text-based consumer interface (TUI) purposes. The Textual library supplies a strong and versatile framework for constructing TUIs. It affords quite a lot of options that let you create interactive and fascinating console purposes.
On this tutorial, you’ll learn to create, model, and improve Textual apps with layouts, occasions, and actions.
By the top of this tutorial, you’ll perceive that:
- Python Textual is a framework for constructing terminal-based purposes with interactive and visually interesting textual content interfaces.
- Textual works by offering a set of widgets, layouts, and styling choices, enabling you to create responsive and interactive console apps.
- Textual is beneficial for constructing environment friendly, platform-independent text-based consumer interfaces that work over distant connections and in low-resource environments.
Textual is constructed on Wealthy, a Python library for creating wealthy textual content and superbly formatted terminal output. It enhances text-based purposes by making use of colours, kinds, and formatting to your textual content output in Python.
Take the Quiz: Check your data with our interactive “Python Textual: Construct Lovely UIs within the Terminal” quiz. You’ll obtain a rating upon completion that can assist you monitor your studying progress:
Interactive Quiz
Python Textual: Construct Lovely UIs within the Terminal
On this quiz, you may check your understanding of the Python Textual library. This library is used to create wealthy terminal purposes and widgets. By working by means of this quiz, you may reinforce your data of Textual’s key ideas and options.
Putting in Textual
Textual requires Python 3.8 or later to work. As with all new Python venture, it’s a good suggestion to create a digital setting earlier than you begin. This helps hold your system’s Python setting clear and prevents pointless dependencies that will trigger bother in a while.
After you have the Python digital setting, you may set up Textual from PyPI utilizing pip, which is the package deal installer for Python.
Open a command-line console and create a listing to host your Textual code. Then, run the instructions beneath to create a digital setting, activate it, and set up Textual:
Right here, you first create a digital setting utilizing the venv module from the usual library. Then, you activate it, and eventually, you put in Textual utilizing pip.
You’ve put in two packages:
textualis the library and software framework that’ll present the equipment in your TUI purposes.textual-devincorporates a command-line software, additionally namedtextual, that facilitates debugging and interactive growth by means of the Textual console.
In what follows, you’ll principally be utilizing the textual library, however you’ll additionally see an instance of methods to use the textual software from textual-dev.
Checking the Textual Set up
The textual package deal is now put in in your Python digital setting. You possibly can examine your set up by working the next command:
You must see the Textual demo app, a properly formatted TUI software that shows helpful details about Textual’s capabilities. You possibly can work together with it utilizing the mouse or keys:
Discover the coloured textual content, emojis, structured format, and the keyboard shortcuts listed within the window footer. There’s loads to discover right here, however for now, you’re going to dive proper in and create your first app utilizing Textual. You possibly can shut the demo by urgent Ctrl+C.
Attending to Know Textual
Textual is an software framework that gives courses and companies for constructing fully-fledged purposes. Its event-driven programming mannequin allows you to outline callbacks for varied occasions, reminiscent of key presses, mouse clicks, and timer ticks.
You may also outline actions, that are capabilities that the consumer can name utilizing a keystroke, or by clicking a textual content hyperlink. Occasions and actions allow you to construct interactive TUIs.
Key options of Textual embody:
-
Wealthy widget library: Gives a complete set of widgets reminiscent of buttons, inputs, checkboxes, switches, and extra, permitting you to construct interactive interfaces effectively.
-
Versatile format administration: Supplies varied format choices, together with docking and grid techniques, permitting you to design complicated interfaces that adapt to completely different terminal sizes.
-
Reactive attributes: Helps reactive programming, enabling the creation of dynamic interfaces that reply seamlessly to adjustments in software state.
-
CSS styling: Makes use of a CSS-like syntax to customise widget look and habits, which permits for personalisation of the looks and habits of widgets to match particular design necessities.
-
Asynchronous occasion dealing with: Constructed on Python’s
asyncio, it effectively manages asynchronous occasions, guaranteeing responsive consumer interactions even in I/O-bound purposes. -
Command palette: Features a command palette with fuzzy search capabilities, enhancing consumer navigation and command execution throughout the software.
-
Accessibility options: Designed with accessibility in thoughts, providing integration with display screen readers, monochrome mode, high-contrast themes, and color-blind themes to accommodate various consumer wants.
-
Cross-platform compatibility: Runs on varied platforms, together with Home windows, macOS, and Linux, guaranteeing broad usability throughout completely different working techniques.
-
Distant software help: Permits purposes to run over SSH, making it simpler to handle servers and develop remotely.
-
Integration with Wealthy: Leverages the Wealthy library to supply superior textual content formatting, syntax highlighting, and rendering capabilities, enhancing the visible attraction and performance of terminal purposes.
All in all, Textual supplies every little thing you’ll want to construct lovely, responsive text-based interface purposes.
Creating Your First Textual App
It’s time to create your first Textual app! You’ll begin with one thing minimal, simply to examine that every little thing works as anticipated. Fireplace up your favourite code editor or IDE and create a brand new Python file referred to as hello_textual.py. Then, add the next code:
That is in regards to the quickest Textual app you may write. On strains 1 and a pair of, you import the App class from textual.app and the Static class from textual.widgets.
The App class represents a generic Textual software. By deriving your software from App, you inherit loads of Textual’s structure.
Static is your first bare-bones widget class. A widget is a UI element that manages an oblong space in your display screen. It’ll seem within the UI of your app, and it could additionally reply to occasions and actions, which you’ll work with extra a little bit later on this tutorial.
On strains 4 to six, you outline a customized class referred to as HelloTextualApp by inheriting from App. Then, you override its .compose() methodology.
Textual makes use of this methodology to construct the applying’s UI. On this instance, the UI consists of a single Static widget implicitly contained in a Display screen object, however typically, it may be constructed from a posh hierarchy of containers and widgets.
You possibly can run the app by executing the next command:
Right here’s how the app seems:
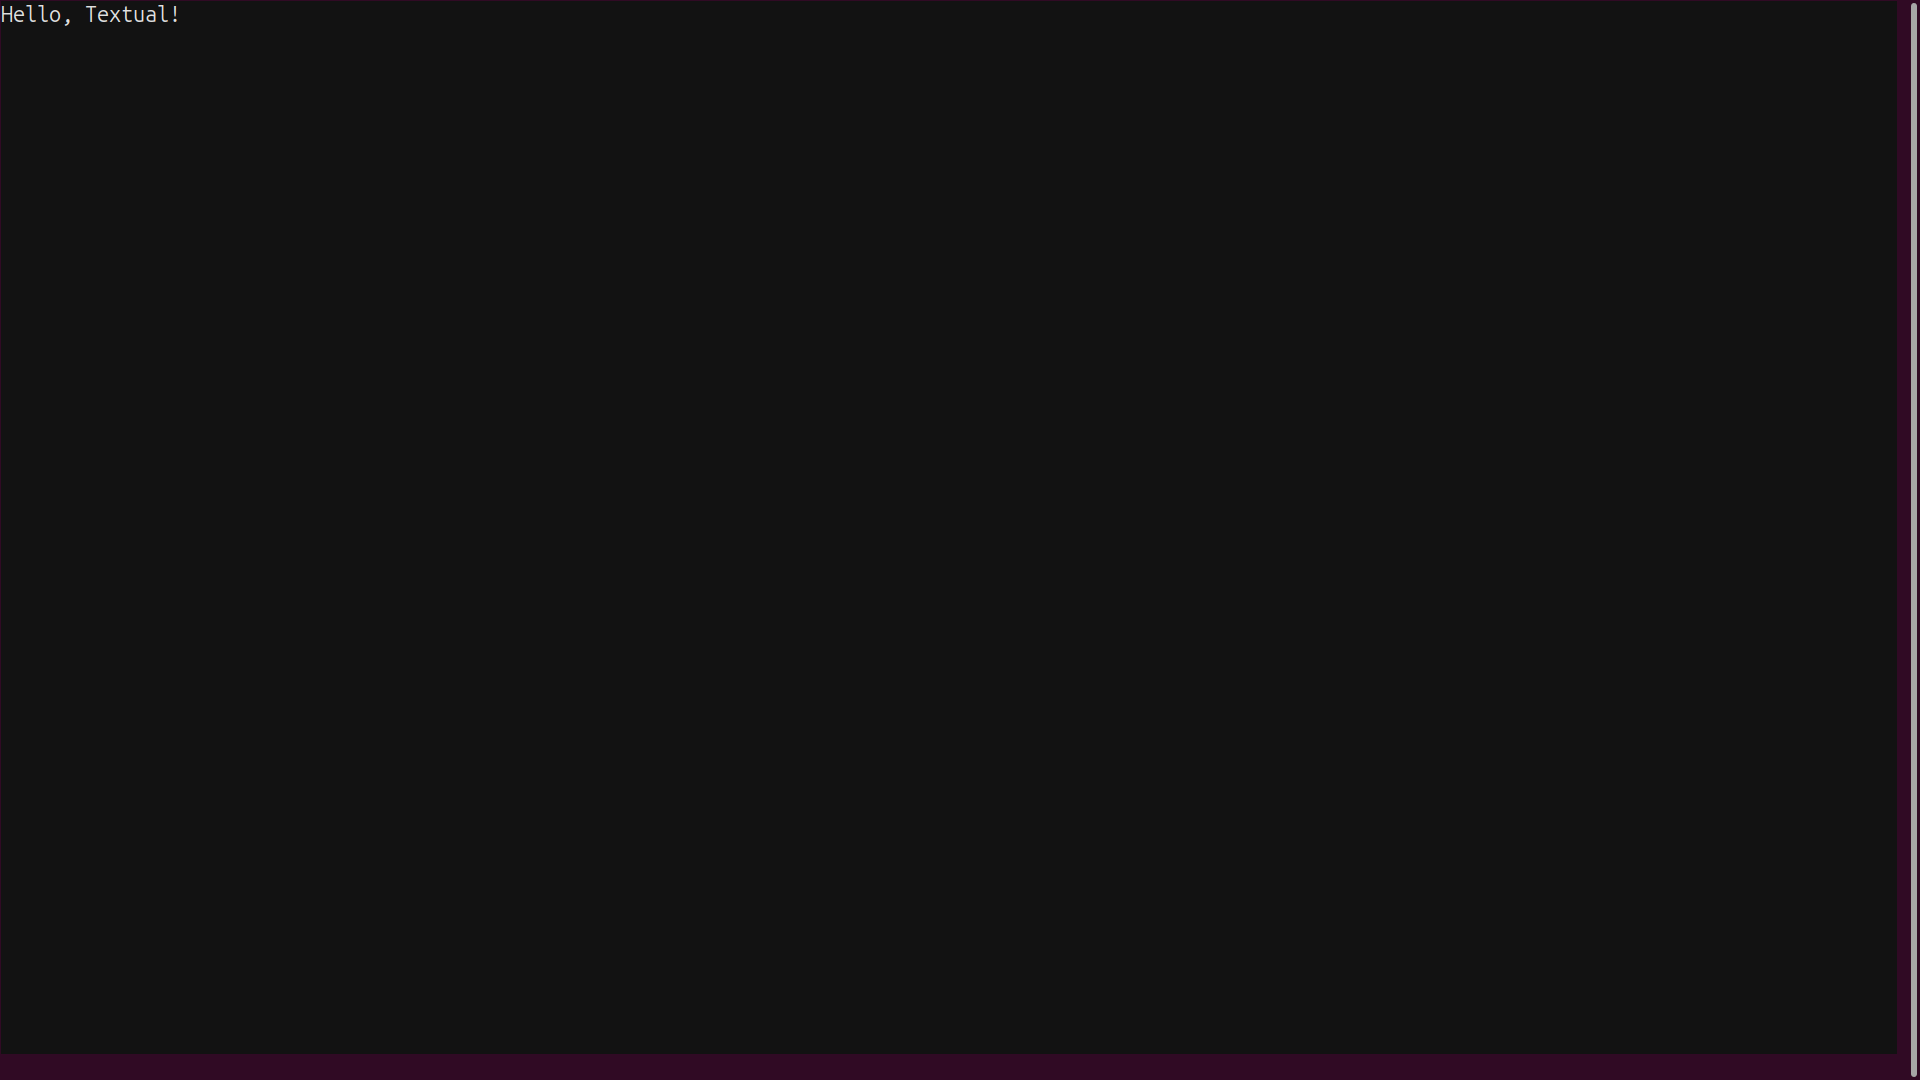
This hello_textual.py software demonstrates the fundamental scaffolding on which you’ll construct extra complicated and attention-grabbing apps. Whenever you’re bored with admiring your first Textual software, you may press Ctrl+Q to return to your system console.
Within the subsequent part, you’ll take a better have a look at widgets and methods to embody them in your software.
Exploring Textual Widgets
Textual affords quite a lot of widgets, together with buttons, checkboxes, enter fields, progress bars, and extra. Once more, a widget is a graphical element that represents a UI management and occupies an oblong space of the display screen. Textual supplies each fundamental widgets and extra superior ones.
In Textual, every widget can have its personal set of favor settings and may reply to specific occasions like keystrokes, mouse clicks, timer ticks, and others.
Static and Label Widgets
Static and Label are probably the most fundamental widgets in Textual. You’ve already used Static, which manages an oblong space on the display screen with some non-obligatory textual content. Label is sort of much like Static, although it’s specialised for displaying textual content.
Even these elementary widgets have some shocking powers—like all Textual widgets, they will show wealthy textual content renderables as outlined by the Wealthy library’s renderable protocol. This implies you may specify the textual content’s foreground and background colours, in addition to textual content codecs like daring, italic, and even flashing results.
Apart from textual content styling, you can even assign any widget its personal background shade and body model. You may also use a variety of emojis.
Be aware: Textual totally helps Unicode characters, letting you show textual content in varied pure languages and all kinds of symbols. This makes it appropriate for internationalization and localization.
Right here’s a bare-bones instance utilizing Static and Label widgets, together with some wealthy textual content and styling:
This time, .compose() yields two widgets with some wealthy renderable content material. You’ve saved a reference to every widget earlier than calling yield, at which level Textual provides the widget to the app’s display screen.
The .on_mount() methodology is an occasion handler, which decides what ought to occur if an occasion happens. Textual robotically calls this methodology earlier than the display screen is rendered. Textual, like HTML, builds the UI right into a doc object mannequin (DOM) that’s a hierarchy of containers and widgets. You possibly can find any Textual object on this hierarchy by a DOM question that references its Python class, or its distinctive ID if out there.
At this level, the DOM of your Textual app is totally constructed. You need to use your saved references self.static and self.label to use kinds to the widgets, which you do with their .kinds attributes.
Go forward and run static_and_label.py in your command line:
Admire the results of your efforts to construct and magnificence a Textual UI:
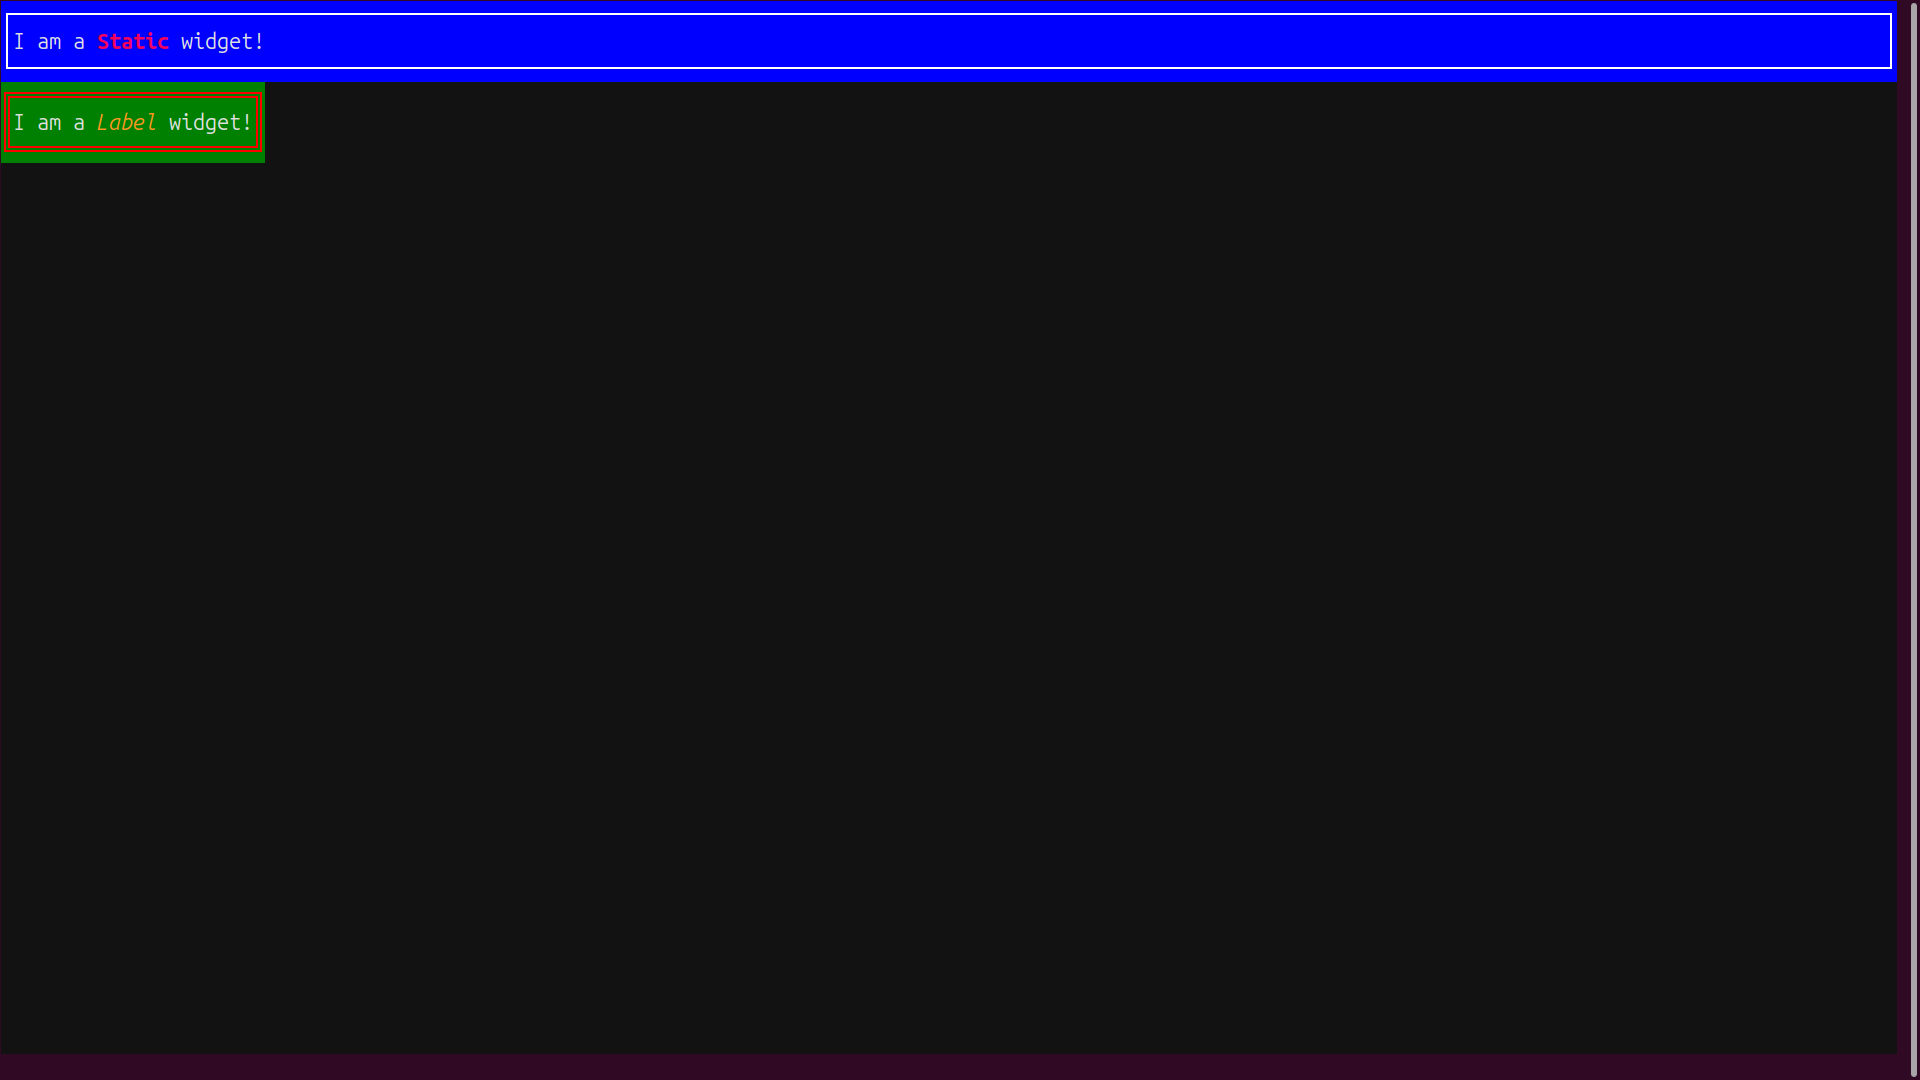
The Static and Label situations are formatted to your specs, however you’ll discover a small distinction of their default codecs. The Static widget expands horizontally to fill the display screen, whereas the default habits of the Label is to regulate its content material’s width.
You possibly can all the time override these default behaviors if you want. For instance, should you specified model.width = 100% on the Label and model.width = auto on the Static, then their width behaviors could be reversed.
Button and Enter Widgets
Textual supplies text-based variations of almost all of the controls you’d anticipate in a contemporary UI. Buttons and textual content inputs are two building-block widgets that you simply’ll use in nearly any UI app. This subsequent instance introduces Textual’s model of those widgets:
This instance exhibits just some of the various attainable methods of developing Button and Enter widgets. By default, the widgets are organized vertically on the display screen, within the order through which they seem within the code.
On line 7, you create a vanilla Button with the textual content "Click on me!" It’s a moderately drab black-and-white button.
The Button class has a number of variants, every utilizing completely different colours and kinds. For instance, line 8 makes use of the parameter variant="major", whereas strains 9 to 11 showcase some comfort constructors for Button widgets with different variants.
Variants are mapped to colours by way of Textual’s system of themes, so the consumer can change all of your app’s colours directly by choosing one other theme by means of the built-in command palette. This palette might be accessed by urgent Ctrl+P whereas the app is working. You may also hard-code widget colours should you choose. You’ll see examples of each approaches shortly.
Subsequent, you’ve the Enter widget, which has a spread of parameters that allow you to customise its habits. Every Enter on this instance has a placeholder textual content. This textual content seems solely when the enter subject is empty and prompts the consumer to sort what they’re anticipated to.
Line 14 creates an Enter with password=True in order that the textual content typed by the consumer is hidden. Traces 15 to 19 specify an Enter that accepts solely numbers. This Enter additionally has a tooltip, which supplies a pop-up label that seems when the mouse cursor hovers close to the widget.
Go forward and run your app now:
Though your widgets aren’t but hooked as much as any occasions or actions, they nonetheless present some attention-grabbing built-in habits. Discover how the themed Button widgets are animated as you progress the mouse over them or click on them. Attempt typing into the Enter widgets and observe how their habits differs:
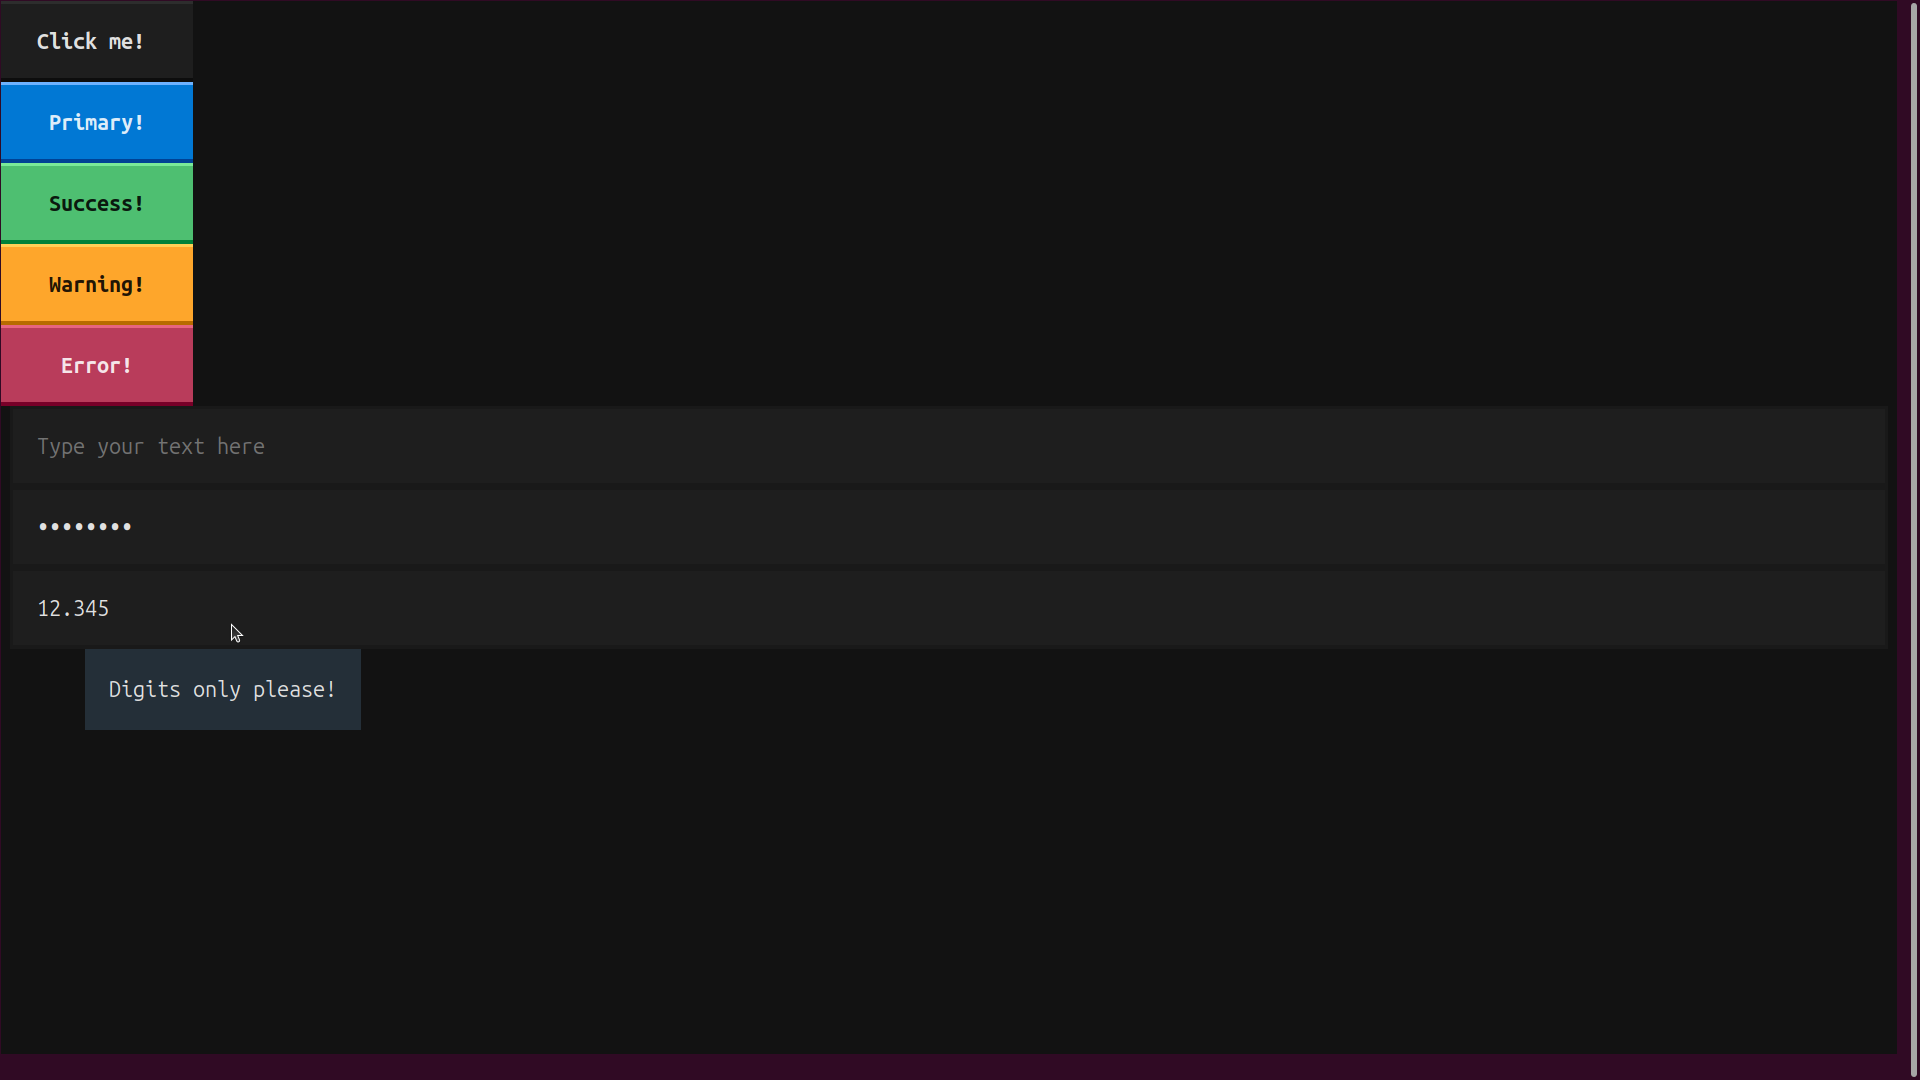
The Enter with password=True hides the enter textual content, and the Enter with sort="quantity" ignores non-numeric inputs.
You’ve created an app with some prebuilt interactive elements, however they don’t do a lot but. You’ll discover methods to combine them together with your app’s logic within the part on occasions and actions.
Superior Widgets
Textual has many prebuilt widgets. You’ll discover basic UI widgets, reminiscent of labels, buttons, radio buttons, inputs, and textual content areas. You’ll additionally discover superior widgets, together with the next:
Treesupplies a collapsible hierarchical showSparklineis a compact histogramSwapsupplies an on and off swapFairlyis a pretty-printed show of a Python object
There are additionally widgets like TabbedContent that facilitate navigation between a number of screens, giving your software a multi-page feel and appear. The Textual doc on widgets has all the small print about utilizing these widgets and supplies utilization examples for each.
Now that you’ve got a greater understanding of widgets, it’s time to study in regards to the highly effective styling choices Textual supplies for customizing the looks of your software.
Styling Your Software With Textual’s CSS
With Textual, you may apply completely different kinds to textual content, reminiscent of foreground and background colours, daring, italics, underline kinds, and extra.
Within the part on Static and Label widgets, you discovered a technique of making use of preliminary kinds to your widgets. You saved references to the widgets whereas developing them, after which utilized attributes to every widget’s .kinds member variable within the app’s .on_mount() occasion handler.
Sadly, this method clutters your Python code with loads of styling data that’s not related to your major program logic. Fortunately, there’s a greater manner: utilizing Textual Cascading Model Sheets (TCSS).
TCSS implements a modified and simplified subset of the cascading model sheets (CSS) language used for net pages. Your static kinds might be laid out in a textual content file that’s separate out of your Python code. This textual content file is often given a .tcss extension.
Kinds and textual content can be modified dynamically within the code, letting you create responsive, visually interesting interfaces. Textual helps all of the rich-text styling choices of the Wealthy library, together with textual content colours and attributes, frames, emojis, and even animations.
TCSS allows you to model your software in a textual content file with out cluttering the Python code with visible design particulars. This helps you concentrate on the applying logic, whereas the model file makes use of a compact syntax.
Right here’s how one can clear up the instance of Static and Label widgets utilizing exterior kinds:
The highlighted line references your exterior TCSS file. Whenever you outline the App class fixed CSS_PATH, Textual robotically masses the offered file and makes use of it to model the UI. Now, you don’t have to hold code references to the widgets, because the .tcss file can reference them in varied methods.
Right here’s the model file for StaticAndLabelAppWithTCSS:
The syntax is modeled on the CSS language utilized in styling net pages. Like CSS, TCSS makes use of selectors to focus on widgets to model. You possibly can choose widgets utilizing their Python class identify, their distinctive ID, or their TCSS class identify.
For illustrative functions, you choose every widget another way:
- The
Staticwidget is chosen by its Python class identify. If you happen to added extraStaticwidgets, they’d all obtain the identical kinds. - The first
Labelwidget is chosen by its ID. A widget’s ID is assigned when it’s constructed, and it needs to be distinctive throughout the software. - The second
Labelis chosen by a TCSS class. The identical TCSS class might be utilized to a number of widgets. This supplies a handy manner so as to add and take away styling dynamically.
TCSS courses don’t have anything to do with Python courses. They’re identifiers used for grouping and organizing model attributes. They’re usually added to a widget throughout development utilizing its courses argument. Nevertheless, TCSS courses, not like IDs, might be freely added to or faraway from a widget.
You may also use TCSS class names as search keys by a DOM question in your Python code. The question will goal all of the widgets that at the moment include the requested courses.
Be aware: There’s much more to find out about TCSS. For a deeper dive into the subject, examine the Textual doc on TCSS. As a result of TCSS is so much like CSS, you can even check out the HTML and CSS for Python Builders tutorial.
Run the instance with exterior styling:
You’ll get the identical outcome as earlier than, however now your Python code is cleaner. Now, you’re able to study in regards to the Textual growth instruments and the advantages they supply.
Utilizing the textual-dev Growth Instruments
The textual-dev package deal provides you entry to the Textual console, which provides you a handy workflow for working with kinds. As an alternative of utilizing the python command to run your software, you can begin the Textual console in your command line:
This command triggers the Textual console that appears one thing like the next:
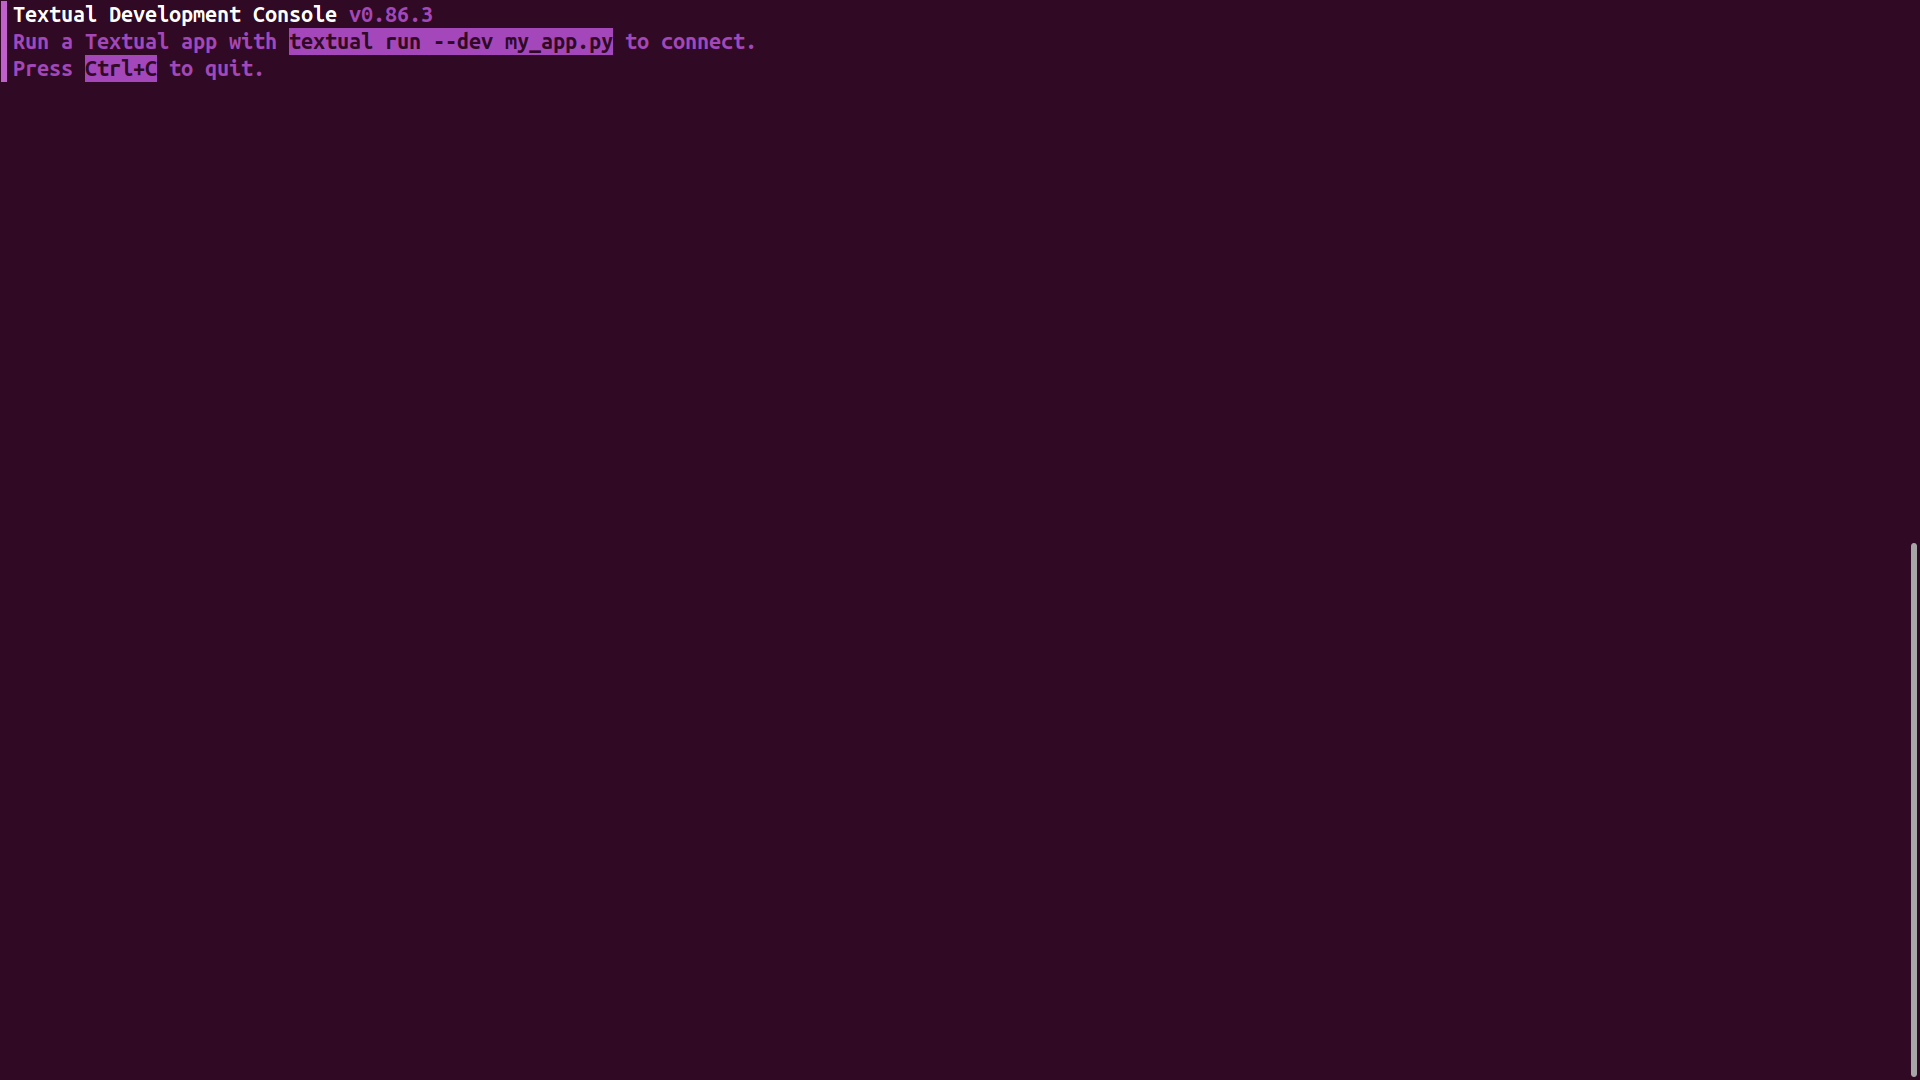
This window will present the debugging output of your app as soon as it’s working, together with log messages, errors, and the output of any print() name you embody in your code.
You possibly can see the Textual console in motion by working your app with textual in one other OS window:
On this second window, your Textual app executes and every little thing seems simply as earlier than. However within the textual console window, you may see a properly formatted, colorized log of every little thing that’s occurring within the software. Attempt clicking on the app window to see the occasions flowing within the log. You possibly can add your individual print() calls within the supply code for debugging functions, and the output will seem within the Textual console window.
Maybe the nicest facet of utilizing textual run --dev as a substitute of a plain python command is that you simply not have to restart the applying if you make adjustments within the .tcss file. For instance, should you change some model particulars in your static_and_label.tcss file, as quickly as you save your adjustments, they’ll seem within the working app. This makes incremental design adjustments a lot simpler to check.
Be aware: You could possibly use the Textual console for working all of the examples on this tutorial. Remember, although, that that is only a comfort for growth. All the .py information you create can be run from the command line within the standard manner. The apps will run precisely as they do within the Textual console, however with out the additional debugging amenities.
One other helpful function of the Textual console is that it might probably act as an online server. To see your software working as an online web page in your browser, you simply want to make use of the serve command:
Then, you may open your browser at http://localhost:8000 to see the outcome. You may also specify a goal server host and port utilizing the --host=<hostname> and --port=<port> choices within the textual serve command.
Laying Out Textual UIs With Containers
Textual widgets might be nested and mixed to create intuitive consumer interfaces and decrease code reuse. The visible hierarchy is often outlined in Python code utilizing containers. Container courses provide help to lay out your UIs.
Apart from easy rectangular schemes, in addition they help a number of views, break up panes, and extra. Within the following sections, you’ll study the fundamentals of Textual containers and methods to use them to rearrange widgets successfully, to construct visually interesting and practical UIs.
Vertical Containers
In your first two apps, you implicitly used a Vertical container. The default format in Textual is Vertical, which is why your widgets are all lined up in a column.
Textual containers are applied as context managers, so you need to use them on a with assertion. For instance, a Vertical container stacks its components vertically:
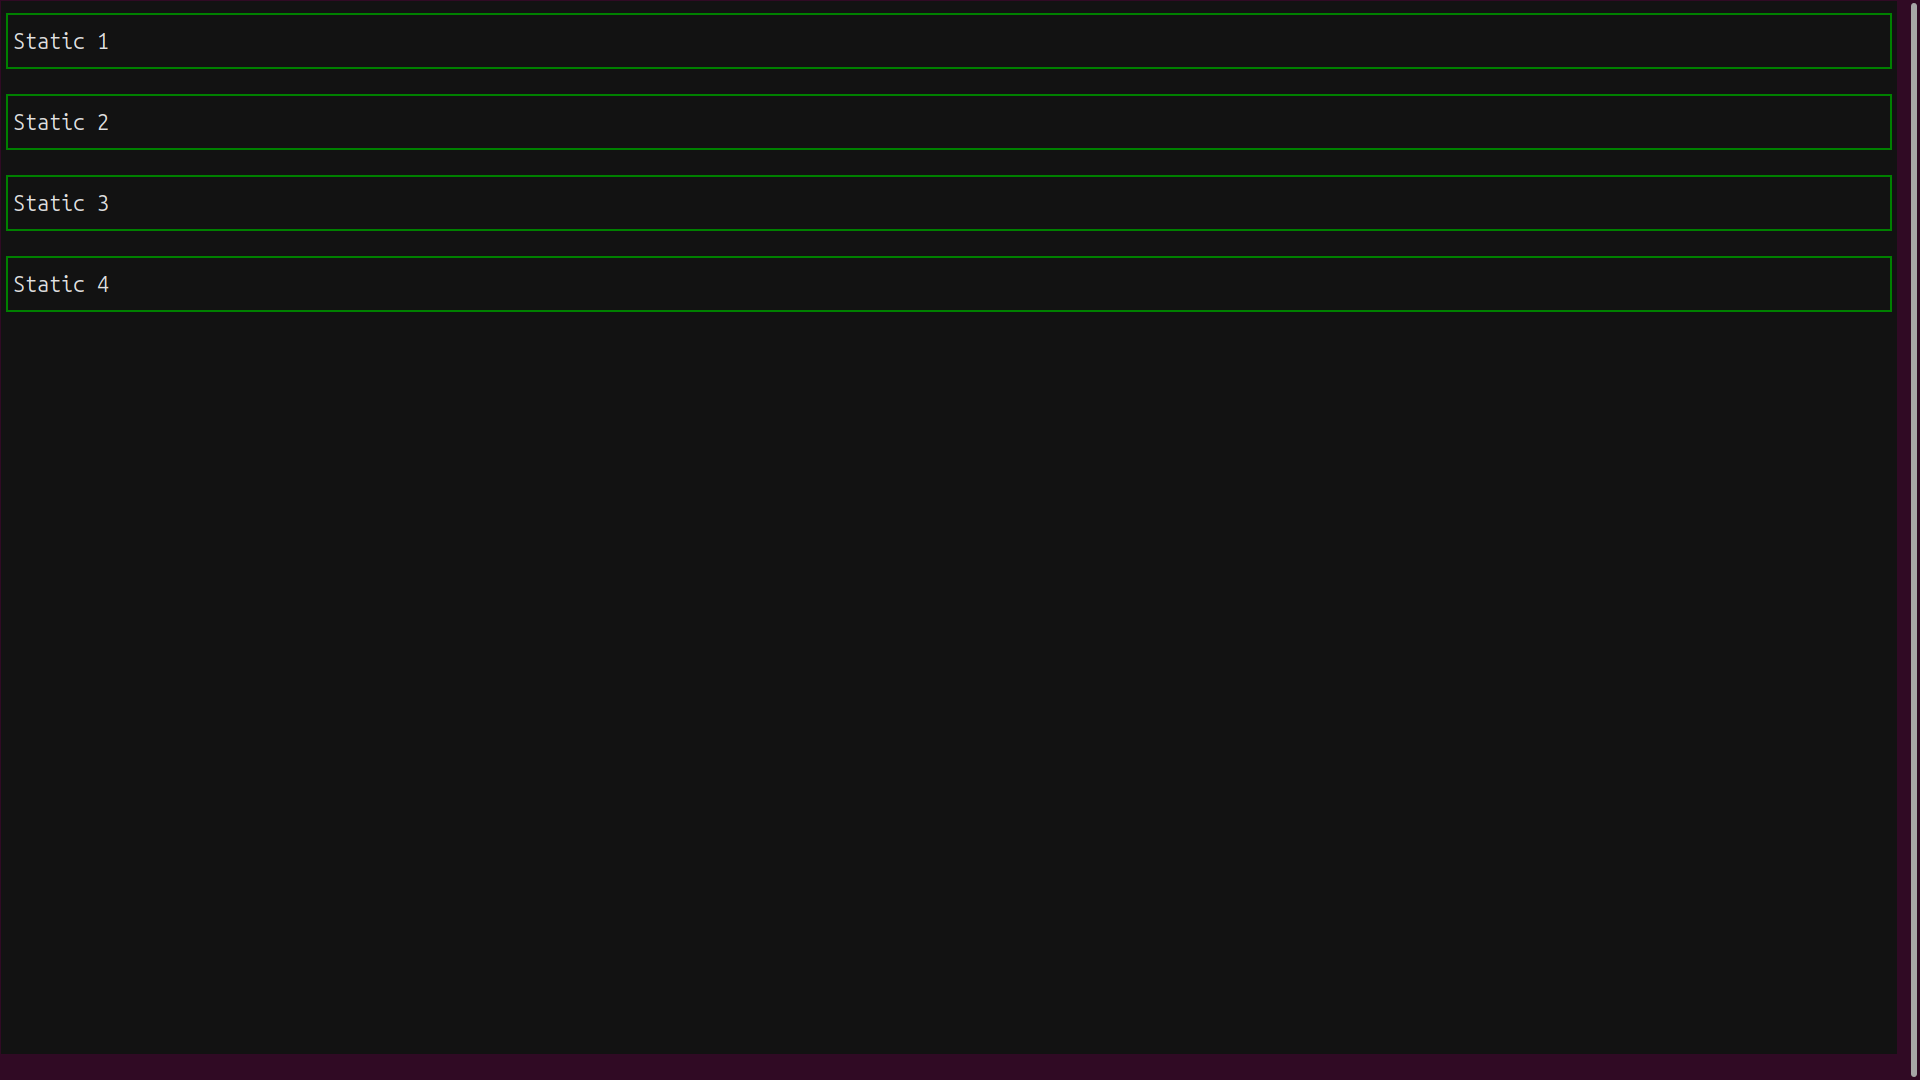
The NUM_BOXES fixed on line 5 determines what number of widgets will probably be stacked. Line 9 introduces the context supervisor. All the things nested beneath it in strains 10 to 13 will probably be managed by a Vertical container, which stacks the widgets vertically on the display screen.
As a result of the Vertical container is the default, you possibly can obtain the identical impact by changing the with Vertical() stanza with the commented code beneath it.
Run the instance to see the impact:
The Static widgets line up in a vertical column:
The vertical_layout.py app makes use of Python code to use kinds to the Static widgets. You possibly can obtain the identical outcome utilizing an exterior .tcss file:
The vertical_layout_tcss.py instance references a .tcss file that will seem like the next:
You possibly can run this model as standard:
The output will probably be equivalent to that from vertical_layout.py.
Recall that NUM_BOXES determines the variety of widgets to be stacked. In both model of the vertical format app, attempt altering NUM_BOXES to a bigger quantity, say 20. If you happen to do that, you’ll have too many widgets to suit vertically on the display screen. A few of them will disappear and turn out to be inaccessible.
Happily, Textual supplies a fast answer to any such concern. You need to use the VerticalScroll container:
You need to use the identical exterior TCSS file as for vertical_layout.py. Run the vertical scrolling instance:
The brand new container class, VerticalScroll, is a drop-in alternative for Vertical that may accommodate an infinite variety of widgets:
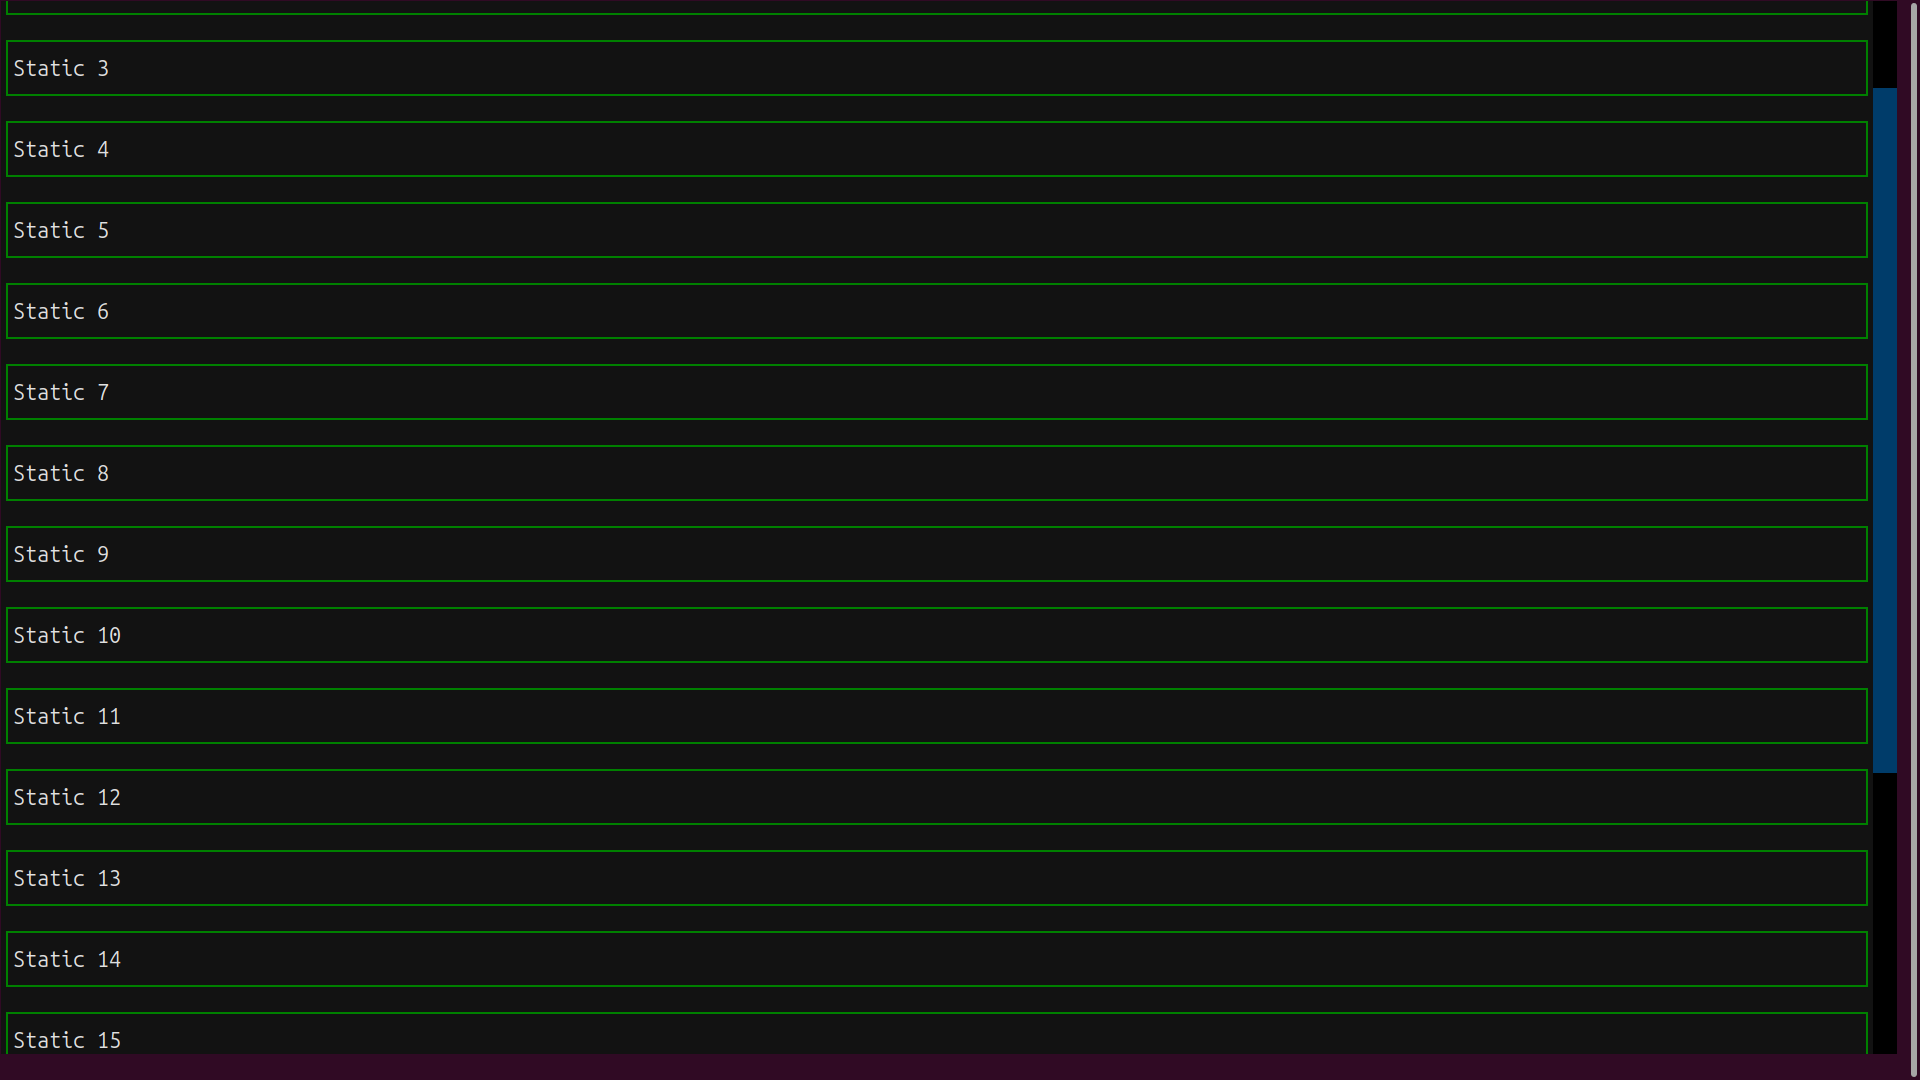
The scrollbar on the fitting of the show permits you to scroll by means of all of the bins, utilizing mouse gestures, the mouse scroll wheel, or the up and down arrow keys.
Horizontal Containers
A Horizontal container works in an analogous approach to the Vertical container however locations the widgets horizontally:
Once more, the with Horizontal() stanza on strains 9 to 14 determines the format of the app. Right here, you’ll want to specify the width of every widget, which you do on line 13. In any other case, the primary widget will increase and declare all of the horizontal house.
You possibly can run the instance within the standard manner:
Right here’s the way it seems with NUM_BOXES set to 4:
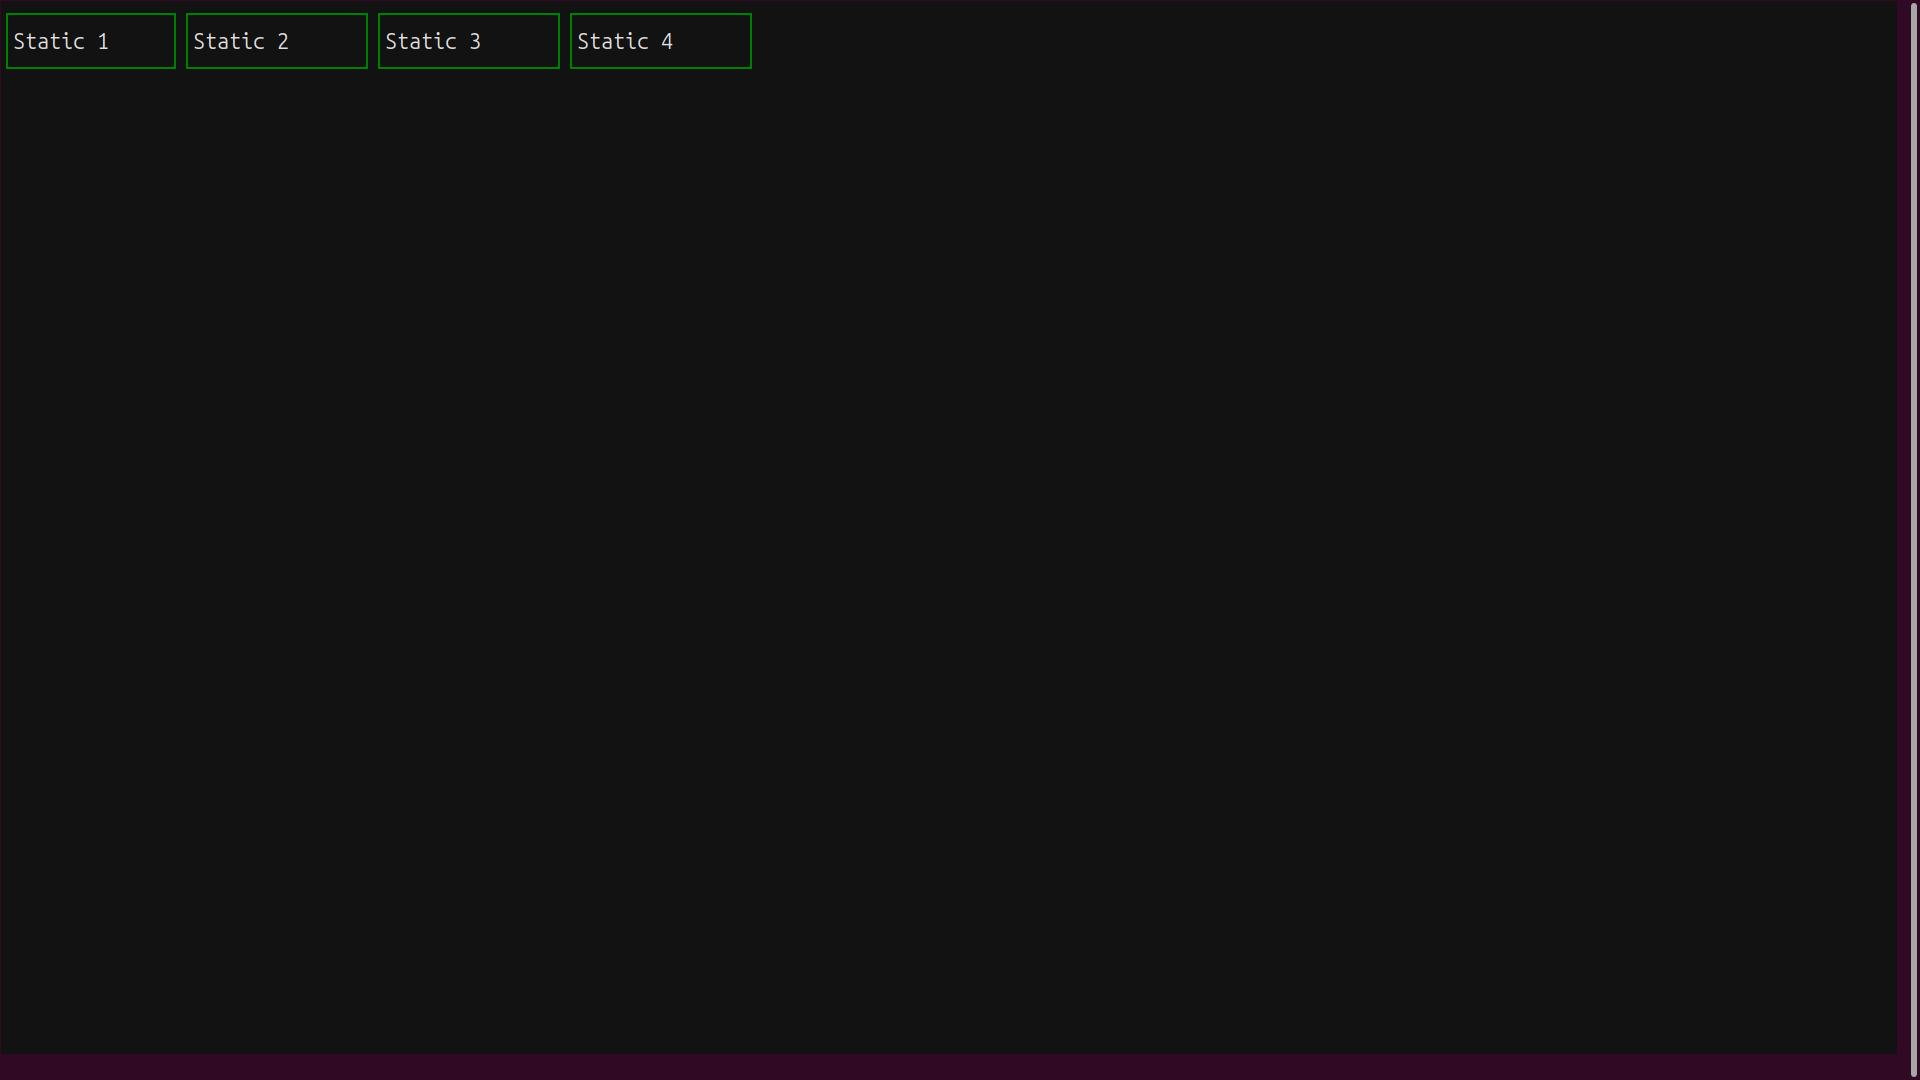
The widgets are laid out neatly in a horizontal row sharing the out there house.
Once more, the Horizontal container works nicely for a small variety of widgets. Setting NUM_BOXES to a bigger quantity will trigger the show to overflow horizontally, and a few bins will turn out to be inaccessible. The answer is as soon as once more to make use of the scrolling variant of the container:
The one change from the earlier app is that now you’re utilizing the HorizontalScroll container class. You’ve set NUM_BOXES to 20 to make sure the scrolling impact is seen.
Run your horizontal scrolling demo:
Now you may scroll by means of all of the widgets:
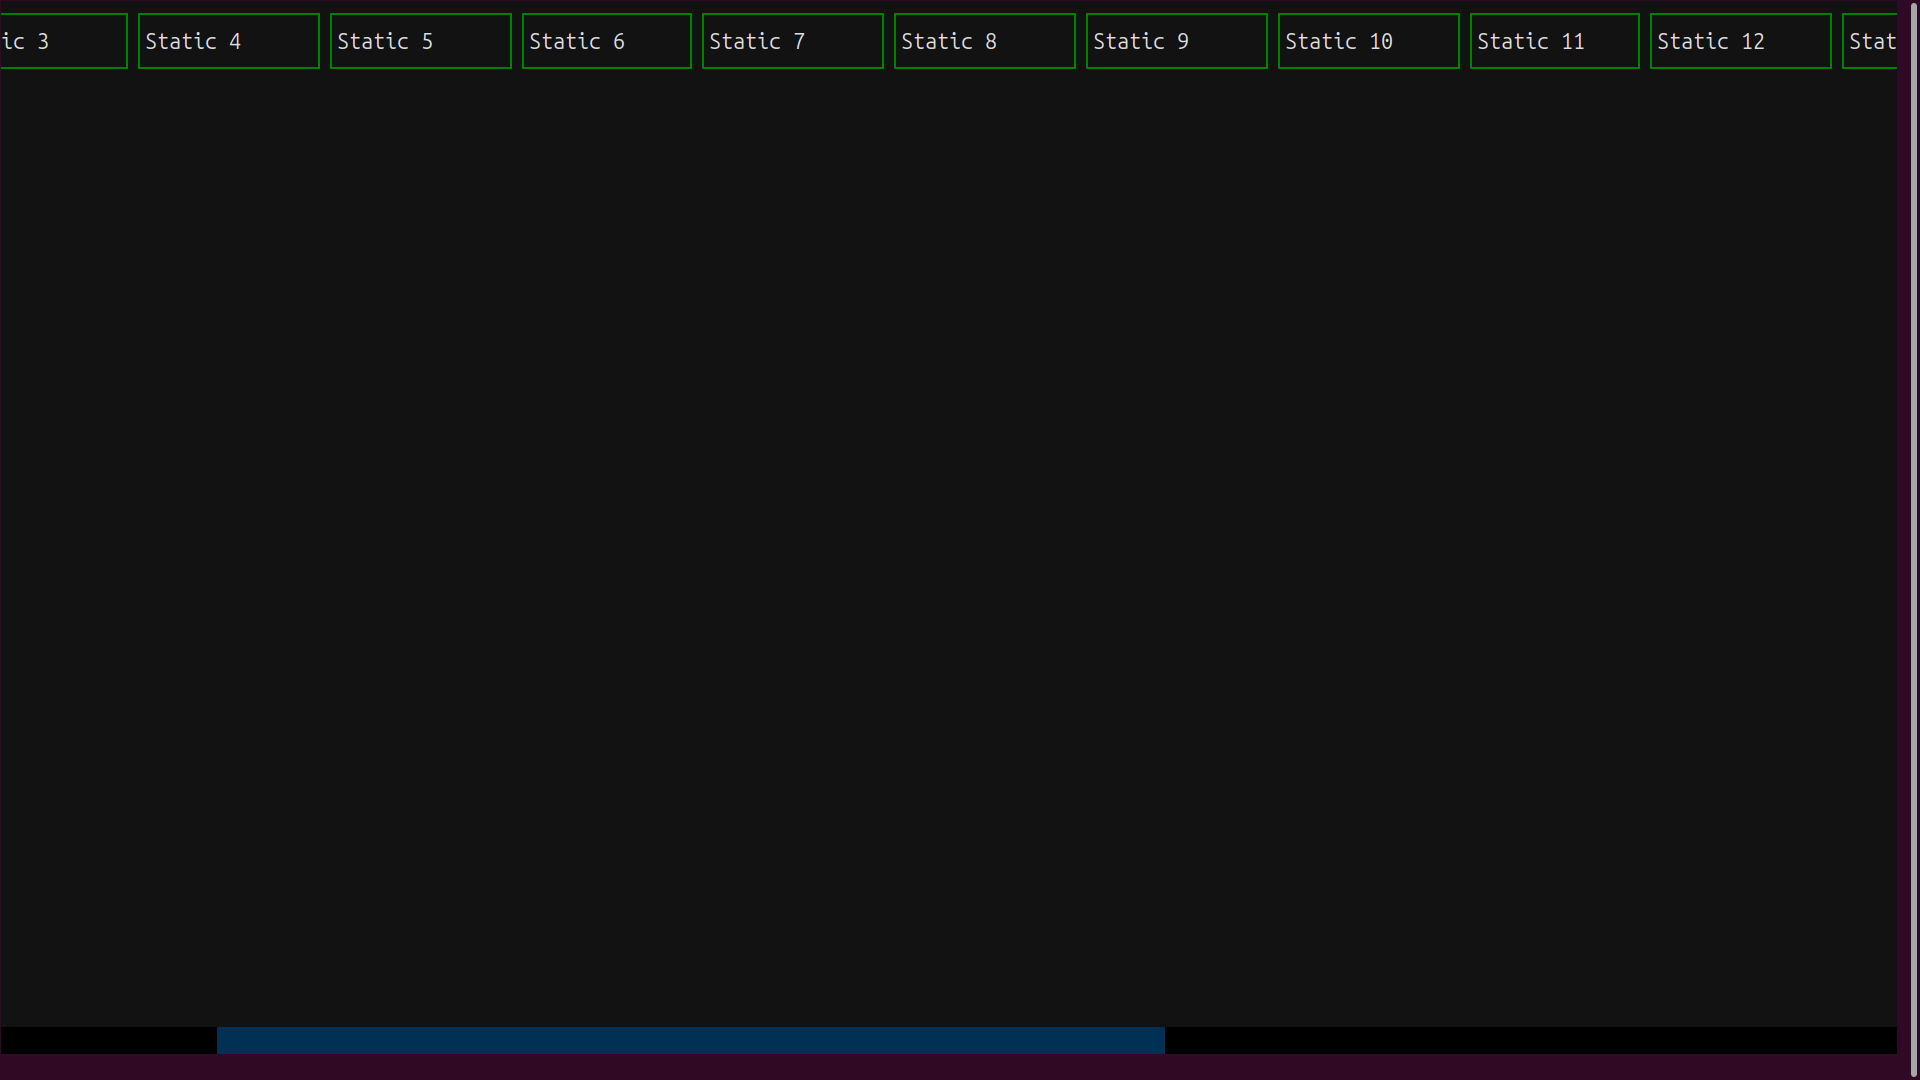
This time, the scroll bar seems robotically on the backside of the display screen. You possibly can manipulate it utilizing the mouse or the Left and Proper arrow keys.
Be aware: You could possibly obtain the identical scrolling results by utilizing Horizontal and Vertical with a even handed alternative of TCSS properties, however the predefined scrollable containers make this a lot simpler when just one axis of scroll is required.
You’re not restricted to a single container class per app. In precept, Horizontal and Vertical containers might be nested indefinitely to make complicated layouts.
Docked Widgets
A completely completely different format choice is dock. It’s not a container-based choice since a docked widget fully ignores the format guidelines outlined by its dad or mum container.
Docks follow their assigned place: high, left, backside, or proper throughout the container. The container’s different widgets get laid out in line with the container’s guidelines, even when this ends in overlaps with the docked widget.
Nested Containers and Docked Widgets
You possibly can nest containers and mix them to create complicated UI layouts. This subsequent instance will mix horizontal and vertical containers with a docked widget:
As all the time, the .compose() methodology defines the UI construction. First, you declare the general format supervisor as a Horizontal container. Inside this container, you’ve a Static widget, a HorizontalScroll container, and a VerticalScroll container.
Every of the scrolling containers holds twelve Static objects, too many to show unexpectedly. As well as, the VerticalScroll incorporates a Label that will probably be docked inside it.
Textual widget constructors have an non-obligatory courses argument that accepts a collection of TCSS class names in a space-separated string. These correspond to TCSS courses outlined in a .tcss file that you simply’ll see in a second.
Be aware: Recall that regardless that TCSS courses are principally used to use kinds, in addition they function question targets to find the related sub-widgets within the app’s DOM for dynamic updates. This may be helpful if you wish to replace a bunch of associated widgets. You possibly can’t use an ID for that as a result of TCSS IDs have to be distinctive.
The linked layouts.tcss file beneath declares the related TCSS:
The .field class defines the final model that can make widgets seem like bins with a coloured border. Be aware that you simply’ve specified the top and width in fr values. This unit represents a fraction of the out there house. If all of the widgets get 1fr, then every will occupy the identical house.
Subsequent, you’ve two extra particular courses: .redbox and .yellowbox. They add or override some model attributes.
The #docked-label ID is utilized to the label outlined throughout the VerticalScroll container. This ID selector positions the label on the container backside utilizing the dock attribute. This positioning is totally impartial of the container’s format.
You possibly can run your app to see the assorted format results:
The ensuing app will look one thing like this:
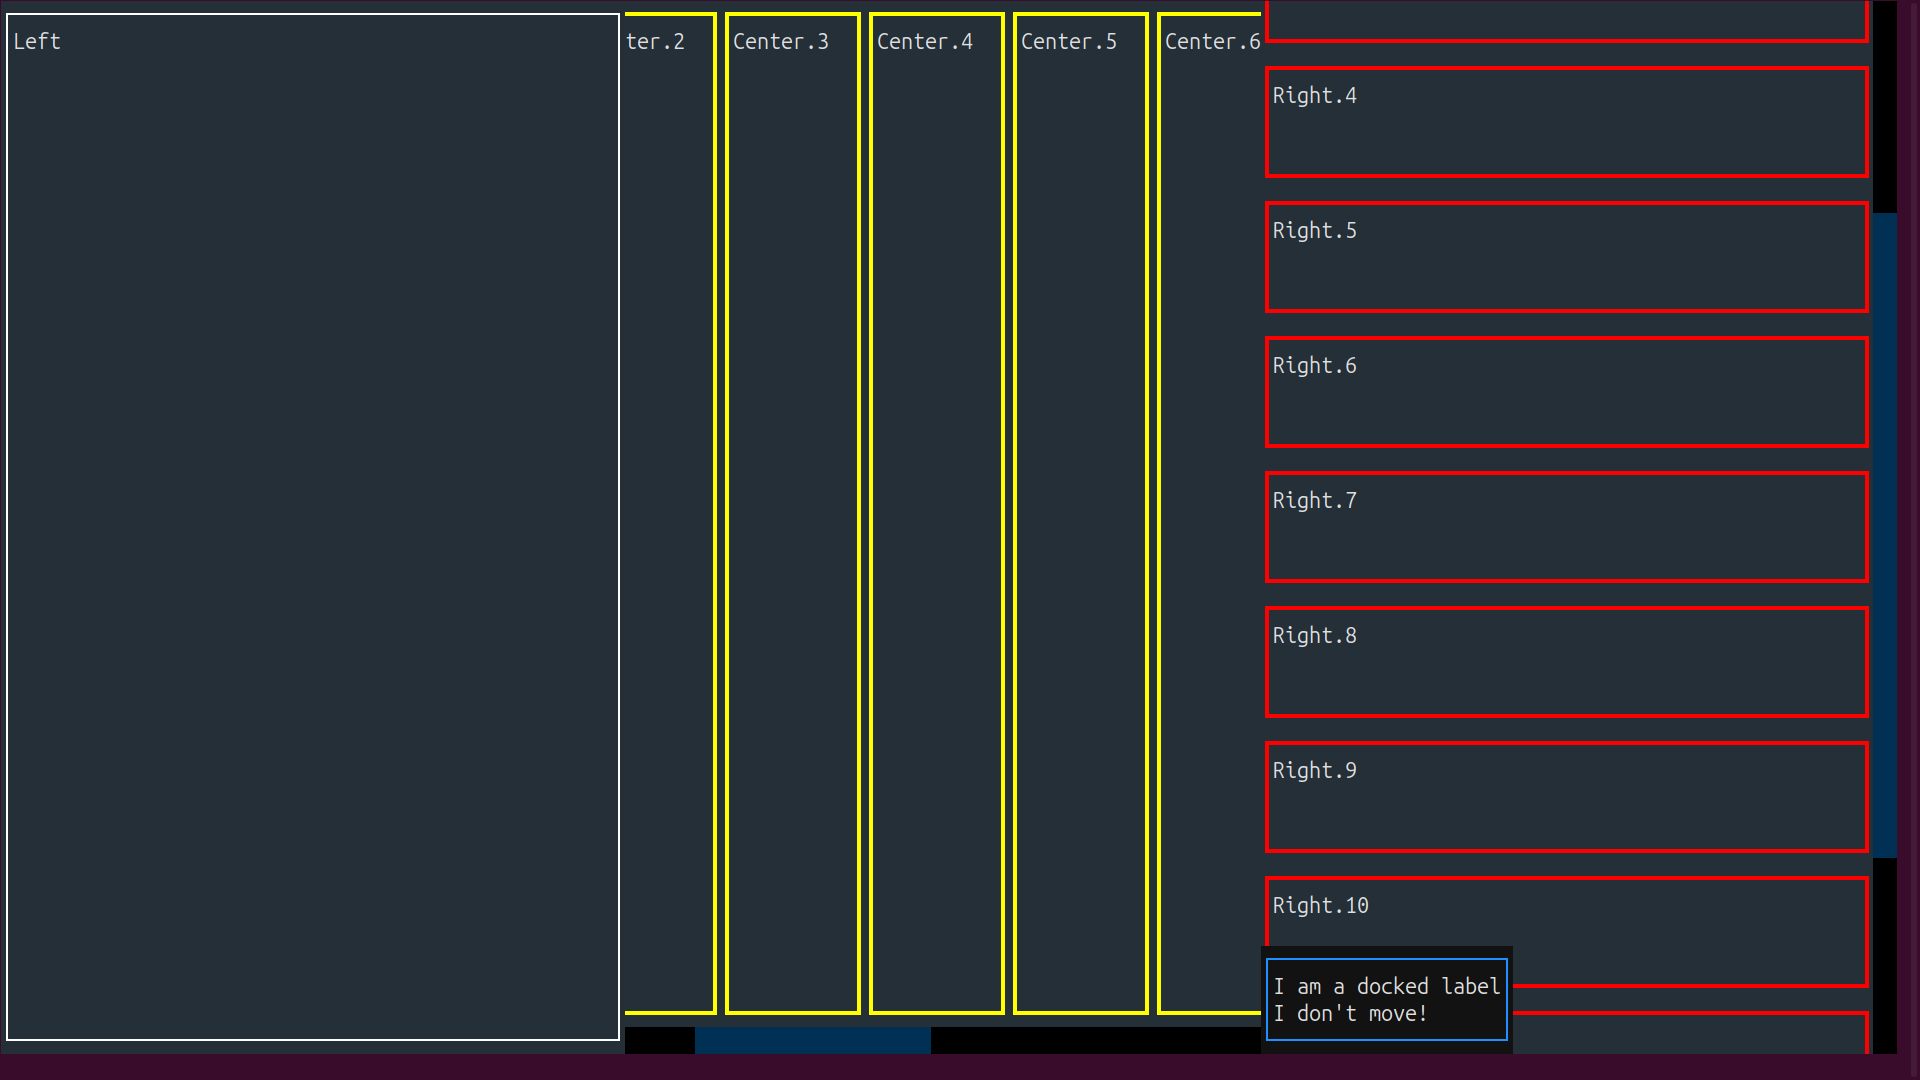
The leftmost widget is a plain Static. The HorizontalScroll within the middle panel scrolls horizontally, and the VerticalScroll within the rightmost half scrolls vertically. The docked label stays mounted as a replacement throughout the VerticalScroll container whereas the opposite widgets scroll previous it.
Whenever you resize the display screen, the format will adapt easily!
Grid Container
The Grid container permits you to specify quite a few rows and columns in your UI. As you yield every widget or container in your .compose() methodology, it’s robotically allotted to a grid place. The columns within the first row are stuffed, then the columns within the second row, and so forth.
You’ve got many styling choices to customise this container. You possibly can assign a top to every row and a width to every column. You may make particular person cells span a number of rows or columns. You possibly can specify gutters to order house between the rows and columns. And naturally, you may shade, body, and add content material to every particular person cell or container throughout the grid.
Right here’s an instance as an example the pliability of the Grid container:
You’ve outlined a Grid container with six rows and 4 columns. The Static widgets will robotically populate this grid from left to proper and from high to backside.
Now you may run your app:
The widgets are organized as specified, and show their row and column numbers:
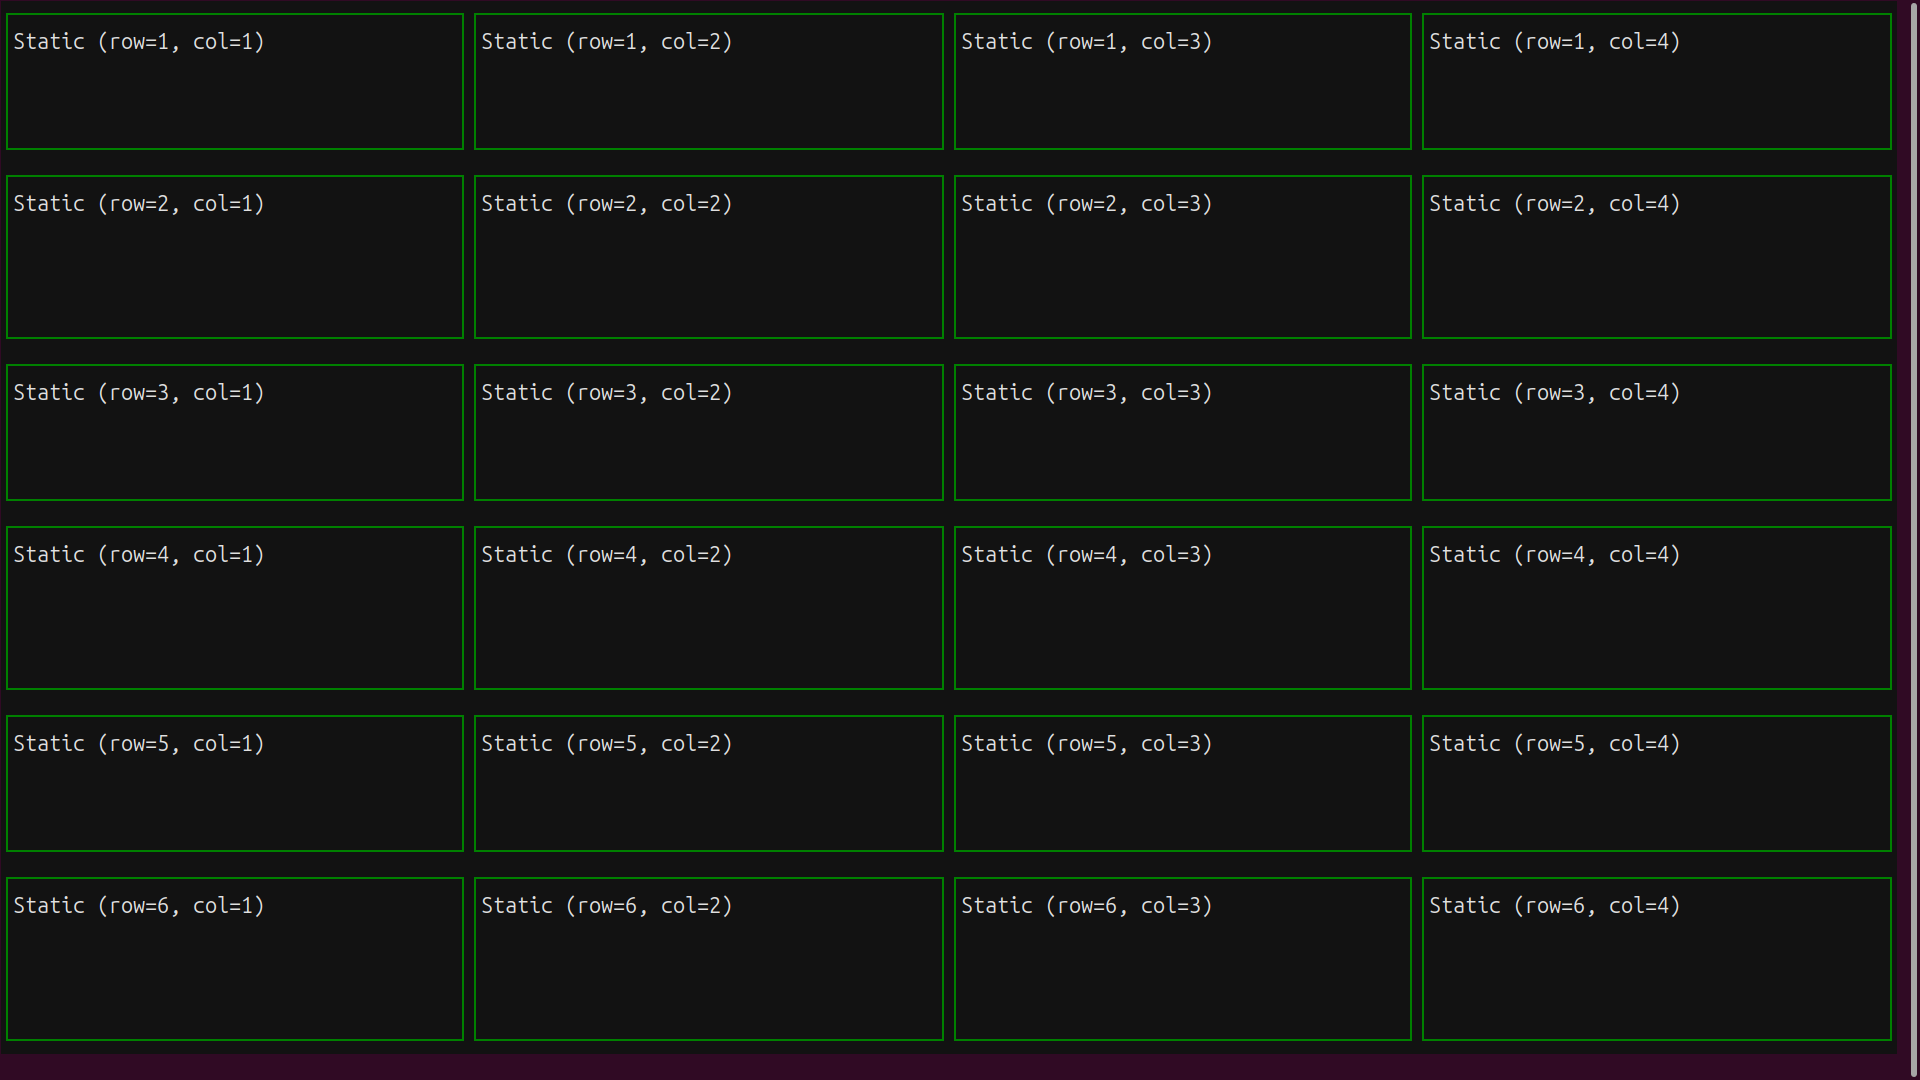
Be aware that by nesting grids along with different containers, you may craft nearly any affordable display screen design.
You may also use an exterior TCSS file to construct the above app. Right here’s how:
The highlighted line references the exterior TCSS file, which has the next styling guidelines for the app:
First, you’ve the Grid class that defines a grid of 4 columns and 6 rows. Then you’ve the Static class that defines some styling for the Static widget.
You possibly can run this model:
The outcome is identical as for the non-TCSS model. On the whole, TCSS is fairly helpful for outlining an app’s format. It will probably simplify your Python code and facilitate the way you model and configure your widgets and containers.
Dealing with Occasions and Actions in Textual Apps
Up thus far, you’ve seen methods to model and format your Textual purposes utilizing both Python code or TCSS code in an exterior .tcss file. Nevertheless, you haven’t but discovered methods to make your apps carry out actual computations in response to consumer interactions.
You’ll have two main methods for the consumer to work together together with your Textual apps:
-
Occasions are often triggered by a consumer interplay with a UI, reminiscent of a mouse click on or a keystroke. They can be related to a timer tick or the arrival of a community packet. You’ll course of occasions utilizing occasion handlers, that are strategies that do one thing when the occasion happens.
-
Actions are often triggered by a particular consumer motion, reminiscent of a keypress or a click on on a hotlink in some textual content. You’ll course of an motion with an everyday methodology prefixed with
.action_and adopted by the motion’s identify.
In Textual, you may create occasion handlers in two alternative ways:
- Prefix the strategy with
.on_adopted by the identify of the occasion - Use the
@ondecorator on the handler methodology
As soon as an occasion or motion has occurred, the occasion handler or motion methodology will get management. Right here’s an instance of an app that handles consumer actions and occasions:
In strains 7 to 10, you outline the BINDINGS fixed. It’s a listing of three-value tuples representing the binding between keystrokes and actions. The primary component of every tuple is the important thing to be certain. The second component is a string representing the strategy that can carry out the motion. The third component is the seen textual content.
This app introduces two new widgets:
Digitshelps the large-format show of digits utilizing line graphic characters.Footersupplies a footer in your app show and in addition robotically exhibits prompts for any outlined keyboard actions.
EventsApp contains two actions. Line 8 declares the Give up motion, which is certain to the Q key. As a result of the Give up motion is such a standard requirement, Textual implements it for you.
Line 9 defines the Toggle border motion, which is certain to the B key. The motion methodology is .action_toggle_border(). Every time the motion is invoked, this code toggles the border of the Digits widget from single to double or from double to single.
Traces 30 to 34 declare the .on_button_pressed() occasion handler. This methodology runs when the consumer clicks the Click on me! button. The handler’s occasion parameter carries details about the triggering occasion. You’ll use this argument to confirm the supply of the occasion earlier than updating the Digits component.
Another event-handler syntax is proven within the commented code. After importing the on decorator in line 1, you need to use it to brighten the handler methodology in strains 37 to 40, which can be given any identify. The decorator syntax in line 36 declares this methodology because the handler for a button-pressed occasion and in addition ensures that it’s referred to as provided that the supply of that occasion has the button ID.
In occasion handlers, you want some approach to reference the widgets. Textual’s DOM retains all of the widgets in a hierarchy and allows you to use queries to find them. Due to this querying mechanism, you don’t have to hold references to the widgets you create in your code.
These queries let you discover widgets utilizing the next properties:
- The Python class identify
- The widget’s ID
- The widget’s TCSS courses
- The widget’s place within the DOM hierarchy
- A mixture of those
In occasions.py, you’ve assigned IDs to sure widgets utilizing the id argument of their constructors. Every ID have to be distinctive throughout the DOM, which permits DOM queries to find particular widgets at runtime.
Textual supplies a number of DOM-querying strategies which are out there to all Widget subclasses. Relying in your wants, you may find a single widget with .query_one() or an entire assortment of widgets with .question(). Within the instance above, you employ self.query_one("#digits") within the .action_toggle_border() methodology to get a reference to the Digits widget by way of its ID.
Textual all the time calls occasion handlers with an occasion argument. This object incorporates helpful details about the occasion that triggered the decision. On this instance, your app makes use of occasion.button.id to examine that the occasion has come from the right button.
The occasions.tcss file for the occasions.py app showcases some new options:
The :hover suffix in line 7 is a pseudoclass. The indicated kinds are utilized to the widget solely when the mouse cursor is hovering over the management. On this instance, the Button will get a unique border model when the cursor is hovering over it to make it come out visually. Lastly, the #digits rule particularly targets the widget with that ID within the app’s DOM.
Now, you’re able to run the instance:
Right here’s the outcome, with the cursor over the Button:
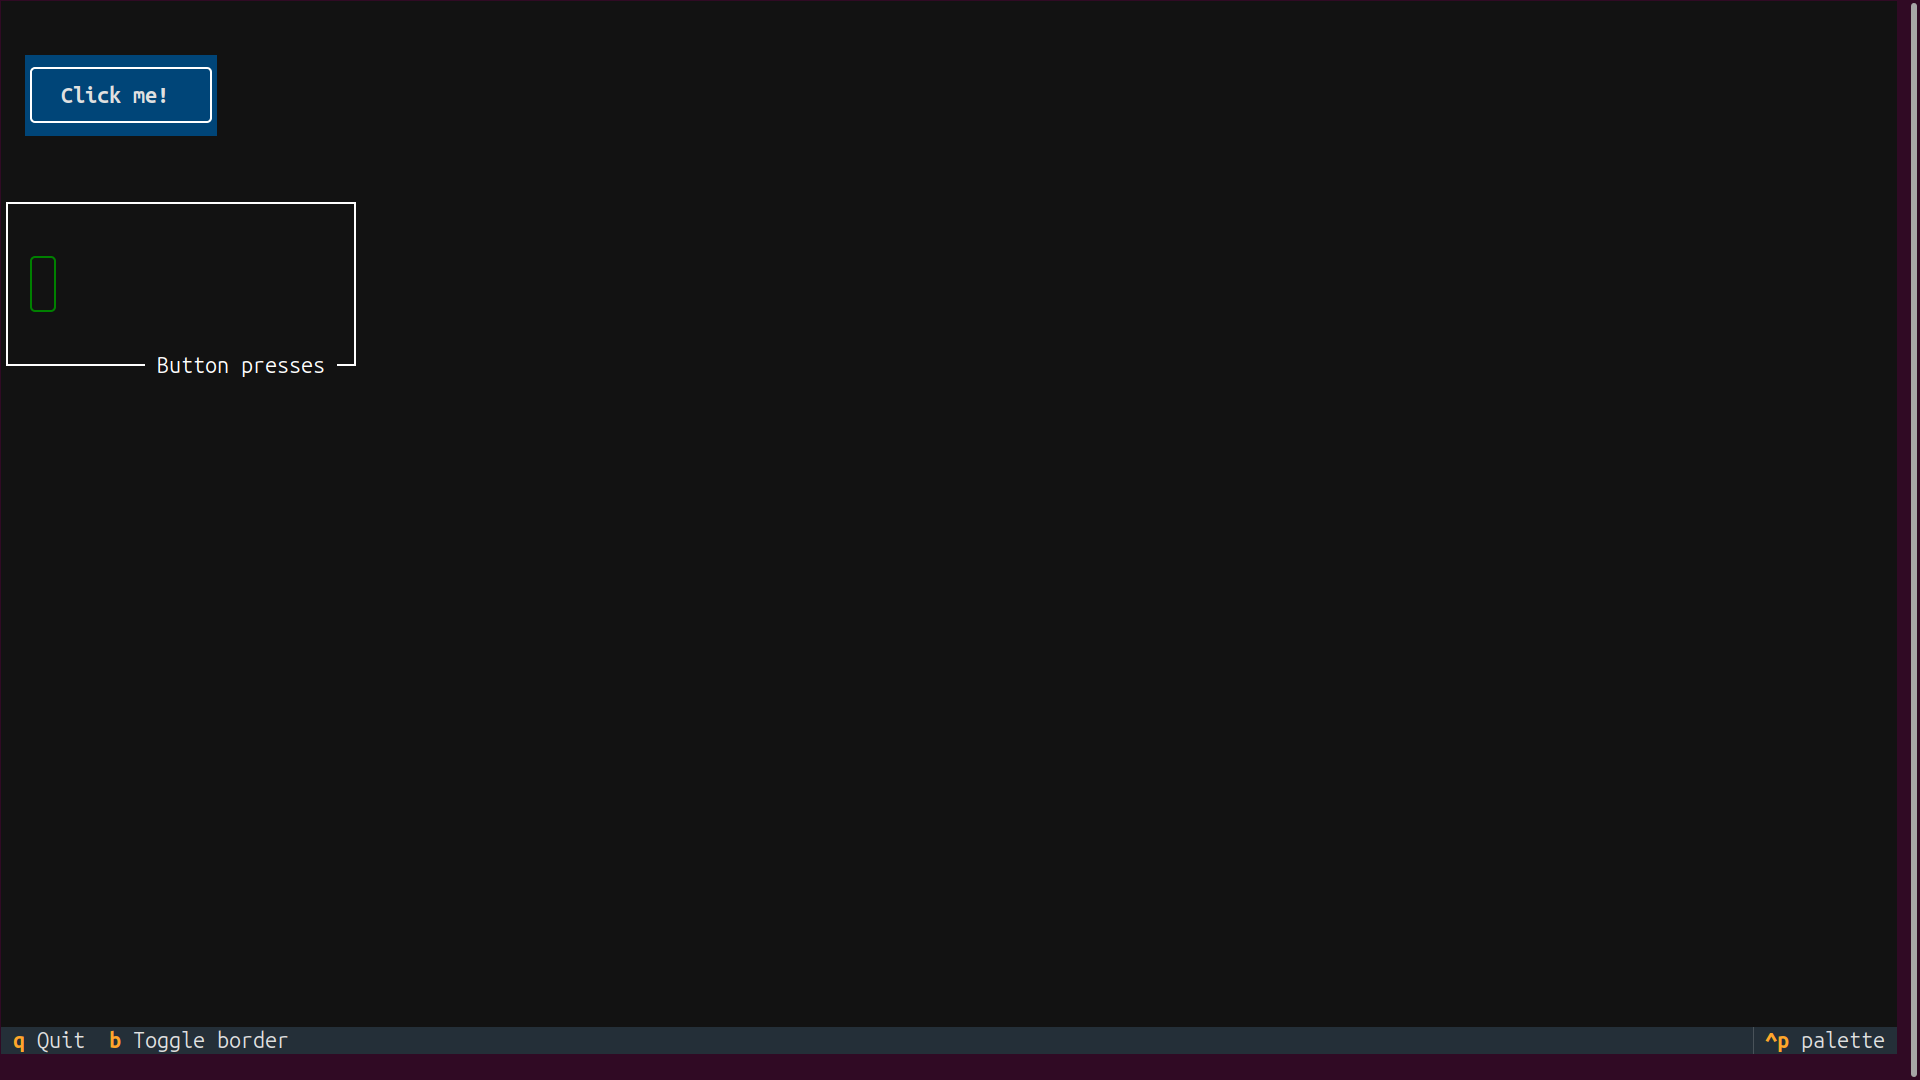
Attempt clicking the button to replace the counter. Press the B key, or click on the b within the footer to toggle the border model across the Digits. Lastly, press Q to give up the applying.
Conclusion
You’ve discovered methods to construct text-based consumer interface (TUI) apps for the terminal utilizing the Python Textual framework. You’ve additionally explored methods to create, model, and improve Textual apps with varied widgets, layouts, occasions, and actions.
Textual is a good library for Python builders who wish to create environment friendly and platform-independent TUI apps, particularly in environments the place graphical consumer interfaces might not be possible.
On this tutorial, you’ve discovered methods to:
- Set up and arrange Textual for constructing text-based interface apps
- Create and magnificence widgets utilizing Python code and TCSS
- Construct and lay out consumer interfaces with Textual containers
- Deal with occasions and actions to make your purposes interactive
With these abilities, now you can create complicated and fascinating text-based interfaces in your purposes, enhancing consumer interplay and expertise in terminal environments.
These examples have given you some thought of the ability and flexibility of Textual, however there’s much more to find about this framework! For a deeper dive, try the official Textual information on the Textual web site. For a extra sensible software, see Construct a Contact Guide App With Python, Textual, and SQLite.
Regularly Requested Questions
Now that you’ve got some expertise with Python Textual, you need to use the questions and solutions beneath to examine your understanding and recap what you’ve discovered.
These FAQs are associated to an important ideas you’ve lined on this tutorial. Click on the Present/Cover toggle beside every query to disclose the reply.
You possibly can create a text-based consumer interface in Python utilizing the Textual framework, which supplies a set of widgets, containers, event-handling mechanisms, and styling choices for constructing visually interesting and interactive TUI apps.
Textual content-based consumer interfaces are environment friendly, platform-independent, and may function over distant connections in low-resource environments, making them perfect for server administration and distant growth duties.
You possibly can set up Textual in Python by making a digital setting and working the command python -m pip set up textual throughout the activated setting.
Textual is a framework for constructing TUI purposes for the terminal, whereas Wealthy is a library for including wealthy textual content formatting to the terminal. Textual leverages Wealthy to boost the visible attraction and performance of its terminal purposes.
Take the Quiz: Check your data with our interactive “Python Textual: Construct Lovely UIs within the Terminal” quiz. You’ll obtain a rating upon completion that can assist you monitor your studying progress:
Interactive Quiz
Python Textual: Construct Lovely UIs within the Terminal
On this quiz, you may check your understanding of the Python Textual library. This library is used to create wealthy terminal purposes and widgets. By working by means of this quiz, you may reinforce your data of Textual’s key ideas and options.