

Welcome readers, on this tutorial, we are going to perceive the best way to use the Context Hook in a React-js software.
1. Introduction
React is a versatile javascript library accountable for constructing reusable UI parts. It’s an open-source component-based frontend library accountable just for the view a part of an software and works in a digital doc object mannequin. However earlier than that allow us check out the variations between angular and react –
| Angular | React |
| Full framework | Library |
| Object-oriented programming | Extension to the javascript library and its inner structure is predicated on jsx |
| Based mostly on the mannequin view controller and actual doc object mannequin | Based mostly on the digital doc object mannequin |
1.1 Use Context hook in React-js
Hooks in React-js are the features which can be hooked into react-js state and lifecycle options from perform parts. The useContext(…) permits the parts to entry international knowledge and re-render when that international knowledge is modified. It helps to resolve the drilling drawback when we have now to cross props from dad and mom to youngsters parts. It helps to take away the complicated nesting.
- Props drilling in React-js is an issue the place knowledge is handed from one part by means of a number of a number of interdependent parts till we get to the part the place the information is required
1.2 Organising dependencies
To play with React allow us to arrange among the required dependencies.
1.2.1 Organising Node.js
To arrange Node.js on home windows you’ll need to obtain the installer from this hyperlink. Click on on the installer (additionally embody the NPM package deal supervisor) on your platform and run the installer to begin with the Node.js setup wizard. Observe the wizard steps and click on on End when it’s executed. If the whole lot goes properly you may navigate to the command immediate to confirm if the set up was profitable as proven in Fig. 1.

1.2.2 Organising React-js venture
As soon as the Nodejs setup is profitable we are going to use the under command to put in the react library and arrange the venture. Do observe that the npx package deal is out there with the npm 5.2 model and above.
Create venture construction
$ npx create-react-app usecontext-app
The above command will take a while to put in the react library and create a brand new venture named – usecontext-app as proven under.
2. Utilizing React Context Hook
To arrange the applying, we might want to navigate to a path the place our venture will reside and I can be utilizing Visible Studio Code as my most well-liked IDE.
2.1 Organising the react code
To know a sensible implementation allow us to undergo some hands-on workouts.
2.1.1 Creating parts
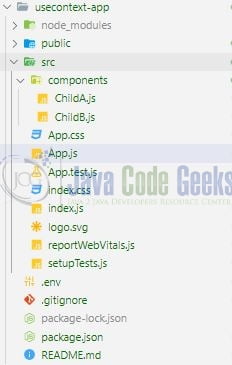
Create a folder named parts within the src folder.
2.1.1.1 Creating ChildA part
Add the next code to the ChildA.js file. We’ll use the useContext(..) hook to retrieve the information from the titleContext context. The context can be handed from the App.js file.
ChildA.js
import React, { useContext } from "react";
import { titleContext } from "../App";
import ChildB from "./ChildB";

const ChildA = () => {
  // retrieved from app.js
  const title = useContext(titleContext);

  return (
    <>
      <h2>{title}</h2>
      <ChildB></ChildB>
    </>
  );
};

export default ChildA;
2.1.1.2 Creating ChildB part
Add the next code to the ChildB.js file. We’ll use the useContext(..) hook to retrieve the information from the genreContext and nameContext context. The context can be handed from the App.js file.
ChildB.js
import React, { useContext } from "react";
import { genreContext, nameContext } from "../App";

const ChildB = () => {
  // retrieved from app.js
  const web site = useContext(nameContext);
  const websiteGenre = useContext(genreContext);

  return (
    <>
      <h4>
        {web site} is of {websiteGenre} class
      </h4>
    </>
  );
};

export default ChildB;
2.1.2 Creating implementation file
Within the App.js part we are going to name the kid part and export the created contexts. We’ll use the createContext(…) methodology to create a context occasion and Supplier on the context occasion to offer the context to the kid parts, regardless of how deep they’re within the software. To set the worth of the context we use the worth prop out there on the supplier.
App.js
import { createContext } from "react";
import "./App.css";
import ChildA from "./parts/ChildA";

// what's the useContext hook?
// create, supplier, useContext
// permits the part to entry some international knowledge and re-render when that international knowledge is modified.
// solves props drilling drawback once we cross down props from dad and mom to youngsters.

// the best way to use it?
const titleContext = createContext();
const nameContext = createContext();
const genreContext = createContext();

perform App() {
  const title = "useContext hook in reactjs";
  const identify = "javacodegeeks";
  const style = "studying";

  return (
    <div className="App">
      <titleContext.Supplier worth={title}>
        <nameContext.Supplier worth={identify}>
          <genreContext.Supplier worth={style}>
            <ChildA></ChildA>
          </genreContext.Supplier>
        </nameContext.Supplier>
      </titleContext.Supplier>
    </div>
  );
}

export default App;
export { titleContext, nameContext, genreContext };
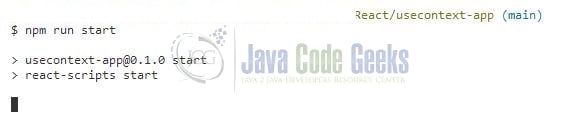
3. Run the setup
To run the applying navigate to the venture listing and enter the next command as proven under within the terminal.
Run command
$ npm run begin
The applying can be began on the default port. In case the applying doesn’t get began on the default port you may change the port quantity as per your requirement. I’ve modified the default port to 2000.
4. Demo
The applying can be began within the default browser as proven under and a welcome message can be proven.

That’s all for this tutorial and I hope the article served you with no matter you had been searching for. Blissful Studying and don’t forget to share!
5. Abstract
On this tutorial, we created a react software and understood the Context Hook in React-js. You possibly can obtain the supply code from the Downloads part.
6. Obtain the Mission
This was a tutorial to grasp the useContext() hook in a react software.