


Within the following tutorial, you’ll learn to create a pop artwork textual content impact in Adobe Illustrator.
First, you’ll learn to create two easy patterns. Utilizing an Envato Parts font and your saved patterns together with the Look panel, you’ll learn to put collectively your editable pop artwork textual content impact.
If you do not have the time to make your pop artwork textual content impact from scratch, then Envato Parts is the answer. This subscription-based market has over 2,000 Illustrator add-ons you possibly can obtain with out restrictions! You could find pop artwork comedian fonts, pop artwork letters, and extra. This pop artwork textual content impact is simply one of many many examples.


What You may Be taught in This Pop Artwork Textual content Font Tutorial
- Tips on how to create patterns in Illustrator
- Tips on how to create editable pop artwork lettering
- Tips on how to create a pop artwork textual content impact
What You may Want
You will have the next font to be able to full this pop artwork textual content impact:
1. Tips on how to Create a New Doc and Set Up a Grid
Hit Management-N to create a brand new doc. Choose Pixels from the Models drop-down menu, set the Width to 850 px and the Top to 800 px, after which click on that Superior Choices button. Choose RGB for the Colour Mode and set the Raster Results to Display screen (72 ppi), after which click on the Create button.
Allow the Grid (View > Present Grid or Management-“) and the Snap to Grid (View > Snap to Grid or Shift-Management-“). You will have a grid each 5 px, so merely go to Edit > Preferences > Guides & Grid, enter 5 within the Gridline each field and 1 within the Subdivisions field. Strive to not get discouraged by all that grid—it’ll make your work simpler, and remember the fact that you possibly can simply allow or disable it utilizing the Management-“ keyboard shortcut.
You must also open the Data panel (Window > Data) for a dwell preview with the dimensions and place of your shapes. Do not forget to set the unit of measurement to pixels from Edit > Preferences > Models. All these choices will considerably enhance your work velocity.


2. Tips on how to Create and Save Two Patterns
Step 1
Decide the Line Software () and use it to create a 30 px, horizontal path. Preserve it chosen and deal with the management panel to regulate the colour settings. Take away the fill colour, set the stroke colour to R=22 G=1 B=80 and remember to extend the Weight to 2 px.
Change to the Direct Choice Software (A), choose simply the left anchor level and drag it 30 px up, as proven within the second picture.


Step 2
Ensure that your line remains to be chosen and go to Impact > Distort & Rework > Rework. Set the variety of Copies to 3 and drag that Transfer-Vertical slider to 10 px, after which click on the OK button to use the impact.


Step 3
Transferring on, you will want a gridline each 1 px. Go once more to Edit > Preferences > Guides & Grid and enter 1 within the Gridline each field.
Preserve focusing in your strains and decide the Rectangle Software (M). Use it to create a 20 px sq. and place it precisely as proven within the first picture. When you’re achieved, guarantee that the sq. is chosen and press Shift-Management-[ to move it behind the lines.


Step 4
Make sure that your square is still selected and remove the fill color to make the shape invisible.
Use the Selection Tool (V) to select your invisible shape along with the lines and simply drag them into the Swatches panel (Window > Swatches) to save them as a pattern.


Step 5
Reselect the Rectangle Tool (M) and use it to create a 10 px square.
Switch to the Ellipse Tool (L) and create a 4 px circle, fill it with white (R=255 G=255 B=255) and place it as shown in the second image.


Step 6
Select that 10 px square and make it invisible, and then select it along with the white circle. Again, drag your selection into the Swatches panel, and this will be your second pattern.


3. How to Create the Pop Art Lettering Background
Step 1
Pick the Rectangle Tool (M), use it to create a shape that covers your entire background, and fill it with R=255 G=235 B=40.


Step 2
Make sure that your background shape is still selected, open the Appearance panel (Window > Appearance), and add a second fill using the Add New Fill button.
Select this new fill and apply your first pattern from the Swatches panel, and then change its Blending Mode to Overlay.


4. How to Create the Pop Art Letters
Step 1
Pick the Type Tool (T) and focus on the control panel to set the settings for the text that you’re about to add. Select that Etna font and set the size to 220 px, don’t forget to Align Center the text, and then click on your artboard to type in your text.


Step 2
Make sure that your text remains selected and remove the current text color. This can be easily done from the control panel.
Once you’re done, move to the Appearance panel and use that same Add New Fill button to add a fill for your selected text. Select this new fill and set its color to R=239 G=1 B=141.


Step 3
Make sure that your text remains selected for the rest of this tutorial and keep focusing on the Appearance panel.
Use that same Add New Fill button to add a second fill for your text. Select it and set the color to R=89 G=0 B=178, drag it below the first fill, and then go to Effect > Distort & Transform > Transform. Increase the number of Copies to 20 and set both Move sliders to 0.5 px, and then click OK.


Step 4
Add a third fill for your text and select it. Drag it below the existing fills and set its color to R=22 G=1 B=80, and then go to Effect > Distort & Transform > Transform. Just drag both Move sliders to 20 px and then click OK.


Step 5
Add a new fill for your text and select it. Drag it below the existing fills and apply your first pattern from the Swatches panel, and then go to Effect > Distort & Transform > Transform. Set both Move sliders to 30 px and then click OK.


Step 6
Add a new fill for your text and select it. Place it on top of the existing fills and apply your second pattern from the Swatches panel, and then go to Effect > Distort & Transform > Transform. Set both Move sliders to -5 px and then click OK.


Step 7
Select the existing stroke from the Appearance panel, set the color to R=22 G=1 B=80 and increase the Weight to 4 px, and then go to Effect > Path > Offset Path. Set the Offset to -2 px and click OK, and then go to Effect > Distort & Transform > Transform. Set both Move sliders to -10 px and click OK.


Step 8
Finally, make sure that your pop art text is still selected and keep focusing on the Appearance panel. For the beginning, click that Type text from the top of the panel to make sure that the effect which you’re about to add will distort the entire text effect.
Go to 3D and Materials > 3D (Classic) > Rotate (Classic). Enter the settings shown below and then click OK to apply this final effect.


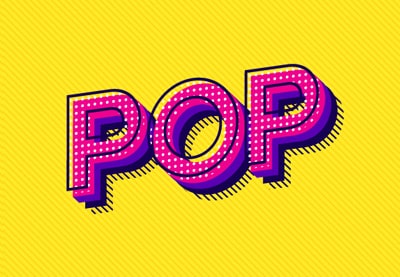
Congratulations! You’re Done!
Here is how your pop art lettering should look. I hope you’ve enjoyed this tutorial and can apply these techniques in your future projects.
Feel free to adjust the final pop art letters. You can find some great sources of inspiration at Envato Elements, with interesting solutions to stylize any pop art text font.


Popular Pop Art Lettering From Envato Elements
Envato Elements is an excellent resource for pop art text effects and pop art fonts. Here’s a short list of some of the most popular pop art letters that you can find.
Vector Pop Art Text Effect (AI, EPS)
Cut the hassle of learning how to create a pop art text effect and use this vibrant text effect instead. It’s fully editable, so just double-click the text and type in yours.


3D Pop Art Text Effect (AI, EPS)
Here’s another bold and colorful pop art text effect that you can use if you don’t have the time to put together your own design.


Pop Art Font (OTF, TTF, WOFF)
Here’s one of the many pop art fonts that you will find at Envato Elements. Give it a try to make your own pop art text effect.


Pop Art Comic Font (OTF, TTF, WOFF)
Keep it sweet and funny with this pop art text font. These smooth and bold letters will make your pop art text stand out.


Pop Art Font (OTF, TTF, WOFF)
Here’s one more pop art font that can be a pretty good option whenever you’re looking to create pop art lettering.


Want to Learn More?
We have loads of tutorials on Envato Tuts+, from beginner to intermediate level. Take a look!