


Are you searching for a option to maintain your Ubuntu system in its tip-top form? You’re in luck! Discover ways to maintain updated with computerized upgrades in Ubuntu and improve your system repeatedly.
On this tutorial, you’ll discover ways to set Automated Upgrades in your machine, configured for complete management over which packages to improve.
Keep tuned and let Automated Improve maintain your Ubuntu system keep up-to-date!
Necessities
This tutorial contains hands-on demonstrations. To finish this tutorial, you will want the next:
- An Ubuntu system – This tutorial makes use of Ubuntu 20.04, however you should utilize any taste of Ubuntu, together with Ubuntu Desktop, Ubuntu Server, or Kubuntu.
- A consumer account with sudo privileges.
Putting in Automated Upgrades in Ubuntu
One of many quickest methods to make sure you get the most recent updates as they’re launched is with the Automated Improve. This tutorial will set up Automated Improve in your machine with the apt package deal supervisor.
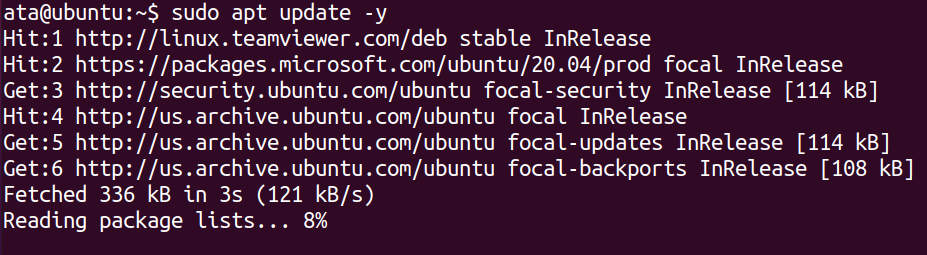
1. Open your terminal and run the next apt replace command to replace your system’s package deal index.
2. Subsequent, run the under apt set up command to put in the unattended-upgrades package deal.
sudo apt set up unattended-upgrades -y
3. As soon as put in, run the under systemctl instructions to begin and allow the unattended-upgrades service systemd unit. This command ensures that the service begins routinely at boot time and persists after reboot.
# Begin the unattended-upgrades service
sudo systemctl begin unattended-upgrades
# Allows the unattended-upgrades to begin at bootup
sudo systemctl allow unattended-upgrades4. Lastly, run the next command to examine the standing of the unattended-upgradesservice unit to make sure it runs appropriately.
sudo systemctl standing unattended-upgrades.service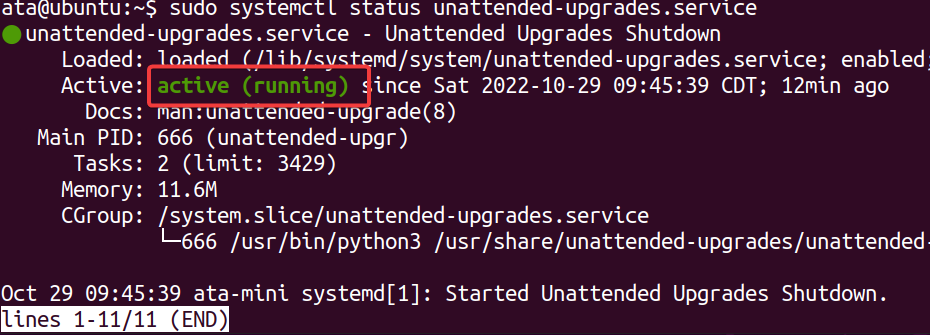
Configuring Automated Improve
Putting in and enabling Automated Improve ought to work wonderful in getting computerized updates to your machine. However what if there are packages you do not need to get fixed updates? Configuring Automated Improve will do the trick.
To configure Automated Improve, open the configuration file (/and so forth/apt/apt.conf.d/50unattended-upgrades) in your most popular textual content editor.
You will note the same configuration to the one under. The // image in entrance of every choice denotes the choice is commented out, which the Automated Improve service ignores.

Learn on and see how one can get full management over which packages get fixed updates.
Ignoring Particular Packages
Why let different packages replace should you can have them blacklisted? The Automated Improve configuration file allows you to ignore particular packages. This characteristic will be helpful whether or not you wish to ignore packages completely or maintain them off on upgrading till a later time.
Scroll all the way down to the Unattended-Improve::Bundle-Blacklist part and add the names of any packages you wish to blacklist, every on its line.
For instance, add apache2 to blacklist the Apache package deal.

Enabling Further Repositories
Solely the official Ubuntu and safety repositories are enabled by default in Automated Improve. However you possibly can enable different repositories to incorporate within the improve course of.
Scroll all the way down to the Unattended-Improve::Allowed-Origins part.
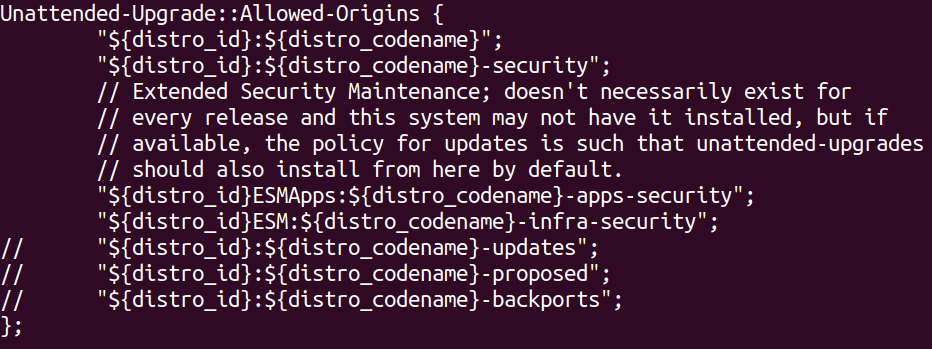
Now, take away the // symbols in entrance of any repositories you wish to allow.
This tutorial allows the entire Ubuntu repositories, like:
- updates – for secure package deal releases.
- proposed – for testing new secure package deal variations.
- backports – for newer variations of present secure packages.

Rebooting the System Routinely
Would you select to reboot your system routinely after a profitable improve? Why not? Doing so helps guarantee your system is at all times up-to-date. However this characteristic will also be disruptive if you’re in the course of utilizing your system when an improve occurs.
To allow computerized rebooting, scroll all the way down to the Unattended-Improve::Automated-Reboot line, take away the // image, and make sure the worth is about to true.

Eradicating Unused Dependencies
Put in dependencies solely devour cupboard space. Why not take away them? This configuration enables you to configure whether or not or not unused dependencies must be routinely eliminated after a profitable improve.
Observe that whereas this characteristic helps maintain your system clear, it may well additionally take away packages that you simply nonetheless want however are now not utilized by the upgraded packages.
To allow the removing of unused dependencies, discover the Unattended-Improve::Take away-Unused-Dependencies line, take away the // image, and set the worth to true.

Enabling Verbose Logging
When an improve fails, how are you aware what induced it? Verbose logging is a good way to get extra details about the automated improve course of.
This characteristic can assist troubleshoot a failed improve or should you merely wish to know extra about what is going on behind the scenes.
To allow verbose logging, scroll all the way down to the Verbose Logging line, take away the // image, and set the worth to true. As soon as modified, save and shut the file for the modifications to take impact.

Enabling Unattended Automated Updates
At this level, it’s best to have a great understanding of the way to configure Automated Improve to satisfy your wants. However you continue to want a method, particularly a file, to inform the system when to run computerized updates. This file is known as 20auto-upgrades and must be positioned within the /and so forth/apt/apt.conf.d listing.
Managing or creating recordsdata within the /and so forth/apt/apt.conf.d listing requires a sudo privilege.
To allow Unattended Automated Updates:
1. Create a file known as 20auto-upgrades within the /and so forth/apt/apt.conf.d/ in your most popular textual content editor.
sudo nano /and so forth/apt/apt.conf.d/20auto-upgrades2. Subsequent, add the next configuration choices to the 20auto-upgrades file, save the modifications and shut the file.
This configuration is the naked minimal you want to get began with computerized updates, the place:
- The primary line tells the system to replace the record of obtainable packages every day. This selection is important, so the system is aware of which packages have out there updates.
- The second line tells the system to run unattended-upgrades as soon as a day. This selection is what performs the improve course of.
- The third line tells the system to routinely clear up any previous or unused recordsdata as soon as per week.
APT::Periodic::Replace-Bundle-Lists "1";
APT::Periodic::Unattended-Improve "1";
APT::Periodic::AutocleanInterval "7";
3. Lastly, run the under command to restart the unattended-upgradesservice to use the modifications.
This command doesn’t present output, however you take a look at all configurations within the following part.
sudo systemctl restart unattended-upgrades.serviceTesting the Automated Improve Configurations
You’ve got managed to get all the pieces configured. However how are you aware all configurations are working? Common updates occur as soon as a day, so you shouldn’t have to attend too lengthy.
However the quickest option to take a look at your Automated Improve configuration is by performing a dry run of the unattended-upgrade course of.
Run the unattended-upgrade command under to conduct a –dry-run of all upgrades with out truly putting in any (–debug).
sudo unattended-upgrades --dry-run --debugYou will note a comparatively lengthy output. However at first, you will note an output just like the one under.
As you possibly can see, the apache2 package deal is blacklisted, which signifies your configuration works in blacklisting packages from upgrading.

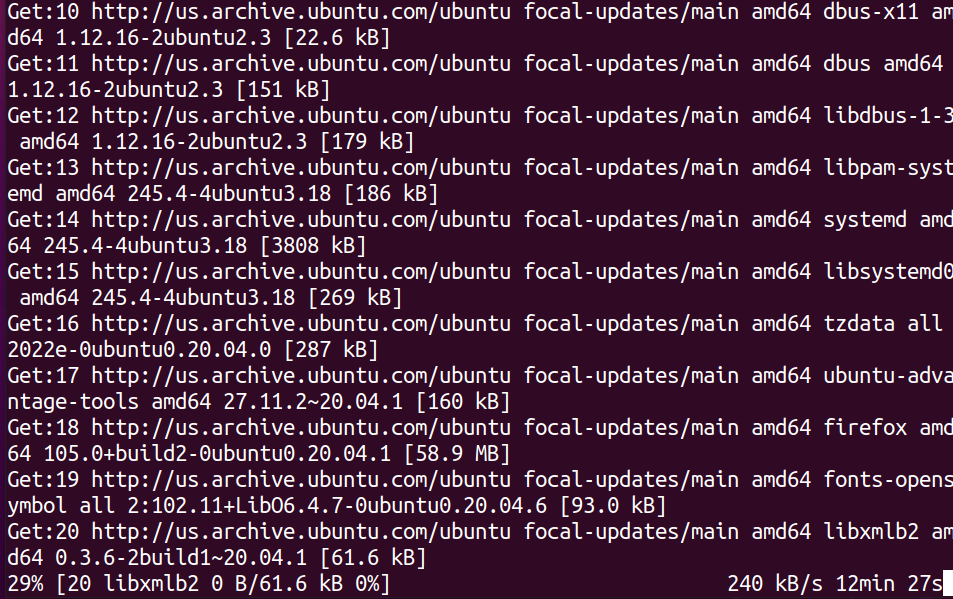
Now, scroll by the output, and you will note a piece that appears just like the one under, which reveals out there updates for a number of packages. Every replace is downloaded however is just not put in because you solely performed a dry run.
Viewing the Automated Improve Logs
After you have verified your configurations work, you could wish to see what occurred once you obtained a current improve. The logs for unattended-upgrades are saved within the /var/log/unattended-upgrades file that you could view.
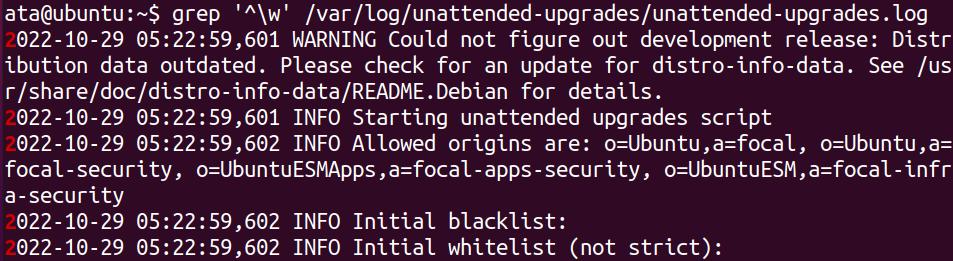
Run the under grep command to solely show logs that begin with a phrase character (^w), filtering out all empty traces and ones that simply comprise dashes.
grep '^w' /var/log/unattended-upgrades/unattended-upgrades.logBeneath, you possibly can see log data as follows:
- The final time the unattended-upgrades ran.
- Which packages have been upgraded.
- When the method began and completed.
Conclusion
Conserving your server up-to-date is an important a part of sustaining its safety. And on this tutorial, you realized the way to set up and configure computerized upgrades on Ubuntu. You’ve got additionally examined your configurations and seen the logs to see what occurred the final time computerized updates ran.
At this level, you’ve gotten full management over which packages obtain an computerized improve. However don’t cease right here! There are lots of extra unattended-upgrade configuration choices out there for computerized upgrades.