


Hey everybody, I’m Jorge Toloza, Freelance Artistic Developer based mostly in Colombia, It’s a pleasure for me to have the possibility to encourage, train and study in collaboration with Codrops.
On this tutorial, we’ll create a progressive gradient blur impact that dynamically adjustments based mostly on the place of photos. We’ll use CSS to place the weather after which acquire the coordinates for the objects in WebGL.
A lot of the logic is on the shader, so you’ll be able to translate this impact to another WebGL library like Three.js, and even obtain it in vanilla WebGL.
HTML construction
First we have to outline our picture container, It’s fairly easy; we’ve a <determine> and an <img> tag.
<determine class="media">
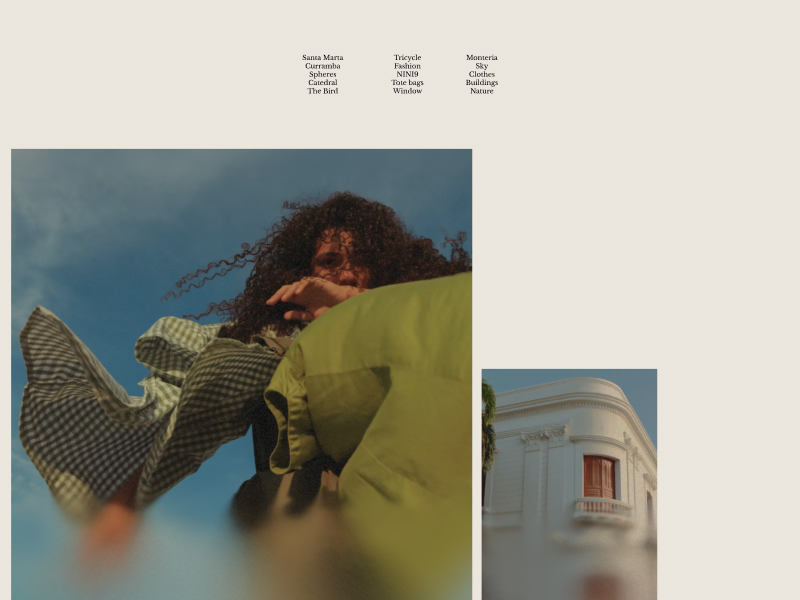
<img src="/img/8.webp" alt="tote bag">
</determine>Types
The kinds are actually easy too, we’re hiding our photos as a result of they are going to be rendered on the canvas.
.media {
  img {
    width: 100%;
    visibility: hidden;
  }
}
GL Class
Now within the JS, we’ve a few essential lessons. The primary one is GL.js, which incorporates many of the logic to render our photos utilizing OGL.
import { Renderer, Digicam, Rework, Aircraft } from 'ogl'
import Media from './Media.js';

export default class GL {
  constructor () {
    this.photos = [...document.querySelectorAll('.media')]

    this.createRenderer()
    this.createCamera()
    this.createScene()

    this.onResize()

    this.createGeometry()
    this.createMedias()

    this.replace()

    this.addEventListeners()
  }
  createRenderer () {
    this.renderer = new Renderer({
      canvas: doc.querySelector('#gl'),
      alpha: true
    })

    this.gl = this.renderer.gl
  }
  createCamera () {
    this.digicam = new Digicam(this.gl)
    this.digicam.fov = 45
    this.digicam.place.z = 20
  }
  createScene () {
    this.scene = new Rework()
  }
  createGeometry () {
    this.planeGeometry = new Aircraft(this.gl, {
      heightSegments: 50,
      widthSegments: 100
    })
  }
  createMedias () {
    this.medias = this.photos.map(merchandise => {
      return new Media({
        gl: this.gl,
        geometry: this.planeGeometry,
        scene: this.scene,
        renderer: this.renderer,
        display screen: this.display screen,
        viewport: this.viewport,
        $el: merchandise,
        img: merchandise.querySelector('img')
      })
    })
  }
  onResize () {
    this.display screen = {
      width: window.innerWidth,
      peak: window.innerHeight
    }

    this.renderer.setSize(this.display screen.width, this.display screen.peak)

    this.digicam.perspective({
      side: this.gl.canvas.width / this.gl.canvas.peak
    })

    const fov = this.digicam.fov * (Math.PI / 180)
    const peak = 2 * Math.tan(fov / 2) * this.digicam.place.z
    const width = peak * this.digicam.side

    this.viewport = {
      peak,
      width
    }
    if (this.medias) {
      this.medias.forEach(media => media.onResize({
        display screen: this.display screen,
        viewport: this.viewport
      }))
      this.onScroll({scroll: window.scrollY})
    }
  }
  onScroll({scroll}) {
    if (this.medias) {
      this.medias.forEach(media => media.onScroll(scroll))
    }
  }
  replace() {
    if (this.medias) {
      this.medias.forEach(media => media.replace())
    }

    this.renderer.render({
      scene: this.scene,
      digicam: this.digicam
    })
    window.requestAnimationFrame(this.replace.bind(this))
  }
  addEventListeners () {
    window.addEventListener('resize', this.onResize.bind(this))
  }
}
For people
We import some essential objects, get all the pictures from the DOM, then create the Media objects for every picture. Lastly, we replace the medias and the renderer within the replace technique utilizing requestAnimationFrame.
Media class
That is the cool one. First, we set all of the choices, then we set the shader and await the feel to set the uImageSize uniform. The mesh shall be a Aircraft. Within the onResize technique, we set the place of the media within the canvas based mostly on the place we’ve within the CSS. I’m utilizing the identical strategy from Bizarro’s tutorial; you’ll be able to have a look if you wish to know extra concerning the positioning and the duvet habits for the pictures.
import { Mesh, Program, Texture } from 'ogl'
import vertex from '../../shaders/vertex.glsl';
import fragment from '../../shaders/fragment.glsl';

export default class Media {
  constructor ({ gl, geometry, scene, renderer, display screen, viewport, $el, img }) {
    this.gl = gl
    this.geometry = geometry
    this.scene = scene
    this.renderer = renderer
    this.display screen = display screen
    this.viewport = viewport
    this.img = img
    this.$el = $el
    this.scroll = 0

    this.createShader()
    this.createMesh()

    this.onResize()
  }
  createShader () {
    const texture = new Texture(this.gl, {
      generateMipmaps: false
    })

    this.program = new Program(this.gl, {
      depthTest: false,
      depthWrite: false,
      fragment,
      vertex,
      uniforms: {
        tMap: { worth: texture },
        uPlaneSize: { worth: [0, 0] },
        uImageSize: { worth: [0, 0] },
        uViewportSize: { worth: [this.viewport.width, this.viewport.height] },
        uTime: { worth: 100 * Math.random() },
      },
      clear: true
    })

    const picture = new Picture()

    picture.src = this.img.src
    picture.onload = _ => {
      texture.picture = picture

      this.program.uniforms.uImageSize.worth = [image.naturalWidth, image.naturalHeight]
    }
  }
  createMesh () {
    this.airplane = new Mesh(this.gl, {
      geometry: this.geometry,
      program: this.program
    })

    this.airplane.setParent(this.scene)
  }
  onScroll (scroll) {
    this.scroll = scroll
    this.setY(this.y)
  }
  replace () {
    this.program.uniforms.uTime.worth += 0.04
  }
  setScale (x, y)
  setX(x = 0) {
    this.x = x
    this.airplane.place.x = -(this.viewport.width / 2) + (this.airplane.scale.x / 2) + (this.x / this.display screen.width) * this.viewport.width
  }
  setY(y = 0) {
    this.y = y
    this.airplane.place.y = (this.viewport.peak / 2) - (this.airplane.scale.y / 2) - ((this.y - this.scroll) / this.display screen.peak) * this.viewport.peak
  }
  onResize ({ display screen, viewport } = {}) {
    if (display screen) {
      this.display screen = display screen
    }

    if (viewport) {
      this.viewport = viewport
      this.airplane.program.uniforms.uViewportSize.worth = [this.viewport.width, this.viewport.height]
    }
    this.setScale()

    this.setX(this.$el.offsetLeft)
    this.setY(this.$el.offsetTop)
  }
}
The Vertex
Quite simple implementation, we’re getting the UV and place to render the pictures.
precision highp float;

attribute vec3 place;
attribute vec2 uv;

uniform mat4 modelViewMatrix;
uniform mat4 projectionMatrix;

various vec2 vUv;

void predominant() {
  vUv = uv;

  gl_Position = projectionMatrix * modelViewMatrix * vec4(place, 1.0);
}
The Fragment
Okay, right here is the ultimate file; we’re nearly there.
precision highp float;

uniform vec2 uImageSize;
uniform vec2 uPlaneSize;
uniform vec2 uViewportSize;
uniform float uTime;
uniform sampler2D tMap;

various vec2 vUv;

/*
  by @arthurstammet
  https://shadertoy.com/view/tdXXRM
*/
float tvNoise (vec2 p, float ta, float tb) {
  return fract(sin(p.x * ta + p.y * tb) * 5678.);
}
vec3 draw(sampler2D picture, vec2 uv) {
  return texture2D(picture,vec2(uv.x, uv.y)).rgb;
}
float rand(vec2 co){
  return fract(sin(dot(co.xy, vec2(12.9898, 78.233))) * 43758.5453);
}
/*
  impressed by https://www.shadertoy.com/view/4tSyzy
  @anastadunbar
*/
vec3 blur(vec2 uv, sampler2D picture, float blurAmount){
  vec3 blurredImage = vec3(0.);
  float d = smoothstep(0.8, 0.0, (gl_FragCoord.y / uViewportSize.y) / uViewportSize.y);
  #outline repeats 40.
  for (float i = 0.; i < repeats; i++) {
    vec2 q = vec2(cos(levels((i / repeats) * 360.)), sin(levels((i / repeats) * 360.))) * (rand(vec2(i, uv.x + uv.y)) + blurAmount);
    vec2 uv2 = uv + (q * blurAmount * d);
    blurredImage += draw(picture, uv2) / 2.;
    q = vec2(cos(levels((i / repeats) * 360.)), sin(levels((i / repeats) * 360.))) * (rand(vec2(i + 2., uv.x + uv.y + 24.)) + blurAmount);
    uv2 = uv + (q * blurAmount * d);
    blurredImage += draw(picture, uv2) / 2.;
  }
  return blurredImage / repeats;
}


void predominant() {
  vec2 ratio = vec2(
    min((uPlaneSize.x / uPlaneSize.y) / (uImageSize.x / uImageSize.y), 1.0),
    min((uPlaneSize.y / uPlaneSize.x) / (uImageSize.y / uImageSize.x), 1.0)
  );

  vec2 uv = vec2(
    vUv.x * ratio.x + (1.0 - ratio.x) * 0.5,
    vUv.y * ratio.y + (1.0 - ratio.y) * 0.5
  );

  float t = uTime + 123.0;
  float ta = t * 0.654321;
  float tb = t * (ta * 0.123456);
  vec4 noise = vec4(1. - tvNoise(uv, ta, tb));

  vec4 last = vec4(blur(uv, tMap, 0.08), 1.0);

  last = last - noise * 0.08;

  gl_FragColor = last;
}
Let’s clarify somewhat bit. First, we apply the crop within the picture to maintain the ratio:
vec2 ratio = vec2(
  min((uPlaneSize.x / uPlaneSize.y) / (uImageSize.x / uImageSize.y), 1.0),
  min((uPlaneSize.y / uPlaneSize.x) / (uImageSize.y / uImageSize.x), 1.0)
);

vec2 uv = vec2(
  vUv.x * ratio.x + (1.0 - ratio.x) * 0.5,
  vUv.y * ratio.y + (1.0 - ratio.y) * 0.5
);
Subsequent, we play with the time to get TV noise for our photos utilizing the tvNoise operate:
float t = uTime + 123.0;
float ta = t * 0.654321;
float tb = t * (ta * 0.123456);
vec4 noise = vec4(1. - tvNoise(uv, ta, tb));
For the blur, I’m utilizing the blur operate based mostly on the implementation of the Gaussian Blur by @anastadunbar. We’re mainly getting the common relative to the present pixel and the repeats.
The essential half is the gradient variable. We’re utilizing the gl_FragCoord and the uViewportSize to generate a set gradient on the backside of the viewport so we will apply the blur based mostly on the proximity of every pixel to the sting.
vec3 blur(vec2 uv, sampler2D picture, float blurAmount){
  vec3 blurredImage = vec3(0.);
  float gradient = smoothstep(0.8, 0.0, (gl_FragCoord.y / uViewportSize.y) / uViewportSize.y);
  #outline repeats 40.
  for (float i = 0.; i < repeats; i++) {
    vec2 q = vec2(cos(levels((i / repeats) * 360.)), sin(levels((i / repeats) * 360.))) * (rand(vec2(i, uv.x + uv.y)) + blurAmount);
    vec2 uv2 = uv + (q * blurAmount * gradient);
    blurredImage += draw(picture, uv2) / 2.;
    q = vec2(cos(levels((i / repeats) * 360.)), sin(levels((i / repeats) * 360.))) * (rand(vec2(i + 2., uv.x + uv.y + 24.)) + blurAmount);
    uv2 = uv + (q * blurAmount * gradient);
    blurredImage += draw(picture, uv2) / 2.;
  }
  return blurredImage / repeats;
}
Then we will return the ultimate shade
vec4 last = vec4(blur(uv, tMap, 0.08), 1.);

last = last - noise * 0.08;
gl_FragColor = last;
You need to get one thing hyperlink this:
And that’s it! Thanks for studying. I hope this tutorial was helpful to you 🥰.
Images by @jazanadipatocu.